Grow Pumpkins in Containers at Home: A Complete Step-by-Step Guide

Grow Pumpkins in Containers at Home: A Complete Step-by-Step Guide

Pumpkins are more than just a seasonal decoration—they’re a versatile and nutritious vegetable that can be used in cooking, baking, and even beverages. While pumpkins are often associated with large garden spaces, they can actually thrive in containers when grown correctly. Container gardening allows urban gardeners, balcony owners, and those with limited space to enjoy fresh, home-grown pumpkins. This guide will provide a complete step-by-step method for growing pumpkins in containers at home, from choosing the right container to harvesting your pumpkins.


Why Grow Pumpkins at Home?

Growing pumpkins at home has several advantages:

  1. Fresh and Nutritious: Home-grown pumpkins are fresher and richer in nutrients than store-bought ones.
  2. Cost-Effective: Growing your own pumpkins reduces grocery bills, especially during the harvest season.
  3. Space-Saving: Container gardening allows you to grow pumpkins even in small spaces like balconies or patios.
  4. Chemical-Free: You have complete control over fertilizers and pesticides, ensuring organic produce.
  5. Fun and Educational: Growing pumpkins can be a rewarding activity for both adults and children, teaching gardening skills and patience.

Choosing the Right Pumpkin Variety

Not all pumpkin varieties are suitable for container gardening. Smaller, bush-type pumpkins work best for containers, while sprawling vine types are better suited for large garden beds unless you provide vertical support.

Recommended Varieties for Containers:

  • Bush or Dwarf Pumpkins: Compact plants that produce small-to-medium-sized pumpkins.
  • Jack Be Little: Miniature pumpkins perfect for container growth.
  • Sugar Pie Pumpkin: Ideal for cooking and baking; smaller varieties adapt well to containers.
  • Baby Boo: Decorative miniature white pumpkins suitable for small spaces.

Choosing the right variety ensures manageable growth, higher yields, and easier maintenance in containers.


Selecting the Right Container

Pumpkins require a large container to accommodate their deep root system:

  • Size: At least 18–20 inches deep and 20–24 inches wide for each plant. Larger containers support bigger fruits.
  • Material: Plastic, fabric grow bags, or ceramic pots are suitable.
  • Drainage: Ensure multiple holes at the bottom to prevent waterlogging and root rot.
  • Mobility: Containers with handles or lightweight material make it easy to move them as needed.

Pro Tip: Repurposing large plastic bins or barrels works well for growing pumpkins, making it both sustainable and cost-effective.


Preparing the Soil

Pumpkins thrive in nutrient-rich, well-draining soil. Preparing a proper soil mix is crucial for high yields:

  • 2 parts garden soil
  • 1 part compost or well-rotted manure
  • 1 part perlite or coco peat for aeration and water retention

Mix thoroughly to create a fertile, loose soil medium. Pumpkins prefer slightly acidic to neutral soil with a pH of 6.0–7.0.

Tip: Adding bone meal or rock phosphate at planting encourages strong root development and abundant flowering.


Planting Pumpkin Seeds or Seedlings

Pumpkins can be grown from seeds or seedlings. Here’s how:

  1. Seeds: Sow 2–3 seeds per container at a depth of 1–2 inches. Once seedlings sprout and develop 2–3 true leaves, thin to the strongest plant.
  2. Seedlings: Transplant seedlings carefully into containers, burying them up to the first set of leaves to encourage additional root growth.

Spacing: Even in containers, give each plant enough room for root expansion and airflow to reduce the risk of disease.

Pro Tip: Soaking pumpkin seeds overnight before planting can improve germination rates and produce stronger seedlings.


Watering Techniques

Consistent watering is essential for pumpkin growth and fruit development:

  • Water deeply 2–3 times per week depending on weather and container size.
  • Avoid wetting the leaves to prevent fungal infections; water at the base of the plant.
  • Mulch around the base with straw, dried leaves, or coco peat to retain soil moisture and regulate temperature.

Pro Tip: Self-watering containers or using drip irrigation reduces watering frequency while keeping the soil consistently moist.


Fertilization for High Yield

Pumpkins are heavy feeders and need regular nutrients to produce large, healthy fruits:

  1. Organic Fertilizers: Apply compost, vermicompost, or liquid manure every 2–3 weeks.
  2. Balanced Fertilizer: Use an NPK fertilizer during vegetative growth for strong leaves and stems.
  3. Flowering and Fruiting Boost: Apply a high-phosphorus and potassium fertilizer when flowers appear to encourage fruit set.

Proper fertilization ensures vigorous plant growth and a high yield of pumpkins in containers.


Supporting Pumpkin Plants

Even dwarf or bush-type pumpkins may need some support as the fruits grow:

  • Trellis: Vertical support can be used for vining varieties to save space.
  • Cages: Tomato cages or similar structures can help support sprawling stems.
  • Guiding Vines: Regularly guide and tie vines gently to prevent them from breaking or sprawling excessively.

Proper support helps keep fruits off the ground, reduces pest attacks, and improves airflow around the plant.


Pest and Disease Management

Pumpkins in containers are less susceptible to pests than ground-planted ones, but attention is still required:

  • Common Pests: Aphids, cucumber beetles, squash bugs, and spider mites.
  • Organic Control: Use neem oil, insecticidal soap, or introduce beneficial insects like ladybugs.
  • Disease Prevention: Provide adequate spacing, sunlight, and airflow. Remove infected leaves promptly.

Healthy plants produce more flowers and fruits, directly impacting yield.


Pruning and Maintenance

Pruning pumpkin plants improves airflow, directs energy to fruit production, and prevents disease:

  • Remove yellowing or diseased leaves.
  • Pinch off excess side shoots in bush varieties.
  • For vining varieties, trim excessively long vines to control spread and focus energy on fruiting.

Pruning helps container-grown pumpkin plants produce larger, healthier fruits in a limited space.


Pollination Tips

Pumpkins have separate male and female flowers, so pollination is critical for fruit development:

  • Hand-pollinate using a small brush or cotton swab to transfer pollen from male to female flowers if pollinators are scarce.
  • Ensure at least 2–3 flowers are blooming simultaneously for effective pollination.

Pollination increases the chances of fruit set and maximizes your pumpkin harvest.


Harvesting Pumpkins

Pumpkins are typically ready for harvest 80–120 days after planting, depending on the variety:

  • The skin should be firm, hard, and have a deep, even color.
  • Use a sharp knife or scissors to cut the fruit from the vine, leaving a small stem attached.
  • Avoid harvesting immature pumpkins, as they will not store well and may affect further fruiting.

Pro Tip: Harvest pumpkins before the first frost to avoid frost damage, which can ruin the fruits.


Storing Pumpkins for Year-Round Use

One of the benefits of growing pumpkins is their long shelf life:

  • Store in a cool, dry, well-ventilated place.
  • Properly cured pumpkins can last 2–3 months or more.
  • Avoid stacking pumpkins directly on top of each other to prevent bruising and rotting.

With proper storage, you can enjoy fresh, home-grown pumpkins year-round.


Tips for Maximizing Container Pumpkin Yield

  1. Choose Compact Varieties: Bush-type pumpkins are ideal for containers.
  2. Use Large Containers: More root space supports larger fruits and better yields.
  3. Sunlight: Ensure at least 6–8 hours of direct sunlight daily.
  4. Regular Monitoring: Check plants frequently for pests, diseases, and nutrient deficiencies.
  5. Companion Planting: Plant marigolds or basil nearby to repel pests naturally.
  6. Vertical Growth: Use trellises for vining varieties to save space and improve fruit quality.

Final Thoughts

Growing pumpkins in containers at home is a rewarding, space-saving, and sustainable way to enjoy this versatile vegetable. By selecting the right variety, preparing nutrient-rich soil, providing consistent water and fertilizer, supporting your plants, managing pests, and practicing proper pruning and pollination, you can enjoy a bountiful pumpkin harvest even in limited spaces.

Container-grown pumpkins allow urban gardeners and beginners to enjoy fresh, chemical-free vegetables, while proper storage ensures a year-round supply of nutritious and delicious pumpkins.

Start today, set up your containers, and follow this complete guide to grow pumpkins successfully at home. With patience and attention to detail, you can enjoy a plentiful harvest and experience the joy of home gardening!

Grow High-Yield Butternut Squash in Plastic Containers for Year-Round Harvest

Grow High-Yield Butternut Squash in Plastic Containers for Year-Round Harvest

Butternut squash, a popular winter squash variety, is loved for its sweet, nutty flavor and versatile culinary uses. Traditionally grown in garden beds, butternut squash can also thrive in plastic containers, making it possible for gardeners with limited space to enjoy a bountiful harvest. With the right techniques, you can grow high-yield butternut squash in containers and even have fresh squash available to enjoy year-round. This guide will walk you through every step, from selecting the right container to harvesting and storing your squash.


Why Grow Butternut Squash at Home?

Growing butternut squash at home offers multiple benefits:

  1. Freshness and Flavor: Home-grown squash is fresher and tastier than store-bought alternatives.
  2. Nutritional Value: Butternut squash is rich in vitamins A and C, potassium, fiber, and antioxidants.
  3. Cost-Effective: Growing your own squash reduces grocery bills, especially for families who consume squash regularly.
  4. Control Over Chemicals: By growing at home, you control fertilizers and pesticides, ensuring healthy, chemical-free produce.
  5. Sustainability: Container gardening reduces reliance on commercial agriculture and encourages eco-friendly practices.

Why Use Plastic Containers for Butternut Squash?

Plastic containers are a practical solution for growing squash, especially in urban or small-space gardens:

  • Space-Saving: Perfect for balconies, terraces, or patios.
  • Portable: Containers can be moved to optimize sunlight exposure or protect plants from adverse weather.
  • Durable: Plastic containers last for multiple growing seasons.
  • Water Retention: Plastic retains moisture longer than clay pots, which benefits butternut squash plants.
  • Eco-Friendly: Repurposing plastic containers reduces waste and promotes sustainable gardening.

Choosing the Right Butternut Squash Variety

For container gardening, bush or compact varieties of butternut squash are ideal. While vining types can grow in containers, they require trellises or additional support to prevent sprawling.

Recommended Varieties for Containers:

  • Bush Butternut Squash: Compact, ideal for container growth, and produces a high yield.
  • Butterbush: Small, bush-type plant perfect for limited spaces.
  • Tromboncino (Optional for Vertical Growth): Requires trellis support but produces long, abundant fruits.

Choosing the right variety ensures manageable growth, higher fruit yield, and easier maintenance in containers.


Selecting the Right Plastic Container

Butternut squash requires deep, spacious containers to accommodate its root system:

  • Size: Choose containers at least 15–20 inches deep and 18–24 inches wide. Large containers support vigorous growth and heavier fruit production.
  • Drainage: Ensure containers have multiple drainage holes at the bottom to prevent waterlogging and root rot.
  • Durability: Use sturdy containers that can withstand outdoor conditions.

Pro Tip: Reuse large plastic barrels or storage bins as squash containers after cleaning and drilling drainage holes.


Preparing the Soil

Butternut squash is a heavy feeder and thrives in nutrient-rich, well-draining soil. A proper soil mix is key to high yields:

  • 2 parts garden soil
  • 1 part compost or organic manure
  • 1 part perlite or coco peat for aeration and water retention

Mix thoroughly to ensure good soil structure. The soil pH should ideally be between 6.0 and 7.0.

Tip: Adding a handful of bone meal or rock phosphate at planting time can promote strong root development and flowering.


Planting Butternut Squash Seeds or Seedlings

You can grow butternut squash from seeds or seedlings:

  1. Seeds: Sow 2–3 seeds per container, 1 inch deep. Thin to the strongest seedling after germination.
  2. Seedlings: Transplant seedlings into the container, burying up to the first set of leaves for stronger root growth.

Spacing: Even in containers, give each plant enough space to grow without crowding, ensuring better airflow and reducing disease risk.

Pro Tip: Soak seeds overnight before planting to speed up germination and improve seedling vigor.


Watering Techniques

Consistent moisture is critical for squash growth and fruiting:

  • Water deeply 2–3 times per week depending on weather and container size.
  • Avoid wetting the leaves to prevent fungal infections; water at the base of the plant.
  • Mulch the soil surface with straw, dried leaves, or coco peat to retain moisture and regulate soil temperature.

Tip: Self-watering containers can reduce the frequency of watering while ensuring consistent moisture for squash roots.


Fertilization for High Yield

Butternut squash requires regular feeding to support rapid growth and heavy fruiting:

  1. Organic Fertilizers: Use compost, vermicompost, or liquid manure every 2–3 weeks.
  2. Balanced NPK Fertilizer: Apply a balanced fertilizer during vegetative growth for strong leaves and stems.
  3. Flowering and Fruiting Boost: High phosphorus and potassium fertilizers support flower development and fruit set.

Proper fertilization ensures healthy plants capable of producing a high number of fruits per container.


Supporting Your Butternut Squash Plants

Butternut squash plants can be sprawling, so providing support is crucial, especially for container-grown plants:

  • Trellis or Stakes: Train vines to grow vertically to save space and prevent fruits from touching the ground.
  • Cages: Tomato cages can also support squash vines and protect fruits from soil-borne diseases.
  • Guiding Vines: Regularly guide and tie vines to the support structure gently to prevent breakage.

Proper support improves air circulation, reduces disease risk, and keeps fruits clean and healthy.


Pest and Disease Management

Even in containers, squash can face pest and disease challenges:

  • Common Pests: Squash bugs, aphids, spider mites, and cucumber beetles.
  • Organic Controls: Neem oil spray, insecticidal soap, or introducing beneficial insects like ladybugs.
  • Disease Prevention: Ensure proper spacing, sunlight, and air circulation. Remove infected leaves promptly.

Healthy plants are more productive, producing more flowers and fruits for year-round harvesting.


Pruning and Maintenance

Pruning butternut squash can improve yields and fruit quality:

  • Remove yellowing or diseased leaves.
  • Trim side shoots for bush-type varieties to focus energy on main stems.
  • For vining types, prune overly long vines to manage space and encourage fruiting.

Pruning directs the plant’s energy to producing larger, healthier fruits.


Harvesting Butternut Squash

Butternut squash typically matures in 80–120 days depending on the variety:

  • Fruits are ready when the skin is hard, matte, and the color is deep beige.
  • Use a sharp knife or scissors to cut the fruit from the vine, leaving a small stem attached.
  • Avoid harvesting immature fruits; they will not store well and may reduce the plant’s overall productivity.

Pro Tip: Harvest regularly to encourage continuous flowering and fruiting throughout the growing season.


Storing Butternut Squash for Year-Round Use

One of the great benefits of butternut squash is its long shelf life:

  • Store in a cool, dry place with good ventilation.
  • Properly cured squash can last 2–3 months or even longer.
  • Avoid stacking fruits directly on each other to prevent bruising and rotting.

By storing squash properly, you can enjoy a year-round supply of fresh, home-grown squash.


Tips for Maximizing Yield in Containers

  1. Choose Compact Varieties: Bush-type squash is ideal for container gardening.
  2. Use Large Containers: More root space = higher fruit yield.
  3. Sunlight: Provide at least 6–8 hours of direct sunlight daily.
  4. Regular Monitoring: Check plants for pests, diseases, and nutrient deficiencies.
  5. Companion Planting: Marigolds and basil can deter pests naturally.
  6. Vertical Growth: Trellises maximize space and improve fruit quality.

Final Thoughts

Growing high-yield butternut squash in plastic containers is a practical, space-saving, and sustainable gardening solution. With proper care—choosing the right variety, preparing nutrient-rich soil, watering consistently, supporting plants, managing pests, and pruning—you can achieve a bountiful harvest.

Container-grown butternut squash allows gardeners with limited space to enjoy fresh, chemical-free vegetables year-round. With careful planning and attention to detail, you can have abundant fruits ready to eat, store, or share with family and friends.

Start today, set up your plastic containers, and enjoy the satisfaction of growing your own high-yield butternut squash for a continuous, year-round harvest.

Old Burlap Sacks? Don’t Throw Them Away! How to Grow Carrots Easily at Home

Old Burlap Sacks? Don’t Throw Them Away! How to Grow Carrots Easily at Home

Carrots are a highly nutritious and versatile vegetable that can be enjoyed raw, cooked, or juiced. Rich in beta-carotene, vitamins A, K, and C, antioxidants, and fiber, carrots support eye health, immunity, digestion, and overall well-being.

Many urban gardeners believe growing carrots requires deep garden beds, fertile soil, and lots of space. However, the YouTube video “Old burlap sacks Don’t throw them away Grow carrots this way!” demonstrates a simple, space-saving method to grow carrots using recycled burlap sacks. This approach is eco-friendly, cost-effective, and perfect for small spaces, allowing gardeners to enjoy fresh, homegrown carrots with minimal effort.

This blog post explains step-by-step how to grow carrots in old burlap sacks, tips for high yield, and ways to ensure fast, healthy growth.


Why Grow Carrots in Burlap Sacks?

Using burlap sacks for carrot cultivation offers several advantages:

  1. Space-Saving: Perfect for terraces, balconies, and small patios.
  2. Cost-Effective: Recycles old sacks and avoids purchasing expensive garden beds.
  3. High Yield: Carrots grow straight and healthy in loose, well-aerated soil.
  4. Easy to Manage: Lightweight and movable, ideal for watering, fertilizing, and harvesting.
  5. Eco-Friendly: Reduces waste by repurposing old materials.

Burlap sack gardening is perfect for beginners and urban gardeners.


Step 1: Choosing the Right Burlap Sacks

  • Use clean, intact burlap sacks.
  • Large sacks work best: at least 12–18 inches deep and wide to accommodate root growth.
  • Avoid torn sacks or those with chemical residues.
  • Burlap is breathable, allowing air circulation and moisture retention, which promotes healthy root growth.

Proper sack selection ensures straight, robust carrots.


Step 2: Preparing the Growing Medium

Carrots need light, loose, and nutrient-rich soil to grow straight and long.

Recommended Soil Mix:

  • 50% garden soil or loamy soil
  • 30% compost or well-rotted manure
  • 20% sand or cocopeat for aeration and moisture retention

Optional: Add bone meal or wood ash to improve phosphorus content and support root development.

Well-prepared soil ensures fast germination and straight, healthy roots.


Step 3: Selecting Carrot Seeds

  • Use fresh, high-quality carrot seeds suitable for your region.
  • Popular varieties include Nantes, Chantenay, and Amsterdam carrots.
  • Choose seeds that are uniform and free from damage for better germination.

Quality seeds ensure strong seedlings and faster harvests.


Step 4: Planting Carrots in Burlap Sacks

  • Fill the burlap sack with prepared soil, leaving 2–3 inches from the top.
  • Sow seeds ¼–½ inch deep, spacing 1–2 inches apart.
  • Lightly cover seeds with soil and water gently.
  • Keep sacks in a flat, sunny area during germination.

Correct planting ensures straight, strong carrot roots and healthy seedlings.


Step 5: Sunlight Requirements

  • Carrots need 6–8 hours of sunlight daily.
  • Place the sacks on a terrace, balcony, or near a sunny window.
  • In hot climates, provide partial shade during peak afternoon hours to prevent soil from drying out.

Adequate sunlight promotes healthy leaves and strong root growth.


Step 6: Watering Carrots

  • Keep the soil consistently moist but not waterlogged.
  • Water 2–3 times a week, more frequently in hot or dry conditions.
  • Mulch with dry leaves or straw to retain moisture and regulate temperature.

Proper watering ensures continuous growth and prevents root splitting.


Step 7: Fertilization for High Yield

  • Apply organic fertilizers like vermicompost or cow dung slurry every 10–15 days.
  • Avoid nitrogen-rich fertilizers that promote excessive leafy growth instead of root development.
  • Phosphorus and potassium-rich fertilizers support strong root formation and better flavor.

Balanced fertilization results in straight, healthy carrots with rich taste.


Step 8: Thinning Seedlings

  • Once seedlings are 2–3 inches tall, thin them to 2–3 inches apart.
  • Thinning ensures enough space for roots to grow straight and long.
  • Use removed seedlings as greens or compost.

Proper thinning prevents crowding and improves yield quality.


Step 9: Pest and Disease Management

Even in sacks, carrots can face minor pests:

ProblemSolution
AphidsSpray neem oil or mild soap solution
Root flyCover soil with fine mesh or netting
Fungal infectionsEnsure proper drainage and avoid overwatering

Monitoring and early intervention keep carrots healthy and highly productive.


Step 10: Harvesting Carrots

  • Carrots are ready to harvest 60–90 days after sowing, depending on variety.
  • Gently loosen the soil around the roots and pull carrots carefully.
  • Avoid damaging roots, as broken carrots store poorly and lose flavor.
  • Harvest regularly to encourage continuous growth in successive sowings.

Burlap sacks make harvesting easy and mess-free, even in small spaces.


Step 11: Benefits of Growing Carrots in Burlap Sacks

  • Mobility: Sacks can be moved to adjust sunlight or protect from rain.
  • Space Efficiency: Ideal for small terraces, balconies, and urban homes.
  • High Yield: Loose soil encourages straight, large carrots.
  • Low Maintenance: Minimal watering, fertilization, and pest management.
  • Eco-Friendly: Repurposes old materials and reduces waste.

This method is practical, economical, and productive.


Step 12: Tips for Continuous Carrot Production

  • Succession Planting: Sow seeds every 2–3 weeks to maintain a steady supply.
  • Soil Refresh: Add compost or organic fertilizer between harvests.
  • Mulching: Conserves soil moisture and reduces weeds.
  • Regular Monitoring: Check for pests and nutrient deficiencies weekly.

Following these tips ensures lush, fast-growing carrots with minimal effort.


Step 13: Why Gardeners Are Amazed by This Method

  • Minimal space and resources produce abundant, high-quality carrots.
  • Burlap sacks provide loose, well-aerated soil, resulting in straight and healthy roots.
  • Urban gardeners can enjoy fresh, organic carrots without a traditional garden.
  • Easy, low-maintenance method makes home gardening accessible for everyone.

This method combines simplicity, sustainability, and high productivity, making it ideal for urban home gardeners.


Conclusion: Grow Carrots Easily Using Old Burlap Sacks

Using old burlap sacks to grow carrots is a smart, eco-friendly solution for urban gardeners. With proper soil, sunlight, watering, and fertilization, anyone can enjoy healthy, straight, flavorful carrots in limited space.

Even without a garden, you can harvest multiple carrots regularly, save money, and enjoy fresh, homegrown vegetables year-round. Don’t throw away those old burlap sacks—turn them into a productive carrot garden today!

Why Garlic Grown in Plastic Bags Produces So Many Bulbs and Harvests Quickly: Here’s the Answer

Why Garlic Grown in Plastic Bags Produces So Many Bulbs and Harvests Quickly: Here’s the Answer

Garlic is more than just a flavorful ingredient; it’s a nutritional powerhouse. Packed with vitamins, minerals, antioxidants, and medicinal compounds like allicin, garlic supports heart health, boosts immunity, and fights infections.

Traditionally, garlic is grown in open fields or garden beds, but many urban gardeners struggle with space and soil quality. The YouTube video “Why do garlic grown in plastic bags produce so many bulbs and harvest so quickly? Here is answer” reveals a surprising method to grow garlic efficiently in plastic bags. This method allows gardeners to enjoy abundant, healthy bulbs in less time, even with minimal space and effort.

This blog post explains why garlic grows so well in plastic bags and provides tips to achieve maximum yield and fast harvests.


Why Grow Garlic in Plastic Bags?

Growing garlic in plastic bags offers multiple advantages:

  1. Space-Efficient: Perfect for terraces, balconies, and small patios.
  2. Fast Harvest: Garlic matures more quickly in controlled container environments.
  3. High Yield: Concentrated nutrients in the bag promote larger and more numerous bulbs.
  4. Reduced Pests and Diseases: Limited exposure to soil-borne pests and fungi.
  5. Ease of Care: Lightweight bags make watering, fertilizing, and harvesting simple.

Plastic bag cultivation is ideal for urban gardeners who want garlic year-round.


Step 1: Choosing the Right Plastic Bag

  • Use durable, food-grade plastic bags or recycled shopping bags.
  • Size should be 12–15 inches deep and wide enough for several cloves.
  • Ensure drainage holes at the bottom to prevent waterlogging.
  • Larger bags accommodate more cloves and allow bulbs to grow larger.

Proper bag selection ensures healthy root growth and abundant bulbs.


Step 2: Preparing the Growing Medium

Garlic thrives in well-draining, nutrient-rich soil:

Recommended Soil Mix:

  • 40% garden soil or loamy soil
  • 30% compost or well-rotted manure
  • 20% cocopeat or peat moss for moisture retention
  • 10% sand for aeration

Optional: Add bone meal, neem cake, or wood ash to enhance nutrients and protect against pests.

This mixture supports vigorous root growth and rapid bulb formation.


Step 3: Selecting Garlic Cloves

  • Use healthy, firm cloves from disease-free garlic bulbs.
  • Avoid cloves that are soft, shriveled, or damaged.
  • Large cloves produce larger bulbs and higher yields.

Choosing quality cloves is crucial for fast-growing, productive garlic plants.


Step 4: Planting Garlic in Plastic Bags

  • Fill the bag with soil, leaving 2–3 inches from the top.
  • Separate garlic bulbs into individual cloves, keeping the pointed end upward.
  • Plant cloves 1–2 inches deep and 3 inches apart.
  • Water gently after planting to settle the soil.

Correct planting ensures strong roots and fast sprouting.


Step 5: Sunlight Requirements

  • Garlic requires 6–8 hours of sunlight daily for optimal growth.
  • Place bags on a sunny terrace, balcony, or near a bright window.
  • In hot climates, provide partial shade during peak afternoon hours.

Adequate sunlight encourages healthy leaves and rapid bulb formation.


Step 6: Watering Garlic

  • Water 2–3 times a week, keeping the soil consistently moist but not waterlogged.
  • Mulch with straw or dry leaves to retain moisture and regulate temperature.
  • Avoid overwatering, which can cause rot and fungal infections.

Proper watering ensures continuous growth and faster bulb development.


Step 7: Fertilization for Maximum Yield

  • Apply organic fertilizers like vermicompost or cow dung slurry every 10–15 days.
  • Use nitrogen-rich fertilizers in the early growth stage for strong green leaves.
  • Switch to potassium and phosphorus-rich fertilizers during bulb formation to promote large, healthy bulbs.

Balanced fertilization results in numerous, well-formed garlic bulbs.


Step 8: Why Garlic Grows Fast and Produces Many Bulbs in Plastic Bags

  1. Concentrated Nutrients: The confined soil in bags allows roots to absorb all available nutrients, resulting in faster growth and larger bulbs.
  2. Better Drainage and Aeration: Bags prevent waterlogging while maintaining moisture and air circulation, reducing stress on the plants.
  3. Temperature Control: The soil in bags warms up faster, encouraging rapid sprouting and growth.
  4. Controlled Environment: Less exposure to pests and competition allows garlic to focus energy on bulb formation.

These factors together make garlic grow faster and produce more bulbs than traditional garden planting.


Step 9: Pest and Disease Management

Even in bags, garlic can face minor issues:

ProblemSolution
AphidsSpray neem oil or mild soap solution
Fungal infectionsEnsure good drainage, avoid overhead watering
Rotting bulbsRemove affected cloves and maintain proper spacing

Regular monitoring keeps garlic healthy and highly productive.


Step 10: Harvesting Garlic

  • Garlic is ready to harvest when leaves turn yellow and start drying.
  • Carefully lift the bulbs from the soil to avoid damage.
  • Cure bulbs in shade for 7–10 days before storage.
  • Harvested garlic can last several months if stored properly.

Plastic bag cultivation allows for quick harvest and repeated planting cycles.


Step 11: Benefits of Growing Garlic in Plastic Bags

  • Mobility: Bags can be moved to optimize sunlight or protect from rain.
  • Space Optimization: Ideal for urban spaces and small terraces.
  • Fast Growth: Controlled environment speeds up sprouting and bulb formation.
  • High Productivity: Concentrated nutrients and minimal pest exposure increase yield.
  • Cost-Effective: Uses recycled bags and reduces market dependency.

Plastic bag gardening makes garlic accessible, efficient, and productive.


Step 12: Tips for Continuous Harvest

  • Succession Planting: Plant new cloves every 6–8 weeks for continuous supply.
  • Soil Enrichment: Add compost or organic fertilizer after each harvest.
  • Mulching: Retains moisture and protects bulbs from temperature extremes.
  • Pest Monitoring: Inspect weekly to maintain healthy plants.

Following these tips ensures lush, fast-growing garlic bulbs all year.


Step 13: Why Gardeners Are Amazed by This Method

  • Minimal space and resources produce high yields of garlic.
  • Bulbs grow faster and more abundant than traditional garden planting.
  • Urban gardeners can enjoy fresh, organic garlic without a backyard.
  • Efficient, low-maintenance method reduces labor and increases productivity.

This method combines simplicity, efficiency, and high yield, making it perfect for beginners and urban home gardeners.


Conclusion: Grow Garlic Quickly and Abundantly in Plastic Bags

Growing garlic in plastic bags is a game-changer for home gardeners. With proper cloves, nutrient-rich soil, sunlight, watering, and fertilization, anyone can enjoy fast-growing, high-yield garlic bulbs in limited space.

Even without a garden, you can harvest multiple bulbs quickly, ensure a continuous supply of fresh garlic, and experience the satisfaction of homegrown produce. Start using plastic bags today and discover why garlic grows so abundantly and quickly in this simple, effective method!

How to Build Your Own Hydroponic System at Home: A Step-by-Step Beginner’s Guide

How to Build Your Own Hydroponic System at Home: A Step-by-Step Beginner’s Guide

Hydroponics is revolutionizing the way we grow plants. Imagine cultivating fresh vegetables, herbs, and greens without soil, using just water, nutrients, and a little creativity. Hydroponic systems are space-efficient, environmentally friendly, and perfect for home gardeners who want fresh produce year-round. In this guide, we’ll show you how to make a hydroponic system at home, step by step, whether you have a small balcony, kitchen counter, or backyard.


Why Hydroponics is Perfect for Home Gardening

Hydroponic gardening offers many benefits over traditional soil-based planting:

  1. Space Efficiency: Grow more plants in less space.
  2. Faster Growth: Plants grow up to 50% faster in nutrient-rich water.
  3. Water Conservation: Hydroponics uses 70–90% less water than soil gardening.
  4. Year-Round Production: Grow fresh vegetables regardless of the season.
  5. Pest-Free Plants: No soil means fewer pests and diseases.
  6. Easy to Monitor: Nutrient levels and plant health are easier to control.

Whether you want fresh lettuce, basil, spinach, or cherry tomatoes, hydroponics is a smart, modern solution.


Step 1: Choose Your Hydroponic System Type

There are several hydroponic systems suitable for home use. Selecting the right one depends on your space, budget, and type of plants:

  1. Nutrient Film Technique (NFT): A thin film of nutrient solution flows over the roots. Ideal for leafy greens.
  2. Deep Water Culture (DWC): Plants float on nutrient-rich water using a floating platform. Best for lettuce, herbs, and small vegetables.
  3. Kratky Method: A passive hydroponic system without pumps. Perfect for beginners and small setups.
  4. Wick System: Uses wicks to draw nutrient solution to plant roots. Simple but suitable for small plants.
  5. Ebb and Flow: Nutrient solution floods the plants periodically and drains back into the reservoir. Great for various vegetables.

For beginners, Deep Water Culture (DWC) or Kratky Method is often the easiest and most cost-effective choice.


Step 2: Gather Materials

To build a basic home hydroponic system, you’ll need:

  • Container or Reservoir: To hold nutrient solution (plastic bins, buckets, or trays).
  • Net Pots or Cups: Hold plants and growing medium.
  • Growing Medium: Options include clay pebbles, coco coir, perlite, or rockwool.
  • Hydroponic Nutrients: Balanced solution with nitrogen, phosphorus, potassium, and micronutrients.
  • Water: Clean, preferably filtered or dechlorinated.
  • Air Pump & Air Stone (for DWC): Oxygenates the nutrient solution.
  • pH Meter and pH Up/Down Solutions: To monitor and adjust water pH (ideal 5.5–6.5).
  • Seeds or Seedlings: Lettuce, spinach, basil, and herbs are beginner-friendly.

Having the right materials ensures your hydroponic system runs efficiently and produces healthy plants.


Step 3: Prepare the Reservoir

The reservoir is the heart of your hydroponic system:

  1. Clean the container thoroughly to remove dust or residues.
  2. Fill it with water and mix in the hydroponic nutrient solution according to the instructions.
  3. Measure and adjust the pH to between 5.5–6.5 for optimal nutrient uptake.
  4. If using a DWC system, place the air stone connected to the pump at the bottom to oxygenate the water.

A well-prepared reservoir ensures plants get all the nutrients they need.


Step 4: Set Up Net Pots and Growing Medium

Net pots hold the plants above the nutrient solution while supporting the roots:

  • Fill net pots with your chosen growing medium.
  • Place seedlings or germinated seeds carefully into the medium.
  • Ensure roots can reach or will eventually reach the nutrient solution.
  • For DWC, use floating platforms to suspend net pots above the water.

The growing medium supports plant roots and helps maintain stability and moisture.


Step 5: Planting Seeds or Seedlings

Choose plants suitable for hydroponics:

  • Leafy Greens: Lettuce, spinach, kale, arugula
  • Herbs: Basil, mint, parsley, cilantro
  • Small Vegetables: Cherry tomatoes, peppers, cucumbers

Plant seeds directly in the growing medium or transplant seedlings carefully, ensuring roots have access to nutrients.


Step 6: Maintain Your Hydroponic System

Hydroponics requires regular maintenance to keep plants healthy:

  1. Check Nutrient Levels: Replenish the reservoir as water evaporates or plants absorb nutrients.
  2. Monitor pH: Test pH 2–3 times per week and adjust if necessary.
  3. Provide Light: Indoor hydroponics needs 12–16 hours of light per day using sunlight or LED grow lights.
  4. Temperature Control: Keep water between 18–24°C (64–75°F) for optimal growth.
  5. Inspect Plants: Look for signs of disease, nutrient deficiencies, or algae growth.

Consistent monitoring ensures healthy, fast-growing plants.


Step 7: Harvesting Hydroponic Crops

One of the biggest advantages of hydroponics is faster growth and quick harvesting:

  • Leafy Greens: Can be harvested in 3–5 weeks depending on the variety.
  • Herbs: Trim regularly to encourage new growth.
  • Vegetables: Harvest cherry tomatoes or peppers as they ripen.

Use clean scissors or knives to prevent contamination and encourage regrowth. With proper care, your hydroponic system can produce multiple harvests per season.


Tips for a Successful Home Hydroponic System

  1. Start small and expand as you gain confidence.
  2. Choose plants that grow well hydroponically.
  3. Keep the system clean to prevent algae or pests.
  4. Use quality nutrients and monitor pH levels.
  5. Ensure sufficient light, either natural or artificial.
  6. Rotate crops or experiment with different varieties for continuous harvest.

Following these tips helps maximize yield and efficiency in your home hydroponic garden.


Benefits of Hydroponics at Home

  • Fresh Produce Anytime: Enjoy homegrown, pesticide-free vegetables and herbs.
  • Space-Saving: Perfect for apartments, rooftops, or small gardens.
  • Sustainable: Uses less water and reduces the need for soil and fertilizers.
  • Educational: Great project for families to learn about plant growth and nutrition.
  • Fast Results: Plants grow faster than traditional soil-based methods.

Hydroponics is not just gardening—it’s a modern, eco-friendly, and productive approach to growing food at home.


Conclusion

Building a hydroponic system at home is easier than most beginners think. With simple materials, careful planning, and consistent maintenance, anyone can grow fresh, nutritious vegetables, herbs, and greens without soil. From choosing the right system and setting up a reservoir to planting seedlings and harvesting crops, hydroponics allows you to maximize space, water efficiency, and plant growth.

Whether you want to supplement your kitchen with fresh produce or explore modern farming techniques, a home hydroponic system is an amazing way to cultivate plants year-round. With patience and care, your hydroponic garden can thrive, providing delicious, healthy greens for your family and friends.

Amazing Agricultural Machines Operating at an INSANE Level: Revolutionizing Modern Farming

Amazing Agricultural Machines Operating at an INSANE Level: Revolutionizing Modern Farming

Agriculture has always been the backbone of human civilization. From manual labor and simple tools to mechanized farming, the evolution of agricultural technology has been extraordinary. Today, some agricultural machines operate at an insane level, increasing productivity, efficiency, and sustainability. In this guide, we explore the most impressive modern farming machinery, their uses, and how they are transforming agriculture globally.


Why Agricultural Machines Are Crucial

Modern agriculture faces challenges like growing population, limited labor, and the need for sustainable practices. Advanced machinery helps address these issues by:

  1. Boosting Productivity: Machines can perform tasks faster than human labor.
  2. Reducing Labor Costs: Fewer workers are needed for large-scale operations.
  3. Ensuring Precision: Modern machines use GPS and sensors for accurate planting, watering, and harvesting.
  4. Sustainability: Machines optimized for efficiency reduce waste and environmental impact.

From plowing fields to harvesting crops at record speeds, agricultural machines are redefining how farming is done.


Step 1: Tractors – The Backbone of Modern Farming

Tractors are the most recognizable farming machines, but today’s models go far beyond basic plowing and hauling:

  • High Horsepower: Modern tractors operate with hundreds of horsepower, capable of towing multiple implements simultaneously.
  • GPS-Guided Steering: Precision farming tractors use GPS to plant seeds accurately, reducing overlap and maximizing yield.
  • Multi-Functionality: Tractors now perform plowing, seeding, spraying, and even harvesting, making them indispensable.

With these innovations, tractors are operating at an insane level, handling multiple tasks efficiently and reducing time and labor costs.


Step 2: Combine Harvesters – Efficiency Redefined

Combine harvesters are among the most impressive agricultural machines:

  • Functionality: They cut, thresh, and separate grains in a single operation.
  • Capacity: Large combines can harvest hundreds of acres per day.
  • Technology: Modern models feature automated grain flow control, moisture sensors, and GPS mapping.

By integrating cutting-edge technology, combine harvesters dramatically increase yield while reducing manual labor.


Step 3: Planters and Seeders – Precision at Its Best

Planting is one of the most critical stages in crop production. Advanced planters and seeders ensure:

  • Accurate Spacing: Seeds are sown at consistent depths and distances, optimizing growth.
  • Multiple Crop Handling: Machines can plant various seeds simultaneously, including corn, wheat, and soybeans.
  • Efficiency: Large-scale planters cover several acres in hours, something impossible with manual planting.

Precision planting maximizes crop potential and reduces seed wastage, making it a game-changer for farmers worldwide.


Step 4: Irrigation Machines – Smart Water Management

Water is essential for crop growth, and modern irrigation machines ensure efficient water distribution:

  • Center-Pivot Irrigation: Machines rotate in a circular pattern, covering vast areas uniformly.
  • Drip Irrigation Systems: Deliver water directly to plant roots, minimizing evaporation.
  • Automated Scheduling: Smart systems adjust watering based on soil moisture, rainfall, and crop type.

These irrigation innovations save water, reduce costs, and enhance crop health, allowing agriculture to thrive even in water-scarce regions.


Step 5: Sprayers and Drones – Smart Crop Protection

Pest control and fertilization are crucial for high yields:

  • Self-Propelled Sprayers: Cover large fields with precise chemical application, reducing overuse.
  • Drone Technology: Agricultural drones monitor crops, detect diseases early, and spray fertilizers or pesticides efficiently.
  • Variable Rate Technology (VRT): Machines adjust the amount of input applied based on crop needs, improving yield and sustainability.

Using drones and smart sprayers, farmers protect crops effectively while minimizing environmental impact.


Step 6: Harvesting Machines Beyond Combines

Apart from grain crops, specialized harvesting machines handle fruits, vegetables, and other crops:

  • Potato Harvesters: Lift potatoes from soil, separating them from dirt with minimal damage.
  • Fruit Pickers: Machines with suction or mechanical arms harvest fruits without bruising.
  • Cotton Pickers: Efficiently remove cotton bolls from plants, reducing labor-intensive manual picking.

These machines operate at insane efficiency levels, making harvesting faster, safer, and less labor-intensive.


Step 7: Post-Harvest Machinery

Farming doesn’t end at harvesting; processing and packaging are equally important:

  • Sorting and Grading Machines: Automatically sort fruits and vegetables based on size, color, and quality.
  • Packing Machines: Pack produce into crates, boxes, or bags efficiently for transport.
  • Cold Storage Handling: Machines move harvested crops to temperature-controlled storage, preserving freshness.

Post-harvest machines ensure the produce reaches consumers in the best condition, reducing waste and increasing profits.


Step 8: The Role of Automation and AI in Agriculture

Modern agriculture is increasingly driven by AI, robotics, and automation:

  • Autonomous Tractors and Harvesters: Operate with minimal human supervision.
  • Predictive Analytics: AI predicts pest outbreaks, crop diseases, and optimal harvest times.
  • Robotic Weeders: Machines identify weeds and remove them selectively without harming crops.

These technologies allow farms to operate at an insane scale and efficiency, transforming agriculture into a tech-driven industry.


Benefits of Using Advanced Agricultural Machines

  1. Time Efficiency: Tasks that took days manually can now be completed in hours.
  2. Reduced Labor Costs: Fewer workers are needed for large-scale operations.
  3. Higher Yield: Precision planting, irrigation, and harvesting maximize productivity.
  4. Sustainability: Efficient input use reduces waste, energy, and environmental impact.
  5. Quality Produce: Mechanized handling reduces damage and improves consistency.

By adopting modern machinery, farms can achieve record-breaking yields while conserving resources.


Tips for Farmers to Maximize Machine Efficiency

  • Invest in regular maintenance to ensure machines operate at peak performance.
  • Train operators to handle machines efficiently and safely.
  • Implement precision farming tools like GPS, sensors, and drones.
  • Monitor and analyze crop and soil data to optimize machine usage.
  • Combine mechanization with sustainable farming practices for long-term productivity.

With these strategies, farmers can fully harness the power of advanced agricultural machines.


Conclusion

The evolution of agricultural machines has reached an insane level, revolutionizing the way farming is done. From high-tech tractors and combine harvesters to drones, robotic weeders, and automated post-harvest equipment, modern machinery enhances productivity, sustainability, and profitability. These machines allow farmers to feed a growing global population efficiently while reducing labor and resource use.

As agriculture continues to embrace technology, we can expect even more innovative machines and smart farming solutions that will transform the future of food production. Watching these machines operate at an insane level is not just impressive—it’s a glimpse into the future of farming.

How the World’s Most Delicious Pineapples Are Grown and Processed: From Farm to Table

How the World’s Most Delicious Pineapples Are Grown and Processed: From Farm to Table

Pineapples are among the most loved tropical fruits worldwide, known for their sweet, juicy flavor and aromatic fragrance. But have you ever wondered how the world’s most delicious pineapples are grown and processed? From careful cultivation to handling hundreds of thousands of tons, the journey of pineapples from farm to market is a fascinating process that combines agricultural expertise, technology, and careful handling. In this guide, we’ll explore how pineapples are produced and processed on a massive scale, ensuring quality and taste for consumers everywhere.


Why Pineapples Are So Special

Pineapples are not only delicious but also packed with nutrients:

  1. Rich in Vitamins and Minerals: They are a great source of Vitamin C, manganese, and antioxidants.
  2. Digestive Benefits: Bromelain, an enzyme in pineapples, aids digestion and reduces inflammation.
  3. Versatile Use: Enjoyed fresh, in juices, desserts, canned products, and even in savory dishes.

Their global popularity means that producing pineapples efficiently is essential to meet demand while maintaining taste and quality.


Step 1: Selecting the Best Pineapple Varieties

The first step in producing top-quality pineapples begins on the farm:

  • Variety Selection: Farmers choose high-yield, sweet, and aromatic varieties suited to the region’s climate. Common varieties include MD-2, Queen, and Smooth Cayenne.
  • Soil Suitability: Pineapples thrive in well-drained, slightly acidic soil rich in organic matter.
  • Climate Consideration: They require tropical or subtropical climates with temperatures between 20–30°C (68–86°F) and moderate rainfall.

Careful selection ensures that every pineapple is sweet, juicy, and consistent in quality.


Step 2: Planting Pineapples

Pineapples are usually grown from suckers, crowns, or slips rather than seeds:

  • Crowns: The leafy top of the fruit is planted directly in the soil.
  • Suckers: Side shoots from the main plant are used to produce new plants.
  • Slips: Smaller offshoots from the base of the pineapple plant.

Spacing is critical: plants are typically set 30–40 inches apart to allow room for growth, proper sunlight, and airflow, reducing the risk of disease.


Step 3: Caring for Pineapple Plants

Growing delicious pineapples requires patience and consistent care:

  1. Irrigation: Pineapples are drought-tolerant but produce better yields with consistent watering. Drip irrigation is often used for efficiency.
  2. Fertilization: Organic and chemical fertilizers provide essential nutrients like nitrogen, phosphorus, and potassium.
  3. Weed Control: Mulching and manual weeding prevent competition for nutrients.
  4. Pest Management: Insect pests like mealybugs and nematodes are controlled using natural or chemical solutions.

With proper care, pineapple plants take 18–24 months to produce mature, flavorful fruits.


Step 4: Harvesting Pineapples

Harvesting is a delicate process to maintain the fruit’s quality:

  • Timing: Pineapples are harvested when fully ripe but firm, ensuring sweetness and longevity.
  • Manual Handling: Workers carefully cut fruits using knives to avoid bruising.
  • Sorting in the Field: Only healthy, damage-free pineapples are sent for processing.

On large farms, hundreds of thousands of pineapples may be harvested weekly, requiring meticulous coordination.


Step 5: Transportation from Farm to Processing Facility

Transporting pineapples efficiently is essential to maintain freshness:

  • Crates and Boxes: Fruits are packed in ventilated crates to prevent crushing.
  • Temperature Management: Pineapples are sensitive to heat; trucks are often cooled to reduce ripening during transport.
  • Handling: Gentle handling minimizes bruising, ensuring that the fruit reaches the processing facility in perfect condition.

Efficient logistics ensure that even 140,000 tons of pineapples can be transported safely for processing.


Step 6: Processing Pineapples at Scale

Once at the facility, pineapples undergo several steps before reaching consumers:

  1. Washing and Cleaning: Fruits are washed thoroughly to remove dirt, pesticides, or residues.
  2. Sorting: Pineapples are sorted by size, color, and quality. Damaged or undersized fruits are removed.
  3. Peeling and Coring: Automated machines or skilled workers remove the tough outer skin and core.
  4. Slicing and Packaging: Depending on the product—fresh, canned, juice—pineapples are sliced, diced, or juiced.
  5. Canning and Preservation: For long-term storage, pineapples are canned with syrup or juice under hygienic conditions.

Modern facilities use advanced machinery and quality control to maintain taste, aroma, and nutritional value.


Step 7: Quality Control and Safety Measures

Maintaining consistency and safety is crucial:

  • Hygiene Standards: Processing facilities follow strict cleanliness and sanitation protocols.
  • Quality Checks: Random samples are tested for sugar content, acidity, and ripeness.
  • Traceability: Each batch is recorded to ensure food safety and accountability.

These steps guarantee that consumers enjoy high-quality, delicious pineapples every time.


Step 8: Distribution to Markets

After processing, pineapples are distributed to local and international markets:

  • Cold Storage: Maintains freshness during transit.
  • Efficient Logistics: Coordinated supply chains ensure timely delivery.
  • Retail Display: Pineapples are arranged to attract consumers while preserving their quality.

Efficient distribution ensures that delicious pineapples reach consumers around the world, maintaining the farm-to-table journey.


Benefits of Modern Pineapple Production

  1. High-Quality Fruit: Advanced agricultural practices improve sweetness, aroma, and texture.
  2. Large-Scale Efficiency: Millions of tons can be processed and distributed globally.
  3. Reduced Waste: Careful harvesting, handling, and processing minimize losses.
  4. Economic Growth: Pineapple farming supports rural economies and provides jobs.
  5. Consumer Satisfaction: Fresh, safe, and delicious pineapples available year-round.

By combining traditional farming knowledge with modern technology, pineapple producers deliver consistently delicious fruit on a massive scale.


Tips for Small-Scale Pineapple Growers

Even if you’re not managing 140,000 tons, you can grow delicious pineapples at home or on small farms:

  • Choose high-quality planting material (crowns, slips, or suckers).
  • Provide well-drained, nutrient-rich soil.
  • Water regularly but avoid overwatering.
  • Protect plants from pests and diseases naturally.
  • Harvest at the right time for peak sweetness.

With attention to detail, even small growers can produce amazing, sweet pineapples.


Conclusion

The journey of pineapples from farm to table is a combination of patience, skill, and technology. From planting carefully selected varieties to processing hundreds of thousands of tons with precision, every step is designed to ensure the fruit’s quality, taste, and freshness. Modern agricultural technology has revolutionized pineapple production, making it possible to enjoy the world’s most delicious pineapples anywhere, anytime.

Whether you are a consumer, farmer, or food enthusiast, understanding the intricate process behind pineapple production gives a greater appreciation for this tropical fruit. The next time you enjoy a sweet, juicy pineapple, remember the careful steps—from planting, harvesting, transporting, to processing—that brought it to your plate.

खरबूजा खाना पसंद है? इस आसान तरीके से उगाइए, अब बाजार से खरबूजा खरीदने की ज़रूरत नहीं पड़ेगी!

खरबूजा खाना पसंद है? इस आसान तरीके से उगाइए, अब बाजार से खरबूजा खरीदने की ज़रूरत नहीं पड़ेगी!

खरबूजा (Cantaloupe या Musk Melon) गर्मियों का एक स्वादिष्ट, रसदार और पौष्टिक फल है जिसे हर कोई पसंद करता है। लेकिन क्या आप जानते हैं कि इसे आप अपने घर पर भी बहुत आसानी से उगा सकते हैं — चाहे आपके पास बड़ा बगीचा हो या सिर्फ एक छोटी बालकनी!
अगर आप सोचते हैं कि खरबूजे के लिए बहुत ज़मीन चाहिए, तो यह लेख आपकी सोच बदल देगा। आज हम आपको बताएंगे कि कैसे आप खरबूजा घर की छत, बालकनी या छोटे गमलों में भी उगा सकते हैं — और एक बार सीख लेने के बाद, आपको इसे बाजार से खरीदने की जरूरत नहीं पड़ेगी।


चरण 1: सही किस्म का चयन करें

खरबूजा उगाने से पहले सबसे जरूरी है सही किस्म चुनना। घर या छत पर खेती के लिए Hybrid Mini Cantaloupe, Sugar Baby, या Arka Jeet जैसी किस्में सबसे उपयुक्त हैं। ये पौधे ज्यादा जगह नहीं लेते और जल्दी फल देते हैं।

टिप: स्थानीय नर्सरी या ऑनलाइन स्टोर से बीज खरीदते समय “container-friendly” या “dwarf” किस्मों पर ध्यान दें।


चरण 2: सही समय और जलवायु का चयन

खरबूजा गर्म और धूप वाली जलवायु में सबसे अच्छा बढ़ता है। भारत में इसे फरवरी से अप्रैल या जुलाई से अगस्त तक उगाना आदर्श होता है।

  • तापमान: 25°C से 35°C के बीच सबसे उपयुक्त।
  • धूप: प्रतिदिन कम से कम 6-8 घंटे सीधी धूप आवश्यक है।

अगर आप इसे छत पर उगा रहे हैं, तो पौधों को ऐसे स्थान पर रखें जहाँ पूरे दिन भरपूर धूप मिलती हो।


चरण 3: मिट्टी और कंटेनर की तैयारी

खरबूजे को अच्छी जल निकासी वाली, जैविक पदार्थों से भरपूर मिट्टी पसंद है।

मिट्टी मिश्रण तैयार करें:

  • 50% बागवानी मिट्टी (garden soil)
  • 30% गोबर की खाद या कम्पोस्ट
  • 20% बालू या पर्लाइट (drainage के लिए)

कंटेनर का चुनाव:

  • 18–24 इंच गहरा गमला या पुराने टायर में उगाना एक बेहतरीन विकल्प है।
  • टायर को दो परत में रखकर बीच में मिट्टी भरें।
  • नीचे कुछ छेद करें ताकि पानी निकल सके।

इससे न केवल पौधों की जड़ें फैलने के लिए जगह मिलती है, बल्कि मिट्टी गर्म भी रहती है — जो खरबूजे के विकास के लिए लाभदायक है।


चरण 4: बीज बोना और अंकुरण

  1. मिट्टी तैयार करने के बाद, खरबूजे के बीजों को लगभग 1 इंच गहराई में बोएं।
  2. हर गमले में 3-4 बीज डालें और हल्का पानी दें।
  3. 5-7 दिनों में अंकुर निकलने लगेंगे।
  4. जब पौधे 3-4 इंच ऊँचाई के हो जाएं, तो मजबूत पौधों को ही रहने दें और बाकी को निकाल दें।

सुझाव: अगर आप तेज़ अंकुरण चाहते हैं, तो बीजों को 12 घंटे के लिए गुनगुने पानी में भिगोकर रखें।


चरण 5: सिंचाई और देखभाल

खरबूजे के पौधों को नियमित लेकिन संतुलित सिंचाई की आवश्यकता होती है।

  • शुरुआत में हर दिन हल्का पानी दें।
  • जब पौधे बढ़ने लगें, तो हर 2-3 दिन में गहराई तक पानी दें
  • फूल आने और फल बनने के समय ज़्यादा पानी की जरूरत होती है।

ध्यान दें: मिट्टी में पानी रुकना नहीं चाहिए, वरना जड़ें सड़ सकती हैं।


चरण 6: पौधों की देखभाल और सहारा देना

खरबूजे की बेलें बहुत फैलती हैं, इसलिए उन्हें सहारा देना जरूरी है।

  • छत या बालकनी में उगाते समय जाली (trellis) या रस्सियों का उपयोग करें।
  • बेलों को ऊपर की ओर बढ़ने दें ताकि फलों को साफ हवा और धूप मिले।
  • जब फल लगने लगें, तो छोटे जाल या कपड़े का झूला बनाकर फलों को सहारा दें ताकि वे नीचे न गिरें।

चरण 7: जैविक खाद और पोषण

खरबूजे के पौधों को फल देने के लिए पोषण की ज़रूरत होती है।
हर 15-20 दिनों में एक बार निम्न में से कोई एक खाद डालें:

  • गोबर की सड़ी हुई खाद
  • कम्पोस्ट चाय (compost tea)
  • केले के छिलके का तरल घोल
  • नीम खली पाउडर (pest control के लिए भी उपयोगी)

विशेष टिप: फूल आने के बाद पौधे को पोटैशियम और फॉस्फोरस की मात्रा ज़्यादा दें — इससे फल मीठे और रसीले बनते हैं।


चरण 8: कीट और रोग नियंत्रण

खरबूजे की बेलों पर अक्सर एफिड्स (aphids), सफेद मक्खी और पाउडरी मिल्ड्यू जैसी समस्याएँ आती हैं।
इनसे बचाव के लिए:

  • नीम का तेल (Neem Oil) + पानी मिलाकर 7-10 दिनों में एक बार छिड़काव करें।
  • अगर फफूंदी दिखे, तो छाछ (buttermilk) का छिड़काव भी बहुत प्रभावी होता है।
  • पत्तियों के नीचे नियमित जांच करें और संक्रमित पत्तियाँ हटा दें।

चरण 9: फूल से फल बनने की प्रक्रिया

खरबूजे में नर और मादा फूल अलग-अलग होते हैं।

  • नर फूल पहले आते हैं, मादा फूल बाद में।
  • मादा फूल के नीचे छोटा फल जैसा भाग होता है।
    अगर मधुमक्खियाँ कम हों तो हाथ से परागण (hand pollination) करें — नर फूल से पराग लेकर मादा फूल पर लगाएँ।
    5-7 दिनों में फल बढ़ने लगता है।

चरण 10: फल की परिपक्वता और कटाई

खरबूजे का फल सामान्यतः 60-75 दिनों में पक जाता है।
पकने के संकेत:

  • फल की खुशबू तेज़ हो जाती है।
  • डंठल के पास हल्का दरार दिखती है।
  • फल का रंग हल्का सुनहरा या नारंगी हो जाता है।

कटाई के बाद फलों को 1-2 दिन ठंडी जगह पर रख दें — इससे स्वाद और मिठास बढ़ जाती है।


बोनस टिप: खरबूजे का उपयोग और भंडारण

  • खरबूजे के टुकड़ों को ठंडा करके परोसें या जूस बनाएं।
  • बीजों को सुखाकर अगले सीजन के लिए रखें।
  • फलों को फ्रिज में 5-7 दिन तक ताजा रखा जा सकता है।

निष्कर्ष:

घर की छत या बालकनी में खरबूजा उगाना न सिर्फ आसान है, बल्कि यह आपको 100% जैविक, स्वादिष्ट और ताज़ा फल देता है।
एक बार जब आप यह तरीका अपनाएंगे, तो आप समझेंगे कि खरबूजा खरीदने से बेहतर उसे खुद उगाना कितना संतोषजनक है।

तो अब इंतज़ार किस बात का?
पुराने टायर, बालकनी के गमले या छत के कोने का इस्तेमाल करें और इस गर्मी अपने घर का मीठा खरबूजा खुद उगाएं!

बगीचा नहीं है? कोई बात नहीं! बीट (चुकंदर) उगाने का इतना आसान तरीका जानिए, जिसे न आजमाना होगा अफसोस का कारण

बगीचा नहीं है? कोई बात नहीं! बीट (चुकंदर) उगाने का इतना आसान तरीका जानिए, जिसे न आजमाना होगा अफसोस का कारण

अगर आपके पास बगीचा नहीं है, लेकिन फिर भी आप घर पर ताज़ी, पौष्टिक सब्जियाँ उगाना चाहते हैं — तो आपके लिए ये लेख खास है!
आज हम बात करेंगे एक ऐसी सब्ज़ी की जो न केवल स्वादिष्ट होती है बल्कि सेहत के लिए भी खज़ाना है — चुकंदर (Beetroot)

चुकंदर में आयरन, फोलेट, फाइबर, और एंटीऑक्सीडेंट की भरपूर मात्रा होती है। यह रक्तचाप नियंत्रित करता है, त्वचा को निखारता है और ऊर्जा का शानदार स्रोत है।
अच्छी बात यह है कि इसे उगाने के लिए आपको बगीचे की ज़रूरत नहीं है — सिर्फ कुछ गमले, थोड़ी मिट्टी और सही तरीका चाहिए।

तो आइए जानते हैं, बिना बगीचे के भी चुकंदर उगाने का यह “सुपर आसान तरीका” जिससे आप अपने घर की बालकनी, छत या खिड़की पर ही ताज़े, रसीले बीट उगा सकते हैं!


1. क्यों करें घर पर चुकंदर की खेती?

चुकंदर एक ऐसी सब्ज़ी है जो कम जगह में, जल्दी और बिना ज्यादा देखभाल के उगाई जा सकती है।
यह ठंडे या हल्के गर्म मौसम में भी अच्छी तरह बढ़ती है और घर की छोटी जगहों में आसानी से फलती-फूलती है।

घर पर उगाने के फायदे:

  • ताज़ा, जैविक और केमिकल-फ्री सब्ज़ी।
  • बाजार के मुकाबले अधिक स्वादिष्ट और पौष्टिक।
  • बालकनी या छत की जगह का बेहतर उपयोग।
  • छोटे बच्चों को बागवानी से जोड़ने का अच्छा अवसर।

2. बीज चयन और तैयारी (Seed Selection and Preparation)

बीज का चुनाव

बीट के बीज बाजार या ऑनलाइन आसानी से मिल जाते हैं।
लोकप्रिय किस्में:

  • Detroit Dark Red
  • Crimson Globe
  • Ruby Queen

इनमें से कोई भी किस्म घर पर उगाने के लिए बढ़िया है।

बीज की तैयारी

  • बीज बोने से पहले उन्हें 8–10 घंटे तक पानी में भिगो दें।
  • इससे बीज जल्दी अंकुरित होते हैं और पौधे मजबूत बनते हैं।

3. सही कंटेनर का चयन (Choosing the Right Container)

अगर आपके पास बगीचा नहीं है, तो कोई चिंता की बात नहीं।
आप चुकंदर को गमले, बाल्टी, पुराने टायर, ट्रे, या प्लास्टिक के डिब्बों में भी उगा सकते हैं।

मुख्य बातें ध्यान में रखें:

  • कंटेनर की गहराई कम से कम 10–12 इंच होनी चाहिए।
  • नीचे की ओर पानी निकासी के लिए छोटे छेद (drainage holes) ज़रूर बनाएं।
  • चौड़ा कंटेनर चुनें ताकि कई पौधे एक साथ लग सकें।

4. मिट्टी और खाद की तैयारी (Soil Preparation)

चुकंदर की अच्छी वृद्धि के लिए मिट्टी हल्की, ढीली और पोषक तत्वों से भरपूर होनी चाहिए।
एक परफेक्ट मिश्रण तैयार करें:

  • 40% बगीचे की मिट्टी
  • 40% गोबर की खाद या वर्मी कंपोस्ट
  • 20% रेत या नारियल की भूसी (Coco peat)

यह मिश्रण जड़ों को फैलने के लिए पर्याप्त जगह देता है और मिट्टी में नमी बनाए रखता है।

टिप: अगर मिट्टी बहुत सख्त है, तो चुकंदर की जड़ें सही आकार नहीं ले पाएंगी — इसलिए मिट्टी जितनी मुलायम होगी, बीट उतनी गोल और सुंदर बनेगी।


5. बीज बोने की विधि (Sowing the Seeds)

  1. कंटेनर में तैयार मिट्टी भरें और ऊपर से 1 इंच खाली जगह छोड़ें।
  2. बीजों को 2–3 सेमी की दूरी पर बोएं।
  3. बीजों को हल्के से मिट्टी से ढक दें और ऊपर से थोड़ा पानी छिड़कें।
  4. 5–7 दिन में छोटे पौधे निकलने लगेंगे।

जब पौधे 4–5 पत्तियों के हो जाएं, तो एक गमले में सिर्फ 2–3 मजबूत पौधे छोड़ दें। बाकी को हल्के से निकाल दें ताकि बाकी पौधों को बढ़ने की जगह मिले।


6. पानी देना और देखभाल (Watering and Care)

  • चुकंदर को नमी पसंद है, लेकिन ज्यादा पानी से जड़ें सड़ सकती हैं।
  • हर 2–3 दिन में हल्का पानी दें।
  • गर्मियों में रोज़ाना सुबह या शाम पानी दें।
  • मिट्टी हमेशा हल्की नम रहे, लेकिन कभी भी गीली या दलदली न हो।

सलाह: अगर मिट्टी सूखी लगे तो पानी दें, वरना रुकें — ज़रूरत से ज्यादा पानी देना नुकसानदायक है।


7. धूप और तापमान (Sunlight and Temperature)

चुकंदर को 6–8 घंटे की सीधी धूप बहुत पसंद है।
यदि आपकी बालकनी में धूप कम आती है, तो पौधे को सप्ताह में कुछ बार छत पर रख दें ताकि उन्हें पर्याप्त रोशनी मिले।

उत्तम तापमान:

  • 15°C से 25°C तक सबसे अच्छा रहता है।
  • बहुत ज्यादा गर्मी में पौधों को दोपहर की धूप से बचाएँ।

8. पौधों को पोषण देना (Fertilizing the Plants)

हर 15–20 दिन में मिट्टी के ऊपर थोड़ा जैविक खाद या वर्मी कंपोस्ट डालें।
यह पौधों को आवश्यक पोषण देगा और जड़ें मजबूत बनाएगा।

यदि पत्तियाँ पीली दिखने लगें, तो इसका मतलब है पौधों को नाइट्रोजन की जरूरत है।
इसके लिए आप घर की बनी खाद या केंचुआ खाद का घोल (liquid compost tea) उपयोग कर सकते हैं।


9. पत्तियों की कटाई (Harvesting Beet Leaves)

चुकंदर के पौधों की पत्तियाँ भी खाने लायक और पौष्टिक होती हैं।

  • जब पौधे 20–25 दिन के हो जाएँ, तो आप ऊपर की 2–3 पत्तियाँ काट सकते हैं।
  • ध्यान रखें कि एक बार में पूरी पत्तियाँ न काटें, वरना जड़ें कमजोर हो जाएंगी।

इन पत्तियों को आप सलाद, सूप या पराठे में इस्तेमाल कर सकते हैं — स्वाद और पोषण दोनों मिलेगा!


10. चुकंदर की कटाई (Beetroot Harvesting)

अब आता है सबसे रोमांचक पल — कटाई का समय!
बीज बोने के लगभग 45–60 दिनों में चुकंदर पूरी तरह तैयार हो जाते हैं।

कटाई के संकेत:

  • जड़ें 5–7 सेमी व्यास की दिखने लगें।
  • मिट्टी से थोड़ा ऊपर लाल रंग की जड़ दिखाई दे।
  • पत्तियाँ मोटी और गहरी हरी हो जाएँ।

पौधे को हल्के हाथों से मिट्टी से खींचकर निकालें।
जड़ों को धोकर छाया में सुखाएँ — अब ये खाने या स्टोर करने के लिए तैयार हैं।


11. भंडारण और उपयोग (Storage and Use)

चुकंदर को लंबे समय तक ताज़ा रखने के लिए:

  • उन्हें बिना काटे फ्रिज में रखें।
  • अगर आप उन्हें छील चुके हैं, तो हल्के पानी में डालकर 2–3 दिन रख सकते हैं।
  • सुखाकर एयरटाइट डिब्बे में भी स्टोर कर सकते हैं।

उपयोग के तरीके:

  • सलाद में कच्चा खाएँ
  • जूस बनाएं
  • सूप, पराठे, या सब्ज़ी में डालें

चुकंदर का रंग और स्वाद दोनों ही खाने को आकर्षक बनाते हैं।


12. आम समस्याएँ और उनके समाधान (Common Problems and Solutions)

समस्याकारणसमाधान
पत्तियाँ पीली होनाखाद की कमीहर 15 दिन जैविक खाद डालें
जड़ें छोटी रहनामिट्टी बहुत सख्तमिट्टी में रेत या कोकोपीट मिलाएँ
पौधे मुरझानाज़्यादा पानी देनापानी का संतुलन बनाए रखें
कीट लगनाएफिड्स या कैटरपिलरनीम तेल का छिड़काव करें

13. बोनस टिप्स (Bonus Tips for Maximum Growth)

  1. बीजों को बैच में बोएँ: हर 15 दिन पर कुछ बीज बोएँ ताकि लगातार ताज़े चुकंदर मिलें।
  2. कंटेनर को घुमाते रहें: हर कुछ दिन में गमले की दिशा बदलें ताकि पौधों को हर ओर से धूप मिले।
  3. पानी के साथ प्यार दें: पौधों से बात करें, देखभाल करें — वे जल्दी फलेंगे!
  4. पत्तियों को नुकसान न पहुँचाएँ: यही पौधे की ऊर्जा का स्रोत होती हैं।

14. छोटे स्थानों में बागवानी का आनंद (The Joy of Small-Space Gardening)

बिना बगीचे के भी जब आप अपने हाथों से सब्ज़ी उगाते हैं, तो उसका स्वाद और खुशी दोनों अलग ही होते हैं।

  • हर सुबह पौधों को देखना, पानी देना और नई पत्तियाँ निकलते देखना तनाव को कम करता है
  • घर की छत या बालकनी हरियाली से भर जाती है।
  • और सबसे बड़ी बात — आप अपने परिवार को स्वच्छ, सुरक्षित और पौष्टिक भोजन दे पाते हैं।

15. निष्कर्ष (Conclusion)

अब चाहे आपके पास बगीचा हो या नहीं, चुकंदर उगाना अब कोई मुश्किल काम नहीं।
सिर्फ एक गमला, थोड़ी मिट्टी और आपका ध्यान ही काफी है।
45–60 दिनों में ही आपकी बालकनी या छत पर ताज़े, लाल और रसीले बीट तैयार हो जाएँगे!

तो अब देर किस बात की?
आज ही कुछ बीज बोएँ और देखें कैसे यह छोटा सा प्रयोग आपके घर को हरियाली और स्वास्थ्य से भर देता है।

याद रखें — “बगीचा नहीं तो क्या, दिल में बागवानी का शौक हो तो हर कोना हरा हो जाता है!”

5-Step Guide to Growing Lettuce in Shaded Areas

5-Step Guide to Growing Lettuce in Shaded Areas

Lettuce (Lactuca sativa) is a staple leafy green in diets worldwide, valued for its crisp texture, mild flavor, and nutritional benefits. While lettuce is typically grown in full sun, many gardeners face the challenge of limited sunlight due to urban spaces, shaded patios, or tree-covered yards. Fortunately, lettuce is a cool-season crop that can thrive in partial shade if grown under the right conditions.

This guide provides a comprehensive 5-step approach to growing lettuce in shaded areas, focusing on proper variety selection, soil preparation, planting techniques, care, and harvesting strategies. By following these steps, gardeners can enjoy fresh, homegrown lettuce even in low-light conditions.


Step 1: Choose the Right Lettuce Varieties

Selecting lettuce varieties suited for shade is the foundation for a successful crop. Different lettuce types have varying tolerance to sunlight and growth habits.

  1. Lettuce Types:
    • Loose-Leaf Lettuce: Ideal for shaded areas; grows quickly and tolerates partial sun. Varieties include ‘Black Seeded Simpson’ and ‘Green Salad Bowl.’
    • Butterhead Lettuce: Forms soft, rounded heads and performs well in partial shade. Varieties include ‘Bibb’ and ‘Boston.’
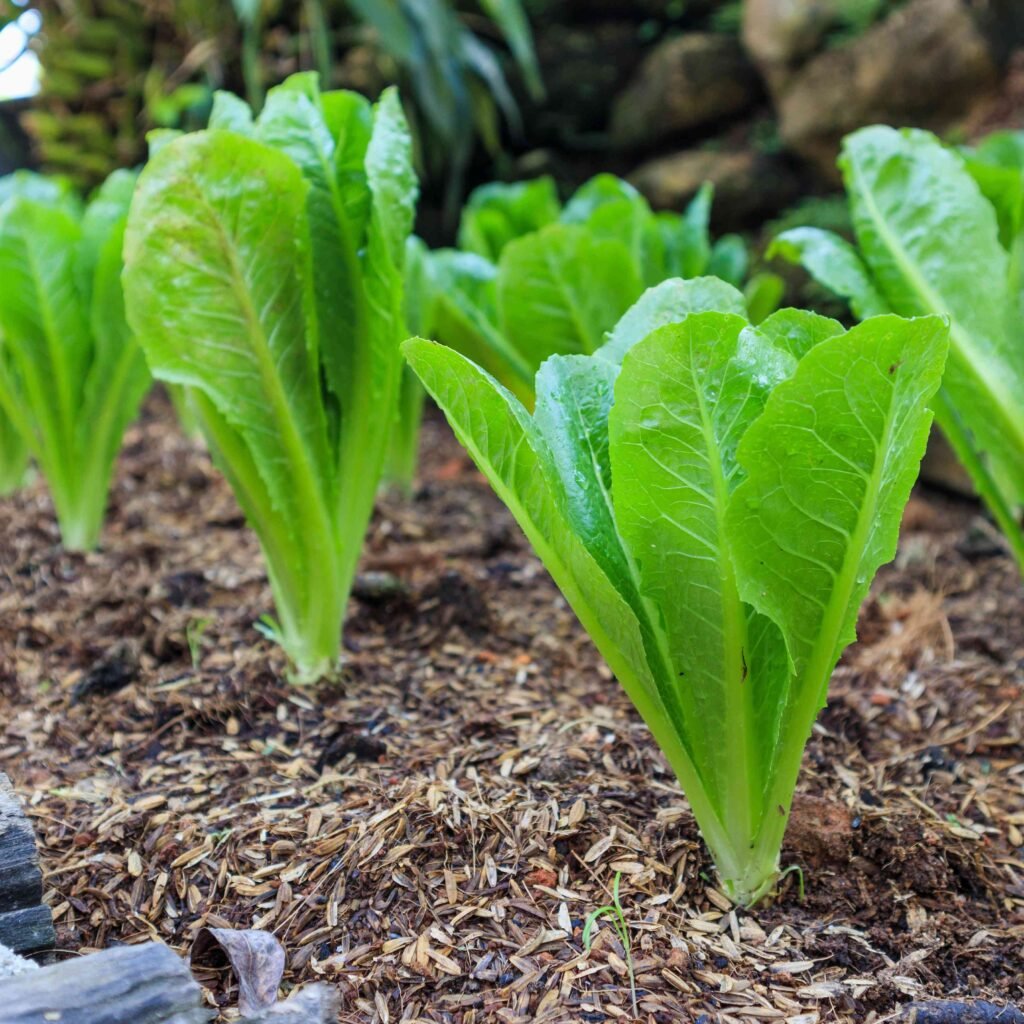
    • Romaine (Cos) Lettuce: Requires slightly more sunlight but can still produce in light shade. Varieties include ‘Little Gem’ and ‘Parris Island.’
    • Oakleaf Lettuce: Highly shade-tolerant and grows well in cool, low-light conditions.
  2. Leaf Color and Texture:
    • Darker leaves absorb more light, helping the plant photosynthesize efficiently in low-light conditions.
    • Opt for varieties with tender leaves that grow quickly for multiple harvests.

Choosing shade-tolerant varieties ensures lettuce grows healthy, flavorful leaves even with limited sunlight exposure.


Step 2: Prepare the Soil

Lettuce requires nutrient-rich, well-draining soil to thrive, particularly in shaded areas where sunlight is limited.

  1. Soil Selection:
    • Choose loamy, light soil with good drainage. Avoid heavy clay soils, which can cause waterlogging and root rot.
    • Ideal pH: 6.0–6.8.
  2. Soil Enrichment:
    • Mix in well-rotted compost, aged manure, or organic matter to improve fertility and moisture retention.
    • Lettuce benefits from a balanced nutrient profile, so incorporate a slow-release fertilizer or organic amendments high in nitrogen to promote leafy growth.
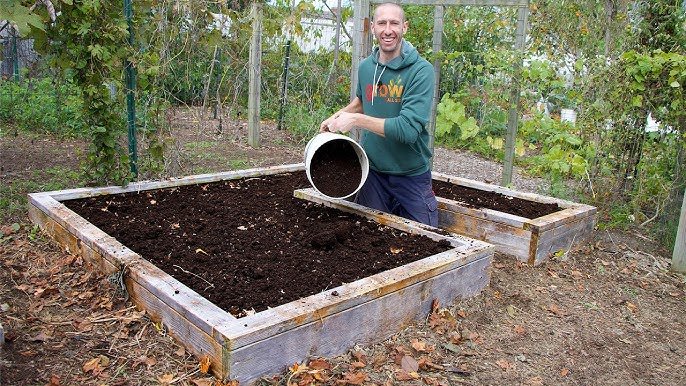
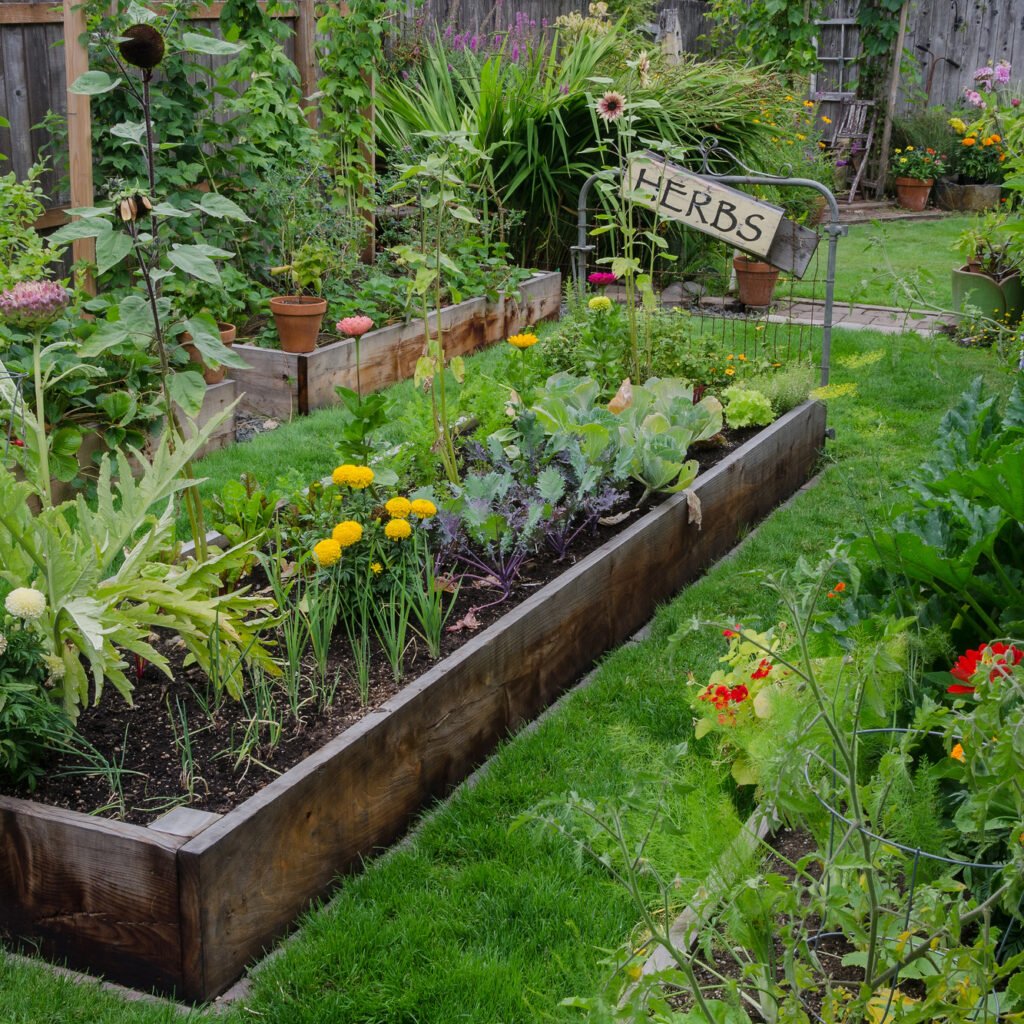
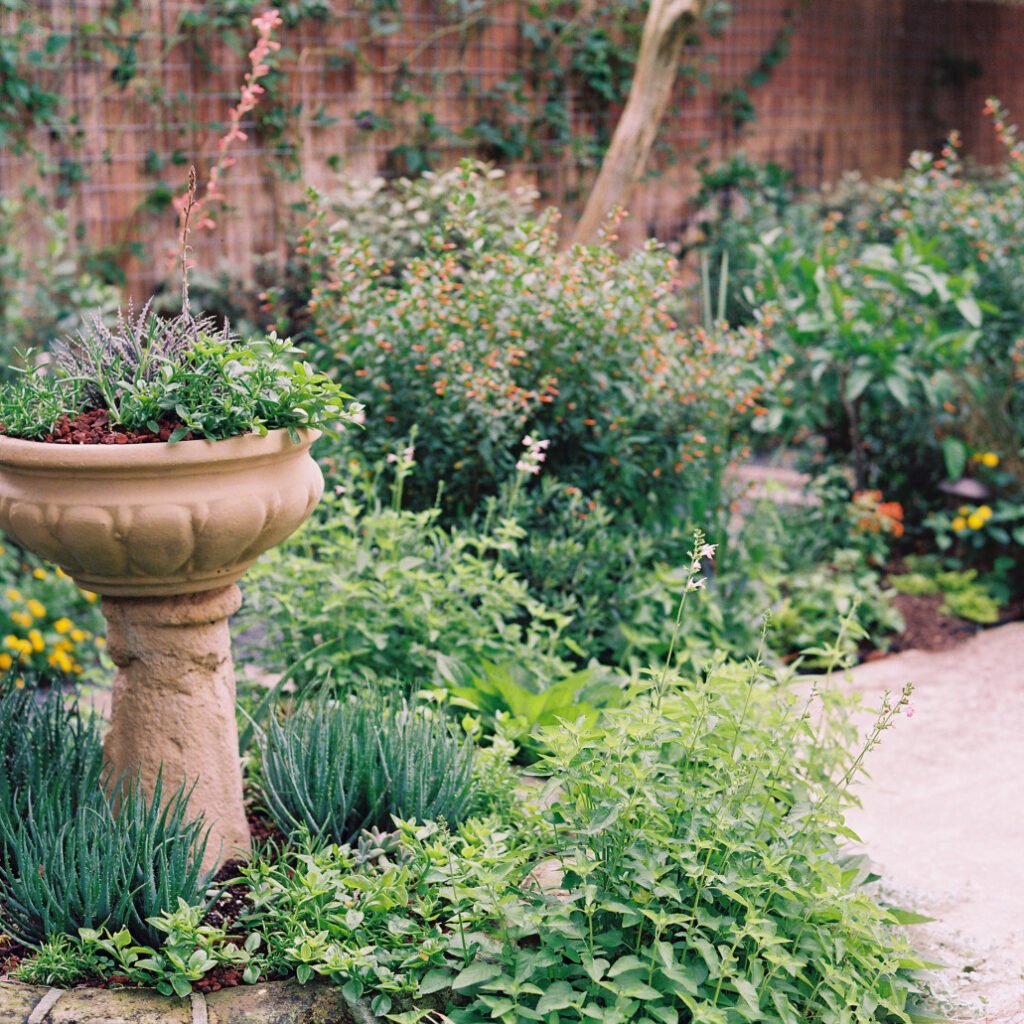
  3. Raised Beds or Containers:
    • In shaded areas, consider raised beds or containers to improve soil drainage and provide better control over nutrient content.
    • Containers allow you to move plants slightly to catch the most sunlight available during the day.

Proper soil preparation ensures robust root development, healthier leaves, and improved growth under limited light conditions.


Step 3: Planting Lettuce in Shaded Areas

Planting techniques play a crucial role in maximizing growth in low-light conditions.

  1. Sowing Seeds:
    • Direct sow seeds ¼–½ inch deep in rows or scatter lightly for loose-leaf varieties.
    • Space seeds 6–12 inches apart, depending on variety and leaf size.
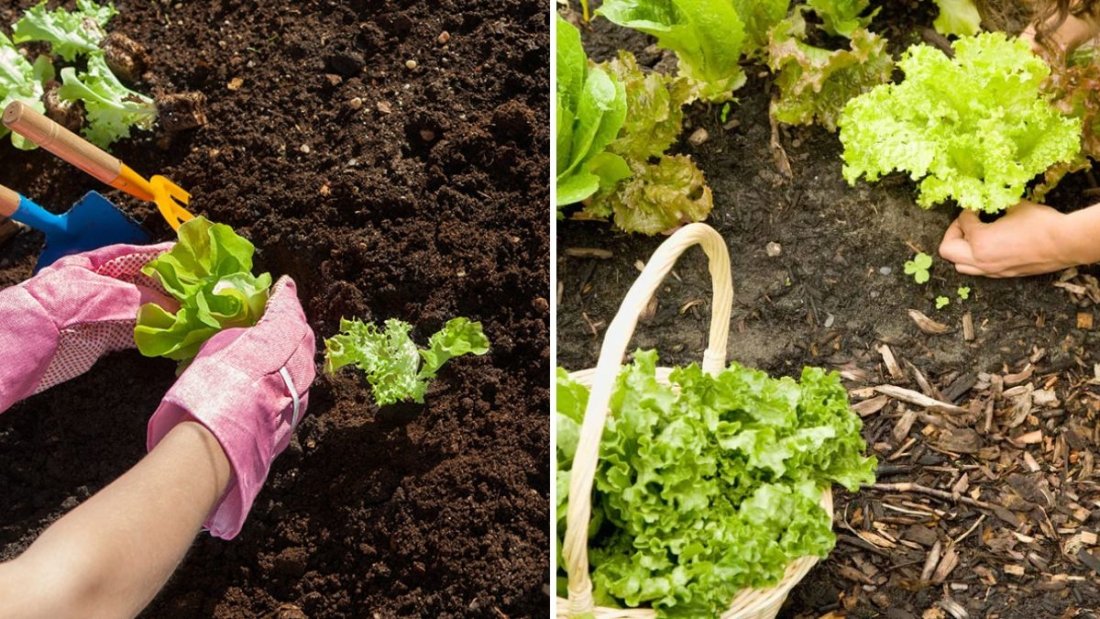
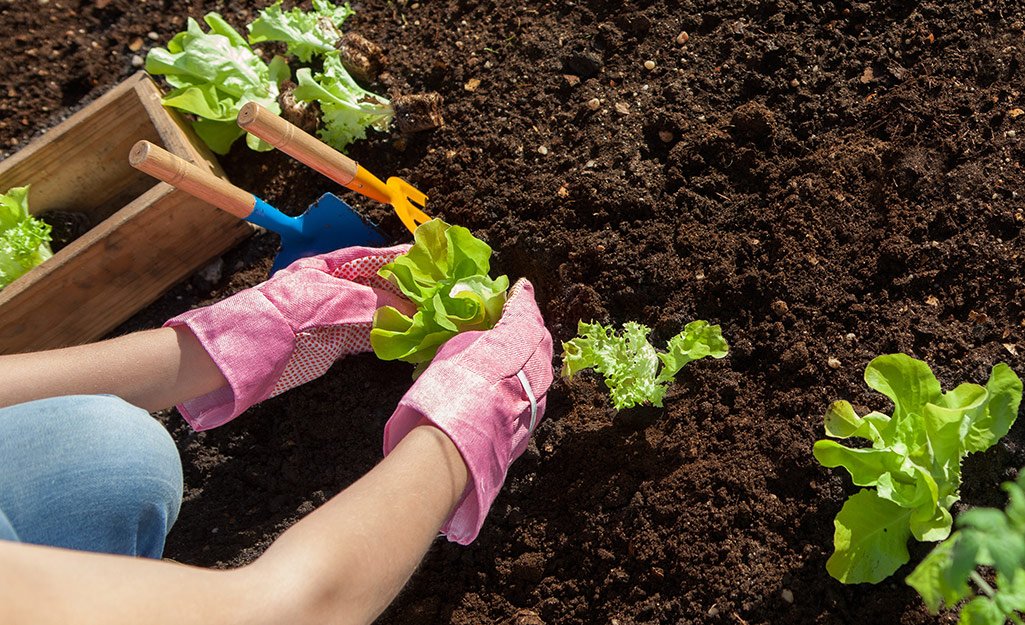
  2. Transplanting Seedlings:
    • Start seeds indoors in trays or pots and transplant seedlings once they develop 3–4 true leaves.
    • Harden off seedlings by gradually exposing them to outdoor shaded conditions before planting.
  3. Spacing Considerations:
    • Proper spacing is essential for air circulation in shaded areas, reducing the risk of fungal diseases such as downy mildew.
    • For loose-leaf varieties, space plants closer together (6–8 inches) for dense, continuous harvests.
  4. Orientation:
    • Arrange rows or containers so plants receive the maximum light during available sunny hours.
    • Even a few hours of morning sun can significantly improve growth in shaded areas.

Correct planting ensures lettuce seedlings establish quickly, leading to healthier, more productive plants.


Step 4: Care and Maintenance

Lettuce grown in shaded areas requires attentive care to thrive and resist disease.

  1. Watering:
    • Maintain consistent moisture, as shaded soils retain water longer.
    • Water deeply at the base of plants to prevent fungal issues on leaves.
    • Avoid overhead watering to reduce leaf wetness and disease risk.
  2. Fertilization:
    • Leafy growth benefits from additional nitrogen. Apply liquid fertilizer or compost tea every 2–3 weeks.
    • Avoid excessive fertilization, which can cause bitter-tasting leaves or tip burn.
  3. Mulching:
    • Apply organic mulch, such as straw or shredded leaves, to conserve moisture, suppress weeds, and maintain consistent soil temperature.
    • Mulching helps shaded areas avoid soil compaction and nutrient leaching during heavy rains.
  4. Pest and Disease Management:
    • Monitor for aphids, slugs, and snails, which thrive in shaded, moist environments.
    • Use natural remedies like neem oil, diatomaceous earth, or hand-picking pests.
    • Ensure adequate spacing and airflow to prevent fungal infections.
  5. Succession Planting:
    • Sow seeds or transplant seedlings every 2–3 weeks for a continuous harvest throughout the growing season.

Consistent care ensures leafy, tender lettuce with minimal pest and disease problems even under limited sunlight.


Step 5: Harvesting and Post-Harvest Handling

Harvesting lettuce at the right stage maximizes flavor, texture, and nutrient content.

  1. Timing:
    • Loose-leaf varieties: Harvest outer leaves when they reach 3–4 inches.
    • Head-forming varieties: Wait until the head is firm and fully developed.
  2. Harvest Techniques:
    • Use scissors or a knife to cut leaves above the base, allowing plants to continue producing.
    • For head varieties, harvest the entire head by cutting at soil level.
  3. Post-Harvest Care:
    • Wash leaves gently and dry thoroughly to remove soil and pests.
    • Store in perforated plastic bags or containers in the refrigerator to maintain freshness.
    • Lettuce grown in shaded areas may be slightly more tender, so handle gently to prevent bruising.
  4. Encouraging Regrowth:
    • For loose-leaf types, cutting outer leaves allows the plant to continue producing new leaves for multiple harvests.

Proper harvesting practices ensure high-quality lettuce with extended shelf life and continuous supply for home use.


Additional Tips for Growing Lettuce in Shaded Areas

  1. Use Shade-Tolerant Varieties:
    • Darker leaf varieties like romaine or oakleaf perform better in low-light conditions due to higher chlorophyll content.
  2. Adjust Watering Schedule:
    • Shaded soil retains moisture longer, so reduce watering frequency to prevent root rot.
  3. Enhance Light Availability:
    • Reflective surfaces like white walls or reflective mulch can increase light intensity in shaded areas.
  4. Cool-Season Advantage:
    • Lettuce prefers cooler temperatures (60–70°F). Shaded areas naturally provide cooler microclimates, reducing bolting in spring or summer.
  5. Organic Fertilization:
    • Use compost, vermicompost, or liquid seaweed extract to boost growth naturally without chemical inputs.
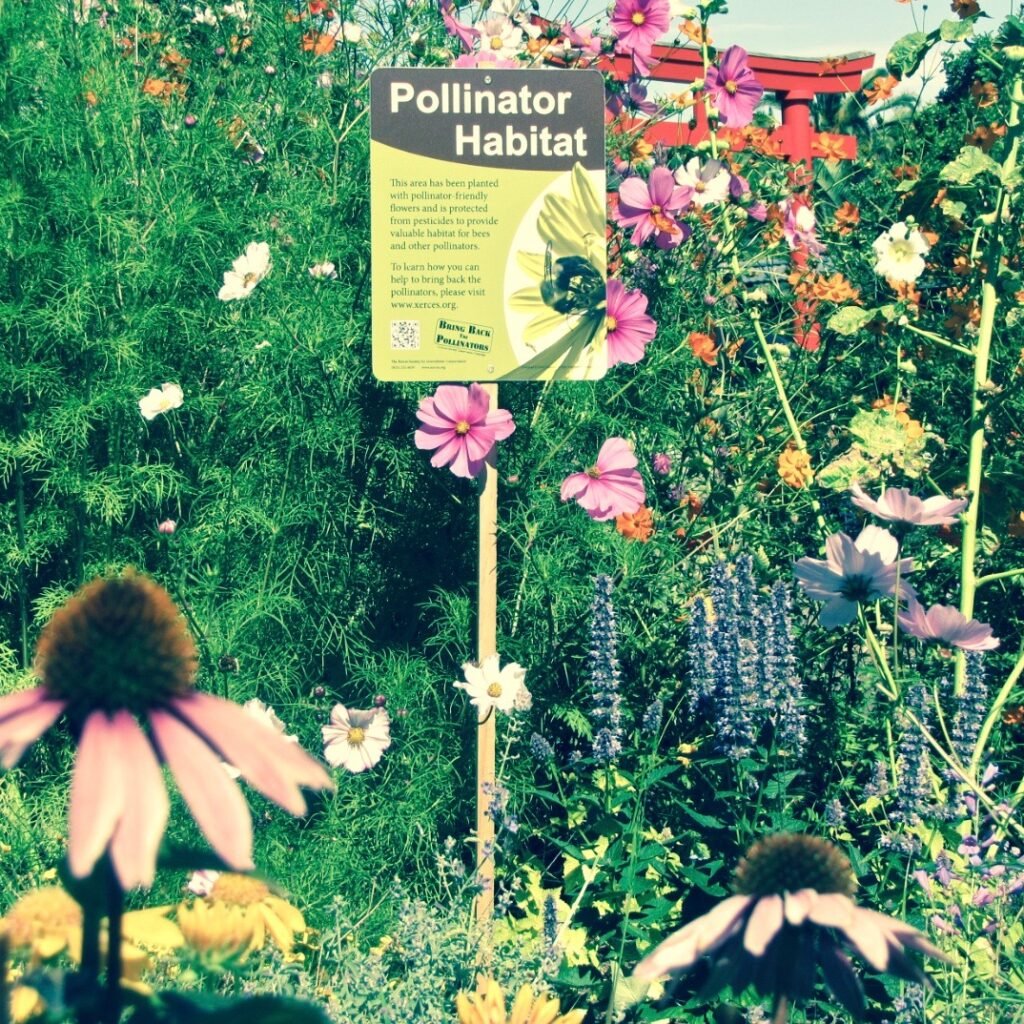
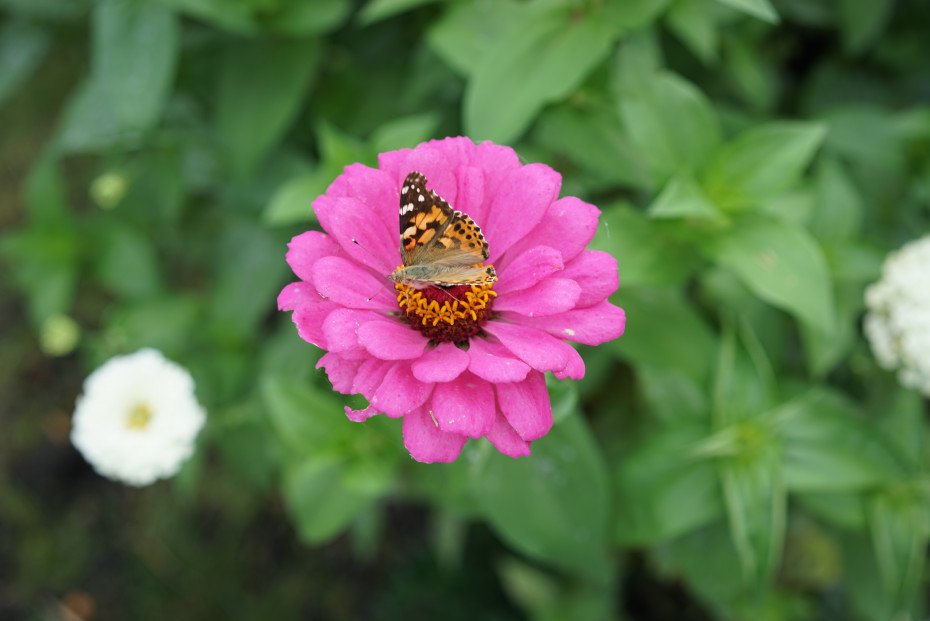
  6. Pest Prevention:
    • Encourage beneficial insects like ladybugs to control aphids and maintain a balanced ecosystem.

These tips enhance growth, flavor, and resilience of lettuce plants in shaded gardens.


Benefits of Growing Lettuce in Shaded Areas

  1. Extended Growing Options:
    • Shaded areas previously considered unproductive can now yield fresh, nutritious greens.
  2. Reduced Heat Stress:
    • Lettuce in shaded areas avoids direct summer sun, preventing leaf scorch and bolting.
  3. Enhanced Garden Utilization:
    • Utilize patios, balcony corners, or under tree canopies to maximize space.
  4. Sustainable and Fresh Produce:
    • Growing at home reduces dependence on store-bought lettuce, ensuring freshness and chemical-free crops.
  5. Aesthetic and Health Benefits:
    • Shaded lettuce beds can create attractive garden corners while providing a constant supply of nutrient-rich greens.

Growing lettuce in shaded areas promotes sustainable gardening and optimizes underutilized spaces while providing fresh, homegrown produce.


Conclusion

Cultivating lettuce in shaded areas is entirely achievable with proper planning, care, and attention to detail. By following this 5-step guide—selecting shade-tolerant varieties, preparing nutrient-rich soil, planting strategically, providing consistent care, and harvesting correctly—gardeners can enjoy continuous, flavorful, and healthy leafy greens even in limited sunlight.

Shaded gardens offer a unique microclimate that protects lettuce from excessive heat and sun stress, allowing for tender, high-quality leaves. With the right techniques, gardeners can transform shaded spaces into productive and sustainable salad gardens, enjoying fresh, homegrown lettuce throughout the year.