7 Plants That Attract Hummingbirds—and Keep Them Coming Back

7 Plants That Attract Hummingbirds—and Keep Them Coming Back

Hummingbirds are some of the most captivating visitors to any garden. Their iridescent feathers, rapid wingbeats, and delicate feeding behavior make them a favorite among gardeners and nature enthusiasts alike. Beyond their beauty, hummingbirds play a vital role as pollinators, supporting the health of flowers, shrubs, and even fruits in your garden.

If you want to create a hummingbird-friendly garden that keeps these tiny aviators returning throughout the season, selecting the right plants is key. Certain flowers provide the nectar, color, and shape that hummingbirds love. This guide highlights seven plants that attract hummingbirds, with detailed tips on planting, care, and maximizing their appeal.


1. Trumpet Creeper (Campsis radicans)

Why Hummingbirds Love It

Trumpet creeper is a vigorous climbing vine with trumpet-shaped, bright orange to red flowers, ideal for hummingbirds. Its tubular blooms allow hummingbirds to easily access nectar while facilitating pollination.

Planting Tips

  • Light: Full sun for optimal flowering.
  • Soil: Well-draining soil; tolerates a range of soil types.
  • Watering: Moderate; keep soil moist during establishment.
  • Care: Prune after flowering to maintain shape and encourage new growth.

Placement

  • Train on trellises, arbors, fences, or walls to create vertical nectar sources.

Pro Tip: Trumpet creeper is fast-growing and self-sowing. Plant carefully to avoid it overtaking smaller plants.


2. Cardinal Flower (Lobelia cardinalis)

Why Hummingbirds Love It

Cardinal flower produces striking red spikes of tubular blooms that are rich in nectar. Its vibrant color acts as a visual cue, signaling food to passing hummingbirds.

Planting Tips

  • Light: Full sun to partial shade.
  • Soil: Moist, rich, and well-draining. Prefers consistently damp soil.
  • Watering: High; keeps soil evenly moist.
  • Care: Divide clumps every few years to maintain vigor.

Placement

  • Ideal for edges of ponds, rain gardens, or moist garden beds, creating a water-friendly hummingbird habitat.

Pro Tip: Cardinal flower attracts not only hummingbirds but also butterflies and bees, supporting a pollinator-friendly ecosystem.


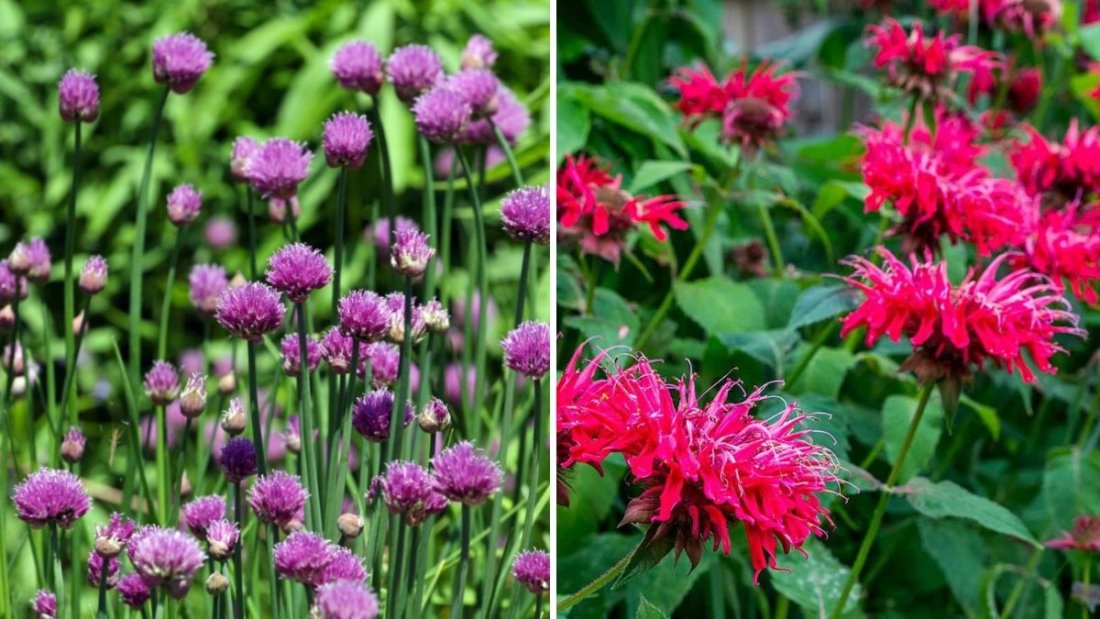
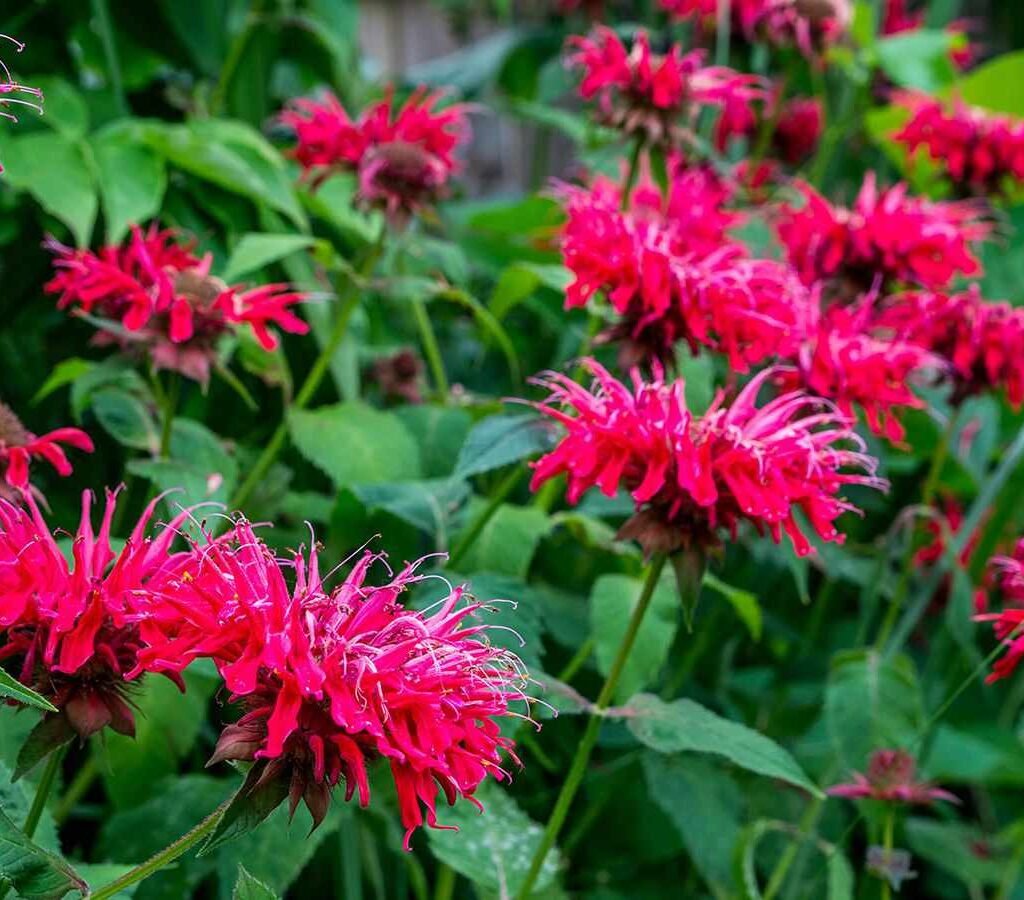
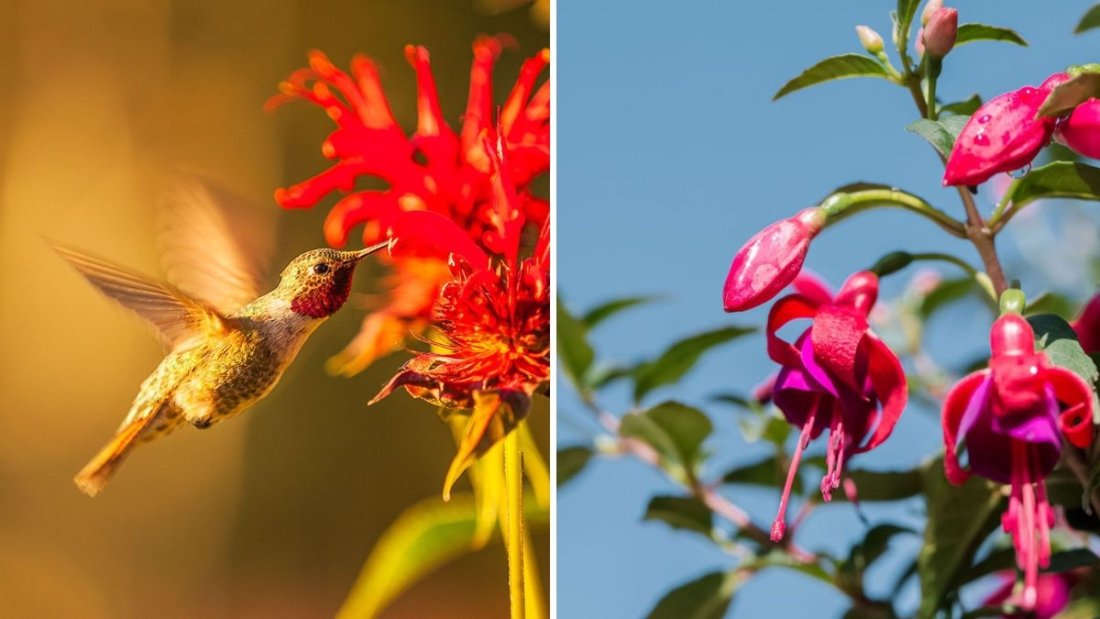
3. Bee Balm (Monarda didyma)

Why Hummingbirds Love It

Bee balm features clusters of tubular, brightly colored flowers in red, pink, purple, or white. Its long-lasting blooms provide abundant nectar for hummingbirds over several weeks.

Planting Tips

  • Light: Full sun; tolerates light shade.
  • Soil: Well-draining, fertile soil.
  • Watering: Moderate; water regularly but avoid waterlogged soil.
  • Care: Cut back spent blooms and divide every 2–3 years to prevent overcrowding.

Placement

  • Plant in clumps or borders to attract hummingbirds from a distance.
  • Combines well with asters and coneflowers for late-season nectar sources.

Pro Tip: Bee balm is prone to powdery mildew; ensure good air circulation around plants.


4. Hummingbird Mint (Agastache spp.)

Why Hummingbirds Love It

Hummingbird mint, also known as giant hyssop, produces spikes of tubular flowers in shades of purple, orange, pink, or red. The flowers are exceptionally nectar-rich and long-blooming.

Planting Tips

  • Light: Full sun.
  • Soil: Well-draining; tolerates poor soil once established.
  • Watering: Low to moderate; drought-tolerant once mature.
  • Care: Deadhead to prolong bloom; cut back in late fall.

Placement

  • Perfect for garden beds, containers, or pollinator gardens.
  • Combines with ornamental grasses for an attractive landscape design.

Pro Tip: Hummingbird mint attracts bees and butterflies too, creating a multi-pollinator habitat.


5. Coral Honeysuckle (Lonicera sempervirens)

Why Hummingbirds Love It

Coral honeysuckle is a twining vine with bright red or coral tubular flowers. Unlike invasive Japanese honeysuckle, coral honeysuckle is non-invasive and perfect for hummingbird gardens.

Planting Tips

  • Light: Full sun; tolerates partial shade.
  • Soil: Well-draining, moderately fertile.
  • Watering: Moderate; water until established.
  • Care: Prune after flowering to maintain shape and encourage new blooms.

Placement

  • Ideal for trellises, fences, arbors, or pergolas to provide vertical nectar-rich spaces.

Pro Tip: Coral honeysuckle flowers are also fragrant, making your garden enjoyable for humans while attracting hummingbirds.


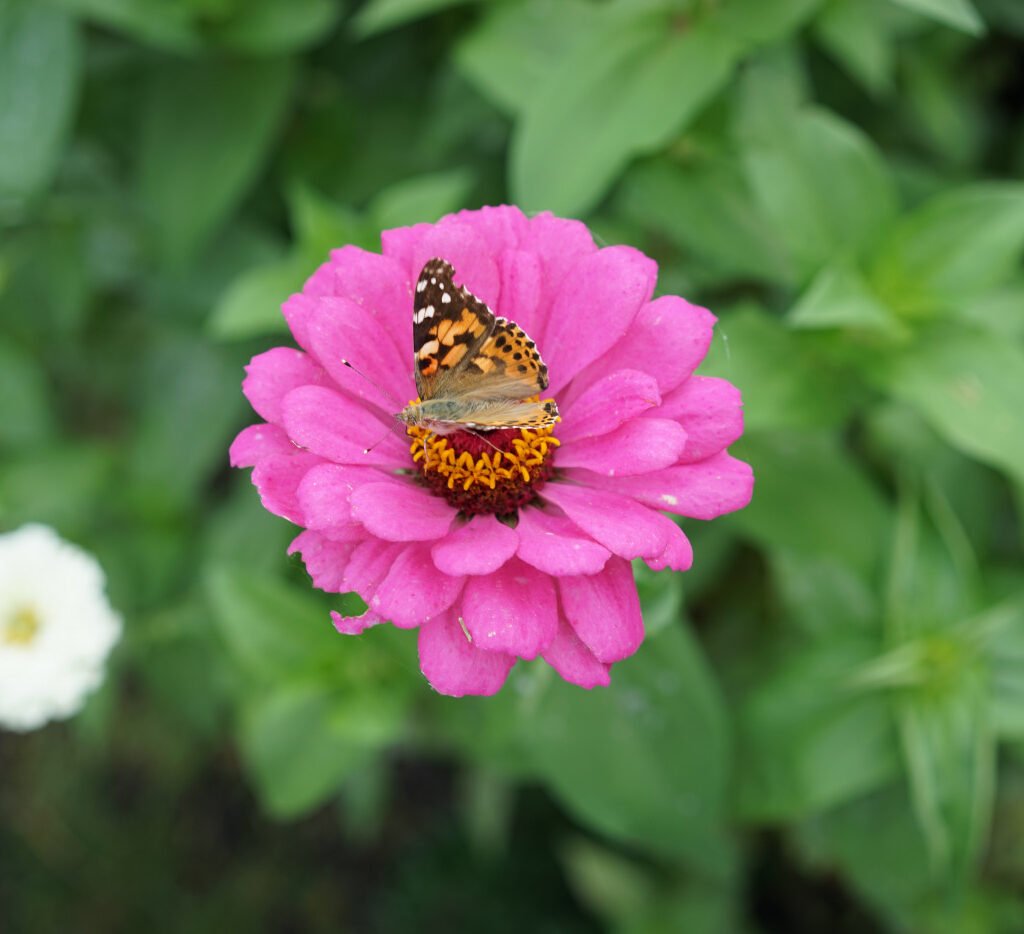
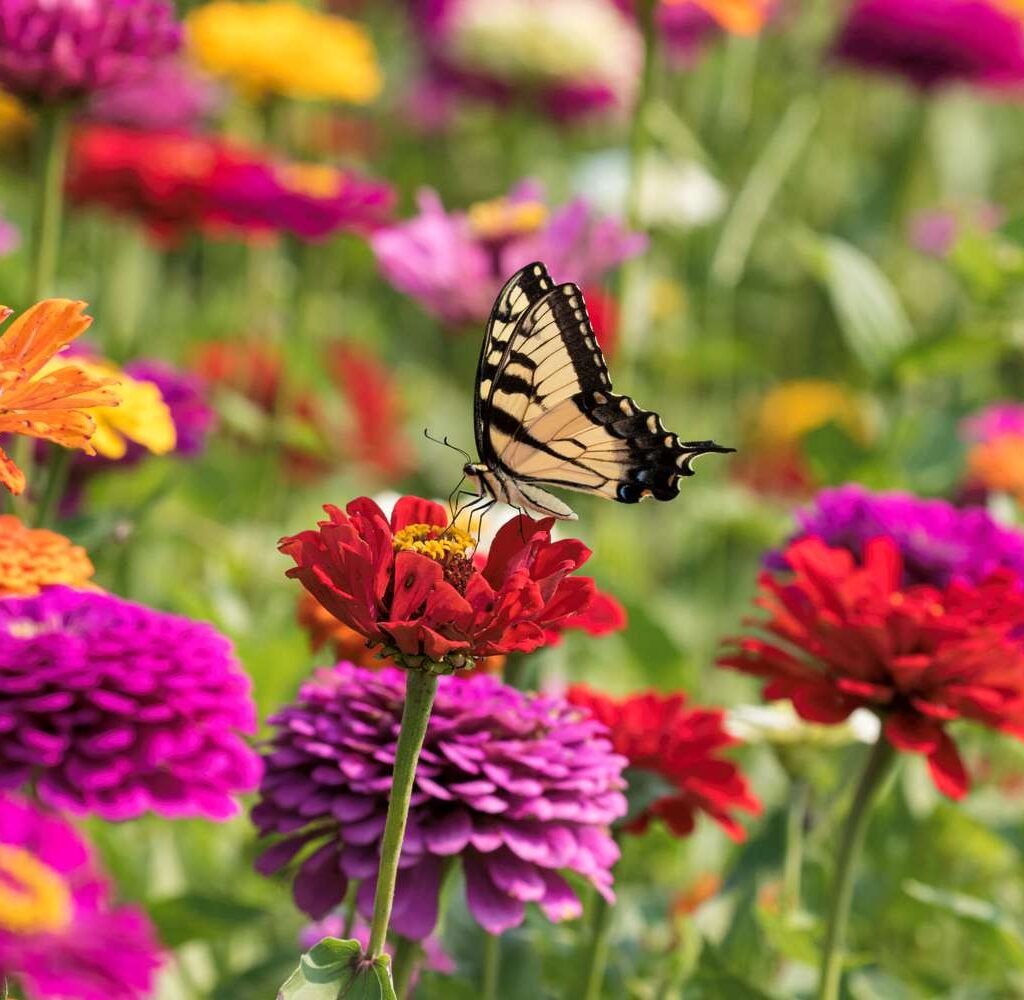
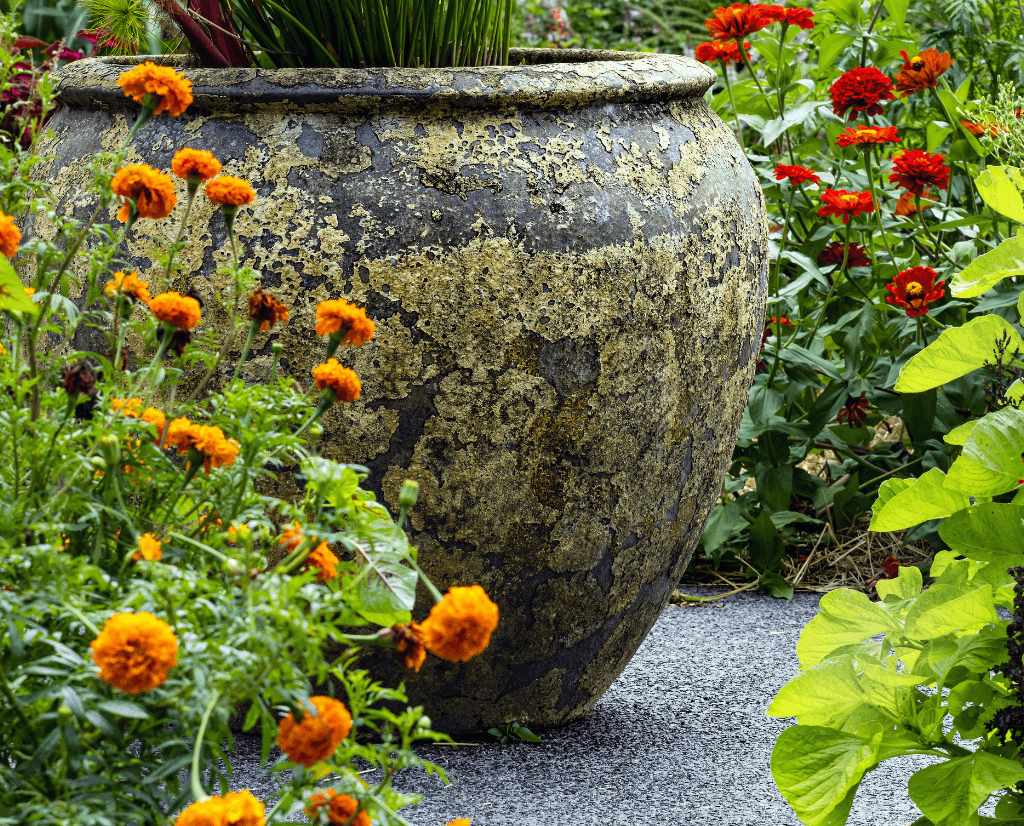
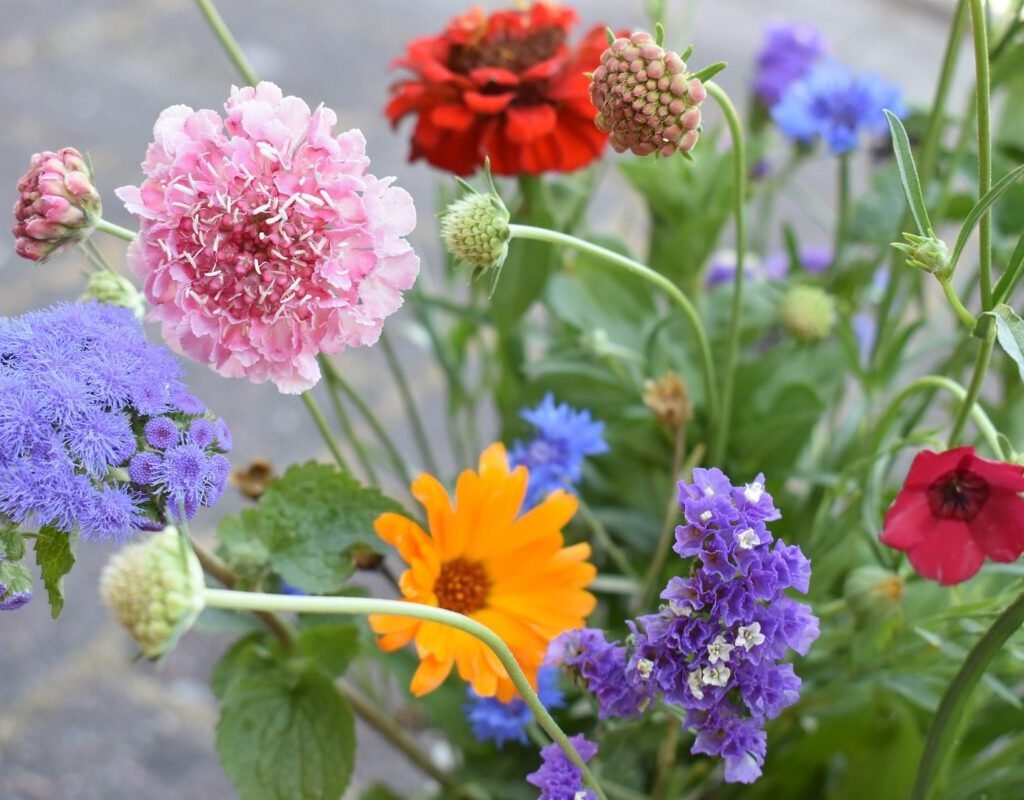
6. Zinnias (Zinnia elegans)

Why Hummingbirds Love It

Zinnias are bright, daisy-like flowers that provide nectar and are extremely easy to grow. Their vivid red, pink, orange, and purple blooms make them a magnet for hummingbirds.

Planting Tips

  • Light: Full sun.
  • Soil: Well-draining, moderately fertile soil.
  • Watering: Moderate; water at the base to prevent powdery mildew.
  • Care: Deadhead regularly to prolong flowering season.

Placement

  • Plant in beds, borders, or containers to provide accessible nectar.
  • Group colors together to attract more hummingbirds from a distance.

Pro Tip: Zinnias are excellent for cut flower arrangements, letting you enjoy blooms indoors while supporting pollinators outdoors.


7. Salvias (Salvia spp.)

Why Hummingbirds Love It

Salvias, particularly red and tubular varieties, are highly attractive to hummingbirds. Their spiky blooms are nectar-rich, and many varieties flower late into the season.

Planting Tips

  • Light: Full sun; tolerates light shade.
  • Soil: Well-draining soil; moderately fertile.
  • Watering: Low to moderate; drought-tolerant once established.
  • Care: Deadhead and cut back after flowering to encourage new blooms.

Placement

  • Salvias thrive in pollinator gardens, borders, and containers.
  • Combine with ornamental grasses or bee balm for a dynamic, multi-season garden display.

Pro Tip: Salvias are long-blooming, ensuring a continuous food source for hummingbirds.


Designing a Hummingbird-Friendly Garden

To keep hummingbirds returning year after year, consider these design tips:

  1. Diverse color palette: Hummingbirds are particularly attracted to reds, oranges, and pinks.
  2. Varied flower shapes: Mix tubular flowers for nectar access and flat blooms for perching.
  3. Continuous bloom: Plant species with staggered bloom times for steady nectar availability from spring to fall.
  4. Water source: Include a shallow birdbath or dripper; hummingbirds need water for drinking and bathing.
  5. Shelter and perches: Provide shrubs, small trees, or trellises where hummingbirds can rest safely.
  6. Avoid pesticides: Chemical sprays can harm hummingbirds and beneficial insects.

Pro Tip: Place feeders alongside flowers to supplement natural nectar, encouraging frequent visits.


Benefits of a Hummingbird Garden

  • Pollination: Hummingbirds help pollinate flowers, fruits, and vegetables, increasing garden productivity.
  • Biodiversity: Attracts other pollinators like bees and butterflies.
  • Visual and auditory beauty: Adds color, movement, and gentle humming sounds to your garden.
  • Educational opportunities: Perfect for observing wildlife behavior and ecological interactions.

Pro Tip: Hummingbird gardens are rewarding for gardeners of all ages, offering both aesthetic enjoyment and ecological benefits.


Final Thoughts

Creating a hummingbird-friendly garden is about strategic plant selection, thoughtful placement, and year-round care. By planting trumpet creeper, cardinal flower, bee balm, hummingbird mint, coral honeysuckle, zinnias, and salvias, you provide abundant nectar sources, visual attraction, and safe shelter.

Key takeaways:

  • Focus on nectar-rich, tubular flowers in vibrant colors.
  • Stagger bloom times to ensure continuous food supply.
  • Include water, perches, and shelter to encourage long-term visits.
  • Avoid chemicals and pesticides to protect hummingbirds and pollinators.

With the right planning, your garden can become a hummingbird haven, offering beauty, movement, and ecological balance. These tiny aviators will not only enhance your outdoor space with their sparkling presence but also contribute to a healthy, thriving garden ecosystem all season long.

The Best Homemade Fertilizer for Bright, Long-Lasting Petunias

The Best Homemade Fertilizer for Bright, Long-Lasting Petunias

Petunias are beloved garden favorites, renowned for their vibrant blooms, rich colors, and cascading growth habits. Whether planted in garden beds, hanging baskets, or window boxes, these flowers bring cheer and elegance to any space. However, petunias are heavy feeders, meaning they require consistent nutrients to maintain their bright colors and prolonged flowering season. Commercial fertilizers work, but many gardeners are now turning to homemade fertilizers, which are cost-effective, eco-friendly, and tailored to the plant’s needs.

This guide explores how to create the best homemade fertilizer for petunias and techniques to keep them blooming brightly all season.


1. Why Homemade Fertilizer Works for Petunias

Petunias require a balance of nitrogen (N), phosphorus (P), and potassium (K):

  • Nitrogen: Promotes strong foliage and overall growth.
  • Phosphorus: Supports healthy root development and vibrant blooms.
  • Potassium: Enhances flower size, color, and disease resistance.

Homemade fertilizers allow gardeners to control nutrient ratios, avoid synthetic chemicals, and recycle kitchen or garden waste into nutrient-rich compost that improves soil structure.

Tip: A balanced, nutrient-rich fertilizer ensures continuous blooms, stronger stems, and more vibrant petals.


2. Key Ingredients for Homemade Petunia Fertilizer

Several common household and garden items can be combined to create effective fertilizer for petunias.

A. Eggshells

  • Rich in calcium, which strengthens cell walls and prevents blossom-end rot.
  • Helps maintain slightly alkaline soil, beneficial for healthy growth.

How to Use: Crush eggshells finely and sprinkle around the base of plants, or blend into a powder and mix into the soil.

B. Coffee Grounds

  • Contains nitrogen and organic matter, boosting foliage growth.
  • Slightly acidic, which helps in maintaining soil pH favorable for certain petunia varieties.

How to Use: Mix fresh or used coffee grounds into the soil or compost. Avoid thick layers to prevent mold.

C. Banana Peels

  • High in potassium and phosphorus, promoting large, vibrant blooms.
  • Provides essential micronutrients like magnesium for chlorophyll production.

How to Use: Chop peels and bury them near the base of the plant or blend into a liquid fertilizer.

D. Vegetable Scraps and Compost

  • Adds organic matter and a variety of nutrients.
  • Improves soil structure, drainage, and moisture retention, all essential for healthy petunias.

How to Use: Add vegetable scraps to a compost bin, then mix the finished compost into garden beds or containers.

E. Epsom Salt

  • Supplies magnesium to enhance flower color and overall plant health.
  • Prevents yellowing leaves caused by magnesium deficiency.

How to Use: Dissolve 1 tablespoon in a gallon of water and apply as a foliar spray or soil drench every 3–4 weeks.

Tip: Combining these ingredients creates a balanced, all-natural fertilizer that addresses both growth and bloom quality.


3. How to Make Liquid Homemade Fertilizer for Petunias

Liquid fertilizers are quickly absorbed by plants and ideal for container-grown or hanging basket petunias.

Simple Recipe

Ingredients:

  • 1 cup crushed eggshells
  • 1 banana peel
  • 1 tablespoon Epsom salt
  • 1 gallon water

Steps:

  1. Chop banana peel and crush eggshells finely.
  2. Mix all ingredients in a blender with a gallon of water.
  3. Let it sit for 24 hours for nutrients to infuse.
  4. Strain and pour the liquid around the base of your petunias.

Tip: Apply every 2–3 weeks for continuous feeding. This liquid fertilizer promotes bright, long-lasting blooms and strong stems.


4. How to Make Granular or Slow-Release Homemade Fertilizer

For garden beds or larger planting areas, granular fertilizers provide a slow nutrient release, reducing the frequency of feeding.

Simple Granular Recipe

Ingredients:

  • 1 cup crushed eggshells
  • 1 cup dry coffee grounds
  • 1 cup compost
  • Optional: ½ cup crushed dried banana peel

Steps:

  1. Mix all dry ingredients thoroughly.
  2. Sprinkle around the base of petunias, about 2 inches away from stems.
  3. Gently water to help nutrients penetrate the soil.

Tip: Reapply every 4–6 weeks for season-long support. Slow-release fertilizer encourages steady growth and continuous flowering.


5. Soil Preparation and Fertilizer Application

Proper soil preparation enhances fertilizer effectiveness:

  1. Loosen Soil: Ensure roots have space to grow and access nutrients.
  2. Add Mulch: Mulching retains moisture and prevents nutrient leaching.
  3. Apply Fertilizer Correctly: Keep fertilizer slightly away from the crown to prevent root burn.
  4. Water After Application: Helps nutrients reach roots efficiently.

Tip: Combining fertilizer with mulch ensures long-lasting nutrient availability, maximizing bloom performance.


6. Tips for Continuous Petunia Blooms

Even with the best homemade fertilizer, certain practices ensure your petunias thrive:

  • Deadhead Regularly: Remove spent flowers to encourage new blooms.
  • Pinch Back Stems: Promotes bushier growth and more flowering sites.
  • Monitor Soil Moisture: Petunias prefer moist, well-drained soil. Avoid overwatering to prevent root rot.
  • Sunlight: Plant in full sun for at least 6–8 hours per day to maximize flowering.

Tip: Fertilization works best when combined with proper pruning, watering, and sunlight exposure.


7. Avoiding Common Mistakes With Homemade Fertilizer

  • Over-fertilization: Too much nitrogen encourages leafy growth over flowers.
  • Direct Contact With Stems: Can burn roots and damage plants.
  • Ignoring pH: While most petunias prefer slightly acidic to neutral soil, too much acidity can reduce nutrient availability.
  • Inconsistent Feeding: Regular feeding is key for long-lasting blooms.

Tip: Keep a fertilizer schedule to maintain consistent nutrient supply.


8. Benefits of Homemade Fertilizer Over Commercial Fertilizers

  • Eco-Friendly: Reduces chemical runoff and recycling household waste.
  • Cost-Effective: Uses readily available ingredients instead of expensive products.
  • Customizable: Nutrient ratios can be adjusted based on soil tests and plant needs.
  • Improves Soil Health: Adds organic matter that enhances soil structure and microbial activity.

Tip: Homemade fertilizers nurture both plants and soil, creating a sustainable gardening system.


9. Advanced Tips for Maximum Bloom

  • Combine Liquid and Granular Feeding: Use granular fertilizer at planting and supplement with liquid feed throughout the season.
  • Companion Planting: Plant petunias alongside herbs like basil or oregano to naturally repel pests, reducing stress on blooms.
  • Regular Monitoring: Check leaves for nutrient deficiencies and adjust fertilizer accordingly.
  • Rotate Plants: Avoid planting petunias in the same soil year after year to prevent soil depletion.

Tip: Healthy, well-fed petunias are more resilient to heat, pests, and disease, ensuring continuous blooms.


Conclusion

Petunias reward gardeners who provide consistent nutrients, proper care, and attention to detail. Homemade fertilizers, made from everyday ingredients like eggshells, banana peels, coffee grounds, and Epsom salt, provide a balanced nutrient supply that supports vibrant, long-lasting blooms.

By combining homemade fertilizer with deadheading, pinching, proper watering, and sunlight, you can enjoy petunias that bloom nonstop throughout the season. Not only does this approach reduce costs and environmental impact, but it also nurtures soil health and strengthens plant resilience.

Tip: Think of homemade fertilizer as the secret ingredient to your garden’s success—it transforms ordinary petunias into a spectacular, colorful display that lasts from spring through fall.

How to Protect Your Roses From Japanese Beetles Without Chemicals

How to Protect Your Roses From Japanese Beetles Without Chemicals

Roses are often called the queen of the garden, celebrated for their vibrant colors, intoxicating fragrance, and timeless elegance. But for many gardeners, Japanese beetles (Popillia japonica) are a persistent challenge. These metallic green pests are voracious feeders, capable of stripping leaves, flowers, and buds in a matter of days.

While chemical pesticides can eliminate Japanese beetles, many gardeners prefer natural, eco-friendly strategies that protect roses without harming beneficial insects, pollinators, or the environment. This guide provides detailed methods to prevent, deter, and manage Japanese beetles naturally, ensuring your roses remain healthy and beautiful.


1. Understanding Japanese Beetle Behavior

Before implementing protective strategies, it’s important to understand Japanese beetles:

  • Appearance: Adults are ½ inch long, with metallic green bodies and copper-colored wings.
  • Feeding habits: They feed on rose foliage, flowers, and buds, often skeletonizing leaves.
  • Life cycle: Adult beetles emerge in early summer, while larvae (grubs) live in soil and feed on grass roots.
  • Vulnerability: Japanese beetles are most active during warm, sunny days and tend to target plants in full sun.

Pro Tip: Early detection is crucial. Inspect your roses regularly for beetles and damage signs, especially in June and July when adults emerge.


2. Hand-Picking and Mechanical Control

One of the simplest natural methods is physical removal of beetles.

How to Do It

  • Wear gloves and pick beetles off plants by hand early in the morning or late evening when they are sluggish.
  • Drop them into a bucket of soapy water to ensure they do not return.
  • Shake plants gently to dislodge beetles hiding under leaves.

Additional Mechanical Controls

  • Row covers or fine mesh netting: Protect plants from beetle access, especially during peak activity periods.
  • Traps: Japanese beetle traps can be effective but may attract more beetles than they capture, so use with caution and place them far from roses.

Pro Tip: Hand-picking is time-consuming but highly effective for small to medium gardens and prevents chemical exposure.


3. Companion Planting to Repel Japanese Beetles

Certain plants naturally repel Japanese beetles, and strategically planting them near roses can reduce infestations:

Recommended Companion Plants

  • Garlic and chives: Their strong scent confuses beetles.
  • Catnip: Deters beetles while attracting pollinators.
  • Marigolds: Produce compounds that beetles dislike, while brightening your garden.
  • Rue: Its pungent aroma is a natural beetle deterrent.

Placement Tips

  • Plant repellant flowers and herbs around rose beds or interspersed between rose bushes.
  • Combine with other deterrents for maximum effectiveness.

Pro Tip: Companion planting also enhances biodiversity, attracting pollinators and beneficial insects that support rose health.


4. Natural Sprays and Repellents

Homemade sprays can discourage beetles without harming beneficial insects:

Effective Natural Sprays

  1. Neem oil: Acts as a repellent and disrupts feeding behavior. Spray on leaves and buds early in the morning.
  2. Garlic spray: Blend garlic cloves with water and a few drops of liquid soap; spray on rose foliage.
  3. Pepper spray: Mix chili powder or hot sauce with water and a small amount of soap.

Application Tips

  • Spray thoroughly, covering the undersides of leaves where beetles often hide.
  • Reapply after rain or heavy watering.
  • Rotate sprays to prevent beetles from becoming accustomed to a single scent.

Pro Tip: Combining sprays with physical barriers increases protection while minimizing chemical use.


5. Encourage Beneficial Insects

Certain predatory insects and birds naturally prey on Japanese beetles:

Beneficial Predators

  • Parasitic wasps: Lay eggs in beetle larvae, reducing future populations.
  • Tachinid flies: Attack adult beetles.
  • Birds: Robins, starlings, and cardinals feed on beetles and larvae.
  • Ladybugs and lacewings: While not major beetle predators, they boost overall garden health by controlling other pests.

How to Encourage Them

  • Plant native flowers and herbs that provide nectar and shelter.
  • Avoid broad-spectrum insecticides that kill beneficial insects.
  • Provide bird feeders and water sources to attract insect-eating birds.

Pro Tip: A balanced garden ecosystem is a long-term defense against Japanese beetles and other pests.


6. Soil Management to Target Larvae

Japanese beetle larvae (grubs) live in soil and feed on grass roots. Controlling them reduces adult beetle populations naturally:

Soil Strategies

  • Milky spore disease: A natural bacterium that targets beetle larvae without harming other insects.
  • Beneficial nematodes: Microscopic worms that infect and kill grubs.
  • Proper lawn care: Avoid overwatering and maintain healthy grass, as unhealthy lawns are more attractive to egg-laying beetles.

Pro Tip: Treating soil early in spring reduces beetle emergence during summer.


7. Timing and Regular Monitoring

Prevention and early intervention are critical:

  • Inspect roses daily during peak beetle season (June to August).
  • Remove beetles immediately before they lay eggs or cause extensive damage.
  • Implement multiple strategies simultaneously for best results.

Pro Tip: Keeping a garden journal helps track beetle activity patterns and improve future control efforts.


8. Combining Strategies for Maximum Protection

Relying on a single method is rarely effective. Experienced gardeners recommend a layered, integrated approach:

  1. Physical barriers: Row covers, mesh, and hand-picking.
  2. Companion plants: Garlic, marigolds, and rue around roses.
  3. Natural sprays: Neem oil, garlic, or pepper sprays.
  4. Encourage predators: Birds, parasitic wasps, and beneficial insects.
  5. Soil treatments: Milky spore or beneficial nematodes for long-term control.

Pro Tip: The combination of prevention, deterrence, and ecological balance ensures healthy roses without chemicals.


Benefits of Natural Japanese Beetle Control

  • Eco-friendly: Protects pollinators, beneficial insects, and the environment.
  • Safe for children and pets: No harmful chemical exposure.
  • Sustainable: Creates a garden ecosystem that naturally resists pests.
  • Aesthetic: Keeps roses beautiful while maintaining biodiversity.

Pro Tip: A chemical-free approach enhances your garden’s health and resilience over time.


Final Thoughts

Japanese beetles can be a formidable challenge for rose gardeners, but a combination of natural strategies, early intervention, and ecological awareness can keep them at bay. By hand-picking beetles, planting repellent companion flowers, using natural sprays, encouraging predators, and managing soil health, you can protect your roses without relying on chemicals.

Key takeaways:

  • Start monitoring and preventative measures before beetles emerge.
  • Use a layered approach, combining physical, chemical-free deterrents, and ecological methods.
  • Encourage beneficial insects and birds to naturally reduce beetle populations.
  • Maintain healthy roses through proper watering, pruning, and fertilization to reduce stress and vulnerability.

With patience and consistent care, your rose garden can remain lush, vibrant, and free from Japanese beetle damage, providing enjoyment and beauty throughout the growing season while supporting a healthy, chemical-free ecosystem.

Why Mulching Is the Secret to Healthier Hydrangeas

Why Mulching Is the Secret to Healthier Hydrangeas

Hydrangeas are a favorite among gardeners, celebrated for their lush foliage and voluminous flower clusters that come in shades of pink, blue, white, and purple. However, growing healthy, vibrant hydrangeas goes beyond watering and fertilizing. One of the most underrated yet powerful gardening techniques is mulching. Mulching not only improves soil health but also helps hydrangeas thrive throughout the season, producing strong stems, vibrant blooms, and disease resistance.

This guide explores why mulching is essential, how it benefits hydrangeas, and tips for choosing and applying mulch effectively.


1. What Mulching Does for Hydrangeas

Mulching involves placing a layer of organic or inorganic material on top of the soil around plants. While many gardeners use mulch for decorative purposes, its benefits extend far beyond aesthetics:

  1. Soil Moisture Retention: Mulch slows water evaporation, ensuring hydrangeas get a steady supply of moisture.
  2. Temperature Regulation: It insulates roots against temperature extremes, protecting against heat in summer and frost in winter.
  3. Weed Suppression: A thick mulch layer prevents weed growth, reducing competition for nutrients.
  4. Soil Enrichment: Organic mulches decompose over time, enriching the soil with nutrients.
  5. Disease Prevention: Mulch reduces soil splash, which can spread fungal pathogens to hydrangea leaves.

Tip: Mulching is not just cosmetic—it’s a comprehensive care strategy that boosts overall plant health and bloom quality.


2. Choosing the Right Mulch for Hydrangeas

Not all mulches are created equal. Hydrangeas respond best to organic mulches that improve soil fertility and maintain a slightly acidic environment.

Recommended Mulches

  • Bark Chips: Slow-decomposing and ideal for long-term coverage; enhances soil structure.
  • Shredded Leaves: Readily available, enrich the soil as they break down.
  • Compost: Nutrient-rich and improves moisture retention.
  • Pine Needles: Slightly acidic, perfect for hydrangeas that prefer lower soil pH (helps maintain blue blooms).

What to Avoid

  • Mulches that compact easily, such as heavy clay or sawdust without compost, which can restrict water flow.
  • Synthetic mulches around hydrangeas may not improve soil fertility and can sometimes affect soil temperature excessively.

Tip: A 2–4 inch layer of organic mulch is generally sufficient to protect roots without suffocating them.


3. How Mulching Protects Hydrangea Roots

Hydrangeas have shallow root systems, making them vulnerable to temperature swings and drought. Mulch acts as a protective barrier:

  • Summer: Prevents soil from drying out and overheating, reducing stress on the plant.
  • Winter: Insulates roots, preventing frost heaving that can damage or kill hydrangea plants.
  • Transplants: Newly planted hydrangeas benefit from mulch as it reduces transplant shock and promotes root establishment.

Tip: Keep mulch about 1–2 inches away from the crown of the plant to prevent rot while maximizing root protection.


4. Mulching Improves Hydrangea Flower Quality

Consistent moisture and nutrient availability are directly tied to bloom size, color, and longevity:

  • Vibrant Colors: Mulching helps maintain slightly acidic soil, which is critical for blue hydrangea varieties.
  • Larger Blooms: Steady moisture ensures flowers develop fully rather than wilting or turning brown prematurely.
  • Extended Blooming Season: Well-hydrated and nourished plants bloom longer, producing more flower clusters.

Tip: Replenish mulch as it decomposes to maintain consistent benefits throughout the growing season.


5. Mulching for Disease and Pest Management

Hydrangeas can be susceptible to powdery mildew, leaf spots, and root rot. Mulching helps mitigate these issues:

  • Reduces soil splash during watering or rain, limiting fungal spread to leaves.
  • Helps maintain even soil moisture, preventing root stress that attracts pests.
  • Certain organic mulches, like compost or shredded leaves, promote beneficial microbes that naturally combat pathogens.

Tip: Remove any old or moldy mulch from the previous season before applying a fresh layer to reduce disease risks.


6. Seasonal Mulching Strategies

Spring Mulching

  • Apply a fresh layer after soil has warmed and before active growth begins.
  • Supports strong new growth and early flower development.

Summer Mulching

  • Maintain 2–3 inches to retain moisture during hot months.
  • Consider using pine bark or pine needles to keep soil slightly acidic for blue hydrangeas.

Fall and Winter Mulching

  • Increase mulch depth to 3–4 inches to insulate roots against frost.
  • Mulch also protects the soil from heavy rains and prevents erosion.

Tip: Seasonal mulching ensures hydrangeas remain healthy and productive year-round.


7. Applying Mulch Correctly Around Hydrangeas

Proper technique ensures maximum benefits:

  1. Clear the Area: Remove weeds and debris around the base of the plant.
  2. Spread Evenly: Apply 2–4 inches of mulch in a circle around the plant, extending to the drip line if possible.
  3. Avoid Direct Contact: Keep mulch 1–2 inches away from the main stem to prevent rot.
  4. Replenish as Needed: Organic mulch decomposes, so check monthly and add more as necessary.

Tip: Combining mulch with deep watering ensures nutrients reach the roots efficiently.


8. Combining Mulching With Fertilization

Mulch and fertilizer work hand-in-hand for hydrangeas:

  • Organic Mulches: Release nutrients slowly as they decompose, reducing the need for frequent synthetic fertilizers.
  • Fertilization Timing: Apply slow-release fertilizer under the mulch in early spring for strong root and shoot growth.
  • Soil Testing: Test soil pH periodically; amend with lime or sulfur if necessary to maintain desired flower color (especially for blue or pink hydrangeas).

Tip: Mulch enhances fertilizer efficiency by keeping nutrients in the root zone rather than letting them wash away.


9. Common Mulching Mistakes to Avoid

  • Too Thick: Mulch layers over 4 inches can suffocate roots and promote fungal diseases.
  • Piling Against Stems: Direct contact with the hydrangea crown can lead to crown rot.
  • Ignoring Decomposition: Old mulch should be replaced or refreshed to maintain benefits.
  • Using Non-Organic Materials: Materials like gravel or rubber don’t improve soil fertility or moisture retention.

Tip: Correct mulching technique is essential to reap all the benefits without causing harm.


10. The Long-Term Benefits of Mulching Hydrangeas

When done properly, mulching is a low-effort, high-reward strategy:

  • Healthier, stronger plants with deeper root systems.
  • Fewer pests and diseases, reducing the need for chemical interventions.
  • Enhanced flower size, color, and longevity.
  • Reduced water requirements and labor, thanks to better moisture retention.
  • A more attractive garden with well-maintained soil and tidy beds.

Conclusion

Mulching is more than just a decorative practice—it’s a secret weapon for growing healthy, vibrant hydrangeas. By providing consistent moisture, regulating soil temperature, enriching soil fertility, and preventing disease, mulch ensures your hydrangeas thrive and produce abundant, colorful blooms year after year.

For gardeners looking to maximize bloom size, prolong flowering, and minimize maintenance, mulching is the essential step that can transform ordinary hydrangeas into show-stopping garden stars.

Tip: Combine mulching with proper watering, fertilization, and pruning for the ultimate hydrangea care routine, ensuring your garden remains colorful and lush throughout the growing season.

The Best Flowers for Attracting Pollinators in Fall

The Best Flowers for Attracting Pollinators in Fall

As summer fades and the vibrant colors of autumn arrive, many gardeners worry that their flower beds will lose their charm. Yet fall is a critical season for pollinators like bees, butterflies, and hummingbirds, who are preparing for winter and still need nectar and pollen. By planting the right fall-blooming flowers, you can create a garden that supports pollinators, extends blooming seasons, and maintains a colorful landscape into late autumn.

This guide highlights the best flowers for attracting pollinators in fall, along with planting tips, care instructions, and ecological benefits.


1. Asters (Aster spp.)

Why Pollinators Love Them

Asters are among the most important late-season nectar sources for pollinators. Bees, butterflies, and even some migratory hummingbirds rely on asters as they stock up on energy for winter.

Planting Tips

  • Light: Full sun to partial shade.
  • Soil: Well-draining, fertile soil.
  • Watering: Regular watering; avoid soggy soil.
  • Care: Deadhead spent flowers to prolong bloom and prevent self-seeding.

Bloom Time

  • Late summer through fall, providing consistent nectar when other flowers decline.

Pro Tip: Plant asters in clusters to maximize pollinator attraction, as pollinators are drawn to large patches of blooms.


2. Sedum (Sedum ‘Autumn Joy’)

Why Pollinators Love Them

Sedum, particularly the variety known as Autumn Joy, produces dense clusters of tiny flowers that are rich in nectar. Bees and butterflies flock to these flowers, making them a late-season pollinator magnet.

Planting Tips

  • Light: Full sun.
  • Soil: Well-draining soil; tolerates poor soil.
  • Watering: Low; drought-tolerant once established.
  • Care: Cut back in early spring to encourage healthy new growth.

Bloom Time

  • Late summer to early fall, offering nectar at a critical time for pollinators.

Pro Tip: Sedum’s flowers retain their nectar even after frost, providing food for pollinators later into the season.


3. Goldenrod (Solidago spp.)

Why Pollinators Love Them

Goldenrod is often misunderstood as the culprit for fall allergies, but it is a critical nectar and pollen source for bees, butterflies, and other insects. Its tall, bright yellow blooms are highly visible and easy for pollinators to access.

Planting Tips

  • Light: Full sun.
  • Soil: Well-draining soil; adaptable to many soil types.
  • Watering: Moderate; tolerant of dry conditions once established.
  • Care: Cut back dead stems in late winter or early spring.

Bloom Time

  • Late summer through fall, providing nectar when other flowers are dwindling.

Pro Tip: Goldenrod pairs beautifully with asters for a late-season pollinator-friendly garden.


4. Japanese Anemone (Anemone hupehensis)

Why Pollinators Love Them

Japanese anemones produce delicate, open-faced flowers that are easy for bees and butterflies to access. Their late bloom period helps extend the pollinator season into autumn.

Planting Tips

  • Light: Partial shade to full sun.
  • Soil: Well-draining, fertile soil.
  • Watering: Regular; keep soil consistently moist.
  • Care: Mulch in winter to protect roots and cut back after flowering.

Bloom Time

  • Late summer through early fall, complementing other autumn-blooming species.

Pro Tip: Japanese anemones tolerate cooler temperatures, making them ideal for early frost conditions.


5. Helenium (Helenium autumnale)

Why Pollinators Love Them

Helenium, also called sneezeweed, produces bright daisy-like flowers with large central disks full of pollen. Bees and butterflies are drawn to these vibrant, nectar-rich blooms, providing a late-season energy boost.

Planting Tips

  • Light: Full sun.
  • Soil: Moist, well-draining soil.
  • Watering: Regular; avoid letting soil dry completely.
  • Care: Deadhead regularly to prolong blooms.

Bloom Time

  • Late summer to fall, ideal for filling gaps in a pollinator garden.

Pro Tip: Combine Helenium with goldenrod or asters for a continuous late-season nectar source.


6. Toad Lily (Tricyrtis spp.)

Why Pollinators Love Them

Toad lilies are exotic-looking flowers with spotted petals that bloom in the shade during fall. They attract bees and occasional butterflies, offering nectar when sun-loving flowers are past their prime.

Planting Tips

  • Light: Partial to full shade.
  • Soil: Moist, fertile, well-draining soil.
  • Watering: Keep consistently moist; mulch helps retain moisture.
  • Care: Divide clumps every few years to maintain vigor.

Bloom Time

  • Late summer through fall, adding color to shaded areas while feeding pollinators.

Pro Tip: Plant toad lilies near pathways or shaded seating areas to enjoy their intricate beauty while supporting pollinators.


7. Sunflowers (Helianthus annuus – Fall Varieties)

Why Pollinators Love Them

Sunflowers are nectar and pollen powerhouses for bees and butterflies. While common summer varieties bloom early, certain fall-blooming sunflowers extend pollinator support into September and October.

Planting Tips

  • Light: Full sun.
  • Soil: Well-draining, fertile soil.
  • Watering: Moderate; keep soil moist until established.
  • Care: Remove spent blooms to encourage further flowering; support tall varieties with stakes.

Bloom Time

  • Late summer to fall, providing bright, large flowers for pollinators to land on.

Pro Tip: Plant sunflowers in groups or clusters to attract more pollinators efficiently.


Designing a Pollinator-Friendly Fall Garden

To maximize pollinator attraction in fall:

  1. Plant in clusters: Pollinators are more likely to visit groups of the same flower.
  2. Mix bloom times: Combine early, mid, and late-blooming fall flowers to ensure continuous nectar supply.
  3. Include native plants: Native species are often the best food sources for local pollinators.
  4. Provide shelter: Include shrubs, grasses, or small trees to give pollinators protection from wind and predators.
  5. Avoid pesticides: Chemicals can harm beneficial insects; use organic solutions instead.

Pro Tip: A diverse garden with different heights, colors, and flower shapes supports a wider range of pollinators.


Benefits of Fall-Blooming Pollinator Flowers

  • Supports local ecosystems: Bees, butterflies, and other insects are essential for pollination.
  • Extends garden color: Fall-blooming flowers maintain visual appeal as summer plants fade.
  • Provides seeds for wildlife: Flowers like sunflowers produce seeds that birds feed on later.
  • Encourages biodiversity: Attracting pollinators supports a healthy, balanced garden ecosystem.

Pro Tip: Even a small garden or balcony can contribute to pollinator support when planted with the right fall flowers.


Final Thoughts

Fall is not the end of your garden’s productivity. By selecting asters, sedum, goldenrod, Japanese anemones, Helenium, toad lilies, and fall sunflowers, you can create a vibrant, pollinator-friendly garden well into autumn.

Key takeaways:

  • Focus on nectar-rich, late-season blooms to feed pollinators.
  • Plant in clusters and mix species for continuous color and food.
  • Incorporate both sunny and shaded areas for a variety of pollinators.
  • Maintain your garden without pesticides for the health and safety of pollinators.

With careful planning and thoughtful plant selection, your fall garden can support pollinators, extend seasonal blooms, and provide ecological benefits, making it both beautiful and functional. Fall blooms are not just visually appealing—they are vital lifelines for pollinators preparing for winter, ensuring your garden plays a role in sustaining local ecosystems.

7 Little-Known Secrets to Keeping Zinnias Blooming Nonstop

7 Little-Known Secrets to Keeping Zinnias Blooming Nonstop

Zinnias are a favorite among gardeners for their vibrant colors, long-lasting blooms, and ability to attract pollinators. From fiery reds and oranges to soft pastels, zinnias can transform a garden into a riot of color. However, many gardeners struggle to enjoy continuous blooms throughout the growing season.

The secret lies in a combination of smart planting, attentive care, and strategic maintenance. This guide reveals seven little-known secrets to keeping zinnias blooming nonstop from early summer through fall.


1. Start with the Right Varieties

Why It Matters

Not all zinnias are created equal. Some bloom once and fade quickly, while others are bred for continuous flowering. Choosing the right variety is the foundation for nonstop blooms.

Top Varieties for Continuous Blooms

  • Zinnia elegans ‘State Fair’ – large, bright, and prolific.
  • Zinnia ‘Cut and Come Again’ – perfect for repeated harvests as it encourages regrowth.
  • Zinnia ‘Profusion’ – disease-resistant and abundant bloomers.
  • Zinnia angustifolia – smaller flowers, long-lasting and drought-tolerant.

Tip: Combining dwarf and tall varieties adds depth and dimension to your flower beds while maintaining continuous blooms.


2. Plant in Full Sun

Why It Matters

Zinnias thrive in bright sunlight. Sun exposure not only encourages photosynthesis but also stimulates bud formation for continuous blooms.

Planting Tips

  • Choose a sunny location with at least 6–8 hours of direct sunlight daily.
  • Space plants 6–12 inches apart (depending on variety) to allow airflow and reduce disease risk.
  • Avoid planting in areas prone to shade or heavy competition from larger shrubs.

Tip: Sunlight isn’t just for growth—it directly impacts bloom frequency and color intensity.


3. Deadhead Regularly

Why It Matters

Deadheading, or removing spent flowers, is critical for encouraging zinnias to produce new blooms instead of setting seed. Neglecting deadheading can drastically shorten flowering periods.

How to Deadhead

  • Cut the stem just above the next set of leaves or nodes.
  • Remove flowers weekly, especially during peak blooming months.
  • For cutting gardens, harvest blooms with 4–6 leaves attached to support regrowth.

Tip: Consistent deadheading not only prolongs flowering but also keeps plants tidy and disease-free.


4. Feed Your Zinnias Properly

Why It Matters

Zinnias are moderate feeders, requiring balanced nutrients to produce continuous blooms. Fertilizing encourages vigorous growth and enhances flower color and size.

Fertilizing Tips

  • Use a low-nitrogen fertilizer to prevent excessive foliage at the expense of flowers.
  • A balanced 10-10-10 or 5-10-10 (N-P-K) fertilizer is ideal.
  • Apply liquid fertilizer every 2–3 weeks during the growing season for rapid nutrient uptake.
  • Incorporate organic compost at planting to maintain long-term soil fertility.

Tip: Overfertilization with nitrogen can result in leafy plants with few blooms, so moderation is key.


5. Water Consistently, but Avoid Overwatering

Why It Matters

Zinnias prefer well-drained soil. Too little water causes wilting and fewer blooms, while too much promotes fungal diseases that can halt flowering entirely.

Watering Tips

  • Water at the base of the plant, avoiding leaves to reduce the risk of powdery mildew.
  • Maintain 1 inch of water per week, increasing during hot, dry periods.
  • Mulch around plants with straw, bark, or compost to retain soil moisture and regulate temperature.

Tip: Consistent deep watering encourages strong roots, supporting continuous flowering.


6. Pinch Young Plants to Encourage Bushier Growth

Why It Matters

Zinnias that grow tall and leggy may produce fewer flowers. Pinching the tips of young plants encourages side branching, which leads to more flower-bearing stems.

How to Pinch

  • When seedlings reach 3–4 inches tall, pinch the top 1–2 inches of the stem.
  • Repeat as needed to maintain a compact, bushy plant.
  • Focus on dead, weak, or overcrowded stems during the season.

Tip: Bushier plants not only yield more blooms but also resist wind damage and disease better.


7. Monitor for Pests and Diseases

Why It Matters

Even healthy zinnias can be affected by aphids, spider mites, and powdery mildew, which can stress plants and reduce blooms. Early detection and management are crucial.

Preventive and Corrective Measures

  • Inspect plants weekly for yellowing leaves, curled foliage, or sticky residue.
  • Encourage beneficial insects such as ladybugs and lacewings to control pests.
  • Use organic sprays like neem oil or insecticidal soap as needed.
  • Ensure good airflow between plants to prevent fungal issues.

Tip: Healthy plants bloom longer; pest and disease management is as important as fertilization and watering.


Bonus Tips for Continuous Zinnia Blooms

  • Succession Planting: Sow seeds every 2–3 weeks to extend the flowering season.
  • Support Taller Varieties: Stake or cage tall zinnias to prevent stem breakage.
  • Harvest Cut Flowers Strategically: Regularly harvesting blooms encourages additional flower production.
  • Sun Exposure Rotation: If possible, rotate container-grown zinnias to maximize daily sunlight exposure.

Tip: Combining proper planting, care, and proactive maintenance creates a blooming machine in your garden.


Conclusion

Keeping zinnias blooming nonstop requires attention to detail, strategic care, and consistency. By implementing these seven little-known secrets—choosing the right varieties, planting in full sun, deadheading, proper fertilization, consistent watering, pinching for bushiness, and monitoring pests and diseases—gardeners can enjoy a continuous, vibrant display of flowers from early summer through fall.

Zinnias reward gardeners who invest in their care with bright, cheerful blooms that enhance any garden space. When combined with succession planting and proper maintenance, your garden can remain a colorful sanctuary full of pollinators and beauty all season long.

Tip: The secret to nonstop blooms is not magic—it’s understanding the plant’s needs and meeting them consistently.

How to Extend Your Sunflower Season With Succession Planting

How to Extend Your Sunflower Season With Succession Planting

Sunflowers are the quintessential summer blooms, brightening gardens with their golden petals and towering stems. Beyond their beauty, they attract pollinators, provide seeds for birds and snacks, and can even be used for cut flowers. Yet, one challenge gardeners often face is the short blooming season. Fortunately, with a strategy called succession planting, you can enjoy sunflowers from early summer well into fall.

This guide explores the principles, techniques, and tips for extending your sunflower season using succession planting.


1. Understanding Succession Planting

Succession planting involves staggering sowing times so that crops or flowers mature at different intervals. For sunflowers, this technique ensures that while one batch is finishing blooming, another is just starting, creating a near-continuous display.

Benefits of Succession Planting

  • Continuous blooms for cut flowers or garden aesthetics.
  • Steady production of seeds for snacks or wildlife.
  • Reduced risk of crop loss due to diseases, pests, or weather fluctuations.
  • Efficient use of garden space by overlapping growth cycles.

Tip: Succession planting is not only for vegetables—it’s a powerful method to keep ornamental gardens vibrant all season.


2. Choosing the Right Sunflower Varieties

To maximize succession planting, it’s important to select varieties with different growth rates and heights. Sunflowers vary in maturity periods, typically from 55 to 100 days.

Suggested Varieties for Staggered Blooms

  • Early Bloomers (55–70 days): ‘Big Smile,’ ‘Sunspot,’ or ‘Elf’ dwarf varieties.
  • Mid-Season Bloomers (70–85 days): ‘Mammoth Grey Stripe,’ ‘Autumn Beauty,’ or ‘Teddy Bear.’
  • Late Bloomers (85–100 days): ‘Russian Giant,’ ‘Italian White,’ or tall hybrid sunflowers.

Tip: Combining dwarf, medium, and tall varieties adds visual interest and ensures blooms at different heights for a dynamic garden display.


3. Planning Your Succession Planting Schedule

A clear schedule is key to keeping sunflowers in bloom all season. Here’s how to plan it:

A. Determine First Planting Date

  • Sunflowers thrive in full sun and warm soil (55–60°F / 13–16°C).
  • Start seeds 2–3 weeks after the last frost in your area.

B. Stagger Subsequent Plantings

  • Sow a new batch every 2–3 weeks.
  • This ensures that each group reaches bloom at different times, creating overlapping flowers from early summer to late fall.

C. Consider Seasonal Length

  • For regions with short growing seasons, use faster-maturing varieties for early blooms.
  • In longer seasons, you can stretch succession planting over 3–4 months for continuous flowering.

Tip: Keep a garden calendar to track sowing dates, expected bloom periods, and harvest times for seeds or cut flowers.


4. Preparing Soil for Healthy Growth

Sunflowers are heavy feeders, so soil preparation is crucial to ensure strong, sustained growth.

Steps for Optimal Soil

  1. Choose a Sunny Spot: At least 6–8 hours of direct sunlight daily.
  2. Loosen Soil: Sunflowers have deep taproots, so loosen soil to 12–18 inches deep.
  3. Add Nutrients: Mix in compost or well-rotted manure to provide nitrogen, phosphorus, and potassium.
  4. Ensure Good Drainage: Avoid waterlogged soil, which can cause root rot.

Tip: Maintaining consistent soil fertility throughout the season supports successive waves of healthy blooms.


5. Proper Planting Techniques for Succession

Sunflowers can be direct-sown or started indoors for early planting.

Direct Sowing

  • Plant seeds 1 inch deep, 6–12 inches apart for small varieties, or 12–18 inches for larger types.
  • Water thoroughly after planting and keep soil consistently moist until seedlings emerge.

Indoor Seed Starting

  • Start seeds 3–4 weeks before the last frost in pots or trays.
  • Transplant seedlings outdoors when they are 6–10 inches tall and the risk of frost has passed.

Tip: Indoor starting allows early blooms while outdoor planting can continue succession waves.


6. Caring for Succession Sunflowers

A. Watering

  • Sunflowers need 1 inch of water per week, more during dry spells.
  • Water at the base to prevent fungal diseases on foliage.

B. Fertilizing

  • Apply a balanced, slow-release fertilizer at planting.
  • Feed every 3–4 weeks during active growth, especially for taller varieties.

C. Staking

  • Tall sunflowers may require support to prevent bending or breaking.
  • Insert stakes early to avoid damaging roots.

D. Pest and Disease Management

  • Watch for aphids, cutworms, and powdery mildew.
  • Use organic sprays, neem oil, or companion planting with marigolds or basil to repel pests.

Tip: Healthy plants bloom longer, so consistent care is critical for succession success.


7. Harvesting and Extending Bloom Life

For Cut Flowers

  • Harvest sunflowers early in the morning when stems are hydrated.
  • Cut flowers with 4–6 leaves remaining to support continued growth.
  • Regularly harvesting blooms encourages plants to produce more flowers.

For Seeds

  • Allow seed heads to mature fully, typically 30–45 days after flowering.
  • Harvest seeds before birds eat them, or use netting to protect crops.

Tip: Strategic harvesting prevents plants from going to seed too early, extending flowering duration.


8. Advanced Succession Techniques

  • Interplanting: Mix sunflowers with fast-growing annuals to maximize space while waiting for later sunflower plantings.
  • Succession with Different Heights: Plant shorter varieties in front rows and taller varieties behind for visual appeal and layered blooms.
  • Late Season Protection: Use row covers or lightweight frost cloths to extend the bloom season into early fall in cooler climates.

Tip: Combining timing, variety selection, and microclimate management allows gardeners to stretch the sunflower season as long as possible.


9. Common Mistakes to Avoid

  • Planting all seeds at once, leading to a single short bloom period.
  • Neglecting soil fertility or watering, causing weak or leggy plants.
  • Ignoring spacing requirements, leading to crowded plants and poor air circulation, which encourages disease.
  • Allowing early blooms to go to seed, which reduces energy for further flowering.

Tip: Following a clear succession plan prevents these common pitfalls and maximizes flower production.


Conclusion

Succession planting is a simple yet powerful strategy to enjoy sunflowers from early summer until the first frost. By staggering sowing times, selecting the right varieties, preparing fertile soil, and providing consistent care, gardeners can extend the blooming season and enjoy continuous vibrant flowers, seeds, and cut blooms.

The key to success lies in planning, attention to detail, and ongoing maintenance. With these practices, your garden can burst with sunflowers for months, offering beauty, wildlife benefits, and homegrown seeds, long after the first batch of blooms fades.

Tip: Think of succession planting as a way to orchestrate a season-long floral performance, where each wave of sunflowers takes the spotlight in your garden.

5 Flowers That Repel Mosquitoes for a Pest-Free Garden

5 Flowers That Repel Mosquitoes for a Pest-Free Garden

A beautiful garden is meant to be a sanctuary, but mosquitoes can quickly turn it into a nuisance. These tiny insects not only cause itchy bites but also carry diseases like dengue, malaria, and Zika virus. While chemical repellents and sprays can help, many gardeners prefer natural, eco-friendly solutions that enhance both the look and functionality of their outdoor spaces.

Planting mosquito-repelling flowers is one of the simplest and most effective strategies. These flowers release aromatic oils and scents that mosquitoes dislike, creating a natural barrier while beautifying your garden. Here’s a detailed guide to five flowers that repel mosquitoes, including planting tips, care instructions, and how to maximize their effectiveness.


1. Marigolds (Tagetes spp.)

Why Mosquitoes Avoid Them

Marigolds are famous for their strong, pungent scent, which comes from a chemical called pyrethrum. This natural compound is widely used in commercial insect repellents and effectively deters mosquitoes, as well as other garden pests like aphids and nematodes.

Planting Tips

  • Light: Full sun (at least 6 hours daily).
  • Soil: Well-draining soil; moderately fertile.
  • Watering: Regular watering; avoid waterlogging.
  • Care: Deadhead spent blooms to encourage continuous flowering.

Placement

  • Plant marigolds near seating areas, garden edges, or water features to keep mosquitoes away.
  • Ideal for beds, borders, and containers.

Pro Tip: Companion planting marigolds with vegetables can also protect edible crops from pests naturally.


2. Lavender (Lavandula spp.)

Why Mosquitoes Avoid It

Lavender produces fragrant essential oils that are highly effective in repelling mosquitoes. Its aroma is pleasant to humans but offensive to these pests, making it a dual-purpose plant for beauty and function.

Planting Tips

  • Light: Full sun; requires at least 6–8 hours of direct sunlight.
  • Soil: Well-draining, sandy or loamy soil.
  • Watering: Moderate; drought-tolerant once established.
  • Care: Prune lightly after flowering to maintain shape and encourage new growth.

Placement

  • Plant near patios, entrances, or outdoor seating areas.
  • Lavender also attracts pollinators like bees and butterflies, supporting garden biodiversity.

Pro Tip: Crush a few leaves before seating outdoors to release extra essential oils and boost mosquito-repelling effects.


3. Citronella Grass (Cymbopogon nardus)

Why Mosquitoes Avoid It

Citronella grass is widely recognized for its mosquito-repelling properties, thanks to the citronella oil it produces. This oil masks scents that attract mosquitoes, making them less likely to land near your garden.

Planting Tips

  • Light: Full sun to partial shade.
  • Soil: Moist, well-draining soil.
  • Watering: Regular watering; prefers consistent moisture.
  • Care: Trim back dead leaves and stems; propagate via division.

Placement

  • Ideal for borders, containers, or around outdoor seating areas.
  • Can be combined with other flowers for a multi-layered mosquito defense.

Pro Tip: Crush leaves gently before sitting nearby to release stronger mosquito-repelling scent.


4. Petunias (Petunia spp.)

Why Mosquitoes Avoid Them

Petunias produce a chemical called allicin, which is similar to compounds in garlic. This chemical emits a scent that mosquitoes and other flying insects dislike, while adding vibrant colors to your garden.

Planting Tips

  • Light: Full sun for best blooms.
  • Soil: Fertile, well-draining soil.
  • Watering: Keep soil moist but avoid soggy conditions.
  • Care: Deadhead regularly; fertilize every 2–3 weeks during flowering season.

Placement

  • Great for window boxes, hanging baskets, and flower beds near outdoor activity zones.
  • Petunias also attract butterflies and hummingbirds, increasing garden appeal.

Pro Tip: Plant petunias near entrances or walkways to create a natural mosquito shield.


5. Rosemary (Rosmarinus officinalis)

Why Mosquitoes Avoid It

Rosemary is a fragrant herb whose essential oils repel mosquitoes effectively. Its woody stems and aromatic leaves act as a natural barrier, while its delicate flowers add visual charm.

Planting Tips

  • Light: Full sun; needs at least 6 hours of sunlight daily.
  • Soil: Well-draining soil; slightly sandy or loamy.
  • Watering: Moderate; drought-tolerant once established.
  • Care: Prune regularly to maintain shape and promote flowering.

Placement

  • Plant in garden borders, containers, or herb gardens near patios and seating areas.
  • Rosemary is also culinary-friendly, letting you harvest fresh sprigs for cooking.

Pro Tip: Rub leaves between your fingers while sitting outdoors to release extra aromatic oils for enhanced mosquito repelling.


Creating a Mosquito-Free Garden

To maximize the mosquito-repelling effect:

  1. Combine multiple plants: Group at least 2–3 mosquito-repelling flowers for a stronger effect.
  2. Plant near activity zones: Place flowers where you spend time, such as patios, decks, and outdoor dining areas.
  3. Maintain healthy plants: Regular pruning, watering, and fertilizing ensures flowers produce optimal levels of aromatic oils.
  4. Eliminate standing water: Mosquitoes breed in water, so remove puddles, clogged gutters, and unused containers.
  5. Use containers: Place potted mosquito-repelling flowers around seating areas for flexibility and maximum effect.

Pro Tip: Mixing colorful, fragrant flowers adds aesthetic appeal while providing natural pest control.


Additional Benefits of Mosquito-Repelling Flowers

  • Pollinator-friendly: Many mosquito-repelling flowers, like lavender and rosemary, attract bees, butterflies, and hummingbirds.
  • Eco-friendly: Avoids harmful chemical sprays, protecting beneficial insects and soil health.
  • Fragrance: Enhances the garden with pleasant natural scents.
  • Low maintenance: Most mosquito-repelling flowers are hardy, drought-tolerant, and easy to grow.

Pro Tip: A garden with both visual and functional appeal improves quality of outdoor living spaces while reducing pest-related discomfort.


Final Thoughts

A mosquito-free garden doesn’t have to rely on harsh chemicals. By planting marigolds, lavender, citronella grass, petunias, and rosemary, gardeners can create a beautiful, fragrant, and natural barrier against mosquitoes.

Key takeaways:

  • Plant a mix of mosquito-repelling flowers for maximum effectiveness.
  • Maintain plants regularly to ensure strong scent production.
  • Place flowers strategically near patios, decks, and activity zones.
  • Combine natural repellents with habitat management, like removing standing water, to reduce mosquito populations.

With these strategies, your garden can become both stunning and pest-free, offering a safe and enjoyable outdoor environment throughout the growing season. By combining aesthetic beauty with functional design, you can enjoy your garden without worrying about mosquito bites, all while supporting a healthy, eco-friendly outdoor space.

How to Stop Deer From Eating Your Sunflowers Naturally

How to Stop Deer From Eating Your Sunflowers Naturally

Sunflowers are among the most cheerful and iconic flowers in any garden. Their bright yellow blooms and tall stalks make them a favorite among gardeners and photographers alike. However, in many regions, deer pose a significant threat to sunflower beds. These graceful creatures are herbivorous and opportunistic feeders, often finding tender sunflower shoots and blossoms irresistible.

While fencing and chemical repellents can be effective, many gardeners prefer natural, eco-friendly ways to protect their sunflowers. This guide explores proven strategies for keeping deer away, promoting healthy blooms, and maintaining a thriving garden without harming wildlife.


1. Understanding Deer Behavior

Before implementing protective strategies, it’s important to understand why deer are attracted to sunflowers:

  • Tender shoots: Young sunflower sprouts and buds are particularly palatable.
  • High nutrient content: Sunflowers provide calories and nutrients that deer need, especially in early spring.
  • Easy access: Gardens without barriers or deer deterrents are prime feeding grounds.

Pro Tip: Deer are creature-of-habit animals. Once they discover a food source, they will repeatedly return, making early prevention critical.


2. Natural Fencing Solutions

One of the most effective ways to keep deer away is creating a physical barrier without resorting to chemicals:

Options for Natural Fencing

  • Tall garden fencing: Deer can jump over low barriers. Fences should be at least 8 feet high.
  • Hedge barriers: Plant thorny or dense shrubs around sunflower beds, such as holly, barberry, or hawthorn.
  • Temporary stakes with netting: Lightweight garden netting or mesh can be erected around young sunflowers until they are more established.

Pro Tip: Combining multiple fencing strategies, like a hedge with netting, increases effectiveness.


3. Deer-Repelling Plants

Gardening enthusiasts often use companion plants to naturally deter deer:

  • Strong-smelling herbs: Lavender, rosemary, sage, and mint are disliked by deer.
  • Alliums: Ornamental onions, garlic, and chives create a smell barrier.
  • Spicy flowers: Marigolds, zinnias, and certain salvias can reduce deer visits.

Planting these around or interspersed with sunflowers not only protects them but also enhances visual appeal.

Pro Tip: Grouping several deterrent plants together creates a more potent smell barrier for deer.


4. Homemade Deer Repellents

Sprays made from natural ingredients can be applied to sunflower leaves and stems:

Common Natural Repellents

  1. Garlic or onion spray: Blend cloves with water and a small amount of soap; spray on foliage.
  2. Hot pepper spray: Mix chili powder or hot sauce with water and a few drops of dish soap.
  3. Egg-based spray: Mix eggs with water to create a protein-based deterrent.
  4. Soap bars: Hang strong-smelling soaps around sunflower beds; deer dislike the odor.

Application Tips

  • Apply in the early morning or late evening for best absorption.
  • Reapply after rain or heavy watering.
  • Rotate sprays to prevent deer from getting used to a single scent.

Pro Tip: Natural repellents are most effective in combination with other protective strategies.


5. Strategic Garden Placement

Where you plant sunflowers can influence deer activity:

  • Raised beds: Elevating sunflower roots makes them harder to reach.
  • Away from edges: Plant sunflowers toward the center of the garden rather than near paths or wooded areas.
  • Dense plantings: Interplanting sunflowers with deterrent plants can reduce visibility and accessibility.

Pro Tip: A central garden bed surrounded by herbs and shrubs forms a natural protective barrier for your sunflowers.


6. Timing Plantings

Adjusting the timing of your sunflower plantings can reduce deer damage:

  • Plant in late spring: Early emergent shoots attract hungry deer; slightly later planting may avoid peak deer feeding periods.
  • Succession planting: Staggering planting times ensures that some flowers bloom when deer pressure is lower.

Pro Tip: Early-season protection is crucial since young, tender shoots are the most vulnerable.


7. Encourage Natural Predators

Creating a garden environment that encourages deer predators can help reduce visits:

  • Dogs or cats: Supervised pets can act as deterrents without harming deer.
  • Birds of prey: Hawks and owls in the area naturally discourage deer.
  • Scare devices: Motion-activated lights or noise-makers simulate predator presence.

Pro Tip: Predators are most effective when used alongside fencing and repellents, creating a multi-layered defense system.


8. Habitat Modification

Deer are more likely to invade gardens that provide cover and easy access. Reduce risk by:

  • Clearing brush: Remove tall grass, weeds, or piles of debris near sunflower beds.
  • Pruning nearby shrubs: Open up sightlines to make the garden less inviting.
  • Removing attractants: Avoid feeding pets outdoors or leaving compost piles exposed.

Pro Tip: A tidy, well-maintained garden discourages deer from making it a habitual feeding spot.


9. Combining Strategies for Maximum Protection

Deer are persistent, so relying on a single method rarely works. Experienced gardeners recommend a layered approach:

  1. Physical barriers: Fences, netting, or thorny hedges.
  2. Repelling plants: Strong-smelling herbs and alliums around sunflower beds.
  3. Natural sprays: Rotate garlic, chili, or egg sprays.
  4. Garden placement: Raised beds, central planting, and dense borders.
  5. Habitat management: Remove hiding spots and attractants.

Pro Tip: Early intervention and consistency are key—start protection before sunflowers emerge.


10. Benefits of Natural Deer Control

Using natural methods offers several advantages:

  • Eco-friendly: Protects wildlife without chemicals.
  • Safe for children and pets: Avoids toxic sprays.
  • Cost-effective: Homemade repellents and strategic planting reduce expenses.
  • Long-term sustainability: Encourages balanced ecosystems in your garden.

Pro Tip: Natural solutions can be combined with seasonal monitoring to maintain deer-free sunflower beds year after year.


Final Thoughts

Sunflowers are worth every effort to protect. By understanding deer behavior and using a combination of fencing, deterrent plants, natural repellents, strategic placement, and habitat management, gardeners can enjoy vibrant, healthy sunflowers without conflict.

Key takeaways:

  • Start protection early, before shoots emerge.
  • Use a multi-layered approach combining barriers, repellents, and companion plants.
  • Manage your garden environment to make it less appealing to deer.
  • Maintain consistency and monitor for signs of deer activity.

With patience and thoughtful planning, your sunflower beds can thrive all season, providing sunny blooms, attracting pollinators, and remaining free from deer damage. Your garden becomes not only a haven for sunflowers but also a showcase of sustainable, wildlife-conscious gardening.

The Fertilizer Experts Use to Keep Dahlias Blooming All Summer

The Fertilizer Experts Use to Keep Dahlias Blooming All Summer

Dahlias are among the most vibrant and versatile summer flowers, celebrated for their dazzling colors, intricate petal shapes, and long blooming season. While they naturally thrive in sunny, well-drained locations, maintaining consistent, prolific blooms all summer long requires more than just sunlight and water. One key element is the right fertilizer—used correctly, it can dramatically extend the flowering period, strengthen stems, and enhance color intensity.

This guide explores the fertilizers experts use, why they work, and how to apply them to keep your dahlias in peak bloom all season.


1. Understanding the Nutritional Needs of Dahlias

Before choosing a fertilizer, it’s crucial to understand what dahlias require:

  • Nitrogen (N): Supports leafy growth. Too much nitrogen encourages foliage at the expense of flowers.
  • Phosphorus (P): Promotes strong root development and supports early bud formation.
  • Potassium (K): Enhances flower size, color, and disease resistance.
  • Micronutrients: Calcium, magnesium, and iron contribute to healthy stems, vibrant petals, and overall plant vitality.

Expert Tip: Dahlias are heavy feeders; balancing macronutrients with micronutrients is key to continuous flowering.


2. The Expert-Recommended Fertilizer Formula

Gardeners and horticultural experts often rely on a low-nitrogen, high-phosphorus, and potassium-rich fertilizer for dahlias. A typical formula might be 5-10-10 or 10-20-20 (N-P-K).

Why This Works

  • Low Nitrogen: Prevents excessive leafy growth that can overshadow blooms.
  • High Phosphorus: Stimulates root strength and encourages prolific flower formation.
  • High Potassium: Improves bloom size, color vibrancy, and disease resistance.

Experts also add micronutrients through specialized fertilizers or amendments like Epsom salts (for magnesium) to enhance color intensity and overall plant health.

Tip: Avoid high-nitrogen fertilizers during the flowering season to maximize bloom production.


3. Organic vs. Synthetic Fertilizers for Dahlias

A. Organic Options

  • Compost and Well-Rotted Manure: Provide slow-release nutrients, improve soil structure, and promote beneficial microbial activity.
  • Bone Meal: Rich in phosphorus, ideal for promoting root growth and flower bud development.
  • Seaweed Extract: Supplies potassium and trace elements while boosting plant resilience.

Benefits: Organic fertilizers improve soil health and support sustainable gardening practices.

B. Synthetic Fertilizers

  • Granular or Water-Soluble Fertilizers: Offer precise nutrient ratios and quick uptake.
  • Specialized Dahlia Fertilizers: Often labeled as “bloom boosters” with low nitrogen and high phosphorus/potassium content.

Benefits: Provide rapid nutrient delivery for immediate results, especially during heavy flowering periods.

Expert Tip: Many gardeners use a combination of organic soil enrichment and targeted synthetic feeding for the best balance of long-term soil health and peak bloom production.


4. How and When to Fertilize Dahlias

Timing and method are critical to keep dahlias blooming all season:

A. Pre-Planting

  • Mix bone meal or balanced organic fertilizer into the planting hole.
  • This encourages strong root establishment, which is vital for consistent blooms.

B. Early Growth Stage

  • Apply a low-nitrogen, high-phosphorus fertilizer once shoots are 6–12 inches tall.
  • Fertilize every 3–4 weeks during active growth to maintain energy for flower bud formation.

C. Blooming Stage

  • Switch to a bloom-boosting fertilizer with higher potassium.
  • Use a liquid feed every 10–14 days for quick absorption and continuous flowering.
  • Combine with mulching to retain moisture and support nutrient uptake.

D. Tips for Fertilizer Application

  • Water plants before fertilizing to prevent root burn.
  • Apply fertilizer around the base of the plant, avoiding direct contact with stems or leaves.
  • Monitor plants for signs of nutrient imbalance and adjust accordingly.

Tip: Consistent, moderate feeding encourages repeat blooms without exhausting the plant.


5. Additional Expert Strategies to Maximize Dahlia Blooms

While the right fertilizer is essential, experts combine feeding with other techniques for endless summer blooms:

A. Deadheading

  • Remove spent flowers to redirect energy into new blooms.
  • Perform deadheading weekly during peak flowering.

B. Pruning and Pinching

  • Pinch back young stems to encourage bushier growth and more flower sites.
  • Prune weaker or overcrowded stems to improve air circulation and sunlight penetration.

C. Soil Maintenance

  • Keep soil well-drained but moist.
  • Mulch with compost, straw, or bark to retain moisture and suppress weeds.

D. Pest and Disease Management

  • Monitor for aphids, spider mites, and powdery mildew.
  • Treat infestations early using organic sprays or beneficial insects to prevent blooms from being damaged.

E. Support Structures

  • Use stakes, cages, or trellises to support tall dahlia varieties, preventing stem breakage and ensuring blooms stay upright.

6. Common Mistakes to Avoid

Even with the best fertilizer, certain mistakes can reduce bloom output:

  • Overfertilization: Excess nitrogen leads to lush foliage but fewer flowers.
  • Irregular Feeding: Skipping feedings can cause blooms to fade early.
  • Poor Water Management: Both drought and waterlogging stress plants, reducing flowering.
  • Ignoring Soil Health: Nutrient imbalances, compacted soil, or poor drainage hinder root function.

Expert Tip: Observe your plants closely; changes in leaf color, bloom size, or stem strength often indicate a nutrient adjustment is needed.


7. The Science Behind Continuous Blooming

Experts understand that dahlias are perennial tuberous plants, and their blooming is largely energy-dependent:

  • Tubers store energy for shoot and flower development.
  • Balanced fertilizer ensures the plant uses stored energy efficiently for flower production rather than excessive vegetative growth.
  • Potassium and phosphorus-rich fertilizers enhance flower longevity, color intensity, and stem strength, allowing blooms to last longer on the plant.

Tip: A healthy, well-fed root system ensures dahlias can produce multiple flushes of flowers throughout summer.


Conclusion

Keeping dahlias blooming all summer requires a strategic approach combining proper fertilizer, consistent care, and environmental attention. Experts rely on:

  • Low-nitrogen, high-phosphorus/potassium fertilizers
  • Regular liquid feeding for quick nutrient uptake
  • Organic amendments for long-term soil fertility

Coupled with deadheading, pruning, watering, and pest management, these practices ensure continuous, vibrant blooms that delight gardeners and visitors alike.

By understanding what nutrients dahlias need and how to provide them effectively, gardeners can enjoy a summer-long display of dazzling flowers, making dahlias the centerpiece of any garden or landscape.

Tip: The secret to endless dahlia blooms isn’t just fertilizer—it’s consistent care, attentive observation, and balanced nutrition.