7 Plants You Should Avoid Growing in Containers

7 Plants You Should Avoid Growing in Containers

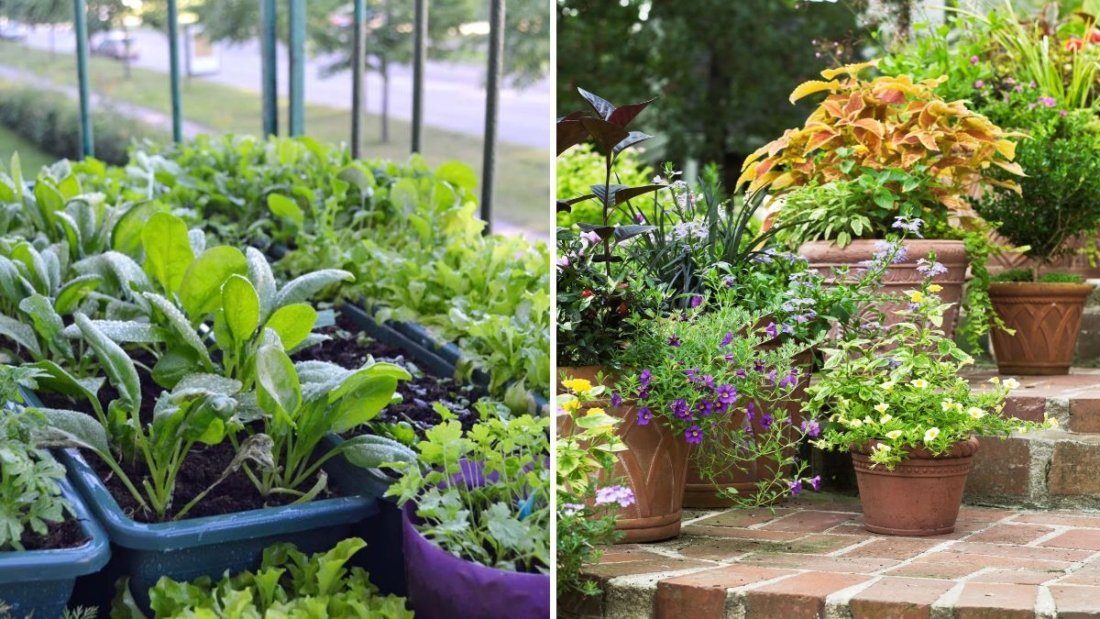
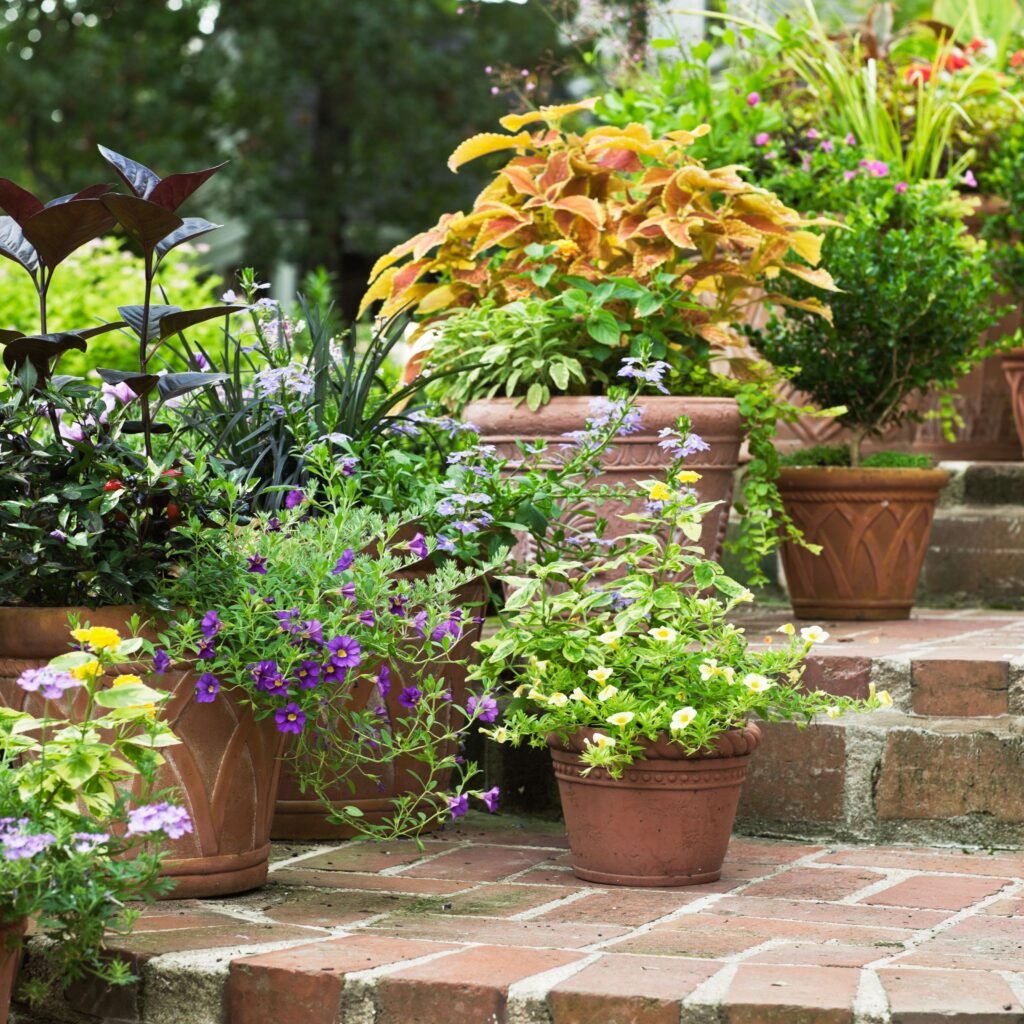
Container gardening is a popular way to bring greenery into small spaces, patios, balconies, and urban gardens. It allows gardeners to control soil, sunlight, and water conditions while adding versatility and charm to any area. However, not all plants thrive in containers. Some species are naturally large, require deep or expansive root systems, or have specific soil and moisture needs that containers cannot adequately provide. Attempting to grow unsuitable plants in pots often leads to poor growth, stress, disease, and frustration. This article explores seven plants you should avoid growing in containers, why they struggle in limited spaces, and alternative planting strategies to ensure success.


Understanding Container Gardening Limitations

Before discussing specific plants, it’s essential to understand the inherent constraints of container gardening:

  1. Limited Root Space: Containers restrict root expansion, which affects nutrient uptake and plant stability.
  2. Watering Challenges: Containers dry out faster than ground soil, requiring frequent attention.
  3. Nutrient Depletion: Plants in pots rely entirely on the soil mix and fertilizer provided, which can be quickly exhausted.
  4. Temperature Fluctuations: Containers are more susceptible to extreme heat and cold, which can stress sensitive plants.

These factors mean that plants with large or deep root systems, high water demands, or specific soil requirements may struggle in containers.


Plant 1: Large Trees (e.g., Oak, Maple, Pine)

Large trees are ill-suited for container growth due to their size, root depth, and structural needs.

Why They Struggle:

  • Root Confinement: Tree roots require extensive underground space to anchor and absorb nutrients.
  • Stability Issues: Tall trees in small pots are prone to tipping or wind damage.
  • Growth Limitation: Restricted roots limit canopy size, reducing overall health and vigor.

Alternative Strategy:

  • Plant large trees directly in the ground.
  • For container use, choose dwarf or patio tree varieties specifically bred for limited root spaces, such as dwarf citrus or Japanese maple cultivars.

Plant 2: Bamboo (Phyllostachys spp. and others)

Bamboo is fast-growing, aggressive, and difficult to contain in confined spaces.

Why It Struggles:

  • Rapid Growth: Bamboo roots (rhizomes) spread aggressively, quickly outgrowing containers.
  • Root Crowding: In pots, bamboo can become root-bound, stunted, or die back unexpectedly.
  • Maintenance Nightmare: Frequent repotting is required to prevent root overgrowth.

Alternative Strategy:

  • Plant bamboo in the ground with barriers to control spread.
  • If container-grown bamboo is desired, select clumping varieties (Fargesia spp.) and provide large, deep containers with consistent care.

Plant 3: Pumpkins and Large Squash (Cucurbita spp.)

Pumpkins, large squash, and other vining gourds are not ideal for pots.

Why They Struggle:

  • Expansive Root Systems: These plants require substantial soil volume for nutrient uptake.
  • Heavy Fruit Production: Large fruits add weight, which can destabilize containers.
  • High Water Needs: Insufficient moisture can stress the plant and reduce fruit quality.

Alternative Strategy:

  • Grow pumpkins in garden beds or raised beds for adequate space and support.
  • For containers, select dwarf or bush varieties of squash designed for pot cultivation.

Plant 4: Corn (Zea mays)

Corn is a tall, fast-growing cereal that demands full sunlight, deep soil, and constant moisture.

Why It Struggles:

  • Shallow Containers Limit Growth: Restricted roots stunt tall, robust stalk development.
  • Pollination Issues: Corn is wind-pollinated, and isolated container plants may not pollinate effectively.
  • Nutrient Demands: Corn is a heavy feeder, often requiring more nutrients than container soil can provide.

Alternative Strategy:

  • Grow corn in garden rows with adequate spacing and sun exposure.
  • Container gardening is better suited for smaller vegetables or dwarf corn varieties if space is extremely limited.

Plant 5: Rhubarb (Rheum rhabarbarum)

Rhubarb produces large leaves and requires extensive root space to thrive.

Why It Struggles:

  • Bulky Root System: The thick, fleshy crowns need deep soil to grow properly.
  • Long-Term Growth: Rhubarb is perennial and can live for decades; containers restrict longevity.
  • Soil Moisture Sensitivity: Rhubarb requires consistent moisture that can be difficult to maintain in pots.

Alternative Strategy:

  • Plant rhubarb in garden beds or raised beds with rich, well-draining soil.
  • Containers are only feasible for very young plants with frequent maintenance and large deep pots.

Plant 6: Large Ornamental Grasses (e.g., Miscanthus, Pampas Grass)

Tall ornamental grasses add texture and movement to gardens but struggle in confined root spaces.

Why They Struggle:

  • Expansive Root Mass: Mature grasses develop dense root clumps that container soil cannot accommodate.
  • Top-Heavy Growth: Tall plumes or foliage make the plant unstable in shallow containers.
  • Reduced Aesthetic Appeal: Inadequate soil and nutrients result in smaller, less impressive plants.

Alternative Strategy:

  • Plant in garden borders, beds, or large outdoor planters designed to handle mature sizes.
  • For container gardening, select dwarf or clumping ornamental grass varieties.

Plant 7: Large Fruit Trees (e.g., Apple, Pear, Peach)

While dwarf fruit trees can thrive in containers, standard-sized fruit trees are unsuitable.

Why They Struggle:

  • Root Restriction: Deep, spreading roots are essential for water and nutrient uptake.
  • Fruit Stress: Producing heavy fruit in a container can overwhelm the root system.
  • Long-Term Viability: Trees may live only a few years in a pot before declining.

Alternative Strategy:

  • Use dwarf, patio, or columnar fruit tree varieties specifically bred for container growth.
  • Ensure large pots, regular fertilization, and careful watering for long-term success.

General Guidelines for Container Gardening Success

To prevent disappointment in container gardening, consider the following principles:

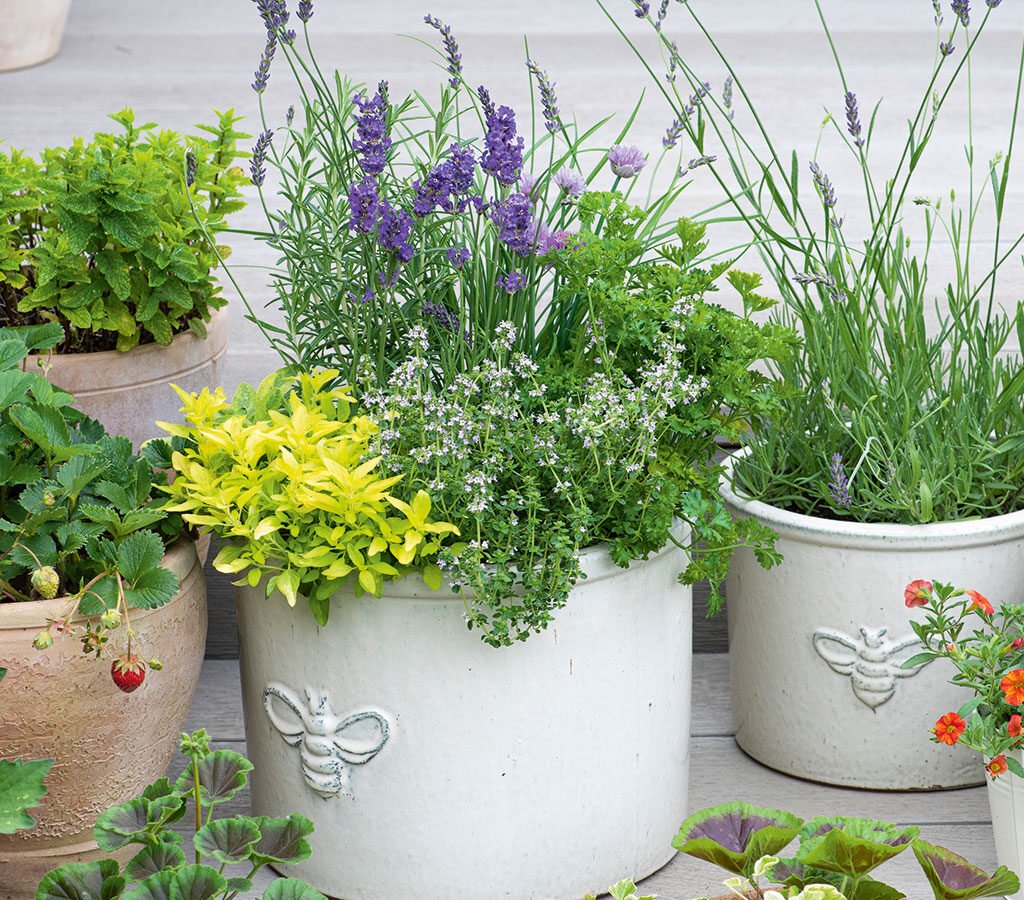
  1. Choose Size-Appropriate Plants: Small shrubs, dwarf trees, herbs, and compact vegetables thrive in pots.
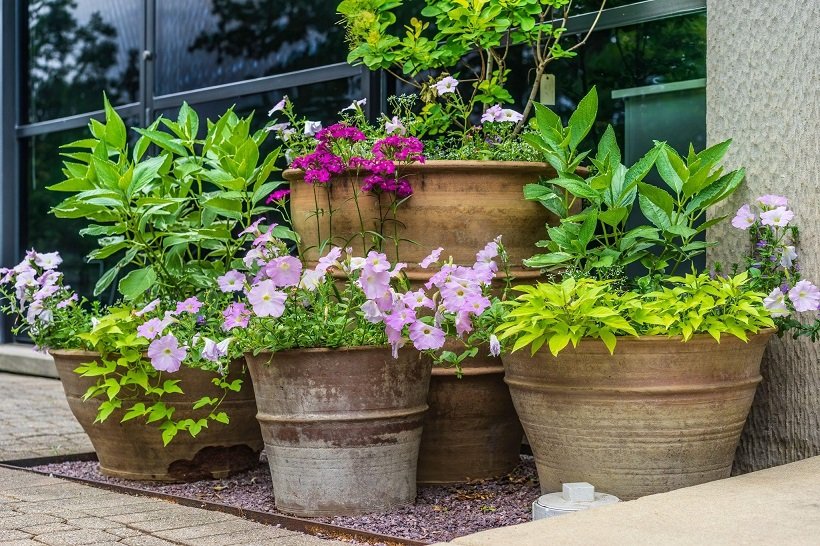
  2. Use Large Containers When Needed: Some medium-sized plants require bigger pots to develop properly.
  3. Provide High-Quality Soil: Use a well-draining potting mix rich in organic matter.
  4. Fertilize Regularly: Container plants rely entirely on supplied nutrients; slow-release or liquid fertilizers are essential.
  5. Ensure Proper Drainage: Pots should have adequate drainage holes to prevent root rot.
  6. Monitor Watering: Containers dry faster than ground soil, so check moisture frequently, especially during hot weather.
  7. Repot When Necessary: Avoid overcrowding by moving plants to larger pots or refreshing soil every 1–2 years.

By following these guidelines, gardeners can enjoy thriving container plants without the frustration of stunted growth or failure.


Conclusion

Container gardening offers incredible flexibility and beauty for small spaces, but success depends on plant selection. Large trees, bamboo, pumpkins, corn, rhubarb, large ornamental grasses, and standard fruit trees are generally poor choices for container growth due to their size, root requirements, and specific environmental needs. Attempting to grow these plants in pots often leads to weak growth, poor blooms, root stress, and ultimately, plant failure.

Instead, select plants that naturally thrive in confined spaces, provide adequate soil, sunlight, and water, and consider dwarf or container-adapted varieties for larger species. Understanding which plants are unsuitable for pots and choosing alternatives ensures a productive, attractive, and low-maintenance container garden. With proper planning and plant selection, gardeners can enjoy lush foliage, vibrant blooms, and bountiful harvests from containers year after year.

When To Pick Pumpkins for Long-Term Storage

When To Pick Pumpkins for Long-Term Storage

Pumpkins are one of the most popular fall crops, valued for decoration, cooking, and baking. However, their shelf life varies greatly depending on when and how they are harvested. Picking pumpkins at the wrong time can lead to rapid decay, soft spots, or loss of flavor. Proper timing ensures pumpkins remain firm, nutritious, and usable for months, making them ideal for winter storage.

This guide explores how to determine the optimal time to harvest pumpkins, techniques for picking them safely, and post-harvest care to maximize storage life.


Understanding Pumpkin Maturity

Pumpkins are mature when they reach full size, develop firm skin, and the color deepens. Different varieties mature at varying rates, generally between 75 and 120 days after planting.

Key indicators of pumpkin maturity include:

  1. Skin Hardness
    • Press your fingernail into the skin; mature pumpkins resist puncture.
    • Hard skin prevents moisture loss and decay during storage.
  2. Color
    • Orange pumpkins: Look for a deep, uniform color.
    • White or other colored varieties: Check for the characteristic shade of maturity.
    • Avoid green patches, which indicate immaturity.
  3. Vine and Stem Condition
    • Mature pumpkins often have dry, brown stems.
    • A green, flexible stem may indicate the fruit is still growing.
  4. Sound Test
    • Tap the pumpkin; a hollow sound often signals ripeness.

Understanding these indicators ensures that pumpkins are harvested at the peak of quality for long-term storage.


Optimal Harvest Time

1. Before First Frost

  • Pumpkins are sensitive to frost, which can damage skin and shorten storage life.
  • Harvest one to two weeks before expected frost to prevent cold injury.

2. When Fully Mature

  • Ensure pumpkins have reached their full varietal color and size.
  • Overripe pumpkins left too long on the vine may develop soft spots or cracks.

3. During Dry Weather

  • Harvest on a dry day to prevent moisture-related rot.
  • Wet pumpkins are more prone to fungal infections in storage.

Timing the harvest carefully provides pumpkins with the best chance to store for several months.


Harvesting Techniques

Proper handling during harvest is essential to prevent bruising and skin damage, which are major causes of decay.

Tools and Methods

  • Sharp garden knife or pruners: Cut stems 2–4 inches above the fruit.
  • Avoid pulling or twisting: This can damage the stem and reduce storage life.
  • Support large pumpkins: For heavy varieties, use both hands to lift and carry.

Tips for Safe Harvest

  • Wear gloves to protect hands from rough stems or prickly vines.
  • Handle pumpkins gently; even minor scratches can lead to rot.
  • Place harvested pumpkins on straw, cardboard, or another soft surface to avoid bruising.

Correct harvesting methods help maintain pumpkin integrity and longevity.


Post-Harvest Curing

Curing is a critical step for pumpkins intended for long-term storage.

Steps for Curing

  1. Place pumpkins in a warm, dry location with temperatures around 80–85°F (27–29°C).
  2. Maintain moderate humidity to prevent shriveling.
  3. Cure for 10–14 days to allow the skin to harden and minor cuts to heal.
  4. Avoid direct sunlight, which can cause uneven drying or sunscald.

Benefits of Curing

  • Hardens the skin, reducing moisture loss.
  • Extends storage life by minimizing fungal or bacterial infections.
  • Enhances sweetness and flavor in edible varieties.

Curing transforms freshly harvested pumpkins into long-lasting, high-quality storage crops.


Storage Conditions

Proper storage is essential to keep pumpkins firm and prevent spoilage.

Temperature and Humidity

  • Ideal temperature: 50–55°F (10–13°C) for most varieties.
  • Humidity: Moderate (50–70%) to avoid shriveling or mold growth.

Storage Methods

  • Store pumpkins in single layers on pallets, straw, or racks to prevent moisture buildup.
  • Avoid stacking, which can cause bruising and increase rot risk.
  • Keep away from cold drafts or direct heat sources.

Inspection

  • Check pumpkins regularly for soft spots, mold, or decay.
  • Remove any affected fruit immediately to protect others.

Following these storage guidelines can preserve pumpkins for 3–6 months, depending on the variety.


Selecting Varieties for Long-Term Storage

Some pumpkin varieties are naturally more suitable for winter storage due to thick skin and firm flesh:

  1. ‘Cinderella’ (Rouge Vif d’Etampes): Thick skin, retains flavor for months.
  2. ‘Sugar Pie’ or ‘Small Sugar’ pumpkins: Ideal for pies; long storage life.
  3. ‘Long Island Cheese’: Flat, dense pumpkins, store well in cool conditions.
  4. ‘Blue Hubbard’ or ‘Kabocha’: Dense, firm flesh, excellent for long-term storage.
  5. ‘Fairytale’ pumpkins: Attractive and durable for months if handled correctly.

Selecting the right variety ensures maximum storage duration and usability.


Common Mistakes to Avoid

  1. Harvesting too early: Green pumpkins have thin skin and do not store well.
  2. Harvesting after frost: Frost-damaged pumpkins quickly develop rot.
  3. Bruising or cutting stems improperly: Leads to decay and shorter storage life.
  4. Improper curing: Skipping curing reduces skin hardness and longevity.
  5. Poor storage conditions: Damp, warm, or overcrowded storage promotes mold and spoilage.

Avoiding these mistakes ensures pumpkins remain edible and attractive for months.


Benefits of Proper Pumpkin Harvesting

  • Extended shelf life: Allows pumpkins to last through winter.
  • Improved flavor and sweetness: Properly cured pumpkins are naturally sweeter.
  • Reduced waste: Minimizes losses from rot and spoilage.
  • Versatility: Maintains quality for cooking, baking, and decoration.
  • Cost-effective: Reduces the need for mid-winter purchases.

Proper harvesting, curing, and storage practices maximize the value and enjoyment of your pumpkin crop.


Conclusion

Knowing when to pick pumpkins is essential for long-term storage success. By observing maturity indicators such as skin hardness, color, and stem condition, harvesting before frost, and handling pumpkins carefully, gardeners can ensure a long-lasting winter supply.

Key steps include:

  1. Monitor pumpkin maturity: Use skin, color, stem, and sound tests.
  2. Harvest before frost: Protect fruit from cold damage.
  3. Use proper tools and handling: Cut stems, avoid bruising, and support heavy pumpkins.
  4. Cure pumpkins: Harden skin and heal minor cuts in a warm, dry environment.
  5. Store in optimal conditions: Maintain cool temperatures, moderate humidity, and single-layer arrangements.
  6. Choose storage-friendly varieties: Thick-skinned and firm-fleshed pumpkins last the longest.
  7. Inspect and maintain storage regularly: Remove damaged fruit to protect others.

By following these guidelines, gardeners can enjoy healthy, flavorful pumpkins well into winter, whether for cooking, baking, or decoration. Proper timing, harvesting, and storage transform pumpkins from a seasonal crop into a reliable, long-lasting resource for months to come.

5 Flowers You Should Never Plant in Full Shade

5 Flowers You Should Never Plant in Full Shade

Choosing the right flowers for your garden is not just about color, bloom shape, or fragrance—it’s also about understanding each plant’s sunlight requirements. Many gardeners make the mistake of planting sun-loving flowers in areas with limited light, only to watch their plants struggle, wither, or fail to bloom entirely. Full shade, defined as areas receiving less than 2–3 hours of direct sunlight daily, presents a unique challenge for flowering plants. Planting the wrong species in such conditions can result in weak growth, sparse blooms, and overall disappointment. This article explores five popular flowers that should never be planted in full shade, why they fail in low-light conditions, and alternatives to ensure a thriving garden.


Understanding Full Shade Conditions

Before exploring which flowers to avoid, it’s essential to define full shade:

  • Minimal sunlight: Less than 2–3 hours of direct sun per day, often filtered through trees or structures.
  • Low light intensity: Even indirect light may not be sufficient for plants that require bright conditions.
  • Cooler microclimate: Shaded areas retain moisture longer and have lower temperatures, which can affect growth.

Full shade favors plants adapted to low-light conditions, such as ferns, hostas, and certain impatiens. Sun-loving flowers, however, rely on photosynthesis at higher light levels to produce energy for blooms. Planting them in full shade compromises their vitality.


Flower 1: Tulips (Tulipa spp.)

Tulips are iconic spring bulbs celebrated for their vibrant, upright blooms and a wide spectrum of colors.

Why They Fail in Full Shade:

  • Insufficient energy: Tulips require bright, direct sunlight to photosynthesize and store energy in their bulbs for next year.
  • Weak stems: Low light causes tall, spindly growth, resulting in stems that cannot support blooms.
  • Reduced flowering: Bulbs may fail to flower or produce small, pale flowers.

Expert Tip:

  • Planting location: Tulips thrive in full sun or partial shade with at least 4–6 hours of direct sunlight.
  • Alternative for shade: Try hostas or astilbes, which provide lush foliage and occasional blooms in low light.

Flower 2: Lavender (Lavandula spp.)

Lavender is loved for its fragrant foliage, spikes of purple flowers, and pollinator-friendly blooms.

Why They Fail in Full Shade:

  • Fungal susceptibility: Shaded, damp conditions increase the risk of root rot and powdery mildew.
  • Sparse blooms: Lavender requires full sun to develop vibrant flower spikes.
  • Leggy growth: Without sufficient sunlight, plants stretch in search of light, becoming weak and unattractive.

Expert Tip:

  • Planting location: Full sun for 6–8 hours daily and well-draining soil.
  • Alternative for shade: Try lamium or heuchera, which provide interesting foliage and flowers in shaded areas.

Flower 3: Daylilies (Hemerocallis spp.)

Daylilies are hardy perennials with trumpet-shaped blooms that last a single day but are replaced by successive flowers.

Why They Fail in Full Shade:

  • Poor flowering: Daylilies need bright sunlight to produce prolific blooms.
  • Weak foliage: Low-light conditions result in thin, pale leaves prone to disease.
  • Delayed growth: Plants may not establish properly and will produce fewer flowers each season.

Expert Tip:

  • Planting location: Full sun or light shade with at least 4–6 hours of sunlight.
  • Alternative for shade: Brunnera or bleeding heart (Dicentra) perform well in shaded spots.

Flower 4: Zinnias (Zinnia spp.)

Zinnias are popular annuals known for vibrant colors, long stems, and butterfly-attracting flowers.

Why They Fail in Full Shade:

  • Insufficient blooms: Zinnias need bright sunlight to produce dense, vibrant flowers.
  • Leggy plants: In low light, stems stretch excessively, causing flopping and poor air circulation.
  • Increased disease risk: Shaded, moist conditions can promote powdery mildew and fungal infections.

Expert Tip:

  • Planting location: Full sun for at least 6 hours per day.
  • Alternative for shade: Impatiens or coleus offer vivid color and thrive in shady areas.

Flower 5: Coneflowers (Echinacea spp.)

Coneflowers are perennial favorites with daisy-like flowers, attractive to pollinators, and hardy across many climates.

Why They Fail in Full Shade:

  • Sparse flowering: Lack of sunlight reduces energy production, resulting in fewer blooms.
  • Weak stems: Flowers may flop or fail to stand upright.
  • Susceptibility to fungal issues: Shaded conditions with poor airflow increase the risk of powdery mildew.

Expert Tip:

  • Planting location: Full sun with at least 6 hours of sunlight per day.
  • Alternative for shade: Toad lilies (Tricyrtis) or hydrangea varieties offer color and interest in low-light areas.

General Principles for Shady Gardens

While certain flowers fail in full shade, gardeners can design beautiful, low-light gardens by following these principles:

  1. Know your light zones: Map your garden areas as full sun, partial sun, partial shade, or full shade to guide plant selection.
  2. Choose shade-adapted plants: Plants like ferns, hostas, caladiums, astilbes, and impatiens flourish in minimal sunlight.
  3. Monitor soil moisture: Shaded areas retain moisture longer; overwatering is a common problem.
  4. Use foliage for color: Shade gardens can be visually dynamic through leaf color, texture, and shape, rather than relying solely on flowers.
  5. Consider seasonal blooms: Choose plants with staggered blooming times to maintain year-round visual interest.

By respecting each plant’s sunlight requirements and selecting shade-tolerant varieties, gardeners can avoid disappointment and create thriving, beautiful gardens.


How to Fix Mistakes in Shady Areas

If sun-loving flowers have already been planted in full shade:

  1. Relocate the plants: Dig up bulbs or seedlings and move them to sunnier locations.
  2. Amend soil: Improve drainage to prevent fungal problems in areas that must remain shaded.
  3. Supplement light: Consider reflective surfaces, light-colored walls, or artificial grow lights for small shaded plots.
  4. Use shade-loving companions: Replace struggling flowers with species adapted to low light.

Correcting placement ensures plants reach their full potential and prevents wasted effort.


Conclusion

Planting the right flowers in the right environment is essential for garden success. Tulips, lavender, daylilies, zinnias, and coneflowers are all sun-loving species that should never be planted in full shade. Doing so can lead to leggy growth, poor blooms, fungal diseases, and overall disappointment. By understanding sunlight requirements, choosing shade-tolerant alternatives, and implementing proper garden design principles, gardeners can create thriving, vibrant landscapes that succeed even in challenging low-light areas.

A well-planned garden considers both aesthetic appeal and plant biology, ensuring that every bloom flourishes in its optimal environment. By avoiding these common mistakes and making informed plant choices, gardeners can enjoy stunning flowers, robust growth, and a healthy, resilient garden throughout the growing season.

6 Common Mistakes That Are Killing Your Tulips (and How to Fix Them

6 Common Mistakes That Are Killing Your Tulips (and How to Fix Them

Tulips are among the most beloved spring-blooming bulbs, celebrated for their vibrant colors, elegant shapes, and ability to brighten gardens after long winters. However, despite their popularity, many gardeners struggle to keep tulips healthy year after year. Often, the culprit isn’t the climate or soil but common mistakes that can severely impact their growth, bloom quality, and longevity. Understanding these errors and learning how to fix them ensures that tulips remain vibrant, resilient, and show-stopping in every season. This guide explores six frequent mistakes gardeners make with tulips and provides expert strategies to correct them.


Mistake 1: Planting Bulbs Too Shallow or Too Deep

Tulip bulbs have specific planting depth requirements. Incorrect planting depth can compromise root development, bulb protection, and bloom quality.

Symptoms:

  • Tulips fail to emerge or produce weak, spindly stems.
  • Flowers bloom late, unevenly, or not at all.

How to Fix It:

  • Ideal Depth: Plant tulip bulbs 6–8 inches deep, measured from the base of the bulb to the soil surface.
  • Spacing: Keep bulbs 4–6 inches apart to avoid overcrowding, which can lead to competition for nutrients and water.
  • Tip: In sandy soils, plant slightly deeper to prevent bulbs from drying out; in heavy clay soils, plant slightly shallower to avoid rot.

Correct planting depth ensures tulips have room for healthy root development and are protected from frost and pests.


Mistake 2: Ignoring Soil Drainage

Tulips are highly susceptible to root and bulb rot if planted in poorly drained soil. Wet, compacted soils suffocate roots and encourage fungal diseases.

Symptoms:

  • Bulbs appear soft or mushy.
  • Stunted growth or sudden collapse of shoots.
  • Foul smell from the soil around bulbs.

How to Fix It:

  • Soil Preparation: Amend soil with organic matter, sand, or perlite to improve drainage.
  • Raised Beds: Consider planting tulips in raised beds or mounds to ensure water drains away from bulbs.
  • Avoid Heavy Watering: Only water when the soil is dry to the touch.

Proper drainage protects tulips from rot, encourages strong root systems, and promotes healthy blooms.


Mistake 3: Overwatering or Underwatering

Watering mistakes are common among tulip growers. Both extremes can harm bulbs and prevent flowering.

Symptoms:

  • Overwatering: Yellowing leaves, bulb rot, and fungal growth.
  • Underwatering: Wilting, poor flower development, and weak stems.

How to Fix It:

  • Moderate Watering: Water tulips once a week during dry spells, ensuring soil is moist but not soggy.
  • Monitor Weather: Reduce watering after rainfall or in humid conditions.
  • Mulching: Apply a light layer of mulch to retain moisture in dry climates without keeping soil wet.

Balanced watering provides tulips with the hydration needed to thrive without risking rot.


Mistake 4: Failing to Provide Enough Sunlight

Tulips are sun-loving plants, and insufficient light can drastically reduce bloom quality and plant vigor.

Symptoms:

  • Leggy, thin stems.
  • Small, pale flowers.
  • Leaves grow tall but weak.

How to Fix It:

  • Full Sun: Plant tulips in locations receiving 6–8 hours of direct sunlight per day.
  • Avoid Shade: Keep tulips away from large shrubs, trees, or buildings that cast prolonged shadows.
  • Rotate Planting Locations: If tulips are in pots, move them to sunnier spots during early spring.

Ample sunlight supports photosynthesis, energizes bulb development, and produces large, vibrant flowers.


Mistake 5: Cutting Leaves Too Early

Many gardeners remove tulip leaves immediately after flowering, thinking it tidies up the garden. This practice can harm the plant’s ability to store energy for the next season.

Symptoms:

  • Reduced bloom size the following year.
  • Bulbs fail to produce flowers at all.

How to Fix It:

  • Leave Foliage Intact: Allow leaves to yellow and wither naturally before removing them.
  • Photosynthesis: Foliage continues to convert sunlight into energy stored in the bulb for next year’s blooms.
  • Optional Support: Tie taller leaves gently to prevent flopping, but avoid removing them prematurely.

Patience with foliage ensures tulips store enough energy for strong, showy blooms the following season.


Mistake 6: Neglecting Bulb Care After Blooming

Once tulips finish flowering, proper care is crucial for longevity. Ignoring post-bloom care reduces bulb vigor and lifespan.

Symptoms:

  • Bulbs fail to flower in subsequent years.
  • Smaller flowers or fewer blooms.
  • Bulb shrinkage or disease.

How to Fix It:

  1. Deadheading: Remove spent flowers to prevent energy diversion into seed production.
  2. Fertilization: Apply a low-nitrogen, high-phosphorus fertilizer after flowering to strengthen bulbs.
  3. Bulb Lifting (Optional): In areas with wet summers or cold winters, dig up bulbs after foliage dies back, clean, and store in a cool, dry place.
  4. Replanting: Replant bulbs in autumn with proper depth and spacing for the next season.

Post-bloom care is essential to maintain healthy bulbs that consistently produce beautiful flowers year after year.


Additional Tips for Tulip Success

  • Pest Protection: Watch for aphids, slugs, and bulb-eating rodents. Use protective barriers or natural deterrents as needed.
  • Soil Testing: Ensure soil pH is slightly acidic to neutral (6.0–7.0) for optimal nutrient availability.
  • Companion Planting: Plant tulips with perennials that emerge after tulip foliage dies back to maintain garden aesthetics without disturbing bulbs.
  • Variety Selection: Some tulip cultivars are more resilient and perennial; choose accordingly if re-blooming is desired.

These tips, combined with avoiding the six common mistakes, create the foundation for long-lasting, thriving tulip gardens.


Conclusion

Tulips are stunning and rewarding plants, but they require careful attention to thrive year after year. The most common mistakes—incorrect planting depth, poor soil drainage, watering errors, insufficient sunlight, premature leaf removal, and neglecting post-bloom care—can all lead to weak plants, reduced blooms, or even bulb loss.

By understanding and correcting these errors, gardeners can ensure healthy, vibrant tulips that return each spring with strong stems, lush foliage, and abundant flowers. Proper planting, watering, sun exposure, and maintenance practices work together to create an environment where tulips can flourish, bringing seasonal beauty and elegance to any garden. With careful attention, tulips will reward gardeners with years of show-stopping blooms and a reliable burst of spring color.

5 Herbs That Store Well Through Winter

5 Herbs That Store Well Through Winter

Herbs are an essential component of any garden, adding flavor, aroma, and even medicinal benefits to meals and remedies. However, as winter approaches, fresh herbs may become scarce, and gardeners often worry about preserving their harvest for months of cold weather. Fortunately, many herbs store exceptionally well and can provide freshness and flavor throughout the winter if harvested, dried, or stored correctly.

This guide explores five herbs that store well through winter, along with detailed instructions on harvesting, drying, freezing, and other preservation techniques to maximize their shelf life.


1. Rosemary

Rosemary is a hardy, evergreen herb known for its strong, pine-like aroma and flavor. Its robust structure makes it ideal for long-term storage.

Harvesting Tips

  • Harvest sprigs in the morning when essential oils are at their peak.
  • Choose healthy, vibrant stems and avoid woody, older growth.
  • Cut just above a leaf node to encourage new growth.

Storage Methods

Drying:

  • Hang small bundles upside down in a cool, dark, well-ventilated space.
  • Once fully dry (2–3 weeks), strip leaves from stems and store in airtight containers.

Freezing:

  • Chop fresh leaves and place them in ice cube trays with water or olive oil.
  • Freeze and transfer cubes to labeled freezer bags.

Benefits:

  • Preserved rosemary retains flavor for up to one year.
  • Excellent for roasting meats, vegetables, and making infused oils.

2. Thyme

Thyme is a versatile, low-maintenance herb with a subtle, earthy flavor that enhances soups, stews, and roasted dishes. It’s highly resilient and stores well in both dried and frozen forms.

Harvesting Tips

  • Harvest sprigs before flowering for the most intense flavor.
  • Snip young, healthy stems, leaving at least one-third of the plant intact for regrowth.

Storage Methods

Drying:

  • Tie stems together and hang upside down in a dark, ventilated area.
  • Alternatively, use a dehydrator set to low heat.
  • Strip leaves and store in airtight containers away from sunlight.

Freezing:

  • Remove leaves from stems and spread them on a baking sheet to flash-freeze.
  • Transfer frozen leaves to labeled freezer bags for later use.

Benefits:

  • Dried thyme retains potency for up to 12 months, making it perfect for winter cooking.
  • Thyme-infused oils and vinegars offer a flavorful alternative for preserved seasoning.

3. Sage

Sage is a robust, aromatic herb often associated with fall and winter dishes. Its thick leaves make it ideal for long-term storage and use in hearty meals.

Harvesting Tips

  • Harvest leaves just before the plant flowers to maximize flavor.
  • Select healthy, unblemished leaves from mature stems.
  • Avoid over-harvesting to prevent weakening the plant.

Storage Methods

Drying:

  • Bundle stems together and hang in a dark, dry place with good airflow.
  • Once leaves are crisp, strip them from stems and store in airtight jars.

Freezing:

  • Lay individual leaves flat on a baking sheet and freeze.
  • Transfer to freezer bags, separating with parchment paper to prevent clumping.

Benefits:

  • Preserved sage maintains flavor for 6–12 months.
  • Ideal for seasoning roasted vegetables, poultry, and winter soups.

4. Parsley

Parsley is a bright, leafy herb commonly used as a garnish or in sauces. While delicate, it stores well when properly preserved, making it an essential winter herb.

Harvesting Tips

  • Harvest outer stems regularly to promote new growth.
  • Choose vibrant green leaves without yellowing or damage.

Storage Methods

Freezing:

  • Chop leaves and freeze in ice cube trays with water or olive oil.
  • Flash-freezing preserves color and flavor, allowing easy use in soups and sauces.

Drying:

  • Parsley can be air-dried in small bunches, though some flavor is lost compared to freezing.
  • Use dried parsley in seasoning blends, soups, and baked dishes.

Benefits:

  • Frozen parsley retains freshness for 6–12 months.
  • Offers a convenient way to add bright flavor to winter meals when fresh parsley is unavailable.

5. Mint

Mint is a hardy, fast-growing herb with a refreshing, aromatic flavor that works well in teas, desserts, and savory dishes. Its resilient leaves make it suitable for both freezing and drying.

Harvesting Tips

  • Harvest leaves before flowering for the most concentrated flavor.
  • Snip stems regularly to encourage bushy growth and prevent legginess.

Storage Methods

Freezing:

  • Chop leaves and freeze in ice cube trays with water for use in teas or beverages.
  • Alternatively, freeze leaves flat on a tray and store in freezer bags for culinary use.

Drying:

  • Bundle stems and hang upside down in a dark, well-ventilated area.
  • Once dried, crush leaves gently and store in airtight containers.

Benefits:

  • Preserved mint retains aroma and flavor for up to 12 months.
  • Perfect for teas, garnishes, and adding a burst of freshness to winter recipes.

Additional Tips for Winter Herb Storage

  1. Label and date containers: Track the harvest and storage date for optimal use.
  2. Use airtight containers: Prevent moisture and light from degrading flavor.
  3. Store in cool, dark spaces: Avoid sunlight and heat, which reduce essential oils and potency.
  4. Check periodically: Inspect for mold or spoilage and remove affected portions immediately.
  5. Combine preservation methods: Dry some herbs for cooking and freeze others for maximum flexibility.

By following these tips, gardeners can enjoy fresh-tasting herbs year-round while maintaining nutrient content and flavor.


Benefits of Preserving Herbs Through Winter

  • Extends the growing season: Fresh flavors from the garden are available even in cold months.
  • Reduces waste: Preserving herbs prevents harvest loss and maximizes productivity.
  • Supports winter cooking: Adds essential flavor to soups, stews, teas, and baked dishes.
  • Saves money: Reduces the need to buy fresh herbs in winter.
  • Maintains nutritional value: Preserved herbs retain vitamins, minerals, and antioxidants.

Winter storage transforms herbs from a seasonal luxury into a year-round culinary resource.


Conclusion

Preserving herbs through winter is both an art and a science, requiring careful harvesting, drying, freezing, and storage. The five herbs highlighted—rosemary, thyme, sage, parsley, and mint—are particularly well-suited for long-term preservation.

Key practices include:

  1. Harvest at the right time to maximize flavor and nutrient content.
  2. Use gentle handling and proper techniques to prevent damage.
  3. Dry, freeze, or cure herbs according to their specific characteristics.
  4. Store in cool, dark, airtight containers to maintain potency.
  5. Label and monitor stored herbs to ensure quality over months.

By implementing these strategies, gardeners can enjoy fresh, flavorful, and aromatic herbs throughout winter, adding richness and nutrition to meals long after the growing season ends. Preserved herbs not only enhance cooking but also extend the joy and rewards of gardening into the colder months.

How to Water Hydrangeas During Heat Waves Without Damaging Them

How to Water Hydrangeas During Heat Waves Without Damaging Them

Hydrangeas are beloved for their lush foliage and spectacular blooms, ranging from soft pastels to vibrant shades of pink, blue, and purple. However, these popular garden shrubs are particularly sensitive to heat stress. During heat waves, improper watering can quickly lead to wilted leaves, scorched blooms, or even long-term plant damage. Understanding the science of water management, recognizing the signs of stress, and implementing expert-backed techniques ensures hydrangeas remain healthy and continue producing stunning flowers, even in extreme heat. This guide provides a comprehensive, step-by-step approach to watering hydrangeas during hot weather without harming them.


Understanding Hydrangea Water Needs

Hydrangeas are shallow-rooted plants, which makes them highly sensitive to both drought and overwatering. Proper hydration is essential for:

  1. Maintaining turgor pressure: Water keeps cells firm, preventing wilting.
  2. Supporting blooms: Adequate water ensures full, vibrant flowers.
  3. Nutrient uptake: Hydrated roots absorb essential minerals efficiently.
  4. Photosynthesis: Water is crucial for energy production and overall plant growth.

Heat waves increase evapotranspiration—the combined loss of water through leaves and soil—causing rapid dehydration. Understanding this physiological process helps gardeners time watering and adjust techniques to prevent stress.


Signs Hydrangeas Are Stressed During Heat

Recognizing early stress signals allows for timely intervention:

  • Wilting leaves: Leaves droop during the hottest part of the day.
  • Curling or scorched edges: Leaf margins turn brown or crispy.
  • Drooping blooms: Flower heads may droop or fade prematurely.
  • Slow growth: New shoots fail to develop or elongate.

Noticing these signs early can save the plant from long-term damage.


Common Watering Mistakes During Heat Waves

Even experienced gardeners can inadvertently harm hydrangeas with improper watering:

  1. Frequent shallow watering: Encourages surface roots instead of deep root growth, reducing drought tolerance.
  2. Watering during peak heat: Hot sun can cause water droplets on leaves to magnify sunlight, leading to leaf burn.
  3. Overwatering: Saturated soil can lead to root rot, especially in poorly drained areas.
  4. Ignoring soil moisture levels: Watering on a schedule without checking soil can cause either over- or under-watering.

Avoiding these mistakes is crucial for maintaining healthy, hydrated hydrangeas during heat waves.


How to Water Hydrangeas Properly in Hot Weather

1. Water Deeply and Infrequently

  • Method: Apply water slowly and deeply so it penetrates the root zone (6–12 inches deep).
  • Frequency: Typically 2–3 times per week during extreme heat, adjusting based on rainfall, soil type, and plant size.
  • Benefit: Encourages deeper root growth, improving drought resistance.

2. Water in the Early Morning or Late Evening

  • Timing: Water before sunrise or after sunset to minimize evaporation.
  • Avoid mid-day watering: Watering in direct sun can cause leaf scorching or excessive water loss.
  • Expert tip: Early morning watering allows leaves to dry quickly, reducing fungal risk.

3. Use Mulch to Retain Moisture

  • Materials: Organic mulch such as bark, straw, or shredded leaves.
  • Depth: 2–4 inches around the base, keeping mulch away from the stem crown.
  • Benefit: Mulch moderates soil temperature, reduces evaporation, and keeps roots cooler.

4. Check Soil Moisture Regularly

  • Technique: Stick a finger or a moisture meter into the soil near the root zone.
  • Guideline: Soil should be consistently moist but not waterlogged.
  • Adjustment: Increase watering frequency during extreme heat or reduce if the soil is still damp from rainfall.

5. Consider Drip Irrigation or Soaker Hoses

  • Why: Delivers water directly to roots while keeping foliage dry.
  • Advantage: Reduces water waste, prevents leaf burn, and maintains consistent soil moisture.
  • Tip: Avoid overhead sprinklers during intense heat to minimize water loss and disease risk.

Adjusting Watering Based on Hydrangea Types

Different hydrangea species have slightly varying water needs:

  1. Bigleaf (Hydrangea macrophylla): Sensitive to drought; prefers consistently moist soil.
  2. Panicle (Hydrangea paniculata): More heat-tolerant; can handle slight drying between watering.
  3. Smooth (Hydrangea arborescens): Adaptable but benefits from deep, consistent watering.
  4. Oakleaf (Hydrangea quercifolia): Tolerates heat better but still requires moisture during prolonged drought.

Understanding your hydrangea type helps tailor watering schedules for optimal health.


Supplemental Tips for Heat Wave Resilience

Shade Protection

  • Temporary shading: Use shade cloth or lightweight garden fabric during peak heat to protect leaves and blooms.
  • Natural shade: Plant near taller shrubs or trees that provide filtered sunlight.

Fertilization

  • Timing: Avoid heavy fertilization during heat waves, which can stress plants.
  • Slow-release options: Apply fertilizers in early spring or after the heat wave subsides to promote healthy growth.

Pruning and Deadheading

  • Light pruning: Remove wilted or damaged flowers to reduce plant stress.
  • Avoid heavy pruning: Excessive leaf removal during heat can reduce photosynthesis and exacerbate stress.

Long-Term Strategies for Hydrangea Health

  1. Soil improvement: Amend soil with organic matter to improve moisture retention and drainage.
  2. Mulch layers: Renew mulch annually to maintain cooling and moisture benefits.
  3. Root care: Avoid compacting soil around the root zone to allow proper water infiltration.
  4. Plant selection: Choose heat-tolerant varieties if you live in regions with frequent heat waves.
  5. Irrigation system: Consider installing a drip irrigation system with timers for consistent watering during summer months.

By combining proper watering, soil care, and heat protection strategies, hydrangeas can thrive even during extreme temperatures.


Common Mistakes to Avoid During Heat Waves

  • Ignoring water needs: Even drought-tolerant varieties require supplemental hydration during extreme heat.
  • Assuming foliage indicates hydration: Wilting may occur during the day even when roots are moist; always check soil moisture.
  • Overcompensating with water: Too much water can suffocate roots, cause rot, and reduce oxygen availability.
  • Neglecting mulching: Bare soil heats rapidly, increasing water stress and damaging root systems.

Attention to detail ensures that hydrangeas receive the precise amount of water needed without unintended harm.


Signs of Properly Watered Hydrangeas

  • Upright, firm leaves throughout the day.
  • Blooms remain vibrant and turgid.
  • New growth appears healthy and strong.
  • Soil remains moist but not soggy.

Monitoring these indicators allows gardeners to adjust care and maintain thriving plants during heat waves.


Conclusion

Watering hydrangeas during heat waves requires a balance between hydration and protection. Deep, infrequent watering, timed in the early morning or late evening, helps preserve water in the root zone while reducing leaf scorch. Mulching, drip irrigation, and proper soil management further enhance plant resilience. By understanding species-specific needs, monitoring soil moisture, and implementing heat-protective strategies, gardeners can maintain healthy, vibrant hydrangeas even under extreme conditions.

With careful attention, hydrangeas not only survive heat waves—they continue to flourish, producing lush foliage and show-stopping blooms that elevate any garden. Proper watering practices, combined with thoughtful soil care, mulching, and plant protection, ensure these beloved shrubs remain a stunning feature throughout the growing season, regardless of summer heat challenges.

How To Harvest Root Vegetables Properly

How To Harvest Root Vegetables Properly

Root vegetables are a cornerstone of home gardens, providing nutritious, versatile crops like carrots, beets, radishes, turnips, parsnips, and sweet potatoes. However, their quality, taste, and storage life depend heavily on proper harvesting techniques. Harvesting too early or too late, or using incorrect methods, can damage the vegetable, reduce yield, and shorten shelf life.

This guide provides a comprehensive approach to harvesting root vegetables properly, including timing, techniques, tools, storage, and post-harvest handling.


Understanding Root Vegetable Growth

Root vegetables develop underground, absorbing nutrients and moisture to grow firm, flavorful roots. Their growth stages influence when and how they should be harvested:

  1. Early growth: Small roots may be tender but underdeveloped. Some, like radishes, are ideal at this stage for a crisp texture.
  2. Mature roots: Fully grown roots have reached peak flavor, size, and nutrient density.
  3. Late or over-mature roots: Prolonged growth may cause woody texture, fibrousness, or splitting.

Knowing the growth stage of each vegetable is crucial for timely and proper harvesting.


Timing the Harvest

1. Carrots

  • Ready 60–80 days after sowing, depending on variety.
  • Pull when roots reach 1/2 to 1 inch in diameter for small varieties, or 1–2 inches for larger types.
  • Harvesting after frost improves flavor but may reduce texture in some climates.

2. Beets

  • Harvest small roots (1–2 inches) for tender greens and roots.
  • Larger roots (2–3 inches) provide robust storage options.
  • Avoid leaving them in soil too long to prevent toughness.

3. Radishes

  • Quick-growing; typically 25–35 days to maturity.
  • Harvest promptly when roots are 1 inch in diameter to avoid pithy texture.

4. Turnips and Rutabagas

  • Turnips: 2–3 inches in diameter, typically 50–60 days.
  • Rutabagas: 3–5 inches, longer season; store well after frost for improved sweetness.

5. Parsnips

  • Require a long growing season (120–180 days).
  • Harvest after first frost for sweeter flavor, as cold converts starches to sugar.

6. Sweet Potatoes

  • Harvest 90–120 days after planting, before frost.
  • Cure roots in a warm, humid environment for 7–10 days to enhance flavor and storage life.

Proper timing ensures maximum flavor, tenderness, and nutrient retention.


Harvesting Techniques

Proper technique prevents damage and maximizes yield:

Hand-Pulling

  • Ideal for small or loose-soil root vegetables like radishes and carrots.
  • Gently loosen soil around the root with hands before pulling straight up.
  • Avoid twisting aggressively, which may snap or bruise the root.

Using Garden Forks or Spades

  • Suitable for larger or compacted soils.
  • Loosen soil 2–3 inches away from the root to prevent cutting or bruising.
  • Lift gently, supporting the root while removing it from the soil.

Cutting Greens

  • Some root vegetables, like beets and turnips, allow cutting greens while leaving roots in soil.
  • Harvest greens early for tender salads without disturbing the root.

Specialized Tools

  • Hori-hori knife: Useful for loosening soil and lifting delicate roots.
  • Root lifter: Provides leverage for deep or heavy roots like parsnips.

Using proper techniques ensures roots remain intact, undamaged, and suitable for storage.


Post-Harvest Handling

How root vegetables are handled after harvest greatly affects quality, flavor, and storage life.

Cleaning

  • Shake off loose soil; avoid excessive washing for long-term storage.
  • Brush soil gently instead of scrubbing, as bruising encourages rot.
  • Only wash vegetables intended for immediate use.

Curing

  • Certain root crops like sweet potatoes, beets, and carrots benefit from curing.
  • Curing involves keeping roots at moderate temperature and humidity for several days to toughen skin and heal minor damage.
  • Improves storage life and flavor.

Storage

  • Carrots and parsnips: Store in sand or moist peat in a cool, dark place (32–40°F).
  • Beets and turnips: Trim tops to 1–2 inches, store in perforated bags in cool, humid conditions.
  • Sweet potatoes: Cure first, then store at 55–60°F in darkness.
  • Radishes: Best used fresh; can be stored 1–2 weeks in the refrigerator.

Proper storage preserves nutrients, prevents rot, and extends shelf life.


Signs of Overripe or Damaged Roots

Identifying roots that are no longer suitable for storage helps maintain quality:

  • Cracking or splitting: Indicates over-maturity or inconsistent watering.
  • Woody texture: Overgrown roots may become fibrous and unpleasant to eat.
  • Soft spots or rot: May result from damage during harvest or prolonged soil exposure.
  • Pest damage: Holes, tunnels, or discoloration signal insect or rodent activity.

Removing damaged roots promptly prevents contamination of stored crops.


Tips for Optimal Root Vegetable Harvest

  1. Water lightly before harvest: Moist soil is easier to work with, reducing root breakage.
  2. Harvest during cool hours: Morning or evening reduces stress and moisture loss.
  3. Handle gently: Avoid dropping or bruising roots, as damage accelerates spoilage.
  4. Label and organize: Track harvest dates and storage methods for best rotation.
  5. Harvest progressively: Pick mature roots first, leaving younger ones to grow.

Implementing these tips ensures a high-quality, extended harvest season.


Benefits of Proper Harvesting

  • Enhanced flavor: Roots harvested at peak maturity are sweeter and more tender.
  • Extended storage life: Minimizing damage prevents rot and spoilage.
  • Reduced pest and disease exposure: Prompt harvest limits time in soil where pathogens thrive.
  • Efficient garden management: Progressive harvesting frees up space for fall or winter crops.
  • Nutritional retention: Proper handling maintains vitamins, minerals, and antioxidants.

By harvesting correctly, gardeners can enjoy fresh, nutritious root vegetables long after the growing season ends.


Conclusion

Harvesting root vegetables properly is essential for maximizing yield, flavor, and storage life. By understanding growth stages, timing harvests correctly, using gentle techniques, and implementing proper post-harvest handling, gardeners can enjoy the full benefits of their labor.

Key practices include:

  1. Monitor plant maturity and harvest at peak size and flavor.
  2. Use appropriate harvesting tools and techniques to prevent root damage.
  3. Handle crops gently, minimizing bruising and breakage.
  4. Clean, cure, and store roots properly to extend shelf life.
  5. Remove damaged or overripe roots to maintain quality in storage.
  6. Progressively harvest to optimize space and crop rotation.

By following these strategies, gardeners create a productive, efficient, and sustainable root vegetable harvest, ensuring fresh, nutritious crops are available well into fall and winter. Proper harvesting not only maximizes yield but also enhances the overall gardening experience, turning labor into reward with crisp, flavorful, and long-lasting vegetables.

The Right Way to Divide Irises for Healthier Plants

The Right Way to Divide Irises for Healthier Plants

Irises are iconic garden perennials, known for their elegant, sword-like foliage and vibrant, intricate blooms. They are resilient, low-maintenance plants that bring a splash of color to gardens from late spring through early summer. However, like many perennials, irises can become overcrowded over time, leading to reduced bloom quality and increased susceptibility to disease. Dividing irises is an essential horticultural practice that rejuvenates the plants, encourages healthier growth, and ensures abundant flowering year after year. This article provides a comprehensive guide on why, when, and how to divide irises properly, along with expert tips to maintain their vitality and visual appeal.


Why Dividing Irises Matters

Over time, iris clumps naturally expand as rhizomes grow and multiply. While this is a sign of vigor, overcrowded irises face several issues:

  1. Reduced blooms: Crowded rhizomes compete for nutrients, light, and space, producing fewer and smaller flowers.
  2. Weaker plants: Overcrowding can result in thinner, weaker stems prone to bending or breakage.
  3. Disease susceptibility: Dense growth increases humidity and reduces airflow, creating an ideal environment for fungal infections such as rhizome rot.
  4. Soil depletion: Nutrient competition among rhizomes can lead to poor overall plant health.

Dividing irises addresses these challenges by spreading the plants, restoring vigor, and promoting lush, healthy growth. Gardeners who divide their irises every few years enjoy larger, more vibrant blooms and a more aesthetically pleasing garden.


When to Divide Irises

Timing is crucial for successful iris division. The general rule of thumb:

  • Late summer to early fall (6–8 weeks after bloom): This is the ideal period for dividing most iris varieties, as the plant is entering dormancy and can recover before winter.
  • Signs it’s time to divide:
    • Clumps with fewer flowers than previous years
    • Rhizomes growing in dense, crowded patterns
    • Thin or stunted foliage
    • Rhizomes showing signs of rot or decay

By dividing at the right time, gardeners minimize stress and give the plants sufficient recovery time for robust blooms the following spring.


Tools and Materials Needed

Proper tools make dividing irises safe, efficient, and effective:

  • Garden fork or spade: For lifting the clump without damaging rhizomes.
  • Sharp knife or pruning shears: For cutting rhizomes cleanly.
  • Gloves: To protect hands from sharp foliage edges.
  • Bucket of water: For rinsing soil from rhizomes.
  • Disinfectant: To clean tools and prevent disease transmission.
  • Compost or well-rotted manure: For enriching the planting site.

Using the right tools ensures clean cuts, minimizes damage to rhizomes, and reduces the risk of infection.


Step-by-Step Guide to Dividing Irises

1. Dig Up the Clump

  • Gently lift the entire iris clump with a garden fork or spade, starting several inches away from the center to avoid cutting rhizomes.
  • Lift the rhizomes carefully, keeping the roots intact.

2. Clean the Rhizomes

  • Rinse the rhizomes with water to remove excess soil.
  • Examine for any signs of rot, disease, or damage.
  • Discard any mushy or discolored rhizomes to prevent spreading infection.

3. Separate the Rhizomes

  • Identify healthy rhizomes with at least one or two “fans” of leaves and visible growth buds or “eyes.”
  • Use a sharp knife or pruning shears to cut the rhizomes apart.
  • Ensure each division has healthy roots and at least one leaf fan.

4. Trim Foliage

  • Cut foliage back to 6 inches to reduce water loss and encourage root establishment.
  • Remove any dead or damaged leaves completely.

5. Prepare the Planting Site

  • Choose a sunny location with well-draining soil, as irises are prone to rot in wet conditions.
  • Amend the soil with compost or well-rotted manure for added fertility.
  • Avoid planting rhizomes too deeply; the top should be just at or slightly above soil level.

6. Plant the Divisions

  • Place each rhizome with roots spread out horizontally.
  • Cover roots with soil while keeping the rhizome top exposed.
  • Space divisions 12–24 inches apart to allow room for growth.

7. Watering and Mulching

  • Water lightly after planting to settle the soil.
  • Avoid heavy watering, which can encourage rot.
  • Apply a light layer of mulch around the plants to retain moisture and control weeds, but keep mulch away from the rhizome crown.

Aftercare for Divided Irises

Proper care after division ensures strong recovery and healthy blooms:

  1. Watering: Provide consistent but moderate moisture until the plants establish roots.
  2. Fertilization: Apply a low-nitrogen fertilizer to encourage root growth and prevent excessive leafy growth.
  3. Sunlight: Ensure 6–8 hours of full sun daily to support vigorous flowering.
  4. Weed control: Keep the area around the iris free of weeds to reduce competition for nutrients and water.
  5. Monitor for pests and disease: Check for signs of iris borers or fungal infections and treat promptly.

Regular aftercare promotes robust plants ready for showstopping blooms next season.


Common Mistakes to Avoid

Even experienced gardeners can make mistakes when dividing irises. Avoid these pitfalls:

  1. Dividing too frequently: Irises generally need division every 3–5 years. Over-dividing can stress the plants.
  2. Planting too deep: Rhizomes buried too deeply may rot and fail to bloom.
  3. Ignoring diseased rhizomes: Planting infected rhizomes spreads disease and compromises the entire bed.
  4. Neglecting sunlight: Irises require full sun for at least 6 hours daily. Partial shade can lead to weak stems and fewer flowers.
  5. Over-fertilizing: Excess nitrogen promotes leaf growth at the expense of blooms.

Awareness of these mistakes helps ensure successful division and thriving plants.


Benefits of Dividing Irises

Dividing irises provides numerous benefits beyond simply making more plants:

  • Stronger, healthier plants: Reduces overcrowding and competition for nutrients.
  • More prolific blooms: Healthy rhizomes produce larger, more abundant flowers.
  • Disease prevention: Separating old, decaying rhizomes reduces the risk of fungal infections.
  • Aesthetic enhancement: Regular division ensures even spacing and a tidy, visually appealing garden.
  • Propagation: Division allows gardeners to increase their collection or share plants with friends and family.

By maintaining a consistent division schedule, gardeners can enjoy a vibrant, thriving iris garden year after year.


Expert Tips for Optimal Division

  1. Label divisions: Keep track of different iris varieties for organized planting and identification.
  2. Consider companion planting: Plant irises alongside perennials with similar sun and soil requirements to enhance garden aesthetics.
  3. Use disinfected tools: Prevent the spread of disease by cleaning knives and shears with rubbing alcohol or a bleach solution.
  4. Timing matters: Avoid dividing during extreme heat or cold; late summer to early fall is ideal.
  5. Observe growth patterns: Some irises benefit from dividing after 3–4 years, while vigorous varieties may need division sooner.

Following these expert tips maximizes plant health, bloom quality, and overall garden beauty.


Conclusion

Dividing irises is a vital gardening practice that ensures healthy, vibrant plants capable of producing showstopping blooms year after year. By understanding the importance of division, recognizing the signs of overcrowding, and following proper techniques, gardeners can rejuvenate their iris beds, promote robust growth, and prevent disease. From careful lifting and cleaning of rhizomes to precise planting and aftercare, each step contributes to stronger plants, abundant flowers, and a stunning garden display.

Whether for a small home garden or an extensive perennial border, dividing irises at the right time and with attention to detail guarantees a perennial paradise filled with tall, striking blooms. With careful practice, gardeners can enjoy the full glory of irises season after season, maintaining healthy, thriving plants that are the centerpiece of any garden.

How To Prepare Your Garden Beds for Late-Season Planting

How To Prepare Your Garden Beds for Late-Season Planting

As summer fades and fall approaches, many gardeners assume that their growing season is over. However, late-season planting offers a wonderful opportunity to extend your harvest, take advantage of cooler temperatures, and enjoy fresh, homegrown vegetables, herbs, and flowers well into late autumn and even early winter. The key to success lies in properly preparing your garden beds. Preparing garden beds for late-season planting ensures healthy plants, strong root systems, and maximum productivity before the first frost. This article provides a detailed guide on how to prepare your garden beds for late-season planting, including soil preparation, planting strategies, and care tips.


Why Late-Season Planting Matters

Late-season planting is not just a way to fill empty garden beds; it provides numerous benefits:

  1. Extended Harvest: Cool-weather crops and hardy plants can continue producing for weeks or even months after summer crops have finished.
  2. Optimal Growing Conditions: Cooler temperatures reduce plant stress, prevent heat-related damage, and often enhance flavor in vegetables like kale and carrots.
  3. Efficient Use of Garden Space: Late-season planting maximizes garden productivity and prevents beds from sitting idle.
  4. Reduced Pest Problems: Many pests are less active in cooler weather, reducing the risk of infestations.

Proper preparation ensures that plants have the best conditions to thrive and produce a successful late-season harvest.


Step 1: Clear and Clean Your Garden Beds

Before planting, it is crucial to remove any remnants of summer crops, weeds, and debris. This reduces disease risk and creates a clean environment for new plants.

Tips for Cleaning:

  • Remove Dead or Dying Plants: Pull out spent vegetables, herbs, or flowers. Compost healthy plant material and discard diseased plants to prevent pathogens from spreading.
  • Weed Thoroughly: Late-season weeds compete for nutrients, water, and sunlight. Remove them by hand or with a hoe, making sure to get the roots.
  • Rake and Level: After clearing, rake the soil to remove stones and create a level planting surface. This makes planting seeds or seedlings easier and promotes uniform growth.

Step 2: Improve Soil Fertility

Soil fertility is the backbone of a productive garden bed. Late-season crops require nutrient-rich soil to establish strong roots and sustain growth in cooler weather.

Steps to Improve Soil:

  • Add Organic Matter: Incorporate compost, well-rotted manure, or leaf mold into the soil. This improves structure, fertility, and moisture retention.
  • Test Soil pH: Most vegetables prefer slightly acidic to neutral soil (pH 6.0–7.0). Use a home test kit and amend soil with lime to raise pH or sulfur to lower pH if necessary.
  • Fertilize Appropriately: Use a balanced, slow-release fertilizer to supply essential nutrients without promoting excessive leafy growth that could be vulnerable to frost.

By enriching the soil, you create a fertile foundation that supports robust late-season growth.


Step 3: Loosen and Aerate the Soil

Compacted soil inhibits root growth, water infiltration, and nutrient absorption. Loosening and aerating your garden beds is critical for late-season planting success.

Methods:

  • Double Digging: For small beds, remove the top 8–12 inches of soil, loosen the subsoil, and return the topsoil.
  • Tilling or Forking: In larger beds, lightly till or use a garden fork to break up compacted soil without disturbing existing beneficial microorganisms.
  • Add Amendments: Mix in sand or perlite if your soil is heavy clay to improve drainage, or add organic matter to sandy soil to retain moisture.

Aerated soil encourages strong root systems and ensures your late-season crops can establish quickly before cold weather sets in.


Step 4: Plan for Frost Protection

Late-season planting often coincides with the approach of frost. Protecting your crops ensures they survive longer and produce a healthy harvest.

Frost Protection Strategies:

  • Row Covers: Lightweight fabric row covers trap heat and protect plants from frost without blocking sunlight.
  • Cloches and Cold Frames: Individual plants or small beds can be shielded using cloches or cold frames to extend the growing season.
  • Mulching: Apply a 2–3 inch layer of straw, shredded leaves, or compost around plants to insulate roots and moderate soil temperature.
  • Container Gardening: Growing frost-sensitive plants in pots allows you to move them indoors or to a sheltered location when temperatures drop.

Step 5: Choose the Right Crops for Late-Season Planting

Not all plants thrive in cooler temperatures, so select crops suited for late-season growth. Some excellent options include:

  • Leafy Greens: Kale, spinach, arugula, and lettuce grow quickly in cooler weather and are often sweeter after frost.
  • Root Vegetables: Carrots, radishes, and beets develop excellent flavor and store well in cold soil.
  • Cabbage Family: Broccoli, cauliflower, and Brussels sprouts are cold-hardy and productive in fall gardens.
  • Herbs: Parsley, cilantro, chives, and thyme tolerate cool weather and provide fresh flavors for winter cooking.

Selecting the right crops maximizes your garden’s productivity and ensures a successful late-season harvest.


Step 6: Plan Your Planting Layout

A well-organized garden layout enhances plant growth and simplifies maintenance. Consider these tips:

  • Succession Planting: Stagger sowing dates to ensure continuous harvest throughout fall.
  • Companion Planting: Pair compatible crops to improve growth and deter pests. For example, plant chives near carrots to repel insects.
  • Crop Rotation: Avoid planting the same plant family in the same bed repeatedly to prevent soil-borne diseases and nutrient depletion.

A thoughtful layout helps crops mature evenly and reduces problems caused by overcrowding or nutrient competition.


Step 7: Watering and Care

Even in cooler weather, consistent watering is essential for late-season crops.

Watering Tips:

  • Maintain Moisture: Keep soil evenly moist but not waterlogged.
  • Water Early: Water in the morning to allow foliage to dry before nightfall, reducing disease risk.
  • Mulch for Moisture Retention: Mulching helps reduce evaporation and insulates soil from temperature fluctuations.

Additional Care:

  • Monitor Pests: While cooler weather reduces most pests, slugs and aphids can still be problematic. Use organic methods like neem oil, diatomaceous earth, or handpicking.
  • Prune and Harvest: Regularly harvest leaves, roots, and other edible parts to encourage continued growth and prevent overcrowding.

Step 8: Extend the Season with Protective Measures

Late-season gardening can be extended further with simple techniques:

  • Hoop Houses or Tunnels: Cover beds with hoop structures to trap warmth and shield crops from frost.
  • Cloches and Cold Frames: Mini greenhouses for individual plants protect tender crops.
  • Bring Containers Indoors: Move sensitive potted plants inside or into a greenhouse during freezing nights.

These strategies allow you to enjoy fresh produce well into late fall and early winter.


Conclusion

Preparing your garden beds for late-season planting is essential to ensure a productive harvest despite cooler temperatures and shorter days. By clearing and cleaning beds, improving soil fertility, loosening the soil, planning for frost protection, selecting suitable crops, and organizing your planting layout, you create optimal conditions for growth. Proper watering, pest management, and seasonal protective measures further enhance your garden’s success.

Late-season gardening allows you to maximize garden space, extend the harvest, and enjoy fresh, flavorful vegetables and herbs when many other crops have finished producing. With thoughtful preparation and attention to detail, your garden can thrive even as temperatures drop, providing healthy, homegrown produce well into late fall and early winter.

Preparing garden beds for late-season planting is not just about extending the growing season—it’s about creating a resilient, productive, and beautiful garden that continues to nourish and delight throughout the colder months.

How to Overwinter Dahlias for Showstopping Blooms Next Year

How to Overwinter Dahlias for Showstopping Blooms Next Year

Dahlias are renowned for their vibrant colors, intricate blooms, and long-lasting presence in summer and fall gardens. From small pompons to giant dinner-plate varieties, dahlias bring dramatic flair to landscapes and containers alike. While they thrive in warm seasons, gardeners in temperate and colder climates face a common challenge: dahlias are tender perennials that cannot survive harsh winters outdoors. Proper overwintering is essential to protect their tubers, preserve plant vitality, and ensure showstopping blooms the following year. This guide offers a detailed, expert-backed approach to overwintering dahlias, covering preparation, storage, and spring revival.


Understanding Dahlia Dormancy

Dahlias naturally enter dormancy as temperatures drop in late autumn. During this stage:

  • Foliage and stems die back.
  • The plant stores nutrients in its tubers underground.
  • Growth halts until warmer conditions trigger sprouting in spring.

Recognizing dormancy is key to successful overwintering. Attempting to store or dig tubers too early or too late can lead to rot, disease, or loss of next season’s blooms.


Why Overwintering Dahlias Matters

Overwintering is not just about survival—it’s about ensuring vigor, bloom quality, and disease-free plants. Proper overwintering:

  1. Protects tubers from freezing: Dahlias are frost-sensitive, and exposure to subzero temperatures can kill tubers.
  2. Preserves genetic varieties: Overwintered tubers allow gardeners to maintain favorite cultivars year after year.
  3. Supports strong flowering: Healthy, properly stored tubers produce robust stems, lush foliage, and abundant blooms in the next season.
  4. Reduces pest and disease risk: Tubers stored in optimal conditions are less likely to succumb to fungal infections or pests.

Without careful winter care, gardeners risk losing their plants or facing reduced flower quality the following season.


Preparing Dahlias for Winter

Preparation begins after the first frost or once the plant shows signs of dormancy. Follow these steps:

1. Cutting Back Foliage

  • Cut back stems to about 4–6 inches above the soil surface after the first frost.
  • Remove any diseased or damaged foliage to prevent fungal infections during storage.

Tip: Leave some green if mild frost occurs, but do not wait too long, or stems will decay and affect tuber health.

2. Digging Up Tubers

  • Carefully dig around the base of the plant with a garden fork or spade.
  • Lift tubers gently to avoid bruising or cutting them.
  • Shake off excess soil without washing, as moisture increases the risk of rot.

Expert advice: For tender varieties, dig tubers before the first hard frost. Hardier types can remain in the ground if protected with sufficient mulch.


Cleaning and Inspecting Tubers

Proper cleaning and inspection ensure tubers remain healthy throughout storage:

  1. Remove soil clumps: Gently brush off soil without scrubbing.
  2. Separate damaged tubers: Discard any shriveled, mushy, or diseased tubers.
  3. Divide large clumps: Many dahlia tubers grow in clusters; separate them carefully to avoid damaging “eyes” (growth points).

Healthy, undamaged tubers are critical for strong flowering next season.


Selecting the Right Storage Conditions

Dahlia tubers need a controlled environment to survive winter:

Temperature

  • Ideal storage: 40–50°F (4–10°C).
  • Avoid freezing temperatures, which kill tubers, and overly warm conditions, which may trigger premature sprouting.

Humidity

  • Maintain slightly humid conditions (70–80%) to prevent shriveling.
  • Avoid damp, wet conditions that can encourage rot or fungal infections.

Darkness and Ventilation

  • Store tubers in a dark area to prevent sprouting.
  • Ensure good air circulation to prevent mold growth.

Storage options:

  • Unheated basement or garage
  • Root cellar
  • Insulated boxes with peat moss, vermiculite, or sawdust

Preparing Tubers for Storage

  1. Layering: Place tubers in a box or crate, separating each with shredded newspaper, peat moss, or vermiculite.
  2. Labeling: Label each variety to track cultivars and maintain garden organization.
  3. Checking periodically: Inspect tubers every 4–6 weeks for signs of rot, mold, or shriveling. Remove affected tubers immediately.

Proper storage preparation significantly increases survival rates and ensures vigorous growth in spring.


Alternative In-Ground Overwintering

For gardeners with mild climates (zones 8–10), in-ground overwintering may be possible:

  • Mulching: Apply 6–12 inches of straw, leaves, or compost over the root zone.
  • Protective covers: Use frost cloths or garden blankets during extreme cold spells.
  • Monitoring: Check for signs of frost damage or wet conditions that can promote rot.

Even in mild climates, lifting and storing tubers indoors ensures maximum safety and plant health.


Spring Revival: Preparing Tubers for Planting

Once the danger of frost has passed, it’s time to wake up your tubers for the growing season:

  1. Inspect tubers: Remove any that show rot or mold.
  2. Optional pre-sprouting: Place tubers in shallow trays with slightly moist peat or vermiculite to encourage early sprouting.
  3. Planting: Plant in well-draining soil with full sun exposure, 6–8 inches deep, spaced 18–24 inches apart.
  4. Watering: Water lightly after planting and gradually increase as shoots emerge.

Pre-sprouting can lead to earlier flowering and stronger plants in the first season.


Tips for Showstopping Blooms

  • Soil preparation: Use rich, well-draining soil with organic matter to support root development and strong stems.
  • Fertilization: Apply balanced fertilizer (N-P-K 10-10-10) at planting, switching to a high-phosphorus fertilizer during flowering.
  • Staking: Tall varieties often need stakes or cages to prevent stem breakage.
  • Deadheading: Remove spent flowers to encourage continuous bloom production.
  • Watering: Provide consistent moisture, avoiding wetting foliage to prevent fungal disease.

Following these tips ensures tubers that survived winter become healthy, vigorous plants producing abundant, eye-catching flowers.


Common Mistakes to Avoid

  1. Storing tubers while wet: Moisture encourages rot and fungal growth.
  2. Allowing tubers to freeze: Even brief exposure to subzero temperatures can destroy tubers.
  3. Ignoring signs of disease: Moldy or shriveled tubers can infect others if not removed promptly.
  4. Overcrowding: Tubers packed too tightly may not receive enough air circulation, leading to decay.
  5. Premature planting: Planting too early in cold soil can stunt growth and reduce bloom quality.

Awareness of these mistakes improves overwintering success and ensures beautiful blooms in the next season.


Conclusion

Overwintering dahlias is a critical step for gardeners seeking showstopping blooms year after year. By understanding dahlia dormancy, carefully digging and cleaning tubers, and storing them under optimal conditions, you preserve plant vitality and maximize flowering potential. Whether storing tubers indoors or protecting them with mulch in mild climates, proper overwintering ensures strong stems, lush foliage, and vibrant flowers in the following season.

Spring revival is equally important: inspect tubers, pre-sprout if desired, plant in nutrient-rich soil, and provide proper care throughout the growing season. Combined with staking, fertilization, and deadheading, these practices turn overwintered tubers into spectacular, long-lasting garden displays.

Ultimately, overwintering dahlias is not just about survival—it’s about creating a foundation for exceptional blooms that captivate the eye and elevate any garden. With careful attention, gardeners can enjoy vibrant, showstopping dahlias year after year, transforming their outdoor spaces into colorful, flourishing paradises.