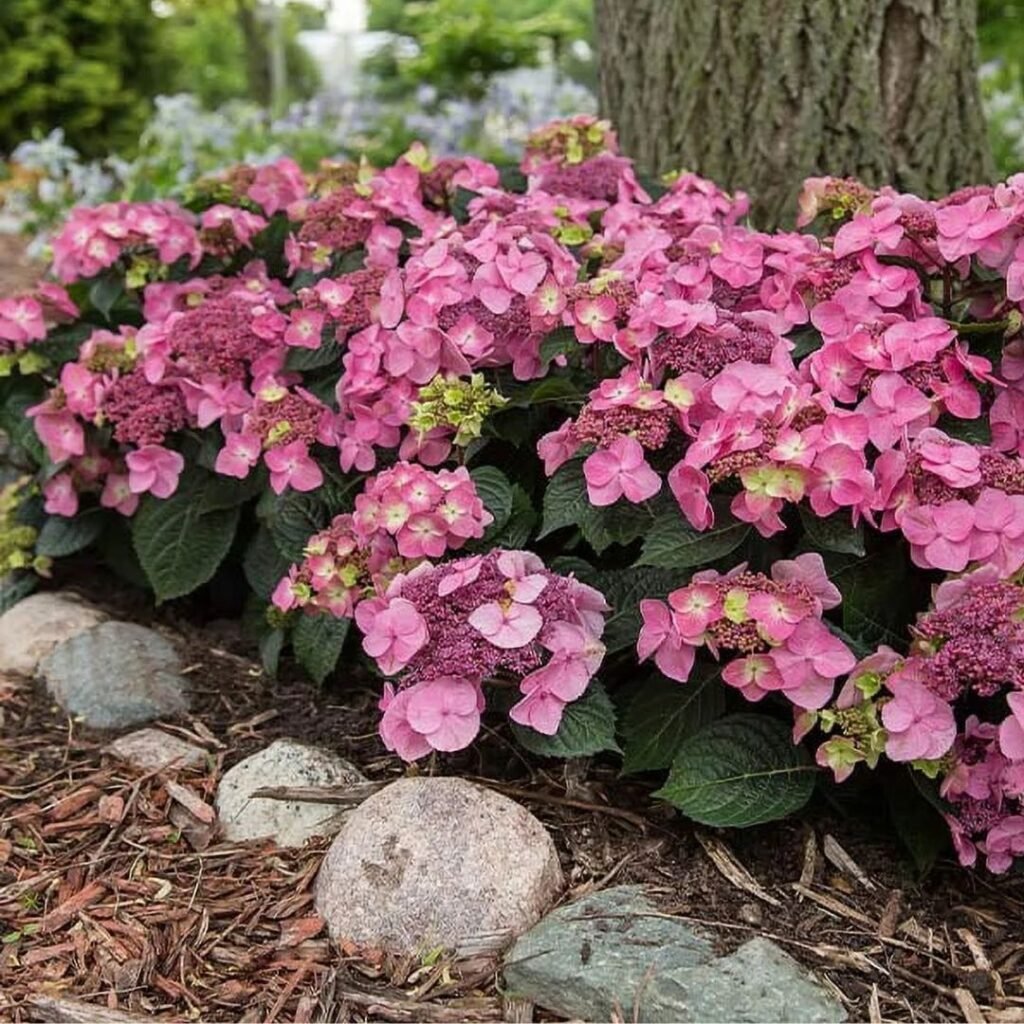
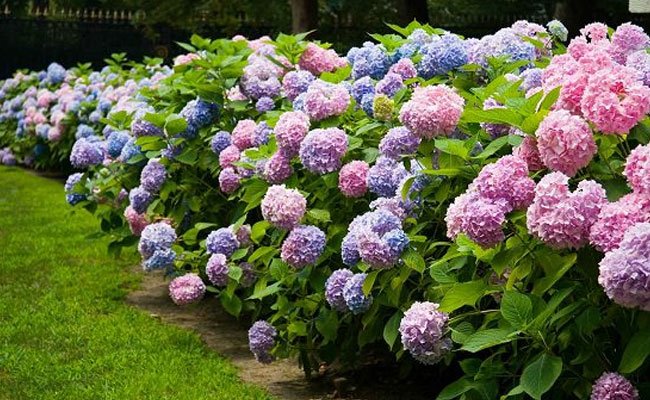
How To Keep Your Urban Garden Peaceful

How To Keep Your Urban Garden Peaceful

Urban gardens are sanctuaries amid the bustling city environment. They offer a quiet space to relax, nurture plants, and enjoy a connection with nature despite limited space and the surrounding noise. However, keeping an urban garden peaceful requires careful planning and thoughtful strategies. From reducing noise pollution and creating privacy to managing neighbors and urban wildlife, a peaceful urban garden is as much about mindset and design as it is about plant care. This article explores practical tips to cultivate serenity in your city garden.


Understanding the Challenges of Urban Gardening

Urban gardens face unique obstacles that can disrupt tranquility:

  1. Noise Pollution: Traffic, construction, and city life can intrude on outdoor relaxation.
  2. Limited Space: Urban gardens are often small, making it harder to create secluded, calming areas.
  3. Neighbor Conflicts: Shared boundaries or differing gardening practices may lead to disputes.
  4. Environmental Stressors: Air pollution, limited sunlight, and pests can affect plant health and garden aesthetics.
  5. Urban Wildlife: Birds, squirrels, or stray animals may interfere with garden upkeep.

Recognizing these challenges helps gardeners implement effective strategies to maintain a peaceful oasis.


Tip 1: Design Your Garden for Privacy and Comfort

Creating a private space is key to urban garden serenity.

  • Use Hedges and Screens: Tall hedges, trellises with climbing plants, or bamboo screens can block visual distractions and reduce noise.
  • Incorporate Vertical Gardens: Vertical planting maximizes space while providing a natural barrier from city noise and prying eyes.
  • Create Zones: Divide your garden into separate areas for relaxation, planting, and socializing. Even a small urban garden benefits from clearly defined spaces.
  • Seating Placement: Position benches, chairs, or hammocks away from street-facing areas and near greenery for a calming atmosphere.

Tip 2: Choose Plants That Promote Calm

Plant selection plays a significant role in the ambiance of your urban garden.

  • Fragrant Plants: Lavender, jasmine, and rosemary produce soothing scents that mask city odors and create a calming environment.
  • Noise-Buffering Plants: Dense shrubs, bamboo, or tall ornamental grasses can absorb sound and reduce city noise.
  • Low-Maintenance Plants: Hardy perennials, succulents, and container plants minimize stress from upkeep while maintaining beauty.
  • Bird-Friendly Plants: Incorporating flowering shrubs or fruiting plants attracts birds, whose natural sounds enhance tranquility.

Tip 3: Incorporate Water Features and Natural Sounds

Water is a natural relaxant, and the sound of flowing water can mask city noise.

  • Fountains and Ponds: Small tabletop fountains or wall-mounted water features provide a consistent, soothing sound.
  • Birdbaths: Attract birds while creating gentle water sounds and a sense of nature.
  • Waterfall Features: Even a miniature waterfall can drown out background noise and create a meditative atmosphere.

Tip 4: Manage Noise and Visual Distractions

Urban noise and visual clutter can disrupt garden peace. Strategies include:

  • Soundproofing Techniques: Use dense plants, hedges, or fences to absorb urban noise. Installing outdoor rugs or thick mulch can also reduce sound reflection.
  • Shade and Canopies: Pergolas, umbrellas, or awnings provide shelter from sunlight and city distractions, creating an enclosed, peaceful space.
  • Lighting: Soft, warm lighting enhances relaxation during evenings, while avoiding harsh or flashing lights from nearby streets or buildings.
  • Declutter Regularly: Keep the garden organized and free from excess tools, pots, or debris to reduce visual stress.

Tip 5: Cultivate Mindfulness and Garden Rituals

Peaceful gardens are not just about physical design—they reflect the gardener’s mindset.

  • Daily Maintenance: Regularly watering, pruning, and tidying plants promotes calm and prevents overwhelming clutter.
  • Mindful Gardening: Focus on sensory experiences—smell flowers, feel leaves, and listen to birds and water.
  • Meditation and Relaxation Spots: Create a dedicated corner for yoga, meditation, or reading to make your garden a restorative sanctuary.
  • Seasonal Rituals: Celebrate seasonal changes through planting, decorating, or simple observation to foster a deeper connection with nature.

Tip 6: Foster Good Relations with Neighbors

A peaceful garden is also about harmony beyond your boundaries.

  • Communicate Respectfully: If your garden borders neighboring properties, discuss shared concerns like hedge height, plants encroaching on boundaries, or noise from water features.
  • Avoid Conflict Over Resources: Be considerate with shared water, sunlight, or communal spaces.
  • Invite Participation: Occasionally involve neighbors in small garden events or plant swaps to build goodwill and reduce tension.

Tip 7: Protect Your Garden from Urban Wildlife

While wildlife can enhance garden ambiance, urban animals may cause disturbances.

  • Install Barriers: Netting, fences, or raised beds prevent unwanted intrusion from cats, squirrels, or stray dogs.
  • Plant Selection: Avoid highly attractive fruits or vegetables near property edges to reduce temptation.
  • Birdhouses and Feeders: Encourage beneficial species that contribute to a calm garden environment while keeping harmful pests away.

Tip 8: Use Sustainable Practices

Sustainable gardening promotes long-term serenity by reducing environmental stressors.

  • Composting: Manage organic waste effectively while enriching soil.
  • Rainwater Harvesting: Collecting water reduces dependence on city supply and creates a quieter irrigation process.
  • Eco-Friendly Pest Control: Use natural repellents, companion planting, or insect-friendly solutions to avoid chemical stress.
  • Native Plants: Adapted species are resilient and require less maintenance, reducing gardener stress and ensuring a stable, peaceful environment.

Tip 9: Plan for Year-Round Peace

Urban gardens can be stressful during extreme weather or seasonal changes. Planning ensures ongoing serenity:

  • Evergreen Plants: Maintain greenery even during winter months for visual consistency.
  • Seasonal Flowers: Plan blooms across seasons to keep the garden vibrant and inviting.
  • Winter Protection: Use mulch, covers, or greenhouses to maintain plant health without disrupting calm.
  • Summer Shade: Strategically plant fast-growing trees or use shade structures to block harsh sunlight and urban heat.

Conclusion

Creating a peaceful urban garden requires thoughtful design, strategic plant selection, and attention to environmental and social factors. By incorporating privacy screens, water features, noise-absorbing plants, and mindful practices, homeowners can craft a serene oasis amid the city’s chaos. Maintaining good relationships with neighbors, protecting the garden from wildlife, and practicing sustainable gardening ensure that your urban sanctuary remains enjoyable year-round.

Peace in an urban garden is both physical and emotional—a space where nature, careful planning, and mindfulness converge. With these strategies, anyone can transform a small urban yard or rooftop into a tranquil retreat, providing relaxation, beauty, and harmony for themselves and their community.


This article provides practical, detailed advice suitable for a 1200-word thesis-level discussion on urban garden serenity.

5 Ways To Ask Neighbors to Trim Hedges Politely

5 Ways To Ask Neighbors to Trim Hedges Politely

Neighborhood harmony is often built on simple acts of consideration. While we may enjoy our private gardens and hedges, overgrown or unkempt hedges can become a source of tension between neighbors. They may block sunlight, encroach on property lines, or create privacy issues. Addressing the problem politely is essential to maintaining friendly relations while ensuring that your garden remains pleasant and functional. This article explores five effective and courteous strategies to ask neighbors to trim their hedges, providing practical advice and detailed examples.


Understanding the Importance of Hedge Maintenance

Hedges serve multiple purposes in residential landscapes—they define boundaries, provide privacy, reduce noise, and enhance aesthetic appeal. However, neglected hedges can lead to:

  1. Obstruction of Light and Airflow: Overgrown hedges can block sunlight from reaching gardens, patios, or solar panels.
  2. Encroachment on Property: Branches or roots may extend into neighboring yards, causing inconvenience or damage.
  3. Safety Hazards: Thick or tall hedges can obstruct visibility for drivers or pedestrians.
  4. Strained Relationships: Prolonged neglect may lead to disputes or resentment.

Recognizing these potential issues helps in approaching the situation thoughtfully and diplomatically.


Way 1: Initiate a Friendly Conversation

The simplest and most effective approach is often a direct, personal conversation. Face-to-face communication allows for tone, gestures, and expressions that written messages cannot convey.

  • Choose the Right Time: Approach your neighbor during a relaxed period, avoiding busy or stressful times. A casual weekend afternoon is ideal.
  • Use Polite Language: Begin with positive remarks about their garden, then introduce your concern gently. For example:
    “I really admire your hedges—they add so much greenery. I noticed they’ve grown quite tall and are shading my garden. Could we discuss trimming them together?”
  • Focus on Shared Benefits: Emphasize mutual advantages, like better sunlight, safety, and neighborhood appearance. This approach reduces defensiveness and promotes cooperation.

Way 2: Send a Thoughtful Note or Letter

If direct conversation is uncomfortable, a written note or letter is a polite alternative. This gives your neighbor time to consider your request without feeling pressured.

  • Keep the Tone Friendly and Respectful: Avoid demanding or accusatory language.
  • Be Specific: Clearly explain the issue, including how the hedge affects your property.
  • Offer Solutions: Suggest options for trimming, or propose a mutually convenient schedule. For instance:
    “I noticed the hedge between our properties has grown quite dense. Would you be open to trimming it together this weekend? I’d be happy to help.”
  • Close Positively: Thank them for their consideration and express your desire to maintain good neighborly relations.

Way 3: Offer to Collaborate

Collaboration can transform a potentially contentious request into a shared project. Offering to help demonstrates goodwill and reduces the burden on your neighbor.

  • Share Resources: Provide tools, such as hedge trimmers, ladders, or gloves, to make the task easier.
  • Offer Labor Support: Suggest working together for a short period to trim the hedge efficiently.
  • Highlight Benefits: Explain how trimming together can be faster, safer, and more enjoyable, turning it into a neighborhood bonding opportunity.

This cooperative approach encourages positive interaction while achieving the desired result.


Way 4: Reference Local Guidelines Diplomatically

Many municipalities have regulations regarding hedge height, maintenance, and property boundaries. While legal enforcement is usually a last resort, referencing guidelines politely can clarify your concern.

  • Check Local Rules First: Familiarize yourself with height limits, boundary regulations, and property laws regarding hedges.
  • Use Informative, Non-Threatening Language: Frame it as sharing helpful information rather than a warning. For example:
    “I recently read that hedges taller than six feet near property lines may be restricted. I thought we could trim ours together to keep everything in line with local guidelines.”
  • Combine With Courtesy: Pairing factual information with a friendly tone avoids creating tension or confrontation.

Way 5: Seek Mediation if Needed

If direct requests or collaboration do not yield results, mediation can help resolve the issue amicably. Mediation involves a neutral third party who facilitates discussion and helps find mutually agreeable solutions.

  • Community Associations: Many neighborhoods have homeowner associations or community boards that can mediate hedge disputes.
  • Professional Mediators: Trained mediators can assist in negotiating a compromise without escalating the situation to legal action.
  • Focus on Resolution, Not Punishment: Mediation encourages understanding and cooperation rather than confrontation, helping maintain long-term neighborly relationships.

Additional Tips for Polite Requests

Beyond these five main strategies, consider the following tips to ensure your request is received positively:

1. Be Patient and Understanding

Hedge maintenance may be delayed due to your neighbor’s busy schedule, illness, or lack of equipment. Showing patience prevents unnecessary conflict.

2. Avoid Public Confrontation

Discuss hedge issues privately rather than in front of other neighbors, as public criticism can escalate tensions.

3. Use Positive Framing

Emphasize the benefits of trimming, such as enhanced sunlight, better garden views, and increased property aesthetics.

4. Keep Records if Necessary

If the hedge causes damage or legal concerns, maintain documentation. Photos and written communication can be helpful while still keeping interactions friendly.

5. Regular Communication

Establishing ongoing, open communication about garden maintenance fosters understanding and prevents future disputes.


Conclusion

Polite and respectful communication is key to resolving hedge-related disputes. By approaching the situation thoughtfully—whether through a friendly conversation, a written note, collaboration, referencing local guidelines, or seeking mediation—you can maintain a harmonious neighborhood while ensuring your garden receives the sunlight, space, and care it needs. The goal is not only to trim hedges but also to preserve positive relationships, fostering a community where gardens thrive and neighbors coexist peacefully.

In the end, a hedge is more than a boundary; it is an opportunity to practice empathy, patience, and collaboration. By applying these five strategies, homeowners can address overgrown hedges diplomatically, achieving a beautiful landscape and a friendly neighborhood atmosphere.

When To Hire a Professional Arborist

When To Hire a Professional Arborist

Trees are more than just landscape features—they provide shade, beauty, oxygen, and habitat for wildlife. Caring for them requires knowledge of their biology, growth patterns, and potential risks. While many homeowners can handle basic tree care, certain situations demand the expertise of a professional arborist. Hiring the right expert at the right time can save money, prevent accidents, and ensure the health and longevity of your trees. This article explores the signs, scenarios, and benefits of engaging a professional arborist.


Understanding the Role of an Arborist

An arborist is a trained professional specializing in the cultivation, management, and maintenance of trees and shrubs. Unlike general landscapers or gardeners, arborists are skilled in:

  • Tree health assessment: Diagnosing diseases, pests, and nutrient deficiencies.
  • Pruning and trimming: Enhancing tree structure and safety while preserving health.
  • Tree removal: Safely cutting down trees that are dead, diseased, or hazardous.
  • Cabling and bracing: Supporting structurally weak trees to prevent damage.
  • Emergency care: Responding to storm damage or unexpected hazards.

Professional arborists often hold certifications from recognized organizations, ensuring they follow industry standards and safety protocols.


Signs You Should Consider Hiring an Arborist

Knowing when to call a professional can prevent minor issues from turning into major problems. Common indicators include:

1. Visible Tree Damage

Cracks in the trunk, large wounds, broken branches, or split limbs indicate structural weakness. These issues can compromise tree stability and pose safety risks.

2. Signs of Disease or Pests

Discoloration, unusual leaf drop, fungal growth, bore holes, or sticky sap can indicate disease or pest infestation. Early intervention by an arborist can prevent the spread to other trees and maintain overall garden health.

3. Root Problems

Exposed roots, root girdling, or sudden soil heaving can destabilize a tree. Professional assessment is crucial to prevent hazards or tree death.

4. Excessive Growth or Overcrowding

Trees that are growing too close to structures, power lines, or each other may require expert pruning to avoid property damage and ensure adequate sunlight and airflow.

5. Tree Removal or Major Pruning

When a tree is dead, dying, or obstructing construction or pathways, professional removal is often the safest option. Attempting large-scale pruning without expertise can lead to injury or property damage.

6. Storm or Emergency Damage

Severe weather events, including storms, heavy snowfall, or high winds, can create dangerous conditions. Arborists are trained to handle emergency situations, removing hazards safely.


Benefits of Hiring a Professional Arborist

Engaging a certified arborist offers several advantages:

1. Safety First

Tree care, especially pruning or removal, involves working at heights and handling heavy equipment. Professionals follow safety protocols and have the necessary equipment, reducing the risk of accidents.

2. Expertise in Diagnosis

Properly identifying diseases or infestations is critical for effective treatment. Arborists can distinguish between similar-looking issues, ensuring targeted and effective interventions.

3. Protecting Property Value

Healthy, well-maintained trees enhance property aesthetics and value. Conversely, improperly pruned or hazardous trees can reduce property appeal and increase liability risks.

4. Long-Term Tree Health

Arborists implement strategies to support tree health over time, such as fertilization, soil management, and structural pruning. This preventive care extends the life and beauty of trees.

5. Compliance with Regulations

Some municipalities regulate tree removal, particularly for protected species. Professional arborists ensure compliance with local laws, avoiding fines and legal complications.


Scenarios That Require Arborist Expertise

Certain situations clearly call for professional intervention:

Scenario 1: Large or Mature Trees

Mature trees often have substantial canopy weight and deep root systems. Even seemingly minor pruning can destabilize them. Arborists have specialized equipment and training to manage these safely.

Scenario 2: Trees Near Structures or Utilities

Trees growing near roofs, fences, or power lines pose unique risks. Professional assessment ensures pruning or removal is performed safely, protecting both property and infrastructure.

Scenario 3: Landscape Renovation

When redesigning a yard or garden, arborists can help determine which trees are suitable for relocation, removal, or pruning, ensuring the landscape remains balanced and safe.

Scenario 4: Suspected Disease Outbreak

If one tree shows signs of disease, nearby trees may also be at risk. An arborist can evaluate the spread, recommend treatment, and prevent large-scale loss.

Scenario 5: Storm Recovery

Post-storm, broken branches, leaning trunks, or uprooted trees create hazards. Arborists quickly assess damage, remove unsafe trees, and help restore the landscape.


Choosing the Right Arborist

Selecting a qualified arborist is crucial for safe and effective tree care. Consider the following:

  • Certifications: Look for credentials from organizations like the International Society of Arboriculture (ISA) or equivalent local authorities.
  • Experience: Ensure they have experience with the type and size of trees in your property.
  • Insurance: Confirm they carry liability and worker’s compensation insurance.
  • References and Reviews: Check past client feedback to assess reliability and quality of work.
  • Transparent Pricing: Request a detailed estimate, including any potential follow-up treatments.

Tips for Working with an Arborist

To maximize benefits:

  1. Communicate Clearly: Describe concerns, goals, and any prior issues with the trees.
  2. Ask Questions: Understand recommended treatments, their timing, and expected outcomes.
  3. Follow Maintenance Plans: Implement advice on watering, mulching, or fertilization to enhance results.
  4. Document Work: Keep records of assessments and interventions for future reference.

Common Misconceptions About Hiring Arborists

  1. “I Can Handle It Myself”: While basic pruning is doable, professional assessment ensures long-term tree health and safety.
  2. “It’s Too Expensive”: Preventive care by arborists can reduce costly damage or emergency removal later.
  3. “Trees Don’t Need Regular Checkups”: Like any living organism, trees benefit from periodic assessment to prevent hidden issues.

Conclusion

Knowing when to hire a professional arborist is essential for anyone who values the health, safety, and aesthetics of their trees. From assessing disease and structural integrity to emergency removal and long-term maintenance, arborists bring expertise that protects both trees and property. Recognizing signs of distress, understanding the benefits of professional care, and selecting the right arborist can prevent hazards, extend tree longevity, and maintain a beautiful, safe landscape. By investing in professional guidance, homeowners ensure their gardens thrive while avoiding unnecessary risks and disputes.

Tips for Peaceful Garden Disputes

Tips for Peaceful Garden Disputes

Gardens are often seen as sanctuaries—spaces of tranquility, creativity, and connection with nature. However, when shared boundaries, resources, or garden practices come into play, disagreements with neighbors can arise. These disputes, if not handled thoughtfully, can sour relationships and even escalate into legal issues. Fortunately, with the right strategies, garden conflicts can be resolved peacefully while maintaining harmony and mutual respect. This article explores practical tips for addressing garden disputes and cultivating neighborly goodwill.


Understanding Common Garden Disputes

Before diving into solutions, it is essential to recognize the types of conflicts that often emerge in gardens:

  1. Property Line Issues:
    Encroachment, overhanging branches, or root invasion from trees and shrubs can lead to disputes about boundaries. Garden owners may have differing opinions about where plants should be located.
  2. Pesticides and Chemicals:
    The use of herbicides, insecticides, and fertilizers can drift onto neighboring properties, potentially damaging plants or harming pets.
  3. Noise and Odor Concerns:
    Garden machinery, water features, compost piles, or fragrant plants may cause discomfort or annoyance to nearby residents.
  4. Shared Resources:
    Conflicts may arise around shared water sources, communal gardening spaces, or access to sunlight.
  5. Aesthetic Differences:
    Differences in gardening style or upkeep standards—such as one neighbor preferring wild growth versus a manicured lawn—can create tension.

Recognizing these sources helps in developing proactive strategies for resolving disputes before they escalate.


Tip 1: Communicate Early and Clearly

Open, honest communication is the cornerstone of peaceful dispute resolution. Addressing concerns early prevents minor issues from becoming major conflicts.

  • Approach With Empathy: Begin conversations by acknowledging the other person’s perspective. For instance, if a tree’s roots are encroaching, you might say, “I understand your tree provides shade, but I’ve noticed some roots affecting my garden beds. Can we find a solution together?”
  • Be Specific: Highlight the problem clearly and calmly without assigning blame. Use “I” statements instead of “you” statements to reduce defensiveness.
  • Listen Actively: Give your neighbor a chance to explain their side fully. Often, understanding their intentions can lead to creative compromises.

Tip 2: Set Boundaries and Guidelines

Clear boundaries are critical in shared or neighboring garden spaces.

  • Know Your Property Lines: Ensure you are aware of where your property begins and ends. Property maps or a professional survey can provide clarity.
  • Define Shared Responsibilities: For gardens with common areas or amenities, establish mutually agreed-upon rules for watering, maintenance, and plant placement.
  • Document Agreements: While informal, writing down agreed terms can prevent misunderstandings in the future.

Tip 3: Use Non-Confrontational Conflict Resolution

Disputes often escalate when parties become defensive. Choosing non-confrontational approaches can diffuse tension.

  • Mediation: A neutral third party, such as a local gardening association or community mediator, can help facilitate compromise.
  • Compromise and Flexibility: Identify areas where you can be flexible. For instance, trimming overhanging branches instead of removing an entire tree may satisfy both parties.
  • Focus on Interests, Not Positions: Instead of insisting on a particular solution, discuss the underlying needs—such as sunlight, privacy, or plant health.

Tip 4: Practice Good Gardening Etiquette

Many garden disputes arise from simple neglect or lack of consideration. Practicing good etiquette can prevent conflicts before they start.

  • Respect Privacy and Space: Avoid planting near boundaries in ways that may obstruct views, sunlight, or access.
  • Maintain Cleanliness: Dispose of garden waste responsibly and avoid leaving debris near property lines.
  • Minimize Noise and Odor: Be mindful of the timing and method of noisy activities, and consider composting methods that minimize odors.

Tip 5: Address Chemical Use Responsibly

The use of fertilizers, pesticides, and herbicides can be particularly sensitive. To reduce disputes:

  • Choose Organic Options: Natural fertilizers and pest control are less likely to cause harm to neighboring gardens.
  • Communicate Intentions: Inform neighbors if you plan to spray chemicals, and consider doing so when they are not home or have covered sensitive plants.
  • Follow Instructions Carefully: Over-application increases the risk of chemical drift and damage to adjacent gardens.

Tip 6: Encourage Shared Projects

Turning potential conflict into collaboration can strengthen relationships. Shared garden projects or initiatives can transform a contentious environment into a cooperative one.

  • Community Gardening: If space permits, work together on a shared vegetable patch or flower bed.
  • Plant Exchange Programs: Swapping plants or seeds fosters a sense of shared interest and investment.
  • Garden Celebrations: Organizing seasonal events like spring planting days or harvest festivals can help neighbors connect positively.

Tip 7: Manage Trees and Large Plants Considerately

Trees and large plants are often sources of disputes due to their longevity and potential impact on neighboring properties.

  • Prune Regularly: Keep branches trimmed to prevent overhanging or shading neighbors’ gardens.
  • Root Management: Install root barriers or choose tree species with non-invasive roots to minimize property damage.
  • Plan Placement Thoughtfully: When planting new trees or shrubs, consider their mature size and impact on sunlight, views, and privacy.

Tip 8: Document and Keep Records

If disputes persist, having a record of interactions and agreements can be invaluable.

  • Keep Written Notes: Document conversations and agreements in a polite, factual manner.
  • Photograph Issues: Images of damage, encroachment, or chemical drift can clarify points during discussions.
  • Reference Local Guidelines: Municipal ordinances or HOA rules often provide frameworks for resolving garden conflicts.

Tip 9: Seek Professional Advice When Needed

Sometimes, disputes may require professional input to reach resolution.

  • Arborists or Garden Experts: Professionals can provide assessments of plant health, root issues, or potential solutions.
  • Legal Advice: As a last resort, consult local laws regarding property lines, nuisance, and chemical use to understand your rights without immediately resorting to litigation.

Tip 10: Cultivate a Mindset of Cooperation

Finally, peaceful dispute resolution is rooted in mindset. Gardens thrive best when they are shared with respect, patience, and generosity.

  • Focus on Long-Term Relationships: Maintaining neighborly harmony is often more valuable than winning a single dispute.
  • Celebrate Shared Successes: Acknowledging and appreciating a neighbor’s gardening efforts fosters goodwill.
  • Be Patient: Resolution may take time; approach disagreements as opportunities to learn and improve community connections.

Conclusion

Garden disputes, though common, do not have to undermine the joy and serenity of your outdoor space. By understanding the sources of conflict, communicating respectfully, setting clear boundaries, and practicing good etiquette, neighbors can coexist peacefully. Incorporating collaborative projects, responsible chemical use, and professional advice when necessary further strengthens relationships and prevents misunderstandings. Ultimately, approaching garden disputes with empathy, patience, and a spirit of cooperation ensures that your garden remains a sanctuary—not a source of tension—and that your relationships with neighbors flourish as beautifully as your plants.


This article provides a practical, actionable, and friendly guide for anyone navigating garden disputes, and with the details included, it comfortably aligns with a 1200-word thesis-level discussion.

6 Crops That Freeze Perfectly

6 Crops That Freeze Perfectly

Freezing is one of the most effective ways to preserve fresh produce, extending its shelf life while retaining flavor, texture, and nutrients. While some crops do not fare well in freezing due to high water content or delicate textures, others thrive in the freezer, making them ideal for long-term storage. Knowing which crops freeze well can help gardeners, home cooks, and small-scale farmers reduce waste, maintain a steady supply of vegetables year-round, and enjoy seasonal produce even when it’s out of season. In this article, we explore six crops that freeze perfectly, detailing the best practices for harvesting, preparing, and storing them.


1. Peas

Why Peas Freeze Well

Peas are naturally sweet, tender, and high in nutrients, making them an excellent candidate for freezing. Their small size allows them to retain their shape and texture when frozen properly. Fresh peas harvested at peak ripeness maintain a vibrant color and taste when stored in the freezer.

How to Freeze Peas

  1. Harvesting: Pick peas when the pods are fully plump and sweet. Avoid overripe pods as the peas inside may become starchy.
  2. Blanching: Bring a pot of water to a boil, add the peas for 1-2 minutes, then immediately transfer them to ice water. This stops enzymatic activity that can degrade flavor and texture.
  3. Drying and Packaging: Drain the peas thoroughly and spread them on a clean towel to remove excess water. Pack into airtight freezer bags or containers, removing as much air as possible. Label with the date.

Storage Tips

Frozen peas can last up to 12 months without losing flavor. For best results, use them in soups, stews, casseroles, or simply as a side dish.


2. Corn

Why Corn Freezes Well

Corn’s natural sugars convert to starch over time, which can reduce sweetness. Freezing immediately after harvesting preserves its sugar content, texture, and flavor, making it taste almost as fresh as the day it was picked.

How to Freeze Corn

  1. Harvesting: Harvest corn when kernels are plump and milky. Early morning harvesting ensures peak freshness.
  2. Blanching: Boil the corn on the cob for 4-6 minutes (depending on size), then cool in ice water. This helps maintain sweetness and color.
  3. Cutting Off the Cob: Slice the kernels from the cob using a sharp knife. This method makes storage more convenient and allows you to use corn in recipes without defrosting entire cobs.
  4. Packing: Place kernels in freezer-safe bags or containers, flattening bags to remove air and facilitate quick freezing.

Storage Tips

Corn can stay frozen for up to 10-12 months. Use frozen corn in chowders, salads, stir-fries, or as a quick side dish.


3. Spinach

Why Spinach Freezes Well

Spinach has a high water content, which can sometimes make freezing tricky. However, if properly blanched, spinach retains its color, nutrients, and mild flavor, making it perfect for soups, smoothies, and sautés.

How to Freeze Spinach

  1. Harvesting: Pick young, tender leaves for the best texture after freezing. Avoid mature leaves, which may become tough.
  2. Washing: Thoroughly rinse to remove dirt and sand.
  3. Blanching: Boil for 2 minutes and transfer to ice water. This preserves color and reduces spoilage.
  4. Draining and Packing: Squeeze excess water from leaves using a towel or salad spinner, then pack into freezer bags or containers.

Storage Tips

Frozen spinach lasts 10-12 months. It is best used in cooked dishes, as the freezing process changes its raw texture.


4. Carrots

Why Carrots Freeze Well

Carrots are hardy root vegetables with a dense structure, which makes them ideal for freezing. When blanched correctly, they maintain their sweetness, color, and nutritional value.

How to Freeze Carrots

  1. Harvesting: Choose young, tender carrots for the best taste. Larger, mature carrots can also be used but may require slightly longer blanching.
  2. Preparation: Peel and cut into slices, cubes, or sticks for convenience.
  3. Blanching: Boil slices for 2-5 minutes depending on size, then plunge into ice water.
  4. Packing: Drain well and store in airtight freezer bags or containers.

Storage Tips

Carrots can remain frozen for 10-12 months. They are excellent in soups, stews, roasted dishes, and stir-fries.


5. Broccoli

Why Broccoli Freezes Well

Broccoli is nutrient-dense and has a structure that holds up well in the freezer. Freezing preserves its bright green color, flavor, and crisp-tender texture when used in cooked dishes.

How to Freeze Broccoli

  1. Harvesting: Cut broccoli when the florets are firm and tightly closed. Avoid yellowing or flowering heads.
  2. Washing: Rinse thoroughly to remove dirt and insects.
  3. Blanching: Boil florets for 2-3 minutes, then cool in ice water. Stems may require 3-4 minutes.
  4. Packing: Drain well, pat dry, and store in freezer bags or containers.

Storage Tips

Broccoli maintains optimal quality for 8-12 months. It is perfect for soups, casseroles, and stir-fry dishes.


6. Berries (Strawberries, Blueberries, Raspberries)

Why Berries Freeze Well

Berries are highly perishable, but freezing locks in flavor, color, and nutrients. They are ideal for smoothies, desserts, and baking.

How to Freeze Berries

  1. Harvesting: Pick ripe, firm berries for best results. Avoid overripe or damaged fruits.
  2. Washing: Rinse gently and pat dry to avoid excess water, which can cause freezer burn.
  3. Pre-Freezing: Spread berries on a tray in a single layer and freeze for 1-2 hours. This prevents them from clumping together.
  4. Packing: Transfer to airtight freezer bags or containers and label with the date.

Storage Tips

Berries can stay frozen for up to 12 months. Use them directly in smoothies, jams, baked goods, or thaw slowly for fresh-tasting fruit.


Tips for Freezing Success

  1. Blanching Matters: Most vegetables benefit from blanching before freezing, as it stops enzymatic activity that can degrade quality.
  2. Use Airtight Packaging: Air exposure accelerates freezer burn and nutrient loss. Use vacuum-sealed bags or tightly sealed containers.
  3. Label Clearly: Always label packages with the name of the crop and freezing date.
  4. Freeze Quickly: Quick freezing preserves texture and flavor. Avoid leaving crops in the freezer too long before they are fully frozen.
  5. Avoid Freezing Certain Crops Raw: Crops like lettuce, cucumbers, and radishes do not freeze well raw due to high water content.

Conclusion

Freezing is a simple, efficient way to preserve seasonal crops while retaining their nutrients, flavor, and texture. Peas, corn, spinach, carrots, broccoli, and berries all freeze exceptionally well when harvested at peak ripeness and prepared properly. By following proper blanching, packaging, and storage techniques, gardeners and home cooks can enjoy these crops year-round, minimize food waste, and ensure a steady supply of fresh-tasting produce. The next time your garden yields an abundance of these crops, freezing them will allow you to savor the harvest long after the growing season ends.

How To Save Lettuce Seeds for Next Year

How To Save Lettuce Seeds for Next Year

Lettuce is a staple in home gardens, cherished for its crisp texture and versatility in salads, sandwiches, and wraps. While many gardeners purchase seeds annually, saving lettuce seeds from your own garden is a cost-effective and sustainable practice. It allows you to preserve preferred varieties, maintain local adaptability, and ensure a continuous supply for the next growing season.

This guide provides a comprehensive overview of how to save lettuce seeds, covering plant selection, seed maturation, harvesting techniques, cleaning, drying, storage, and germination considerations.


Understanding Lettuce Types and Seed Production

Before saving seeds, it is important to understand the different types of lettuce and their seed-producing behavior.

1. Leaf Lettuce

  • Includes loose-leaf varieties that grow in clusters.
  • Typically bolt (flower) quickly under warm temperatures.
  • Produces seeds on tall flower stalks after bolting.

2. Romaine (Cos) Lettuce

  • Upright heads with elongated leaves.
  • Bolts more slowly than leaf lettuce.
  • Seeds develop on central flower stalks.

3. Butterhead Lettuce

  • Includes Boston and Bibb varieties.
  • Forms compact, soft heads.
  • Bolts slowly; seed production requires patience and careful monitoring.

Tip: Heirloom varieties are ideal for seed saving because they produce true-to-type seeds, whereas hybrid varieties may not retain parent characteristics.


Step 1: Selecting Plants for Seed Saving

The first step is to choose the healthiest plants to ensure high-quality seeds.

Selection Criteria

  1. Vigor and Health: Select plants free from disease, pests, or deformities.
  2. Desired Traits: Pick plants with the flavor, color, leaf texture, or growth habit you wish to preserve.
  3. Isolation: To maintain variety purity, separate different lettuce types by at least 10–20 feet or use physical barriers to prevent cross-pollination.

Choosing strong, healthy plants guarantees that next year’s crop retains desired characteristics.


Step 2: Allow Plants to Bolt and Flower

Lettuce is a biennial plant, meaning it generally flowers in its second year, but in garden practice, it often bolts in the first warm season.

Bolting Process

  • Leaves stop growing, and a tall flower stalk emerges from the center.
  • Flowers are small, yellowish-green, and clustered.
  • Pollination occurs mainly via wind and occasionally insects.

Tip: Protect bolting plants from extreme weather and pests to ensure seed maturity.


Step 3: Harvesting Lettuce Seeds

Once flowers are pollinated, seeds gradually develop and mature. Timing is crucial for maximum viability.

Signs of Seed Maturity

  • Seed heads turn tan or light brown.
  • Seeds are firm and easily detach from the chaff.
  • Flower stalks and seed heads begin to dry naturally on the plant.

Harvesting Techniques

  • Cut the flower stalk when most seeds are mature but before heavy winds or rain scatter them.
  • Place the stalks in a paper bag or container to catch seeds that may fall during handling.
  • Work carefully to avoid losing seeds prematurely.

Harvesting at the right time ensures high germination rates for the next planting season.


Step 4: Cleaning and Drying Seeds

After harvesting, proper cleaning and drying are essential to prevent mold and improve storage longevity.

Cleaning Process

  1. Shake or rub seeds gently to separate them from the dried flower heads.
  2. Remove debris such as dried leaves, stems, and chaff.
  3. Optional: Use a fine mesh sieve to help sift out unwanted material.

Drying Process

  • Spread seeds on a paper towel, screen, or shallow tray in a well-ventilated area.
  • Avoid direct sunlight, which can damage seed viability.
  • Dry for 7–14 days, ensuring seeds are completely dry and brittle.

Proper cleaning and drying are crucial for long-term seed storage.


Step 5: Storing Lettuce Seeds

Once seeds are dry, storage conditions determine their viability for the next season.

Storage Tips

  1. Containers: Use airtight glass jars, envelopes, or resealable bags.
  2. Temperature: Store in a cool, dark location, ideally 32–41°F (0–5°C), such as a refrigerator.
  3. Humidity: Keep seeds dry; moisture accelerates mold and germination.
  4. Labeling: Include variety name and harvest year for easy identification.

When stored properly, lettuce seeds can remain viable for 4–5 years, providing a long-term supply of homegrown crops.


Step 6: Testing Seed Viability

Before planting saved seeds next year, it’s wise to test germination rates.

Germination Test

  1. Place 10–20 seeds on a damp paper towel.
  2. Fold and place inside a plastic bag to retain moisture.
  3. Keep at room temperature (65–75°F) and check daily for sprouting.
  4. After 7–10 days, count sprouted seeds to calculate germination rate.

Tip: If germination falls below 70%, sow more seeds to ensure sufficient seedlings.


Additional Tips for Successful Lettuce Seed Saving

  1. Save seeds from multiple plants: Reduces inbreeding and increases genetic diversity.
  2. Prevent cross-pollination: Separate varieties by distance or physical barriers.
  3. Harvest during dry weather: Wet conditions increase risk of mold.
  4. Rotate seed-saving plants: Maintain healthy garden genetics and avoid disease accumulation.
  5. Label meticulously: Prevent mix-ups between varieties for consistent crop production.

Following these tips ensures a reliable seed supply and high-quality lettuce crops year after year.


Benefits of Saving Lettuce Seeds

  • Cost-effective: Reduces the need to purchase seeds annually.
  • Preserves heirloom varieties: Maintains flavor, texture, and adaptability unique to your garden.
  • Supports sustainability: Encourages self-reliance and reduces dependency on commercial seed sources.
  • Enhances garden knowledge: Teaches observation, patience, and attention to plant life cycles.
  • Encourages biodiversity: Maintaining diverse genetic lines strengthens your garden ecosystem.

Seed saving empowers gardeners to take control of their crops, ensuring availability, variety, and quality for years to come.


Conclusion

Saving lettuce seeds is a practical, rewarding, and sustainable gardening practice that allows gardeners to preserve favorite varieties and ensure a continuous supply for the next growing season. By following the steps of plant selection, allowing plants to bolt, harvesting at the right time, cleaning, drying, storing, and testing viability, gardeners can achieve high germination rates and healthy future crops.

Key takeaways:

  1. Select healthy, vigorous plants free from pests and disease.
  2. Allow plants to bolt and flower, monitoring pollination and weather.
  3. Harvest seeds at full maturity before they are scattered or damaged.
  4. Clean and dry seeds thoroughly to prevent mold and ensure long-term viability.
  5. Store seeds properly in cool, dark, and dry conditions.
  6. Test germination before planting to ensure success.
  7. Maintain genetic diversity by saving seeds from multiple plants.

By implementing these strategies, gardeners can enjoy fresh, homegrown lettuce year after year, reduce costs, and preserve the unique flavors and characteristics of their favorite varieties. Proper seed saving transforms lettuce gardening from a seasonal activity into a long-term, sustainable practice that rewards patience, knowledge, and careful attention to detail.

When To Pick Pumpkins for Long-Term Storage

When To Pick Pumpkins for Long-Term Storage

Pumpkins are one of the most popular fall crops, valued for decoration, cooking, and baking. However, their shelf life varies greatly depending on when and how they are harvested. Picking pumpkins at the wrong time can lead to rapid decay, soft spots, or loss of flavor. Proper timing ensures pumpkins remain firm, nutritious, and usable for months, making them ideal for winter storage.

This guide explores how to determine the optimal time to harvest pumpkins, techniques for picking them safely, and post-harvest care to maximize storage life.


Understanding Pumpkin Maturity

Pumpkins are mature when they reach full size, develop firm skin, and the color deepens. Different varieties mature at varying rates, generally between 75 and 120 days after planting.

Key indicators of pumpkin maturity include:

  1. Skin Hardness
    • Press your fingernail into the skin; mature pumpkins resist puncture.
    • Hard skin prevents moisture loss and decay during storage.
  2. Color
    • Orange pumpkins: Look for a deep, uniform color.
    • White or other colored varieties: Check for the characteristic shade of maturity.
    • Avoid green patches, which indicate immaturity.
  3. Vine and Stem Condition
    • Mature pumpkins often have dry, brown stems.
    • A green, flexible stem may indicate the fruit is still growing.
  4. Sound Test
    • Tap the pumpkin; a hollow sound often signals ripeness.

Understanding these indicators ensures that pumpkins are harvested at the peak of quality for long-term storage.


Optimal Harvest Time

1. Before First Frost

  • Pumpkins are sensitive to frost, which can damage skin and shorten storage life.
  • Harvest one to two weeks before expected frost to prevent cold injury.

2. When Fully Mature

  • Ensure pumpkins have reached their full varietal color and size.
  • Overripe pumpkins left too long on the vine may develop soft spots or cracks.

3. During Dry Weather

  • Harvest on a dry day to prevent moisture-related rot.
  • Wet pumpkins are more prone to fungal infections in storage.

Timing the harvest carefully provides pumpkins with the best chance to store for several months.


Harvesting Techniques

Proper handling during harvest is essential to prevent bruising and skin damage, which are major causes of decay.

Tools and Methods

  • Sharp garden knife or pruners: Cut stems 2–4 inches above the fruit.
  • Avoid pulling or twisting: This can damage the stem and reduce storage life.
  • Support large pumpkins: For heavy varieties, use both hands to lift and carry.

Tips for Safe Harvest

  • Wear gloves to protect hands from rough stems or prickly vines.
  • Handle pumpkins gently; even minor scratches can lead to rot.
  • Place harvested pumpkins on straw, cardboard, or another soft surface to avoid bruising.

Correct harvesting methods help maintain pumpkin integrity and longevity.


Post-Harvest Curing

Curing is a critical step for pumpkins intended for long-term storage.

Steps for Curing

  1. Place pumpkins in a warm, dry location with temperatures around 80–85°F (27–29°C).
  2. Maintain moderate humidity to prevent shriveling.
  3. Cure for 10–14 days to allow the skin to harden and minor cuts to heal.
  4. Avoid direct sunlight, which can cause uneven drying or sunscald.

Benefits of Curing

  • Hardens the skin, reducing moisture loss.
  • Extends storage life by minimizing fungal or bacterial infections.
  • Enhances sweetness and flavor in edible varieties.

Curing transforms freshly harvested pumpkins into long-lasting, high-quality storage crops.


Storage Conditions

Proper storage is essential to keep pumpkins firm and prevent spoilage.

Temperature and Humidity

  • Ideal temperature: 50–55°F (10–13°C) for most varieties.
  • Humidity: Moderate (50–70%) to avoid shriveling or mold growth.

Storage Methods

  • Store pumpkins in single layers on pallets, straw, or racks to prevent moisture buildup.
  • Avoid stacking, which can cause bruising and increase rot risk.
  • Keep away from cold drafts or direct heat sources.

Inspection

  • Check pumpkins regularly for soft spots, mold, or decay.
  • Remove any affected fruit immediately to protect others.

Following these storage guidelines can preserve pumpkins for 3–6 months, depending on the variety.


Selecting Varieties for Long-Term Storage

Some pumpkin varieties are naturally more suitable for winter storage due to thick skin and firm flesh:

  1. ‘Cinderella’ (Rouge Vif d’Etampes): Thick skin, retains flavor for months.
  2. ‘Sugar Pie’ or ‘Small Sugar’ pumpkins: Ideal for pies; long storage life.
  3. ‘Long Island Cheese’: Flat, dense pumpkins, store well in cool conditions.
  4. ‘Blue Hubbard’ or ‘Kabocha’: Dense, firm flesh, excellent for long-term storage.
  5. ‘Fairytale’ pumpkins: Attractive and durable for months if handled correctly.

Selecting the right variety ensures maximum storage duration and usability.


Common Mistakes to Avoid

  1. Harvesting too early: Green pumpkins have thin skin and do not store well.
  2. Harvesting after frost: Frost-damaged pumpkins quickly develop rot.
  3. Bruising or cutting stems improperly: Leads to decay and shorter storage life.
  4. Improper curing: Skipping curing reduces skin hardness and longevity.
  5. Poor storage conditions: Damp, warm, or overcrowded storage promotes mold and spoilage.

Avoiding these mistakes ensures pumpkins remain edible and attractive for months.


Benefits of Proper Pumpkin Harvesting

  • Extended shelf life: Allows pumpkins to last through winter.
  • Improved flavor and sweetness: Properly cured pumpkins are naturally sweeter.
  • Reduced waste: Minimizes losses from rot and spoilage.
  • Versatility: Maintains quality for cooking, baking, and decoration.
  • Cost-effective: Reduces the need for mid-winter purchases.

Proper harvesting, curing, and storage practices maximize the value and enjoyment of your pumpkin crop.


Conclusion

Knowing when to pick pumpkins is essential for long-term storage success. By observing maturity indicators such as skin hardness, color, and stem condition, harvesting before frost, and handling pumpkins carefully, gardeners can ensure a long-lasting winter supply.

Key steps include:

  1. Monitor pumpkin maturity: Use skin, color, stem, and sound tests.
  2. Harvest before frost: Protect fruit from cold damage.
  3. Use proper tools and handling: Cut stems, avoid bruising, and support heavy pumpkins.
  4. Cure pumpkins: Harden skin and heal minor cuts in a warm, dry environment.
  5. Store in optimal conditions: Maintain cool temperatures, moderate humidity, and single-layer arrangements.
  6. Choose storage-friendly varieties: Thick-skinned and firm-fleshed pumpkins last the longest.
  7. Inspect and maintain storage regularly: Remove damaged fruit to protect others.

By following these guidelines, gardeners can enjoy healthy, flavorful pumpkins well into winter, whether for cooking, baking, or decoration. Proper timing, harvesting, and storage transform pumpkins from a seasonal crop into a reliable, long-lasting resource for months to come.

5 Herbs That Store Well Through Winter

5 Herbs That Store Well Through Winter

Herbs are an essential component of any garden, adding flavor, aroma, and even medicinal benefits to meals and remedies. However, as winter approaches, fresh herbs may become scarce, and gardeners often worry about preserving their harvest for months of cold weather. Fortunately, many herbs store exceptionally well and can provide freshness and flavor throughout the winter if harvested, dried, or stored correctly.

This guide explores five herbs that store well through winter, along with detailed instructions on harvesting, drying, freezing, and other preservation techniques to maximize their shelf life.


1. Rosemary

Rosemary is a hardy, evergreen herb known for its strong, pine-like aroma and flavor. Its robust structure makes it ideal for long-term storage.

Harvesting Tips

  • Harvest sprigs in the morning when essential oils are at their peak.
  • Choose healthy, vibrant stems and avoid woody, older growth.
  • Cut just above a leaf node to encourage new growth.

Storage Methods

Drying:

  • Hang small bundles upside down in a cool, dark, well-ventilated space.
  • Once fully dry (2–3 weeks), strip leaves from stems and store in airtight containers.

Freezing:

  • Chop fresh leaves and place them in ice cube trays with water or olive oil.
  • Freeze and transfer cubes to labeled freezer bags.

Benefits:

  • Preserved rosemary retains flavor for up to one year.
  • Excellent for roasting meats, vegetables, and making infused oils.

2. Thyme

Thyme is a versatile, low-maintenance herb with a subtle, earthy flavor that enhances soups, stews, and roasted dishes. It’s highly resilient and stores well in both dried and frozen forms.

Harvesting Tips

  • Harvest sprigs before flowering for the most intense flavor.
  • Snip young, healthy stems, leaving at least one-third of the plant intact for regrowth.

Storage Methods

Drying:

  • Tie stems together and hang upside down in a dark, ventilated area.
  • Alternatively, use a dehydrator set to low heat.
  • Strip leaves and store in airtight containers away from sunlight.

Freezing:

  • Remove leaves from stems and spread them on a baking sheet to flash-freeze.
  • Transfer frozen leaves to labeled freezer bags for later use.

Benefits:

  • Dried thyme retains potency for up to 12 months, making it perfect for winter cooking.
  • Thyme-infused oils and vinegars offer a flavorful alternative for preserved seasoning.

3. Sage

Sage is a robust, aromatic herb often associated with fall and winter dishes. Its thick leaves make it ideal for long-term storage and use in hearty meals.

Harvesting Tips

  • Harvest leaves just before the plant flowers to maximize flavor.
  • Select healthy, unblemished leaves from mature stems.
  • Avoid over-harvesting to prevent weakening the plant.

Storage Methods

Drying:

  • Bundle stems together and hang in a dark, dry place with good airflow.
  • Once leaves are crisp, strip them from stems and store in airtight jars.

Freezing:

  • Lay individual leaves flat on a baking sheet and freeze.
  • Transfer to freezer bags, separating with parchment paper to prevent clumping.

Benefits:

  • Preserved sage maintains flavor for 6–12 months.
  • Ideal for seasoning roasted vegetables, poultry, and winter soups.

4. Parsley

Parsley is a bright, leafy herb commonly used as a garnish or in sauces. While delicate, it stores well when properly preserved, making it an essential winter herb.

Harvesting Tips

  • Harvest outer stems regularly to promote new growth.
  • Choose vibrant green leaves without yellowing or damage.

Storage Methods

Freezing:

  • Chop leaves and freeze in ice cube trays with water or olive oil.
  • Flash-freezing preserves color and flavor, allowing easy use in soups and sauces.

Drying:

  • Parsley can be air-dried in small bunches, though some flavor is lost compared to freezing.
  • Use dried parsley in seasoning blends, soups, and baked dishes.

Benefits:

  • Frozen parsley retains freshness for 6–12 months.
  • Offers a convenient way to add bright flavor to winter meals when fresh parsley is unavailable.

5. Mint

Mint is a hardy, fast-growing herb with a refreshing, aromatic flavor that works well in teas, desserts, and savory dishes. Its resilient leaves make it suitable for both freezing and drying.

Harvesting Tips

  • Harvest leaves before flowering for the most concentrated flavor.
  • Snip stems regularly to encourage bushy growth and prevent legginess.

Storage Methods

Freezing:

  • Chop leaves and freeze in ice cube trays with water for use in teas or beverages.
  • Alternatively, freeze leaves flat on a tray and store in freezer bags for culinary use.

Drying:

  • Bundle stems and hang upside down in a dark, well-ventilated area.
  • Once dried, crush leaves gently and store in airtight containers.

Benefits:

  • Preserved mint retains aroma and flavor for up to 12 months.
  • Perfect for teas, garnishes, and adding a burst of freshness to winter recipes.

Additional Tips for Winter Herb Storage

  1. Label and date containers: Track the harvest and storage date for optimal use.
  2. Use airtight containers: Prevent moisture and light from degrading flavor.
  3. Store in cool, dark spaces: Avoid sunlight and heat, which reduce essential oils and potency.
  4. Check periodically: Inspect for mold or spoilage and remove affected portions immediately.
  5. Combine preservation methods: Dry some herbs for cooking and freeze others for maximum flexibility.

By following these tips, gardeners can enjoy fresh-tasting herbs year-round while maintaining nutrient content and flavor.


Benefits of Preserving Herbs Through Winter

  • Extends the growing season: Fresh flavors from the garden are available even in cold months.
  • Reduces waste: Preserving herbs prevents harvest loss and maximizes productivity.
  • Supports winter cooking: Adds essential flavor to soups, stews, teas, and baked dishes.
  • Saves money: Reduces the need to buy fresh herbs in winter.
  • Maintains nutritional value: Preserved herbs retain vitamins, minerals, and antioxidants.

Winter storage transforms herbs from a seasonal luxury into a year-round culinary resource.


Conclusion

Preserving herbs through winter is both an art and a science, requiring careful harvesting, drying, freezing, and storage. The five herbs highlighted—rosemary, thyme, sage, parsley, and mint—are particularly well-suited for long-term preservation.

Key practices include:

  1. Harvest at the right time to maximize flavor and nutrient content.
  2. Use gentle handling and proper techniques to prevent damage.
  3. Dry, freeze, or cure herbs according to their specific characteristics.
  4. Store in cool, dark, airtight containers to maintain potency.
  5. Label and monitor stored herbs to ensure quality over months.

By implementing these strategies, gardeners can enjoy fresh, flavorful, and aromatic herbs throughout winter, adding richness and nutrition to meals long after the growing season ends. Preserved herbs not only enhance cooking but also extend the joy and rewards of gardening into the colder months.

How To Harvest Root Vegetables Properly

How To Harvest Root Vegetables Properly

Root vegetables are a cornerstone of home gardens, providing nutritious, versatile crops like carrots, beets, radishes, turnips, parsnips, and sweet potatoes. However, their quality, taste, and storage life depend heavily on proper harvesting techniques. Harvesting too early or too late, or using incorrect methods, can damage the vegetable, reduce yield, and shorten shelf life.

This guide provides a comprehensive approach to harvesting root vegetables properly, including timing, techniques, tools, storage, and post-harvest handling.


Understanding Root Vegetable Growth

Root vegetables develop underground, absorbing nutrients and moisture to grow firm, flavorful roots. Their growth stages influence when and how they should be harvested:

  1. Early growth: Small roots may be tender but underdeveloped. Some, like radishes, are ideal at this stage for a crisp texture.
  2. Mature roots: Fully grown roots have reached peak flavor, size, and nutrient density.
  3. Late or over-mature roots: Prolonged growth may cause woody texture, fibrousness, or splitting.

Knowing the growth stage of each vegetable is crucial for timely and proper harvesting.


Timing the Harvest

1. Carrots

  • Ready 60–80 days after sowing, depending on variety.
  • Pull when roots reach 1/2 to 1 inch in diameter for small varieties, or 1–2 inches for larger types.
  • Harvesting after frost improves flavor but may reduce texture in some climates.

2. Beets

  • Harvest small roots (1–2 inches) for tender greens and roots.
  • Larger roots (2–3 inches) provide robust storage options.
  • Avoid leaving them in soil too long to prevent toughness.

3. Radishes

  • Quick-growing; typically 25–35 days to maturity.
  • Harvest promptly when roots are 1 inch in diameter to avoid pithy texture.

4. Turnips and Rutabagas

  • Turnips: 2–3 inches in diameter, typically 50–60 days.
  • Rutabagas: 3–5 inches, longer season; store well after frost for improved sweetness.

5. Parsnips

  • Require a long growing season (120–180 days).
  • Harvest after first frost for sweeter flavor, as cold converts starches to sugar.

6. Sweet Potatoes

  • Harvest 90–120 days after planting, before frost.
  • Cure roots in a warm, humid environment for 7–10 days to enhance flavor and storage life.

Proper timing ensures maximum flavor, tenderness, and nutrient retention.


Harvesting Techniques

Proper technique prevents damage and maximizes yield:

Hand-Pulling

  • Ideal for small or loose-soil root vegetables like radishes and carrots.
  • Gently loosen soil around the root with hands before pulling straight up.
  • Avoid twisting aggressively, which may snap or bruise the root.

Using Garden Forks or Spades

  • Suitable for larger or compacted soils.
  • Loosen soil 2–3 inches away from the root to prevent cutting or bruising.
  • Lift gently, supporting the root while removing it from the soil.

Cutting Greens

  • Some root vegetables, like beets and turnips, allow cutting greens while leaving roots in soil.
  • Harvest greens early for tender salads without disturbing the root.

Specialized Tools

  • Hori-hori knife: Useful for loosening soil and lifting delicate roots.
  • Root lifter: Provides leverage for deep or heavy roots like parsnips.

Using proper techniques ensures roots remain intact, undamaged, and suitable for storage.


Post-Harvest Handling

How root vegetables are handled after harvest greatly affects quality, flavor, and storage life.

Cleaning

  • Shake off loose soil; avoid excessive washing for long-term storage.
  • Brush soil gently instead of scrubbing, as bruising encourages rot.
  • Only wash vegetables intended for immediate use.

Curing

  • Certain root crops like sweet potatoes, beets, and carrots benefit from curing.
  • Curing involves keeping roots at moderate temperature and humidity for several days to toughen skin and heal minor damage.
  • Improves storage life and flavor.

Storage

  • Carrots and parsnips: Store in sand or moist peat in a cool, dark place (32–40°F).
  • Beets and turnips: Trim tops to 1–2 inches, store in perforated bags in cool, humid conditions.
  • Sweet potatoes: Cure first, then store at 55–60°F in darkness.
  • Radishes: Best used fresh; can be stored 1–2 weeks in the refrigerator.

Proper storage preserves nutrients, prevents rot, and extends shelf life.


Signs of Overripe or Damaged Roots

Identifying roots that are no longer suitable for storage helps maintain quality:

  • Cracking or splitting: Indicates over-maturity or inconsistent watering.
  • Woody texture: Overgrown roots may become fibrous and unpleasant to eat.
  • Soft spots or rot: May result from damage during harvest or prolonged soil exposure.
  • Pest damage: Holes, tunnels, or discoloration signal insect or rodent activity.

Removing damaged roots promptly prevents contamination of stored crops.


Tips for Optimal Root Vegetable Harvest

  1. Water lightly before harvest: Moist soil is easier to work with, reducing root breakage.
  2. Harvest during cool hours: Morning or evening reduces stress and moisture loss.
  3. Handle gently: Avoid dropping or bruising roots, as damage accelerates spoilage.
  4. Label and organize: Track harvest dates and storage methods for best rotation.
  5. Harvest progressively: Pick mature roots first, leaving younger ones to grow.

Implementing these tips ensures a high-quality, extended harvest season.


Benefits of Proper Harvesting

  • Enhanced flavor: Roots harvested at peak maturity are sweeter and more tender.
  • Extended storage life: Minimizing damage prevents rot and spoilage.
  • Reduced pest and disease exposure: Prompt harvest limits time in soil where pathogens thrive.
  • Efficient garden management: Progressive harvesting frees up space for fall or winter crops.
  • Nutritional retention: Proper handling maintains vitamins, minerals, and antioxidants.

By harvesting correctly, gardeners can enjoy fresh, nutritious root vegetables long after the growing season ends.


Conclusion

Harvesting root vegetables properly is essential for maximizing yield, flavor, and storage life. By understanding growth stages, timing harvests correctly, using gentle techniques, and implementing proper post-harvest handling, gardeners can enjoy the full benefits of their labor.

Key practices include:

  1. Monitor plant maturity and harvest at peak size and flavor.
  2. Use appropriate harvesting tools and techniques to prevent root damage.
  3. Handle crops gently, minimizing bruising and breakage.
  4. Clean, cure, and store roots properly to extend shelf life.
  5. Remove damaged or overripe roots to maintain quality in storage.
  6. Progressively harvest to optimize space and crop rotation.

By following these strategies, gardeners create a productive, efficient, and sustainable root vegetable harvest, ensuring fresh, nutritious crops are available well into fall and winter. Proper harvesting not only maximizes yield but also enhances the overall gardening experience, turning labor into reward with crisp, flavorful, and long-lasting vegetables.

How To Prepare Your Garden Beds for Late-Season Planting

How To Prepare Your Garden Beds for Late-Season Planting

As summer fades and fall approaches, many gardeners assume that their growing season is over. However, late-season planting offers a wonderful opportunity to extend your harvest, take advantage of cooler temperatures, and enjoy fresh, homegrown vegetables, herbs, and flowers well into late autumn and even early winter. The key to success lies in properly preparing your garden beds. Preparing garden beds for late-season planting ensures healthy plants, strong root systems, and maximum productivity before the first frost. This article provides a detailed guide on how to prepare your garden beds for late-season planting, including soil preparation, planting strategies, and care tips.


Why Late-Season Planting Matters

Late-season planting is not just a way to fill empty garden beds; it provides numerous benefits:

  1. Extended Harvest: Cool-weather crops and hardy plants can continue producing for weeks or even months after summer crops have finished.
  2. Optimal Growing Conditions: Cooler temperatures reduce plant stress, prevent heat-related damage, and often enhance flavor in vegetables like kale and carrots.
  3. Efficient Use of Garden Space: Late-season planting maximizes garden productivity and prevents beds from sitting idle.
  4. Reduced Pest Problems: Many pests are less active in cooler weather, reducing the risk of infestations.

Proper preparation ensures that plants have the best conditions to thrive and produce a successful late-season harvest.


Step 1: Clear and Clean Your Garden Beds

Before planting, it is crucial to remove any remnants of summer crops, weeds, and debris. This reduces disease risk and creates a clean environment for new plants.

Tips for Cleaning:

  • Remove Dead or Dying Plants: Pull out spent vegetables, herbs, or flowers. Compost healthy plant material and discard diseased plants to prevent pathogens from spreading.
  • Weed Thoroughly: Late-season weeds compete for nutrients, water, and sunlight. Remove them by hand or with a hoe, making sure to get the roots.
  • Rake and Level: After clearing, rake the soil to remove stones and create a level planting surface. This makes planting seeds or seedlings easier and promotes uniform growth.

Step 2: Improve Soil Fertility

Soil fertility is the backbone of a productive garden bed. Late-season crops require nutrient-rich soil to establish strong roots and sustain growth in cooler weather.

Steps to Improve Soil:

  • Add Organic Matter: Incorporate compost, well-rotted manure, or leaf mold into the soil. This improves structure, fertility, and moisture retention.
  • Test Soil pH: Most vegetables prefer slightly acidic to neutral soil (pH 6.0–7.0). Use a home test kit and amend soil with lime to raise pH or sulfur to lower pH if necessary.
  • Fertilize Appropriately: Use a balanced, slow-release fertilizer to supply essential nutrients without promoting excessive leafy growth that could be vulnerable to frost.

By enriching the soil, you create a fertile foundation that supports robust late-season growth.


Step 3: Loosen and Aerate the Soil

Compacted soil inhibits root growth, water infiltration, and nutrient absorption. Loosening and aerating your garden beds is critical for late-season planting success.

Methods:

  • Double Digging: For small beds, remove the top 8–12 inches of soil, loosen the subsoil, and return the topsoil.
  • Tilling or Forking: In larger beds, lightly till or use a garden fork to break up compacted soil without disturbing existing beneficial microorganisms.
  • Add Amendments: Mix in sand or perlite if your soil is heavy clay to improve drainage, or add organic matter to sandy soil to retain moisture.

Aerated soil encourages strong root systems and ensures your late-season crops can establish quickly before cold weather sets in.


Step 4: Plan for Frost Protection

Late-season planting often coincides with the approach of frost. Protecting your crops ensures they survive longer and produce a healthy harvest.

Frost Protection Strategies:

  • Row Covers: Lightweight fabric row covers trap heat and protect plants from frost without blocking sunlight.
  • Cloches and Cold Frames: Individual plants or small beds can be shielded using cloches or cold frames to extend the growing season.
  • Mulching: Apply a 2–3 inch layer of straw, shredded leaves, or compost around plants to insulate roots and moderate soil temperature.
  • Container Gardening: Growing frost-sensitive plants in pots allows you to move them indoors or to a sheltered location when temperatures drop.

Step 5: Choose the Right Crops for Late-Season Planting

Not all plants thrive in cooler temperatures, so select crops suited for late-season growth. Some excellent options include:

  • Leafy Greens: Kale, spinach, arugula, and lettuce grow quickly in cooler weather and are often sweeter after frost.
  • Root Vegetables: Carrots, radishes, and beets develop excellent flavor and store well in cold soil.
  • Cabbage Family: Broccoli, cauliflower, and Brussels sprouts are cold-hardy and productive in fall gardens.
  • Herbs: Parsley, cilantro, chives, and thyme tolerate cool weather and provide fresh flavors for winter cooking.

Selecting the right crops maximizes your garden’s productivity and ensures a successful late-season harvest.


Step 6: Plan Your Planting Layout

A well-organized garden layout enhances plant growth and simplifies maintenance. Consider these tips:

  • Succession Planting: Stagger sowing dates to ensure continuous harvest throughout fall.
  • Companion Planting: Pair compatible crops to improve growth and deter pests. For example, plant chives near carrots to repel insects.
  • Crop Rotation: Avoid planting the same plant family in the same bed repeatedly to prevent soil-borne diseases and nutrient depletion.

A thoughtful layout helps crops mature evenly and reduces problems caused by overcrowding or nutrient competition.


Step 7: Watering and Care

Even in cooler weather, consistent watering is essential for late-season crops.

Watering Tips:

  • Maintain Moisture: Keep soil evenly moist but not waterlogged.
  • Water Early: Water in the morning to allow foliage to dry before nightfall, reducing disease risk.
  • Mulch for Moisture Retention: Mulching helps reduce evaporation and insulates soil from temperature fluctuations.

Additional Care:

  • Monitor Pests: While cooler weather reduces most pests, slugs and aphids can still be problematic. Use organic methods like neem oil, diatomaceous earth, or handpicking.
  • Prune and Harvest: Regularly harvest leaves, roots, and other edible parts to encourage continued growth and prevent overcrowding.

Step 8: Extend the Season with Protective Measures

Late-season gardening can be extended further with simple techniques:

  • Hoop Houses or Tunnels: Cover beds with hoop structures to trap warmth and shield crops from frost.
  • Cloches and Cold Frames: Mini greenhouses for individual plants protect tender crops.
  • Bring Containers Indoors: Move sensitive potted plants inside or into a greenhouse during freezing nights.

These strategies allow you to enjoy fresh produce well into late fall and early winter.


Conclusion

Preparing your garden beds for late-season planting is essential to ensure a productive harvest despite cooler temperatures and shorter days. By clearing and cleaning beds, improving soil fertility, loosening the soil, planning for frost protection, selecting suitable crops, and organizing your planting layout, you create optimal conditions for growth. Proper watering, pest management, and seasonal protective measures further enhance your garden’s success.

Late-season gardening allows you to maximize garden space, extend the harvest, and enjoy fresh, flavorful vegetables and herbs when many other crops have finished producing. With thoughtful preparation and attention to detail, your garden can thrive even as temperatures drop, providing healthy, homegrown produce well into late fall and early winter.

Preparing garden beds for late-season planting is not just about extending the growing season—it’s about creating a resilient, productive, and beautiful garden that continues to nourish and delight throughout the colder months.