The Ultimate Guide to Growing Maple Trees

The Ultimate Guide to Growing Maple Trees

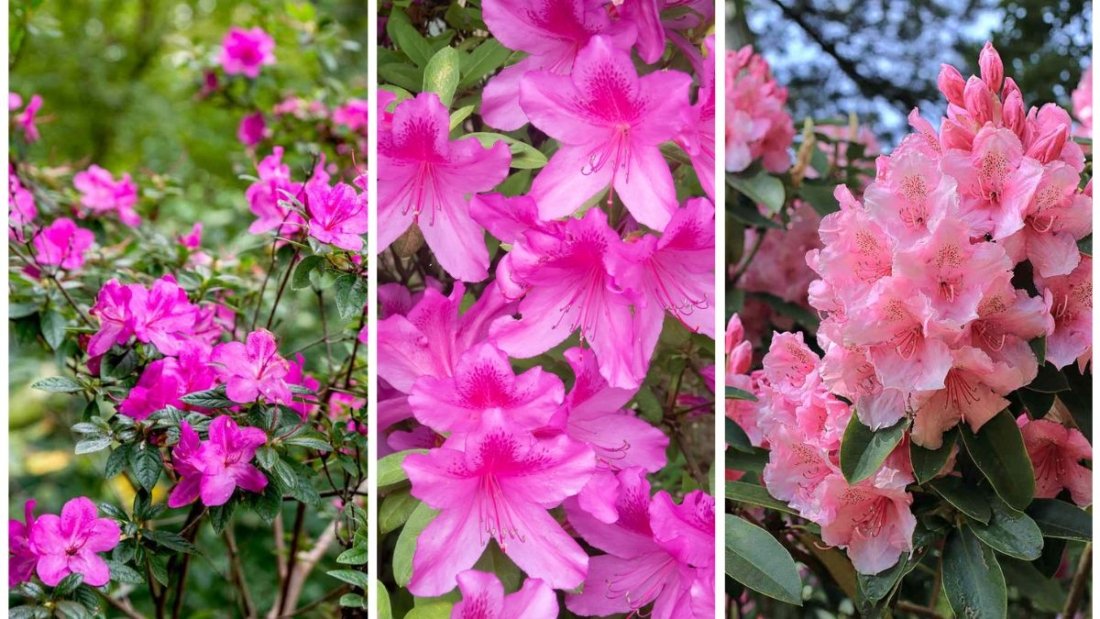
Maple trees (Acer spp.) are among the most iconic and versatile trees in landscapes worldwide. Known for their stunning fall foliage, graceful shape, and adaptability, maples enhance any garden or yard with both aesthetic and ecological benefits. From providing shade and privacy to supporting wildlife and producing sap for syrup, maples are a valuable addition to residential and public spaces.

This ultimate guide offers a comprehensive approach to growing maple trees, including selection, planting, care, and maintenance, ensuring healthy growth and vibrant beauty year after year.


Why Grow Maple Trees?

Maples are cherished by gardeners and landscapers for numerous reasons:

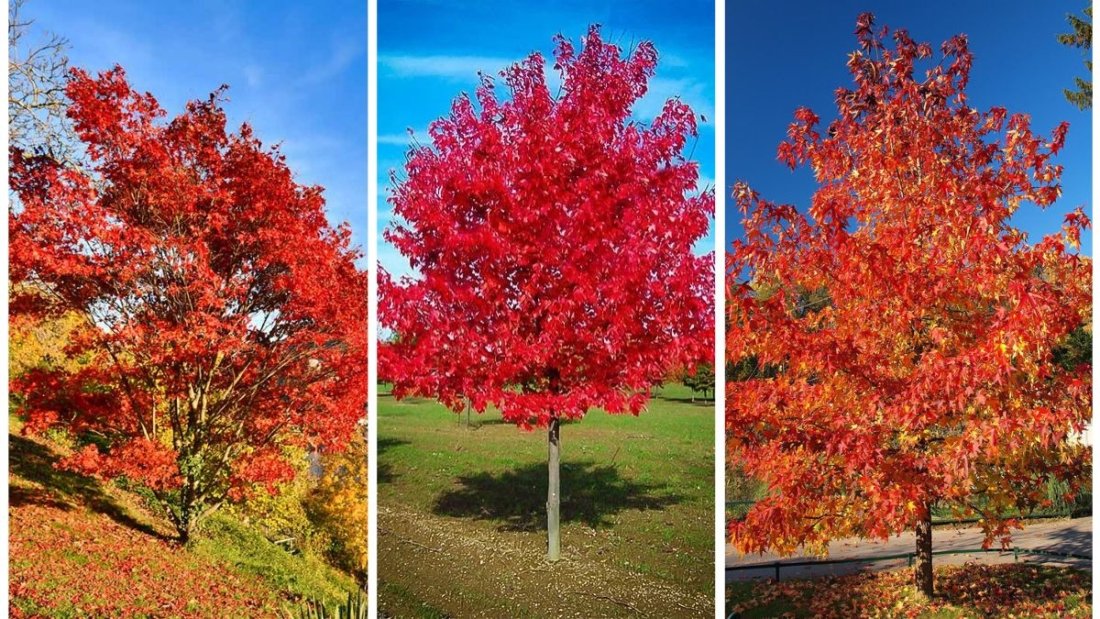
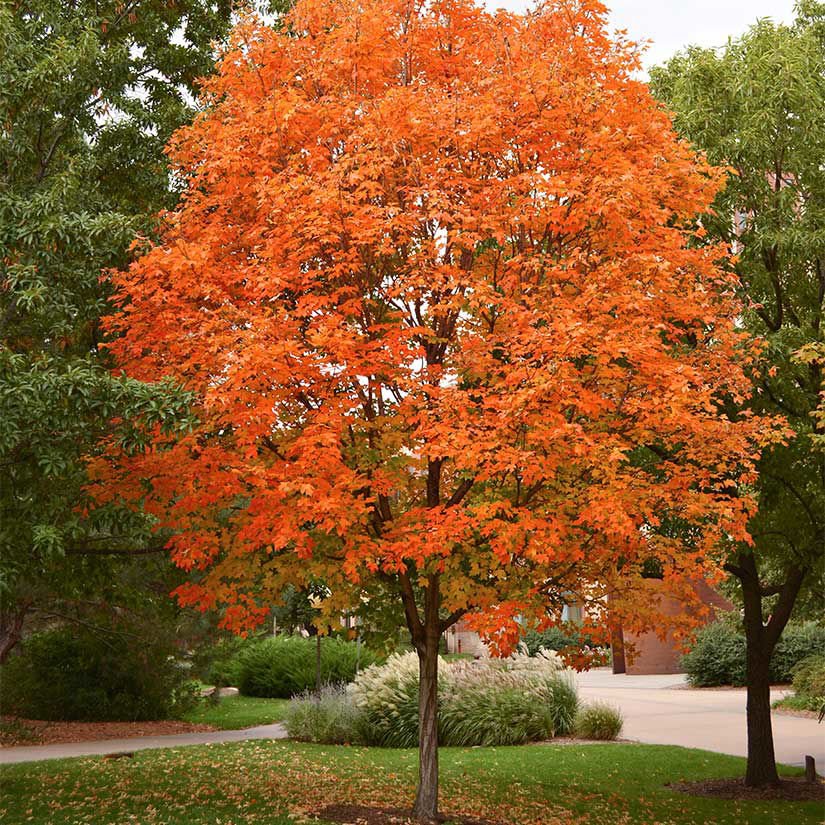
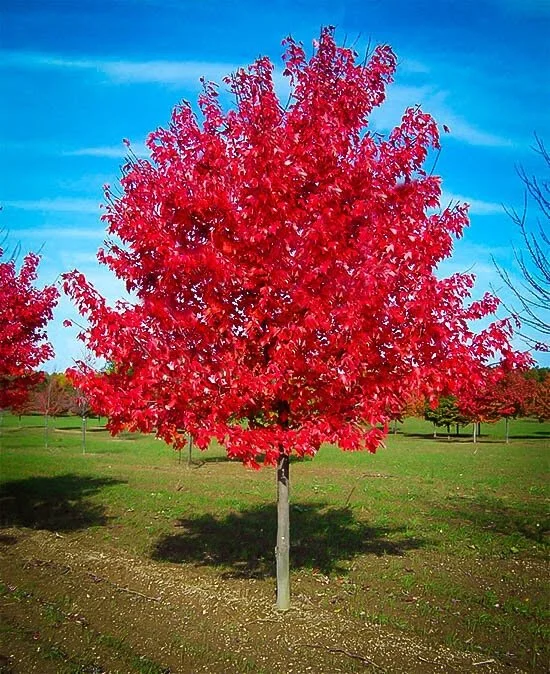
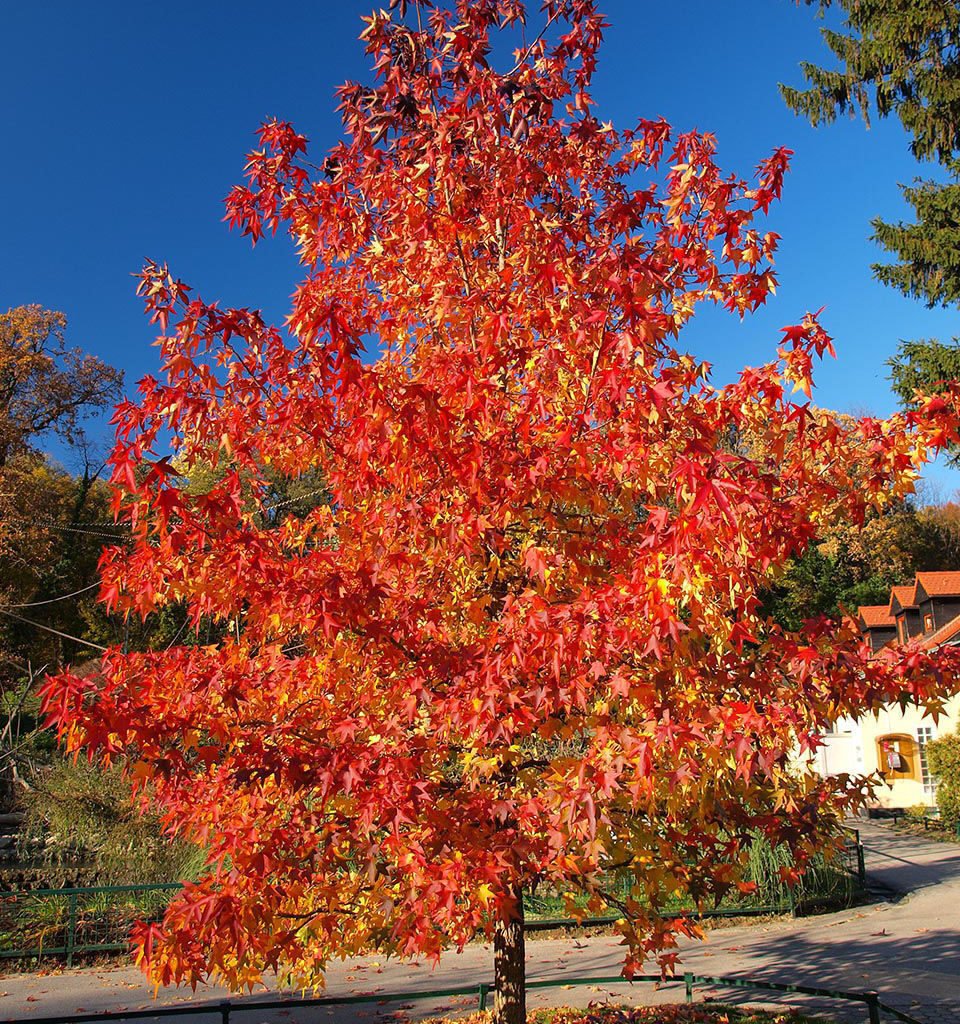
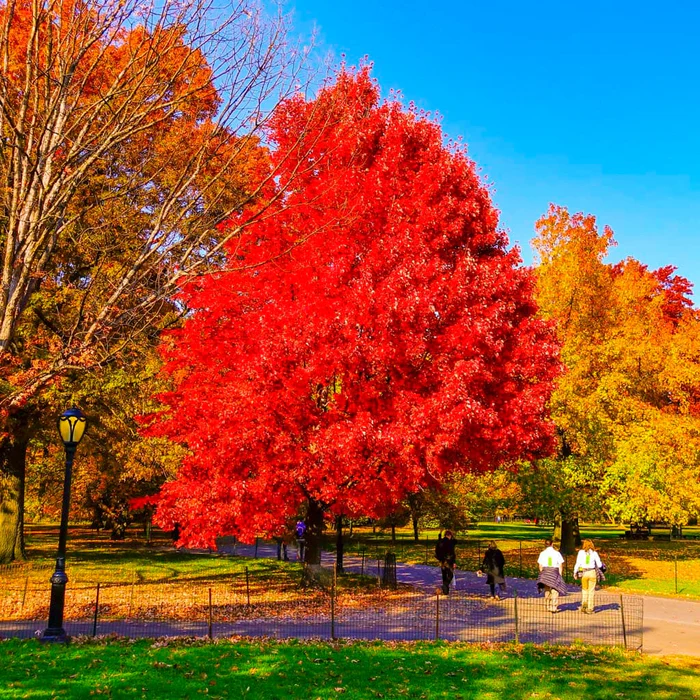
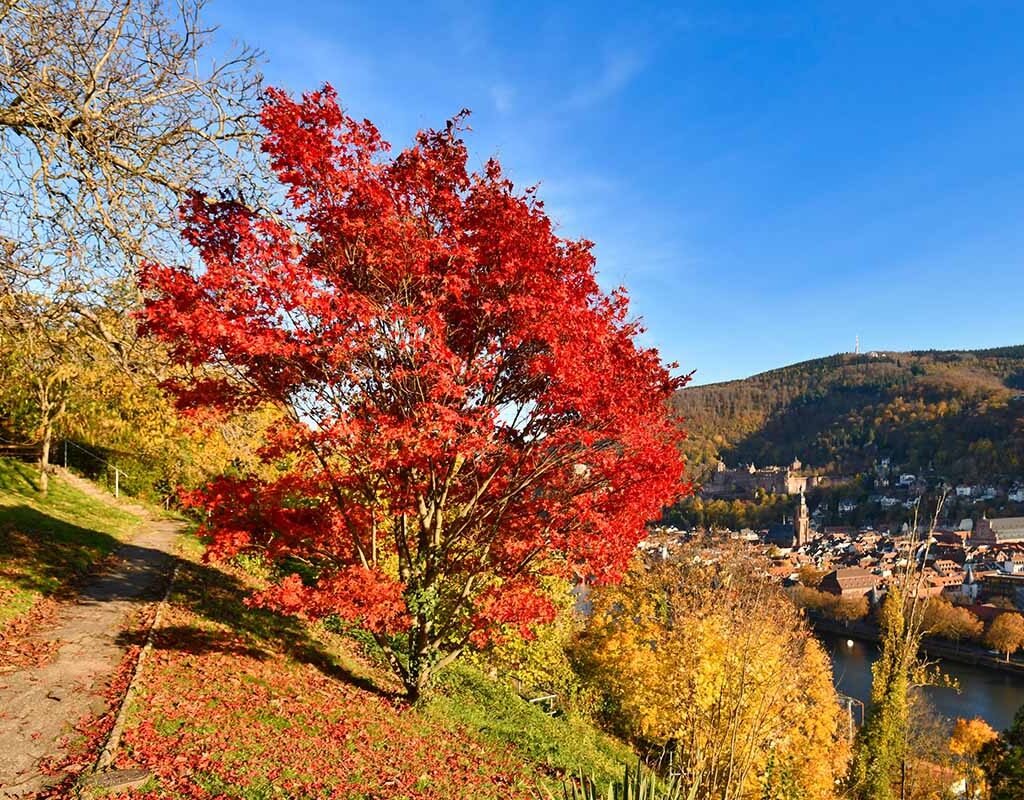
  • Spectacular Foliage: Many varieties exhibit vibrant reds, oranges, and yellows in autumn.
  • Shade and Shelter: Large canopy provides shade, cooling the surrounding environment.
  • Wildlife-Friendly: Supports birds, pollinators, and beneficial insects.
  • Versatility: Suitable for streetscapes, gardens, parks, and yards of all sizes.
  • Maple Syrup Production: Certain species, like sugar maples, can be tapped for syrup.

Understanding these benefits can help homeowners and gardeners appreciate the long-term value of planting maple trees.


Step 1: Choosing the Right Maple Variety

Selecting the right maple species is critical to match your climate, soil, and landscaping goals. Popular varieties include:

  1. Sugar Maple (Acer saccharum)
    • Famous for brilliant fall colors and maple syrup production.
    • Prefers cool climates and well-drained, fertile soil.
    • Can grow 60–75 feet tall.
  2. Red Maple (Acer rubrum)
    • Noted for red flowers, new spring growth, and stunning fall foliage.
    • Tolerates a wide range of soil types and moisture conditions.
    • Height: 40–70 feet.
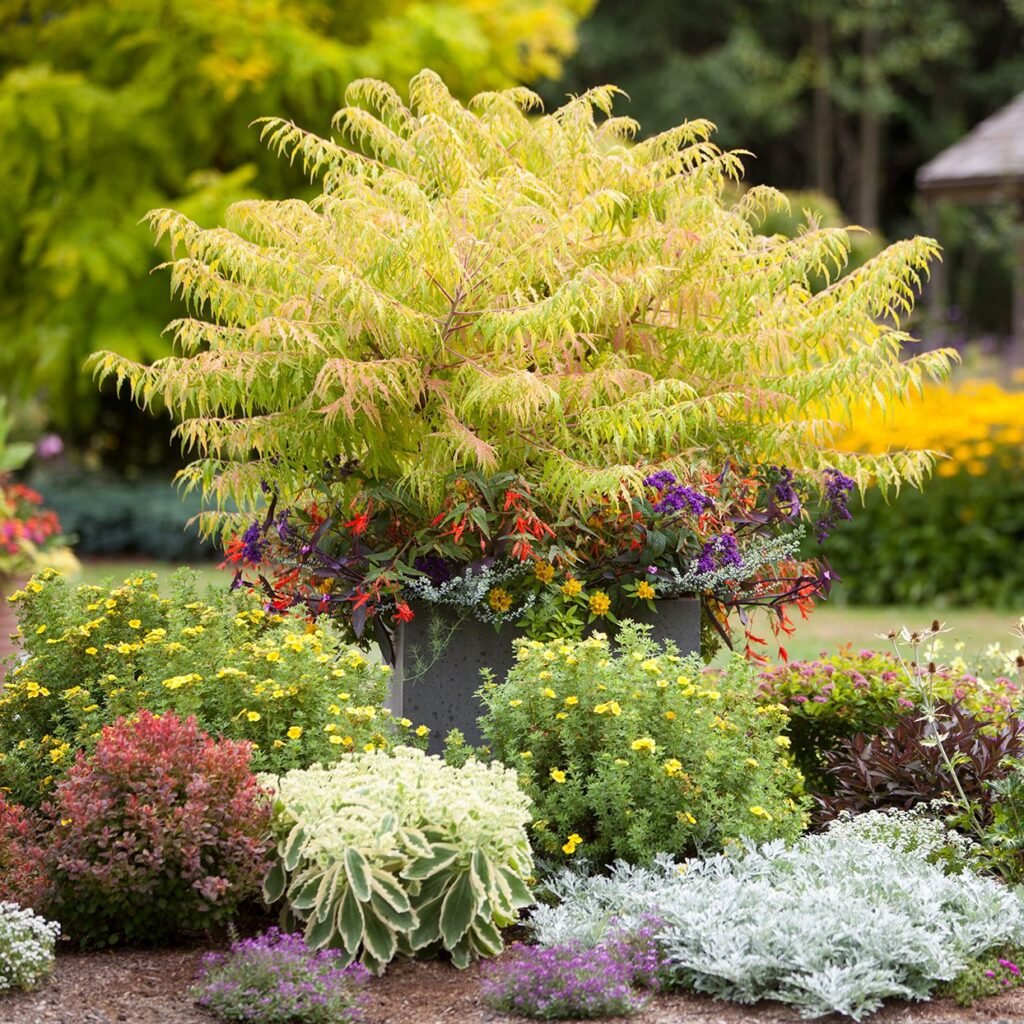
  3. Japanese Maple (Acer palmatum)
    • Small, ornamental tree with striking foliage and delicate form.
    • Perfect for smaller yards or container planting.
    • Height: 10–25 feet.
  4. Silver Maple (Acer saccharinum)
    • Fast-growing and hardy, with silvery undersides on leaves.
    • Ideal for quick shade, but weaker wood is prone to storm damage.
    • Height: 50–70 feet.
  5. Norway Maple (Acer platanoides)
    • Adaptable, tolerant of urban conditions.
    • Excellent for street planting or large landscapes.
    • Height: 40–60 feet.

Tip: Consider the tree’s mature height, growth rate, and soil and light requirements before selecting a variety.


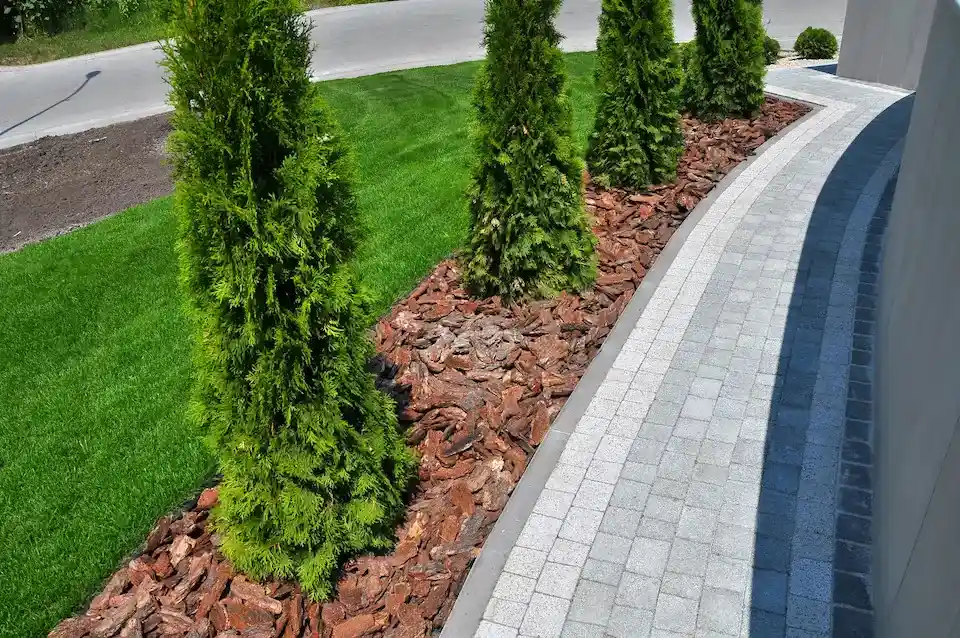
Step 2: Selecting the Perfect Location

Maples require thoughtful placement for optimal growth:

  • Sunlight: Most maple species prefer full sun to partial shade. Japanese maples thrive in partial shade.
  • Soil: Well-drained, fertile soil is ideal. Avoid heavy clay or compacted soils.
  • Space: Allow sufficient room for canopy spread and root growth. Sugar and red maples need large spaces, while Japanese maples suit smaller areas.
  • Protection: Shelter young trees from strong winds and harsh conditions.

Pro Tip: Avoid planting too close to buildings or structures, as mature maples have extensive root systems that can interfere with foundations.


Step 3: Planting Maple Trees

Proper planting ensures a strong, healthy start:

  1. Timing: Plant in early spring or fall to avoid extreme heat or frost.
  2. Digging the Hole: Make the hole twice as wide and slightly deeper than the root ball.
  3. Soil Preparation: Mix native soil with compost or well-rotted organic matter to improve fertility and drainage.
  4. Planting Depth: Position the tree so the root collar is slightly above soil level to prevent crown rot.
  5. Backfilling: Fill the hole with amended soil, gently firming to eliminate air pockets.
  6. Watering: Water thoroughly immediately after planting to help roots settle.
  7. Mulching: Apply 2–3 inches of mulch around the base to retain moisture and regulate soil temperature, keeping mulch away from the trunk.

Step 4: Watering and Moisture Management

Consistent moisture is critical, particularly during the first few years:

  • Frequency: Water deeply once or twice a week, adjusting for rainfall and soil type.
  • New Trees: Require regular watering until fully established.
  • Established Trees: Deep watering during dry spells helps maintain health.
  • Avoid Overwatering: Waterlogged soil can lead to root rot.

Tip: Use a soaker hose or drip irrigation to deliver water efficiently to the root zone.


Step 5: Fertilizing Maple Trees

Fertilization promotes healthy growth and vibrant foliage:

  • Timing: Apply fertilizer in early spring as new growth begins. Avoid late fall fertilization.
  • Type: Use a balanced, slow-release fertilizer or one designed for trees and shrubs.
  • Method: Spread fertilizer evenly around the drip line, not directly at the trunk.
  • Organic Options: Compost or well-rotted manure can supplement nutrients naturally.

Pro Tip: Soil testing before fertilization helps determine nutrient deficiencies and prevents over-fertilization.


Step 6: Pruning and Maintenance

Pruning helps maintain shape, remove deadwood, and improve airflow:

  • Timing: Late winter or early spring before new growth is ideal. Light pruning can be done in summer if necessary.
  • Technique:
    • Remove dead, damaged, or crossing branches.
    • Thin dense areas to improve airflow and sunlight penetration.
    • Avoid excessive pruning that reduces leaf canopy.
  • Shaping: Keep natural form for most maples, but Japanese maples can be pruned for aesthetic shapes.

Step 7: Pest and Disease Management

Maple trees are generally hardy but can encounter a few pests and diseases:

Common Pests

  • Aphids: Cause leaf curling and sap damage. Treat with insecticidal soap.
  • Scale Insects: Small, sap-sucking insects that weaken trees. Use horticultural oil or insecticides.
  • Leafhoppers: Cause stippling and yellowing leaves. Control with insecticides if severe.

Common Diseases

  • Verticillium Wilt: Soil-borne fungus causing branch dieback. Remove affected branches promptly.
  • Tar Spot: Fungal disease causing black spots on leaves; mostly cosmetic.
  • Anthracnose: Fungal infection leading to leaf browning. Prune affected leaves and improve airflow.

Prevention:

  • Maintain healthy soil and proper watering.
  • Space trees adequately to reduce humidity and increase airflow.
  • Remove fallen leaves to prevent fungal buildup.

Step 8: Seasonal Care for Maple Trees

Spring

  • Fertilize to encourage new growth.
  • Inspect for early signs of pests or disease.
  • Apply mulch to retain soil moisture.

Summer

  • Water deeply during dry spells.
  • Monitor for pests like aphids and leafhoppers.
  • Provide light shade for sensitive species like Japanese maples during heatwaves.

Fall

  • Mulch to protect roots during winter.
  • Collect fallen leaves to prevent fungal diseases.
  • Avoid late fertilization to allow dormancy preparation.

Winter

  • Protect young trees from frost with burlap wraps if needed.
  • Avoid heavy pruning that can damage vulnerable branches.
  • Water during dry winter spells when soil is not frozen.

Common Mistakes to Avoid

  • Planting Too Deep: Can suffocate roots and cause poor growth.
  • Overwatering: Leads to root rot and fungal diseases.
  • Underwatering: Can stress the tree, leading to leaf drop or stunted growth.
  • Neglecting Pruning: Results in weak branches, poor shape, and disease susceptibility.
  • Ignoring Soil Conditions: Maples require fertile, well-drained soil for optimal health.

Final Thoughts

Maple trees are a long-term investment in beauty, shade, and ecological value for any yard or garden. By carefully selecting the right variety, planting in the proper location, and providing ongoing care—including watering, fertilization, pruning, and pest management—you can enjoy vibrant, healthy trees for decades.

Whether you seek a majestic sugar maple for fall foliage, a delicate Japanese maple for ornamental beauty, or a hardy red maple for urban landscapes, following these guidelines ensures that your trees will thrive. With patience and consistent care, maple trees will provide shade, shelter, and spectacular seasonal displays that enhance the character and value of your landscape.

Planting and nurturing maples is not only a rewarding gardening experience but also a contribution to a greener, healthier environment. Their shade, wildlife support, and striking appearance make maples indispensable in creating sustainable and beautiful landscapes.

5 Garden Features That Instantly Increase Home Value

5 Garden Features That Instantly Increase Home Value

When it comes to increasing the value of a home, most people think of renovating kitchens or updating bathrooms. However, there’s another area that can offer an impressive return on investment: the garden. A beautifully designed outdoor space doesn’t just enhance your quality of life—it also has the power to dramatically boost your home’s market value.

According to real estate and landscaping experts, certain garden features can yield up to 200% ROI (Return on Investment). These elements create curb appeal, extend living spaces, and offer functional beauty that resonates with potential buyers.

In this article, we’ll explore 5 garden features that instantly increase home value, along with tips on implementation, design inspiration, and cost-effective options for any budget.


1. Well-Designed Outdoor Living Areas

Why It Boosts Value:

In today’s real estate market, outdoor living spaces are seen as extensions of the home. A patio, deck, or pergola transforms a simple garden into a functional space for entertaining, relaxing, and dining.

Buyers are drawn to homes that offer lifestyle enhancements, and a stylish, usable outdoor area can set your property apart from others.

Key Features to Include:

  • Deck or patio: Use materials like composite decking, stone, or pavers.
  • Seating area: Include weatherproof furniture, cushions, and maybe a fire pit or coffee table.
  • Pergola or shade structure: Adds privacy and sun protection.
  • Lighting: String lights, lanterns, or in-ground lighting for ambiance.

Return on Investment:

  • Up to 80% ROI for professionally installed patios/decks.
  • DIY versions can still yield high returns, especially in warmer climates.

Pro Tip:

Choose materials that complement your home’s architecture and use low-maintenance finishes to appeal to busy homeowners.


2. Landscaped Front Yard with Curb Appeal

Why It Boosts Value:

The front yard is your home’s first impression. A neatly landscaped, inviting entryway instantly improves curb appeal and can increase perceived property value by 5–11%, according to the American Society of Landscape Architects.

A well-kept front garden makes the house feel loved and cared for—a major emotional trigger for buyers.

Features to Focus On:

  • Defined lawn edges and borders
  • Flower beds with seasonal color
  • Evergreen shrubs and native plants
  • Mulch or decorative stone
  • Attractive pathway leading to the entrance

Design Ideas:

  • Use a mix of perennials and annuals for year-round interest.
  • Incorporate symmetry in planting for a balanced look.
  • Add a statement tree or focal point, like a flowering dogwood or a Japanese maple.

Return on Investment:

  • Front yard landscaping can add up to 10% to home value when thoughtfully executed.
  • Simple upgrades like fresh mulch and plantings can be done for under $500.

3. Irrigation System or Smart Watering Setup

Why It Boosts Value:

Modern buyers want homes that are efficient and easy to maintain. An automated irrigation system eliminates the hassle of manual watering while promoting healthy, vibrant gardens.

Whether it’s a built-in sprinkler system or a smart drip irrigation network, this feature adds a layer of convenience and sustainability that’s attractive to homeowners—especially in drought-prone areas.

System Types:

  • Sprinkler systems: Great for lawns and large garden beds.
  • Drip irrigation: Conserves water, ideal for flower beds and vegetable gardens.
  • Smart controllers: Adjust watering based on weather forecasts, soil moisture, and plant type.

Eco-Benefits:

  • Promotes water conservation
  • Reduces water bills
  • Keeps plants healthier, reducing replacement costs

Return on Investment:

  • Installation costs can range from $1,000 to $3,500, but the system can pay for itself over time.
  • Smart systems also appeal to eco-conscious buyers, increasing marketability.

4. Outdoor Lighting for Beauty and Safety

Why It Boosts Value:

Landscape lighting does double duty: it adds aesthetic beauty to your garden and improves safety and security. Professionally installed lighting can completely transform your home at night, making it stand out on the street and increasing both real and perceived value.

Buyers are impressed by homes that look just as appealing at night as they do during the day.

Lighting Options:

  • Pathway lighting: Enhances safety and navigation
  • Uplighting trees and shrubs: Creates dramatic focal points
  • Accent lighting for architecture: Highlights home’s best features
  • Deck and step lighting: Adds ambiance and prevents tripping hazards

Solar vs. Wired:

  • Solar lighting is eco-friendly and budget-friendly but may be dimmer.
  • Low-voltage wired lighting provides consistent, reliable brightness.

Return on Investment:

  • Adds visual depth and perceived luxury to your garden.
  • Typically offers 50–80% ROI, with high impact in evening home showings.

5. Functional Garden Space (Edible or Ornamental)

Why It Boosts Value:

Functional garden spaces are highly sought after, especially as homeowners become more interested in self-sufficiency, sustainability, and wellness. Raised beds for vegetables, pollinator gardens, or herb spirals not only offer beauty but also practical value.

In urban or suburban homes, a dedicated space for growing food is a unique selling point that stands out to buyers.

Ideas to Include:

  • Raised vegetable beds: Easy to maintain and attractive
  • Compost bins: Encourages sustainability (choose modern, enclosed types)
  • Herb garden near the kitchen: Convenient and fragrant
  • Pollinator-friendly flowers: Attract butterflies and bees

Bonus:

  • Encourages healthier living and outdoor time
  • Helps the environment and builds soil health
  • Great talking point during property tours or open houses

Return on Investment:

  • ROI depends on execution, but function meets charm in this category.
  • Cost is minimal, and potential buyer appeal is high, especially post-2020, when gardening became a global trend.

Comparative Summary: ROI of Garden Features

FeatureROI EstimateKey Benefit
Outdoor Living Area70–80%Expands usable space
Front Yard Landscaping5–11% added valueBoosts curb appeal
Irrigation SystemLong-term savingsAdds convenience and efficiency
Outdoor Lighting50–80%Enhances safety and night appeal
Edible/Functional GardenVariableUnique appeal and lifestyle benefit

Real Estate Perspective: Why Buyers Care

Modern buyers—especially Millennials and Gen Z—are increasingly prioritizing:

  • Outdoor space over square footage
  • Energy-efficient and eco-conscious features
  • Private areas for entertainment or relaxation
  • Gardens that support wellness and mental health

According to a 2023 Zillow study, homes with outdoor features like patios, decks, and landscaping sold faster and for more money than similar homes without.

A garden isn’t just a space—it’s a lifestyle statement.


Final Thoughts

Your garden has the power to do much more than grow flowers—it can grow your home’s value.

From a welcoming front yard to a functional veggie plot, these five garden features are simple, effective ways to make a big impact. Whether you’re selling in the near future or just want to enjoy a more beautiful and practical space, investing in your garden offers tangible financial and lifestyle rewards.

Start small, plan with intention, and watch how these outdoor improvements pay off—both in enjoyment and in equity.

5 Simple Ways to Boost Your Front Yard Appeal

5 Simple Ways to Boost Your Front Yard Appeal

First impressions matter—and when it comes to your home, your front yard is the first thing people see. Whether you’re preparing to sell your house or simply want to be proud of your property, front yard appeal (also called “curb appeal”) plays a huge role in how your home is perceived.

Fortunately, improving your front yard’s appearance doesn’t require a massive budget or professional landscapers. With a little planning and effort, you can create a welcoming, eye-catching outdoor space that enhances your home’s charm and value.

In this article, we’ll explore five simple yet powerful ways to boost your front yard appeal, with detailed, practical tips to help you get started right away.


1. Refresh the Landscaping with Simple, Low-Maintenance Plants

One of the most effective ways to elevate your front yard is by improving its landscaping. But that doesn’t mean you need to install complex garden beds or exotic plants. Often, simplicity and structure are more impactful than extravagance.

Start with Foundation Plantings

Foundation plants are shrubs and perennials that are planted around the base of your home. These help soften the architectural lines of the house and make it feel grounded.

Examples of great foundation plants:

  • Boxwood (for structure and year-round greenery)
  • Hydrangeas (for colorful, seasonal impact)
  • Hostas (for shady areas)
  • Ornamental grasses (for texture and movement)

Incorporate Color Strategically

Add pops of color through:

  • Seasonal flowers in garden beds or pots
  • Flowering shrubs like azaleas or roses
  • Hanging baskets on porches or lampposts

Use a color theme (e.g., purples and whites, or reds and yellows) to create a cohesive look.

Keep It Low-Maintenance

Choose native plants that thrive in your local climate with minimal watering and care. This makes your landscaping easier to maintain while being eco-friendly.


2. Upgrade the Front Door and Entryway

The front door is the focal point of your home’s exterior—it sets the tone for the entire space. A well-maintained, visually appealing entryway can make your home feel inviting and polished.

Repaint or Replace Your Door

A fresh coat of paint can do wonders. Bold colors like navy, red, or even black can make your door stand out. Make sure the color complements your home’s exterior.

If the door is damaged or outdated, consider replacing it entirely. Modern or classic styles can both work—just match the overall aesthetic of your home.

Add Decorative Elements

Enhance the entryway with simple additions:

  • A stylish doormat
  • Seasonal wreath or door décor
  • Flanking potted plants or lanterns
  • A welcome sign or house number plaque

Don’t Forget Lighting

Good lighting increases both safety and ambiance. Upgrade existing fixtures or install new sconces, pendant lights, or solar pathway lights.

Warm lighting at night creates a cozy, elegant vibe.


3. Define Edges and Borders

One of the most overlooked aspects of front yard design is the definition of spaces. Clean, well-defined edges make your yard look tidy, intentional, and professionally maintained.

Edge the Lawn

Use an edging tool or spade to cut crisp lines between your grass and garden beds. This gives your yard a polished look with minimal cost or effort.

Install Physical Edging

Use materials like:

  • Stone
  • Brick
  • Steel or aluminum edging
  • Wood (for a rustic or cottage look)

This not only creates visual order but also helps keep mulch and soil in place.

Create Pathways

Define walkways from your driveway or sidewalk to the front door using:

  • Gravel
  • Stepping stones
  • Brick pavers
  • Concrete slabs

Pathways guide visitors and add structure to your front yard.


4. Clean, Repair, and Declutter

Sometimes, boosting curb appeal is more about what you remove than what you add. A clean, well-maintained front yard instantly looks more attractive.

Power Wash Surfaces

Use a pressure washer to clean:

  • Driveways
  • Sidewalks
  • Porch steps
  • Siding or brick
  • Fences and railings

This removes years of grime, algae, and stains and makes everything look brighter and newer.

Fix and Maintain

Tend to small repairs that can make a big difference:

  • Patch cracks in concrete or brick
  • Paint or stain fences and railings
  • Tighten loose fixtures
  • Replace torn screens or broken porch lights

Remove Clutter

Too many garden ornaments, empty pots, or random tools can make your yard look chaotic. Keep the front area minimal and intentional.

A few tasteful pieces, like a bench, a birdbath, or a flag, are fine—but less is often more.


5. Add Finishing Touches for Character and Style

Now that the basics are covered, it’s time to add personal touches that express your style and make your home feel warm and inviting.

Update the Mailbox

If your mailbox is rusted or tilted, it might be time for an upgrade. Choose a design that matches your home (modern, farmhouse, colonial, etc.), and consider planting small flowers around its base for a charming touch.

Improve House Numbers

Replace small, hard-to-read numbers with large, modern ones in a contrasting color. This not only improves aesthetics but also makes your home easier to locate for visitors and emergency services.

Incorporate Outdoor Seating

Even a small bench or rocking chair on a front porch or side area makes your home feel welcoming and lived-in.

Use Accent Lighting

Landscape lighting doesn’t have to be expensive or hardwired. Solar-powered stake lights, spotlights, and lanterns can:

  • Highlight trees or architectural features
  • Light up pathways and driveways
  • Create mood lighting around the porch

A well-lit yard looks high-end and inviting, especially at night.


Bonus: Front Yard Appeal on a Budget

Even if you’re on a tight budget, these low-cost ideas can still boost your curb appeal:

ProjectEstimated CostBenefit
Repaint front door$30–$70High impact
Add mulch$3 per bagClean, professional look
Install solar lights$20–$50Evening elegance
Edge the lawnFree (manual)Tidy, defined appearance
Plant seasonal flowers$15–$30Instant color

A few hundred dollars (or less) can completely transform your front yard.


Why Curb Appeal Matters

Enhancing your front yard is about more than just looks. A well-maintained exterior can:

  • Increase property value: A 2023 report by the National Association of Realtors found that homes with strong curb appeal sell for up to 7% more than similar homes without it.
  • Create neighborhood pride: Your yard influences the overall appearance of your street.
  • Enhance personal satisfaction: Coming home to a beautiful space lifts your mood and confidence.

Whether you’re preparing to sell or planning to stay for years, investing in your front yard is a smart and rewarding decision.


Final Thoughts

Boosting your front yard appeal doesn’t have to be complicated or expensive. With these five simple strategies—refreshing your landscaping, upgrading the entryway, defining spaces, cleaning up, and adding finishing touches—you can transform your home’s exterior into something truly special.

Remember, the goal is to create a front yard that reflects your personality, welcomes guests, and makes you feel proud every time you pull into the driveway.

Start small, stay consistent, and enjoy the process—your dream front yard is just a few steps away.

How to Grow and Maintain Boxwood Hedges

How to Grow and Maintain Boxwood Hedges

Boxwood hedges are classic elements of landscaping that provide structure, elegance, and year-round greenery. Known for their dense foliage and slow, steady growth, boxwoods can be shaped into formal hedges, topiaries, or natural borders. Their versatility and aesthetic appeal make them a favorite choice for gardeners, homeowners, and landscape designers.

This guide offers a comprehensive, beginner-friendly approach to growing, shaping, and maintaining boxwood hedges, ensuring lush, healthy, and well-manicured plants year-round.


Why Choose Boxwood Hedges?

Boxwoods (Buxus spp.) are widely used in landscaping because of their unique qualities:

  • Evergreen Foliage: Maintains a rich green color throughout the year.
  • Versatility: Can be grown as formal hedges, low borders, topiaries, or foundation plants.
  • Slow Growth: Makes them easier to shape and maintain.
  • Adaptability: Tolerates a range of soil types and partial shade.
  • Low-Maintenance: Once established, boxwoods are hardy and resilient.

Understanding these benefits highlights why boxwoods are ideal for structured garden designs and ornamental hedging.


Step 1: Selecting the Right Boxwood Variety

Several boxwood varieties are suitable for hedges, each with distinct characteristics:

  1. English Boxwood (Buxus sempervirens ‘Suffruticosa’)
    • Slow-growing, dense, and compact.
    • Ideal for low formal hedges and topiaries.
  2. American Boxwood (Buxus sempervirens ‘American’)
    • Larger leaves and slightly faster growth.
    • Suitable for medium-height hedges and privacy screens.
  3. Japanese Boxwood (Buxus microphylla var. japonica)
    • Compact, adaptable, and tolerant of heat.
    • Perfect for sunny and coastal regions.
  4. Wintergreen Boxwood (Buxus microphylla var. compacta)
    • Small, dense, and slow-growing.
    • Works well in small gardens and container hedges.

Tip: Choose a variety that fits your garden size, climate, and desired hedge height.


Step 2: Choosing the Right Location

Boxwoods thrive under specific conditions:

  • Sunlight: Prefer partial shade to full sun. Avoid harsh afternoon sun in hot climates, which may scorch leaves.
  • Soil: Well-draining soil is critical; boxwoods do not tolerate waterlogged roots. Loamy soil enriched with organic matter works best.
  • Spacing: Space plants 12–24 inches apart for low hedges, and up to 36 inches for taller hedges. Proper spacing allows airflow and healthy growth.

Pro Tip: Avoid planting too close to large trees, which compete for nutrients, water, and light.


Step 3: Planting Boxwood Hedges

Planting correctly is essential for establishing a healthy hedge:

  1. Timing: Early spring or fall is ideal to avoid extreme heat or cold.
  2. Planting Hole: Dig a hole twice as wide and slightly deeper than the root ball.
  3. Soil Amendment: Mix native soil with compost or well-rotted organic matter for improved drainage and fertility.
  4. Planting Depth: Place the boxwood at the same depth as it was in the container or nursery. Avoid burying the crown.
  5. Watering: Water thoroughly after planting to settle soil and remove air pockets.
  6. Mulching: Apply 2–3 inches of mulch around the base to conserve moisture and regulate soil temperature, keeping mulch away from the trunk to prevent rot.

Step 4: Watering and Moisture Management

Consistent watering is crucial, especially during establishment:

  • Frequency: Water deeply once or twice a week, depending on rainfall.
  • Newly Planted Hedges: Require more frequent watering for the first year.
  • Established Hedges: Less frequent watering; monitor during droughts.
  • Avoid Overwatering: Boxwoods are prone to root rot if soil remains soggy.

Tip: Use drip irrigation or soaker hoses for efficient watering without wetting foliage.


Step 5: Fertilizing Boxwoods

Proper fertilization supports healthy growth and vibrant foliage:

  • Timing: Early spring before new growth appears. Optionally, a light application in mid-summer.
  • Type: Use a balanced, slow-release fertilizer or one formulated for evergreen shrubs.
  • Application: Follow manufacturer instructions, and avoid over-fertilization, which can cause excessive leaf growth and reduce density.

Pro Tip: Mulching with compost also provides gradual nutrient release.


Step 6: Pruning and Shaping

Pruning is essential for maintaining neat, dense hedges:

  • Timing:
    • Light shaping can be done throughout the growing season.
    • Major pruning should be done in late winter or early spring before new growth begins.
  • Tools: Use sharp hedge shears for large hedges and hand pruners for detailed shaping.
  • Technique:
    • Trim the top slightly narrower than the base to allow sunlight to reach lower leaves.
    • Remove dead, damaged, or crossing branches to maintain airflow.
    • Avoid cutting into old wood that may not regrow.
  • Shaping Ideas:
    • Formal hedge: Even, straight lines.
    • Topiary: Shapes like spheres, cones, or spirals.
    • Informal hedge: Soft, natural form for a less structured look.

Step 7: Pest and Disease Management

Boxwoods are generally hardy but can be affected by pests and diseases:

Common Pests

  • Boxwood Leafminer: Causes blistered leaves; treat with systemic insecticides in early spring.
  • Boxwood Mite: Leads to stippled, discolored leaves; use miticides if infestation is severe.
  • Boxwood Psyllid: Causes cupped leaves; prune affected areas.

Common Diseases

  • Boxwood Blight: Fungal disease causing leaf spots, defoliation, and stem dieback. Maintain proper spacing and remove infected debris.
  • Volutella Blight: Fungal disease leading to leaf discoloration; prune infected branches and apply fungicide.
  • Root Rot: Caused by waterlogged soil; ensure proper drainage.

Prevention:

  • Avoid overcrowding and ensure good air circulation.
  • Water at the base of plants to keep foliage dry.
  • Inspect plants regularly for early signs of pests and disease.

Step 8: Seasonal Care for Boxwoods

Spring

  • Fertilize to encourage healthy growth.
  • Lightly prune to shape and remove dead wood.
  • Monitor for pests and fungal diseases.

Summer

  • Water deeply during hot periods.
  • Mulch to retain soil moisture.
  • Inspect for leafminer and mite infestations.

Fall

  • Reduce watering as temperatures drop.
  • Apply mulch for winter protection.
  • Avoid heavy pruning to prevent new growth vulnerable to frost.

Winter

  • Protect young or sensitive plants from freezing temperatures using burlap or frost cloth.
  • Water during dry spells when the ground is not frozen.
  • Avoid fertilizing during dormancy.

Common Mistakes to Avoid

  • Planting Too Deep: Can lead to crown rot and poor growth.
  • Overwatering: Leads to root rot and fungal problems.
  • Underwatering: Can cause leaf drop and stunted growth.
  • Neglecting Pruning: Leads to sparse, uneven growth.
  • Crowding Plants: Reduces airflow, increasing the risk of disease.

Final Thoughts

Boxwood hedges are elegant, durable, and versatile landscaping elements that enhance any yard or garden. With careful selection, proper planting, and consistent care, boxwoods can provide structure, privacy, and beauty for decades.

By following this step-by-step guide—from choosing the right variety, planting, watering, fertilizing, and pruning, to managing pests and diseases—gardeners can enjoy dense, healthy hedges that maintain their form and lush greenery year-round.

Whether you aim for a formal hedge lining your walkway, a sculpted topiary, or a natural privacy screen, boxwoods offer a timeless appeal that complements both traditional and contemporary landscapes. Patience, attention to detail, and seasonal care are the keys to achieving thriving, long-lasting boxwood hedges in your yard.

5 Best Shade-Loving Shrubs for Your Yard

5 Best Shade-Loving Shrubs for Your Yard

A lush, thriving garden isn’t just about bright sunlight and colorful blooms. Many homeowners have shaded areas in their yards that are often overlooked when planning landscaping. Fortunately, there are many shrubs that thrive in partial to full shade, offering greenery, texture, and even flowers to brighten darker garden spaces. Planting shade-loving shrubs can transform dull corners of your yard into vibrant, healthy, and visually appealing areas.

This guide highlights five of the best shade-tolerant shrubs and provides practical tips for planting, care, and maintenance.


Why Shade-Loving Shrubs Are Important

Shade-loving shrubs are essential for yards that don’t receive direct sunlight throughout the day. These plants:

  • Enhance Aesthetics: Provide texture, color, and structure to shaded garden areas.
  • Prevent Soil Erosion: Shrubs with dense root systems help stabilize soil.
  • Support Wildlife: Provide habitat and food for birds and beneficial insects.
  • Low-Maintenance Options: Many shade-tolerant shrubs require minimal pruning and thrive with less sunlight.
  • Complement Other Plants: Pair well with ferns, hostas, and other shade-loving perennials.

Understanding these benefits makes it easier to select the right shrubs for shaded areas in your yard.


1. Hydrangea (Hydrangea macrophylla)

Hydrangeas are classic shade-loving shrubs prized for their large, showy flower clusters.

Features

  • Flower Colors: Pink, blue, or white depending on soil pH.
  • Foliage: Dark green, glossy leaves.
  • Size: 3–6 feet tall and wide, depending on variety.

Growing Tips

  • Sunlight: Prefers partial shade; too much sun can scorch leaves.
  • Soil: Moist, well-draining, slightly acidic soil.
  • Watering: Keep soil consistently moist, especially during summer.
  • Pruning: Prune after flowering to maintain shape and encourage blooms next season.

Why It Works in Shade: Hydrangeas tolerate low light while producing stunning flower clusters, making them a top choice for shaded yards.


2. Rhododendron (Rhododendron spp.)

Rhododendrons are evergreen shrubs with large clusters of showy blooms that brighten shaded landscapes.

Features

  • Flowers: Bell-shaped blooms in white, pink, red, or purple.
  • Foliage: Glossy green leaves that remain year-round.
  • Size: 3–10 feet tall depending on variety.

Growing Tips

  • Sunlight: Partial shade; protect from hot afternoon sun.
  • Soil: Acidic, well-drained soil rich in organic matter.
  • Watering: Provide consistent moisture, especially in spring and summer.
  • Pruning: Remove dead or weak branches after flowering.

Why It Works in Shade: Rhododendrons thrive under trees or in dappled light, providing long-lasting beauty in low-light conditions.


3. Azalea (Azalea spp.)

Azaleas are closely related to rhododendrons and are celebrated for their vibrant spring blooms and compact growth.

Features

  • Flowers: Bright clusters of pink, red, white, or purple blooms.
  • Foliage: Evergreen or deciduous leaves depending on variety.
  • Size: 2–6 feet tall and wide.

Growing Tips

  • Sunlight: Partial shade; morning sun with afternoon shade is ideal.
  • Soil: Acidic, well-drained, organic-rich soil.
  • Watering: Keep soil moist, especially during dry periods.
  • Pruning: Light pruning after flowering maintains shape.

Why It Works in Shade: Azaleas flourish in shaded areas, producing spectacular flowers without direct sunlight, making them perfect under trees or along shaded pathways.


4. Japanese Pieris (Pieris japonica)

Japanese pieris, also called lily-of-the-valley shrub, is an elegant evergreen shrub with cascading flower clusters and colorful new foliage.

Features

  • Flowers: White or pink bell-shaped clusters in early spring.
  • Foliage: Glossy green leaves; new growth often appears red or bronze.
  • Size: 6–10 feet tall with a dense, bushy habit.

Growing Tips

  • Sunlight: Partial shade to full shade; avoid harsh afternoon sun.
  • Soil: Acidic, moist, well-draining soil.
  • Watering: Consistent watering; avoid letting soil dry out completely.
  • Pruning: Minimal pruning required; remove dead branches after flowering.

Why It Works in Shade: Its colorful foliage and delicate flowers add interest to shaded areas, while evergreen leaves maintain garden structure year-round.


5. Sweetbox (Sarcococca spp.)

Sweetbox is a low-maintenance, shade-loving evergreen shrub known for its fragrant winter flowers.

Features

  • Flowers: Tiny, white, highly fragrant flowers in late winter to early spring.
  • Foliage: Glossy dark green leaves.
  • Size: 2–4 feet tall and wide, ideal for borders.

Growing Tips

  • Sunlight: Full shade to partial shade.
  • Soil: Moist, well-draining soil enriched with organic matter.
  • Watering: Regular watering during establishment; drought-tolerant once mature.
  • Pruning: Minimal pruning needed; shape as desired.

Why It Works in Shade: Sweetbox thrives in the darkest corners of the garden, providing fragrance and evergreen foliage when most other shrubs are dormant.


General Tips for Planting Shade-Loving Shrubs

  1. Soil Preparation:
    • Enrich shaded soil with compost or organic matter to improve fertility.
    • Ensure good drainage to prevent root rot, which is common in low-light areas.
  2. Mulching:
    • Apply 2–3 inches of mulch to conserve soil moisture, suppress weeds, and maintain soil temperature.
  3. Watering:
    • Shade areas may retain more moisture; avoid overwatering but keep soil consistently moist, especially for newly planted shrubs.
  4. Fertilizing:
    • Use fertilizers formulated for acid-loving plants if necessary.
    • Fertilize in early spring before new growth appears.
  5. Pruning:
    • Prune after flowering for flowering shrubs to maintain shape and encourage blooms next season.
    • Remove dead or diseased branches anytime of the year.

Benefits of Mixing Shade-Loving Shrubs

Planting a variety of shade-tolerant shrubs offers several advantages:

  • Extended Bloom Season: Combining different shrubs like azaleas and pieris ensures flowers from early spring to late winter.
  • Texture and Color Variety: Mix foliage types—evergreen, variegated, and colorful new growth—to create visual interest.
  • Wildlife Support: Diverse shrubs attract birds, bees, and butterflies, enriching your garden ecosystem.
  • Low Maintenance: Shade-loving shrubs are generally resilient and require minimal intervention once established.

Common Mistakes to Avoid

  • Planting in Deep Shade Only: While shade-loving shrubs tolerate low light, some indirect light is still necessary for optimal growth.
  • Overwatering: Shaded soil retains moisture; excessive watering can cause root rot.
  • Neglecting Soil pH: Many shade-tolerant shrubs prefer slightly acidic soil; alkaline soil can stunt growth.
  • Crowding Plants: Allow sufficient spacing for airflow and healthy growth.

Final Thoughts

Shade-loving shrubs are essential for creating a balanced and thriving garden, especially in areas with limited sunlight. Plants like hydrangeas, rhododendrons, azaleas, Japanese pieris, and sweetbox not only survive but thrive in shaded conditions, offering flowers, fragrance, and year-round beauty.

By selecting the right shrubs and following proper planting, watering, fertilizing, and pruning practices, you can turn dark or neglected corners of your yard into lush, vibrant spaces. Incorporating these shade-loving shrubs adds depth, texture, and color, making your garden more diverse, appealing, and ecologically friendly.

Whether you are a beginner gardener or an experienced landscaper, planting shade-tolerant shrubs ensures that every part of your yard—even the shadiest—can be beautiful and productive. With patience and consistent care, these shrubs will reward you with beauty, fragrance, and greenery season after season.

How To Protect Your Yard From Neighbor’s Overgrown Plants

How To Protect Your Yard From Neighbor’s Overgrown Plants

A beautifully maintained yard is a point of pride for many homeowners. But what happens when your neighbor’s lack of yard maintenance becomes your problem? Overgrown plants, invasive roots, creeping vines, and falling leaves can spill across property lines and disrupt your landscape, even when you’ve done everything right on your side.

These issues are not just aesthetic—they can damage fences, invade gardens, attract pests, and even create legal headaches. Fortunately, there are clear and respectful ways to protect your yard while maintaining good relationships with those next door.

This article offers practical, legal, and diplomatic strategies to protect your property from your neighbor’s overgrown plants—without turning the issue into an all-out feud.


1. Recognize the Most Common Problems

Before you can protect your yard, it’s important to identify how overgrown vegetation can become a problem. Common scenarios include:

  • Overhanging tree branches that drop leaves, sap, or branches into your yard
  • Invasive vines (like ivy or wisteria) growing through your fence or onto your house
  • Creeping ground cover like mint or bamboo spreading across the boundary
  • Large root systems that damage foundations, fences, or underground pipes
  • Tall hedges or shrubs that block sunlight or view
  • Neglected areas that become breeding grounds for pests like rodents or mosquitoes

Understanding the type and extent of the problem will help you choose the right defense.


2. Know Your Property Rights

In most regions, you are legally entitled to protect your property from encroaching vegetation—but there are limits.

General Property Law Principles:

  • You can trim any branches, vines, or roots that cross onto your property.
  • You cannot trespass to access plants on your neighbor’s land.
  • You must avoid killing or severely damaging a plant, especially if it’s a tree.
  • If a plant is causing damage, you may be able to seek compensation or request its removal through local authorities or civil court.

Always check your local laws or municipal ordinances before taking action.


3. Start with a Friendly Conversation

Before grabbing your clippers, it’s best to talk to your neighbor. Many homeowners aren’t aware that their plants are causing issues until someone tells them.

How to approach the conversation:

  • Be polite, non-confrontational, and neighborly.
  • Use “I” statements: “I’ve noticed that some of the ivy is starting to come through the fence. I’m a bit worried about it affecting my garden beds.”
  • Offer to work together: “Would it be okay if I trimmed the overgrowth on my side, or would you prefer to handle it?”
  • Keep it light: “Just trying to keep everything tidy over here—thought I’d check in with you first.”

Tip: Having the conversation early—before it becomes a major issue—can prevent tension later.


4. Install Physical Barriers

One of the most effective ways to stop plant encroachment is by installing permanent physical barriers.

Options Include:

A. Root Barriers

  • Made from heavy plastic or metal.
  • Buried 12–36 inches deep to block root spread from invasive trees or bamboo.

B. Garden Edging

  • Keeps creeping plants like ground covers and aggressive flowers in check.
  • Comes in steel, aluminum, composite, or concrete.

C. Privacy Fencing

  • A solid, tall fence can reduce vine growth and falling leaves.
  • Choose materials resistant to decay, like vinyl or pressure-treated wood.

D. Gravel or Mulch Buffer Zones

  • A 1–2 foot strip of mulch or gravel along the boundary discourages weed and vine growth.
  • Also helps with drainage and pest control.

5. Use Strategic Landscaping

Design your yard defensively by planting your own natural barriers.

Options Include:

  • Dense shrubs or hedges (e.g., boxwood, privet, arborvitae) to block visibility and creeping vines.
  • Thorny or aromatic plants like rosemary or barberry to create a deterrent zone.
  • Climbing plants on trellises on your side to block invasive species (be careful not to add to the problem).

This approach lets you fight plants with plants—creating privacy and protection at the same time.


6. Regular Maintenance Is Key

You may not be able to control what your neighbor does, but you can stay ahead of their overgrowth by keeping your own yard well-maintained.

Maintenance Tips:

  • Trim regularly along fence lines.
  • Rake debris from overhanging trees and dispose of it quickly.
  • Check for new growth weekly, especially during spring and summer.
  • Apply pre-emergent herbicide along the border to prevent weed seed germination.
  • Use weed barrier fabric in garden beds along the boundary.

Think of your yard like a fortress—the more proactive your upkeep, the less likely it is that outside invaders will take hold.


7. Use Legal Remedies (As a Last Resort)

If your neighbor refuses to address a serious overgrowth issue that’s damaging your property, you may need to involve legal channels.

Steps You Can Take:

  1. Document the problem with photos, videos, and notes.
  2. Send a polite but firm written request outlining the issue and requesting action.
  3. Check local bylaws—many cities have rules regarding overgrown vegetation, nuisance plants, or shared boundaries.
  4. Report to code enforcement if the overgrowth violates local ordinances.
  5. Consult a property attorney if damage is ongoing or significant (e.g., root damage to foundations or sewer lines).

Remember: legal action should be your last resort, not your first move.


8. Know When to Trim (And When Not To)

You have the right to cut plants encroaching on your land, but be cautious:

  • Trim only what’s on your side of the property line.
  • Don’t use chemicals or tools that could harm the main plant.
  • Don’t cut trees or limbs that are protected species (check local regulations).

When in doubt, hire a professional arborist or landscaper. They can offer advice or do the work safely—and with legal protection.


9. Protect Structures and Surfaces

Overgrown plants don’t just spread across the ground—they can climb walls, fences, and even your house. This can lead to:

  • Mold and moisture buildup
  • Cracked siding or bricks
  • Insect infestation
  • Damage to gutters or roofing

Protective Actions:

  • Trim climbing plants at least 6–12 inches away from structures.
  • Apply sealants or protective coatings to fences and walls.
  • Inspect your property seasonally for damage or hidden growth.

10. Consider Mediation If Things Get Heated

Sometimes, even the best intentions can lead to friction—especially if your neighbor takes your concerns personally. If you’ve tried speaking and writing without success, you can suggest mediation.

Benefits of Mediation:

  • A neutral third party helps guide the discussion.
  • Cheaper and less stressful than legal action.
  • Often provided by municipalities or local dispute resolution services.

This can preserve relationships while still addressing the problem in a structured, solution-focused way.


Conclusion

Dealing with overgrown plants from a neighboring yard isn’t just about weeds and roots—it’s about boundaries, respect, and property protection. The good news is, with clear communication, smart landscaping, and knowledge of your rights, you can keep your yard clean and protected—without damaging your neighborly rapport.

Growing Camellias: Care Tips for Beginners

Growing Camellias: Care Tips for Beginners

Camellias are elegant, evergreen shrubs admired for their glossy leaves and show-stopping flowers. With blooms in shades of white, pink, red, and even variegated patterns, camellias are a favorite choice for gardeners looking to add beauty and charm to their outdoor spaces. While they may seem delicate, camellias are surprisingly resilient and can thrive with proper care.

This comprehensive guide provides beginner-friendly tips for growing camellias successfully—from selecting the right variety to planting, watering, fertilizing, and managing pests. By following these guidelines, you can enjoy stunning camellia blooms for many seasons.


Why Grow Camellias?

Camellias are popular among gardeners for several reasons:

  • Long Blooming Season: Many camellias bloom in fall, winter, or early spring, adding color when few other plants do.
  • Evergreen Foliage: Their glossy, dark-green leaves provide year-round beauty.
  • Versatility: They can be grown as hedges, specimen plants, or in containers.
  • Low-Maintenance: Once established, camellias require minimal pruning.
  • Wildlife-Friendly: Flowers attract pollinators such as bees.

Understanding the appeal of camellias can motivate beginners to invest in proper care and maintenance.


Step 1: Choosing the Right Camellia Variety

There are two main types of camellias to consider:

  1. Camellia Japonica
    • Most commonly grown species.
    • Produces large, showy flowers in early to mid-spring.
    • Prefers partial shade and sheltered locations.
    • Ideal for hedges or specimen planting.
  2. Camellia Sasanqua
    • Blooms in fall to early winter.
    • Smaller leaves and flowers than C. japonica.
    • More tolerant of sun and wind.
    • Suitable for smaller spaces or containers.

Tip: Choose a variety suited to your climate and the desired bloom time. Japanese camellias thrive in cooler, shaded areas, while sasanquas handle more sun.


Step 2: Selecting the Right Location

Camellias thrive in specific conditions, and proper placement is crucial:

  • Sunlight: Prefer partial shade. Morning sun with afternoon shade is ideal to prevent leaf scorch.
  • Soil: Well-draining, acidic soil with pH 5.5–6.5. Avoid waterlogged soil, which can cause root rot.
  • Shelter: Plant near buildings or trees for protection from strong winds and frost.
  • Space: Camellias can grow 6–12 feet tall, so provide ample space for growth and airflow.

Pro Tip: Test soil pH before planting and amend with peat moss or sulfur to increase acidity if necessary.


Step 3: Planting Camellias

Proper planting is key to establishing healthy camellias:

  1. Timing: Plant in fall or early spring when temperatures are moderate.
  2. Planting Hole: Dig a hole twice as wide and as deep as the root ball.
  3. Soil Preparation: Mix garden soil with organic matter such as compost, pine bark, or peat moss to improve drainage.
  4. Planting Depth: Place the camellia slightly higher than the surrounding soil to prevent water pooling around the crown.
  5. Watering: Water thoroughly after planting to help settle the soil and eliminate air pockets.
  6. Mulching: Apply 2–3 inches of mulch around the base to retain moisture and regulate soil temperature, but keep mulch away from the trunk to prevent rot.

Step 4: Watering and Moisture Management

Consistent moisture is crucial for camellias, especially during establishment:

  • Watering Frequency: Deeply water once or twice a week, depending on rainfall.
  • Soil Moisture: Keep soil evenly moist but not waterlogged.
  • Container Plants: Water more frequently as pots dry out faster.
  • Signs of Underwatering: Wilting leaves, brown leaf tips, and poor flower development.
  • Signs of Overwatering: Yellowing leaves and root rot.

Pro Tip: Use drip irrigation or soaker hoses to maintain consistent soil moisture without wetting foliage.


Step 5: Fertilizing Camellias

Proper fertilization encourages healthy growth and vibrant blooms:

  • Timing: Fertilize in early spring after blooming and again in early summer.
  • Type: Use fertilizers formulated for acid-loving plants. Avoid high-nitrogen fertilizers that promote leaf growth at the expense of flowers.
  • Application: Follow package instructions and avoid fertilizing during late fall or winter.
  • Soil Amendment: Add organic matter such as compost or well-rotted manure annually to improve fertility.

Step 6: Pruning and Shaping

Camellias require minimal pruning, but light pruning improves air circulation and maintains shape:

  • Timing: Prune immediately after flowering to avoid removing flower buds for the next season.
  • Method: Remove dead, damaged, or weak branches. Thin out crowded areas to allow light penetration.
  • Shaping: Trim lightly to maintain desired shape, whether as a hedge, specimen plant, or container shrub.
  • Avoid Heavy Pruning: Camellias bloom on old wood, so excessive pruning can reduce flowers.

Step 7: Pest and Disease Management

Although camellias are generally hardy, they can face a few pests and diseases:

Common Pests

  • Aphids: Small insects feeding on sap, causing distorted leaves.
  • Scale Insects: Appear as small bumps on stems and leaves.
  • Spider Mites: Cause stippling and fine webbing on leaves.

Treatment: Use horticultural oil, insecticidal soap, or natural predators like ladybugs.

Common Diseases

  • Camellia Petal Blight: Brown spots on petals, causing flowers to collapse.
  • Root Rot: Caused by poor drainage or overwatering.
  • Leaf Gall: Swollen or thickened leaves, often from fungal infection.

Prevention:

  • Plant in well-draining soil.
  • Avoid wetting leaves when watering.
  • Maintain good air circulation around plants.

Step 8: Seasonal Care Tips

Spring

  • Fertilize after flowering.
  • Lightly prune for shape.
  • Mulch to conserve moisture.

Summer

  • Maintain consistent watering.
  • Protect from intense afternoon sun if necessary.
  • Monitor for pests like aphids or spider mites.

Fall

  • Mulch to insulate roots against winter temperatures.
  • Reduce fertilization to allow the plant to prepare for dormancy.

Winter

  • Protect young or sensitive camellias from frost using burlap or frost cloth.
  • Water during dry spells if the soil is not frozen.
  • Avoid fertilizing, as growth is minimal during cold months.

Growing Camellias in Containers

For limited space, camellias thrive in pots:

  • Container Size: Large enough for roots to expand (at least 15–20 gallons).
  • Soil: Use acidic, well-draining potting mix with added compost or pine bark.
  • Watering: Monitor moisture closely; containers dry out faster than garden soil.
  • Fertilizing: Apply slow-release, acid-forming fertilizer in spring and early summer.
  • Winter Care: Move containers to a sheltered spot or indoors during extreme frost.

Common Mistakes Beginners Make

  • Overwatering: Leads to root rot and fungal diseases.
  • Planting in Full Sun: Can scorch leaves and reduce blooms.
  • Heavy Pruning in Spring: Removes flower buds and reduces blooms.
  • Ignoring Soil pH: Alkaline soil causes nutrient deficiencies and poor growth.
  • Neglecting Mulch: Mulch protects roots, conserves moisture, and regulates temperature.

Final Thoughts

Growing camellias as a beginner gardener is highly rewarding. These stunning shrubs provide year-round visual appeal, striking blooms, and evergreen foliage that enhance any garden or landscape. By understanding their needs—from soil, sunlight, and water to seasonal care, pruning, and pest management—you can ensure healthy growth and vibrant flowers season after season.

Whether planted as hedges, specimen plants, or in decorative containers, camellias are a versatile and elegant addition to your outdoor space. With patience and consistent care, even beginners can enjoy the beauty and charm of camellias, creating a garden filled with color, texture, and grace for many years.

Who Is Responsible For Fallen Branches On Your Property?

Who Is Responsible For Fallen Branches On Your Property?

Trees add immense beauty, shade, and environmental benefits to properties. But they can also present challenges—especially when branches fall unexpectedly onto your property. Fallen branches can cause damage to your home, vehicles, fences, or landscaping, raising an important question: Who is responsible for cleaning up and covering the costs?

This article explores the complexities of responsibility regarding fallen branches, including legal principles, practical prevention tips, and how to handle disputes with neighbors. Understanding these issues will help you protect your property and maintain good relationships.


Why Fallen Branches Become a Problem

Fallen branches can occur due to:

  • Natural events: Wind, storms, heavy snow, or ice accumulation.
  • Tree health issues: Disease, decay, or weakened limbs.
  • Lack of maintenance: Neglected or poorly cared-for trees.
  • External factors: Construction or soil disruption weakening root systems.

Branches can fall directly from your own trees or from your neighbor’s trees, complicating the question of responsibility.


Legal Principles: Understanding Responsibility

Liability for fallen branches depends on a variety of factors and can vary by jurisdiction. However, several common legal concepts apply:

1. Ownership of the Tree

  • The owner of the tree is generally responsible for the condition of the tree.
  • If a branch falls from a neighbor’s tree onto your property, your neighbor usually owns that tree and may be liable.

2. Negligence and Reasonable Care

  • Tree owners have a duty to maintain their trees reasonably.
  • If the owner knew or should have known the tree or branches were hazardous and failed to act, they can be held liable for damage.
  • If a healthy branch falls due to an unforeseeable natural event (an “act of God”), liability may not apply.

3. Boundary Issues

  • If a branch or root crosses a property line, neighbors typically have the right to trim it back to the boundary—provided they do not trespass or harm the main tree.
  • Fallen branches physically on your property are generally your responsibility to remove, even if from a neighbor’s tree.

Step-by-Step Approach to Fallen Branches

Step 1: Inspect and Document

  • Safely assess the situation and document any damage with photos.
  • Determine whether the branch came from your tree or a neighbor’s.
  • Note any circumstances like recent storms, visible disease, or neglect.

Step 2: Notify Your Neighbor (If Applicable)

  • If the branch came from your neighbor’s tree, inform them politely.
  • Share photos and explain any damage caused.
  • Discuss options for cleanup and potential tree maintenance.

Step 3: Clean Up

  • You are generally responsible for removing fallen branches on your property.
  • For large or hazardous branches, hire professional tree services.
  • Keep receipts if you expect to seek compensation.

Step 4: Prevent Future Issues

  • Regularly inspect and maintain your own trees.
  • Ask neighbors to do the same, offering help or recommendations if appropriate.
  • Consider installing protective measures like root barriers or pruning problematic limbs.

Handling Disputes Over Fallen Branches

Disputes over fallen branches can escalate if not handled tactfully. Here are some tips:

  • Communicate calmly: Approach your neighbor without accusations.
  • Use mediation: A neutral third party can help resolve conflicts.
  • Know your rights: Consult legal advice if disputes persist.
  • Avoid DIY legal action: Don’t cut or remove trees beyond your property without consent.

Insurance and Financial Responsibility

  • Check your homeowner’s insurance policy; many cover damage caused by fallen branches.
  • Your neighbor’s insurance may be liable if their tree was neglected.
  • Keeping clear documentation is critical for claims.

Conclusion: Responsibility Requires Care and Cooperation

Fallen branches pose risks but can also be an opportunity for neighbors to work together. Responsibility depends on ownership, care, and circumstances, but good communication, timely maintenance, and clear understanding of the law can keep your property safe and relationships strong.

How to Care for Azaleas in Every Season

How to Care for Azaleas in Every Season

Azaleas are one of the most beloved flowering shrubs, cherished for their vibrant blooms and lush foliage. Their dazzling flowers, ranging from soft pastels to vivid reds and purples, make them a stunning addition to gardens, patios, and landscapes. While azaleas are relatively low-maintenance, they do require seasonal care to thrive, bloom beautifully, and maintain overall health.

This guide will take you through comprehensive, season-by-season care for azaleas, ensuring your shrubs remain healthy, vibrant, and full of blooms year after year.


Why Azaleas Are a Garden Favorite

Before diving into seasonal care, it’s worth understanding why azaleas are so popular:

  • Visual Appeal: Azaleas produce clusters of colorful flowers in spring, creating a striking visual display.
  • Versatility: They can be grown as hedges, specimen plants, or container plants.
  • Adaptability: Many azalea varieties tolerate partial shade and can thrive in various soil conditions.
  • Low-Maintenance: With proper care, azaleas require minimal pruning and upkeep.
  • Wildlife-Friendly: Their flowers attract pollinators like bees and butterflies.

Understanding Azalea Basics

Azaleas are part of the rhododendron family and share some common requirements:

  • Soil: Well-draining, acidic soil (pH 4.5–6.0) is essential. Azaleas do not tolerate waterlogged soil.
  • Light: Most varieties prefer partial shade, especially in hot climates. Morning sun with afternoon shade is ideal.
  • Water: Consistent moisture is important, but overwatering can lead to root rot.
  • Fertilizer: Azaleas benefit from fertilizers formulated for acid-loving plants.

Understanding these basic needs will help you tailor care for each season.


Spring Care: Preparing for Bloom

Spring is the most important season for azaleas, as it marks the flowering period. Proper care ensures vibrant blooms and healthy growth.

1. Fertilizing

  • Apply a slow-release, acid-forming fertilizer in early spring before new growth appears.
  • Avoid high-nitrogen fertilizers, which promote leaf growth over flowers.

2. Watering

  • Increase watering slightly as buds begin to form.
  • Keep soil consistently moist but avoid soggy conditions.

3. Pruning

  • Prune immediately after flowering, while the plant is still in bloom or just after petals drop.
  • Remove dead, damaged, or crossing branches to improve air circulation.
  • Avoid heavy pruning in spring, as this can reduce the current year’s blooms.

4. Mulching

  • Apply a 2–3 inch layer of organic mulch, such as pine needles or bark, around the base to retain moisture and regulate soil temperature.

Summer Care: Protecting from Heat

Summer can be challenging for azaleas, particularly in hot climates. Proper summer care ensures plants stay healthy and continue to grow.

1. Watering

  • Water deeply once or twice a week, depending on rainfall and soil type.
  • Focus on watering the root zone, not foliage, to prevent fungal diseases.

2. Shade

  • Ensure azaleas receive partial shade during the hottest part of the day.
  • Consider temporary shade cloths for young or sensitive plants.

3. Pest and Disease Control

  • Inspect regularly for pests such as lace bugs, spider mites, and azalea caterpillars.
  • Treat infestations promptly using insecticidal soap or horticultural oil.
  • Watch for signs of fungal disease, including leaf spots and powdery mildew, and remove affected leaves.

4. Fertilizing

  • Avoid heavy fertilization during peak summer heat. A light application of balanced fertilizer can be applied in early summer if growth is slow.

Fall Care: Preparing for Dormancy

Fall is a transitional period for azaleas, and proper care during this season ensures they survive winter stress.

1. Watering

  • Continue consistent watering until the first frost.
  • Gradually reduce watering as temperatures drop to prevent root rot.

2. Fertilizing

  • Stop using high-nitrogen fertilizers in late summer or early fall.
  • Apply a slow-release fertilizer formulated for acid-loving plants if necessary to strengthen roots for winter.

3. Pruning and Cleanup

  • Remove any dead or diseased branches.
  • Clear fallen leaves and debris from the base to prevent fungal growth over winter.

4. Mulching

  • Add an additional layer of mulch (3–4 inches) to insulate roots and retain soil moisture.

Winter Care: Protecting from Cold

Azaleas are hardy but sensitive to extreme cold and harsh winds. Proper winter care helps prevent damage and ensures early blooms in spring.

1. Mulching

  • Thick mulch acts as insulation for the root system.
  • Avoid piling mulch against the trunk, which can encourage rot.

2. Watering

  • Water during dry spells when the ground is not frozen, as azaleas can suffer from winter drought.

3. Protecting from Frost and Wind

  • Cover small or sensitive plants with burlap or frost cloth during harsh weather.
  • Use windbreaks or plant azaleas near structures to shield them from strong winds.

4. Avoid Fertilizing

  • Do not fertilize in winter, as this can stimulate growth that is vulnerable to frost damage.

Common Azalea Care Tips Year-Round

1. Soil Maintenance

  • Azaleas thrive in acidic soil, so test pH annually.
  • Amend soil with elemental sulfur or pine bark if pH rises above 6.0.

2. Water Management

  • Consistent moisture is crucial. Consider drip irrigation for efficient watering.
  • Avoid wetting foliage to prevent disease.

3. Fertilization Schedule

  • Fertilize in early spring and, if needed, lightly in summer. Avoid fall and winter fertilization.

4. Pest and Disease Vigilance

  • Regularly inspect for pests like lace bugs and scale insects.
  • Remove diseased or damaged leaves immediately.
  • Practice good air circulation by proper spacing and pruning.

5. Pruning

  • Prune lightly after flowering to maintain shape and encourage new growth.
  • Remove dead, damaged, or weak branches any time of year.

Planting and Transplanting Tips

  • Location: Choose a site with morning sun and afternoon shade. Avoid full sun in hot climates.
  • Spacing: Space azaleas 3–6 feet apart depending on mature size.
  • Transplanting: Best done in early spring or fall. Water thoroughly after transplanting and mulch well.

Fertilizers for Azaleas

  • Slow-Release Fertilizers: Provide nutrients over time and support healthy growth.
  • Acid-Loving Plant Fertilizers: Contain ammonium sulfate or sulfur-coated urea to maintain acidic soil.
  • Timing: Apply in early spring and optionally in mid-summer. Avoid late fall application.

Troubleshooting Common Problems

  1. Yellow Leaves: May indicate nutrient deficiencies or improper soil pH. Test soil and amend accordingly.
  2. Leaf Drop: Can result from drought, overwatering, or sudden temperature changes.
  3. Poor Blooming: Often caused by over-fertilization with high-nitrogen fertilizer or inadequate sunlight.
  4. Pests: Lace bugs, spider mites, and caterpillars can damage leaves. Use organic insecticides or horticultural oils.

Final Thoughts

Caring for azaleas year-round ensures these beautiful shrubs remain vibrant, healthy, and blooming season after season. By understanding their seasonal needs—from watering and fertilization to pruning and winter protection—you can maintain their beauty with minimal stress.

Azaleas reward gardeners with spectacular spring displays and lush greenery throughout the year. With proper soil preparation, pest management, and seasonal care, these shrubs will thrive in your garden, providing color, fragrance, and charm for years to come.

Investing in year-round care not only enhances the aesthetic appeal of your garden but also supports a sustainable and healthy growing environment for azaleas. Whether you are a beginner gardener or a seasoned horticulturist, following this seasonal care guide will help you enjoy the full potential of your azaleas.

What To Do If Your Neighbor’s Flowers Cross The Property Line

What To Do If Your Neighbor’s Flowers Cross The Property Line

Gardening is a beloved pastime that not only beautifies our homes but also nurtures peace and community spirit. However, when your neighbor’s flowers start to spill over onto your property, what should you do? Whether it’s a vine creeping over the fence, colorful blooms crowding your flower bed, or roots stretching underground, boundary-crossing plants can become a tricky issue to manage.

This article explores what to do if your neighbor’s flowers cross the property line, blending practical advice, legal insight, and communication strategies. You’ll learn how to handle these green invasions politely and effectively—keeping your garden flourishing and your neighborly relationships intact.


Understanding the Problem: Why Do Neighbor’s Flowers Cross Boundaries?

Before diving into solutions, it helps to understand why flowers and plants sometimes cross property lines:

  • Natural Growth Patterns: Many plants naturally spread horizontally or send runners underground.
  • Lack of Awareness: Neighbors may be unaware their plants are encroaching.
  • Boundary Ambiguity: Unclear or unmarked property lines can lead to confusion.
  • Desire for Shared Beauty: Sometimes neighbors intentionally allow plants to grow across borders for mutual enjoyment.

While some overlap may be harmless or even welcome, problems arise when encroaching plants cause damage, shade your garden, or take over space you want to use.


Step 1: Assess the Situation Carefully

The first step is to evaluate how much the flowers have crossed over and what impact they’re having:

  • Are the flowers merely leaning over the fence or deeply rooted in your soil?
  • Are they causing damage to your garden beds or crowding out your plants?
  • Do they affect your enjoyment of your property, such as blocking sunlight or access?
  • Are they invasive species with aggressive spreading tendencies?

Understanding the scope of the problem helps determine the right approach.


Step 2: Review Property Boundaries and Local Laws

Knowing exactly where your property line lies is crucial before taking any action.

  • Check your property deed, survey, or title documents for clear boundary details.
  • Consult local municipal or county regulations on property and plant boundaries.
  • Some jurisdictions have specific laws about plant encroachment, invasive species, or tree root rights.
  • Consider whether your area has any Homeowners Association (HOA) rules affecting garden maintenance or boundaries.

Getting this information helps you understand your legal rights and limitations and ensures you act appropriately.


Step 3: Talk to Your Neighbor—Politely and Proactively

Most garden boundary issues can be resolved with open and respectful communication. If your neighbor isn’t aware their flowers have crossed over, a polite conversation can prevent misunderstandings and conflicts.

Tips for Talking to Your Neighbor:

  • Choose a calm, friendly time to speak—avoid confrontations or raised voices.
  • Use “I” statements: “I noticed some flowers from your garden growing into mine and wanted to see if we can figure out a way to manage it.”
  • Express your concerns clearly but kindly, emphasizing your desire to maintain a good relationship.
  • Suggest possible solutions or compromises, such as trimming the plants or installing a root barrier.

Step 4: Manage the Encroaching Flowers Yourself (Within Your Rights)

If the flowers cross onto your property but the roots remain on your neighbor’s side, many jurisdictions allow you to trim or remove the parts of plants that extend into your space—provided you do not trespass or damage the plant’s overall health.

Best Practices for Managing Encroaching Plants:

  • Use clean, sharp garden tools to trim overhanging flowers or vines.
  • Avoid cutting too close to the main stem to prevent harming the plant.
  • Dispose of the clippings responsibly—consider returning them to your neighbor.
  • If possible, avoid digging up roots on the neighbor’s side without permission.

Note that while trimming is generally permitted, removing whole plants or roots beyond your property line without consent is illegal and can lead to disputes.


Step 5: Consider Physical Barriers or Landscaping Solutions

If encroachment is a recurring issue, physical solutions may help prevent further boundary crossing.

  • Install a Root Barrier: These underground plastic or metal barriers block roots from spreading.
  • Erect a Fence or Trellis: A solid fence can prevent vines and sprawling flowers from reaching your property.
  • Create a Garden Border: Plant dense hedges, shrubs, or edging plants along the property line to create a natural barrier.
  • Use Raised Beds: This keeps your garden soil separated and reduces invasive root spread.

Before installing barriers, discuss plans with your neighbor to avoid surprise or offense.


Step 6: When to Seek Professional or Legal Help

If polite conversation and self-management fail, or if encroachment causes significant damage or financial loss, it may be time to escalate the issue.

Options Include:

  • Mediation: Neutral third parties can help resolve disputes amicably.
  • Consulting a Professional Arborist or Gardener: They can assess plant health, recommend pruning or barriers, and provide expert advice.
  • Legal Advice: A property lawyer can clarify your rights and guide you on legal remedies if necessary.

Legal action should be a last resort, pursued carefully to avoid damaging neighbor relations.


Tips for Maintaining Good Neighborly Relations Throughout

Maintaining respect and politeness throughout the process can make all the difference:

  • Approach the issue early before it worsens.
  • Avoid aggressive or confrontational language.
  • Recognize that plants are living things, not just property issues.
  • Share gardening tips or offer to help with trimming or maintenance.
  • Stay patient—plants grow slowly, and solutions may take time.

Additional Considerations: Invasive Species and Environmental Responsibility

Sometimes flowers crossing boundaries involve invasive species that harm local ecosystems.

  • If invasive plants are involved, both you and your neighbor have a shared responsibility to control them.
  • Contact your local environmental agency for advice on managing invasive species.
  • Collaborate with neighbors to remove or contain invasive plants for community benefit.

Conclusion: Balancing Garden Beauty with Boundaries

When your neighbor’s flowers cross the property line, it can be a delicate situation—one that blends property rights, garden aesthetics, and personal relationships. The key is to approach the problem calmly, informed, and politely.

By assessing the situation, knowing your boundaries and rights, communicating openly, managing plants carefully, and seeking help when needed, you can protect your garden and foster goodwill.

Remember: Your garden is a sanctuary, but so is your neighbor’s. With mutual respect and practical solutions, your flowering boundaries can remain beautiful—and peaceful—on both sides of the fence.