How to Grow Bean Sprouts in Plastic Cups: A Simple Guide for Beginners

How to Grow Bean Sprouts in Plastic Cups: A Simple Guide for Beginners

Bean sprouts are one of the most popular and nutritious vegetables worldwide. They are crunchy, tender, and packed with protein, vitamins, and minerals, making them a perfect addition to salads, stir-fries, soups, and sandwiches. The good news is that you don’t need a garden, soil, or fancy equipment to grow fresh bean sprouts at home—they can be easily grown in simple plastic cups. This method is beginner-friendly, fast, and requires minimal space, making it ideal for urban kitchens, apartments, or small homes. In this guide, we’ll show you how to grow bean sprouts in plastic cups step by step, from soaking seeds to harvesting your first batch of crunchy, healthy sprouts.

Why Grow Bean Sprouts at Home?

Growing bean sprouts at home comes with numerous benefits:

  1. Freshness: Homegrown sprouts are more tender, crunchy, and flavorful than store-bought ones.
  2. Nutritional Value: Bean sprouts are high in protein, fiber, vitamin C, vitamin K, and folate, making them a nutrient-dense addition to your diet.
  3. Cost-Effective: Growing your own sprouts is cheaper than buying packaged sprouts from stores.
  4. Space-Saving: Perfect for small kitchens, balconies, or countertops.
  5. Control Over Cleanliness: You can grow sprouts without chemicals, pesticides, or preservatives.
  6. Quick Growth: Bean sprouts grow rapidly and can be ready to eat in just 4–6 days.

With these benefits, bean sprouts are not only nutritious but also an exciting project for beginner gardeners or home cooks.

Materials Needed

To grow bean sprouts in plastic cups, you will need:

  1. Plastic Cups: Transparent cups are preferable so you can monitor sprout growth.
  2. Mung Bean Seeds: The most common and easy-to-grow seeds for sprouts.
  3. Water: Clean, filtered water is best for soaking and rinsing.
  4. Paper Towels or Cheesecloth: Optional, helps retain moisture and makes sprouting easier.
  5. Tray or Plate: To place cups on while draining excess water.
  6. Spray Bottle: For gentle misting if needed.

These simple materials are easy to find and make the sprouting process very accessible.

Choosing the Right Seeds

The choice of seeds plays a key role in sprout quality:

  • Mung Beans: The most common for crunchy, tender sprouts.
  • Lentils: Smaller, softer sprouts suitable for salads.
  • Chickpeas: Larger, heartier sprouts for cooking.
  • Soybeans: Nutritious but require longer sprouting time.

For beginners, mung beans are ideal because they sprout quickly, are easy to handle, and produce consistent results.

Preparing the Seeds

Proper preparation ensures healthy, uniform sprouts:

  1. Sorting: Remove broken, damaged, or discolored seeds.
  2. Rinsing: Wash seeds thoroughly under running water to remove dust and debris.
  3. Soaking:
    • Place seeds in a bowl and cover with clean water.
    • Soak for 8–12 hours or overnight.
    • The seeds will swell and begin the germination process.

Soaking softens the seeds, jumpstarts germination, and results in faster, healthier sprouts.

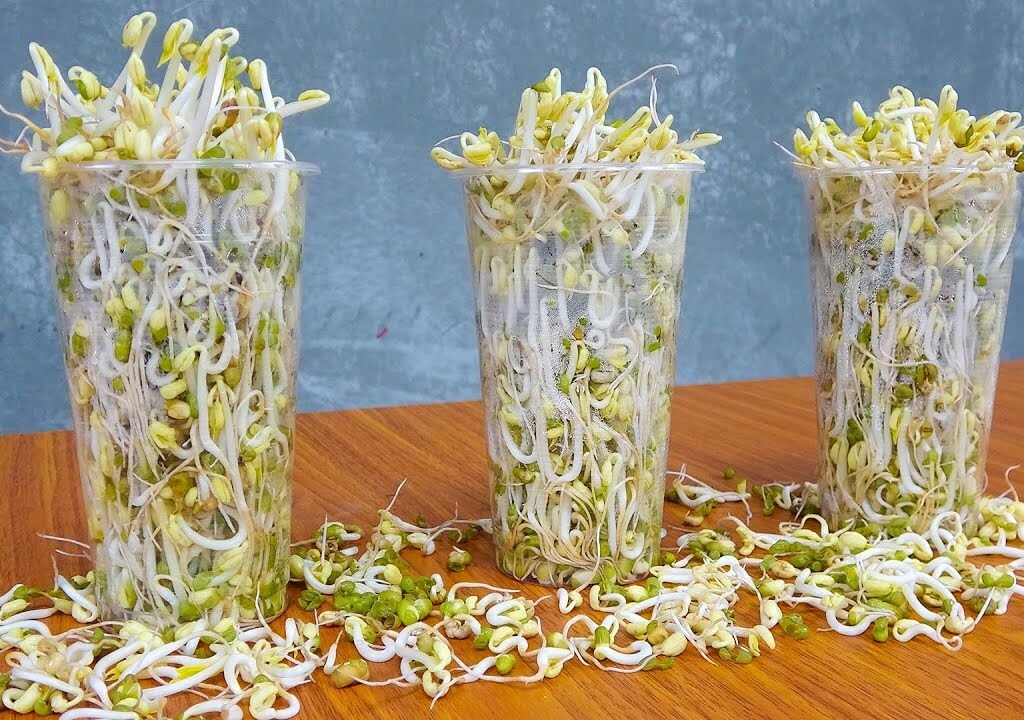
Preparing the Plastic Cups

Plastic cups are simple yet effective containers for sprouting:

  1. Drainage Holes:
    • Poke a few small holes at the bottom of the cup to allow excess water to drain.
    • Proper drainage prevents mold and rot.
  2. Layering (Optional):
    • Line the cup with damp paper towels or cheesecloth.
    • Spread soaked seeds evenly on top.
    • This provides a moist, supportive environment for seeds to sprout.
  3. Placement:
    • Place the cups on a tray or plate to catch drained water.
    • Keep in a well-ventilated, dimly lit area for better sprouting.

Proper cup preparation creates the right conditions for uniform sprout growth and reduces the risk of mold.

Sprouting Process

Bean sprouts grow quickly under the right conditions:

  1. Initial Rinsing:
    • After soaking, drain the seeds and rinse them thoroughly with clean water.
    • Repeat rinsing 2–3 times a day to keep seeds moist and prevent bacterial growth.
  2. Covering:
    • Cover the cup with a plate or cloth to maintain humidity while allowing airflow.
    • This simulates a natural environment for germination.
  3. Temperature:
    • Ideal temperature is between 68–75°F (20–24°C).
    • Avoid direct sunlight, which can make sprouts bitter and tough.
  4. Monitoring Growth:
    • Sprouts will start to appear within 24–48 hours.
    • Continue rinsing and draining twice daily.
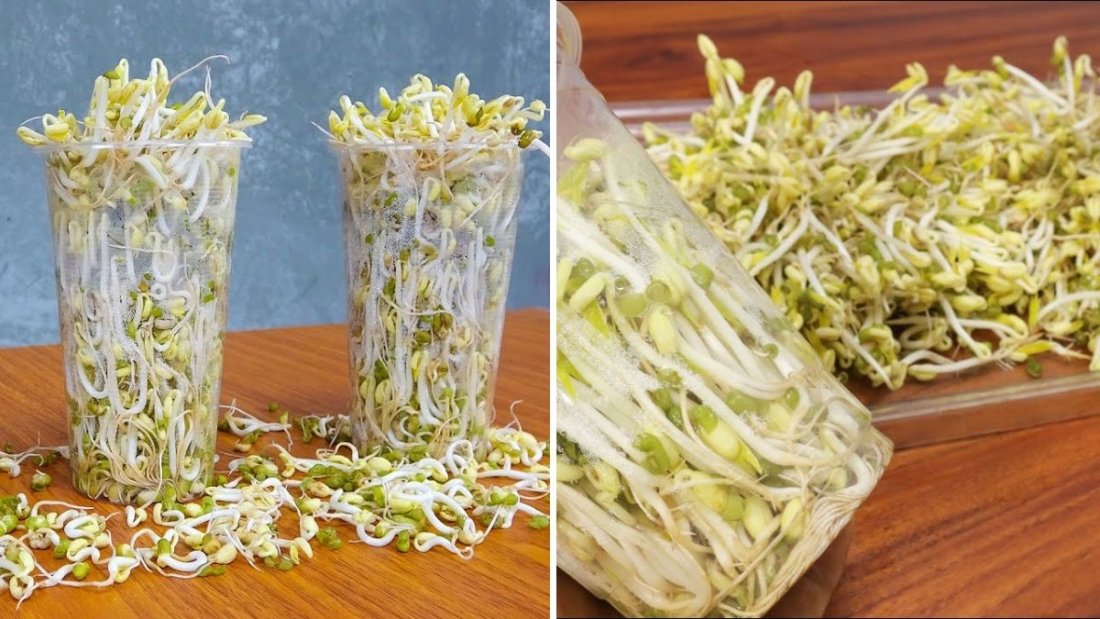
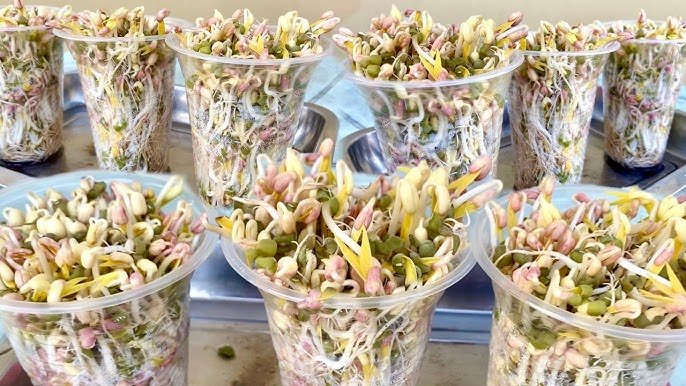
    • By day 4–6, sprouts typically reach a length of 2–3 inches, ready for harvest.

Consistency in rinsing, drainage, and humidity ensures healthy, crunchy sprouts without mold or bad odor.

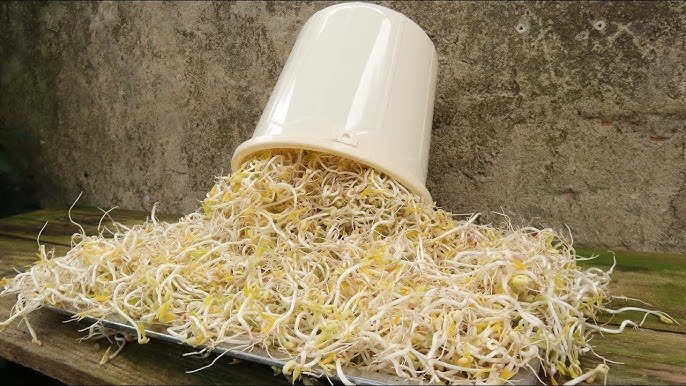
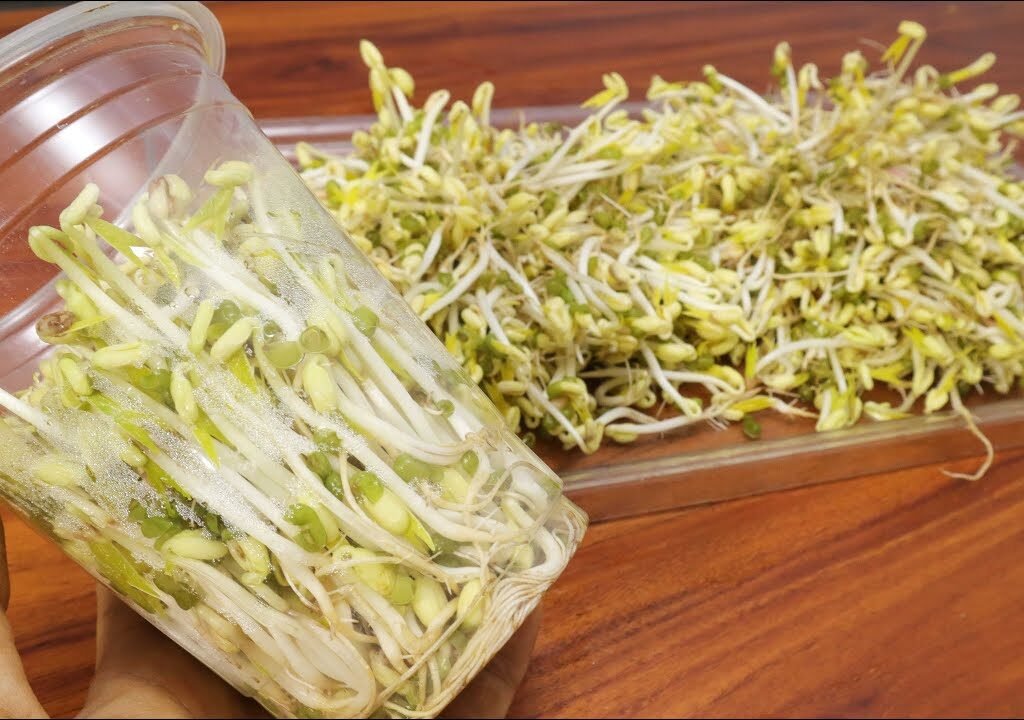
Harvesting Bean Sprouts

Harvesting is simple and quick:

  • Timing: Most mung bean sprouts are ready in 4–6 days.
  • Method: Remove sprouts from the cup and rinse thoroughly under clean water.
  • Storage: Keep harvested sprouts in a sealed container in the refrigerator for up to 3–5 days.

Freshly harvested sprouts are tender, crunchy, and nutrient-rich, perfect for immediate consumption in salads, stir-fries, and sandwiches.

Benefits of Growing Bean Sprouts in Plastic Cups

  • Space Efficiency: Ideal for apartments, kitchens, and small living spaces.
  • Fast Growth: Ready in under a week, providing quick results and satisfaction.
  • Cost-Effective: Cheap and reusable containers make sprouting economical.
  • Nutrient-Rich: Homegrown sprouts are healthier than commercially packed ones.
  • Sustainable: Reuse plastic cups, reducing waste while producing food.
  • Educational: A fun project for kids and adults to learn about plant growth and germination.

Bean sprouts in cups combine convenience, nutrition, and sustainability, making them a perfect addition to any home.

Tips for Success

  • Always use clean, fresh water to avoid bacterial growth.
  • Rinse sprouts at least twice daily to maintain moisture and prevent mold.
  • Avoid direct sunlight during sprouting; indirect light or dim areas are best.
  • Use only high-quality, undamaged seeds for consistent germination.
  • Harvest promptly when sprouts are tender to maintain optimal texture and flavor.
  • Reuse cups after thorough washing for the next batch of sprouts.

Following these tips ensures a steady supply of healthy, fresh bean sprouts in your kitchen.

Common Challenges and Solutions

  • Mold or Bad Odor: Caused by excessive moisture or poor drainage. Solution: Rinse twice daily, ensure proper drainage, and maintain airflow.
  • Uneven Sprouting: Can occur due to overcrowded seeds. Solution: Spread seeds evenly and use multiple cups if needed.
  • Bitter Sprouts: Caused by sunlight exposure. Solution: Keep cups in a dimly lit area.
  • Slow Growth: Caused by low temperatures. Solution: Move cups to a warmer spot between 68–75°F (20–24°C).

Addressing these common issues ensures consistent, healthy sprout production.

Conclusion

Growing bean sprouts in plastic cups is a simple, cost-effective, and rewarding way to enjoy fresh, nutrient-rich vegetables at home. From selecting and soaking seeds to preparing cups, rinsing, and harvesting, the process is beginner-friendly and can be completed in less than a week.

Whether you want crunchy sprouts for salads, soups, or stir-fries, this method allows you to grow your own fresh food without the need for soil or a large garden. With proper care, attention to moisture, and consistent rinsing, you can enjoy continuous batches of healthy, homegrown bean sprouts right from your kitchen.

Starting a small sprout garden in plastic cups is not only convenient and economical but also fun and educational, making it a perfect project for families, beginners, and urban gardeners alike.

How to Revive Flowers After Heavy Rain

How to Revive Flowers After Heavy Rain

Heavy rainfall can be both a blessing and a challenge for gardeners. While rain provides essential water, excessive precipitation can damage flowers, leading to broken stems, waterlogged soil, fungal diseases, and nutrient leaching. For gardeners who invest time and effort into maintaining vibrant flower beds, a sudden downpour can be disheartening. However, with the right strategies, it is possible to revive flowers after heavy rain, restore their beauty, and prevent long-term damage.

This article provides a comprehensive guide on identifying rain damage, immediate recovery measures, soil management, and long-term prevention techniques to maintain healthy, thriving blooms.


1. Understanding the Impact of Heavy Rain on Flowers

Heavy rain affects flowers in multiple ways:

  • Physical Damage: Petals and leaves can be bruised or torn; stems may bend or break under the weight of water.
  • Waterlogged Soil: Excess water displaces oxygen in the root zone, leading to root stress or rot.
  • Nutrient Leaching: Essential minerals like nitrogen, potassium, and phosphorus can be washed away, reducing flower vigor.
  • Increased Risk of Disease: Wet foliage encourages fungal infections like powdery mildew, botrytis, and leaf spots.
  • Delayed Growth: Prolonged saturation slows photosynthesis and may stunt flower development.

Understanding these effects is the first step in assessing damage and implementing recovery strategies.


2. Immediate Recovery Measures After Heavy Rain

A. Assess Damage

  • Walk through the garden and identify flowers with broken stems, bruised petals, or flattened foliage.
  • Prioritize plants that are most vulnerable, such as delicate annuals or tall perennials.

B. Remove Standing Water

  • If water pools in garden beds or containers, gently scoop or drain it to prevent root suffocation.
  • Use a shallow trench or raised beds for better drainage in areas prone to flooding.

C. Straighten Bent Stems

  • Support fallen or bent flowers by staking them or gently propping them with soft ties.
  • Avoid tying too tightly, which can further damage stems.

D. Remove Damaged Foliage

  • Trim broken leaves and shredded petals carefully to reduce stress and prevent disease.
  • Dispose of debris away from flower beds to limit fungal spore proliferation.

3. Soil Management Post-Rain

Proper soil care is essential to revive flowers and restore root health:

A. Check Soil Drainage

  • Heavy rain can compact soil, reducing aeration.
  • Gently loosen compacted areas with a fork or hand trowel, being careful not to damage roots.

B. Add Organic Matter

  • Incorporate compost or well-rotted manure to improve soil structure and drainage.
  • Organic matter enhances oxygen retention and promotes microbial activity, supporting recovery.

C. Fertilize Carefully

  • Rain can leach nutrients; apply a balanced, water-soluble fertilizer once the soil has dried slightly.
  • Avoid over-fertilization, which can stress already weakened plants.

4. Watering Strategies After Heavy Rain

Even after a downpour, careful watering may be needed:

  • Allow Soil to Dry Slightly: Avoid immediate watering until topsoil is moderately dry.
  • Deep, Gentle Watering: Once the soil is ready, water at the base to support roots without wetting foliage.
  • Monitor Moisture Levels: Ensure the soil is not soggy for more than 24–48 hours to prevent root rot.

Proper watering encourages root recovery and reduces susceptibility to disease.


5. Disease Prevention and Management

Excess moisture increases fungal and bacterial risks:

A. Inspect for Fungal Infections

  • Look for spots, mold, or powdery coating on leaves and stems.
  • Remove infected parts immediately.

B. Improve Air Circulation

  • Thin crowded plants to allow sunlight and airflow.
  • Avoid overhead watering for several days to let foliage dry.

C. Use Organic Fungicides

  • Apply neem oil or baking soda solutions to prevent or control fungal growth.
  • Only use chemical fungicides as a last resort and follow label instructions carefully.

Preventing disease ensures damaged flowers recover without secondary infections.


6. Supporting Fragile Flowers

Some flowers require additional care after heavy rain:

  • Tall or Top-Heavy Plants: Stake or cage plants like hollyhocks, delphiniums, and sunflowers to prevent bending.
  • Climbing Plants: Gently untangle vines that may have twisted due to rain and secure them to supports.
  • Delicate Annuals: Lift flattened flowers carefully and avoid stepping on wet soil to reduce compaction.

Providing structural support aids in faster recovery and prevents recurring damage.


7. Mulching for Post-Rain Recovery

Mulch helps regulate soil moisture and protect flower roots:

  • Apply a 2–3 inch layer of organic mulch around plant bases.
  • Mulch reduces splashing, which can spread soil-borne pathogens onto foliage.
  • Helps retain essential moisture once the soil begins to dry after heavy rain.

Mulching is a simple yet effective strategy for both recovery and long-term resilience.


8. Reviving Container Flowers After Heavy Rain

Potted plants face unique challenges:

  • Drainage Check: Ensure pots have adequate drainage holes; excess water should escape freely.
  • Remove Excess Water: Tip or tilt containers to let water drain from saturated soil.
  • Soil Aeration: Gently loosen the top layer of compacted soil.
  • Repotting (if necessary): For severely waterlogged containers, repot into fresh, well-draining soil to prevent root rot.

Containers require extra attention as roots are more vulnerable to waterlogging.


9. Nutrient Restoration After Nutrient Leaching

Heavy rain often washes away nutrients vital for flower growth:

  • Nitrogen Deficiency: Yellowing leaves indicate nitrogen loss; supplement with balanced fertilizers or compost tea.
  • Phosphorus and Potassium: Promote root and flower development; apply slow-release fertilizers if soil tests indicate deficiency.
  • Micronutrients: Trace elements like magnesium and iron may need replenishment for optimal flowering.

Restoring nutrients supports robust regrowth and prolonged blooming.


10. Planning for Future Rain Events

Preventive measures reduce future damage:

  • Raised Beds and Mounds: Improve drainage and protect roots from waterlogging.
  • Rain Gardens: Divert excess water to designated areas to reduce flooding in flower beds.
  • Windbreaks and Shelter: Protect flowers from wind-driven rain that can cause mechanical damage.
  • Soil Amendments: Incorporate sand or perlite into heavy soils to improve drainage.

Strategic planning ensures flowers remain resilient and less prone to rain damage.


11. Encouraging Regrowth and Continuous Bloom

After heavy rain, flowers can bounce back with proper care:

  • Deadheading: Remove spent blooms to stimulate new growth.
  • Regular Pruning: Trim broken or damaged stems to redirect energy to healthy parts of the plant.
  • Sunlight Exposure: Ensure flowers receive adequate sunlight to revive photosynthesis.
  • Monitoring: Check for pest infestations, which may exploit weakened plants.

These steps promote vigorous regrowth and restore garden beauty.


12. Psychological Benefits of Reviving Rain-Damaged Flowers

Gardening after storms provides emotional and cognitive benefits:

  • Stress Relief: Tending to damaged flowers helps gardeners feel productive and connected to nature.
  • Problem-Solving Skills: Diagnosing damage and implementing solutions enhances analytical thinking.
  • Aesthetic Satisfaction: Reviving flowers restores visual harmony, boosting morale and enjoyment of outdoor spaces.

Caring for flowers post-rain fosters both resilient gardens and a healthy mindset.


13. Conclusion

Heavy rain can temporarily disrupt the beauty and vitality of flower gardens, but with timely intervention and proper care, flowers can recover and continue to flourish. Key strategies include:

  1. Immediate Assessment and Support: Straighten stems, trim damaged foliage, and remove standing water.
  2. Soil and Nutrient Management: Improve drainage, aerate compacted soil, and replenish nutrients lost to leaching.
  3. Disease Prevention: Maintain airflow, monitor for fungal growth, and apply organic treatments as needed.
  4. Ongoing Maintenance: Deadhead, prune, and stake plants to encourage regrowth and prevent recurring damage.
  5. Future Planning: Implement raised beds, rain gardens, and soil amendments to mitigate the impact of future heavy rainfall.

By following these practices, gardeners can revive flowers after heavy rain, maintain continuous blooms, and protect the long-term health of their gardens. Resilient flower beds not only enhance the aesthetic appeal of outdoor spaces but also contribute to a balanced ecosystem, attracting pollinators and supporting biodiversity.

Ultimately, successful recovery from rain damage requires awareness, patience, and proactive care, ensuring that gardens remain vibrant, colorful, and thriving despite the challenges posed by nature.

How to Grow Chayote Easily in a Paint Bucket: Step-by-Step Guide

How to Grow Chayote Easily in a Paint Bucket: Step-by-Step Guide

Chayote, also known as vegetable pear or mirliton, is a versatile and nutrient-rich vine vegetable that belongs to the gourd family. Its tender flesh is widely used in soups, stews, stir-fries, and salads. While traditionally grown in gardens or large plots, chayote can also thrive in containers, making it ideal for urban spaces, terraces, or small backyards. Growing chayote in a paint bucket is a simple and effective method that allows anyone to enjoy fresh, homegrown chayote without the need for extensive garden space. In this guide, we’ll cover the complete process of growing chayote in a paint bucket—from selecting seeds to harvesting delicious fruits.

Why Grow Chayote at Home?

Homegrown chayote offers several benefits:

  1. Freshness: Picking chayote from your own plant ensures maximum flavor and nutritional value.
  2. Nutritional Benefits: Chayote is low in calories, rich in fiber, vitamins C and B6, and minerals like potassium and magnesium.
  3. Cost-Effective: Growing your own chayote reduces grocery expenses and provides a continuous supply.
  4. Space-Efficient: Container cultivation allows you to grow chayote in small urban spaces or on terraces.
  5. Organic Growth: Home cultivation allows you to avoid chemical fertilizers and pesticides, producing healthier vegetables.

Whether you want fresh produce for your kitchen or a fun gardening project, chayote is an excellent choice for home cultivation.

Choosing the Right Paint Bucket

The paint bucket you choose can make a significant difference in plant growth:

  • Size: Use a large paint bucket, ideally 15–20 liters, to provide enough space for root expansion.
  • Condition: Ensure the bucket is clean and free from paint residues.
  • Drainage: Drill multiple holes at the bottom to allow excess water to drain, preventing root rot.

A well-prepared bucket creates a healthy environment for chayote roots, encouraging strong growth and higher yields.

Materials Needed

Before starting, gather the following materials:

  1. Chayote Seed or Fruit: Use a fresh, healthy chayote.
  2. Paint Bucket: A 15–20 liter clean bucket with drainage holes.
  3. Potting Mix: Well-draining soil enriched with compost or organic matter.
  4. Trellis or Support: Chayote is a climbing vine and needs support to grow vertically.
  5. Fertilizer: Balanced or organic fertilizer to support growth and fruiting.
  6. Watering Can: For consistent watering.
  7. Knife or Drill: To prepare drainage holes in the bucket.

Having all materials ready ensures a smooth planting process and maximizes the chances of successful growth.

Preparing the Paint Bucket

Proper preparation of the bucket is essential:

  1. Cleaning: Wash the bucket thoroughly to remove dirt and residues.
  2. Drilling Drainage Holes:
    • Drill 5–8 holes at the bottom for proper water drainage.
  3. Filling Soil:
    • Fill the bucket with nutrient-rich, well-draining potting mix.
    • Leave 2–3 inches of space from the top to prevent soil spillage during watering.

Proper preparation ensures that chayote roots remain healthy and have adequate nutrients and drainage.

Planting Chayote

Planting chayote in a paint bucket is straightforward and beginner-friendly:

  1. Selecting Chayote Fruit:
    • Choose a firm, healthy chayote.
    • The fruit should have a visible bud or sprout, which will grow into the vine.
  2. Planting Method:
    • Place the chayote horizontally or at a slight angle in the soil with the bud facing upwards.
    • Cover it lightly with soil, leaving the top part exposed.
  3. Watering:
    • Water immediately after planting to settle the soil around the chayote.
    • Maintain consistent moisture but avoid waterlogging.

With proper planting, chayote will sprout roots and shoots within 2–4 weeks, depending on environmental conditions.

Providing Support for Growth

Chayote is a vigorous climbing vine, so support is essential for healthy growth:

  • Trellis or Pole: Install a trellis or pole in the bucket for the vine to climb.
  • Vertical Growth: Training the vine upwards saves space and improves air circulation.
  • Pruning: Remove weak or overcrowded shoots to direct energy to main vines and fruit production.

Providing support helps prevent tangling, promotes healthy vine development, and makes harvesting easier.

Caring for Chayote in a Bucket

Proper care ensures maximum growth and fruiting:

  1. Watering:
    • Keep the soil consistently moist, especially during flowering and fruiting stages.
    • Water deeply but allow excess water to drain to avoid root rot.
  2. Fertilization:
    • Apply a balanced fertilizer every 3–4 weeks.
    • Organic options like compost tea, fish emulsion, or well-rotted manure work well.
  3. Sunlight:
    • Chayote requires 6–8 hours of direct sunlight daily.
    • Place the bucket in a sunny spot or provide grow lights if indoors.
  4. Temperature and Humidity:
    • Chayote thrives in warm temperatures (70–85°F / 21–29°C).
    • Protect plants from frost and extreme cold.

Consistent care, including watering, fertilization, and sunlight, ensures healthy vines and a continuous supply of fruit.

Flowering and Fruiting

Chayote begins flowering approximately 3–4 months after planting:

  • Flower Types: Chayote produces both male and female flowers; pollination is required for fruit development.
  • Pollination:
    • Natural pollinators like bees can help.
    • Hand pollination can be done using a small brush to transfer pollen from male to female flowers.
  • Fruit Development:
    • Fruits start forming 4–6 weeks after successful pollination.
    • Chayote fruits grow rapidly and can reach harvest size in 3–5 months.

Understanding the flowering and fruiting process helps you manage your plant for maximum yield.

Harvesting Chayote

Harvesting chayote correctly ensures the best flavor and promotes continued fruit production:

  • Timing: Harvest when the fruit is light green, firm, and about the size of a large pear.
  • Method: Cut fruits from the vine using scissors or a sharp knife to avoid damaging the plant.
  • Continuous Harvest: Regular harvesting encourages the plant to produce more fruits throughout the season.

Proper harvesting allows you to enjoy fresh, tender chayote while prolonging the productive life of the vine.

Benefits of Growing Chayote in a Paint Bucket

  • Space Efficiency: Ideal for terraces, balconies, or small urban gardens.
  • Ease of Care: Container growth allows easy monitoring of soil, water, and nutrients.
  • Fresh and Organic: Control over inputs ensures pesticide-free, healthy produce.
  • Vertical Gardening: Training vines saves space and improves yield.
  • Educational and Fun: Great for beginner gardeners and educational home projects.

Container-grown chayote combines practicality, productivity, and the joy of home gardening.

Tips for Success

  • Use a healthy, sprouting chayote for planting.
  • Ensure the bucket has proper drainage to prevent root rot.
  • Provide adequate support for climbing vines.
  • Keep soil consistently moist and fertilize regularly.
  • Place the bucket in a sunny spot for optimal growth.
  • Monitor for pests and remove damaged leaves promptly.
  • Harvest regularly to encourage continued fruiting.

Following these tips ensures a productive, healthy, and rewarding chayote harvest from a simple paint bucket.

Common Challenges and Solutions

  • Slow Growth: Caused by insufficient sunlight or poor soil. Solution: Move bucket to a sunnier spot and enrich soil with compost.
  • Yellowing Leaves: Indicates nutrient deficiency or overwatering. Solution: Adjust watering and apply a balanced fertilizer.
  • Pests: Aphids or caterpillars may appear. Solution: Remove manually or use organic insecticides like neem oil.
  • Overcrowding Vines: Can reduce air circulation and fruit yield. Solution: Prune excess vines and train main shoots along the trellis.

By monitoring plants regularly and addressing issues promptly, your container-grown chayote will thrive.

Conclusion

Growing chayote in a paint bucket is an easy, space-saving, and rewarding method for enjoying fresh, homegrown vegetables. From selecting a healthy chayote, preparing the bucket, and planting, to providing support, maintaining care, and harvesting, this method is perfect for beginners and urban gardeners.

With a little attention to sunlight, water, and nutrients, a simple paint bucket can produce healthy vines and delicious fruits that enhance your meals. Whether you’re gardening for fun, nutrition, or sustainability, growing chayote in containers proves that even limited space can yield abundant, fresh produce.

Start your paint bucket chayote garden today, and experience the satisfaction of harvesting your own nutritious, homegrown vegetables right from your terrace or balcony.

How to Grow Caisin Mustard (Sawi Caisin) in Bottles: From Seed to Harvest

How to Grow Caisin Mustard (Sawi Caisin) in Bottles: From Seed to Harvest

Caisin mustard, known locally as sawi caisin, is a popular leafy green vegetable loved for its tender leaves, mild flavor, and high nutritional value. Often used in soups, stir-fries, and salads, this versatile vegetable is surprisingly easy to grow at home—even in small spaces. With the right technique, you can cultivate caisin mustard in bottles, making it ideal for urban gardens, balconies, and terraces. In this guide, we’ll walk you through the complete process of growing caisin mustard in bottles, from sowing seeds to harvesting fresh, healthy leaves.

Why Grow Caisin Mustard at Home?

Growing caisin mustard at home offers numerous benefits:

  1. Freshness: Homegrown leaves are more tender, flavorful, and nutrient-rich than store-bought greens.
  2. Nutritional Value: Rich in vitamins A, C, and K, minerals, and antioxidants, caisin mustard promotes a healthy diet.
  3. Cost-Effective: Growing your own vegetables reduces grocery expenses.
  4. Space-Saving: Growing in bottles allows for gardening in limited spaces such as balconies, terraces, or small apartments.
  5. Control Over Growth: By cultivating at home, you can grow organic vegetables without pesticides or chemicals.

Whether you want a continuous supply for your kitchen or a fun urban gardening project, caisin mustard is perfect for home cultivation.

Choosing the Right Bottles

Plastic bottles are ideal for small-scale container gardening due to their affordability and availability. Here’s how to choose the right ones:

  • Size: 1.5–2 liter bottles are suitable, providing enough space for roots to grow.
  • Condition: Use clean, undamaged bottles, and remove labels to avoid mold buildup.
  • Drainage: Ensure drainage holes at the bottom to prevent waterlogging.

Properly selected bottles provide a healthy environment for caisin mustard roots and encourage vigorous growth.

Materials Needed

Before starting, gather the following materials:

  1. Plastic Bottles: 1.5–2 liter bottles for container planting.
  2. Caisin Mustard Seeds: Choose fresh, viable seeds from a reliable source.
  3. Potting Mix: Use well-draining soil enriched with compost or organic matter.
  4. Watering Can or Spray Bottle: For gentle watering.
  5. Fertilizer: Organic or balanced fertilizer for healthy growth.
  6. Scissors or Knife: To create openings in the bottles for planting.

Having all materials ready ensures a smooth planting process and reduces complications.

Preparing the Bottles

Transforming plastic bottles into planters requires a few simple steps:

  1. Cleaning: Wash bottles thoroughly with soap and water to remove dirt and residues.
  2. Cutting Openings:
    • Cut a rectangular or circular opening on the side to plant seedlings.
    • Ensure the opening is large enough for planting and harvesting.
  3. Drainage:
    • Create small holes at the bottom to allow excess water to drain.

By properly preparing bottles, you create an ideal growing environment that supports root development and healthy plant growth.

Planting Caisin Mustard Seeds

Sowing seeds correctly is key to successful growth:

  1. Filling Soil:
    • Fill bottles with potting mix, leaving a small space at the top to prevent soil spillage.
  2. Sowing Seeds:
    • Sprinkle caisin mustard seeds evenly over the soil surface.
    • Lightly cover seeds with a thin layer of soil or compost.
  3. Watering:
    • Mist the soil gently to moisten it without washing away seeds.
    • Maintain consistent moisture during germination.

Caisin mustard seeds usually germinate within 5–10 days, depending on temperature and care.

Caring for Seedlings

Once seedlings emerge, proper care ensures strong, healthy growth:

  1. Sunlight:
    • Place bottles where seedlings receive 4–6 hours of sunlight daily.
    • If sunlight is limited, supplement with a grow light.
  2. Watering:
    • Keep the soil consistently moist but not soggy.
    • Container-grown plants dry out faster, so monitor frequently.
  3. Thinning:
    • Once seedlings grow a few leaves, thin them by removing weaker plants to allow space for healthy ones.

Proper seedling care promotes vigorous growth, stronger stems, and larger leaves.

Fertilization and Growth

Caisin mustard thrives when provided with the right nutrients:

  1. Fertilizer Application:
    • Use an organic or balanced fertilizer every 10–14 days.
    • Avoid over-fertilizing, as this can lead to excessive leaf growth with weak stems.
  2. Soil Maintenance:
    • Add compost or organic matter to replenish nutrients in the soil.
    • Loosen soil occasionally to prevent compaction.

Nutrient-rich soil ensures continuous growth and produces tender, flavorful leaves.

Harvesting Caisin Mustard

Harvesting at the right time is crucial for taste and regrowth:

  • Timing: Leaves can be harvested when they reach 4–6 inches in height.
  • Method: Use scissors to cut leaves at the base, leaving some leaves for ongoing growth.
  • Frequency: Harvest regularly, every 5–7 days, to encourage new leaves and extend the growing period.

Proper harvesting ensures a continuous supply of fresh, tender leaves from the same plant.

Benefits of Growing Caisin Mustard in Bottles

  • Space Efficiency: Perfect for small apartments, balconies, and terraces.
  • Continuous Harvest: Regular harvesting produces leaves for several months.
  • Fresh and Organic: You control soil, water, and fertilizer, growing pesticide-free vegetables.
  • Eco-Friendly: Reuses plastic bottles, reducing waste.
  • Decorative: Vertical or stacked bottle gardens add greenery and beauty to your living space.

Container-grown caisin mustard is practical, productive, and visually appealing, making it ideal for urban gardeners.

Tips for Success

  • Choose healthy seeds and fresh seedlings for better germination.
  • Ensure bottles have proper drainage to avoid waterlogging.
  • Maintain consistent moisture in the soil without overwatering.
  • Provide adequate sunlight or grow light for strong leaves.
  • Fertilize periodically to maintain soil fertility and encourage growth.
  • Thin seedlings to avoid overcrowding and weak growth.
  • Harvest regularly to stimulate new leaf production.

Following these tips maximizes yield and ensures a long-lasting harvest of tender caisin mustard leaves.

Common Challenges and Solutions

Even in bottles, caisin mustard can face challenges:

  1. Leggy Seedlings:
    • Cause: Insufficient sunlight.
    • Solution: Provide 4–6 hours of direct sunlight or supplement with artificial light.
  2. Yellowing Leaves:
    • Cause: Nutrient deficiency or overwatering.
    • Solution: Adjust watering schedule and apply balanced fertilizer.
  3. Pests:
    • Cause: Aphids or small insects.
    • Solution: Use neem oil or gently wash leaves to remove pests.
  4. Slow Growth:
    • Cause: Poor soil or compacted roots.
    • Solution: Add fresh compost and loosen the soil periodically.

By monitoring plants regularly and addressing issues promptly, you can maintain a healthy bottle garden.

Conclusion

Growing caisin mustard in bottles is a fun, practical, and space-saving method to enjoy fresh, nutritious vegetables at home. From sowing seeds to caring for seedlings, fertilizing, and harvesting, this technique allows you to cultivate a continuous supply of tender leaves even in limited spaces.

Whether you live in an apartment, on a terrace, or have a small balcony, bottle gardening offers an affordable and sustainable way to grow your own food. By following the steps in this guide—preparing bottles, planting seeds, maintaining proper care, and harvesting correctly—you can enjoy a thriving caisin mustard garden that produces healthy, delicious leaves for months.

With a little patience, regular care, and attention to detail, growing caisin mustard in bottles can become a rewarding hobby that brings freshness, flavor, and greenery right to your home.

Growing a Hydroponic Vegetable Garden at Home: Easy Guide for Beginners

Growing a Hydroponic Vegetable Garden at Home: Easy Guide for Beginners

Hydroponic gardening has become a popular trend for urban dwellers and home gardeners looking to grow fresh, healthy vegetables without the need for soil. By using nutrient-rich water solutions, hydroponics allows plants to thrive faster, yield more, and occupy less space. Best of all, it’s beginner-friendly and can be set up in homes, balconies, or terraces. In this guide, we’ll explore step-by-step instructions for creating your own hydroponic vegetable garden at home, tips for maximizing growth, and how even beginners can enjoy a productive, fresh harvest.

Why Choose Hydroponic Gardening?

Hydroponic gardening offers several advantages over traditional soil-based gardening:

  1. Faster Growth: Plants receive direct access to nutrients, allowing them to grow quicker than in soil.
  2. Higher Yields: Optimized nutrient delivery leads to larger harvests.
  3. Space Efficiency: Ideal for apartments, small terraces, or balconies, as vertical setups can save space.
  4. Water Conservation: Hydroponics uses up to 90% less water than conventional gardening.
  5. No Soil Required: Perfect for urban environments where soil may be contaminated or limited.
  6. Pest and Disease Reduction: Fewer soil-borne pests and diseases mean healthier plants.

Whether you want fresh lettuce, spinach, tomatoes, or peppers, hydroponics offers a modern, sustainable way to grow vegetables right at home.

Choosing the Right Hydroponic System

For beginners, some hydroponic systems are easier to manage than others:

  1. Deep Water Culture (DWC): Plants’ roots are suspended in nutrient-rich water. Ideal for leafy greens like lettuce and spinach.
  2. Nutrient Film Technique (NFT): A thin film of water flows over the roots, delivering nutrients efficiently. Suitable for fast-growing plants.
  3. Wick System: Uses a wick to draw nutrients from a reservoir into the plant roots. Great for small herbs and beginners.
  4. Ebb and Flow (Flood and Drain): Periodically floods the plant roots with nutrient solution, then drains. Works well for a variety of vegetables.

For a home setup, DWC or wick systems are often the easiest and most cost-effective for beginners.

Materials Needed

To start your hydroponic garden at home, gather the following materials:

  1. Containers: Small buckets, plastic trays, or any water-tight containers for your system.
  2. Net Pots: Hold the plants and allow roots to grow into the nutrient solution.
  3. Growing Medium: Options like rockwool, clay pebbles, or perlite support plants in place.
  4. Hydroponic Nutrients: Water-soluble nutrients designed specifically for hydroponic systems.
  5. pH Meter: Ensures the water is at the optimal acidity for nutrient absorption.
  6. Air Pump and Air Stone (for DWC): Supplies oxygen to plant roots.
  7. Vegetable Seeds or Seedlings: Leafy greens, herbs, tomatoes, peppers, and cucumbers are excellent choices for beginners.

Having these materials ready ensures a smooth start and reduces the chances of mistakes during setup.

Setting Up Your Hydroponic System

Follow these steps to create a basic home hydroponic garden:

  1. Prepare the Reservoir:
    • Fill your container or bucket with water.
    • Add hydroponic nutrients according to the instructions on the package.
  2. Check pH Levels:
    • The optimal pH for most vegetables is 5.5–6.5.
    • Use a pH meter and adjust with pH up or down solutions as necessary.
  3. Insert Air Pump (DWC System):
    • Connect the air pump to an air stone in the reservoir to oxygenate the water.
    • Oxygen-rich water promotes healthy root growth.
  4. Prepare Net Pots:
    • Fill net pots with your chosen growing medium.
    • Plant seedlings or seeds in the medium and ensure roots can access the water below.
  5. Place Plants in Reservoir:
    • Position net pots so roots are suspended in nutrient solution but supported by the growing medium.
    • Ensure each plant receives adequate space and light.
  6. Provide Adequate Light:
    • Hydroponic plants need 12–16 hours of light per day.
    • Use natural sunlight near windows or supplement with LED grow lights for indoor setups.
  7. Maintain Temperature:
    • Most vegetables thrive at 65–75°F (18–24°C).
    • Keep the environment consistent to avoid stress on plants.

A well-prepared hydroponic system ensures healthy growth and a high-yield harvest.

Caring for Hydroponic Plants

Proper care is essential for hydroponic success:

  1. Monitor Water Levels:
    • Check water levels daily and top up as needed.
    • Nutrient concentration should remain stable for optimal growth.
  2. Maintain pH:
    • Test pH regularly, ideally every 2–3 days.
    • Correct imbalances promptly to prevent nutrient deficiencies.
  3. Check Nutrient Concentration (EC):
    • Electrical Conductivity (EC) measures nutrient levels.
    • Adjust nutrient strength according to plant growth stages: lower for seedlings, higher for mature plants.
  4. Prune Plants:
    • Trim dead leaves or excessive growth to improve airflow and light penetration.
    • Encourage healthy, productive branches.
  5. Pest Management:
    • Hydroponics reduces soil pests, but watch for aphids, whiteflies, or fungal issues.
    • Use organic sprays or manual removal to manage pests.

Regular maintenance ensures vigorous growth, higher yields, and reduces the risk of plant stress.

Recommended Vegetables for Beginners

Not all vegetables thrive equally in hydroponic systems. For beginners, choose plants that are easy to grow and fast-maturing:

  • Lettuce and Spinach: Quick-growing, ideal for continuous harvest.
  • Herbs (Basil, Mint, Cilantro): Compact, fast-growing, and perfect for indoor systems.
  • Tomatoes: Require staking or trellising but yield abundant fruit.
  • Peppers: Compact varieties work well in DWC or NFT systems.
  • Cucumbers: Best suited for vertical systems with trellises to support vines.

Starting with easy crops builds confidence before moving on to larger or more demanding vegetables.

Harvesting Hydroponic Vegetables

Harvesting at the right time ensures maximum flavor and productivity:

  • Leafy Greens: Ready in 3–6 weeks, depending on variety. Pick outer leaves first for continuous harvest.
  • Herbs: Harvest leaves as needed, promoting new growth.
  • Fruits (Tomatoes, Peppers, Cucumbers): Harvest when fully ripe in color and size.
  • Continuous Harvest: Regular harvesting encourages plants to produce more and prolongs the growing season.

Fresh, homegrown vegetables from a hydroponic system are more flavorful and nutrient-rich than store-bought alternatives.

Benefits of Hydroponic Gardening at Home

  • Space-Efficient: Ideal for urban homes and small apartments.
  • Faster Growth and High Yield: Direct nutrient delivery promotes rapid development.
  • Pesticide-Free: Grow clean, organic vegetables safely.
  • Water-Saving: Uses significantly less water than traditional gardening.
  • Educational: A great way to learn about plant biology, nutrients, and sustainable gardening.

Hydroponic gardening is both practical and rewarding, offering fresh produce year-round.

Tips for Beginners

  • Start with small, easy-to-manage systems like DWC or wick systems.
  • Choose fast-growing vegetables for early success and motivation.
  • Monitor pH and nutrient levels regularly to prevent deficiencies.
  • Provide adequate light, either natural or with LED grow lights.
  • Keep the environment stable in terms of temperature and humidity.
  • Harvest regularly to encourage continuous growth.
  • Gradually expand your system as you gain experience.

Following these tips ensures a successful hydroponic vegetable garden, even for first-time gardeners.

Conclusion

Growing a hydroponic vegetable garden at home is an excellent way to enjoy fresh, nutritious, and pesticide-free vegetables without the need for soil. With a simple setup, proper care, and regular maintenance, even beginners can cultivate leafy greens, herbs, and fruiting vegetables successfully. Hydroponics allows for faster growth, higher yields, and space-efficient gardening, making it ideal for urban dwellers and those with limited outdoor space.

By following the steps outlined in this guide—from setting up the system and planting seeds to monitoring nutrients and harvesting—you can enjoy a productive hydroponic garden right at home. Whether it’s fresh salads, aromatic herbs, or homegrown tomatoes, hydroponics brings gardening innovation, convenience, and satisfaction to your doorstep.

How to Grow and Harvest Large Strawberries in Plastic Bottles for Six Months

How to Grow and Harvest Large Strawberries in Plastic Bottles for Six Months

Strawberries are one of the most popular fruits worldwide, cherished for their juicy sweetness, vibrant color, and incredible versatility in desserts, salads, and beverages. Growing strawberries at home can be a rewarding experience, especially when space is limited. Surprisingly, you don’t need a garden bed to enjoy fresh, plump strawberries for months—plastic bottles can be transformed into highly productive, space-saving containers. In this guide, we’ll explore a step-by-step method to grow strawberries in plastic bottles and harvest large, delicious fruits continuously for up to six months.

Why Grow Strawberries at Home?

Homegrown strawberries come with several advantages:

  1. Freshness: Strawberries lose flavor quickly after harvesting, so picking your own ensures the sweetest, juiciest fruits.
  2. Nutritional Value: Strawberries are packed with vitamin C, antioxidants, fiber, and essential minerals.
  3. Cost-Effective: Growing your own strawberries reduces the need to buy expensive store-bought fruit.
  4. Space-Saving: Plastic bottle cultivation is ideal for balconies, terraces, and small urban spaces.
  5. Control Over Growth: You can grow organic strawberries free from pesticides and chemical fertilizers.

With proper care and a little creativity, it’s possible to enjoy fresh strawberries for half a year or more, even in limited spaces.

Choosing the Right Strawberry Variety

Selecting the right variety is essential for continuous fruiting in containers:

  • Everbearing Strawberries: Produce multiple harvests throughout the season. Perfect for long-term container cultivation.
  • Day-Neutral Strawberries: Not dependent on day length, they produce fruit consistently for several months.
  • June-Bearing Strawberries: Produce a large harvest once per season but may require staggered planting to extend harvest.

For harvesting strawberries continuously in plastic bottles for six months, everbearing or day-neutral varieties are recommended.

Materials Needed

To get started, gather the following materials:

  1. Plastic Bottles: 1.5–2 liter bottles are ideal. You can use empty soda or water bottles.
  2. Potting Mix: Well-draining soil mixed with compost or organic matter.
  3. Strawberry Seedlings or Runners: Healthy, disease-free plants.
  4. Watering Can or Spray Bottle: For gentle watering.
  5. Fertilizer: Organic or balanced fertilizers to promote flowering and fruiting.
  6. Scissors or Knife: To cut openings in the bottles for planting.

Repurposing plastic bottles for strawberry cultivation is eco-friendly and budget-friendly, turning waste into a productive garden.

Preparing Plastic Bottles

Plastic bottles can be transformed into vertical planters with proper preparation:

  1. Cleaning: Wash bottles thoroughly to remove labels, dirt, or residues.
  2. Cutting Openings:
    • Cut a rectangular or circular opening on the side of the bottle large enough to plant seedlings.
    • Make a few small drainage holes at the bottom to prevent waterlogging.
  3. Layering Soil:
    • Fill the bottle with a mixture of potting soil and compost.
    • Leave some space at the top to prevent soil spillage when watering.

Properly prepared bottles create a suitable growing environment for strawberry roots and ensure healthy plant development.

Planting Strawberry Seedlings

Once bottles are ready, it’s time to plant your strawberry seedlings or runners:

  1. Positioning Seedlings:
    • Place seedlings inside the bottle opening.
    • Make sure the crown (where roots meet the stem) is level with the soil surface.
  2. Supporting Roots:
    • Gently spread the roots in the soil for stability and nutrient absorption.
  3. Watering:
    • Water immediately after planting to settle the soil around roots.
    • Keep soil consistently moist, especially during the initial establishment period.

Container-grown strawberries benefit from careful planting to reduce transplant shock and encourage vigorous growth.

Arranging Bottles for Vertical Growth

Plastic bottles are ideal for creating a vertical strawberry garden, maximizing space:

  • Stacking or Hanging:
    • Arrange bottles on shelves, hang them with strings, or stack them in vertical rows.
    • Ensure each bottle receives adequate sunlight.
  • Sunlight Requirements:
    • Strawberries require 6–8 hours of sunlight per day for optimal flowering and fruiting.
    • Adjust bottle placement according to sun exposure throughout the day.

Vertical arrangements save space and allow easy access for watering and harvesting.

Caring for Strawberry Plants

Maintaining strawberries in bottles requires regular attention:

  1. Watering:
    • Keep soil evenly moist but avoid waterlogging.
    • Container plants dry faster than garden beds, so frequent monitoring is essential.
  2. Fertilization:
    • Apply organic fertilizers every 2–3 weeks to support continuous flowering and fruiting.
    • Balanced fertilizers with nitrogen, phosphorus, and potassium promote growth, flowering, and fruit development.
  3. Mulching:
    • Apply straw, dried leaves, or coco coir on the soil surface to retain moisture and reduce soil-borne diseases.
  4. Pruning:
    • Remove yellowing leaves or runners that may weaken the main plant.
    • Focus energy on fruit production rather than excessive foliage growth.

Consistent care ensures healthy strawberry plants and supports continuous fruit production over several months.

Encouraging Continuous Harvest

To harvest strawberries for six months, follow these strategies:

  • Succession Planting: Plant new seedlings or runners every few weeks to extend the harvest period.
  • Pinching Early Flowers: In the initial stage, pinch off early flowers to allow the plant to develop strong roots.
  • Maintaining Soil Fertility: Regular fertilization and compost addition keep plants productive.
  • Pollination: Ensure flowers are pollinated; indoors, gently shake the plant or use a soft brush to transfer pollen.

These techniques ensure a steady supply of large, ripe strawberries over an extended period.

Harvesting Strawberries

Harvesting at the right time ensures maximum flavor and quality:

  • Timing: Pick strawberries when they are fully red and fragrant.
  • Method: Gently twist or cut the fruit with a small stem attached to avoid damaging the plant.
  • Frequency: Harvest every 2–3 days during peak production to encourage continuous fruiting.

Regular harvesting not only provides fresh fruit but also stimulates the plant to produce more berries.

Benefits of Growing Strawberries in Plastic Bottles

  • Space-Efficient: Perfect for terraces, balconies, and small urban gardens.
  • Continuous Yield: With proper care, plants can produce berries for up to six months.
  • Fresh and Organic: Control over soil and fertilizers ensures chemical-free fruit.
  • Eco-Friendly: Reuses plastic bottles, reducing waste.
  • Decorative: Vertical strawberry gardens add greenery and vibrant red fruits, enhancing terrace aesthetics.

Plastic bottle gardening combines productivity, sustainability, and beauty, making it perfect for urban home growers.

Tips for Success

  • Choose everbearing or day-neutral varieties for extended harvest.
  • Use large bottles with adequate soil and drainage for strong root growth.
  • Ensure 6–8 hours of sunlight daily for flowering and fruiting.
  • Keep soil consistently moist, but avoid waterlogging.
  • Fertilize regularly to maintain soil fertility and encourage fruiting.
  • Remove dead leaves and excess runners to focus plant energy on berry production.
  • Harvest frequently to encourage continuous fruiting and prevent overripe berries.

Following these tips ensures a productive and rewarding strawberry harvest from plastic bottles.

Conclusion

Growing strawberries in plastic bottles is an innovative, space-saving method that allows anyone to enjoy fresh, large, and juicy strawberries for up to six months. By selecting the right variety, preparing bottles carefully, planting seedlings correctly, and maintaining consistent care, you can achieve a continuous harvest of delicious fruit.

Whether you live in an apartment, have limited outdoor space, or want to try an eco-friendly gardening method, plastic bottle strawberry cultivation is an easy, cost-effective, and sustainable solution. With a little patience and attention, your terrace or balcony can become a productive strawberry garden, providing fresh berries for months, straight from your own home.

8 Fast-Growing Hedges to Create Natural Privacy

8 Fast-Growing Hedges to Create Natural Privacy

In today’s busy world, privacy is a highly sought-after feature in both urban and suburban gardens. While fences and walls can provide seclusion, they often lack natural beauty and ecological benefits. Fast-growing hedges are an excellent alternative, offering privacy, shade, and a lush, green aesthetic. Some species also provide flowers, berries, and habitat for wildlife, enhancing both the functionality and visual appeal of your garden. This article explores eight fast-growing hedges that can quickly transform open spaces into private, verdant retreats, with detailed guidance on planting, care, and maintenance.


Why Choose Fast-Growing Hedges?

Fast-growing hedges are ideal for gardeners who want immediate results. They offer several advantages:

  1. Quick Privacy: Certain hedge species can grow several feet per year, creating a natural screen in a short time.
  2. Environmental Benefits: Hedges provide windbreaks, reduce noise pollution, and create habitats for birds and beneficial insects.
  3. Aesthetic Appeal: Flowering and evergreen varieties enhance garden beauty year-round.
  4. Low Maintenance Options: Many fast-growing hedges are hardy, drought-tolerant, and pest-resistant, requiring minimal upkeep once established.

Selecting the right species depends on climate, soil type, sunlight, and intended height.


1. Leyland Cypress (× Cuprocyparis leylandii)

Description

Leyland cypress is a popular evergreen hedge, known for its rapid growth rate of 3–4 feet per year. Its dense foliage creates an effective privacy screen, and it can reach heights of 20–30 feet if left unpruned.

Planting and Care

  • Sunlight: Full sun to partial shade.
  • Soil: Well-draining soil; tolerates a range of soil types.
  • Watering: Moderate, especially during establishment; drought-tolerant once mature.
  • Pruning: Trim annually to maintain shape and encourage bushiness.
  • Special Tip: Space plants 6–10 feet apart for a dense hedge.

2. Bamboo (Phyllostachys spp.)

Description

Clumping bamboo is a fast-growing option that can create a tall, green screen in as little as two to three years. It grows vertically with minimal horizontal spread, making it suitable for narrow spaces.

Planting and Care

  • Sunlight: Full sun to partial shade.
  • Soil: Well-draining, fertile soil.
  • Watering: Regular watering, especially during dry periods.
  • Maintenance: Install root barriers to prevent invasive spreading.
  • Special Tip: Choose clumping bamboo varieties for controlled growth and avoid running types that can take over gardens.

3. Privet (Ligustrum spp.)

Description

Privet is a classic choice for formal hedges. It grows quickly, up to 2–3 feet per year, and responds well to trimming, making it ideal for shaping and topiary designs. Its dense foliage provides excellent privacy.

Planting and Care

  • Sunlight: Full sun to partial shade.
  • Soil: Well-draining, moderately fertile soil.
  • Watering: Moderate; water deeply during dry spells.
  • Pruning: Frequent pruning keeps it dense and shapely.
  • Special Tip: Some species produce small white flowers and black berries that attract birds.

4. Photinia (Photinia × fraseri ‘Red Robin’)

Description

Photinia is an evergreen shrub valued for its vibrant red young leaves and glossy green mature foliage. It grows rapidly and forms a dense hedge suitable for privacy.

Planting and Care

  • Sunlight: Full sun to partial shade.
  • Soil: Well-draining soil; tolerates clay and sandy soil.
  • Watering: Regular watering until established.
  • Pruning: Trim in late spring or early summer to encourage fresh growth.
  • Special Tip: Protect from strong winter winds; red foliage is most vibrant in sunny locations.

5. Hornbeam (Carpinus betulus)

Description

Hornbeam is a deciduous hedge that retains many of its brown leaves through winter, providing semi-privacy year-round. It grows quickly, up to 2 feet per year, and tolerates pruning well.

Planting and Care

  • Sunlight: Full sun to partial shade.
  • Soil: Moist, fertile, well-draining soil.
  • Watering: Moderate; keep soil moist during establishment.
  • Pruning: Annual trimming maintains a tidy shape.
  • Special Tip: Hornbeam is suitable for formal and informal hedge styles, and its dense growth provides wind protection.

6. Leylandii × Cupressocyparis

Note: This is a hybrid often used synonymously with Leyland Cypress, included for clarity if hybrid varieties are available.

Description

This hybrid grows extremely fast, up to 3–4 feet per year, forming a tall and dense privacy screen. Ideal for areas where rapid coverage is required.

Planting and Care

  • Sunlight: Full sun.
  • Soil: Well-draining; tolerates a variety of soil conditions.
  • Watering: Moderate, especially in the first two years.
  • Pruning: Annual maintenance ensures uniformity.
  • Special Tip: Suitable for large-scale hedges and boundary screens.

7. Viburnum (Viburnum tinus)

Description

Viburnum tinus is an evergreen shrub with glossy leaves and clusters of small white or pink flowers that bloom from winter to spring. It grows quickly and attracts pollinators while providing privacy.

Planting and Care

  • Sunlight: Full sun to partial shade.
  • Soil: Well-draining, moderately fertile soil.
  • Watering: Moderate; more frequent watering in dry periods.
  • Pruning: Prune after flowering to maintain shape.
  • Special Tip: Viburnum is deer-resistant and can be used in mixed hedges with other flowering shrubs.

8. Photinia Red Robin Alternative Varieties (Photinia fraseri cultivars)

Description

Alternative Photinia cultivars, such as ‘Pink Marble’ or ‘Little Red Robin,’ provide similar rapid growth and dense foliage, with additional color variations. They form effective hedges with visual appeal.

Planting and Care

  • Sunlight: Full sun to partial shade.
  • Soil: Well-draining, fertile soil.
  • Watering: Regular watering during dry periods.
  • Pruning: Maintain shape after flowering for new colorful growth.
  • Special Tip: Combine multiple cultivars to create a dynamic hedge with varied foliage colors.

Tips for Establishing a Fast-Growing Hedge

  1. Spacing: Plant shrubs according to their mature width to ensure a dense hedge without overcrowding.
  2. Soil Preparation: Enrich planting soil with compost or organic matter for optimal growth.
  3. Watering: Young hedges require regular watering until established; deep watering promotes healthy root development.
  4. Pruning: Frequent pruning encourages bushier growth and helps maintain the desired hedge shape.
  5. Fertilization: Use slow-release fertilizers in spring to boost growth and enhance foliage color.
  6. Pest Management: Monitor for common pests such as aphids or spider mites and use eco-friendly solutions if needed.

Conclusion

Fast-growing hedges are the perfect solution for creating natural privacy while enhancing the beauty and functionality of your garden. From the dense evergreen foliage of Leyland Cypress to the colorful leaves of Photinia, these eight hedges provide quick coverage, aesthetic appeal, and ecological benefits.

By selecting the right species for your climate, preparing soil properly, and following best practices for watering, pruning, and maintenance, gardeners can enjoy a lush, private, and thriving hedge within just a few years. Whether your goal is to block unwanted views, reduce noise, or create a serene green retreat, these fast-growing hedges transform open spaces into secluded, visually appealing landscapes.

6 Shrubs That Bloom in Winter When Nothing Else Does

6 Shrubs That Bloom in Winter When Nothing Else Does

Winter often transforms gardens into serene landscapes of muted colors and bare branches. While many plants go dormant during the cold months, certain shrubs defy the season, offering vibrant blooms and subtle fragrances that enliven winter gardens. Selecting the right shrubs that bloom in winter not only adds beauty but also provides food for pollinators and wildlife when most other resources are scarce. This article highlights six remarkable winter-blooming shrubs and provides detailed guidance on their care, planting, and maintenance to ensure your garden stays lively and colorful even in the coldest months.


Why Choose Winter-Blooming Shrubs?

Winter-blooming shrubs serve multiple purposes beyond aesthetics:

  1. Color and Visual Interest: They brighten otherwise dull landscapes with flowers in shades of red, yellow, white, and pink.
  2. Wildlife Support: Some winter flowers provide nectar and seeds for birds, bees, and other pollinators.
  3. Fragrance: Many shrubs release sweet, aromatic scents during winter, enhancing the sensory experience of your garden.
  4. Structural Beauty: These shrubs often have attractive branching patterns, colorful bark, or evergreen foliage that adds texture when flowers are sparse elsewhere.

Selecting shrubs that thrive in cold conditions ensures a vibrant garden during months when most plants are dormant.


1. Witch Hazel (Hamamelis spp.)

Description

Witch hazel is a deciduous shrub renowned for its delicate, spidery flowers that appear in shades of yellow, orange, or red from late fall into winter. Its zigzagging branches create architectural interest, and its fragrant blooms add a subtle, sweet aroma to winter gardens.

Planting and Care

  • Sunlight: Prefers full sun to partial shade.
  • Soil: Well-draining, slightly acidic soil enriched with organic matter.
  • Watering: Moderate watering; drought-tolerant once established.
  • Pruning: Light pruning after flowering encourages healthy growth and prevents overcrowding.
  • Special Tip: Witch hazel flowers best on mature shrubs (3–5 years old), so patience pays off.

2. Winter Jasmine (Jasminum nudiflorum)

Description

Winter jasmine is a deciduous shrub with bright yellow flowers that bloom along arching green stems, often before leaves appear. This hardy shrub is perfect for adding a splash of sunshine during grey winter days.

Planting and Care

  • Sunlight: Full sun to partial shade.
  • Soil: Well-draining soil; tolerates poor soil.
  • Watering: Regular watering in dry periods; adaptable once established.
  • Pruning: Trim immediately after flowering to maintain shape and encourage new growth.
  • Special Tip: Excellent for slopes, walls, or as a ground cover, as its trailing branches add visual flow.

3. Camellia (Camellia japonica and Camellia sasanqua)

Description

Camellias are evergreen shrubs producing large, rose-like blooms in shades of red, pink, and white. While C. japonica typically blooms in late winter to early spring, C. sasanqua may start flowering as early as fall and continue into winter. Their glossy, dark green leaves provide year-round appeal.

Planting and Care

  • Sunlight: Partial shade, avoiding harsh afternoon sun.
  • Soil: Acidic, well-draining soil rich in organic matter.
  • Watering: Keep soil consistently moist but avoid waterlogging.
  • Pruning: Lightly prune after flowering to shape and remove dead wood.
  • Special Tip: Mulch around the base to conserve moisture and protect roots from freezing temperatures.

4. Mahonia (Mahonia spp.)

Description

Mahonia, also known as Oregon grape, is an evergreen shrub with holly-like foliage and clusters of small yellow flowers that bloom in winter. Its flowers attract pollinators and are followed by dark blue berries that feed birds in the late winter and early spring.

Planting and Care

  • Sunlight: Partial to full shade.
  • Soil: Well-draining soil; tolerates clay and poor soils.
  • Watering: Moderate; drought-tolerant once established.
  • Pruning: Minimal pruning; remove dead or damaged branches in early spring.
  • Special Tip: Mahonia is deer-resistant and provides multi-season interest with both flowers and berries.

5. Winter Honeysuckle (Lonicera fragrantissima)

Description

Winter honeysuckle is a deciduous shrub offering creamy-white, highly fragrant blooms from late winter into early spring. Its scent is particularly strong on warm winter days, making it a favorite for sensory gardens.

Planting and Care

  • Sunlight: Full sun to partial shade.
  • Soil: Well-draining soil; adaptable to various soil types.
  • Watering: Regular watering, especially in dry conditions.
  • Pruning: Prune lightly after flowering to maintain shape and promote new growth.
  • Special Tip: Ideal near patios or windows where fragrance can be appreciated.

6. Witch’s Winterberry (Ilex verticillata, ‘Winter Red’ cultivar)

Description

Winterberry holly is a deciduous shrub prized for its vibrant red berries that persist through winter. While it does not produce winter flowers, its bright berries provide visual appeal when most other shrubs are bare. Female plants need a male pollinator nearby to produce berries.

Planting and Care

  • Sunlight: Full sun to partial shade.
  • Soil: Moist, acidic, well-draining soil.
  • Watering: Keep soil consistently moist; tolerates wet conditions.
  • Pruning: Minimal pruning; remove old or weak stems in late winter.
  • Special Tip: Combine with evergreens for contrast; berries attract birds, adding life to the winter landscape.

Tips for Successfully Growing Winter-Blooming Shrubs

  1. Site Selection: Ensure proper sunlight and protection from harsh winds. Microclimates near buildings or fences can enhance survival and bloom.
  2. Soil Preparation: Enrich soil with compost or organic matter to improve drainage and fertility. Mulching helps moderate soil temperature.
  3. Watering: Even winter-hardy shrubs need occasional watering during dry spells. Avoid overwatering, which can cause root rot.
  4. Fertilization: Apply a slow-release fertilizer in early spring to support growth and flowering in the coming season.
  5. Pruning and Maintenance: Remove dead or diseased branches, but avoid heavy pruning just before or during flowering periods to preserve blooms.
  6. Winter Protection: Young shrubs may benefit from windbreaks or burlap wraps during extreme winter conditions, especially in regions with harsh winds or deep freezes.

Conclusion

Winter-blooming shrubs are an invaluable addition to any garden, providing color, fragrance, and life during the coldest months. From the spidery yellow flowers of witch hazel to the sunny cascade of winter jasmine, these six shrubs demonstrate that winter does not have to be a dormant season. By selecting hardy species suited to your climate, preparing the soil, and providing proper care, gardeners can enjoy vibrant blooms and lush foliage year-round.

Incorporating winter-blooming shrubs not only enhances garden aesthetics but also supports wildlife, offers sensory pleasures, and ensures a visually engaging landscape when most other plants lie dormant. With careful selection and maintenance, these remarkable shrubs transform the winter garden from bare and bleak to colorful and inviting, proving that even in the cold, nature can flourish.

Should You Wrap Trees for Winter? Experts Explain

Should You Wrap Trees for Winter? Experts Explain

Winter brings its own set of challenges for trees, especially young or delicate ones. Freezing temperatures, fluctuating weather, strong winds, and sunscald can all cause significant damage. One commonly suggested protective measure is tree wrapping. But is it truly necessary? Experts weigh in, providing guidance on when, why, and how to wrap trees for winter protection. This article explores the science, benefits, potential risks, and best practices for tree wrapping, helping homeowners and gardeners make informed decisions.


Understanding Winter Tree Stress

Trees face multiple stressors during winter. Recognizing these challenges helps determine whether wrapping is appropriate.

1. Frost Cracks

Frost cracks occur when bark contracts and expands rapidly due to temperature fluctuations. These cracks often appear on the south and southwest sides of the tree trunk, where daytime sun warms the bark, followed by rapid nighttime cooling. Frost cracks can compromise the structural integrity of young or thin-barked trees.

2. Sunscald

Sunscald, or southwest injury, results from intense winter sunlight heating the bark. When temperatures drop suddenly, the cambium layer beneath the bark can be damaged, causing dieback or even tree death. This is particularly common in young fruit trees or thin-barked species like maple, birch, and honey locust.

3. Winter Desiccation

Evergreen trees and shrubs may experience winter desiccation, losing moisture faster than roots can absorb it from frozen soil. Cold winds exacerbate the drying effect, leading to brown or scorched foliage.

4. Mechanical Damage

Heavy snow, ice accumulation, and strong winds can physically damage branches or bend the trunk, leaving trees vulnerable to pests and disease.


What Experts Say About Tree Wrapping

Tree wrapping is a method used to protect tree trunks from frost cracks, sunscald, and minor mechanical damage. Experts, however, caution that wrapping is not universally necessary for all trees or climates.

1. Young vs. Mature Trees

According to horticulturists, young trees—especially those less than three to five years old—benefit most from wrapping. Mature trees have thicker bark that naturally resists sunscald and frost cracks, reducing the need for protective wraps.

2. Species Considerations

Not all species need winter wrapping. Thin-barked species like maple, birch, fruit trees, and honey locust are highly susceptible to winter damage and gain the most from wrapping. Thick-barked trees such as oaks and pines generally do not require wrapping.

3. Climate Matters

Tree wrapping is most beneficial in regions with extreme temperature fluctuations, strong winter sun, or harsh winds. In milder climates, wrapping may be unnecessary and can even cause harm if not monitored properly.

4. Timing Is Critical

Experts emphasize timing. Wrap trees in late fall, after temperatures have dropped but before the first hard frost. Removing wraps in early spring is equally important to prevent moisture buildup, mold, and insect infestations.


Benefits of Wrapping Trees

Tree wraps provide several benefits when used correctly:

1. Prevent Sunscald

Wraps act as a protective barrier, shielding the bark from intense winter sunlight and minimizing the risk of sunscald damage. By reflecting sunlight and reducing temperature fluctuations, wraps keep the cambium layer intact.

2. Reduce Frost Cracks

Tree wraps help moderate trunk temperatures, reducing the rapid expansion and contraction that leads to frost cracks. This is especially important for young or thin-barked trees.

3. Protect Against Animal Damage

Wrapping can deter rabbits, rodents, and deer from chewing on young trunks, which can girdle the tree and disrupt nutrient flow. Using physical guards like hardware cloth in combination with wraps adds extra protection.

4. Guard Against Mechanical Injury

Wraps can help cushion minor impacts from wind, ice, and snow, preventing small branches or trunks from splitting. While they won’t prevent all structural damage, wraps offer an additional layer of protection during harsh winter storms.


Risks and Misconceptions of Tree Wrapping

While tree wrapping has benefits, misuse or overuse can be harmful. Experts highlight several risks:

1. Moisture Trapping

Leaving wraps on too long or wrapping too tightly can trap moisture against the bark, promoting fungal growth, mold, and rot. It’s crucial to remove wraps in early spring as temperatures warm.

2. Pest Habitat

Wrapped trees can provide shelter for insects and rodents, especially if the wrap is loose or damaged. Regular inspection throughout winter is necessary to prevent infestations.

3. Restricting Growth

Tightly wrapped trunks can constrict growth and damage the bark. Wraps should be snug but not compressing, allowing the tree to expand naturally.

4. False Sense of Security

Some gardeners assume wrapping alone is sufficient winter protection. Experts stress that wraps are just one component of comprehensive tree care, which should include proper watering, mulching, pruning, and species selection.


Best Practices for Wrapping Trees

If you decide wrapping is appropriate, follow expert-recommended practices for safe and effective protection:

1. Choose the Right Material

Use commercially available tree wraps, burlap, or breathable fabric specifically designed for winter protection. Avoid plastic wrap, which traps moisture and prevents airflow.

2. Wrap Correctly

  • Start at the base of the tree, wrapping upward to just below the first major branches.
  • Overlap each layer slightly for coverage.
  • Secure the wrap with string, twine, or tape without constricting the trunk.
  • Ensure the wrap is loose enough to allow air circulation and trunk expansion.

3. Protect Young Fruit Trees

Fruit trees are particularly prone to winter damage. Wrap trunks after pruning and before the first frost. In addition to wrapping, consider using reflective materials or tree guards to maximize protection against sunscald and frost.

4. Remove Wraps in Spring

As temperatures rise and growth resumes, remove all wraps. Leaving them on too long can lead to moisture buildup, fungal infections, or pest infestations.

5. Monitor Regularly

Check wrapped trees periodically during winter for damage, pests, or shifts in the wrap. Adjust or replace as needed to maintain optimal protection.


Alternatives to Tree Wrapping

For gardeners seeking other winter protection strategies, several alternatives complement or replace tree wrapping:

  • Mulching: Applying 2–4 inches of organic mulch around the base of the tree helps insulate roots and moderate soil temperature.
  • Tree Guards: Hardware cloth or plastic tree guards can protect against animal damage without wrapping the entire trunk.
  • Windbreaks: Installing temporary windbreaks with burlap or fencing around sensitive trees reduces wind stress and desiccation.
  • Proper Watering: Ensure young trees are well-watered before the ground freezes, especially evergreens that continue transpiring during winter.

Expert Recommendations

  • Dr. Linda Chalker-Scott, Horticulture Expert: “Wrapping is beneficial for young, thin-barked trees in climates with high winter sun and temperature swings. However, it’s not a one-size-fits-all solution—monitoring and proper removal are key.”
  • Arborist Advice: “Avoid using plastic wraps. They trap moisture and encourage disease. Use breathable materials and remove them in spring to allow the trunk to ‘breathe.’”
  • Extension Services: Many state extension programs recommend wrapping trees less than five years old in cold regions but emphasize that mature trees rarely need wrapping unless they are injured or diseased.

Conclusion

Should you wrap trees for winter? The answer depends on the tree species, age, climate, and local conditions. Young, thin-barked trees in regions with harsh winter sun, fluctuating temperatures, or strong winds benefit most from wrapping. However, improper wrapping or leaving wraps on too long can harm trees, promoting fungal growth, pest infestations, or constricted growth.

Tree wrapping is just one tool in a comprehensive winter care plan, which also includes proper watering, mulching, pruning, and wildlife protection. By understanding the science behind winter tree stress and following expert-recommended practices, gardeners can protect their trees effectively, ensuring healthy growth and resilience for years to come.

Wrapping, when done correctly, is not just a precaution—it is an investment in the long-term health and beauty of your trees. Understanding when, how, and why to wrap transforms winter from a season of risk into a season of strategic protection.

How to Protect Young Trees From Winter Damage

How to Protect Young Trees From Winter Damage

Winter is a season of stark beauty, but it poses significant challenges to young trees. Unlike mature trees with thick bark and extensive root systems, young trees are particularly vulnerable to the harsh winter elements, including freezing temperatures, heavy snow, frost, ice, and fluctuating moisture levels. Protecting these young trees during winter is crucial to ensure their healthy growth, structural integrity, and long-term survival. This article provides a detailed guide on understanding winter tree damage and implementing effective strategies to protect young trees.


Understanding Winter Damage in Young Trees

Young trees face several risks during the winter months, and understanding these threats is the first step in safeguarding them. Common forms of winter damage include:

1. Frost Cracks

Frost cracks occur when the bark of a tree contracts rapidly due to sudden drops in temperature. Young trees, with their thin bark, are especially prone to splitting, which can expose the inner wood to pests and disease. These cracks often appear on the south or southwest side of the trunk, where sunlight warms the bark during the day, only for it to freeze rapidly at night.

2. Sunscald

Sunscald, also known as southwest injury, is caused by intense winter sun heating the bark during the day, followed by rapid cooling at night. This can damage the cambium layer, causing dieback and even tree death if severe.

3. Desiccation

Winter desiccation occurs when the tree loses water faster than it can replace it. Cold winds can dry out leaves and needles, while frozen soil prevents roots from absorbing water. This is particularly dangerous for evergreens that retain foliage year-round.

4. Mechanical Damage

Heavy snow, ice, and strong winds can physically break branches or bend the tree trunk, causing long-term structural weaknesses. Young trees are especially susceptible because their wood is more flexible and fragile than mature trees.

5. Rodent and Animal Damage

Rabbits, deer, and other wildlife often gnaw on tree bark during winter when food is scarce. This can girdle the tree, disrupt nutrient flow, and even kill it.


Preparing Young Trees for Winter

Proper preparation before the first frost is critical. Early action can prevent much of the damage described above.

1. Choose Hardy Species

The first step in protecting young trees is selecting species suited to your local climate. Native and cold-hardy trees naturally withstand local winter conditions better than exotic species.

2. Planting Location

Plant young trees in locations that provide natural protection. Avoid areas prone to strong winter winds or heavy frost pockets. Planting near fences or buildings can shield trees from harsh elements but ensure adequate sunlight and airflow to prevent disease.

3. Watering and Mulching

Adequate hydration before the ground freezes is essential. Water young trees deeply until the soil begins to freeze to ensure roots are not stressed. Applying a 2–4 inch layer of organic mulch around the base helps retain soil moisture, insulates roots, and moderates soil temperature fluctuations. Keep mulch a few inches away from the trunk to prevent rot.

4. Pruning

Pruning should be done cautiously before winter. Remove dead, damaged, or crossing branches to reduce the risk of breakage under snow or ice weight. Avoid heavy pruning, as this can expose vulnerable wood and increase susceptibility to winter injury.


Protective Measures During Winter

Once winter sets in, several practical strategies can protect young trees from the elements.

1. Wrapping the Trunk

Wrapping the trunk with tree guards, burlap, or specially designed tree wraps can prevent sunscald and frost cracks. Start wrapping at the base and work upward to the first set of branches, securing it loosely to allow airflow. Remove the wrap in early spring to prevent moisture buildup and fungal growth.

2. Using Tree Shelters or Fences

Tree shelters, tubes, or mesh fences can shield young trees from wind, snow, and animals. These shelters provide a microenvironment that reduces stress and promotes growth. Ensure shelters are tall enough to accommodate future growth and have adequate ventilation.

3. Anti-Desiccant Sprays

Evergreen trees are prone to winter desiccation. Anti-desiccant sprays, made from waxy compounds, form a protective coating on leaves and needles, reducing water loss. Apply according to manufacturer instructions in late fall before harsh conditions begin.

4. Snow and Ice Management

Gently remove heavy snow from branches to prevent breakage. Use a broom or stick to lift snow off without shaking the branches vigorously, which can cause damage. Avoid using salt or chemical de-icers near young trees, as these can harm roots and foliage.

5. Wildlife Protection

Wrap the base of the trunk with hardware cloth or tree guards to prevent gnawing by rabbits and rodents. For deer-prone areas, consider fencing the young tree or using repellents. Regular inspection throughout the winter ensures that any signs of animal damage are addressed promptly.


Monitoring and Maintenance

Winter care doesn’t end with preparation and protection—it requires ongoing monitoring.

1. Check Tree Health Regularly

Inspect young trees periodically throughout winter for signs of damage, such as bark splitting, broken branches, or animal activity. Early intervention can save a tree from long-term damage.

2. Adjust Protection as Needed

Tree wraps or shelters may need adjusting due to shifting snow, ice, or wind. Ensure that they remain secure but allow enough airflow to prevent fungal issues.

3. Spring Evaluation

After winter, carefully assess your trees. Remove damaged branches and inspect the trunk for frost cracks or sunscald. This evaluation helps in planning care for the coming growing season.


Long-Term Strategies

While immediate winter protection is vital, long-term strategies can help young trees become more resilient:

  • Soil Health: Maintain healthy soil with compost and balanced fertilization. Strong roots improve water uptake and cold resistance.
  • Windbreaks: Planting shrubs or constructing fences can reduce wind exposure for young trees over several seasons.
  • Gradual Hardening: Trees exposed to seasonal changes gradually become more cold-hardy. Avoid late fertilization that encourages soft, tender growth just before winter.

Conclusion

Protecting young trees from winter damage is a multifaceted task requiring awareness, preparation, and consistent care. By understanding the types of winter damage, preparing trees before frost, implementing protective measures, and monitoring throughout the season, gardeners can ensure that their young trees not only survive winter but thrive in the years ahead. Proper winter care sets the foundation for strong, healthy trees that will provide shade, beauty, and ecological benefits for decades. Young trees may be vulnerable, but with proactive and informed strategies, they can endure even the harshest winters and grow into robust, mature specimens.