Grow Pumpkins in Containers at Home: A Complete Step-by-Step Guide

Grow Pumpkins in Containers at Home: A Complete Step-by-Step Guide

Pumpkins are more than just a seasonal decoration—they’re a versatile and nutritious vegetable that can be used in cooking, baking, and even beverages. While pumpkins are often associated with large garden spaces, they can actually thrive in containers when grown correctly. Container gardening allows urban gardeners, balcony owners, and those with limited space to enjoy fresh, home-grown pumpkins. This guide will provide a complete step-by-step method for growing pumpkins in containers at home, from choosing the right container to harvesting your pumpkins.


Why Grow Pumpkins at Home?

Growing pumpkins at home has several advantages:

  1. Fresh and Nutritious: Home-grown pumpkins are fresher and richer in nutrients than store-bought ones.
  2. Cost-Effective: Growing your own pumpkins reduces grocery bills, especially during the harvest season.
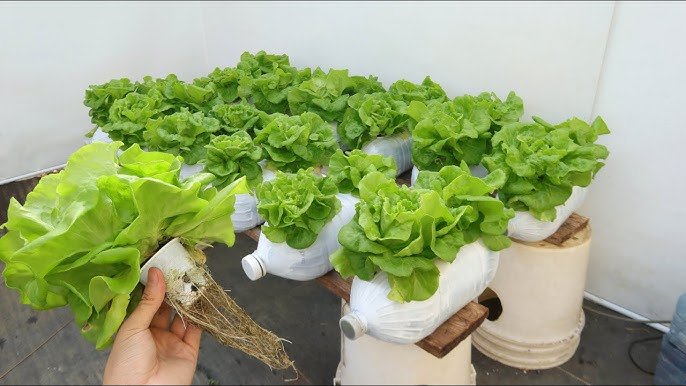
  3. Space-Saving: Container gardening allows you to grow pumpkins even in small spaces like balconies or patios.
  4. Chemical-Free: You have complete control over fertilizers and pesticides, ensuring organic produce.
  5. Fun and Educational: Growing pumpkins can be a rewarding activity for both adults and children, teaching gardening skills and patience.

Choosing the Right Pumpkin Variety

Not all pumpkin varieties are suitable for container gardening. Smaller, bush-type pumpkins work best for containers, while sprawling vine types are better suited for large garden beds unless you provide vertical support.

Recommended Varieties for Containers:

  • Bush or Dwarf Pumpkins: Compact plants that produce small-to-medium-sized pumpkins.
  • Jack Be Little: Miniature pumpkins perfect for container growth.
  • Sugar Pie Pumpkin: Ideal for cooking and baking; smaller varieties adapt well to containers.
  • Baby Boo: Decorative miniature white pumpkins suitable for small spaces.

Choosing the right variety ensures manageable growth, higher yields, and easier maintenance in containers.


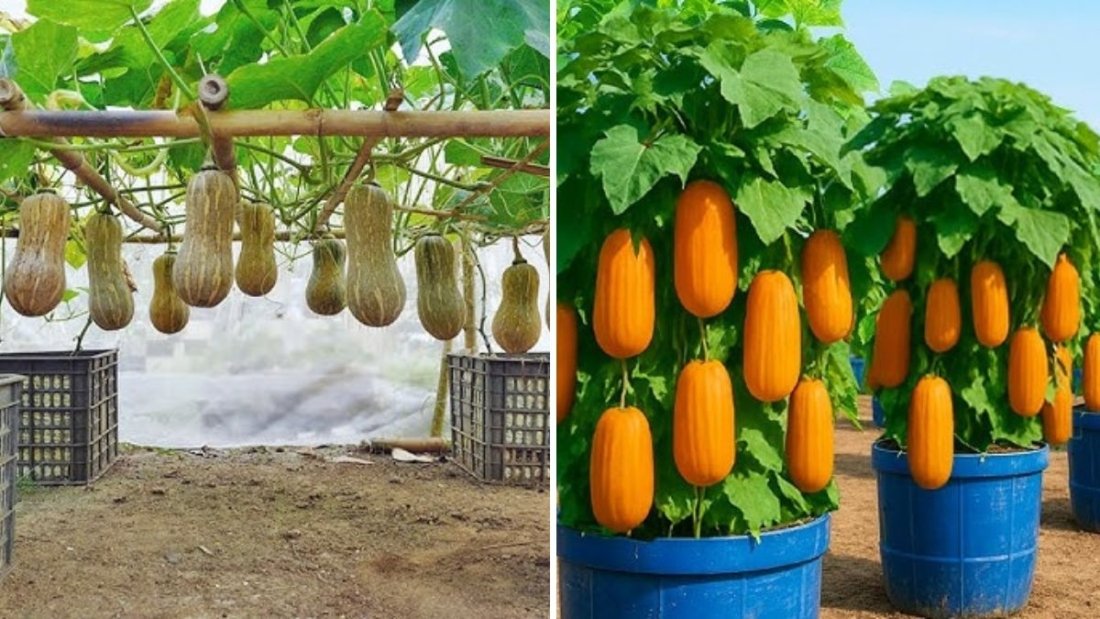
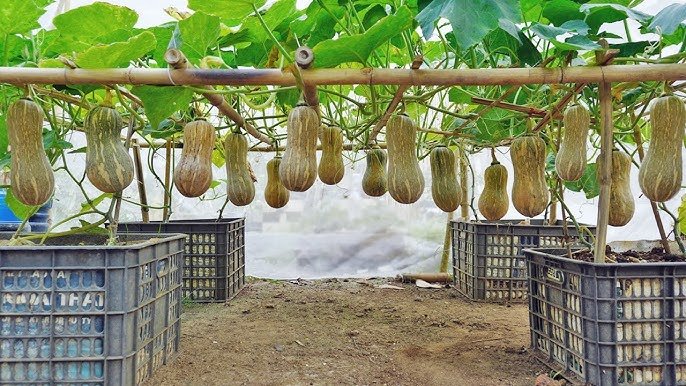
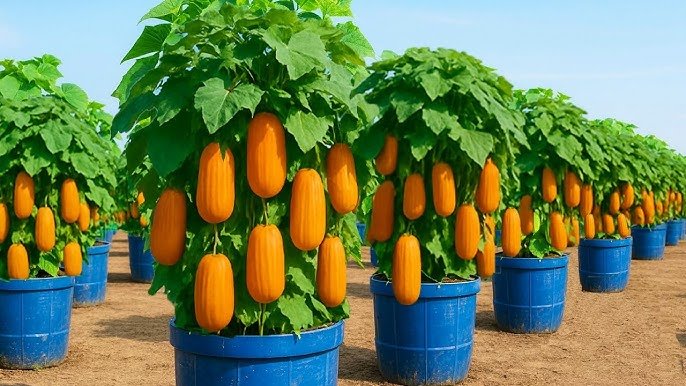
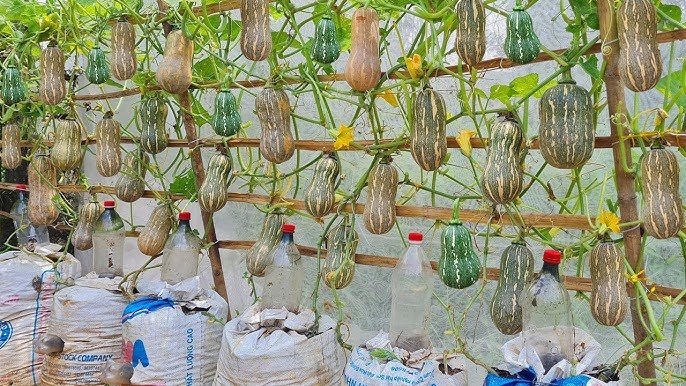
Selecting the Right Container

Pumpkins require a large container to accommodate their deep root system:

  • Size: At least 18–20 inches deep and 20–24 inches wide for each plant. Larger containers support bigger fruits.
  • Material: Plastic, fabric grow bags, or ceramic pots are suitable.
  • Drainage: Ensure multiple holes at the bottom to prevent waterlogging and root rot.
  • Mobility: Containers with handles or lightweight material make it easy to move them as needed.

Pro Tip: Repurposing large plastic bins or barrels works well for growing pumpkins, making it both sustainable and cost-effective.


Preparing the Soil

Pumpkins thrive in nutrient-rich, well-draining soil. Preparing a proper soil mix is crucial for high yields:

  • 2 parts garden soil
  • 1 part compost or well-rotted manure
  • 1 part perlite or coco peat for aeration and water retention

Mix thoroughly to create a fertile, loose soil medium. Pumpkins prefer slightly acidic to neutral soil with a pH of 6.0–7.0.

Tip: Adding bone meal or rock phosphate at planting encourages strong root development and abundant flowering.


Planting Pumpkin Seeds or Seedlings

Pumpkins can be grown from seeds or seedlings. Here’s how:

  1. Seeds: Sow 2–3 seeds per container at a depth of 1–2 inches. Once seedlings sprout and develop 2–3 true leaves, thin to the strongest plant.
  2. Seedlings: Transplant seedlings carefully into containers, burying them up to the first set of leaves to encourage additional root growth.

Spacing: Even in containers, give each plant enough room for root expansion and airflow to reduce the risk of disease.

Pro Tip: Soaking pumpkin seeds overnight before planting can improve germination rates and produce stronger seedlings.


Watering Techniques

Consistent watering is essential for pumpkin growth and fruit development:

  • Water deeply 2–3 times per week depending on weather and container size.
  • Avoid wetting the leaves to prevent fungal infections; water at the base of the plant.
  • Mulch around the base with straw, dried leaves, or coco peat to retain soil moisture and regulate temperature.

Pro Tip: Self-watering containers or using drip irrigation reduces watering frequency while keeping the soil consistently moist.


Fertilization for High Yield

Pumpkins are heavy feeders and need regular nutrients to produce large, healthy fruits:

  1. Organic Fertilizers: Apply compost, vermicompost, or liquid manure every 2–3 weeks.
  2. Balanced Fertilizer: Use an NPK fertilizer during vegetative growth for strong leaves and stems.
  3. Flowering and Fruiting Boost: Apply a high-phosphorus and potassium fertilizer when flowers appear to encourage fruit set.

Proper fertilization ensures vigorous plant growth and a high yield of pumpkins in containers.


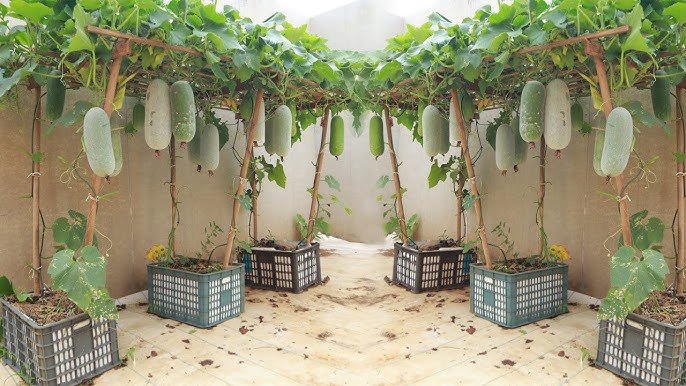
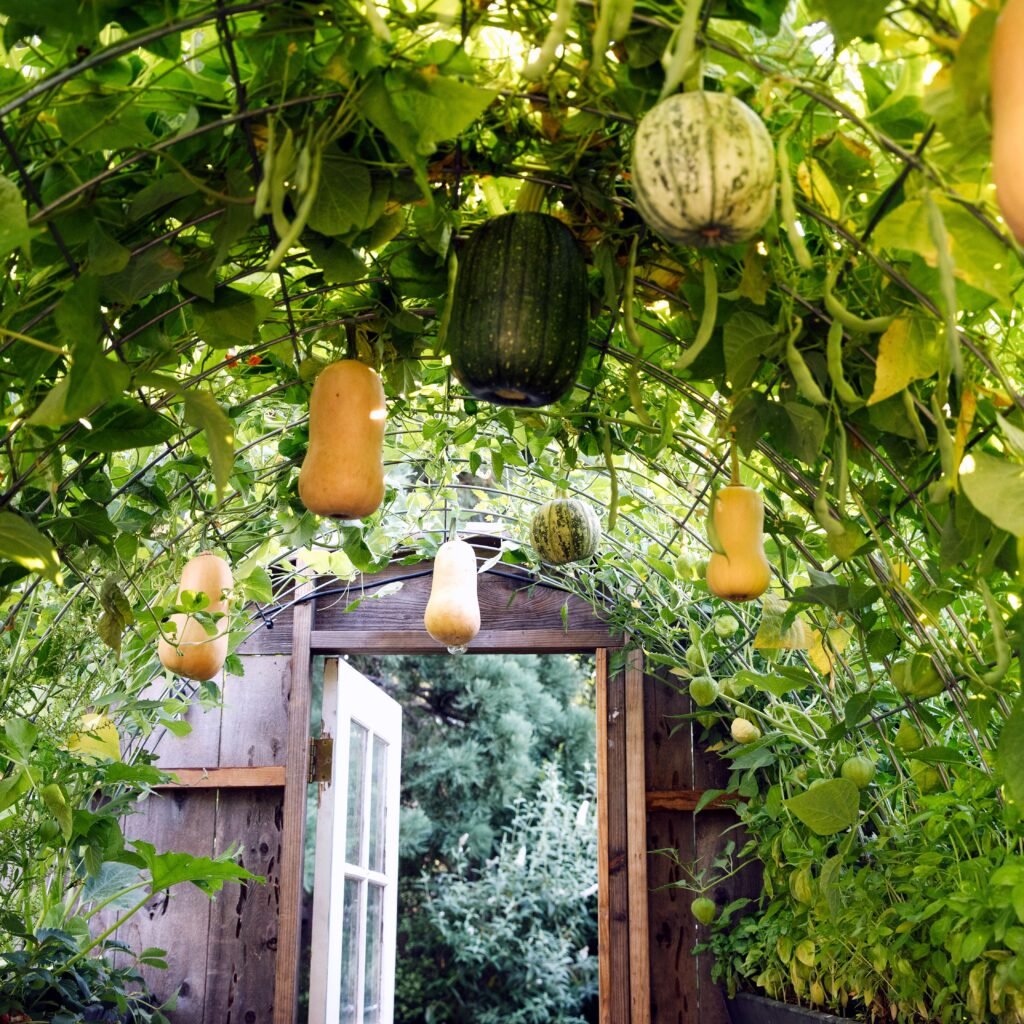
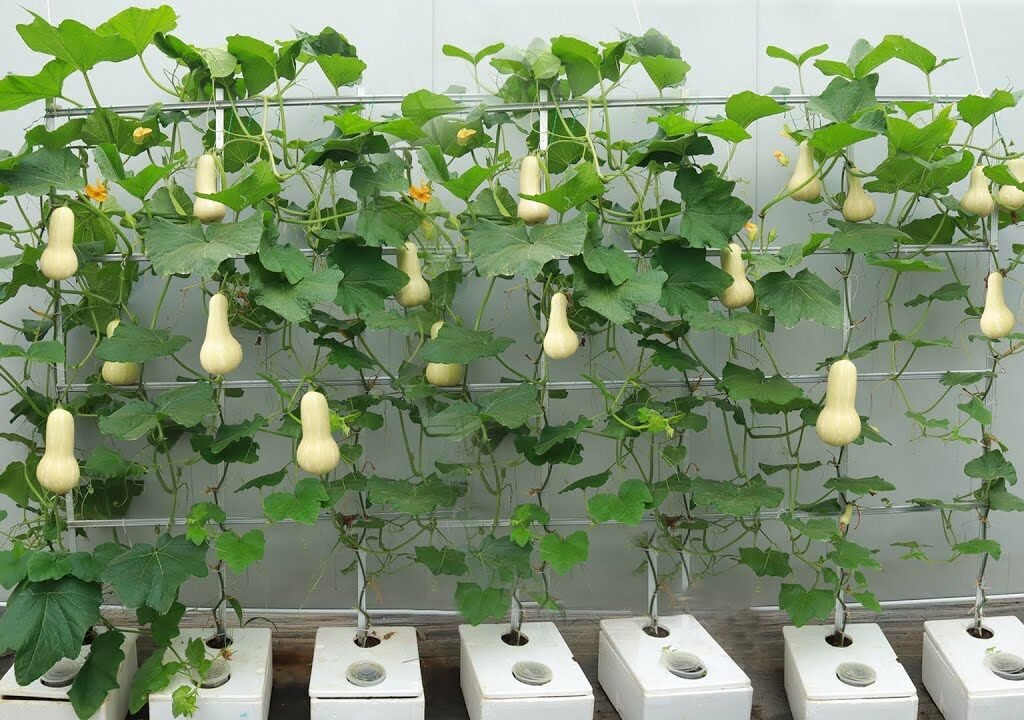
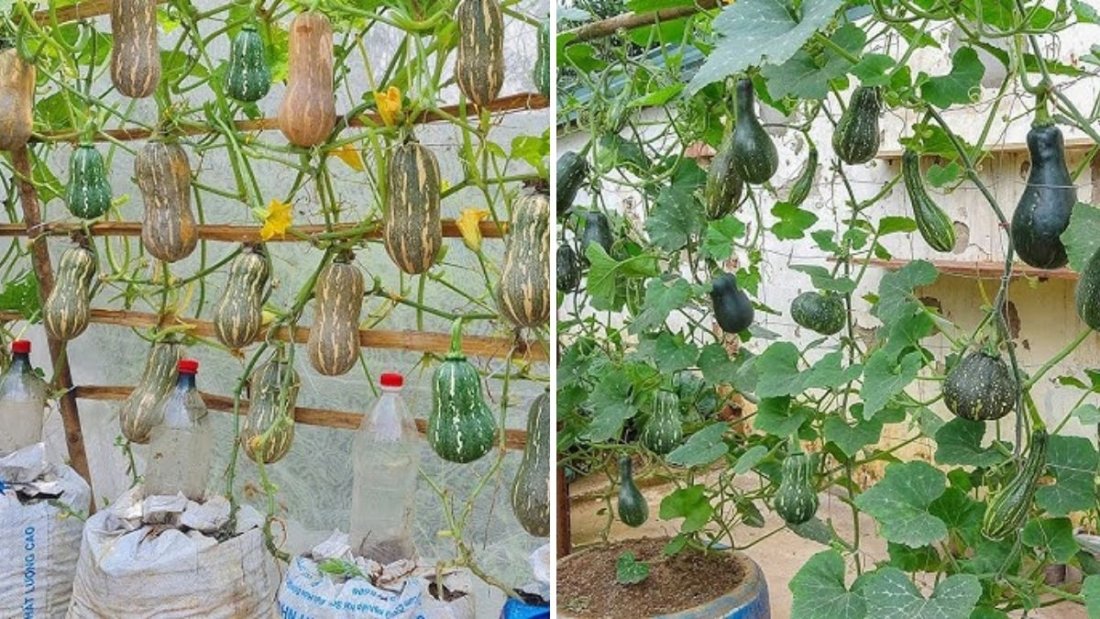
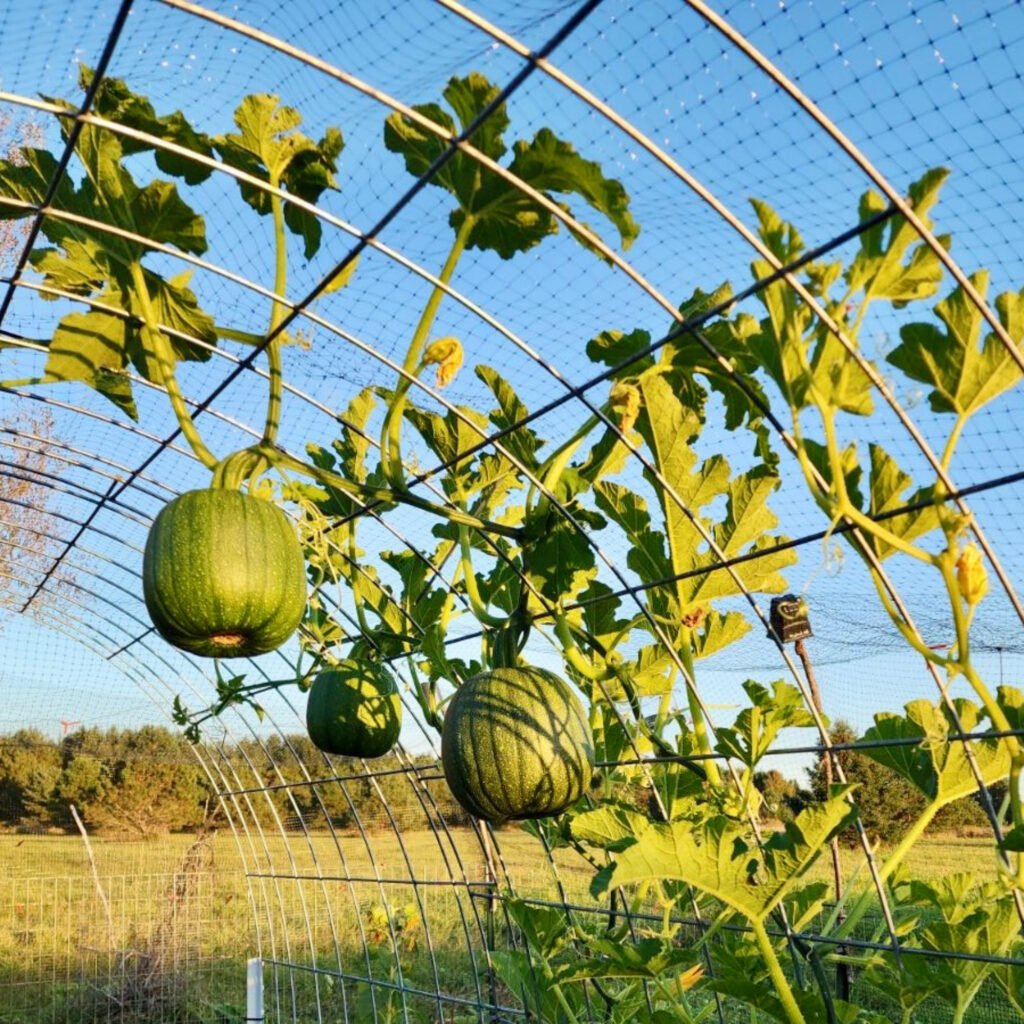
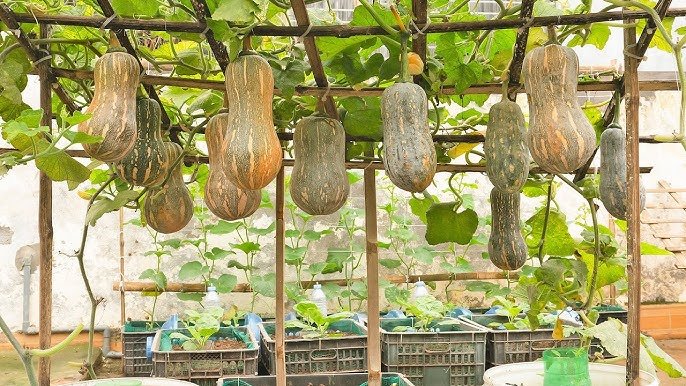
Supporting Pumpkin Plants

Even dwarf or bush-type pumpkins may need some support as the fruits grow:

  • Trellis: Vertical support can be used for vining varieties to save space.
  • Cages: Tomato cages or similar structures can help support sprawling stems.
  • Guiding Vines: Regularly guide and tie vines gently to prevent them from breaking or sprawling excessively.

Proper support helps keep fruits off the ground, reduces pest attacks, and improves airflow around the plant.


Pest and Disease Management

Pumpkins in containers are less susceptible to pests than ground-planted ones, but attention is still required:

  • Common Pests: Aphids, cucumber beetles, squash bugs, and spider mites.
  • Organic Control: Use neem oil, insecticidal soap, or introduce beneficial insects like ladybugs.
  • Disease Prevention: Provide adequate spacing, sunlight, and airflow. Remove infected leaves promptly.

Healthy plants produce more flowers and fruits, directly impacting yield.


Pruning and Maintenance

Pruning pumpkin plants improves airflow, directs energy to fruit production, and prevents disease:

  • Remove yellowing or diseased leaves.
  • Pinch off excess side shoots in bush varieties.
  • For vining varieties, trim excessively long vines to control spread and focus energy on fruiting.

Pruning helps container-grown pumpkin plants produce larger, healthier fruits in a limited space.


Pollination Tips

Pumpkins have separate male and female flowers, so pollination is critical for fruit development:

  • Hand-pollinate using a small brush or cotton swab to transfer pollen from male to female flowers if pollinators are scarce.
  • Ensure at least 2–3 flowers are blooming simultaneously for effective pollination.

Pollination increases the chances of fruit set and maximizes your pumpkin harvest.
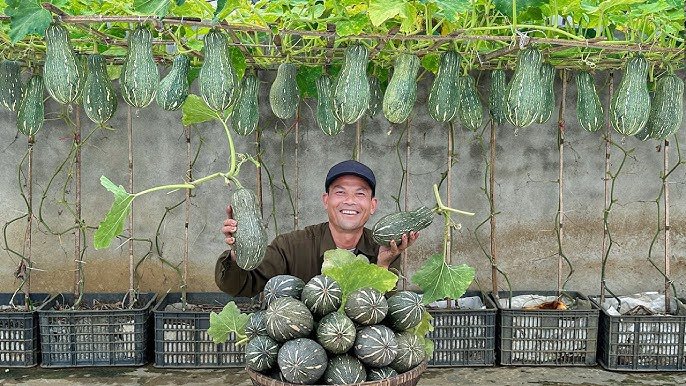

Harvesting Pumpkins

Pumpkins are typically ready for harvest 80–120 days after planting, depending on the variety:

  • The skin should be firm, hard, and have a deep, even color.
  • Use a sharp knife or scissors to cut the fruit from the vine, leaving a small stem attached.
  • Avoid harvesting immature pumpkins, as they will not store well and may affect further fruiting.

Pro Tip: Harvest pumpkins before the first frost to avoid frost damage, which can ruin the fruits.


Storing Pumpkins for Year-Round Use

One of the benefits of growing pumpkins is their long shelf life:

  • Store in a cool, dry, well-ventilated place.
  • Properly cured pumpkins can last 2–3 months or more.
  • Avoid stacking pumpkins directly on top of each other to prevent bruising and rotting.

With proper storage, you can enjoy fresh, home-grown pumpkins year-round.


Tips for Maximizing Container Pumpkin Yield

  1. Choose Compact Varieties: Bush-type pumpkins are ideal for containers.
  2. Use Large Containers: More root space supports larger fruits and better yields.
  3. Sunlight: Ensure at least 6–8 hours of direct sunlight daily.
  4. Regular Monitoring: Check plants frequently for pests, diseases, and nutrient deficiencies.
  5. Companion Planting: Plant marigolds or basil nearby to repel pests naturally.
  6. Vertical Growth: Use trellises for vining varieties to save space and improve fruit quality.

Final Thoughts

Growing pumpkins in containers at home is a rewarding, space-saving, and sustainable way to enjoy this versatile vegetable. By selecting the right variety, preparing nutrient-rich soil, providing consistent water and fertilizer, supporting your plants, managing pests, and practicing proper pruning and pollination, you can enjoy a bountiful pumpkin harvest even in limited spaces.

Container-grown pumpkins allow urban gardeners and beginners to enjoy fresh, chemical-free vegetables, while proper storage ensures a year-round supply of nutritious and delicious pumpkins.

Start today, set up your containers, and follow this complete guide to grow pumpkins successfully at home. With patience and attention to detail, you can enjoy a plentiful harvest and experience the joy of home gardening!

The Best Time to Fertilize Fruit Trees for a Bumper Crop

The Best Time to Fertilize Fruit Trees for a Bumper Crop

Fruit trees are a rewarding addition to any garden, providing fresh, nutritious produce and enhancing the landscape’s beauty. However, achieving a bountiful harvest requires more than just planting the right varieties and watering adequately—it depends heavily on proper fertilization. Fertilizing at the right time is crucial for promoting strong root development, healthy foliage, abundant flowering, and high-quality fruit. Fertilize too early or too late, and you risk poor growth, reduced yield, or weakened trees. This article provides a detailed guide on the best time to fertilize fruit trees, with tips for timing, methods, and nutrient management to maximize your harvest.


Understanding Fruit Tree Nutrition

Fruit trees require essential nutrients for growth, flowering, and fruiting. These nutrients are typically categorized as:

  1. Macronutrients:
    • Nitrogen (N): Promotes leaf and shoot growth. Crucial during the early growing season.
    • Phosphorus (P): Supports root development and flower formation.
    • Potassium (K): Essential for fruit quality, size, and overall plant health.
  2. Secondary Nutrients:
    • Calcium, magnesium, and sulfur contribute to structural strength, chlorophyll production, and overall tree vitality.
  3. Micronutrients:
    • Iron, zinc, manganese, copper, boron, and molybdenum are needed in small amounts for enzymatic functions and metabolic processes.

Fertilization aims to balance these nutrients in accordance with the tree’s growth stage to ensure maximum productivity.


Best Time to Fertilize Based on Tree Growth Stage

The timing of fertilization depends on the seasonal cycle and the tree’s growth stage:

1. Early Spring (Pre-Bud Break)

  • Purpose: Stimulate root development and prepare the tree for vigorous growth.
  • Why It Works: Soil is warming, and trees begin to mobilize nutrients stored in roots.
  • Recommended Fertilizer: Balanced slow-release fertilizer (e.g., 10-10-10) or high-nitrogen formulations for leafy growth.
  • Application Tips:
    • Apply fertilizer evenly around the drip line (the area beneath the canopy where roots absorb most nutrients).
    • Avoid placing fertilizer too close to the trunk to prevent root burn.

Early spring fertilization ensures that trees have the nutrients needed for healthy leaf expansion and flower bud formation.


2. At Bloom (Flowering Stage)

  • Purpose: Support blossom development and pollination.
  • Nutrient Focus: Phosphorus and potassium are critical for flower and fruit set.
  • Recommended Fertilizer: Bloom-specific fertilizers or those higher in P and K.
  • Application Tips:
    • Avoid excessive nitrogen at this stage, which can promote leafy growth at the expense of flowers.
    • Water fertilizer into the soil to enhance absorption.

Proper nutrition during bloom helps ensure maximum flower retention, which directly impacts fruit quantity.


3. Post-Harvest (Late Summer to Early Fall)

  • Purpose: Replenish nutrient reserves and prepare trees for dormancy.
  • Nutrient Focus: Balanced nutrients with a moderate nitrogen component to promote root storage rather than excessive top growth.
  • Recommended Fertilizer: Organic options like composted manure, bone meal, or slow-release granular fertilizers.
  • Application Tips:
    • Spread fertilizer evenly under the canopy to feed roots.
    • Avoid fertilizing too late in fall, as it may stimulate tender growth vulnerable to frost.

Post-harvest fertilization helps the tree recover from fruiting and strengthens it for the next season.


Special Considerations for Different Fruit Trees

1. Apples and Pears

  • Require high nitrogen early in the season for vegetative growth.
  • Post-harvest fertilization with potassium and phosphorus promotes fruit bud formation for next year.

2. Stone Fruits (Peaches, Plums, Cherries)

  • Nitrogen application should be moderate to prevent excessive leafy growth, which can increase disease susceptibility.
  • Timing is critical: early spring application before bloom is ideal.

3. Citrus Trees

  • Benefit from fertilization 3–4 times per year due to continuous growth cycles.
  • Use a citrus-specific fertilizer containing micronutrients such as magnesium and iron.

4. Nut Trees (Almonds, Walnuts, Pecans)

  • Focus on nitrogen in early spring for shoot and leaf growth.
  • Potassium and phosphorus should be applied after nut set for improved kernel quality.

Understanding species-specific nutrient needs ensures optimal fertilization and fruit production.


Methods of Fertilizing Fruit Trees

  1. Granular Fertilizer
    • Spread evenly under the drip line and water in.
    • Provides slow-release nutrition that supports long-term growth.
  2. Liquid Fertilizer
    • Applied as a soil drench or foliar spray.
    • Offers rapid nutrient uptake, particularly useful during bloom or when deficiency symptoms appear.
  3. Organic Fertilizers
    • Compost, manure, bone meal, or fish emulsion provide nutrients and improve soil structure.
    • Slower nutrient release but improves long-term soil fertility.
  4. Foliar Feeding
    • Spraying nutrient solutions directly onto leaves allows rapid absorption of micronutrients like iron and zinc.
    • Useful when soil deficiencies limit nutrient uptake.

Choosing the right method depends on tree size, nutrient needs, and time of year.


Signs Your Fruit Trees Need Fertilization

  • Pale or Yellowing Leaves: Indicates nitrogen or iron deficiency.
  • Poor Flower or Fruit Development: May suggest phosphorus or potassium deficiency.
  • Slow Growth: Could be due to inadequate nutrients or imbalanced soil.
  • Leaf Curling or Necrosis: Often linked to micronutrient deficiency or irregular fertilization.

Regular observation and soil testing help determine fertilization timing and prevent over-application, which can harm the tree or reduce fruit quality.


Common Mistakes to Avoid

  1. Fertilizing at the Wrong Time: Late fall fertilization may stimulate growth susceptible to frost; mid-summer fertilization can disrupt dormancy.
  2. Over-Fertilization: Excess nitrogen can lead to lush foliage but poor fruit set and higher susceptibility to pests and diseases.
  3. Neglecting Soil Testing: Applying fertilizer without knowing soil nutrient levels can result in deficiencies or toxicities.
  4. Applying Too Close to Trunk: Concentrated fertilizer near the trunk can damage roots and create uneven nutrient distribution.

Avoiding these mistakes maximizes fruit yield while maintaining tree health.


Enhancing Fertilization with Soil Care

  • Mulching: Retains moisture, moderates soil temperature, and reduces nutrient runoff.
  • Composting: Adds organic matter and beneficial microorganisms that improve nutrient uptake.
  • Irrigation Management: Proper watering ensures nutrients are absorbed efficiently.
  • pH Management: Adjust soil pH to optimal levels for the species, as nutrient availability depends on pH.

Healthy soil enhances fertilization effectiveness and supports long-term tree productivity.


Conclusion

Fertilizing fruit trees at the right time is critical for achieving a bumper crop. Early spring applications support root growth and leaf development, bloom-stage nutrients ensure strong flower and fruit set, and post-harvest fertilization replenishes reserves for the following season. Understanding each fruit tree’s nutritional requirements, choosing the correct fertilizer, and applying it at the optimal time ensures healthy trees, abundant flowers, and high-quality fruit.

Avoiding common mistakes, monitoring tree health, and maintaining soil fertility further enhance fruit production. By following these strategies, gardeners can maximize yields, improve fruit quality, and enjoy the satisfaction of a productive orchard year after year. Thoughtful, well-timed fertilization is not just a seasonal task—it is the foundation for thriving, fruitful trees and a rewarding gardening experience.

Grow High-Yield Butternut Squash in Plastic Containers for Year-Round Harvest

Grow High-Yield Butternut Squash in Plastic Containers for Year-Round Harvest

Butternut squash, a popular winter squash variety, is loved for its sweet, nutty flavor and versatile culinary uses. Traditionally grown in garden beds, butternut squash can also thrive in plastic containers, making it possible for gardeners with limited space to enjoy a bountiful harvest. With the right techniques, you can grow high-yield butternut squash in containers and even have fresh squash available to enjoy year-round. This guide will walk you through every step, from selecting the right container to harvesting and storing your squash.


Why Grow Butternut Squash at Home?

Growing butternut squash at home offers multiple benefits:

  1. Freshness and Flavor: Home-grown squash is fresher and tastier than store-bought alternatives.
  2. Nutritional Value: Butternut squash is rich in vitamins A and C, potassium, fiber, and antioxidants.
  3. Cost-Effective: Growing your own squash reduces grocery bills, especially for families who consume squash regularly.
  4. Control Over Chemicals: By growing at home, you control fertilizers and pesticides, ensuring healthy, chemical-free produce.
  5. Sustainability: Container gardening reduces reliance on commercial agriculture and encourages eco-friendly practices.

Why Use Plastic Containers for Butternut Squash?

Plastic containers are a practical solution for growing squash, especially in urban or small-space gardens:

  • Space-Saving: Perfect for balconies, terraces, or patios.
  • Portable: Containers can be moved to optimize sunlight exposure or protect plants from adverse weather.
  • Durable: Plastic containers last for multiple growing seasons.
  • Water Retention: Plastic retains moisture longer than clay pots, which benefits butternut squash plants.
  • Eco-Friendly: Repurposing plastic containers reduces waste and promotes sustainable gardening.

Choosing the Right Butternut Squash Variety

For container gardening, bush or compact varieties of butternut squash are ideal. While vining types can grow in containers, they require trellises or additional support to prevent sprawling.

Recommended Varieties for Containers:

  • Bush Butternut Squash: Compact, ideal for container growth, and produces a high yield.
  • Butterbush: Small, bush-type plant perfect for limited spaces.
  • Tromboncino (Optional for Vertical Growth): Requires trellis support but produces long, abundant fruits.

Choosing the right variety ensures manageable growth, higher fruit yield, and easier maintenance in containers.


Selecting the Right Plastic Container

Butternut squash requires deep, spacious containers to accommodate its root system:

  • Size: Choose containers at least 15–20 inches deep and 18–24 inches wide. Large containers support vigorous growth and heavier fruit production.
  • Drainage: Ensure containers have multiple drainage holes at the bottom to prevent waterlogging and root rot.
  • Durability: Use sturdy containers that can withstand outdoor conditions.

Pro Tip: Reuse large plastic barrels or storage bins as squash containers after cleaning and drilling drainage holes.


Preparing the Soil

Butternut squash is a heavy feeder and thrives in nutrient-rich, well-draining soil. A proper soil mix is key to high yields:

  • 2 parts garden soil
  • 1 part compost or organic manure
  • 1 part perlite or coco peat for aeration and water retention

Mix thoroughly to ensure good soil structure. The soil pH should ideally be between 6.0 and 7.0.

Tip: Adding a handful of bone meal or rock phosphate at planting time can promote strong root development and flowering.


Planting Butternut Squash Seeds or Seedlings

You can grow butternut squash from seeds or seedlings:

  1. Seeds: Sow 2–3 seeds per container, 1 inch deep. Thin to the strongest seedling after germination.
  2. Seedlings: Transplant seedlings into the container, burying up to the first set of leaves for stronger root growth.

Spacing: Even in containers, give each plant enough space to grow without crowding, ensuring better airflow and reducing disease risk.

Pro Tip: Soak seeds overnight before planting to speed up germination and improve seedling vigor.


Watering Techniques

Consistent moisture is critical for squash growth and fruiting:

  • Water deeply 2–3 times per week depending on weather and container size.
  • Avoid wetting the leaves to prevent fungal infections; water at the base of the plant.
  • Mulch the soil surface with straw, dried leaves, or coco peat to retain moisture and regulate soil temperature.

Tip: Self-watering containers can reduce the frequency of watering while ensuring consistent moisture for squash roots.


Fertilization for High Yield

Butternut squash requires regular feeding to support rapid growth and heavy fruiting:

  1. Organic Fertilizers: Use compost, vermicompost, or liquid manure every 2–3 weeks.
  2. Balanced NPK Fertilizer: Apply a balanced fertilizer during vegetative growth for strong leaves and stems.
  3. Flowering and Fruiting Boost: High phosphorus and potassium fertilizers support flower development and fruit set.

Proper fertilization ensures healthy plants capable of producing a high number of fruits per container.


Supporting Your Butternut Squash Plants

Butternut squash plants can be sprawling, so providing support is crucial, especially for container-grown plants:

  • Trellis or Stakes: Train vines to grow vertically to save space and prevent fruits from touching the ground.
  • Cages: Tomato cages can also support squash vines and protect fruits from soil-borne diseases.
  • Guiding Vines: Regularly guide and tie vines to the support structure gently to prevent breakage.

Proper support improves air circulation, reduces disease risk, and keeps fruits clean and healthy.


Pest and Disease Management

Even in containers, squash can face pest and disease challenges:

  • Common Pests: Squash bugs, aphids, spider mites, and cucumber beetles.
  • Organic Controls: Neem oil spray, insecticidal soap, or introducing beneficial insects like ladybugs.
  • Disease Prevention: Ensure proper spacing, sunlight, and air circulation. Remove infected leaves promptly.

Healthy plants are more productive, producing more flowers and fruits for year-round harvesting.


Pruning and Maintenance

Pruning butternut squash can improve yields and fruit quality:

  • Remove yellowing or diseased leaves.
  • Trim side shoots for bush-type varieties to focus energy on main stems.
  • For vining types, prune overly long vines to manage space and encourage fruiting.

Pruning directs the plant’s energy to producing larger, healthier fruits.


Harvesting Butternut Squash

Butternut squash typically matures in 80–120 days depending on the variety:

  • Fruits are ready when the skin is hard, matte, and the color is deep beige.
  • Use a sharp knife or scissors to cut the fruit from the vine, leaving a small stem attached.
  • Avoid harvesting immature fruits; they will not store well and may reduce the plant’s overall productivity.

Pro Tip: Harvest regularly to encourage continuous flowering and fruiting throughout the growing season.


Storing Butternut Squash for Year-Round Use

One of the great benefits of butternut squash is its long shelf life:

  • Store in a cool, dry place with good ventilation.
  • Properly cured squash can last 2–3 months or even longer.
  • Avoid stacking fruits directly on each other to prevent bruising and rotting.

By storing squash properly, you can enjoy a year-round supply of fresh, home-grown squash.


Tips for Maximizing Yield in Containers

  1. Choose Compact Varieties: Bush-type squash is ideal for container gardening.
  2. Use Large Containers: More root space = higher fruit yield.
  3. Sunlight: Provide at least 6–8 hours of direct sunlight daily.
  4. Regular Monitoring: Check plants for pests, diseases, and nutrient deficiencies.
  5. Companion Planting: Marigolds and basil can deter pests naturally.
  6. Vertical Growth: Trellises maximize space and improve fruit quality.

Final Thoughts

Growing high-yield butternut squash in plastic containers is a practical, space-saving, and sustainable gardening solution. With proper care—choosing the right variety, preparing nutrient-rich soil, watering consistently, supporting plants, managing pests, and pruning—you can achieve a bountiful harvest.

Container-grown butternut squash allows gardeners with limited space to enjoy fresh, chemical-free vegetables year-round. With careful planning and attention to detail, you can have abundant fruits ready to eat, store, or share with family and friends.

Start today, set up your plastic containers, and enjoy the satisfaction of growing your own high-yield butternut squash for a continuous, year-round harvest.

Old Burlap Sacks? Don’t Throw Them Away! How to Grow Carrots Easily at Home

Old Burlap Sacks? Don’t Throw Them Away! How to Grow Carrots Easily at Home

Carrots are a highly nutritious and versatile vegetable that can be enjoyed raw, cooked, or juiced. Rich in beta-carotene, vitamins A, K, and C, antioxidants, and fiber, carrots support eye health, immunity, digestion, and overall well-being.

Many urban gardeners believe growing carrots requires deep garden beds, fertile soil, and lots of space. However, the YouTube video “Old burlap sacks Don’t throw them away Grow carrots this way!” demonstrates a simple, space-saving method to grow carrots using recycled burlap sacks. This approach is eco-friendly, cost-effective, and perfect for small spaces, allowing gardeners to enjoy fresh, homegrown carrots with minimal effort.

This blog post explains step-by-step how to grow carrots in old burlap sacks, tips for high yield, and ways to ensure fast, healthy growth.


Why Grow Carrots in Burlap Sacks?

Using burlap sacks for carrot cultivation offers several advantages:

  1. Space-Saving: Perfect for terraces, balconies, and small patios.
  2. Cost-Effective: Recycles old sacks and avoids purchasing expensive garden beds.
  3. High Yield: Carrots grow straight and healthy in loose, well-aerated soil.
  4. Easy to Manage: Lightweight and movable, ideal for watering, fertilizing, and harvesting.
  5. Eco-Friendly: Reduces waste by repurposing old materials.

Burlap sack gardening is perfect for beginners and urban gardeners.


Step 1: Choosing the Right Burlap Sacks

  • Use clean, intact burlap sacks.
  • Large sacks work best: at least 12–18 inches deep and wide to accommodate root growth.
  • Avoid torn sacks or those with chemical residues.
  • Burlap is breathable, allowing air circulation and moisture retention, which promotes healthy root growth.

Proper sack selection ensures straight, robust carrots.


Step 2: Preparing the Growing Medium

Carrots need light, loose, and nutrient-rich soil to grow straight and long.

Recommended Soil Mix:

  • 50% garden soil or loamy soil
  • 30% compost or well-rotted manure
  • 20% sand or cocopeat for aeration and moisture retention

Optional: Add bone meal or wood ash to improve phosphorus content and support root development.

Well-prepared soil ensures fast germination and straight, healthy roots.


Step 3: Selecting Carrot Seeds

  • Use fresh, high-quality carrot seeds suitable for your region.
  • Popular varieties include Nantes, Chantenay, and Amsterdam carrots.
  • Choose seeds that are uniform and free from damage for better germination.

Quality seeds ensure strong seedlings and faster harvests.


Step 4: Planting Carrots in Burlap Sacks

  • Fill the burlap sack with prepared soil, leaving 2–3 inches from the top.
  • Sow seeds ¼–½ inch deep, spacing 1–2 inches apart.
  • Lightly cover seeds with soil and water gently.
  • Keep sacks in a flat, sunny area during germination.

Correct planting ensures straight, strong carrot roots and healthy seedlings.


Step 5: Sunlight Requirements

  • Carrots need 6–8 hours of sunlight daily.
  • Place the sacks on a terrace, balcony, or near a sunny window.
  • In hot climates, provide partial shade during peak afternoon hours to prevent soil from drying out.

Adequate sunlight promotes healthy leaves and strong root growth.


Step 6: Watering Carrots

  • Keep the soil consistently moist but not waterlogged.
  • Water 2–3 times a week, more frequently in hot or dry conditions.
  • Mulch with dry leaves or straw to retain moisture and regulate temperature.

Proper watering ensures continuous growth and prevents root splitting.


Step 7: Fertilization for High Yield

  • Apply organic fertilizers like vermicompost or cow dung slurry every 10–15 days.
  • Avoid nitrogen-rich fertilizers that promote excessive leafy growth instead of root development.
  • Phosphorus and potassium-rich fertilizers support strong root formation and better flavor.

Balanced fertilization results in straight, healthy carrots with rich taste.


Step 8: Thinning Seedlings

  • Once seedlings are 2–3 inches tall, thin them to 2–3 inches apart.
  • Thinning ensures enough space for roots to grow straight and long.
  • Use removed seedlings as greens or compost.

Proper thinning prevents crowding and improves yield quality.


Step 9: Pest and Disease Management

Even in sacks, carrots can face minor pests:

ProblemSolution
AphidsSpray neem oil or mild soap solution
Root flyCover soil with fine mesh or netting
Fungal infectionsEnsure proper drainage and avoid overwatering

Monitoring and early intervention keep carrots healthy and highly productive.


Step 10: Harvesting Carrots

  • Carrots are ready to harvest 60–90 days after sowing, depending on variety.
  • Gently loosen the soil around the roots and pull carrots carefully.
  • Avoid damaging roots, as broken carrots store poorly and lose flavor.
  • Harvest regularly to encourage continuous growth in successive sowings.

Burlap sacks make harvesting easy and mess-free, even in small spaces.


Step 11: Benefits of Growing Carrots in Burlap Sacks

  • Mobility: Sacks can be moved to adjust sunlight or protect from rain.
  • Space Efficiency: Ideal for small terraces, balconies, and urban homes.
  • High Yield: Loose soil encourages straight, large carrots.
  • Low Maintenance: Minimal watering, fertilization, and pest management.
  • Eco-Friendly: Repurposes old materials and reduces waste.

This method is practical, economical, and productive.


Step 12: Tips for Continuous Carrot Production

  • Succession Planting: Sow seeds every 2–3 weeks to maintain a steady supply.
  • Soil Refresh: Add compost or organic fertilizer between harvests.
  • Mulching: Conserves soil moisture and reduces weeds.
  • Regular Monitoring: Check for pests and nutrient deficiencies weekly.

Following these tips ensures lush, fast-growing carrots with minimal effort.


Step 13: Why Gardeners Are Amazed by This Method

  • Minimal space and resources produce abundant, high-quality carrots.
  • Burlap sacks provide loose, well-aerated soil, resulting in straight and healthy roots.
  • Urban gardeners can enjoy fresh, organic carrots without a traditional garden.
  • Easy, low-maintenance method makes home gardening accessible for everyone.

This method combines simplicity, sustainability, and high productivity, making it ideal for urban home gardeners.


Conclusion: Grow Carrots Easily Using Old Burlap Sacks

Using old burlap sacks to grow carrots is a smart, eco-friendly solution for urban gardeners. With proper soil, sunlight, watering, and fertilization, anyone can enjoy healthy, straight, flavorful carrots in limited space.

Even without a garden, you can harvest multiple carrots regularly, save money, and enjoy fresh, homegrown vegetables year-round. Don’t throw away those old burlap sacks—turn them into a productive carrot garden today!

How to Transplant Small Trees Without Killing Them

How to Transplant Small Trees Without Killing Them

Transplanting small trees can be a rewarding endeavor, whether you are redesigning your landscape, relocating a sapling for better growth conditions, or rescuing a tree from a construction site. However, transplanting is a delicate process that, if done incorrectly, can stress or even kill a tree. Understanding the biology of trees, selecting the right timing, preparing the site, and providing proper post-transplant care are crucial steps for success. This article provides a comprehensive guide on how to transplant small trees safely and ensure they thrive in their new location.


Why Transplanting Small Trees Requires Care

Small trees, typically defined as young trees under 8–10 feet tall, have delicate root systems that are particularly vulnerable to disturbance. The root system is the lifeline of a tree, responsible for absorbing water, nutrients, and oxygen. Transplant shock occurs when roots are damaged or insufficient to support the canopy, leading to wilting, leaf drop, or death. Key factors that affect transplant success include:

  • Root disturbance during digging
  • Soil and environmental differences at the new site
  • Inadequate watering and nutrient management
  • Seasonal timing and weather conditions

By addressing these factors, gardeners can significantly increase the survival rate of transplanted small trees.


The Best Time to Transplant

Timing is critical for minimizing stress on small trees:

  1. Dormant Season (Late Fall to Early Spring):
    • Deciduous trees are dormant, with minimal foliage and reduced metabolic activity.
    • Transplanting during dormancy limits water loss and reduces stress.
  2. Early Spring:
    • Ideal before leaf buds swell, allowing the tree to focus energy on root establishment.
  3. Avoid Summer Transplants:
    • Hot temperatures increase transpiration, making it difficult for the tree to replace lost water.
    • Trees are more prone to stress and wilting during peak heat.

Evergreen trees may have slightly different timing considerations; mild late winter or early spring is usually preferred to avoid frost damage.


Selecting and Preparing the New Site

A successful transplant starts with site selection:

  • Sunlight Requirements: Match the tree’s light needs to the new location (full sun, partial shade, or shade).
  • Soil Type: Ensure soil is well-drained and similar in texture to the tree’s original location. Avoid heavy clay or waterlogged areas.
  • Space Considerations: Account for mature tree size, including canopy spread and root zone. Avoid proximity to structures or utility lines.
  • Soil Preparation:
    • Dig a hole 2–3 times the width of the root ball to allow room for root expansion.
    • Amend soil with organic matter, such as compost, to improve nutrient availability and drainage.

Proper preparation reduces stress and helps the tree establish quickly.


Digging Up the Small Tree

Careful excavation is essential to preserve roots:

  1. Measure Root Spread:
    • For small trees, the root ball should be roughly 10–12 inches in diameter per inch of trunk diameter.
  2. Prune Roots Carefully:
    • Trim damaged or circling roots while leaving healthy ones intact.
    • Avoid cutting too many roots, as the tree relies on them for water uptake.
  3. Dig Around the Root Ball:
    • Start 6–12 inches from the trunk and dig down to maintain soil around the roots.
    • Gently lift the tree, keeping the soil intact around the root ball to prevent desiccation.
  4. Wrap the Root Ball:
    • Use burlap or a similar breathable material to protect roots during transport.
    • Avoid plastic wrapping, which can suffocate roots and retain excess moisture.

Preserving as much of the original root structure as possible minimizes transplant shock.


Transporting the Tree

Moving a small tree requires care to avoid physical damage:

  • Support the Trunk: Handle the tree by the root ball rather than the trunk to prevent snapping branches.
  • Avoid Exposure: Keep roots covered and moist during transport.
  • Limit Transport Time: Minimize the duration between digging and planting to reduce stress.

For longer distances, keep the tree shaded and periodically mist roots to prevent drying.


Planting the Small Tree

Correct planting technique is crucial:

  1. Hole Depth and Width:
    • Place the root ball so that the top sits slightly above or flush with the surrounding soil.
    • The hole should be wide enough to accommodate roots without crowding or bending.
  2. Backfill Carefully:
    • Fill the hole with native soil, gently firming to eliminate air pockets.
    • Avoid compacting soil excessively, which can hinder root growth.
  3. Mulching:
    • Apply a 2–3 inch layer of organic mulch around the base, keeping it 2–3 inches from the trunk.
    • Mulch conserves moisture, regulates soil temperature, and reduces weed competition.
  4. Watering:
    • Water deeply immediately after planting to settle soil and hydrate roots.
    • Maintain consistent moisture for the first growing season, but avoid waterlogging.

Proper planting ensures roots make contact with the surrounding soil, promoting healthy establishment.


Post-Transplant Care

Caring for the tree after transplanting is critical for survival:

  1. Watering Schedule:
    • Water regularly, especially during dry spells. Young trees may need 1–2 inches of water per week.
    • Gradually reduce frequency as roots establish over 12–18 months.
  2. Staking:
    • Stake small trees in windy areas to prevent toppling, but avoid restricting natural trunk movement, which strengthens the tree.
    • Remove stakes after one growing season.
  3. Pruning:
    • Remove broken, damaged, or crossing branches after transplanting.
    • Avoid heavy pruning, which can stress the tree further.
  4. Fertilization:
    • Avoid heavy fertilization immediately after transplanting.
    • Apply slow-release fertilizer after the tree shows signs of new growth.
  5. Monitoring:
    • Watch for signs of stress such as wilting, leaf discoloration, or premature leaf drop.
    • Adjust care based on environmental conditions and tree response.

Common Mistakes to Avoid

  • Planting Too Deep or Too Shallow: Correct root placement is critical; improper planting can lead to root rot or poor establishment.
  • Neglecting Watering: Newly transplanted trees need consistent moisture, especially during the first growing season.
  • Over-Pruning: Heavy pruning removes foliage needed for photosynthesis, hindering recovery.
  • Ignoring Site Conditions: Soil, light, and drainage must match the tree’s needs to prevent stress and disease.
  • Delaying Transplanting: Waiting too long can result in larger, less adaptable root systems, increasing stress.

Avoiding these mistakes ensures higher survival rates and faster establishment.


Benefits of Transplanting Small Trees Successfully

  • Immediate Landscape Design: Relocating trees allows you to achieve a balanced and visually appealing layout quickly.
  • Tree Rescue: Small trees can be saved from construction sites, poor locations, or unfavorable conditions.
  • Enhanced Growth: Moving a tree to a location with better soil, sunlight, and space improves long-term health and vigor.
  • Cost-Effective Landscaping: Transplanting young trees is often more economical than purchasing mature specimens.

Successfully transplanting trees can transform a landscape while promoting healthy, long-term growth.


Conclusion

Transplanting small trees requires careful planning, precise execution, and attentive post-transplant care. Choosing the right timing, preparing the new site, protecting the root system, and providing consistent watering and monitoring are essential steps to prevent transplant shock and ensure tree survival. Avoiding common mistakes such as over-pruning, planting too deeply, or neglecting water needs significantly increases the likelihood of success.

With proper techniques, small trees can be relocated safely, allowing gardeners to design beautiful, functional landscapes while giving trees the opportunity to thrive in their new homes. By following these guidelines, anyone can confidently transplant small trees without jeopardizing their health, creating vibrant green spaces that will flourish for years to come.

Why Garlic Grown in Plastic Bags Produces So Many Bulbs and Harvests Quickly: Here’s the Answer

Why Garlic Grown in Plastic Bags Produces So Many Bulbs and Harvests Quickly: Here’s the Answer

Garlic is more than just a flavorful ingredient; it’s a nutritional powerhouse. Packed with vitamins, minerals, antioxidants, and medicinal compounds like allicin, garlic supports heart health, boosts immunity, and fights infections.

Traditionally, garlic is grown in open fields or garden beds, but many urban gardeners struggle with space and soil quality. The YouTube video “Why do garlic grown in plastic bags produce so many bulbs and harvest so quickly? Here is answer” reveals a surprising method to grow garlic efficiently in plastic bags. This method allows gardeners to enjoy abundant, healthy bulbs in less time, even with minimal space and effort.

This blog post explains why garlic grows so well in plastic bags and provides tips to achieve maximum yield and fast harvests.


Why Grow Garlic in Plastic Bags?

Growing garlic in plastic bags offers multiple advantages:

  1. Space-Efficient: Perfect for terraces, balconies, and small patios.
  2. Fast Harvest: Garlic matures more quickly in controlled container environments.
  3. High Yield: Concentrated nutrients in the bag promote larger and more numerous bulbs.
  4. Reduced Pests and Diseases: Limited exposure to soil-borne pests and fungi.
  5. Ease of Care: Lightweight bags make watering, fertilizing, and harvesting simple.

Plastic bag cultivation is ideal for urban gardeners who want garlic year-round.


Step 1: Choosing the Right Plastic Bag

  • Use durable, food-grade plastic bags or recycled shopping bags.
  • Size should be 12–15 inches deep and wide enough for several cloves.
  • Ensure drainage holes at the bottom to prevent waterlogging.
  • Larger bags accommodate more cloves and allow bulbs to grow larger.

Proper bag selection ensures healthy root growth and abundant bulbs.


Step 2: Preparing the Growing Medium

Garlic thrives in well-draining, nutrient-rich soil:

Recommended Soil Mix:

  • 40% garden soil or loamy soil
  • 30% compost or well-rotted manure
  • 20% cocopeat or peat moss for moisture retention
  • 10% sand for aeration

Optional: Add bone meal, neem cake, or wood ash to enhance nutrients and protect against pests.

This mixture supports vigorous root growth and rapid bulb formation.


Step 3: Selecting Garlic Cloves

  • Use healthy, firm cloves from disease-free garlic bulbs.
  • Avoid cloves that are soft, shriveled, or damaged.
  • Large cloves produce larger bulbs and higher yields.

Choosing quality cloves is crucial for fast-growing, productive garlic plants.


Step 4: Planting Garlic in Plastic Bags

  • Fill the bag with soil, leaving 2–3 inches from the top.
  • Separate garlic bulbs into individual cloves, keeping the pointed end upward.
  • Plant cloves 1–2 inches deep and 3 inches apart.
  • Water gently after planting to settle the soil.

Correct planting ensures strong roots and fast sprouting.


Step 5: Sunlight Requirements

  • Garlic requires 6–8 hours of sunlight daily for optimal growth.
  • Place bags on a sunny terrace, balcony, or near a bright window.
  • In hot climates, provide partial shade during peak afternoon hours.

Adequate sunlight encourages healthy leaves and rapid bulb formation.


Step 6: Watering Garlic

  • Water 2–3 times a week, keeping the soil consistently moist but not waterlogged.
  • Mulch with straw or dry leaves to retain moisture and regulate temperature.
  • Avoid overwatering, which can cause rot and fungal infections.

Proper watering ensures continuous growth and faster bulb development.


Step 7: Fertilization for Maximum Yield

  • Apply organic fertilizers like vermicompost or cow dung slurry every 10–15 days.
  • Use nitrogen-rich fertilizers in the early growth stage for strong green leaves.
  • Switch to potassium and phosphorus-rich fertilizers during bulb formation to promote large, healthy bulbs.

Balanced fertilization results in numerous, well-formed garlic bulbs.


Step 8: Why Garlic Grows Fast and Produces Many Bulbs in Plastic Bags

  1. Concentrated Nutrients: The confined soil in bags allows roots to absorb all available nutrients, resulting in faster growth and larger bulbs.
  2. Better Drainage and Aeration: Bags prevent waterlogging while maintaining moisture and air circulation, reducing stress on the plants.
  3. Temperature Control: The soil in bags warms up faster, encouraging rapid sprouting and growth.
  4. Controlled Environment: Less exposure to pests and competition allows garlic to focus energy on bulb formation.

These factors together make garlic grow faster and produce more bulbs than traditional garden planting.


Step 9: Pest and Disease Management

Even in bags, garlic can face minor issues:

ProblemSolution
AphidsSpray neem oil or mild soap solution
Fungal infectionsEnsure good drainage, avoid overhead watering
Rotting bulbsRemove affected cloves and maintain proper spacing

Regular monitoring keeps garlic healthy and highly productive.


Step 10: Harvesting Garlic

  • Garlic is ready to harvest when leaves turn yellow and start drying.
  • Carefully lift the bulbs from the soil to avoid damage.
  • Cure bulbs in shade for 7–10 days before storage.
  • Harvested garlic can last several months if stored properly.

Plastic bag cultivation allows for quick harvest and repeated planting cycles.


Step 11: Benefits of Growing Garlic in Plastic Bags

  • Mobility: Bags can be moved to optimize sunlight or protect from rain.
  • Space Optimization: Ideal for urban spaces and small terraces.
  • Fast Growth: Controlled environment speeds up sprouting and bulb formation.
  • High Productivity: Concentrated nutrients and minimal pest exposure increase yield.
  • Cost-Effective: Uses recycled bags and reduces market dependency.

Plastic bag gardening makes garlic accessible, efficient, and productive.


Step 12: Tips for Continuous Harvest

  • Succession Planting: Plant new cloves every 6–8 weeks for continuous supply.
  • Soil Enrichment: Add compost or organic fertilizer after each harvest.
  • Mulching: Retains moisture and protects bulbs from temperature extremes.
  • Pest Monitoring: Inspect weekly to maintain healthy plants.

Following these tips ensures lush, fast-growing garlic bulbs all year.


Step 13: Why Gardeners Are Amazed by This Method

  • Minimal space and resources produce high yields of garlic.
  • Bulbs grow faster and more abundant than traditional garden planting.
  • Urban gardeners can enjoy fresh, organic garlic without a backyard.
  • Efficient, low-maintenance method reduces labor and increases productivity.

This method combines simplicity, efficiency, and high yield, making it perfect for beginners and urban home gardeners.


Conclusion: Grow Garlic Quickly and Abundantly in Plastic Bags

Growing garlic in plastic bags is a game-changer for home gardeners. With proper cloves, nutrient-rich soil, sunlight, watering, and fertilization, anyone can enjoy fast-growing, high-yield garlic bulbs in limited space.

Even without a garden, you can harvest multiple bulbs quickly, ensure a continuous supply of fresh garlic, and experience the satisfaction of homegrown produce. Start using plastic bags today and discover why garlic grows so abundantly and quickly in this simple, effective method!

5 Trees You Should Never Plant Near Your Driveway

5 Trees You Should Never Plant Near Your Driveway

Driveways are the gateway to your home, offering both practical function and curb appeal. While trees can enhance the aesthetic value and shade around a driveway, planting the wrong species too close can lead to structural damage, safety hazards, and costly maintenance. Tree roots can crack pavement, overhanging branches may interfere with vehicles, and certain species produce excessive leaf litter or fruit that makes surfaces slippery. Selecting trees thoughtfully ensures a beautiful, functional landscape without compromising the integrity of your driveway. This article explores five trees you should avoid planting near driveways, explaining why they are problematic and offering tips for safer alternatives.


1. Silver Maple (Acer saccharinum)

Silver maples are beloved for their rapid growth and impressive canopy, but they are notorious for causing problems near driveways.

  • Root Aggressiveness: Silver maples develop shallow, invasive roots that easily lift sidewalks, crack driveways, and damage underground utilities.
  • Size and Canopy: Mature trees can reach 50–70 feet in height with a wide canopy, leading to excessive shade and debris on driveways.
  • Maintenance Issues: Large leaves and twigs fall throughout the year, requiring frequent cleaning. Weak wood makes them prone to branch breakage in storms.
  • Alternatives: Consider sugar maples or red maples planted at a safe distance, which have less aggressive roots and more manageable growth habits.

Silver maples may offer beauty and fast shade, but the long-term structural damage they cause outweighs the benefits.


2. Willow Trees (Salix spp.)

Willows, including weeping willow, are iconic for their elegant, cascading branches but are highly unsuitable near driveways.

  • Root System: Willows have extremely aggressive roots that seek water, often invading driveways, septic systems, and nearby pipes.
  • Fragile Branches: Soft, fast-growing branches break easily in wind or ice storms, creating hazards for vehicles and pedestrians.
  • Messy Debris: Fallen leaves, twigs, and seed pods accumulate rapidly, creating slippery surfaces and increasing maintenance.
  • Alternatives: Consider native dogwoods or ornamental cherries at a safe distance, which provide beauty without destructive root systems.

Willows’ aesthetic appeal cannot compensate for their destructive tendencies near paved areas.


3. Poplar Trees (Populus spp.)

Poplars, including Lombardy poplar, grow quickly and provide fast shade, but their characteristics make them risky near driveways.

  • Weak Wood: Poplar branches are brittle and prone to breaking in storms, posing a danger to cars and people.
  • Invasive Roots: Roots spread widely and can lift driveways and damage underground pipes.
  • Short Lifespan: Many poplars live only 30–50 years, and mature trees often decline rapidly, increasing maintenance and removal costs.
  • Alternatives: Consider columnar oaks or hornbeams for upright growth with stronger wood and less invasive roots.

Poplars are excellent for quick shade but require careful placement away from paved structures.


4. Bradford Pear (Pyrus calleryana ‘Bradford’)

Bradford pear trees were once popular for ornamental driveways but have proven problematic over time.

  • Weak Branch Structure: Upright branches split easily in wind, ice, or snow, creating hazards for vehicles and sidewalks.
  • Invasive Roots: Roots are shallow and can disrupt pavement and nearby structures.
  • Messy Fruit: Small, hard fruit and excessive leaf litter fall on driveways, causing slippery surfaces.
  • Alternatives: Consider serviceberry (Amelanchier) or flowering crabapple trees, which provide seasonal beauty without structural weaknesses.

The combination of weak wood and shallow roots makes Bradford pear a high-risk choice near driveways.


5. Silver Birch (Betula pendula)

Silver birch trees are graceful and provide stunning winter silhouettes, but they are not ideal for proximity to driveways.

  • Shallow Roots: Roots can lift asphalt and concrete, causing cracks and uneven surfaces.
  • Messy Litter: Birch trees shed leaves, twigs, and papery bark that require constant cleaning to keep driveways clear.
  • Prone to Disease: Birch trees are susceptible to pests such as bronze birch borers and can develop weak limbs.
  • Alternatives: Consider hornbeam or ornamental maple varieties, which have more robust roots and cleaner foliage.

Silver birches’ beauty comes at a cost when planted too close to paved areas, making them more trouble than they’re worth.


Factors to Consider When Planting Trees Near Driveways

  1. Root Structure: Avoid trees with aggressive, shallow roots that can lift or crack pavement. Opt for deep-rooted or non-invasive species.
  2. Mature Size: Consider the tree’s full height and canopy spread. Trees that grow large may block sunlight or interfere with vehicle clearance.
  3. Wood Strength: Weak-wooded species are prone to breakage in wind, ice, or snow. Choose trees with durable wood for safety.
  4. Leaf and Fruit Litter: Consider maintenance requirements. Trees that drop heavy fruit, seeds, or excessive foliage can create slippery surfaces and more work.
  5. Distance from Driveway: Plant trees at least 10–15 feet away from driveways to prevent root damage and accommodate growth. Consult local planting guidelines for specific species.
  6. Climate Suitability: Choose trees adapted to your local climate and soil to reduce stress and promote healthy growth.

Safer Alternatives for Driveway Plantings

If you want trees near your driveway without risking damage:

  1. Columnar Trees: Species like columnar hornbeam, Italian cypress, or upright oaks provide vertical structure without wide-spreading roots.
  2. Small Ornamental Trees: Dogwood, Japanese maple, or flowering cherries provide seasonal beauty without aggressive roots or brittle wood.
  3. Evergreen Options: Thuja or compact spruce varieties offer privacy and structure while remaining manageable near paved areas.
  4. Container Trees: Small trees in large containers can be placed near driveways for decorative purposes without risking root damage.

Proper species selection allows you to enjoy shade, color, and aesthetics without compromising driveway integrity.


Maintenance Tips for Driveway Trees

  • Regular Pruning: Remove weak or crossing branches to reduce breakage risks.
  • Inspect Roots: Monitor for signs of pavement lifting or root crowding.
  • Mulching: Protect soil around the base to retain moisture and reduce root stress.
  • Irrigation: Provide adequate water during dry periods to prevent shallow roots from seeking moisture under pavement.
  • Professional Advice: Consult an arborist for large trees near driveways to evaluate risk and proper care.

By following these tips, you can maintain a safe, attractive landscape while protecting your driveway.


Conclusion

Planting trees near a driveway can enhance curb appeal, provide shade, and improve property aesthetics. However, certain species pose significant risks due to invasive roots, weak wood, and excessive debris. Silver maples, willows, poplars, Bradford pears, and silver birches are examples of trees that should be avoided near paved surfaces. Understanding the growth characteristics and potential hazards of trees allows homeowners to make informed choices, preventing structural damage, safety hazards, and costly repairs.

By selecting alternative species, maintaining proper planting distances, and implementing routine care, you can enjoy the benefits of trees near your driveway without compromising safety or function. Thoughtful planning and knowledge of tree behavior ensure a beautiful, durable, and hassle-free landscape for years to come.

How to Keep Evergreens Healthy Through Winter

How to Keep Evergreens Healthy Through Winter

Evergreens are prized for their year-round beauty, vibrant foliage, and ability to add structure and color to gardens even in the harshest months. However, winter presents significant challenges to evergreen health. Cold temperatures, dry winds, frost, ice, and snow can stress plants, cause needle browning, and even lead to branch dieback. With proper preparation and care, gardeners can protect their evergreens and ensure they remain lush, green, and resilient throughout winter. This article provides a comprehensive guide to maintaining evergreen health during the cold months, covering types of evergreens, environmental challenges, and practical care strategies.


Understanding Evergreen Vulnerability in Winter

Evergreens face unique stressors in winter because their leaves remain active when deciduous trees are dormant. Key factors that affect evergreen health include:

  1. Water Stress: Cold soil and frozen ground limit water absorption, leading to dehydration. Needles lose moisture faster than roots can replace it.
  2. Wind Damage: Winter winds increase evaporation from leaves, causing desiccation and needle burn.
  3. Frost Damage: Sudden temperature drops can injure tender branches and needles, especially in young or newly planted trees.
  4. Snow and Ice Load: Heavy snow or ice accumulation can break branches, particularly in conifers with flexible needles.
  5. Salt Injury: Evergreens near roads or sidewalks may suffer from road salt, which can damage roots and foliage.

By understanding these challenges, gardeners can implement preventive measures to protect their evergreens.


Preparing Evergreens for Winter

Proper preparation in late fall is essential for minimizing winter damage:

1. Watering Deeply

  • Before the ground freezes, provide a thorough watering to ensure evergreens enter winter hydrated.
  • Focus on newly planted trees, container-grown evergreens, and shrubs in exposed locations.
  • Watering should be done on warm, sunny days to allow moisture absorption.

2. Mulching

  • Apply 2–4 inches of organic mulch (wood chips, bark, or leaves) around the base of the plant.
  • Mulch conserves soil moisture, moderates temperature fluctuations, and protects roots from freezing.
  • Keep mulch 2–3 inches away from the trunk to prevent rot or fungal issues.

3. Pruning

  • Remove dead, damaged, or weak branches in late fall before snow accumulation.
  • Light shaping can reduce wind resistance and prevent snow-related breakage.
  • Avoid heavy pruning in late fall, as this can stimulate new growth vulnerable to frost.

4. Fertilization

  • Avoid fertilizing evergreens late in the season. Fertilizers can stimulate new growth that may not harden before frost.
  • Use slow-release fertilizers in early fall if needed to strengthen the plant for winter.

Protecting Evergreens from Environmental Stress

1. Wind Protection

  • Install burlap screens or windbreaks around delicate shrubs to reduce exposure to desiccating winds.
  • Plant evergreens in sheltered locations when possible to minimize winter stress.

2. Snow and Ice Management

  • Gently brush off heavy snow to prevent branches from breaking.
  • Avoid shaking or hitting branches, which can cause cracks or needle loss.
  • For ice accumulation, it’s best to let it melt naturally, as removing ice manually can damage branches.

3. Sunscald Prevention

  • Sunscald occurs when bright winter sunlight warms needles during the day, followed by freezing at night, causing tissue damage.
  • Wrap trunks of young or thin-barked evergreens with burlap or tree wrap.
  • Planting evergreens where they receive dappled light rather than full winter sun can reduce sunscald risk.

4. Salt Injury Mitigation

  • If your evergreens are near roads, create a barrier with burlap or evergreen-friendly mulch to reduce salt splash.
  • Rinse foliage and soil near evergreens in early spring to remove salt residue.

Caring for Evergreens During Winter

1. Monitoring Moisture

  • Even in winter, evergreens need water if soil is not frozen and there is little snow.
  • Check soil moisture periodically and water on warm days if necessary.

2. Avoid Excess Foot Traffic

  • Heavy foot traffic around evergreen root zones compacts soil, reducing oxygen availability and root health.
  • Create protective pathways or avoid walking near vulnerable trees and shrubs.

3. Disease and Pest Prevention

  • Inspect evergreens for signs of fungal infections, scale insects, or mites.
  • Remove fallen debris to prevent overwintering of pests.
  • Consider dormant oil sprays for certain pests, applied according to label instructions before freezing temperatures arrive.

4. Container-Grown Evergreens

  • Move potted evergreens to sheltered locations, such as a garage, porch, or near a south-facing wall.
  • Insulate containers with burlap, bubble wrap, or straw to protect roots from freezing.
  • Ensure adequate drainage to prevent waterlogged soil and root rot.

Evergreen Types and Winter Hardiness

Different types of evergreens have varying tolerances to cold, wind, and snow:

  1. Conifers (Pine, Spruce, Fir, Cedar):
    • Strong winter resilience; needle structure retains moisture well.
    • Prune sparingly; snow accumulation may break weak branches.
  2. Broadleaf Evergreens (Boxwood, Holly, Rhododendron, Camellia):
    • Sensitive to desiccating winds and sunscald.
    • Mulching and burlap wrapping are especially important.
  3. Low-Growing Groundcover Evergreens (Juniper, Pachysandra):
    • Benefit from snow cover as insulation against extreme cold.
    • Protect from heavy foot traffic to avoid damage.

Choosing species adapted to your USDA hardiness zone ensures that your evergreens can withstand local winter conditions.


Common Winter Issues and How to Address Them

1. Browning Needles

  • Often caused by winter desiccation or sunscald.
  • Prevention: Deep watering, mulching, and wind protection.
  • Recovery: Damage is often cosmetic; new growth will emerge in spring.

2. Branch Breakage

  • Caused by heavy snow or ice accumulation.
  • Prevention: Lightly shake snow off branches, prune weak limbs, and avoid planting overly dense species in high-snow areas.

3. Frost Damage

  • Tender new growth may freeze during sudden temperature drops.
  • Prevention: Avoid late-season fertilization, mulch roots, and wrap sensitive plants.
  • Recovery: Prune damaged branches in spring after dormancy.

4. Pest Infestation

  • Scale, mites, and aphids may overwinter on evergreens.
  • Prevention: Remove fallen debris and apply dormant oil sprays.
  • Recovery: Inspect plants in spring and treat infestations promptly.

Spring Recovery and Evaluation

After winter passes:

  • Assess damage and prune dead or broken branches.
  • Check for needle loss or discoloration and apply balanced fertilizer if needed.
  • Evaluate planting locations for exposure and drainage to improve resilience for the next winter.

Proactive winter care significantly reduces post-winter stress, ensuring evergreens emerge healthy and vibrant.


Conclusion

Evergreens provide beauty, structure, and year-round greenery, but they require special attention to withstand winter’s challenges. Watering deeply before the ground freezes, mulching, pruning, and protecting against wind, ice, and sunscald are crucial steps to maintain plant health. Selecting species suited to your climate, shielding vulnerable plants, and monitoring conditions throughout winter ensures evergreens remain lush and resilient. By following these comprehensive care strategies, gardeners can enjoy thriving evergreens that enhance the landscape through winter and into spring, preserving both their beauty and functional benefits year-round.

How to Build Your Own Hydroponic System at Home: A Step-by-Step Beginner’s Guide

How to Build Your Own Hydroponic System at Home: A Step-by-Step Beginner’s Guide

Hydroponics is revolutionizing the way we grow plants. Imagine cultivating fresh vegetables, herbs, and greens without soil, using just water, nutrients, and a little creativity. Hydroponic systems are space-efficient, environmentally friendly, and perfect for home gardeners who want fresh produce year-round. In this guide, we’ll show you how to make a hydroponic system at home, step by step, whether you have a small balcony, kitchen counter, or backyard.


Why Hydroponics is Perfect for Home Gardening

Hydroponic gardening offers many benefits over traditional soil-based planting:

  1. Space Efficiency: Grow more plants in less space.
  2. Faster Growth: Plants grow up to 50% faster in nutrient-rich water.
  3. Water Conservation: Hydroponics uses 70–90% less water than soil gardening.
  4. Year-Round Production: Grow fresh vegetables regardless of the season.
  5. Pest-Free Plants: No soil means fewer pests and diseases.
  6. Easy to Monitor: Nutrient levels and plant health are easier to control.

Whether you want fresh lettuce, basil, spinach, or cherry tomatoes, hydroponics is a smart, modern solution.


Step 1: Choose Your Hydroponic System Type

There are several hydroponic systems suitable for home use. Selecting the right one depends on your space, budget, and type of plants:

  1. Nutrient Film Technique (NFT): A thin film of nutrient solution flows over the roots. Ideal for leafy greens.
  2. Deep Water Culture (DWC): Plants float on nutrient-rich water using a floating platform. Best for lettuce, herbs, and small vegetables.
  3. Kratky Method: A passive hydroponic system without pumps. Perfect for beginners and small setups.
  4. Wick System: Uses wicks to draw nutrient solution to plant roots. Simple but suitable for small plants.
  5. Ebb and Flow: Nutrient solution floods the plants periodically and drains back into the reservoir. Great for various vegetables.

For beginners, Deep Water Culture (DWC) or Kratky Method is often the easiest and most cost-effective choice.


Step 2: Gather Materials

To build a basic home hydroponic system, you’ll need:

  • Container or Reservoir: To hold nutrient solution (plastic bins, buckets, or trays).
  • Net Pots or Cups: Hold plants and growing medium.
  • Growing Medium: Options include clay pebbles, coco coir, perlite, or rockwool.
  • Hydroponic Nutrients: Balanced solution with nitrogen, phosphorus, potassium, and micronutrients.
  • Water: Clean, preferably filtered or dechlorinated.
  • Air Pump & Air Stone (for DWC): Oxygenates the nutrient solution.
  • pH Meter and pH Up/Down Solutions: To monitor and adjust water pH (ideal 5.5–6.5).
  • Seeds or Seedlings: Lettuce, spinach, basil, and herbs are beginner-friendly.

Having the right materials ensures your hydroponic system runs efficiently and produces healthy plants.


Step 3: Prepare the Reservoir

The reservoir is the heart of your hydroponic system:

  1. Clean the container thoroughly to remove dust or residues.
  2. Fill it with water and mix in the hydroponic nutrient solution according to the instructions.
  3. Measure and adjust the pH to between 5.5–6.5 for optimal nutrient uptake.
  4. If using a DWC system, place the air stone connected to the pump at the bottom to oxygenate the water.

A well-prepared reservoir ensures plants get all the nutrients they need.


Step 4: Set Up Net Pots and Growing Medium

Net pots hold the plants above the nutrient solution while supporting the roots:

  • Fill net pots with your chosen growing medium.
  • Place seedlings or germinated seeds carefully into the medium.
  • Ensure roots can reach or will eventually reach the nutrient solution.
  • For DWC, use floating platforms to suspend net pots above the water.

The growing medium supports plant roots and helps maintain stability and moisture.


Step 5: Planting Seeds or Seedlings

Choose plants suitable for hydroponics:

  • Leafy Greens: Lettuce, spinach, kale, arugula
  • Herbs: Basil, mint, parsley, cilantro
  • Small Vegetables: Cherry tomatoes, peppers, cucumbers

Plant seeds directly in the growing medium or transplant seedlings carefully, ensuring roots have access to nutrients.


Step 6: Maintain Your Hydroponic System

Hydroponics requires regular maintenance to keep plants healthy:

  1. Check Nutrient Levels: Replenish the reservoir as water evaporates or plants absorb nutrients.
  2. Monitor pH: Test pH 2–3 times per week and adjust if necessary.
  3. Provide Light: Indoor hydroponics needs 12–16 hours of light per day using sunlight or LED grow lights.
  4. Temperature Control: Keep water between 18–24°C (64–75°F) for optimal growth.
  5. Inspect Plants: Look for signs of disease, nutrient deficiencies, or algae growth.

Consistent monitoring ensures healthy, fast-growing plants.


Step 7: Harvesting Hydroponic Crops

One of the biggest advantages of hydroponics is faster growth and quick harvesting:

  • Leafy Greens: Can be harvested in 3–5 weeks depending on the variety.
  • Herbs: Trim regularly to encourage new growth.
  • Vegetables: Harvest cherry tomatoes or peppers as they ripen.

Use clean scissors or knives to prevent contamination and encourage regrowth. With proper care, your hydroponic system can produce multiple harvests per season.


Tips for a Successful Home Hydroponic System

  1. Start small and expand as you gain confidence.
  2. Choose plants that grow well hydroponically.
  3. Keep the system clean to prevent algae or pests.
  4. Use quality nutrients and monitor pH levels.
  5. Ensure sufficient light, either natural or artificial.
  6. Rotate crops or experiment with different varieties for continuous harvest.

Following these tips helps maximize yield and efficiency in your home hydroponic garden.


Benefits of Hydroponics at Home

  • Fresh Produce Anytime: Enjoy homegrown, pesticide-free vegetables and herbs.
  • Space-Saving: Perfect for apartments, rooftops, or small gardens.
  • Sustainable: Uses less water and reduces the need for soil and fertilizers.
  • Educational: Great project for families to learn about plant growth and nutrition.
  • Fast Results: Plants grow faster than traditional soil-based methods.

Hydroponics is not just gardening—it’s a modern, eco-friendly, and productive approach to growing food at home.


Conclusion

Building a hydroponic system at home is easier than most beginners think. With simple materials, careful planning, and consistent maintenance, anyone can grow fresh, nutritious vegetables, herbs, and greens without soil. From choosing the right system and setting up a reservoir to planting seedlings and harvesting crops, hydroponics allows you to maximize space, water efficiency, and plant growth.

Whether you want to supplement your kitchen with fresh produce or explore modern farming techniques, a home hydroponic system is an amazing way to cultivate plants year-round. With patience and care, your hydroponic garden can thrive, providing delicious, healthy greens for your family and friends.

7 Trees That Add Instant Privacy to Your Backyard

7 Trees That Add Instant Privacy to Your Backyard

A private backyard is a sanctuary where you can relax, entertain, and enjoy the outdoors without prying eyes. While fences and walls provide some level of seclusion, nothing compares to the natural beauty and year-round screening offered by trees. Trees not only block views but also reduce noise, provide shade, and enhance the aesthetic appeal of your outdoor space. Choosing the right trees for privacy involves understanding growth rates, mature heights, foliage density, and maintenance requirements. This article explores seven trees that are ideal for creating instant privacy in your backyard, with detailed insights into their characteristics and care.


1. Arborvitae (Thuja)

Arborvitae is a popular choice for homeowners seeking dense, evergreen privacy screens. Known for their tall, narrow growth habit, arborvitae trees create a natural wall that can block neighbors’ views within a few years.

  • Growth Rate: Fast-growing varieties can reach 3–5 feet per year.
  • Mature Height: Depending on the variety, 20–50 feet.
  • Foliage: Dense, evergreen foliage maintains privacy year-round.
  • Planting Tip: Space trees 3–5 feet apart for a solid hedge effect.
  • Care: Prefers well-drained soil and full to partial sun. Regular watering is essential during the first few years.

Arborvitae is perfect for narrow spaces along property lines and is commonly used for formal and informal privacy screens.


2. Leyland Cypress (× Cuprocyparis leylandii)

Leyland cypress is a fast-growing evergreen that forms an effective privacy screen in a short time. Its lush foliage and height make it ideal for blocking unsightly views or creating secluded outdoor spaces.

  • Growth Rate: Very fast, up to 4–5 feet per year.
  • Mature Height: 60–70 feet, with a spread of 15–25 feet.
  • Foliage: Dark green, feathery leaves that provide dense coverage.
  • Planting Tip: Space trees 6–8 feet apart to allow for healthy growth.
  • Care: Tolerates a wide range of soils but prefers moist, well-drained soil. Regular pruning helps maintain shape and prevents overcrowding.

Leyland cypress is excellent for homeowners seeking rapid privacy with minimal planning time.


3. Bamboo (Clumping Varieties)

While technically a grass, clumping bamboo is often used as a fast-growing privacy screen. Unlike running bamboo, clumping varieties are non-invasive and easy to manage.

  • Growth Rate: Rapid; can grow several feet per season.
  • Mature Height: 10–25 feet depending on species.
  • Foliage: Tall, dense stalks and leaves create a thick screen.
  • Planting Tip: Choose clumping varieties such as Fargesia for controlled growth. Plant in full sun to partial shade.
  • Care: Requires regular watering and occasional thinning to maintain density.

Bamboo provides a modern, tropical look while creating a highly effective natural barrier.


4. Privet (Ligustrum)

Privet hedges are classic options for backyard privacy due to their dense foliage and adaptability. They can be shaped into formal hedges or left natural for a more organic appearance.

  • Growth Rate: Moderate to fast, about 2–3 feet per year.
  • Mature Height: 10–15 feet, depending on variety and pruning.
  • Foliage: Dark green, thick leaves that maintain coverage throughout the growing season.
  • Planting Tip: Space plants 2–3 feet apart for a continuous screen. Regular pruning encourages dense growth.
  • Care: Adaptable to most soils, tolerates sun and partial shade. Mulch and consistent watering promote healthy growth.

Privet is ideal for homeowners looking for a customizable, traditional hedge for privacy.


5. Holly (Ilex)

Holly trees and shrubs are evergreen and offer thick, spiny foliage that deters intruders while providing excellent privacy. Varieties such as American holly and Nellie Stevens holly are popular for hedging.

  • Growth Rate: Moderate, 1–2 feet per year.
  • Mature Height: 15–30 feet, depending on variety.
  • Foliage: Glossy, dark green leaves with dense coverage; many varieties produce bright red berries.
  • Planting Tip: Plant 4–6 feet apart for a continuous privacy screen. Male and female plants may be required for berry production.
  • Care: Prefers well-drained, slightly acidic soil. Mulching and annual pruning help maintain shape and health.

Holly adds ornamental value while offering a reliable evergreen barrier.


6. Photinia (Photinia × fraseri ‘Red Robin’)

Photinia is an evergreen shrub known for its striking red new growth and dense foliage, making it an attractive privacy screen. It is commonly used in warm climates as a hedging plant.

  • Growth Rate: Fast, 2–3 feet per year.
  • Mature Height: 10–15 feet tall with a similar spread.
  • Foliage: Shiny green leaves with vibrant red tips in spring and summer.
  • Planting Tip: Space plants 3–4 feet apart and prune annually to encourage dense growth.
  • Care: Thrives in full sun to partial shade and well-drained soil. Resistant to most pests and diseases.

Photinia provides both visual interest and effective screening, making it a dual-purpose landscaping choice.


7. Eastern Red Cedar (Juniperus virginiana)

Eastern red cedar is a hardy, evergreen conifer native to North America. Its dense foliage and adaptability make it ideal for windbreaks, noise reduction, and privacy.

  • Growth Rate: Moderate, about 1–2 feet per year.
  • Mature Height: 40–50 feet tall with a 10–20-foot spread.
  • Foliage: Dark green, aromatic needles provide year-round coverage.
  • Planting Tip: Space trees 6–10 feet apart to form a thick privacy screen.
  • Care: Tolerates a variety of soil types, drought-tolerant once established, and requires minimal maintenance.

Eastern red cedar adds natural beauty while functioning as a long-lasting privacy barrier.


Tips for Creating an Effective Tree Privacy Screen

  1. Consider Growth Rate and Height: Choose a mix of fast-growing and slower-growing species to enjoy both immediate and long-term privacy.
  2. Plan Spacing Carefully: Proper spacing ensures trees grow healthy without competing for nutrients, sunlight, or water.
  3. Layer for Maximum Coverage: Plant a combination of tall and mid-height trees for full vertical and horizontal screening.
  4. Use Evergreen Varieties: Evergreen trees maintain privacy throughout the year, even in winter.
  5. Maintenance Matters: Regular pruning, mulching, and watering keep trees healthy and dense for optimal screening.
  6. Consider Soil and Climate: Select species suited to your local conditions to reduce stress and maintenance.
  7. Protect Roots: Mulching around the base preserves soil moisture and prevents root damage.

By carefully planning species selection, placement, and care, homeowners can create an effective and aesthetically pleasing backyard privacy screen.


Benefits of Backyard Privacy Trees

  • Enhanced Seclusion: Blocks unwanted views from neighbors or streets.
  • Noise Reduction: Dense foliage reduces sound, creating a tranquil outdoor space.
  • Windbreak and Shade: Protects garden areas and outdoor living spaces from harsh weather.
  • Increased Property Value: Well-planned landscaping with privacy trees improves curb appeal and property value.
  • Wildlife Habitat: Provides shelter for birds and beneficial insects, contributing to a healthy backyard ecosystem.

Privacy trees deliver practical and ecological advantages while enhancing the beauty and comfort of your outdoor living space.


Conclusion

Creating instant privacy in your backyard is achievable with the right trees. Arborvitae, Leyland cypress, clumping bamboo, privet, holly, photinia, and eastern red cedar offer effective screening while adding beauty, shade, and environmental benefits. By understanding each tree’s growth rate, mature height, foliage density, and care requirements, homeowners can design a privacy screen that provides immediate results and long-term benefits.

Planting privacy trees is not just about seclusion—it is about creating a serene, functional, and visually appealing backyard sanctuary. With proper planning, care, and maintenance, these seven trees can transform your outdoor space into a private retreat that you and your family can enjoy year-round.