Amazing Agricultural Machines Operating at an INSANE Level: Revolutionizing Modern Farming

Amazing Agricultural Machines Operating at an INSANE Level: Revolutionizing Modern Farming

Agriculture has always been the backbone of human civilization. From manual labor and simple tools to mechanized farming, the evolution of agricultural technology has been extraordinary. Today, some agricultural machines operate at an insane level, increasing productivity, efficiency, and sustainability. In this guide, we explore the most impressive modern farming machinery, their uses, and how they are transforming agriculture globally.


Why Agricultural Machines Are Crucial

Modern agriculture faces challenges like growing population, limited labor, and the need for sustainable practices. Advanced machinery helps address these issues by:

  1. Boosting Productivity: Machines can perform tasks faster than human labor.
  2. Reducing Labor Costs: Fewer workers are needed for large-scale operations.
  3. Ensuring Precision: Modern machines use GPS and sensors for accurate planting, watering, and harvesting.
  4. Sustainability: Machines optimized for efficiency reduce waste and environmental impact.

From plowing fields to harvesting crops at record speeds, agricultural machines are redefining how farming is done.


Step 1: Tractors – The Backbone of Modern Farming

Tractors are the most recognizable farming machines, but today’s models go far beyond basic plowing and hauling:

  • High Horsepower: Modern tractors operate with hundreds of horsepower, capable of towing multiple implements simultaneously.
  • GPS-Guided Steering: Precision farming tractors use GPS to plant seeds accurately, reducing overlap and maximizing yield.
  • Multi-Functionality: Tractors now perform plowing, seeding, spraying, and even harvesting, making them indispensable.

With these innovations, tractors are operating at an insane level, handling multiple tasks efficiently and reducing time and labor costs.


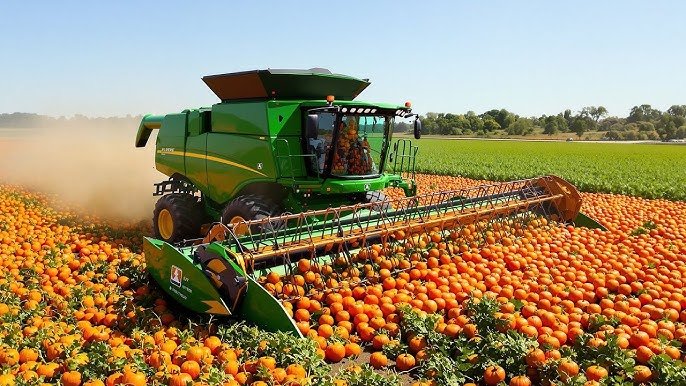
Step 2: Combine Harvesters – Efficiency Redefined

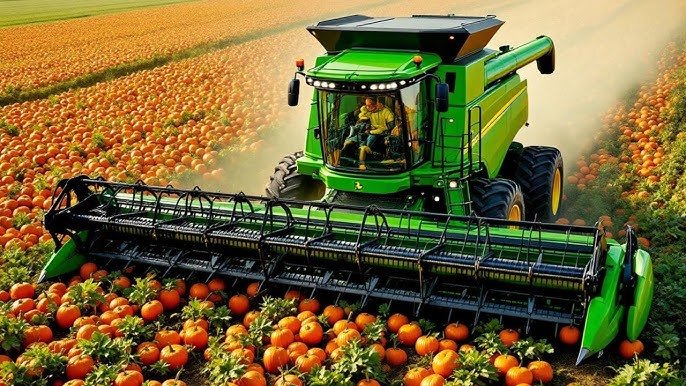
Combine harvesters are among the most impressive agricultural machines:

  • Functionality: They cut, thresh, and separate grains in a single operation.
  • Capacity: Large combines can harvest hundreds of acres per day.
  • Technology: Modern models feature automated grain flow control, moisture sensors, and GPS mapping.

By integrating cutting-edge technology, combine harvesters dramatically increase yield while reducing manual labor.


Step 3: Planters and Seeders – Precision at Its Best

Planting is one of the most critical stages in crop production. Advanced planters and seeders ensure:

  • Accurate Spacing: Seeds are sown at consistent depths and distances, optimizing growth.
  • Multiple Crop Handling: Machines can plant various seeds simultaneously, including corn, wheat, and soybeans.
  • Efficiency: Large-scale planters cover several acres in hours, something impossible with manual planting.

Precision planting maximizes crop potential and reduces seed wastage, making it a game-changer for farmers worldwide.


Step 4: Irrigation Machines – Smart Water Management

Water is essential for crop growth, and modern irrigation machines ensure efficient water distribution:

  • Center-Pivot Irrigation: Machines rotate in a circular pattern, covering vast areas uniformly.
  • Drip Irrigation Systems: Deliver water directly to plant roots, minimizing evaporation.
  • Automated Scheduling: Smart systems adjust watering based on soil moisture, rainfall, and crop type.

These irrigation innovations save water, reduce costs, and enhance crop health, allowing agriculture to thrive even in water-scarce regions.


Step 5: Sprayers and Drones – Smart Crop Protection

Pest control and fertilization are crucial for high yields:

  • Self-Propelled Sprayers: Cover large fields with precise chemical application, reducing overuse.
  • Drone Technology: Agricultural drones monitor crops, detect diseases early, and spray fertilizers or pesticides efficiently.
  • Variable Rate Technology (VRT): Machines adjust the amount of input applied based on crop needs, improving yield and sustainability.

Using drones and smart sprayers, farmers protect crops effectively while minimizing environmental impact.


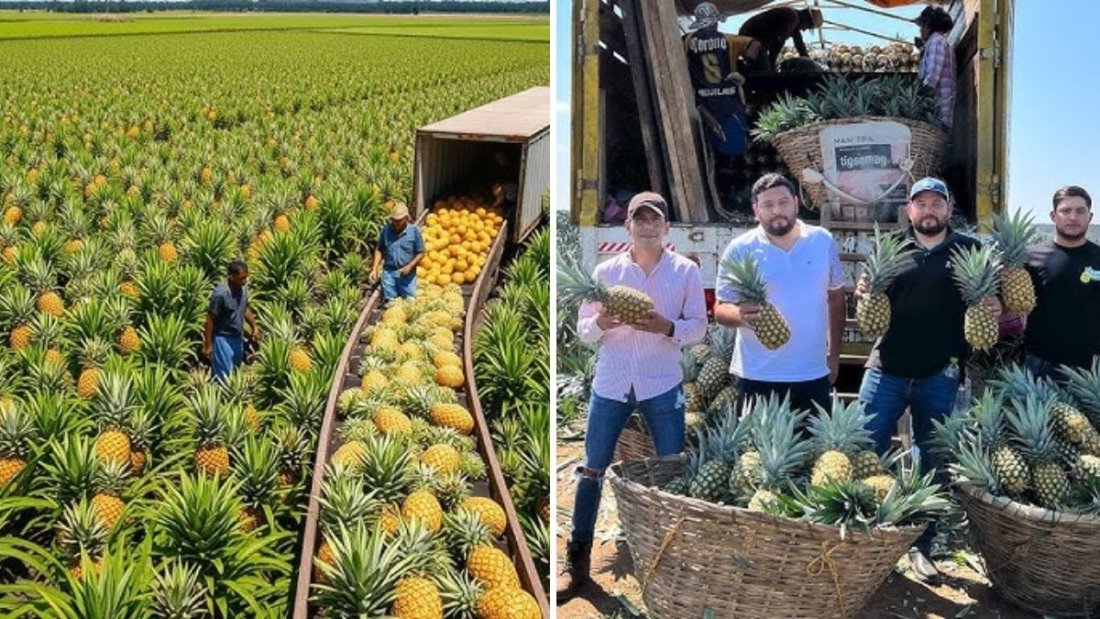
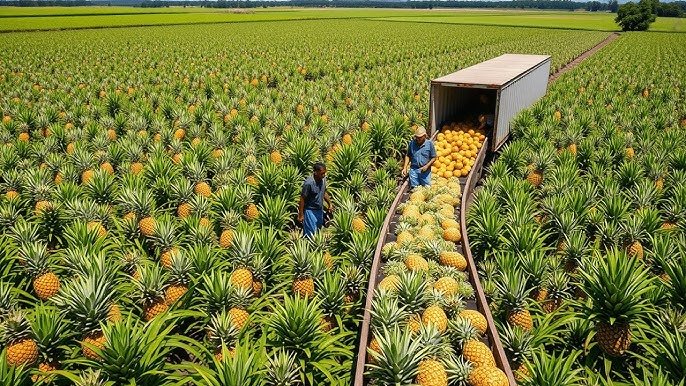
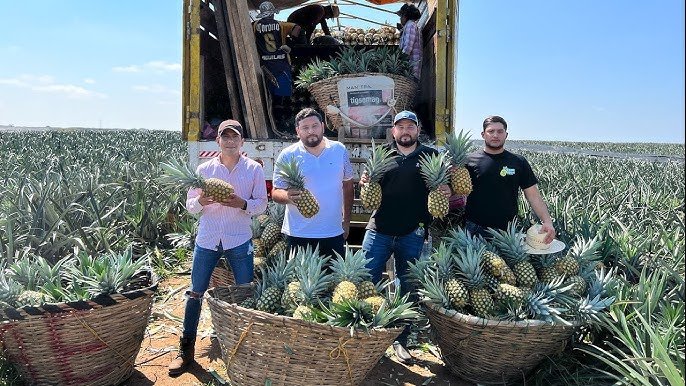
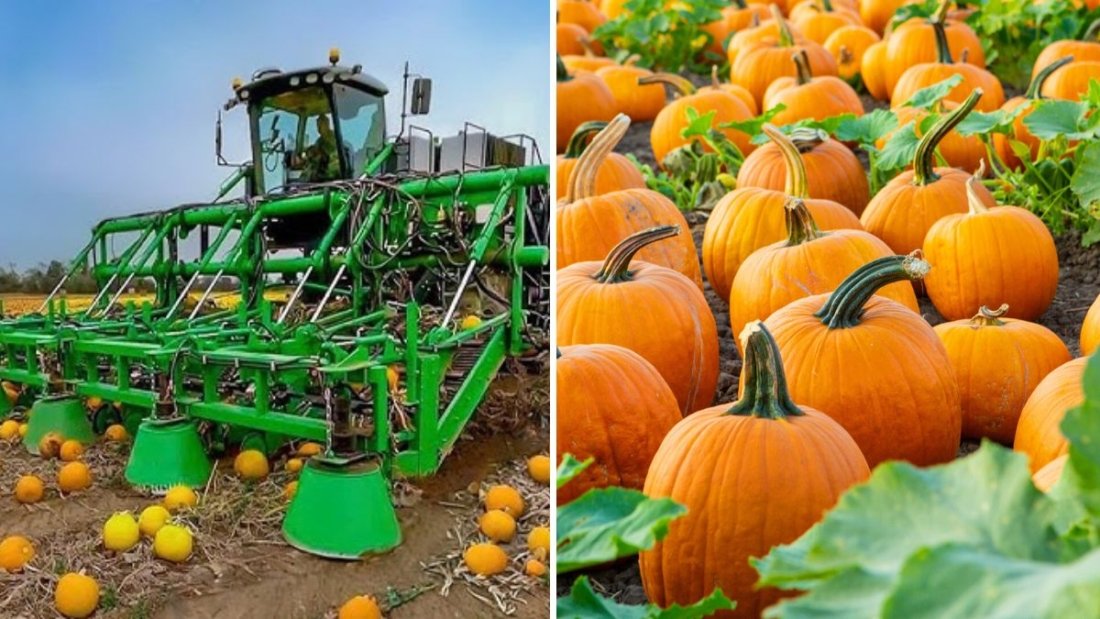
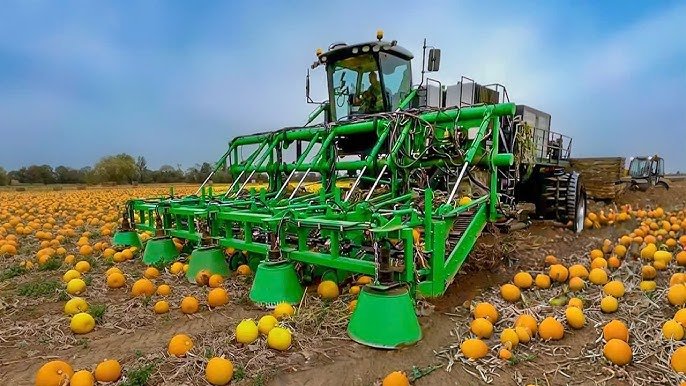
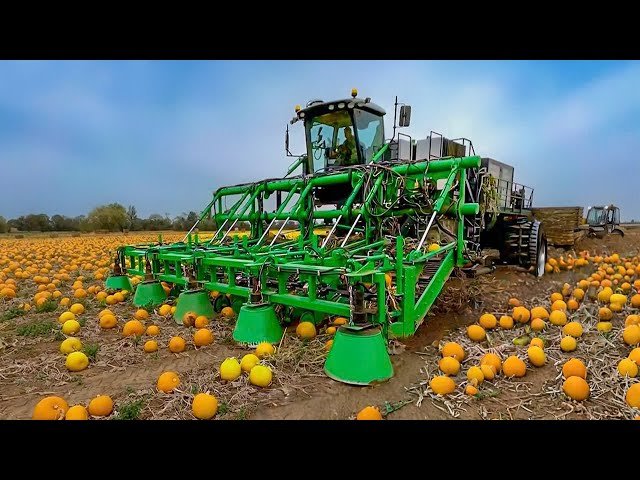
Step 6: Harvesting Machines Beyond Combines

Apart from grain crops, specialized harvesting machines handle fruits, vegetables, and other crops:

  • Potato Harvesters: Lift potatoes from soil, separating them from dirt with minimal damage.
  • Fruit Pickers: Machines with suction or mechanical arms harvest fruits without bruising.
  • Cotton Pickers: Efficiently remove cotton bolls from plants, reducing labor-intensive manual picking.

These machines operate at insane efficiency levels, making harvesting faster, safer, and less labor-intensive.


Step 7: Post-Harvest Machinery

Farming doesn’t end at harvesting; processing and packaging are equally important:

  • Sorting and Grading Machines: Automatically sort fruits and vegetables based on size, color, and quality.
  • Packing Machines: Pack produce into crates, boxes, or bags efficiently for transport.
  • Cold Storage Handling: Machines move harvested crops to temperature-controlled storage, preserving freshness.

Post-harvest machines ensure the produce reaches consumers in the best condition, reducing waste and increasing profits.


Step 8: The Role of Automation and AI in Agriculture

Modern agriculture is increasingly driven by AI, robotics, and automation:

  • Autonomous Tractors and Harvesters: Operate with minimal human supervision.
  • Predictive Analytics: AI predicts pest outbreaks, crop diseases, and optimal harvest times.
  • Robotic Weeders: Machines identify weeds and remove them selectively without harming crops.

These technologies allow farms to operate at an insane scale and efficiency, transforming agriculture into a tech-driven industry.


Benefits of Using Advanced Agricultural Machines

  1. Time Efficiency: Tasks that took days manually can now be completed in hours.
  2. Reduced Labor Costs: Fewer workers are needed for large-scale operations.
  3. Higher Yield: Precision planting, irrigation, and harvesting maximize productivity.
  4. Sustainability: Efficient input use reduces waste, energy, and environmental impact.
  5. Quality Produce: Mechanized handling reduces damage and improves consistency.

By adopting modern machinery, farms can achieve record-breaking yields while conserving resources.


Tips for Farmers to Maximize Machine Efficiency

  • Invest in regular maintenance to ensure machines operate at peak performance.
  • Train operators to handle machines efficiently and safely.
  • Implement precision farming tools like GPS, sensors, and drones.
  • Monitor and analyze crop and soil data to optimize machine usage.
  • Combine mechanization with sustainable farming practices for long-term productivity.

With these strategies, farmers can fully harness the power of advanced agricultural machines.


Conclusion

The evolution of agricultural machines has reached an insane level, revolutionizing the way farming is done. From high-tech tractors and combine harvesters to drones, robotic weeders, and automated post-harvest equipment, modern machinery enhances productivity, sustainability, and profitability. These machines allow farmers to feed a growing global population efficiently while reducing labor and resource use.

As agriculture continues to embrace technology, we can expect even more innovative machines and smart farming solutions that will transform the future of food production. Watching these machines operate at an insane level is not just impressive—it’s a glimpse into the future of farming.

How the World’s Most Delicious Pineapples Are Grown and Processed: From Farm to Table

How the World’s Most Delicious Pineapples Are Grown and Processed: From Farm to Table

Pineapples are among the most loved tropical fruits worldwide, known for their sweet, juicy flavor and aromatic fragrance. But have you ever wondered how the world’s most delicious pineapples are grown and processed? From careful cultivation to handling hundreds of thousands of tons, the journey of pineapples from farm to market is a fascinating process that combines agricultural expertise, technology, and careful handling. In this guide, we’ll explore how pineapples are produced and processed on a massive scale, ensuring quality and taste for consumers everywhere.


Why Pineapples Are So Special

Pineapples are not only delicious but also packed with nutrients:

  1. Rich in Vitamins and Minerals: They are a great source of Vitamin C, manganese, and antioxidants.
  2. Digestive Benefits: Bromelain, an enzyme in pineapples, aids digestion and reduces inflammation.
  3. Versatile Use: Enjoyed fresh, in juices, desserts, canned products, and even in savory dishes.

Their global popularity means that producing pineapples efficiently is essential to meet demand while maintaining taste and quality.


Step 1: Selecting the Best Pineapple Varieties

The first step in producing top-quality pineapples begins on the farm:

  • Variety Selection: Farmers choose high-yield, sweet, and aromatic varieties suited to the region’s climate. Common varieties include MD-2, Queen, and Smooth Cayenne.
  • Soil Suitability: Pineapples thrive in well-drained, slightly acidic soil rich in organic matter.
  • Climate Consideration: They require tropical or subtropical climates with temperatures between 20–30°C (68–86°F) and moderate rainfall.

Careful selection ensures that every pineapple is sweet, juicy, and consistent in quality.


Step 2: Planting Pineapples

Pineapples are usually grown from suckers, crowns, or slips rather than seeds:

  • Crowns: The leafy top of the fruit is planted directly in the soil.
  • Suckers: Side shoots from the main plant are used to produce new plants.
  • Slips: Smaller offshoots from the base of the pineapple plant.

Spacing is critical: plants are typically set 30–40 inches apart to allow room for growth, proper sunlight, and airflow, reducing the risk of disease.


Step 3: Caring for Pineapple Plants

Growing delicious pineapples requires patience and consistent care:

  1. Irrigation: Pineapples are drought-tolerant but produce better yields with consistent watering. Drip irrigation is often used for efficiency.
  2. Fertilization: Organic and chemical fertilizers provide essential nutrients like nitrogen, phosphorus, and potassium.
  3. Weed Control: Mulching and manual weeding prevent competition for nutrients.
  4. Pest Management: Insect pests like mealybugs and nematodes are controlled using natural or chemical solutions.

With proper care, pineapple plants take 18–24 months to produce mature, flavorful fruits.


Step 4: Harvesting Pineapples

Harvesting is a delicate process to maintain the fruit’s quality:

  • Timing: Pineapples are harvested when fully ripe but firm, ensuring sweetness and longevity.
  • Manual Handling: Workers carefully cut fruits using knives to avoid bruising.
  • Sorting in the Field: Only healthy, damage-free pineapples are sent for processing.

On large farms, hundreds of thousands of pineapples may be harvested weekly, requiring meticulous coordination.


Step 5: Transportation from Farm to Processing Facility

Transporting pineapples efficiently is essential to maintain freshness:

  • Crates and Boxes: Fruits are packed in ventilated crates to prevent crushing.
  • Temperature Management: Pineapples are sensitive to heat; trucks are often cooled to reduce ripening during transport.
  • Handling: Gentle handling minimizes bruising, ensuring that the fruit reaches the processing facility in perfect condition.

Efficient logistics ensure that even 140,000 tons of pineapples can be transported safely for processing.


Step 6: Processing Pineapples at Scale

Once at the facility, pineapples undergo several steps before reaching consumers:

  1. Washing and Cleaning: Fruits are washed thoroughly to remove dirt, pesticides, or residues.
  2. Sorting: Pineapples are sorted by size, color, and quality. Damaged or undersized fruits are removed.
  3. Peeling and Coring: Automated machines or skilled workers remove the tough outer skin and core.
  4. Slicing and Packaging: Depending on the product—fresh, canned, juice—pineapples are sliced, diced, or juiced.
  5. Canning and Preservation: For long-term storage, pineapples are canned with syrup or juice under hygienic conditions.

Modern facilities use advanced machinery and quality control to maintain taste, aroma, and nutritional value.


Step 7: Quality Control and Safety Measures

Maintaining consistency and safety is crucial:

  • Hygiene Standards: Processing facilities follow strict cleanliness and sanitation protocols.
  • Quality Checks: Random samples are tested for sugar content, acidity, and ripeness.
  • Traceability: Each batch is recorded to ensure food safety and accountability.

These steps guarantee that consumers enjoy high-quality, delicious pineapples every time.


Step 8: Distribution to Markets

After processing, pineapples are distributed to local and international markets:

  • Cold Storage: Maintains freshness during transit.
  • Efficient Logistics: Coordinated supply chains ensure timely delivery.
  • Retail Display: Pineapples are arranged to attract consumers while preserving their quality.

Efficient distribution ensures that delicious pineapples reach consumers around the world, maintaining the farm-to-table journey.


Benefits of Modern Pineapple Production

  1. High-Quality Fruit: Advanced agricultural practices improve sweetness, aroma, and texture.
  2. Large-Scale Efficiency: Millions of tons can be processed and distributed globally.
  3. Reduced Waste: Careful harvesting, handling, and processing minimize losses.
  4. Economic Growth: Pineapple farming supports rural economies and provides jobs.
  5. Consumer Satisfaction: Fresh, safe, and delicious pineapples available year-round.

By combining traditional farming knowledge with modern technology, pineapple producers deliver consistently delicious fruit on a massive scale.


Tips for Small-Scale Pineapple Growers

Even if you’re not managing 140,000 tons, you can grow delicious pineapples at home or on small farms:

  • Choose high-quality planting material (crowns, slips, or suckers).
  • Provide well-drained, nutrient-rich soil.
  • Water regularly but avoid overwatering.
  • Protect plants from pests and diseases naturally.
  • Harvest at the right time for peak sweetness.

With attention to detail, even small growers can produce amazing, sweet pineapples.


Conclusion

The journey of pineapples from farm to table is a combination of patience, skill, and technology. From planting carefully selected varieties to processing hundreds of thousands of tons with precision, every step is designed to ensure the fruit’s quality, taste, and freshness. Modern agricultural technology has revolutionized pineapple production, making it possible to enjoy the world’s most delicious pineapples anywhere, anytime.

Whether you are a consumer, farmer, or food enthusiast, understanding the intricate process behind pineapple production gives a greater appreciation for this tropical fruit. The next time you enjoy a sweet, juicy pineapple, remember the careful steps—from planting, harvesting, transporting, to processing—that brought it to your plate.

How to Prune Shrubs Safely Before Winter

How to Prune Shrubs Safely Before Winter

Pruning shrubs is an essential gardening practice that maintains plant health, encourages growth, and enhances garden aesthetics. As the growing season winds down, late fall provides an opportune time to prune many shrubs before winter sets in. Proper winter pruning can prevent damage from snow, ice, and wind, while also preparing plants for vigorous spring growth. However, pruning at the wrong time or using improper techniques can harm your shrubs and reduce their flowering potential. This article provides a comprehensive guide to pruning shrubs safely before winter, including tools, timing, techniques, and tips to ensure healthy, beautiful plants.


Why Prune Shrubs Before Winter?

Pruning shrubs in late fall or early winter offers several benefits:

  1. Promotes Plant Health: Removing dead, diseased, or damaged branches reduces the risk of fungal infections and pest infestations during winter.
  2. Prevents Winter Damage: Pruning prevents weak or crossing branches from breaking under heavy snow or ice.
  3. Encourages Spring Growth: Pruning at the right time helps shape shrubs and stimulates strong new growth when the growing season resumes.
  4. Enhances Garden Appearance: Cleanly pruned shrubs improve landscape aesthetics and maintain defined shapes.
  5. Reduces Disease Spread: Removing infected branches before winter can prevent pathogens from overwintering and affecting spring growth.

While some shrubs should be pruned in spring or summer, many benefit from light to moderate pruning in late fall.


When to Prune Shrubs Before Winter

Timing is crucial for safe and effective winter pruning:

  • Late Fall to Early Winter: Prune after shrubs have gone dormant but before the ground freezes. Dormant plants are less likely to experience stress, and branches are easier to see without leaves.
  • Avoid Early Fall: Pruning too early can stimulate new growth that is vulnerable to frost damage.
  • Consider Flowering Shrubs: For spring-flowering shrubs, avoid heavy pruning in late fall, as it may remove next season’s flower buds. Instead, focus on removing dead, damaged, or diseased wood.
  • Evergreens vs. Deciduous: Evergreens often require only light pruning to maintain shape, while deciduous shrubs can tolerate more extensive pruning during dormancy.

Tools Needed for Safe Shrub Pruning

Using the right tools is essential for clean cuts and minimizing damage:

  1. Pruning Shears: For small branches up to ¾ inch thick.
  2. Loppers: For medium branches between ¾ inch and 2 inches thick.
  3. Pruning Saw: For larger branches over 2 inches thick.
  4. Gloves: Protect hands from thorns, sap, and rough bark.
  5. Disinfectant: Clean tools with rubbing alcohol or a bleach solution between cuts to prevent disease spread.
  6. Safety Goggles: Protect eyes from falling debris or snapped branches.

Sharp, clean tools reduce tearing and promote faster healing in shrubs.


Step-by-Step Guide to Pruning Shrubs Safely

Step 1: Assess the Shrub

  • Examine the plant carefully, noting dead, diseased, or damaged branches.
  • Identify branches that cross, rub, or grow inward toward the center.
  • Determine the natural shape of the shrub and which areas need thinning or shaping.

Step 2: Remove Dead, Diseased, or Damaged Branches

  • Cut back to healthy wood just above a lateral branch or bud.
  • Remove any branches that are broken, weak, or infested with pests.
  • Dispose of diseased material in the trash rather than compost to prevent pathogen spread.

Step 3: Thin the Interior

  • Remove crowded or inward-growing branches to improve airflow and light penetration.
  • Thinning helps reduce disease pressure and encourages balanced growth.
  • Focus on selective cuts rather than cutting indiscriminately.

Step 4: Shape the Shrub

  • Lightly trim the outer edges to maintain the shrub’s natural shape.
  • Avoid shearing too heavily, as this can stress the plant and result in a dense outer layer with poor interior growth.
  • Maintain a rounded or vase-shaped profile for deciduous shrubs to allow light to reach the center.

Step 5: Cut at the Correct Angle

  • Make cuts at a slight angle, about ¼ inch above a bud facing outward.
  • Angled cuts prevent water from pooling on the branch, reducing the risk of rot.
  • Ensure cuts are smooth and clean; jagged cuts heal slowly and invite disease.

Step 6: Step Back and Review

  • Frequently step back to evaluate the overall shape and balance.
  • Avoid over-pruning, which can stress the plant and reduce winter hardiness.
  • Aim to remove no more than 25–30% of the shrub in a single session unless rejuvenating an overgrown plant.

Special Considerations for Common Shrubs

  • Hydrangeas: Most spring-flowering hydrangeas should not be heavily pruned in fall, as it removes flower buds. Remove only dead or weak stems.
  • Roses: Remove dead or diseased canes but leave healthy stems for winter protection.
  • Evergreens (Boxwood, Holly, Juniper): Lightly trim for shape; avoid cutting into old wood as they may not resprout.
  • Berry Bushes (Blueberries, Currants): Remove weak or crossing branches to improve air circulation; heavy pruning is usually done in late winter or early spring.

Understanding the growth habits and flowering cycles of specific shrubs ensures pruning supports health without sacrificing blooms.


Safety Tips for Pruning Before Winter

  1. Protect Your Hands and Eyes: Wear gloves and goggles to prevent injury from thorns, branches, or flying debris.
  2. Use Proper Cutting Techniques: Avoid twisting or ripping branches; use controlled cuts to minimize damage.
  3. Work on Stable Ground: Ensure firm footing to prevent slips, especially on damp or frozen soil.
  4. Don’t Overreach: Use ladders safely or extendable tools for tall shrubs.
  5. Clean Tools Between Plants: Prevent the spread of disease by disinfecting tools between shrubs, particularly if any are showing signs of infection.

Benefits of Winter Pruning

  1. Stronger Growth in Spring: Dormant pruning encourages vigorous new shoots in the following growing season.
  2. Reduced Pest and Disease Risk: Removing unhealthy branches lowers the chances of overwintering pests and fungal infections.
  3. Improved Garden Aesthetics: Cleanly pruned shrubs enhance the visual appeal of your winter garden.
  4. Easier Maintenance: Regular winter pruning reduces the need for heavy pruning in spring, making garden care less labor-intensive.

Pruning before winter ensures shrubs enter dormancy in a strong, well-structured condition.


Common Mistakes to Avoid

  • Pruning Too Late: Cutting shrubs after the ground freezes can damage roots and delay healing.
  • Over-Pruning: Removing too much foliage can weaken the plant and reduce winter hardiness.
  • Pruning Flowering Buds: For spring-flowering shrubs, fall pruning may eliminate next season’s blooms.
  • Using Dull Tools: Blunt blades tear bark and slow recovery. Always sharpen and disinfect cutting tools.
  • Ignoring Plant Type: Different shrubs have different pruning needs; one-size-fits-all approaches can harm plants.

Avoiding these mistakes ensures healthy, productive shrubs.


Conclusion

Pruning shrubs before winter is an essential gardening practice that promotes plant health, prevents damage, and prepares shrubs for vigorous spring growth. By understanding the timing, using the right tools, and applying proper techniques, gardeners can safely remove dead, diseased, or damaged branches while maintaining natural shapes. Special attention to shrub type, growth habit, and flowering cycles ensures that pruning enhances both plant health and garden aesthetics.

With careful planning, winter pruning becomes a strategic and rewarding task. Shrubs pruned correctly before winter emerge stronger, healthier, and more beautiful in the spring, making this practice a cornerstone of successful year-round garden care. Safe, informed, and thoughtful pruning not only preserves the vitality of your shrubs but also elevates the overall health and visual appeal of your garden for seasons to come.

7 Flowers That Thrive in Acidic Soil

7 Flowers That Thrive in Acidic Soil

Soil pH is a fundamental factor in gardening that greatly influences plant health, growth, and flowering potential. Acidic soil, generally defined as soil with a pH below 7.0, is common in many regions and can be challenging for gardeners who are unaware of its effects. Certain flowers, however, not only tolerate acidic soil but actually thrive in it, producing vibrant blooms and lush foliage. Understanding which plants flourish in acidic conditions and how to care for them is essential for gardeners seeking beautiful and stress-free gardens. This article explores seven flowers that thrive in acidic soil and provides comprehensive guidance on their cultivation, care, and environmental preferences.


1. Azaleas (Rhododendron spp.)

Overview

Azaleas are among the most beloved acidic-soil-loving flowers. Known for their vivid spring blooms and evergreen foliage, they add spectacular color to gardens and landscapes.

Soil and Environmental Requirements

  • pH: 4.5–6.0
  • Light: Partial shade; filtered sunlight is ideal to prevent leaf scorch.
  • Soil: Well-draining, rich in organic matter, and consistently moist.

Care Tips

  • Mulch with pine bark or leaves to maintain soil acidity.
  • Avoid heavy fertilization; use fertilizers specifically designed for acid-loving plants.
  • Prune immediately after flowering to encourage bushier growth.

Azaleas thrive in woodland-style gardens or shaded borders, producing clusters of showy flowers that brighten acidic soil areas.


2. Camellias (Camellia japonica)

Overview

Camellias are elegant flowering shrubs prized for large, rose-like blooms during winter or early spring, depending on the variety.

Soil and Environmental Requirements

  • pH: 5.0–6.5
  • Light: Partial shade to protect blooms from scorching sun.
  • Soil: Well-draining, rich in organic matter, slightly acidic.

Care Tips

  • Water regularly, ensuring the soil remains moist but not waterlogged.
  • Apply mulch to conserve moisture and maintain a slightly acidic soil environment.
  • Protect from frost in colder climates to preserve flower buds.

Camellias provide winter or early spring color, making them ideal for acidic soil gardens where other flowers might struggle.


3. Gardenias (Gardenia jasminoides)

Overview

Gardenias are cherished for their fragrant white flowers and glossy, dark green leaves, making them a favorite for garden and container planting.

Soil and Environmental Requirements

  • pH: 5.0–6.0
  • Light: Bright, indirect sunlight; partial shade in hot climates.
  • Soil: Well-draining, rich in humus and acidic.

Care Tips

  • Fertilize with acid-forming fertilizers (azalea/camellia fertilizers work well).
  • Maintain high humidity if grown indoors or in dry climates.
  • Pinch spent flowers to encourage continuous blooming.

Gardenias excel in acidic garden beds or containers, filling spaces with intense fragrance and long-lasting blooms.


4. Hydrangeas (Hydrangea macrophylla)

Overview

Hydrangeas are versatile, deciduous shrubs celebrated for their large, mophead or lacecap flowers. The flower color can be influenced by soil pH—acidic soils often produce blue or lavender blooms.

Soil and Environmental Requirements

  • pH: 5.0–6.5 for blue shades
  • Light: Morning sun, afternoon shade for protection in hotter regions.
  • Soil: Moist, well-draining, enriched with organic matter.

Care Tips

  • Adjust soil acidity using garden sulfur or aluminum sulfate for blue flowers.
  • Water consistently, particularly during hot, dry periods.
  • Mulch to retain moisture and protect roots from temperature extremes.

Hydrangeas offer spectacular floral displays, making them one of the top choices for acidic soil gardens seeking dynamic seasonal color.


5. Bleeding Hearts (Dicentra spectabilis)

Overview

Bleeding hearts are perennial favorites for shady, woodland-style gardens, known for their unique, heart-shaped flowers that dangle gracefully from arching stems.

Soil and Environmental Requirements

  • pH: 5.5–6.5
  • Light: Partial to full shade; do not tolerate intense sunlight.
  • Soil: Moist, fertile, and well-draining with a rich layer of organic matter.

Care Tips

  • Mulch with leaf mold or compost to maintain moisture and acidity.
  • Avoid cutting back foliage too early; allow it to die back naturally for root nourishment.
  • Plant in groups to create shaded, romantic woodland borders.

Bleeding hearts flourish in acidic soils, offering delicate blooms that enhance shaded garden corners.


6. Foxgloves (Digitalis purpurea)

Overview

Foxgloves are tall, elegant biennials or short-lived perennials known for their towering spikes of tubular flowers, ideal for cottage gardens and borders.

Soil and Environmental Requirements

  • pH: 5.5–6.5
  • Light: Partial shade, though they tolerate full sun in cooler climates.
  • Soil: Moist, well-draining, rich in organic matter, slightly acidic.

Care Tips

  • Sow seeds directly or transplant seedlings after frost.
  • Remove spent flower spikes to prevent self-seeding if not desired.
  • Protect from slugs and snails, which may damage young leaves.

Foxgloves add vertical drama and charm to acidic soil gardens, attracting pollinators like bees and hummingbirds.


7. Rhododendrons

Overview

Closely related to azaleas, rhododendrons are evergreen shrubs with large, bell-shaped flowers and lush foliage, thriving in acidic, well-draining soils.

Soil and Environmental Requirements

  • pH: 4.5–6.0
  • Light: Partial shade; too much sun can scorch leaves.
  • Soil: High in organic matter, well-draining, acidic.

Care Tips

  • Mulch with pine needles or bark to preserve acidity.
  • Water consistently, particularly during dry periods.
  • Fertilize with acid-loving plant fertilizers during active growth.

Rhododendrons create striking, long-lasting floral displays, making them a staple of acidic soil gardens.


Additional Tips for Growing Flowers in Acidic Soil

  1. Test Soil pH: Use a soil test kit to determine acidity and make adjustments if necessary.
  2. Adjusting Soil pH: Incorporate elemental sulfur, pine needles, or peat moss to increase acidity.
  3. Mulching: Helps maintain soil pH, conserve moisture, and suppress weeds.
  4. Fertilization: Use fertilizers formulated for acid-loving plants; avoid lime or alkaline products.
  5. Companion Planting: Combine flowers with shrubs and perennials suited to acidic soil for a harmonious and healthy garden ecosystem.

Following these strategies ensures that flowers not only survive but thrive and produce vibrant blooms in acidic conditions.


Benefits of Planting Acid-Loving Flowers

  • Colorful Displays: Many acid-loving flowers, like hydrangeas and azaleas, produce intense colors in the right soil.
  • Resilient Growth: These plants are naturally adapted to acidic conditions, reducing stress and disease susceptibility.
  • Pollinator-Friendly: Many acid-loving flowers attract bees, butterflies, and hummingbirds, enhancing garden biodiversity.
  • Seasonal Interest: With careful selection, these plants can provide continuous blooms and foliage interest throughout the year.

By understanding which flowers thrive in acidic soil, gardeners can create lush, colorful, and low-stress gardens that require less intervention.


Conclusion

Acidic soils need not be a limitation for gardeners. By selecting flowers adapted to low pH, such as azaleas, camellias, gardenias, hydrangeas, bleeding hearts, foxgloves, and rhododendrons, and providing appropriate care and environmental conditions, gardeners can cultivate vibrant and thriving floral displays.

Key Takeaways:

  1. Choose acid-loving plants that thrive naturally in low-pH soils.
  2. Test and maintain soil pH using organic amendments and mulch.
  3. Ensure proper watering and soil drainage to prevent root stress.
  4. Use appropriate fertilization formulated for acid-loving plants.
  5. Mulch and maintain garden beds for moisture retention and soil health.
  6. Consider light and shade requirements for optimal bloom performance.

By following these strategies, an acidic soil garden can become a vibrant, sustainable, and low-stress paradise, showcasing stunning flowers year after year.

How to Create a Low-Maintenance Flower Garden

How to Create a Low-Maintenance Flower Garden

A beautiful flower garden is a joy to behold, but for many gardeners, maintaining blooms, watering, weeding, and pruning can feel overwhelming. Creating a low-maintenance flower garden allows homeowners and garden enthusiasts to enjoy colorful, healthy blooms with minimal effort. By thoughtfully selecting plants, designing efficient layouts, and implementing smart maintenance strategies, you can have a stunning garden that requires less time, water, and labor while remaining vibrant throughout the year. This article provides a detailed guide on how to create a low-maintenance flower garden, including plant selection, garden design, soil preparation, watering strategies, mulching, and seasonal care.


1. Benefits of a Low-Maintenance Flower Garden

Before diving into design and plant choices, it’s important to understand why low-maintenance gardens are desirable:

  • Time-Saving: Reduces hours spent on watering, pruning, and weeding.
  • Cost-Effective: Less need for fertilizers, pesticides, and garden labor.
  • Sustainable: Encourages water conservation and environmentally friendly practices.
  • Stress-Free Enjoyment: Allows you to enjoy the beauty of your garden without constant effort.
  • Long-Lasting Appeal: Well-planned low-maintenance gardens remain attractive year-round.

By focusing on efficiency and sustainability, gardeners can enjoy lush blooms and healthy plants without daily upkeep.


2. Choosing the Right Location

The foundation of a low-maintenance garden is choosing the right location:

  • Sunlight Requirements: Assess the sun exposure—full sun (6–8 hours), partial sun (3–5 hours), or shade (<3 hours).
  • Soil Quality: Select areas with well-draining soil. Avoid low-lying, waterlogged spots.
  • Accessibility: Ensure paths and borders are easy to reach for occasional maintenance.
  • Microclimates: Consider wind exposure, proximity to walls, and natural shade for plant survival.

A carefully chosen location reduces plant stress and minimizes the need for constant care.


3. Selecting Low-Maintenance Flowers

Choosing resilient plants is key for a low-maintenance garden. Opt for flowers that are:

  • Drought-Tolerant: Require less watering, ideal for hot or dry climates.
  • Pest-Resistant: Less susceptible to diseases and insect damage.
  • Long-Blooming: Produce color for extended periods without frequent deadheading.
  • Perennials: Return each year, reducing the need to replant annually.

Top Low-Maintenance Flower Choices

A. Perennials

  • Lavender: Drought-tolerant, fragrant, and attracts pollinators.
  • Coneflowers (Echinacea): Long-lasting blooms, tolerant of heat and poor soil.
  • Daylilies (Hemerocallis): Hardy, easy to grow, and low water requirements.
  • Black-Eyed Susan (Rudbeckia): Heat and drought-resistant with bright yellow flowers.

B. Annuals

  • Zinnias: Easy to grow from seed, vibrant blooms, and drought-tolerant.
  • Marigolds: Pest-repelling, heat-tolerant, and long-blooming.
  • Sunflowers: Minimal care, full sun, and striking height/color.

C. Shrubs and Foliage Plants

  • Hostas: Shade-tolerant with lush foliage.
  • Heuchera (Coral Bells): Adds texture and colorful leaves with minimal care.
  • Boxwood or Dwarf Shrubs: Provide structure and evergreen appeal.

Selecting plants suited to your climate and soil conditions significantly reduces garden maintenance.


4. Efficient Garden Design

A low-maintenance garden starts with a thoughtful design:

  • Group Plants by Water Needs: Plant drought-tolerant species together and water-loving species separately.
  • Layering: Use tall plants at the back, medium in the middle, and trailing flowers in front to reduce overcrowding.
  • Use Borders and Mulch Beds: Define garden beds with edging to minimize weed growth.
  • Pathways: Gravel, stone, or woodchip paths reduce grass maintenance and provide easy access.
  • Compact Planting: Dense planting shades soil, suppresses weeds, and retains moisture.

Well-planned layouts reduce weed growth, water loss, and labor-intensive maintenance.


5. Soil Preparation and Fertility

Healthy soil reduces the need for constant care:

  • Improve Drainage: Incorporate compost, sand, or perlite into heavy soils.
  • Add Organic Matter: Enrich soil with well-rotted manure or leaf compost for nutrient retention.
  • Mulching: Apply 2–4 inches of organic mulch to reduce water evaporation, maintain soil temperature, and suppress weeds.
  • Slow-Release Fertilizers: Provide steady nutrients without frequent feeding.

Quality soil ensures strong root systems, healthy foliage, and prolonged blooms.


6. Watering Strategies

Watering efficiently is crucial for low-maintenance gardens:

  • Drip Irrigation or Soaker Hoses: Deliver water directly to roots, reducing evaporation.
  • Water in Early Morning: Minimizes water loss and reduces disease risk.
  • Deep, Infrequent Watering: Encourages strong, drought-resistant roots.
  • Rainwater Harvesting: Collect rainwater for irrigation to conserve resources.

Efficient watering reduces the time and effort needed to keep plants healthy through dry spells.


7. Mulching for Minimal Maintenance

Mulching offers multiple benefits for low-maintenance gardens:

  • Moisture Retention: Reduces the frequency of watering.
  • Temperature Control: Keeps soil cool in hot weather and protects roots.
  • Weed Suppression: Limits competition for nutrients and water.
  • Organic Nutrients: As mulch decomposes, it enriches the soil naturally.

Common mulch materials include bark chips, straw, shredded leaves, or compost.


8. Pruning and Deadheading

Even low-maintenance gardens require minimal pruning:

  • Deadheading: Remove spent flowers from annuals to encourage continued blooms.
  • Light Pruning: Trim perennials and shrubs occasionally to maintain shape and airflow.
  • Avoid Over-Pruning: Too much trimming can stress plants and reduce flowering.

Strategic pruning ensures healthy plants and extended flowering without excessive effort.


9. Pest and Disease Management

Low-maintenance gardens benefit from resilient plant selection and preventive strategies:

  • Choose Pest-Resistant Plants: Avoid highly susceptible species.
  • Encourage Beneficial Insects: Ladybugs, bees, and lacewings naturally control pests.
  • Companion Planting: Marigolds and nasturtiums can deter pests.
  • Regular Monitoring: Inspect plants weekly for early signs of disease.

Preventive care reduces the need for chemical interventions and keeps plants vibrant and healthy.


10. Seasonal Care

Minimal seasonal maintenance ensures a garden thrives year-round:

  • Spring: Mulch beds, divide perennials, and plant new flowers.
  • Summer: Water efficiently, deadhead spent blooms, and monitor for pests.
  • Autumn: Remove dead foliage, add compost, and prepare soil for winter.
  • Winter: Protect perennials and shrubs with mulch or frost covers; prune as necessary.

Seasonal attention, though minimal, ensures consistent beauty and health.


11. Using Ground Covers and Hardy Plants

Incorporating ground covers and hardy plants reduces upkeep:

  • Creeping Thyme or Sedum: Suppress weeds, reduce bare soil, and require little care.
  • Ornamental Grasses: Add texture, movement, and resilience to heat or drought.
  • Native Plants: Adapted to local conditions, requiring less water and fertilizers.

Ground covers and hardy plants minimize weeding and watering tasks, increasing overall garden efficiency.


12. Garden Accessories for Low-Maintenance

Adding functional accessories can further reduce maintenance:

  • Self-Watering Containers: Perfect for flowers in pots or raised beds.
  • Landscape Fabric: Suppresses weed growth under mulch.
  • Automated Irrigation Systems: Schedule waterings for consistency.
  • Raised Beds: Improve drainage, reduce soil compaction, and simplify care.

These additions make the garden more manageable while enhancing aesthetics.


13. Benefits of a Low-Maintenance Flower Garden

Creating a low-maintenance garden provides multiple advantages:

  • Reduced Workload: Less time spent watering, weeding, or pruning.
  • Sustainability: Conserves water and reduces chemical use.
  • Long-Lasting Beauty: Well-chosen plants bloom longer with fewer issues.
  • Enhanced Enjoyment: Focus on relaxation and outdoor enjoyment instead of constant maintenance.

A thoughtfully designed low-maintenance garden is both practical and visually pleasing.


14. Conclusion

A low-maintenance flower garden combines strategic plant selection, efficient design, proper soil preparation, and minimal upkeep techniques. By choosing drought-tolerant, pest-resistant, and long-blooming flowers, using mulching and smart watering systems, and implementing seasonal care routines, gardeners can enjoy vibrant, colorful blooms without constant effort.

Key Takeaways:

  1. Select resilient, low-maintenance flowers suited to your climate and soil.
  2. Plan the garden layout efficiently to reduce weeding and water use.
  3. Improve soil and mulch adequately for moisture retention and fertility.
  4. Use efficient watering methods like drip irrigation and rainwater collection.
  5. Perform minimal pruning and deadheading to extend bloom life.
  6. Encourage beneficial insects and choose pest-resistant varieties.
  7. Incorporate seasonal care for year-round garden vitality.

By following these strategies, a low-maintenance flower garden can provide lasting beauty, sustainable growth, and an enjoyable outdoor retreat with minimal effort and maximum reward.

खरबूजा खाना पसंद है? इस आसान तरीके से उगाइए, अब बाजार से खरबूजा खरीदने की ज़रूरत नहीं पड़ेगी!

खरबूजा खाना पसंद है? इस आसान तरीके से उगाइए, अब बाजार से खरबूजा खरीदने की ज़रूरत नहीं पड़ेगी!

खरबूजा (Cantaloupe या Musk Melon) गर्मियों का एक स्वादिष्ट, रसदार और पौष्टिक फल है जिसे हर कोई पसंद करता है। लेकिन क्या आप जानते हैं कि इसे आप अपने घर पर भी बहुत आसानी से उगा सकते हैं — चाहे आपके पास बड़ा बगीचा हो या सिर्फ एक छोटी बालकनी!
अगर आप सोचते हैं कि खरबूजे के लिए बहुत ज़मीन चाहिए, तो यह लेख आपकी सोच बदल देगा। आज हम आपको बताएंगे कि कैसे आप खरबूजा घर की छत, बालकनी या छोटे गमलों में भी उगा सकते हैं — और एक बार सीख लेने के बाद, आपको इसे बाजार से खरीदने की जरूरत नहीं पड़ेगी।


चरण 1: सही किस्म का चयन करें

खरबूजा उगाने से पहले सबसे जरूरी है सही किस्म चुनना। घर या छत पर खेती के लिए Hybrid Mini Cantaloupe, Sugar Baby, या Arka Jeet जैसी किस्में सबसे उपयुक्त हैं। ये पौधे ज्यादा जगह नहीं लेते और जल्दी फल देते हैं।

टिप: स्थानीय नर्सरी या ऑनलाइन स्टोर से बीज खरीदते समय “container-friendly” या “dwarf” किस्मों पर ध्यान दें।


चरण 2: सही समय और जलवायु का चयन

खरबूजा गर्म और धूप वाली जलवायु में सबसे अच्छा बढ़ता है। भारत में इसे फरवरी से अप्रैल या जुलाई से अगस्त तक उगाना आदर्श होता है।

  • तापमान: 25°C से 35°C के बीच सबसे उपयुक्त।
  • धूप: प्रतिदिन कम से कम 6-8 घंटे सीधी धूप आवश्यक है।

अगर आप इसे छत पर उगा रहे हैं, तो पौधों को ऐसे स्थान पर रखें जहाँ पूरे दिन भरपूर धूप मिलती हो।


चरण 3: मिट्टी और कंटेनर की तैयारी

खरबूजे को अच्छी जल निकासी वाली, जैविक पदार्थों से भरपूर मिट्टी पसंद है।

मिट्टी मिश्रण तैयार करें:

  • 50% बागवानी मिट्टी (garden soil)
  • 30% गोबर की खाद या कम्पोस्ट
  • 20% बालू या पर्लाइट (drainage के लिए)

कंटेनर का चुनाव:

  • 18–24 इंच गहरा गमला या पुराने टायर में उगाना एक बेहतरीन विकल्प है।
  • टायर को दो परत में रखकर बीच में मिट्टी भरें।
  • नीचे कुछ छेद करें ताकि पानी निकल सके।

इससे न केवल पौधों की जड़ें फैलने के लिए जगह मिलती है, बल्कि मिट्टी गर्म भी रहती है — जो खरबूजे के विकास के लिए लाभदायक है।


चरण 4: बीज बोना और अंकुरण

  1. मिट्टी तैयार करने के बाद, खरबूजे के बीजों को लगभग 1 इंच गहराई में बोएं।
  2. हर गमले में 3-4 बीज डालें और हल्का पानी दें।
  3. 5-7 दिनों में अंकुर निकलने लगेंगे।
  4. जब पौधे 3-4 इंच ऊँचाई के हो जाएं, तो मजबूत पौधों को ही रहने दें और बाकी को निकाल दें।

सुझाव: अगर आप तेज़ अंकुरण चाहते हैं, तो बीजों को 12 घंटे के लिए गुनगुने पानी में भिगोकर रखें।


चरण 5: सिंचाई और देखभाल

खरबूजे के पौधों को नियमित लेकिन संतुलित सिंचाई की आवश्यकता होती है।

  • शुरुआत में हर दिन हल्का पानी दें।
  • जब पौधे बढ़ने लगें, तो हर 2-3 दिन में गहराई तक पानी दें
  • फूल आने और फल बनने के समय ज़्यादा पानी की जरूरत होती है।

ध्यान दें: मिट्टी में पानी रुकना नहीं चाहिए, वरना जड़ें सड़ सकती हैं।


चरण 6: पौधों की देखभाल और सहारा देना

खरबूजे की बेलें बहुत फैलती हैं, इसलिए उन्हें सहारा देना जरूरी है।

  • छत या बालकनी में उगाते समय जाली (trellis) या रस्सियों का उपयोग करें।
  • बेलों को ऊपर की ओर बढ़ने दें ताकि फलों को साफ हवा और धूप मिले।
  • जब फल लगने लगें, तो छोटे जाल या कपड़े का झूला बनाकर फलों को सहारा दें ताकि वे नीचे न गिरें।

चरण 7: जैविक खाद और पोषण

खरबूजे के पौधों को फल देने के लिए पोषण की ज़रूरत होती है।
हर 15-20 दिनों में एक बार निम्न में से कोई एक खाद डालें:

  • गोबर की सड़ी हुई खाद
  • कम्पोस्ट चाय (compost tea)
  • केले के छिलके का तरल घोल
  • नीम खली पाउडर (pest control के लिए भी उपयोगी)

विशेष टिप: फूल आने के बाद पौधे को पोटैशियम और फॉस्फोरस की मात्रा ज़्यादा दें — इससे फल मीठे और रसीले बनते हैं।


चरण 8: कीट और रोग नियंत्रण

खरबूजे की बेलों पर अक्सर एफिड्स (aphids), सफेद मक्खी और पाउडरी मिल्ड्यू जैसी समस्याएँ आती हैं।
इनसे बचाव के लिए:

  • नीम का तेल (Neem Oil) + पानी मिलाकर 7-10 दिनों में एक बार छिड़काव करें।
  • अगर फफूंदी दिखे, तो छाछ (buttermilk) का छिड़काव भी बहुत प्रभावी होता है।
  • पत्तियों के नीचे नियमित जांच करें और संक्रमित पत्तियाँ हटा दें।

चरण 9: फूल से फल बनने की प्रक्रिया

खरबूजे में नर और मादा फूल अलग-अलग होते हैं।

  • नर फूल पहले आते हैं, मादा फूल बाद में।
  • मादा फूल के नीचे छोटा फल जैसा भाग होता है।
    अगर मधुमक्खियाँ कम हों तो हाथ से परागण (hand pollination) करें — नर फूल से पराग लेकर मादा फूल पर लगाएँ।
    5-7 दिनों में फल बढ़ने लगता है।

चरण 10: फल की परिपक्वता और कटाई

खरबूजे का फल सामान्यतः 60-75 दिनों में पक जाता है।
पकने के संकेत:

  • फल की खुशबू तेज़ हो जाती है।
  • डंठल के पास हल्का दरार दिखती है।
  • फल का रंग हल्का सुनहरा या नारंगी हो जाता है।

कटाई के बाद फलों को 1-2 दिन ठंडी जगह पर रख दें — इससे स्वाद और मिठास बढ़ जाती है।


बोनस टिप: खरबूजे का उपयोग और भंडारण

  • खरबूजे के टुकड़ों को ठंडा करके परोसें या जूस बनाएं।
  • बीजों को सुखाकर अगले सीजन के लिए रखें।
  • फलों को फ्रिज में 5-7 दिन तक ताजा रखा जा सकता है।

निष्कर्ष:

घर की छत या बालकनी में खरबूजा उगाना न सिर्फ आसान है, बल्कि यह आपको 100% जैविक, स्वादिष्ट और ताज़ा फल देता है।
एक बार जब आप यह तरीका अपनाएंगे, तो आप समझेंगे कि खरबूजा खरीदने से बेहतर उसे खुद उगाना कितना संतोषजनक है।

तो अब इंतज़ार किस बात का?
पुराने टायर, बालकनी के गमले या छत के कोने का इस्तेमाल करें और इस गर्मी अपने घर का मीठा खरबूजा खुद उगाएं!

बगीचा नहीं है? कोई बात नहीं! बीट (चुकंदर) उगाने का इतना आसान तरीका जानिए, जिसे न आजमाना होगा अफसोस का कारण

बगीचा नहीं है? कोई बात नहीं! बीट (चुकंदर) उगाने का इतना आसान तरीका जानिए, जिसे न आजमाना होगा अफसोस का कारण

अगर आपके पास बगीचा नहीं है, लेकिन फिर भी आप घर पर ताज़ी, पौष्टिक सब्जियाँ उगाना चाहते हैं — तो आपके लिए ये लेख खास है!
आज हम बात करेंगे एक ऐसी सब्ज़ी की जो न केवल स्वादिष्ट होती है बल्कि सेहत के लिए भी खज़ाना है — चुकंदर (Beetroot)

चुकंदर में आयरन, फोलेट, फाइबर, और एंटीऑक्सीडेंट की भरपूर मात्रा होती है। यह रक्तचाप नियंत्रित करता है, त्वचा को निखारता है और ऊर्जा का शानदार स्रोत है।
अच्छी बात यह है कि इसे उगाने के लिए आपको बगीचे की ज़रूरत नहीं है — सिर्फ कुछ गमले, थोड़ी मिट्टी और सही तरीका चाहिए।

तो आइए जानते हैं, बिना बगीचे के भी चुकंदर उगाने का यह “सुपर आसान तरीका” जिससे आप अपने घर की बालकनी, छत या खिड़की पर ही ताज़े, रसीले बीट उगा सकते हैं!


1. क्यों करें घर पर चुकंदर की खेती?

चुकंदर एक ऐसी सब्ज़ी है जो कम जगह में, जल्दी और बिना ज्यादा देखभाल के उगाई जा सकती है।
यह ठंडे या हल्के गर्म मौसम में भी अच्छी तरह बढ़ती है और घर की छोटी जगहों में आसानी से फलती-फूलती है।

घर पर उगाने के फायदे:

  • ताज़ा, जैविक और केमिकल-फ्री सब्ज़ी।
  • बाजार के मुकाबले अधिक स्वादिष्ट और पौष्टिक।
  • बालकनी या छत की जगह का बेहतर उपयोग।
  • छोटे बच्चों को बागवानी से जोड़ने का अच्छा अवसर।

2. बीज चयन और तैयारी (Seed Selection and Preparation)

बीज का चुनाव

बीट के बीज बाजार या ऑनलाइन आसानी से मिल जाते हैं।
लोकप्रिय किस्में:

  • Detroit Dark Red
  • Crimson Globe
  • Ruby Queen

इनमें से कोई भी किस्म घर पर उगाने के लिए बढ़िया है।

बीज की तैयारी

  • बीज बोने से पहले उन्हें 8–10 घंटे तक पानी में भिगो दें।
  • इससे बीज जल्दी अंकुरित होते हैं और पौधे मजबूत बनते हैं।

3. सही कंटेनर का चयन (Choosing the Right Container)

अगर आपके पास बगीचा नहीं है, तो कोई चिंता की बात नहीं।
आप चुकंदर को गमले, बाल्टी, पुराने टायर, ट्रे, या प्लास्टिक के डिब्बों में भी उगा सकते हैं।

मुख्य बातें ध्यान में रखें:

  • कंटेनर की गहराई कम से कम 10–12 इंच होनी चाहिए।
  • नीचे की ओर पानी निकासी के लिए छोटे छेद (drainage holes) ज़रूर बनाएं।
  • चौड़ा कंटेनर चुनें ताकि कई पौधे एक साथ लग सकें।

4. मिट्टी और खाद की तैयारी (Soil Preparation)

चुकंदर की अच्छी वृद्धि के लिए मिट्टी हल्की, ढीली और पोषक तत्वों से भरपूर होनी चाहिए।
एक परफेक्ट मिश्रण तैयार करें:

  • 40% बगीचे की मिट्टी
  • 40% गोबर की खाद या वर्मी कंपोस्ट
  • 20% रेत या नारियल की भूसी (Coco peat)

यह मिश्रण जड़ों को फैलने के लिए पर्याप्त जगह देता है और मिट्टी में नमी बनाए रखता है।

टिप: अगर मिट्टी बहुत सख्त है, तो चुकंदर की जड़ें सही आकार नहीं ले पाएंगी — इसलिए मिट्टी जितनी मुलायम होगी, बीट उतनी गोल और सुंदर बनेगी।


5. बीज बोने की विधि (Sowing the Seeds)

  1. कंटेनर में तैयार मिट्टी भरें और ऊपर से 1 इंच खाली जगह छोड़ें।
  2. बीजों को 2–3 सेमी की दूरी पर बोएं।
  3. बीजों को हल्के से मिट्टी से ढक दें और ऊपर से थोड़ा पानी छिड़कें।
  4. 5–7 दिन में छोटे पौधे निकलने लगेंगे।

जब पौधे 4–5 पत्तियों के हो जाएं, तो एक गमले में सिर्फ 2–3 मजबूत पौधे छोड़ दें। बाकी को हल्के से निकाल दें ताकि बाकी पौधों को बढ़ने की जगह मिले।


6. पानी देना और देखभाल (Watering and Care)

  • चुकंदर को नमी पसंद है, लेकिन ज्यादा पानी से जड़ें सड़ सकती हैं।
  • हर 2–3 दिन में हल्का पानी दें।
  • गर्मियों में रोज़ाना सुबह या शाम पानी दें।
  • मिट्टी हमेशा हल्की नम रहे, लेकिन कभी भी गीली या दलदली न हो।

सलाह: अगर मिट्टी सूखी लगे तो पानी दें, वरना रुकें — ज़रूरत से ज्यादा पानी देना नुकसानदायक है।


7. धूप और तापमान (Sunlight and Temperature)

चुकंदर को 6–8 घंटे की सीधी धूप बहुत पसंद है।
यदि आपकी बालकनी में धूप कम आती है, तो पौधे को सप्ताह में कुछ बार छत पर रख दें ताकि उन्हें पर्याप्त रोशनी मिले।

उत्तम तापमान:

  • 15°C से 25°C तक सबसे अच्छा रहता है।
  • बहुत ज्यादा गर्मी में पौधों को दोपहर की धूप से बचाएँ।

8. पौधों को पोषण देना (Fertilizing the Plants)

हर 15–20 दिन में मिट्टी के ऊपर थोड़ा जैविक खाद या वर्मी कंपोस्ट डालें।
यह पौधों को आवश्यक पोषण देगा और जड़ें मजबूत बनाएगा।

यदि पत्तियाँ पीली दिखने लगें, तो इसका मतलब है पौधों को नाइट्रोजन की जरूरत है।
इसके लिए आप घर की बनी खाद या केंचुआ खाद का घोल (liquid compost tea) उपयोग कर सकते हैं।


9. पत्तियों की कटाई (Harvesting Beet Leaves)

चुकंदर के पौधों की पत्तियाँ भी खाने लायक और पौष्टिक होती हैं।

  • जब पौधे 20–25 दिन के हो जाएँ, तो आप ऊपर की 2–3 पत्तियाँ काट सकते हैं।
  • ध्यान रखें कि एक बार में पूरी पत्तियाँ न काटें, वरना जड़ें कमजोर हो जाएंगी।

इन पत्तियों को आप सलाद, सूप या पराठे में इस्तेमाल कर सकते हैं — स्वाद और पोषण दोनों मिलेगा!


10. चुकंदर की कटाई (Beetroot Harvesting)

अब आता है सबसे रोमांचक पल — कटाई का समय!
बीज बोने के लगभग 45–60 दिनों में चुकंदर पूरी तरह तैयार हो जाते हैं।

कटाई के संकेत:

  • जड़ें 5–7 सेमी व्यास की दिखने लगें।
  • मिट्टी से थोड़ा ऊपर लाल रंग की जड़ दिखाई दे।
  • पत्तियाँ मोटी और गहरी हरी हो जाएँ।

पौधे को हल्के हाथों से मिट्टी से खींचकर निकालें।
जड़ों को धोकर छाया में सुखाएँ — अब ये खाने या स्टोर करने के लिए तैयार हैं।


11. भंडारण और उपयोग (Storage and Use)

चुकंदर को लंबे समय तक ताज़ा रखने के लिए:

  • उन्हें बिना काटे फ्रिज में रखें।
  • अगर आप उन्हें छील चुके हैं, तो हल्के पानी में डालकर 2–3 दिन रख सकते हैं।
  • सुखाकर एयरटाइट डिब्बे में भी स्टोर कर सकते हैं।

उपयोग के तरीके:

  • सलाद में कच्चा खाएँ
  • जूस बनाएं
  • सूप, पराठे, या सब्ज़ी में डालें

चुकंदर का रंग और स्वाद दोनों ही खाने को आकर्षक बनाते हैं।


12. आम समस्याएँ और उनके समाधान (Common Problems and Solutions)

समस्याकारणसमाधान
पत्तियाँ पीली होनाखाद की कमीहर 15 दिन जैविक खाद डालें
जड़ें छोटी रहनामिट्टी बहुत सख्तमिट्टी में रेत या कोकोपीट मिलाएँ
पौधे मुरझानाज़्यादा पानी देनापानी का संतुलन बनाए रखें
कीट लगनाएफिड्स या कैटरपिलरनीम तेल का छिड़काव करें

13. बोनस टिप्स (Bonus Tips for Maximum Growth)

  1. बीजों को बैच में बोएँ: हर 15 दिन पर कुछ बीज बोएँ ताकि लगातार ताज़े चुकंदर मिलें।
  2. कंटेनर को घुमाते रहें: हर कुछ दिन में गमले की दिशा बदलें ताकि पौधों को हर ओर से धूप मिले।
  3. पानी के साथ प्यार दें: पौधों से बात करें, देखभाल करें — वे जल्दी फलेंगे!
  4. पत्तियों को नुकसान न पहुँचाएँ: यही पौधे की ऊर्जा का स्रोत होती हैं।

14. छोटे स्थानों में बागवानी का आनंद (The Joy of Small-Space Gardening)

बिना बगीचे के भी जब आप अपने हाथों से सब्ज़ी उगाते हैं, तो उसका स्वाद और खुशी दोनों अलग ही होते हैं।

  • हर सुबह पौधों को देखना, पानी देना और नई पत्तियाँ निकलते देखना तनाव को कम करता है
  • घर की छत या बालकनी हरियाली से भर जाती है।
  • और सबसे बड़ी बात — आप अपने परिवार को स्वच्छ, सुरक्षित और पौष्टिक भोजन दे पाते हैं।

15. निष्कर्ष (Conclusion)

अब चाहे आपके पास बगीचा हो या नहीं, चुकंदर उगाना अब कोई मुश्किल काम नहीं।
सिर्फ एक गमला, थोड़ी मिट्टी और आपका ध्यान ही काफी है।
45–60 दिनों में ही आपकी बालकनी या छत पर ताज़े, लाल और रसीले बीट तैयार हो जाएँगे!

तो अब देर किस बात की?
आज ही कुछ बीज बोएँ और देखें कैसे यह छोटा सा प्रयोग आपके घर को हरियाली और स्वास्थ्य से भर देता है।

याद रखें — “बगीचा नहीं तो क्या, दिल में बागवानी का शौक हो तो हर कोना हरा हो जाता है!”

The Best Flower Varieties for Hanging Baskets

The Best Flower Varieties for Hanging Baskets

Hanging baskets are a stunning way to add color, texture, and visual interest to gardens, patios, balconies, and even indoor spaces. Unlike traditional garden beds, hanging baskets allow flowers to cascade gracefully, creating a dynamic display that draws the eye upward. Choosing the right flower varieties is crucial for successful hanging baskets, as plants must thrive in confined soil, tolerate exposure, and maintain blooms throughout the season. This article provides a comprehensive guide on the best flower varieties for hanging baskets, including care tips, arrangement ideas, and maintenance strategies.


1. Benefits of Hanging Baskets

Before selecting flowers, it’s essential to understand the advantages of hanging baskets:

  • Space-Saving: Ideal for small gardens, balconies, or indoor spaces where ground planting is limited.
  • Visual Appeal: Adds vertical interest, creating layers of color and texture.
  • Accessibility: Easier to maintain and protect from pests like slugs and rabbits.
  • Mobility: Baskets can be moved to optimize sunlight, protect from wind, or change the display with the seasons.

Hanging baskets are a versatile and practical solution for gardeners seeking to enhance outdoor or indoor spaces with vibrant blooms.


2. Characteristics of Ideal Hanging Basket Flowers

Not all flowers are suitable for hanging baskets. The best varieties share several characteristics:

  • Trailing or Cascading Growth: Plants that spill over the edges create a full and flowing appearance.
  • Compact Root System: Adaptable to limited soil volume without suffering from root stress.
  • Continuous Blooming: Produces flowers consistently for long periods.
  • Heat and Drought Tolerance: Can withstand the exposure typical in hanging baskets.
  • Pest Resistance: Less susceptible to common pests or fungal infections.

Selecting plants with these traits ensures vibrant and long-lasting hanging displays.


3. Top Flower Varieties for Hanging Baskets

Here are some of the best flower varieties categorized by growth type and bloom characteristics:


A. Trailing Annuals

Trailing annuals are excellent for cascading effects:

  1. Petunias
    • Varieties: ‘Supertunia,’ ‘Wave,’ and ‘Cascadia.’
    • Features: Long-lasting blooms, vibrant colors, and prolific trailing growth.
    • Care: Deadhead to encourage continuous flowering; water regularly.
  2. Fuchsias
    • Varieties: ‘Swingtime,’ ‘Bella,’ and ‘Hawkshead.’
    • Features: Pendulous blooms in pink, purple, or red; thrive in partial shade.
    • Care: Keep soil moist and feed with a liquid fertilizer for abundant blooms.
  3. Lobelia
    • Varieties: ‘Crystal Palace,’ ‘Regatta Blue.’
    • Features: Delicate trailing stems with bright blue, purple, or white flowers.
    • Care: Prefers cool temperatures and partial shade; keep soil moist.
  4. Bacopa (Sutera cordata)
    • Features: White, pink, or blue flowers; continuous bloom and trailing habit.
    • Care: Moderate sunlight; trim occasionally to maintain fullness.

B. Upright Annuals (Focal Plants)

Upright plants add structure and height:

  1. Geraniums (Pelargoniums)
    • Features: Red, pink, white, or variegated blooms; upright growth with sturdy stems.
    • Care: Full sun to partial shade; prune spent flowers to prolong bloom.
  2. Calibrachoa (Million Bells)
    • Features: Miniature petunia-like flowers in vibrant colors.
    • Care: Full sun, well-drained soil; regular watering and fertilizer.
  3. Begonias
    • Features: Wax or tuberous varieties; excellent for partial shade.
    • Care: Keep soil evenly moist; protect from intense afternoon sun.

C. Foliage Plants for Texture

Foliage plants add contrast and depth:

  1. Sweet Potato Vine (Ipomoea batatas)
    • Features: Heart-shaped, trailing foliage in green, purple, or variegated forms.
    • Care: Full sun to partial shade; drought-tolerant once established.
  2. Ivy (Hedera helix)
    • Features: Trailing evergreen leaves; adds structure and year-round greenery.
    • Care: Moderate light; avoid overwatering.
  3. Coleus
    • Features: Colorful foliage with shades of red, green, yellow, and purple.
    • Care: Partial shade; pinch back regularly for compact growth.

D. Perennials Suitable for Hanging Baskets

Perennials can provide longevity and seasonal returns:

  1. Heuchera (Coral Bells)
    • Features: Attractive foliage in purple, red, or green; small flowers in summer.
    • Care: Partial shade; well-drained soil.
  2. Trailing Ivy Geraniums
    • Features: Long-lasting blooms and cascading habit; ideal for mixed baskets.
    • Care: Requires full sun and regular watering.
  3. Campanula (Bellflower)
    • Features: Bell-shaped flowers in shades of blue, white, or purple.
    • Care: Well-drained soil; moderate sun.

4. Designing a Hanging Basket

A well-designed hanging basket combines thrillers, fillers, and spillers:

  • Thrillers: Upright, showy flowers like geraniums or calibrachoa to act as the focal point.
  • Fillers: Medium-height flowers such as lobelia or bacopa to add density.
  • Spillers: Trailing plants like petunias or ivy to cascade over edges and soften the look.

Layering plants in this way creates a visually appealing and balanced composition.


5. Soil and Fertilization for Hanging Baskets

Hanging baskets have limited soil, so maintaining fertility is crucial:

  • Potting Mix: Use a high-quality, lightweight potting mix enriched with organic matter.
  • Slow-Release Fertilizer: Mix into soil at planting for continuous nutrient supply.
  • Liquid Fertilizer: Feed every 1–2 weeks during active growth and flowering.
  • pH Preference: Most basket flowers prefer slightly acidic to neutral soil (pH 6.0–7.0).

Proper soil and fertilization encourage lush foliage, abundant blooms, and vibrant colors.


6. Watering and Moisture Management

Hanging baskets dry out faster than garden beds due to exposure and limited soil volume:

  • Daily Monitoring: Check soil moisture frequently, especially during hot summer months.
  • Deep Watering: Water until excess flows from drainage holes to ensure roots are saturated.
  • Mulching: Add a light layer of mulch or moss to reduce evaporation.
  • Self-Watering Baskets: Consider baskets with reservoirs for consistent moisture supply.

Consistent moisture supports vitality and prolonged flowering.


7. Sunlight and Placement

Correct placement ensures maximum bloom performance:

  • Full Sun Plants: Petunias, calibrachoa, geraniums; require 6–8 hours of sunlight daily.
  • Partial Shade Plants: Fuchsias, begonias, impatiens; thrive with 3–5 hours of sunlight or dappled light.
  • Indoor Baskets: Place near south- or west-facing windows or supplement with grow lights.

Matching plant sunlight requirements with placement guarantees healthy growth and vibrant blooms.


8. Maintenance Tips for Hanging Baskets

To keep baskets thriving:

  • Deadheading: Remove spent blooms to encourage continuous flowering.
  • Pinching: Trim leggy growth to maintain shape and encourage bushiness.
  • Pest Monitoring: Check regularly for aphids, spider mites, and whiteflies.
  • Rotation: Rotate baskets periodically to ensure even sunlight exposure.
  • Repotting: Refresh soil mid-season if nutrients become depleted.

Regular maintenance ensures consistent bloom color and basket health.


9. Seasonal Considerations

  • Summer: Focus on watering, fertilization, and deadheading for peak color.
  • Autumn: Replace summer flowers with hardy fall blooms like pansies, violas, or chrysanthemums.
  • Winter: Indoor hanging baskets can feature ivy, cyclamen, or small ferns for year-round greenery.

Seasonal planning allows continuous enjoyment of hanging baskets throughout the year.


10. Combining Colors and Textures

Aesthetic arrangements enhance the visual impact of hanging baskets:

  • Complementary Colors: Red and yellow, purple and white, or pink and blue create vibrant contrasts.
  • Monochromatic Schemes: Shades of a single color produce elegance and cohesion.
  • Foliage Variation: Mix leaf textures, colors, and shapes for depth and interest.
  • Trailing Patterns: Combine spillers and fillers to create a layered, flowing look.

Thoughtful combinations create eye-catching and professional-looking baskets.


11. Benefits of Using Hanging Baskets

Hanging baskets offer numerous advantages:

  • Aesthetic Appeal: Cascading blooms elevate garden beauty and create a focal point.
  • Accessibility: Easier to maintain, water, and deadhead than ground-level plants.
  • Pest Protection: Less exposure to soil-borne pests like slugs and snails.
  • Flexibility: Baskets can be moved, rotated, or redesigned according to season or occasion.

Hanging baskets are practical, flexible, and visually striking gardening solutions.


12. Conclusion

Hanging baskets are a versatile and visually stunning way to display vibrant flowers in gardens, patios, and indoor spaces. By selecting the right combination of trailing, upright, and foliage plants, gardeners can create a balanced, colorful, and long-lasting display. Proper soil preparation, fertilization, watering, sunlight management, and maintenance are essential for keeping blooms vibrant throughout the growing season.

Key Takeaways:

  1. Choose cascading and compact flowers suited for hanging baskets.
  2. Layer plants using thrillers, fillers, and spillers for depth and interest.
  3. Use nutrient-rich potting soil and regular fertilization for abundant blooms.
  4. Water consistently and ensure proper drainage to prevent root stress.
  5. Monitor sunlight requirements and place baskets accordingly.
  6. Deadhead and prune regularly to maintain bloom longevity and basket shape.
  7. Rotate and refresh baskets seasonally to keep displays vibrant year-round.

With these strategies, hanging baskets can transform any space into a vibrant, colorful, and inviting environment, making them an essential component of both decorative and functional gardening. Whether for a patio, balcony, or indoor nook, hanging baskets allow gardeners to enjoy cascading flowers that provide beauty, color, and charm throughout the growing season.

The Best Pollinator-Friendly Flowers to Plant

The Best Pollinator-Friendly Flowers to Plant

Pollinators are essential to the health of our ecosystems and the productivity of our gardens. Bees, butterflies, hummingbirds, and other pollinators not only help plants reproduce by transferring pollen, but they also contribute to the growth of fruits, vegetables, and ornamental plants. Planting pollinator-friendly flowers supports these vital creatures while creating vibrant, thriving gardens. Selecting the right flowers can attract a wide range of pollinators, extend bloom periods, and enhance biodiversity. This article explores the best pollinator-friendly flowers to plant, along with guidance on how to create a garden that is both beautiful and ecologically beneficial.


1. Understanding Pollinator-Friendly Flowers

Pollinator-friendly flowers have characteristics that attract and sustain insects and birds:

  • Bright Colors: Bees are attracted to blue and yellow flowers, while butterflies prefer red, orange, pink, and purple.
  • Nectar and Pollen: Flowers that provide ample nectar and pollen supply food for pollinators.
  • Shape and Accessibility: Open or tubular flowers make it easier for pollinators to access nectar.
  • Continuous Blooming: Flowers with extended bloom periods support pollinators throughout the growing season.

By considering these traits, gardeners can select plants that maximize pollinator visits and benefit both the garden and local ecosystems.


2. Top Pollinator-Friendly Flowers

Here are some of the best flowers to plant to attract bees, butterflies, and other pollinators:

a) Lavender (Lavandula spp.)

Overview: Lavender is a fragrant herb known for its beautiful purple spikes and calming scent.

Why It’s Pollinator-Friendly:

  • Produces abundant nectar for bees and butterflies.
  • Long flowering season from late spring to summer.
  • Strong fragrance attracts pollinators from a distance.

Care Tips:

  • Plant in full sun and well-draining soil.
  • Prune after flowering to encourage bushy growth.
  • Water moderately; avoid waterlogged conditions.

b) Coneflower (Echinacea spp.)

Overview: Coneflowers are hardy perennials with vibrant petals surrounding a prominent central disk.

Why It’s Pollinator-Friendly:

  • Offers nectar and pollen to bees, butterflies, and even hummingbirds.
  • Long-lasting blooms throughout summer.
  • Drought-tolerant and low maintenance.

Care Tips:

  • Grow in full sun with well-draining soil.
  • Deadhead spent blooms to extend flowering.
  • Suitable for borders and wildflower gardens.

c) Sunflowers (Helianthus annuus)

Overview: Sunflowers are iconic tall blooms that provide seeds in addition to nectar.

Why It’s Pollinator-Friendly:

  • Large flower heads attract bees and butterflies.
  • Nectar and pollen support early summer pollinators.
  • Seeds provide food for birds after blooming.

Care Tips:

  • Plant in full sun with fertile, well-draining soil.
  • Support tall varieties with stakes.
  • Water consistently, especially during flowering.

d) Bee Balm (Monarda spp.)

Overview: Bee balm is a showy, aromatic perennial that thrives in sunny locations.

Why It’s Pollinator-Friendly:

  • Produces tubular flowers ideal for bees, hummingbirds, and butterflies.
  • Long bloom period from mid to late summer.
  • Attracts beneficial insects that support garden health.

Care Tips:

  • Plant in full sun to partial shade.
  • Space plants to allow airflow and reduce mildew risk.
  • Cut back after blooming to encourage additional flowers.

e) Salvia (Salvia spp.)

Overview: Salvias are versatile flowering plants with spiky blooms in a variety of colors.

Why It’s Pollinator-Friendly:

  • Tubular flowers attract bees, butterflies, and hummingbirds.
  • Extended bloom period in summer and early fall.
  • Low maintenance and drought-tolerant.

Care Tips:

  • Plant in full sun and well-draining soil.
  • Remove spent blooms to encourage continued flowering.
  • Use in borders, containers, or pollinator gardens.

f) Zinnias (Zinnia spp.)

Overview: Zinnias are bright, cheerful annuals that add bold colors to any garden.

Why It’s Pollinator-Friendly:

  • Open flowers provide easy access to nectar for bees and butterflies.
  • Continuous blooms throughout summer.
  • Resistant to many pests and diseases.

Care Tips:

  • Plant in full sun with fertile, well-draining soil.
  • Water regularly, but avoid wetting foliage to prevent mildew.
  • Deadhead to extend flowering season.

g) Milkweed (Asclepias spp.)

Overview: Milkweed is vital for butterfly populations, especially monarchs.

Why It’s Pollinator-Friendly:

  • Nectar-rich flowers attract bees and butterflies.
  • Serves as a host plant for monarch caterpillars.
  • Blooms from late spring to summer.

Care Tips:

  • Grow in full sun with well-draining soil.
  • Avoid removing leaves as they provide habitat for caterpillars.
  • Plant in clusters for maximum butterfly attraction.

h) Black-eyed Susan (Rudbeckia hirta)

Overview: Black-eyed Susans are cheerful yellow flowers with dark centers.

Why It’s Pollinator-Friendly:

  • Nectar and pollen attract bees and butterflies.
  • Long bloom period from summer to early fall.
  • Low maintenance and drought-tolerant.

Care Tips:

  • Plant in full sun to partial shade.
  • Deadhead to prolong flowering.
  • Suitable for borders and meadow-style gardens.

3. Tips for Designing a Pollinator Garden

Creating a garden specifically to attract pollinators ensures that your plants and local wildlife thrive together. Consider these principles:

a) Plant Diversity

Use a mix of flowering plants with varying colors, shapes, and bloom times to attract a broad spectrum of pollinators throughout the season.

b) Continuous Bloom

Choose plants that bloom from early spring to late fall. Combining early bloomers like crocuses with late bloomers like asters ensures a constant nectar supply.

c) Native Plants

Native plants are often best suited for local pollinators. They are adapted to regional conditions and provide ideal food sources.

d) Avoid Pesticides

Chemical pesticides can harm bees and butterflies. Opt for organic pest control methods and encourage beneficial insects.

e) Group Plants in Clumps

Plant flowers in clusters rather than scattered singly. Pollinators are more likely to visit large groups of blooms, which increases pollination efficiency.


4. Providing Additional Resources for Pollinators

Pollinators need more than flowers. Enhance your garden’s appeal by providing:

  • Water Sources: Shallow dishes or birdbaths for bees and butterflies.
  • Shelter: Small brush piles, bee hotels, and hedgerows for nesting.
  • Host Plants: Include species like milkweed or parsley for butterfly larvae.
  • Sun Exposure: Many pollinators are most active in sunny locations.

These resources make your garden a complete habitat, ensuring pollinator visits and long-term garden health.


5. Seasonal Considerations

Pollinator-friendly gardening is about planning for the entire growing season:

  • Spring: Crocus, tulips, primroses, and blueberry flowers attract early bees.
  • Summer: Lavender, bee balm, zinnias, and coneflowers provide abundant nectar.
  • Fall: Asters, goldenrod, and late-blooming salvias keep pollinators nourished before winter.

By selecting flowers that bloom at different times, your garden becomes a haven for pollinators from early spring to late fall.


Conclusion

Planting pollinator-friendly flowers is an essential step toward sustaining local ecosystems, enhancing biodiversity, and creating a vibrant, productive garden. Flowers such as lavender, coneflowers, sunflowers, bee balm, salvia, zinnias, milkweed, and black-eyed Susans attract bees, butterflies, and hummingbirds while offering extended bloom periods and visual appeal. By incorporating a variety of flowering times, providing shelter and resources, and avoiding harmful chemicals, gardeners can create a beautiful and ecologically supportive environment. A pollinator-friendly garden not only benefits wildlife but also enhances the health, color, and productivity of your outdoor spaces, making it a win-win for both people and nature.

How to Grow Lilies for Stunning Summer Displays

How to Grow Lilies for Stunning Summer Displays

Lilies are among the most striking and elegant flowers in any garden. Their tall stems, large trumpet-shaped blooms, and captivating fragrance make them a centerpiece in flower beds, borders, and containers. Growing lilies successfully can provide gardeners with a spectacular summer display that attracts both the eye and pollinators. However, to achieve lush, vibrant blooms, it is essential to understand the requirements of these plants—from soil and planting to care and pest management. This article provides comprehensive guidance on how to grow lilies for stunning summer displays.


1. Understanding Lilies and Their Varieties

Lilies belong to the genus Lilium, which includes hundreds of species and countless hybrids. They are bulbous perennials, meaning they grow from bulbs that store nutrients and energy for the next season. The most common types of lilies include:

  • Asiatic Lilies: Early bloomers, vibrant colors, generally unscented, ideal for mass displays.
  • Oriental Lilies: Fragrant, late bloomers with large, dramatic flowers.
  • Trumpet Lilies: Tall, trumpet-shaped flowers, very fragrant, perfect for focal points.
  • Martagon Lilies: Smaller blooms on branching stems, shade-tolerant.
  • Turk’s Cap Lilies: Unusual downward-facing blooms, often in spotted patterns.

Choosing the right variety depends on your climate, garden space, and desired display. For a summer display, Asiatic and Oriental lilies are particularly popular due to their vibrant colors and long-lasting blooms.


2. Selecting the Perfect Site

Location is crucial for lily growth. Lilies need:

  • Full Sun to Partial Shade: Most lilies require at least 6 hours of direct sunlight daily. However, in hot climates, partial shade in the afternoon helps prevent scorching.
  • Well-Drained Soil: Lilies do not tolerate waterlogged soil, which can cause bulb rot. Raised beds or mounds improve drainage.
  • Air Circulation: Proper spacing and airflow help prevent fungal diseases and support strong stems.

When planning your garden, consider placing lilies where they can be viewed from multiple angles, such as along borders, pathways, or in mixed flower beds.


3. Preparing the Soil

Healthy soil is the foundation for robust lily growth. Follow these steps for soil preparation:

  • Soil Type: Lilies thrive in slightly acidic to neutral soil (pH 6.0–7.0) that is rich in organic matter.
  • Amending Soil: Mix compost, well-rotted manure, or leaf mold to improve fertility and drainage.
  • Bulb Bed Preparation: Loosen soil to a depth of 12–15 inches to allow roots to penetrate easily.
  • Drainage Check: Ensure water does not pool around the planting site. Adding sand or grit can improve drainage in heavy clay soils.

Proper soil preparation ensures strong root development, which directly impacts the size and longevity of blooms.


4. Planting Lilies

Planting lilies correctly is essential for their growth and summer display. Follow these guidelines:

  • Bulb Selection: Choose firm, healthy bulbs free from mold or damage.
  • Planting Depth: Typically, plant bulbs 6–8 inches deep, depending on bulb size. Larger bulbs should be planted deeper for stability.
  • Spacing: Space bulbs 8–12 inches apart to allow room for growth and airflow.
  • Orientation: Position bulbs with the pointed end up for proper shoot emergence.
  • Timing: Plant lilies in early spring or fall, depending on your climate. In cooler zones, spring planting ensures blooms during summer.

After planting, water bulbs thoroughly to help settle the soil and initiate root growth.


5. Watering and Mulching

Consistent watering and proper mulching support healthy lilies:

  • Watering: Lilies need deep, regular watering, especially during dry periods. Avoid overhead watering to reduce the risk of fungal diseases.
  • Mulching: Apply a 2–3 inch layer of organic mulch (straw, bark, or compost) around the base to retain moisture, regulate soil temperature, and suppress weeds.
  • Avoid Waterlogging: Ensure mulch does not trap excessive water around the bulb base.

Proper water management ensures lilies develop strong stems and abundant blooms without succumbing to rot or disease.


6. Fertilization for Abundant Blooms

Nutrient-rich soil is essential for lilies to produce large, vibrant flowers:

  • Balanced Fertilizer: Use a fertilizer with a balanced ratio of nitrogen, phosphorus, and potassium (NPK 10-10-10 or 14-14-14).
  • Timing: Apply fertilizer in early spring as shoots emerge and again when flower buds form.
  • Organic Alternatives: Compost tea, bone meal, or well-rotted manure provides slow-release nutrients.
  • Avoid Excess Nitrogen: Too much nitrogen promotes leafy growth at the expense of flowers.

Regular fertilization ensures strong stems, larger blooms, and prolonged flowering.


7. Supporting Stems and Preventing Damage

Tall lilies often require support to prevent bending or breakage:

  • Stakes: Use bamboo stakes or garden supports, securing stems with soft ties.
  • Wind Protection: Plant lilies in areas sheltered from strong winds.
  • Spacing: Avoid overcrowding to prevent stems from leaning on each other.

Proper support keeps your summer display upright and visually striking.


8. Pest and Disease Management

Lilies are susceptible to pests and diseases, but preventive care can keep them healthy:

  • Common Pests: Aphids, lily beetles, and slugs can damage leaves and flowers. Regular inspection and handpicking pests are effective.
  • Diseases: Fungal diseases like botrytis blight cause spotting and stem rot. Ensure proper spacing, good air circulation, and avoid overhead watering.
  • Organic Solutions: Neem oil, insecticidal soaps, or biological controls help manage pests without harming the environment.

Early intervention is key to maintaining a flawless summer display.


9. Deadheading and Pruning

Maintaining lilies during bloom improves longevity and encourages new growth:

  • Deadheading: Remove spent flowers to redirect energy to bulbs for next season’s growth.
  • Pruning: Cut back damaged or yellowing leaves but leave healthy foliage, as it feeds the bulb for next year.
  • Post-Bloom Care: After flowering, allow foliage to die back naturally before cutting down completely.

Proper maintenance ensures that lilies come back year after year with stunning summer blooms.


10. Container and Specialty Displays

Lilies also thrive in containers and special garden arrangements:

  • Containers: Use deep pots with well-draining soil and regular feeding.
  • Mixed Planting: Combine lilies with complementary plants like hostas, ferns, or annuals for color contrast.
  • Focal Points: Group tall lilies together in strategic garden locations to create dramatic summer displays.
  • Cut Flowers: Lilies make excellent cut flowers, extending their beauty indoors.

Containers and focal planting allow flexibility in design and enhance the visual impact of your summer garden.


11. Tips for Maximizing Bloom Impact

  • Plant in Odd Numbers: Groups of 3, 5, or 7 create a natural, visually appealing look.
  • Color Harmony: Choose colors that complement your garden or create vibrant contrasts.
  • Layering Heights: Plant shorter flowers around the base to highlight the tall lilies.
  • Scent Consideration: Place fragrant varieties near pathways or seating areas for maximum enjoyment.

By applying these design principles, your lilies will stand out and make a memorable summer display.


Conclusion

Lilies are among the most rewarding garden plants for summer displays. With proper site selection, soil preparation, planting, watering, fertilization, and maintenance, gardeners can achieve spectacular blooms that last throughout the season. By understanding their varieties, providing support, preventing pests and diseases, and planning arrangements thoughtfully, lilies can transform any garden into a striking, colorful oasis. Whether planted in borders, containers, or mixed displays, these elegant flowers bring height, fragrance, and drama to summer gardens, creating an unforgettable seasonal spectacle.