How to Grow Chamomile for Teas and Fragrance

How to Grow Chamomile for Teas and Fragrance

Chamomile is a timeless herb cherished for its soothing teas, calming fragrance, and therapeutic properties. With delicate, daisy-like flowers and a gentle apple-like scent, chamomile adds both beauty and utility to gardens, pots, and even balconies. Its flowers are commonly used to make herbal teas, infusions, skincare products, and aromatic remedies. Growing chamomile is relatively easy, making it an ideal choice for beginner and experienced gardeners alike.

This guide provides detailed information on choosing varieties, planting techniques, soil preparation, care, harvesting, and using chamomile for teas and fragrance.


Why Grow Chamomile?

Chamomile offers multiple benefits beyond its charming appearance:

  1. Herbal Tea: Chamomile tea is known for promoting relaxation, aiding digestion, and supporting sleep.
  2. Fragrance: The gentle scent of chamomile enhances garden aroma and attracts pollinators like bees and butterflies.
  3. Medicinal Uses: Chamomile flowers have anti-inflammatory, antibacterial, and calming properties.
  4. Low Maintenance: Chamomile thrives with minimal care, tolerating poor soil and partial shade.
  5. Companion Planting: Chamomile improves the growth and flavor of nearby vegetables, herbs, and flowers.

Growing chamomile combines practical utility with aesthetic charm, making it a multifunctional garden plant.


Step 1: Selecting the Right Chamomile Variety

There are two main types of chamomile to grow:

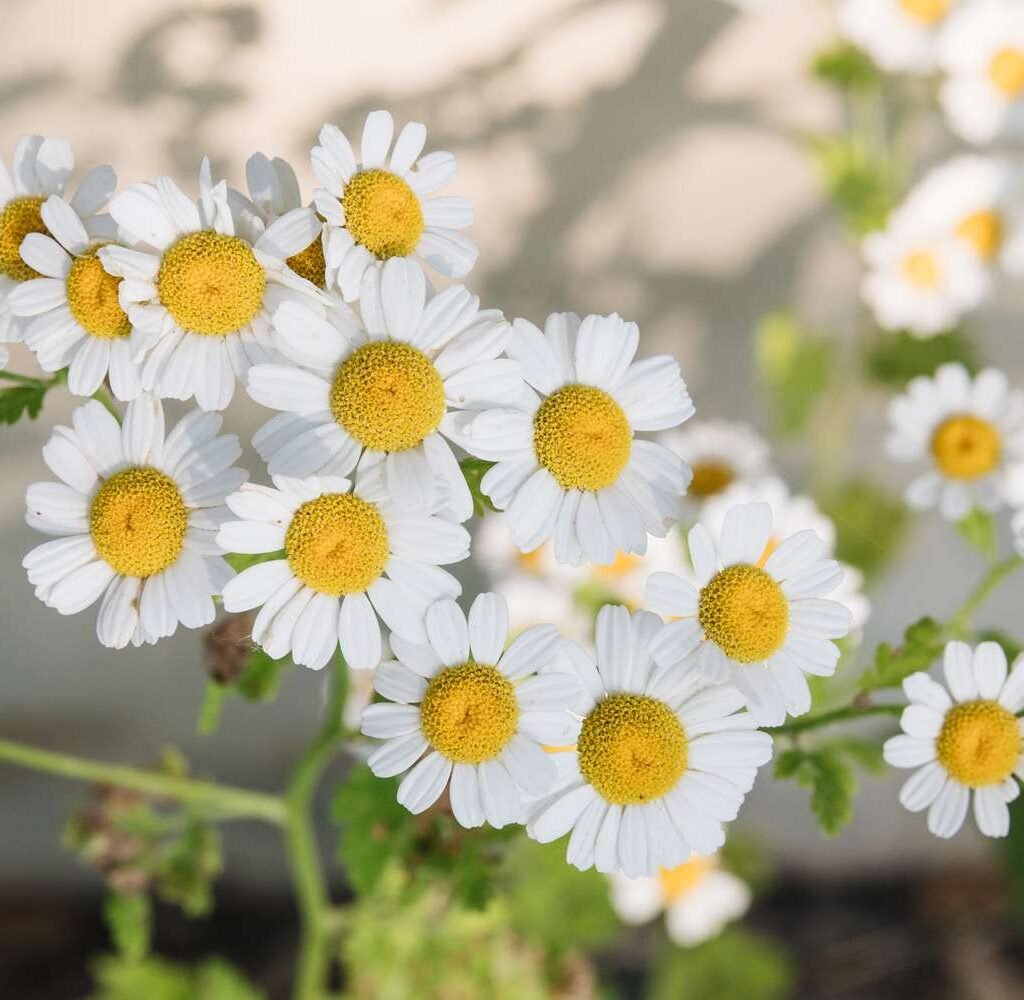
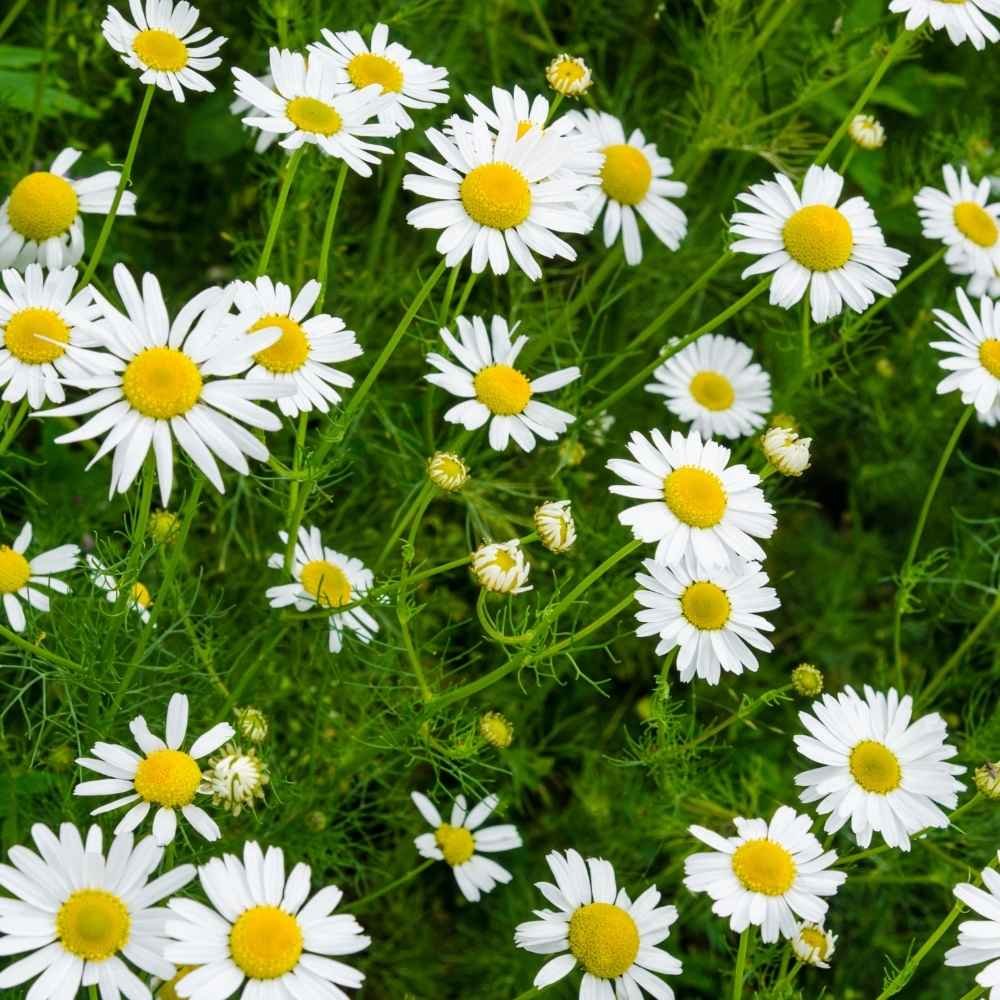
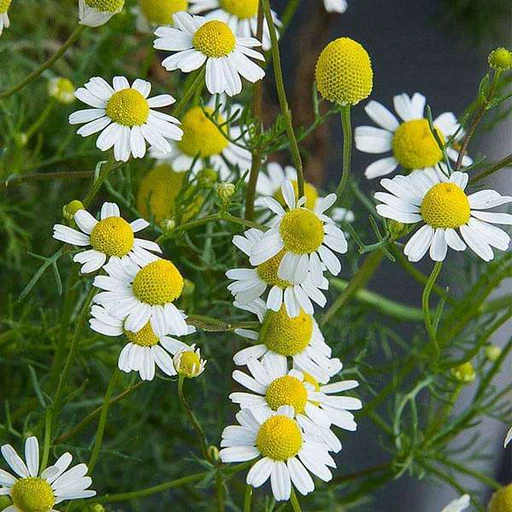
  1. German Chamomile (Matricaria chamomilla):
    • Annual herb with fine, feathery foliage and small, daisy-like flowers.
    • Ideal for teas due to its strong flavor and high flower yield.
    • Grows 12–24 inches tall.
  2. Roman Chamomile (Chamaemelum nobile):
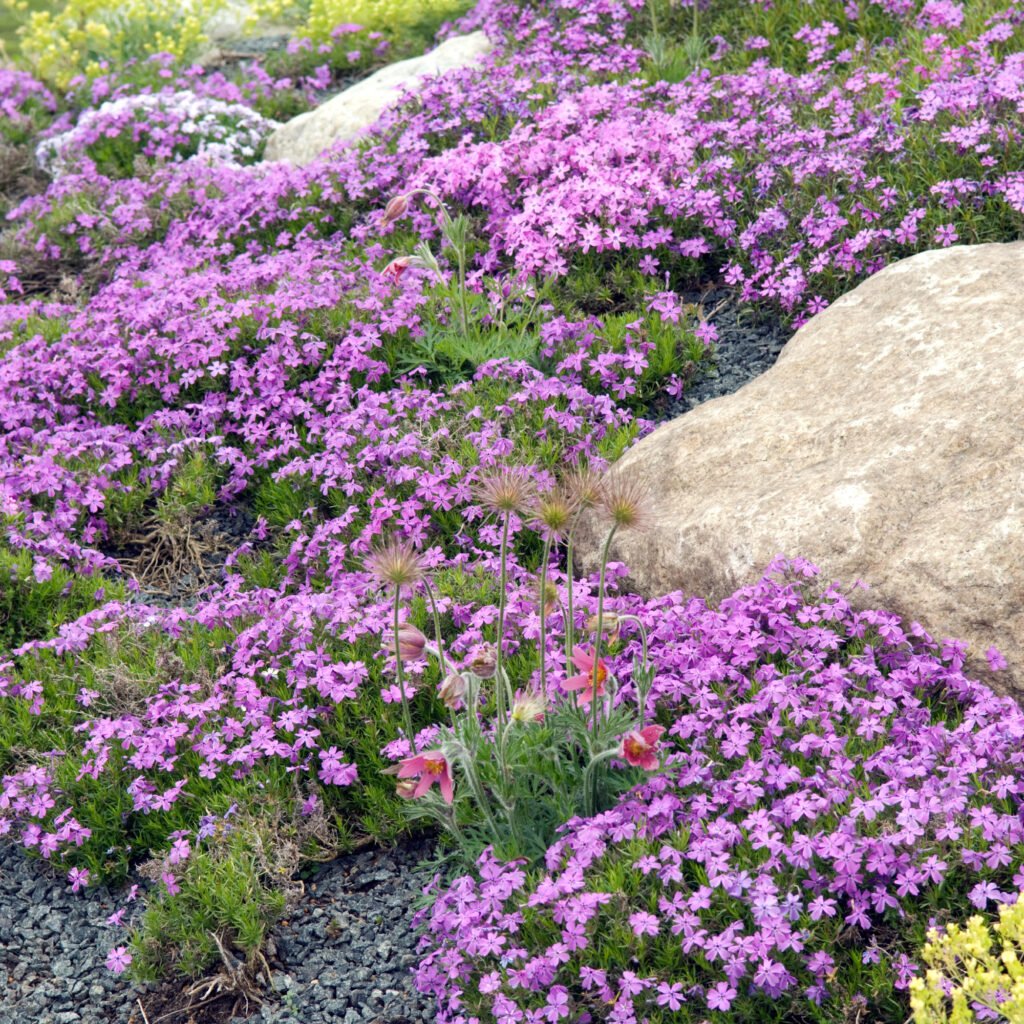
    • Perennial with creeping growth, making it suitable as a ground cover.
    • Flowers are less potent than German chamomile but highly fragrant.
    • Stays low, around 6–12 inches in height.

Choose a variety based on purpose and garden space—German chamomile for herbal teas, Roman chamomile for fragrance and ornamental use.


Step 2: Choosing the Ideal Location

Chamomile thrives in sunny locations with well-draining soil:

  • Sunlight: 4–6 hours of direct sunlight for optimal growth. Partial shade is acceptable, especially in hotter climates.
  • Soil: Prefers sandy or loamy soil with good drainage. Avoid heavy clay soils, which may retain water and cause root rot.
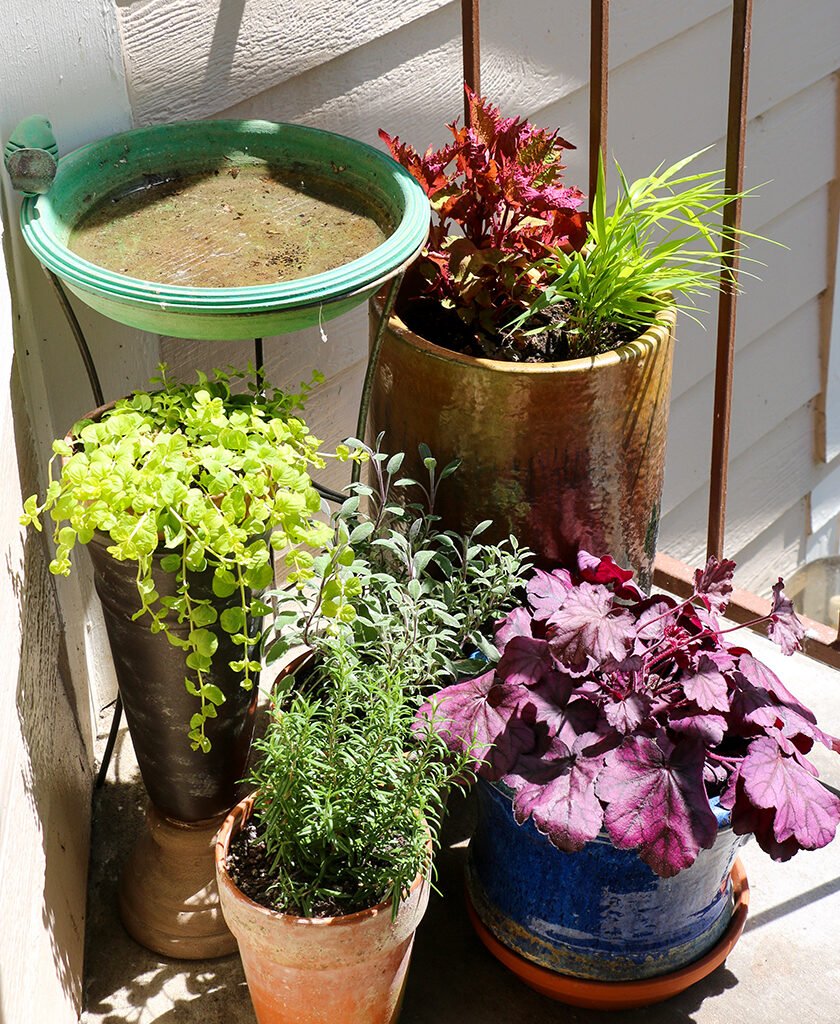
  • Containers: Chamomile grows well in pots, window boxes, and raised beds, making it suitable for urban gardening.
  • Spacing: Space plants 6–12 inches apart to allow air circulation and prevent overcrowding.

The right location ensures healthy foliage, abundant blooms, and potent aroma.


Step 3: Soil Preparation

Healthy soil is key to chamomile success:

  1. Loosen Soil: Dig 6–8 inches deep and remove weeds and rocks.
  2. Amend Soil: Add compost or organic matter to enrich nutrient content while maintaining drainage.
  3. pH Level: Chamomile prefers slightly acidic to neutral soil (pH 6–7).
  4. Raised Beds: In wetter climates, consider raised beds or containers to prevent root rot.

Well-prepared soil supports strong roots and abundant flowering, crucial for both tea-making and fragrance.


Step 4: Planting Chamomile

Chamomile can be grown from seeds, seedlings, or divisions:

  • From Seeds:
    • Sow seeds directly outdoors in spring after the last frost.
    • Press seeds lightly into the soil; do not cover them completely, as they need light to germinate.
    • Germination occurs in 7–14 days at temperatures of 60–70°F (15–21°C).
  • From Seedlings:
    • Transplant seedlings once they have 2–3 true leaves.
    • Water lightly and maintain spacing to prevent overcrowding.
  • From Divisions (Roman Chamomile):
    • Divide established clumps in spring or fall.
    • Replant divisions in prepared soil for quicker growth.

Proper planting ensures healthy root development and vigorous flowering.


Step 5: Watering and Fertilization

Chamomile is relatively drought-tolerant but benefits from consistent care:

  • Watering:
    • Keep soil evenly moist during germination.
    • Once established, water moderately, allowing soil to dry between watering.
    • Avoid overwatering, as it can lead to fungal diseases.
  • Fertilization:
    • Chamomile prefers low fertility; excessive fertilizer may reduce flower production.
    • Use compost or a mild balanced fertilizer sparingly during the growing season.

Balanced watering and light fertilization ensure fragrant blooms and healthy foliage.


Step 6: Pruning and Maintenance

Regular maintenance enhances growth and prolongs bloom:

  • Deadheading: Remove spent flowers to encourage continuous flowering.
  • Trimming Foliage: Light trimming prevents legginess and maintains compact growth.
  • Weed Control: Keep surrounding soil free of weeds to reduce competition for nutrients and water.
  • Pest Management: Chamomile is relatively pest-resistant but may occasionally attract aphids; use neem oil or soapy water as a natural remedy.

Consistent care ensures long-lasting blooms and a tidy, aromatic garden display.


Step 7: Harvesting Chamomile

Harvesting at the right time preserves aroma and flavor:

  • Flowers: Pick chamomile flowers in the morning when dew has dried but before the sun becomes too hot.
  • Frequency: Harvest throughout the blooming season to encourage new flowers.
  • Drying:
    • Spread flowers on a paper tray in a cool, dark, and well-ventilated space.
    • Store dried flowers in airtight containers away from light and moisture.
  • Leaves: While less commonly used, leaves can also be harvested for fragrance or culinary use.

Proper harvesting techniques maximize potency for teas and aromatic purposes.


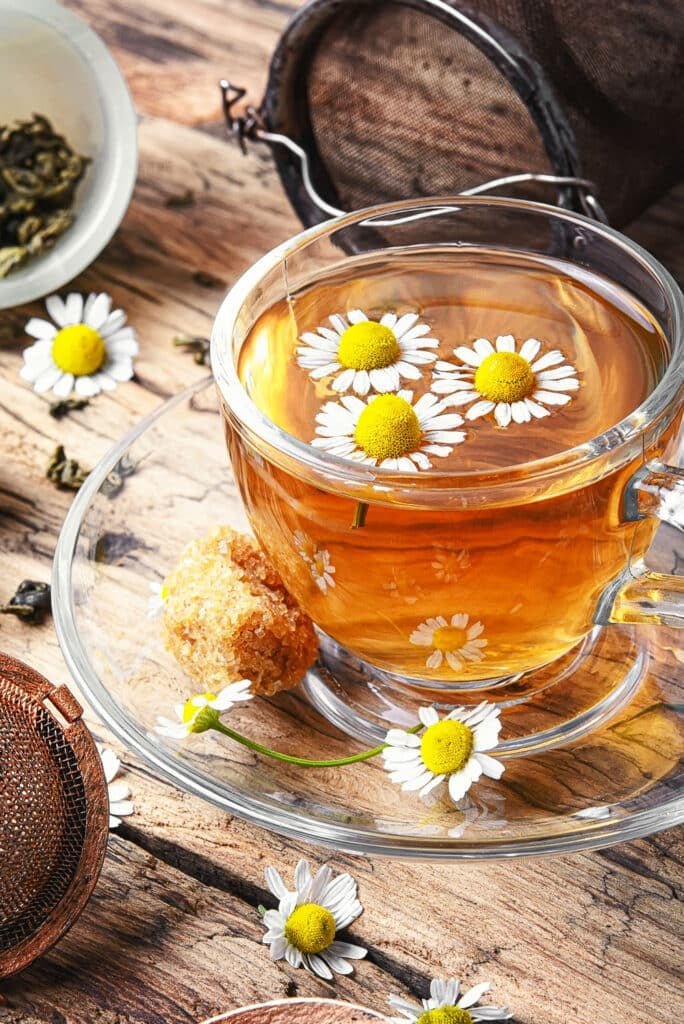
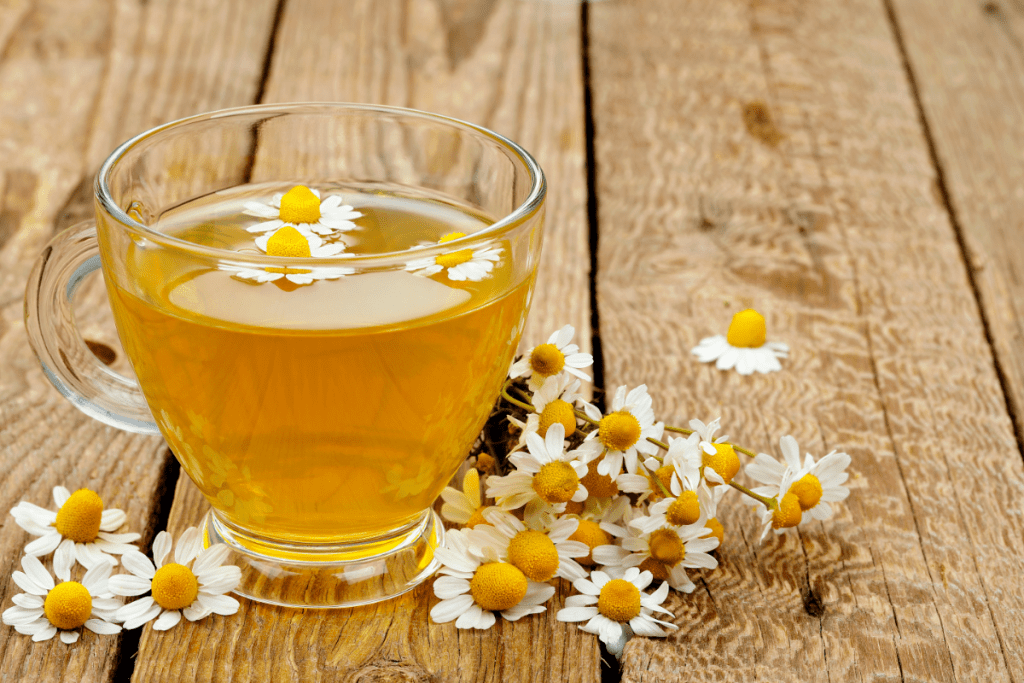
Step 8: Using Chamomile for Teas and Fragrance

Chamomile is versatile and can be used in multiple ways:

  1. Chamomile Tea:
    • Use 1–2 teaspoons of dried flowers per cup of hot water.
    • Steep 5–10 minutes, strain, and enjoy calming, aromatic tea.
    • Optionally, add honey or lemon for enhanced flavor.
  2. Aromatic Use:
    • Fresh or dried flowers can be added to sachets, potpourris, or herbal pillows.
    • Roman chamomile is ideal for garden borders due to its fragrant foliage.
  3. Skin Care:
    • Chamomile infusions can be used as gentle facial toners or added to baths for a soothing effect.

Growing chamomile allows gardeners to combine functional utility with sensory enjoyment, providing multiple practical and decorative uses.


Step 9: Companion Planting with Chamomile

Chamomile is an excellent companion plant:

  • Enhances Growth: Promotes the growth and flavor of vegetables like cabbage, onions, and herbs such as parsley.
  • Attracts Beneficial Insects: Bees, hoverflies, and predatory wasps are drawn to its flowers, helping with pollination and natural pest control.
  • Protects Plants: Chamomile can improve overall garden health and act as a natural pest deterrent.

Strategic companion planting maximizes both garden productivity and aesthetics.


Step 10: Winter Care for Chamomile

Chamomile requires some protection in colder climates:

  • German Chamomile: As an annual, it dies after flowering; collect seeds for next season.
  • Roman Chamomile: Perennial type may need mulching or container relocation indoors to survive frost.
  • Indoor Cultivation: Both types can be grown in pots indoors during winter for continuous aroma and small-scale harvesting.

Proper winter care ensures perennial chamomile survives and provides flowers year after year.


Benefits of Growing Chamomile

  1. Therapeutic Use: Chamomile tea and infusions promote relaxation and wellness.
  2. Garden Aesthetics: Adds soft, daisy-like flowers and feathery foliage.
  3. Pollinator-Friendly: Attracts bees and other beneficial insects.
  4. Low Maintenance: Tolerates moderate drought and poor soil conditions.
  5. Sustainable Gardening: Reduces dependence on commercial herbs and enhances homegrown resources.

Chamomile is both a functional and decorative herb, enriching gardens in multiple ways.


Conclusion

Growing chamomile is a rewarding experience for gardeners seeking both beauty and utility. From selecting the right variety and preparing the soil to planting, watering, and harvesting, every step contributes to healthy, fragrant blooms. Whether you grow German chamomile for aromatic teas or Roman chamomile for ground cover and fragrance, this herb offers calming, culinary, and ornamental benefits.

With careful care, companion planting, and seasonal attention, chamomile can become a central feature in your garden, providing continuous enjoyment, wellness benefits, and natural fragrance throughout the growing season. By cultivating this versatile herb, gardeners create a sustainable, visually appealing, and multi-purpose garden space that enhances both lifestyle and landscape aesthetics.

8 Perennials That Love Wet Soil and Pond Edges

8 Perennials That Love Wet Soil and Pond Edges

Gardens with ponds, streams, or areas of naturally wet soil can be both beautiful and challenging to plant. While many garden plants struggle in consistently moist conditions, certain perennials thrive in wet soil and along pond edges, creating lush, vibrant, and low-maintenance landscapes. These plants not only tolerate moisture but also help stabilize soil, prevent erosion, and enhance habitat for wildlife such as birds, frogs, and pollinators.

This guide highlights eight perennials that flourish in wet soil and pond-edge environments, along with detailed planting and care tips for a thriving waterside garden.


1. Marsh Marigold (Caltha palustris)

Why It Loves Wet Soil

  • Marsh Marigold is a native wetland plant that thrives in consistently moist or even shallow standing water.
  • Produces bright yellow flowers in early spring, adding early color to ponds and wet gardens.
  • Attracts early pollinators, such as bees emerging in spring.

Care Tips

  • Sunlight: Full sun to partial shade.
  • Soil: Wet, rich, and consistently moist. Can grow in shallow water along pond edges.
  • Maintenance: Low; remove dead foliage in late spring.
  • Planting Tip: Plant in clusters to create a bold splash of yellow at the water’s edge.

Bonus: Its vibrant blooms brighten wet areas that are otherwise difficult to plant.


2. Cardinal Flower (Lobelia cardinalis)

Why It Loves Wet Soil

  • Cardinal Flower is a tall, striking perennial with brilliant red blooms that attract hummingbirds and butterflies.
  • Thrives in moist soil or shallow water, making it perfect for pond edges.
  • Provides vertical interest in wetland garden designs.

Care Tips

  • Sunlight: Full sun to partial shade.
  • Soil: Rich, consistently moist soil; tolerates shallow water.
  • Maintenance: Cut back spent blooms to encourage extended flowering.
  • Planting Tip: Pair with ferns or grasses for contrast and texture.

Bonus: Its intense red flowers create a focal point for water gardens.


3. Blue Flag Iris (Iris versicolor)

Why It Loves Wet Soil

  • Blue Flag Iris is a native iris that thrives along streams, ponds, and marshes.
  • Produces vivid blue-violet flowers in late spring, attracting bees and butterflies.
  • Spreads easily, forming dense clumps that stabilize pond edges.

Care Tips

  • Sunlight: Full sun to partial shade.
  • Soil: Moist, acidic to neutral soil; tolerates shallow water.
  • Maintenance: Divide clumps every 3–4 years to prevent overcrowding.
  • Planting Tip: Plant in groups to maximize visual impact.

Bonus: Its lacy foliage and striking blooms enhance both naturalistic and formal water gardens.


4. Marsh Hibiscus (Hibiscus moscheutos)

Why It Loves Wet Soil

  • Marsh Hibiscus produces large, tropical-looking flowers in shades of red, pink, and white.
  • Thrives in wet soil, pond margins, and damp meadows.
  • Attracts pollinators, including bees and hummingbirds.

Care Tips

  • Sunlight: Full sun for abundant blooms.
  • Soil: Moist, fertile, well-draining wet soil; tolerates shallow water.
  • Maintenance: Cut stems to the ground in late fall; mulch in winter for protection.
  • Planting Tip: Ideal as a tall backdrop behind shorter wetland plants.

Bonus: Its dramatic flowers add a tropical touch to wet gardens.


5. Swamp Milkweed (Asclepias incarnata)

Why It Loves Wet Soil

  • Swamp Milkweed is a pollinator-friendly native that thrives in moist soil or near water.
  • Produces clusters of pink flowers in summer, attracting butterflies, especially monarchs.
  • Supports wildlife and biodiversity in wetland gardens.

Care Tips

  • Sunlight: Full sun to partial shade.
  • Soil: Moist to wet soil; tolerates occasional shallow flooding.
  • Maintenance: Remove spent blooms to encourage longer flowering; cut back in fall.
  • Planting Tip: Combine with native grasses for a natural, meadow-like edge.

Bonus: This plant provides nectar and host habitat, supporting pollinator conservation.


6. Joe-Pye Weed (Eutrochium purpureum)

Why It Loves Wet Soil

  • Joe-Pye Weed is a tall, sturdy perennial that produces mauve-pink flower clusters in late summer.
  • Tolerates wet soil and pond margins, making it ideal for low-lying areas.
  • Attracts butterflies, bees, and other pollinators, extending the season of activity in the garden.

Care Tips

  • Sunlight: Full sun to partial shade.
  • Soil: Moist, fertile soil; tolerates occasional standing water.
  • Maintenance: Cut back in late winter or early spring.
  • Planting Tip: Use as a vertical accent to create layers in wetland gardens.

Bonus: Its height and color make Joe-Pye Weed a natural backdrop for shorter perennials.


7. Marsh Marigold Cousin: Ligularia (Ligularia dentata)

Why It Loves Wet Soil

  • Ligularia is known for its large, bold foliage and bright yellow flowers.
  • Thrives in wet, shaded areas, including pond edges and rain gardens.
  • Its broad leaves provide dramatic texture and visual contrast with smaller flowers.

Care Tips

  • Sunlight: Partial shade to full shade.
  • Soil: Moist, humus-rich soil; keep consistently damp.
  • Maintenance: Remove spent flower stalks; divide every 3–4 years.
  • Planting Tip: Combine with ferns or hostas for moisture-loving shade gardens.

Bonus: Ligularia adds bold foliage interest, even when not in bloom.


8. Siberian Iris (Iris sibirica)

Why It Loves Wet Soil

  • Siberian Iris produces slender, elegant flowers in shades of blue, purple, or white.
  • Tolerates wet soil and occasional flooding, making it perfect for ponds and streams.
  • Forms dense clumps of grass-like foliage, stabilizing edges and preventing erosion.

Care Tips

  • Sunlight: Full sun to partial shade.
  • Soil: Moist, fertile, well-draining soil; tolerates standing water.
  • Maintenance: Divide clumps every 3–4 years to maintain vigor.
  • Planting Tip: Plant in clusters for a mass of graceful blooms along water edges.

Bonus: Its slender form and elegant blooms complement bolder wetland plants.


General Tips for Planting Perennials in Wet Soil and Pond Edges

  1. Group Plants by Moisture Preference: Ensure plants with similar water requirements are planted together for optimal growth.
  2. Provide Layers: Combine tall perennials like Joe-Pye Weed with mid-height plants like Cardinal Flower and low groundcovers for visual depth.
  3. Prevent Erosion: Dense plantings stabilize pond edges and reduce soil loss during heavy rains.
  4. Encourage Wildlife: Include pollinator-friendly plants such as Swamp Milkweed and Blue Flag Iris to attract butterflies, bees, and birds.
  5. Maintain Soil Health: Mulch around roots to retain moisture and reduce weeds.
  6. Regular Pruning: Remove dead foliage and spent flowers to maintain plant health and appearance.

Conclusion: Create a Lush Waterside Garden

Gardens with wet soil or ponds can be vibrant, wildlife-friendly spaces when planted with the right perennials. By including Marsh Marigold, Cardinal Flower, Blue Flag Iris, Marsh Hibiscus, Swamp Milkweed, Joe-Pye Weed, Ligularia, and Siberian Iris, gardeners can enjoy bold colors, diverse textures, and year-round beauty along pond edges.

These moisture-loving perennials not only enhance the aesthetic appeal of wet garden areas but also support local ecosystems, providing nectar, shelter, and habitat for pollinators and aquatic life.

With proper planting, spacing, and care, wet-soil gardens can thrive naturally, creating a peaceful, picturesque landscape that combines ornamental beauty and ecological benefits. These perennials make pond edges and damp garden areas a focal point of color and life, ensuring your waterside garden remains captivating season after season.

7 Flowers That Repel Garden Pests Naturally

7 Flowers That Repel Garden Pests Naturally

Gardeners know that maintaining a healthy, thriving garden often involves battling pests. While chemical pesticides are effective, they can harm beneficial insects, pollinators, and the environment. A more sustainable approach is to use flowers that naturally repel pests. Certain plants produce scents, oils, or chemicals that deter insects and other garden nuisances. By integrating these flowers into your garden design, you can protect your plants while enhancing beauty and biodiversity.

This guide explores seven effective pest-repelling flowers, their mechanisms, planting tips, companion planting strategies, and care for natural garden protection.


1. Marigolds (Tagetes spp.)

Marigolds are among the most popular pest-repelling flowers, known for their vibrant orange, yellow, and red blooms.

  • Pests Repelled: Nematodes, aphids, whiteflies, and certain beetles.
  • Mechanism: Marigolds produce compounds called thiophenes, which repel soil-dwelling nematodes and certain insects.
  • Planting Tips:
    • Plant around vegetable beds, especially tomatoes, peppers, and beans.
    • Sow seeds directly outdoors after the last frost, or start indoors 6–8 weeks prior.
    • Regular deadheading encourages continuous blooms.
  • Companion Strategy: Interplant with tomatoes or cucumbers for both pest protection and visual appeal.

Marigolds offer color, fragrance, and functional pest control, making them a garden staple.


2. Nasturtiums (Tropaeolum majus)

Nasturtiums are easy-to-grow flowers with bright red, yellow, or orange blooms that act as trap crops for pests.

  • Pests Repelled: Aphids, whiteflies, squash bugs, and cucumber beetles.
  • Mechanism: The plant attracts pests away from vegetables, reducing damage. Its leaves also contain compounds that repel some insects.
  • Planting Tips:
    • Sow seeds directly in the garden after frost, spacing plants 10–12 inches apart.
    • Ideal for edges of vegetable beds or containers.
    • Provide moderate watering and full sun.
  • Companion Strategy: Plant near cucumbers, squash, and brassicas to protect them naturally.

Nasturtiums are edible, decorative, and serve as both a deterrent and a trap, providing multifunctional benefits.


3. Lavender (Lavandula spp.)

Lavender is not only fragrant but also a natural insect deterrent, making it ideal for ornamental and functional gardening.

  • Pests Repelled: Moths, fleas, flies, and mosquitoes.
  • Mechanism: The essential oils in lavender emit a strong scent that confuses or repels many insects.
  • Planting Tips:
    • Prefer full sun and well-draining soil.
    • Prune annually to maintain bushy growth and prevent woody stems.
    • Drought-tolerant once established.
  • Companion Strategy: Plant near roses, tomatoes, or in herb gardens to repel pests and attract pollinators.

Lavender adds fragrance, texture, and pest protection, enhancing both aesthetic and functional garden value.


4. Chrysanthemums (Chrysanthemum spp.)

Chrysanthemums, or mums, are classic flowers with natural insecticidal properties.

  • Pests Repelled: Aphids, mites, ants, Japanese beetles, and other common insects.
  • Mechanism: They contain pyrethrins, a compound used in natural insecticides.
  • Planting Tips:
    • Plant in well-draining soil with full sun.
    • Water at the base to prevent fungal diseases on foliage.
    • Deadhead spent blooms to encourage new flowers.
  • Companion Strategy: Place chrysanthemums near vegetable beds or flower borders to reduce pest activity.

Chrysanthemums offer beauty and functional pest control, ideal for mixed flower and vegetable gardens.


5. Petunias (Petunia spp.)

Petunias are bright, easy-to-grow annuals that deter several garden pests naturally.

  • Pests Repelled: Aphids, tomato hornworms, leafhoppers, and certain caterpillars.
  • Mechanism: The scent of petunias acts as a natural deterrent to many common garden insects.
  • Planting Tips:
    • Sow seeds indoors 8–10 weeks before the last frost or plant transplants outside.
    • Prefer full sun and fertile, well-draining soil.
    • Regular deadheading encourages continuous blooms.
  • Companion Strategy: Plant near tomatoes, peppers, or herbs to reduce pest pressure.

Petunias combine ornamental appeal with practical pest management, making them versatile garden additions.


6. Basil Flowers (Ocimum basilicum)

Basil is well-known as an aromatic herb, but its flowers and leaves also repel various garden pests.

  • Pests Repelled: Mosquitoes, flies, aphids, and tomato hornworms.
  • Mechanism: The strong scent of basil masks the odor of nearby plants, confusing pests.
  • Planting Tips:
    • Sow seeds indoors 6–8 weeks before frost or direct sow in warm soil.
    • Provide full sun and consistent watering.
    • Pinch back flowering tips to prolong leaf production.
  • Companion Strategy: Plant near tomatoes, peppers, or garden herbs to naturally reduce pest infestations.

Basil adds culinary value, fragrance, and natural pest control, making it a multifunctional garden plant.


7. Calendula (Calendula officinalis)

Calendula, or pot marigold, is a cheerful, hardy flower with multiple pest-repelling benefits.

  • Pests Repelled: Aphids, whiteflies, nematodes, and certain beetles.
  • Mechanism: Calendula releases compounds that repel insects and attracts beneficial predators like ladybugs.
  • Planting Tips:
    • Sow seeds directly in the garden after frost or start indoors 4–6 weeks early.
    • Prefers full sun and well-draining soil.
    • Deadhead regularly to encourage continuous blooms.
  • Companion Strategy: Plant near vegetables such as carrots, tomatoes, or cucumbers to protect them naturally.

Calendula provides edible flowers, visual charm, and ecological pest control, making it ideal for integrated garden design.


Step 8: Companion Planting for Maximum Protection

Using pest-repelling flowers strategically enhances their effectiveness:

  1. Border Planting: Place pest-repelling flowers around vegetable beds to create a natural barrier.
  2. Interplanting: Mix flowers among vegetables to confuse pests and attract beneficial insects.
  3. Layering Heights: Use taller flowers like chrysanthemums or lavender at the back and shorter flowers like calendula or nasturtiums at the front.
  4. Continuous Blooms: Plant combinations with staggered bloom times for year-round pest protection.

Companion planting creates a harmonious, pest-resistant ecosystem in your garden.


Step 9: Maintenance for Pest-Repelling Flowers

Healthy flowers are more effective at deterring pests:

  • Watering: Keep soil consistently moist but avoid waterlogging.
  • Pruning: Remove faded flowers and dead stems to promote growth.
  • Fertilization: Use organic compost or balanced fertilizers to support strong, healthy plants.
  • Pest Monitoring: Ironically, pest-repelling flowers can still attract pests; inspect regularly and treat as needed with natural remedies.

Proper care ensures the flowers continue to repel pests while enhancing garden beauty.


Benefits of Using Pest-Repelling Flowers

  1. Environmental Safety: Reduces the need for chemical pesticides.
  2. Attracts Beneficial Insects: Pollinators and predators of harmful pests are drawn to these flowers.
  3. Visual Appeal: Adds color, texture, and fragrance to gardens.
  4. Multi-Purpose: Many flowers are edible or aromatic, adding culinary and sensory benefits.
  5. Sustainable Gardening: Promotes a balanced garden ecosystem and long-term plant health.

Pest-repelling flowers combine ecological, aesthetic, and practical benefits, making them invaluable for sustainable gardens.


Conclusion

Integrating flowers that naturally repel pests is a smart, sustainable strategy for gardeners seeking healthy, thriving gardens without relying on chemicals. Marigolds, nasturtiums, lavender, chrysanthemums, petunias, basil, and calendula not only deter harmful insects but also enhance color, fragrance, and biodiversity.

By combining strategic companion planting, seasonal bloom planning, and attentive care, gardeners can enjoy lush, productive gardens that remain vibrant and pest-resistant year-round. These seven flowers prove that beauty and functionality can coexist, creating a thriving, eco-friendly, and visually stunning outdoor space.

How to Grow Tulips in Pots Indoors for Winter Blooms

How to Grow Tulips in Pots Indoors for Winter Blooms

Tulips are one of the most beloved spring flowers, celebrated for their vibrant colors and elegant shapes. While tulips are traditionally planted outdoors for spring blooms, they can also be grown indoors in pots, allowing gardeners to enjoy their beauty during the winter months. Growing tulips indoors requires careful planning, proper potting techniques, and a bit of patience, but the reward is a stunning display of early-season color and fragrance.

This guide provides detailed instructions for growing tulips in pots indoors, ensuring healthy growth and beautiful winter blooms.


Understanding Indoor Tulip Growth

Tulips are bulbous perennials, meaning they grow from bulbs that store nutrients to support flowering. When grown indoors, tulip bulbs require a period of cold dormancy, known as vernalization, to stimulate flowering. This mimics winter conditions and prepares the bulbs for indoor spring-like blooms.

Key factors for indoor tulip success include:

  • Choosing the right bulbs: Select firm, healthy bulbs free of mold or soft spots.
  • Providing proper chilling: Bulbs need 12–16 weeks of cold temperatures (35–48°F / 1–9°C).
  • Using well-draining soil: Tulips dislike soggy soil, which can cause bulbs to rot.
  • Managing light and temperature: Adequate light and moderate indoor temperatures promote strong growth.

Step 1: Choosing the Right Tulip Bulbs

Not all tulip varieties are suitable for indoor forcing. Choose “early bloom” or “forceable” varieties, which are bred for container growth and short-day forcing. Popular options include:

  • ‘Apeldoorn’ – classic red tulip with strong stems
  • ‘Ice Cream’ – cream-colored blooms with pink tips
  • ‘Angelique’ – double-flowered pink tulip
  • ‘Queen of Night’ – dramatic deep purple blooms

When purchasing bulbs:

  • Select large, firm bulbs; larger bulbs generally produce stronger flowers.
  • Avoid bulbs that are soft, moldy, or shriveled, as they are unlikely to flower.

Step 2: Preparing Bulbs for Chilling (Vernalization)

Tulip bulbs require a cold period to stimulate flowering. To simulate winter indoors:

  1. Place bulbs in a paper bag with slightly damp peat moss or sand.
  2. Store in the refrigerator at 35–48°F (1–9°C) for 12–16 weeks.
  3. Keep bulbs away from fruits like apples or bananas, which release ethylene gas that can damage them.

Some gardeners choose to pre-chill bulbs purchased from nurseries, which often have already undergone vernalization.


Step 3: Selecting Pots and Soil

For indoor tulips:

  • Pots: Use containers with drainage holes to prevent waterlogging.
  • Size: Choose a pot 3–4 inches wider than the bulb cluster. Tulips prefer snug planting, so bulbs can support each other.
  • Soil: Use well-draining potting mix, ideally mixed with sand or perlite for aeration. Avoid heavy garden soil.

Step 4: Planting Tulip Bulbs in Pots

  1. Layer drainage material: Place a layer of pebbles or small stones at the bottom to improve drainage.
  2. Add soil: Fill the pot with soil, leaving enough space for bulbs.
  3. Position bulbs: Place bulbs pointy side up, with the flat root side down. Bulbs can be planted close together but not touching.
  4. Cover with soil: Add enough soil to cover bulbs completely (about 1–2 inches above the bulb tops).
  5. Water lightly: Moisten soil without making it soggy.

Tip: Planting multiple bulbs together creates a dense, vibrant display reminiscent of outdoor tulip beds.


Step 5: Chilling Bulbs in Pots

After planting, tulip bulbs need to remain in a cold environment for root development:

  • Place the potted bulbs in a cool, dark location (refrigerator, garage, or unheated basement) for 12–16 weeks.
  • Maintain temperatures 35–48°F (1–9°C).
  • Water sparingly, just enough to keep soil slightly moist.

This chilling period is crucial for stimulating strong flower stems and vibrant blooms.


Step 6: Transitioning to Indoor Warmth

Once chilling is complete:

  1. Move pots indoors to a bright, cool location (60–65°F / 15–18°C) with indirect sunlight.
  2. Gradually increase light exposure to encourage stem growth.
  3. Avoid direct heat sources (radiators, vents), which can stress the bulbs.

Tulip shoots will begin to emerge within 1–2 weeks, signaling the start of flowering.


Step 7: Caring for Indoor Tulips

Proper care ensures long-lasting, vibrant blooms:

  • Light: Place near a south- or west-facing window to provide bright, indirect light. Tulips may stretch if light is insufficient.
  • Watering: Keep soil moderately moist. Avoid waterlogging, which can cause bulb rot.
  • Fertilizing: Use a diluted, balanced liquid fertilizer every 2–3 weeks once shoots appear.
  • Temperature: Maintain cool indoor temperatures (60–65°F / 15–18°C) to prolong bloom life.

Tip: Rotate pots occasionally to ensure even light exposure and prevent stems from leaning.


Step 8: Extending Bloom Life

  • Remove wilted flowers promptly to prevent energy loss.
  • Do not cut foliage prematurely, as leaves feed the bulb for next year’s blooms.
  • For a longer display, maintain cool indoor temperatures and bright, indirect light.

Indoor tulip blooms typically last 2–4 weeks, depending on variety and care.


Step 9: Aftercare and Storage

After flowering:

  1. Allow foliage to die back naturally; do not cut leaves until yellowed.
  2. Optional: Lift bulbs from pots, dry them, and store in a cool, dark, dry place for replanting outdoors in spring.
  3. Alternatively: Leave bulbs in pots and provide summer rest outdoors, then repeat the chilling process for next winter.

This ensures bulbs remain healthy and capable of producing flowers again.


Step 10: Creative Indoor Display Ideas

  • Clustered Pots: Plant multiple bulbs together in wide, shallow pots for a dense, colorful display.
  • Decorative Containers: Use ceramic, glass, or decorative baskets to match home decor.
  • Layering Colors: Combine early-, mid-, and late-blooming tulips for continuous indoor color.
  • Companion Plants: Add moss, small ferns, or ornamental grasses to enhance texture and interest.

Indoor tulips can serve as centerpieces, window accents, or festive holiday decor, bringing the beauty of spring indoors during winter months.


Common Challenges and Solutions

  • Bulbs fail to bloom: Ensure proper chilling duration and temperature. Some bulbs may need longer cold periods.
  • Leggy stems: Caused by insufficient light; move pots to a brighter location or provide artificial grow lights.
  • Fungal issues: Avoid overwatering and ensure well-draining soil. Remove affected bulbs promptly.

By addressing these challenges, gardeners can maximize bloom success and maintain healthy indoor tulips.


Conclusion: Enjoy Winter Color with Indoor Tulips

Growing tulips in pots indoors is a rewarding way to enjoy early spring flowers during winter. With careful attention to bulb selection, chilling, potting, and care, indoor tulips can thrive, offering vivid blooms and elegant foliage in your home.

From classic reds to pastel pinks, purples, and whites, tulips bring color, fragrance, and elegance to indoor spaces, making them ideal for holiday displays, centerpieces, or seasonal home decoration. By following these steps, you can successfully cultivate indoor tulips, turning the dreariness of winter into a season of vibrant beauty and joy.

With patience and proper care, your indoor tulip pots will become a stunning, long-lasting winter display, showcasing the timeless charm of these beloved flowers right in your home.

How to Overwinter Tender Perennials Successfully

How to Overwinter Tender Perennials Successfully

Tender perennials are plants that thrive in warm climates but cannot survive freezing temperatures. These plants, including fuchsias, geraniums, cannas, hibiscus, and salvias, are prized for their vibrant blooms, lush foliage, and ornamental appeal. However, without proper care during winter, they risk frost damage or death. Successfully overwintering tender perennials ensures they return year after year, providing continued beauty and reducing the cost and effort of replanting.

This guide provides detailed strategies for preparing tender perennials for winter, protecting them from cold, indoor and outdoor overwintering techniques, watering and fertilization tips, and post-winter revival practices.


Why Overwintering Tender Perennials Matters

Tender perennials are different from hardy perennials in that they cannot withstand frost or prolonged cold temperatures. Overwintering helps:

  1. Preserve Mature Plants: Maintaining established plants saves time compared to starting from seeds.
  2. Ensure Bloom Continuity: Healthy plants resume flowering earlier in the spring.
  3. Protect Root Systems: Proper winter care prevents root damage and improves spring growth.
  4. Maintain Foliage and Structure: Some tender perennials also have attractive foliage that enhances garden design.
  5. Cost Efficiency: Reduces the need for annual replanting of tender plants.

By understanding their requirements, gardeners can extend the lifespan and productivity of tender perennials.


Step 1: Identifying Tender Perennials in Your Garden

Before winter approaches, identify which perennials need protection:

  • Tropical or Subtropical Plants: Hibiscus, cannas, elephant ears, and brugmansia.
  • Frost-Sensitive Flowers: Fuchsias, geraniums, impatiens, and begonias.
  • Semi-Hardy Perennials: Salvias, dahlias, and chrysanthemums may need partial protection.

Understanding which plants are tender helps you prioritize resources and plan appropriate overwintering techniques.


Step 2: Timing Your Winter Preparation

Timing is critical to prevent frost damage:

  1. Monitor Local Frost Dates: Check your area’s first frost date to know when to begin preparations.
  2. Gradual Acclimation: Move plants to cooler conditions gradually to prevent shock.
  3. Avoid Last-Minute Action: Tender perennials exposed to frost can be permanently damaged.

Early preparation ensures plants enter winter in optimal health.


Step 3: Preparing Plants for Overwintering

Healthy plants withstand winter stress better. Preparation involves:

  1. Pruning: Remove dead, diseased, or weak stems to reduce stress and prevent pest infestations.
  2. Cleaning: Clear fallen leaves and debris around the base to minimize fungal or bacterial growth.
  3. Reducing Fertilization: Stop high-nitrogen fertilization 4–6 weeks before moving indoors; excessive nitrogen promotes tender growth prone to damage.
  4. Water Reduction: Gradually reduce watering to slow growth before winter storage.

Well-prepared plants are less susceptible to disease and damage during dormancy.


Step 4: Choosing the Right Overwintering Method

Tender perennials can be overwintered indoors or outdoors, depending on space, climate, and plant type.

A. Indoor Overwintering

Ideal for frost-sensitive plants like fuchsias, geraniums, and begonias:

  • Containers: Move potted plants indoors before the first frost.
  • Location: Bright, cool areas with temperatures around 50–60°F (10–15°C).
  • Light: Provide sufficient sunlight or supplemental grow lights for leafy plants.
  • Humidity: Indoor air can be dry; mist leaves occasionally or place plants near humidifiers.
  • Watering: Water sparingly; allow the top inch of soil to dry between watering to prevent root rot.

Indoor overwintering protects plants from freezing and ensures they remain healthy for spring growth.

B. Outdoor Overwintering

For slightly hardy or frost-tolerant tender perennials:

  • Mulching: Apply 2–4 inches of organic mulch (straw, bark, or leaves) around the base to insulate roots.
  • Row Covers: Use frost cloths, garden blankets, or plastic tunnels for extra protection.
  • Microclimates: Plant near walls, under eaves, or in sheltered areas to reduce frost exposure.
  • Container Plants: Move containers to protected spots like garages, sheds, or close to walls.

Outdoor techniques allow plants to survive in situ while mitigating cold damage.


Step 5: Potting and Storage Techniques

Many tender perennials, especially tropical ones, benefit from container storage:

  1. Potting Medium: Use well-draining soil mixed with compost for root health.
  2. Pot Size: Avoid oversized containers that retain excess moisture and cause rot.
  3. Dormancy Encouragement: Place plants in cooler, darker areas to slow growth naturally.
  4. Regular Checks: Inspect monthly for pests, disease, or drying out.

Container storage offers flexibility and ensures plants are ready for spring replanting.


Step 6: Watering and Fertilization During Winter

During dormancy or slower growth, plants need minimal water and no fertilizer:

  • Watering Frequency: Once every 2–3 weeks, depending on indoor humidity and temperature.
  • Avoid Overwatering: Waterlogged soil leads to root rot.
  • Fertilization: Resume only in spring when new growth appears.

Correct winter watering prevents stress and prepares plants for vigorous spring growth.


Step 7: Pest and Disease Management in Winter

Even indoors, tender perennials are susceptible to pests:

  1. Common Pests: Aphids, spider mites, mealybugs, and fungus gnats.
  2. Inspection: Examine leaves and stems weekly for signs of infestation.
  3. Remedies: Use neem oil, insecticidal soap, or wipe leaves with mild soapy water.
  4. Cleanliness: Remove fallen leaves or debris that can harbor pests or diseases.

Proactive pest management ensures healthy plants and reduces spring reinfestation risks.


Step 8: Preparing for Spring Replanting

Successful overwintering ends with a smooth transition to spring:

  1. Gradual Acclimation: Move plants outdoors gradually to avoid shock from sudden sunlight or wind.
  2. Pruning: Trim dead growth to encourage fresh spring growth.
  3. Fertilization: Begin light feeding with balanced fertilizer to support new growth.
  4. Re-potting (if necessary): Refresh soil and inspect root health before planting in garden beds or larger containers.

Careful spring preparation ensures plants flourish and resume their full bloom potential.


Step 9: Tips for Successful Overwintering

  • Label Plants: Keep track of varieties and care requirements.
  • Avoid Crowding: Ensure adequate airflow around stored plants to reduce mold or fungal infections.
  • Temperature Control: Avoid extreme temperature fluctuations indoors.
  • Document Growth: Note which plants thrived after overwintering for future reference.
  • Protect Flowers and Buds: Remove faded flowers before winter to focus energy on root and stem survival.

These steps maximize survival and health of tender perennials, making next season’s gardening easier and more rewarding.


Benefits of Overwintering Tender Perennials

  1. Longevity: Enjoy multi-year displays from plants typically treated as annuals.
  2. Cost Savings: Avoid purchasing new plants each year.
  3. Early Spring Blooms: Established plants flower sooner than newly planted ones.
  4. Sustainable Gardening: Reduces waste and supports eco-friendly practices.
  5. Consistent Garden Design: Maintain favorite plant combinations and landscape aesthetics.

Proper overwintering enhances garden sustainability and ensures beauty year after year.


Conclusion

Overwintering tender perennials successfully requires timely planning, careful preparation, appropriate storage, and attentive maintenance. By identifying frost-sensitive plants, choosing the best overwintering method—indoors or outdoors—managing watering and light, and monitoring for pests, gardeners can ensure tender perennials survive the cold months.

With proper care, these plants return each spring with vibrant blooms, lush foliage, and renewed vigor, enriching garden beds, containers, and balcony displays. Overwintering not only preserves treasured plants but also saves time, money, and effort, making it a critical practice for gardeners who value long-term beauty and sustainability.

By following these strategies, even the most delicate tender perennials can thrive year after year, offering gardeners continuous enjoyment and a colorful, flourishing garden regardless of winter’s chill.

How to Mix Annuals and Perennials for Year-Round Color

How to Mix Annuals and Perennials for Year-Round Color

A vibrant garden that blooms throughout the year is every gardener’s dream. Achieving continuous color requires strategic planning, plant selection, and thoughtful design. One of the most effective ways to ensure a garden remains lively in every season is by mixing annuals and perennials. Annuals provide bursts of color for a single growing season, while perennials offer structure, texture, and recurring blooms year after year. By combining these two groups, gardeners can create dynamic, layered gardens that are visually stunning and low-maintenance.

This guide explores the benefits, plant selection strategies, planting techniques, seasonal planning, and maintenance tips for successfully combining annuals and perennials for year-round color.


Why Mix Annuals and Perennials?

Mixing annuals and perennials offers multiple advantages:

  1. Continuous Blooms: Annuals provide vibrant colors when perennials are not flowering.
  2. Structural Interest: Perennials add height, texture, and foliage interest year-round.
  3. Seasonal Flexibility: Adjust annual plantings each year to introduce new colors and trends.
  4. Low Maintenance: Perennials form a permanent backbone, reducing annual replanting requirements.
  5. Wildlife Support: A mix of flowers attracts pollinators like bees, butterflies, and hummingbirds.

Combining these plant types ensures a garden that is never dull, regardless of the season.


Step 1: Understanding Annuals and Perennials

Annuals complete their life cycle in one growing season. They are typically planted in spring or summer and provide instant color and variety. Examples include:

  • Petunias
  • Marigolds
  • Zinnias
  • Impatiens
  • Cosmos

Perennials live for multiple years, often dying back in winter and re-emerging in spring. They provide structure and consistency. Examples include:

  • Daylilies
  • Coneflowers
  • Hostas
  • Lavender
  • Hellebores

By understanding the characteristics of each group, gardeners can plan for blooms, foliage texture, and seasonal color gaps.


Step 2: Planning for Year-Round Color

Effective planning is crucial:

  1. Assess Light and Soil: Determine sun exposure, soil type, and drainage. Annuals and perennials may have different requirements.
  2. Seasonal Blooms: Choose plants with staggered bloom times to maintain continuous color. For example, hellebores bloom in winter/early spring, tulips in spring, coneflowers in summer, and asters in fall.
  3. Height and Texture: Plant taller perennials in the back of beds and shorter annuals in the front to create layers and depth.
  4. Color Coordination: Select complementary or contrasting colors for a visually harmonious display.

A thoughtful plan ensures no gaps in color and continuous visual appeal throughout the year.


Step 3: Selecting Annuals for Seasonal Impact

Annuals offer flexibility and instant gratification:

  • Spring Annuals: Pansies, primroses, and snapdragons bring color after winter.
  • Summer Annuals: Marigolds, zinnias, and petunias provide intense summer color.
  • Fall Annuals: Chrysanthemums and ornamental kale extend blooming into cooler months.
  • Colorful Foliage Annuals: Coleus or caladiums add texture and visual interest even when flowers fade.

Annuals fill gaps between perennial blooms and allow gardeners to experiment with new colors each year.


Step 4: Choosing Perennials for Structure and Longevity

Perennials create the backbone of a garden, providing year-to-year stability:

  • Early Bloomers: Hellebores, bleeding hearts, and dwarf irises bring early spring color.
  • Summer Stalwarts: Coneflowers, daylilies, and coreopsis produce vibrant summer flowers.
  • Fall Favorites: Sedums, asters, and ornamental grasses ensure color in late seasons.
  • Evergreen Foliage: Hostas, ferns, and boxwoods maintain interest during dormant periods.

Perennials reduce the need for replanting and provide consistent texture across seasons.


Step 5: Designing Mixed Plant Beds

When combining annuals and perennials:

  1. Layer by Height: Place tall perennials at the back, mid-height in the middle, and low-growing annuals at the front.
  2. Use Groupings: Plant in clumps or drifts for natural flow and impact rather than scattering individual plants.
  3. Color Repetition: Repeat colors across the bed to unify the design.
  4. Seasonal Pockets: Include small clusters of seasonal annuals among perennials to cover gaps when perennials aren’t blooming.
  5. Foliage Texture: Mix leaf shapes, sizes, and colors for added depth and interest beyond blooms.

This approach creates a balanced, dynamic garden that is visually appealing in every season.


Step 6: Container Gardens and Balcony Displays

Mixing annuals and perennials isn’t limited to ground beds; containers are perfect for:

  • Seasonal Swaps: Replace annuals each season while keeping perennials as permanent anchors.
  • Compact Spaces: Perfect for balconies, patios, or terraces where space is limited.
  • Color Coordination: Containers allow experimentation with bolder color combinations that might be harder to achieve in large beds.

Container planting provides flexibility and ensures continuous color even in small urban spaces.


Step 7: Soil Preparation and Fertilization

Healthy soil is critical for continuous blooms:

  1. Soil Enrichment: Mix compost or well-rotted manure into garden beds.
  2. pH Balance: Aim for slightly acidic to neutral soil (pH 6–7) for most flowering plants.
  3. Fertilization: Use slow-release fertilizer for perennials and supplemental liquid fertilizer for annuals during active bloom periods.
  4. Mulching: Apply mulch to retain moisture, reduce weeds, and regulate soil temperature.

Proper soil preparation supports robust root systems and abundant flowering.


Step 8: Watering Techniques

Watering needs vary between annuals and perennials:

  • Consistency: Keep soil evenly moist, especially during hot, dry periods.
  • Avoid Waterlogging: Ensure proper drainage to prevent root rot in both perennials and annuals.
  • Deep Watering: Encourage deep root growth in perennials by watering thoroughly but less frequently.
  • Containers: Water more frequently in pots as they dry faster than garden beds.

Effective watering prevents stress, supports bloom production, and maintains healthy foliage.


Step 9: Maintenance for Year-Round Color

Regular maintenance keeps mixed beds thriving:

  1. Deadheading: Remove spent flowers from annuals and perennials to encourage new blooms.
  2. Pruning: Trim perennials as needed to maintain shape and prevent overcrowding.
  3. Division: Divide overcrowded perennials every 2–3 years to rejuvenate growth.
  4. Pest Control: Monitor for aphids, snails, slugs, and fungal diseases; use organic or chemical solutions carefully.
  5. Seasonal Adjustments: Rotate or replace annuals to fill seasonal gaps.

Consistent care ensures long-lasting color and a healthy, balanced garden.


Step 10: Seasonal Planning for Continuous Bloom

  • Spring: Early perennials like hellebores and annual pansies add color after winter.
  • Summer: Mix in zinnias, petunias, and mid-season perennials like daylilies.
  • Fall: Add chrysanthemums, ornamental kale, and asters for late-season color.
  • Winter (Mild Climates): Evergreen perennials like heucheras or boxwoods maintain visual interest.

Strategic seasonal planning creates a seamless transition of color throughout the year, ensuring your garden never looks bare.


Additional Tips for Success

  1. Record Keeping: Maintain a journal of bloom times to plan future plantings.
  2. Experiment with Color Schemes: Try monochromatic, complementary, or analogous palettes to see what works best.
  3. Wildlife-Friendly Gardens: Include plants that attract pollinators to enhance garden ecology.
  4. Edge Planting: Use annuals along pathways or balcony edges for vibrant borders.
  5. Succession Planting: Plant in stages to maintain uninterrupted bloom.

These tips enhance aesthetic appeal and ensure continuous color while supporting ecological balance.


Conclusion

Mixing annuals and perennials is a proven strategy for achieving year-round color, dynamic texture, and continuous garden interest. Annuals provide bursts of color and flexibility for seasonal trends, while perennials offer structure, long-term stability, and recurring blooms. By carefully selecting plant varieties, planning for bloom times, preparing soil, providing proper care, and maintaining consistent seasonal management, gardeners can create stunning gardens that are visually appealing throughout the year.

Whether in garden beds, balcony containers, or raised planters, the synergy of annuals and perennials transforms spaces into vibrant, ever-changing landscapes. Thoughtful design, attentive maintenance, and strategic planting ensure that your garden remains lively, beautiful, and full of life in every season, delighting both humans and pollinators alike.

7 Fall Flowers That Look Beautiful in Window Boxes

7 Fall Flowers That Look Beautiful in Window Boxes

As the air turns crisp and the vibrant greens of summer fade, window boxes provide a perfect opportunity to bring seasonal color and charm to your home. Fall flowers not only enhance curb appeal but also create a warm, inviting atmosphere during shorter days. With the right selection, window boxes can showcase blooms that survive cooler temperatures, complement autumn foliage, and provide visual interest well into late fall.

This guide highlights seven fall flowers that look beautiful in window boxes and offers detailed care tips for maintaining a stunning autumn display.


1. Chrysanthemums (Mums)

Why They’re Perfect for Fall

  • Chrysanthemums are classic fall flowers, available in shades of red, orange, yellow, pink, and white.
  • They are cold-tolerant and can bloom well into late autumn.
  • Compact growth makes them ideal for window boxes where space is limited.

Care Tips

  • Sunlight: Full sun to partial shade for optimal flowering.
  • Watering: Moderate; keep soil consistently moist but not waterlogged.
  • Soil: Well-draining, fertile soil enriched with compost.
  • Maintenance: Pinch back stems early in the growing season to encourage bushier growth.

Bonus: Mums can be paired with ornamental kale or grasses for a textured fall display.


2. Pansies (Viola × wittrockiana)

Why They’re Perfect for Fall

  • Pansies are vibrant, hardy flowers that tolerate cooler temperatures.
  • Available in almost every color, including deep purples, blues, yellows, and multicolored varieties.
  • Their cheerful blooms can withstand light frost, extending window box color into late fall.

Care Tips

  • Sunlight: Full sun to partial shade.
  • Watering: Keep soil evenly moist, especially during dry spells.
  • Soil: Well-draining soil enriched with organic matter.
  • Maintenance: Remove faded flowers to encourage more blooms.

Bonus: Pansies pair beautifully with ornamental pumpkins and gourds for a festive autumn display.


3. Ornamental Kale and Cabbage (Brassica oleracea)

Why They’re Perfect for Fall

  • Ornamental kale and cabbage offer colorful foliage in shades of purple, pink, and cream rather than traditional flowers.
  • Extremely cold-hardy, they can survive frosts that end flowering in other plants.
  • Their textured leaves provide contrast and complement flowering plants in window boxes.

Care Tips

  • Sunlight: Full sun to partial shade.
  • Watering: Moderate; avoid waterlogged soil.
  • Soil: Well-draining soil with good fertility.
  • Maintenance: Remove yellowed or damaged leaves to maintain appearance.

Bonus: Their rich foliage colors intensify after the first frost, making them an ideal choice for late fall.


4. Asters (Aster spp.)

Why They’re Perfect for Fall

  • Asters bloom late in the season, providing continuous color when many summer flowers fade.
  • Available in purple, pink, blue, and white, with daisy-like flowers that attract pollinators.
  • Compact varieties are perfect for window boxes, adding height and vibrancy.

Care Tips

  • Sunlight: Full sun for best flowering.
  • Watering: Keep soil moderately moist.
  • Soil: Well-draining, fertile soil.
  • Maintenance: Pinch back in early summer to encourage branching and more flowers.

Bonus: Asters are pollinator-friendly, attracting bees and butterflies even in the fall season.


5. Ornamental Grasses (Pennisetum, Carex, or Festuca)

Why They’re Perfect for Fall

  • Ornamental grasses add texture, movement, and contrast in window boxes.
  • Their warm, earthy tones complement autumn blooms.
  • Hardy varieties can survive cooler temperatures, providing structure even after other flowers fade.

Care Tips

  • Sunlight: Full sun to partial shade.
  • Watering: Moderate; allow soil to dry slightly between watering.
  • Soil: Well-draining soil with moderate fertility.
  • Maintenance: Trim dead foliage in late winter to prepare for new growth.

Bonus: Ornamental grasses pair beautifully with bright fall blooms like mums or pansies, creating dynamic visual interest.


6. Heuchera (Coral Bells)

Why They’re Perfect for Fall

  • Heuchera offers vibrant foliage in shades of burgundy, bronze, green, and silver, which complements late-season flowers.
  • Small, bell-shaped flowers bloom on tall spikes, attracting pollinators.
  • Cold-tolerant perennials, perfect for adding texture and color to window boxes.

Care Tips

  • Sunlight: Partial shade to full sun, depending on variety.
  • Watering: Moderate; ensure good drainage.
  • Soil: Rich, well-draining soil.
  • Maintenance: Remove dead or damaged leaves to keep plants looking fresh.

Bonus: Heuchera’s colorful foliage persists even after flowers fade, ensuring year-round appeal.


7. Cyclamen (Cyclamen persicum)

Why They’re Perfect for Fall

  • Cyclamen are cool-season flowering plants with upswept petals in shades of pink, red, purple, and white.
  • Tolerant of cooler temperatures, making them ideal for late fall displays.
  • Compact growth habit suits small window boxes and containers.

Care Tips

  • Sunlight: Bright indirect light.
  • Watering: Water from the bottom to avoid rotting tubers; keep soil moderately moist.
  • Soil: Well-draining, fertile soil with added organic matter.
  • Maintenance: Remove yellowed leaves and spent flowers to encourage more blooms.

Bonus: Cyclamen’s elegant blooms and foliage patterns provide a touch of sophistication to fall window boxes.


Tips for Creating Stunning Fall Window Boxes

  1. Mix Textures and Heights: Combine flowering plants, leafy plants, and grasses for depth and interest.
  2. Complement Seasonal Colors: Choose flowers in reds, oranges, yellows, purples, and burgundies to reflect fall tones.
  3. Provide Adequate Drainage: Use pots or boxes with drainage holes to prevent waterlogging.
  4. Use Fertile Soil: Incorporate compost or slow-release fertilizer to keep blooms healthy.
  5. Water Consistently: Cooler temperatures reduce evaporation, but soil should remain moderately moist.
  6. Incorporate Decorative Elements: Small pumpkins, gourds, pinecones, or autumn leaves enhance seasonal charm.

By following these tips, window boxes can remain vibrant and attractive throughout the fall season, providing a welcoming touch for homes, balconies, and patios.


Conclusion: Make Your Window Boxes a Fall Focal Point

Fall is the perfect time to showcase your gardening creativity, and window boxes offer a unique canvas for seasonal color. By planting Chrysanthemums, Pansies, Ornamental Kale, Asters, Ornamental Grasses, Heuchera, and Cyclamen, you can create eye-catching displays that thrive in cooler temperatures.

Combining vibrant blooms, textured foliage, and decorative elements ensures your window boxes not only look beautiful but also reflect the rich, warm tones of autumn. With careful attention to sunlight, watering, and soil preparation, these fall flowers can provide continuous charm from early September through November, making your home exterior welcoming, colorful, and seasonally festive.

By incorporating these seven flowers, gardeners can transform their window boxes into stunning focal points, celebrating the beauty of fall while enjoying the satisfaction of low-maintenance, long-lasting seasonal blooms.

How to Grow Morning Glories for Natural Privacy

How to Grow Morning Glories for Natural Privacy

Morning glories are fast-growing, climbing flowering plants that can transform balconies, fences, trellises, and walls into lush, vibrant green screens. Their heart-shaped leaves and trumpet-shaped flowers not only provide aesthetic appeal but also serve as natural privacy barriers for urban gardens, patios, and balconies. With proper planning, soil preparation, and maintenance, morning glories can become a beautiful and functional addition to your outdoor space.

This guide provides detailed insights into choosing varieties, preparing soil, planting, training, watering, fertilization, pruning, pest management, and tips for achieving dense coverage for natural privacy.


Why Morning Glories Are Ideal for Privacy

Morning glories are well-suited for privacy purposes due to several traits:

  1. Rapid Growth: They grow quickly, often climbing several feet in a single season.
  2. Dense Foliage: Heart-shaped leaves create a lush screen that obscures unsightly views.
  3. Vibrant Flowers: Their trumpet-shaped blooms in blue, purple, pink, white, or red add color to functional privacy.
  4. Climbing Ability: They naturally twine around trellises, fences, railings, and walls.
  5. Low Maintenance: Hardy annuals that are easy to grow from seeds.

With the right care, morning glories combine functionality with ornamental beauty, making them a top choice for natural privacy solutions.


Step 1: Choosing the Right Morning Glory Variety

Selecting the right variety ensures both coverage and aesthetic appeal:

  1. Heavenly Blue (Ipomoea tricolor): Classic blue flowers with a vigorous growth habit, ideal for full-screen privacy.
  2. Scarlet O’Hara: Bright red flowers that create an eye-catching privacy wall.
  3. Grandpa Ott: Tall vines with deep purple blooms, perfect for large trellises.
  4. White Wonder: White flowers for a subtle, elegant screen.
  5. Mixed Colors: Planting multiple colors creates a vibrant, decorative privacy screen.

Consider growth height, bloom color, and climate suitability when selecting varieties for your space.


Step 2: Preparing the Soil

Morning glories thrive in well-draining, moderately fertile soil:

  1. Soil Type: Loamy or sandy soil ensures proper drainage and root development.
  2. Soil pH: Slightly acidic to neutral (pH 6.0–7.0) is ideal.
  3. Nutrient Preparation: Mix compost or well-rotted manure to enrich soil without overfertilizing. Excess nitrogen may produce more foliage at the expense of flowers.
  4. Seed Preparation: Scarify seeds by nicking the outer coat or soaking them overnight to improve germination rates.

Healthy soil ensures strong roots, fast growth, and abundant blooms.


Step 3: Planting Morning Glory Seeds

Planting correctly is crucial for successful germination:

  1. Timing: Sow seeds after the last frost when soil is warm (65–75°F / 18–24°C).
  2. Spacing: Space seeds 6–12 inches apart to allow room for climbing.
  3. Depth: Plant seeds about ½ inch deep in prepared soil.
  4. Germination: Seeds usually sprout within 7–14 days. Keep soil consistently moist during this period.
  5. Containers vs. Ground: Morning glories grow well in large containers, balcony planters, or directly in garden soil.

Proper planting ensures healthy seedlings ready for climbing and foliage coverage.


Step 4: Providing Support for Climbing

Morning glories need structures to climb for maximum privacy:

  1. Trellises: Wooden, metal, or bamboo trellises support upward growth.
  2. Fences: Chain-link or wooden fences allow vines to naturally twine.
  3. String or Wire Lines: Stretch lines horizontally or vertically for balcony railing coverage.
  4. Pergolas or Arches: Ideal for decorative privacy screens in outdoor seating areas.

Secure support structures guide growth and create dense foliage walls for effective screening.


Step 5: Watering and Moisture Management

Consistent watering is essential, especially during early growth:

  1. Frequency: Water regularly, keeping soil moist but not waterlogged.
  2. Container Plants: Ensure drainage holes prevent root rot.
  3. Mulching: Apply organic mulch around the base to retain moisture and moderate soil temperature.
  4. Monitoring: Reduce watering during heavy rains but maintain consistent moisture for container plants.

Proper moisture promotes healthy growth, larger leaves, and more abundant flowers.


Step 6: Fertilization for Optimal Growth

Morning glories are not heavy feeders but benefit from occasional nutrients:

  1. Balanced Fertilizer: Use a low-nitrogen, high-phosphorus fertilizer to encourage flowering over foliage.
  2. Frequency: Fertilize every 4–6 weeks during active growth.
  3. Organic Alternatives: Compost tea or diluted fish emulsion promotes vigorous growth naturally.
  4. Avoid Excess Fertilizer: Too much nitrogen leads to excessive leaves with fewer flowers.

Balanced nutrition ensures dense foliage and continuous blooms for an effective privacy screen.


Step 7: Pruning and Training

Proper pruning and training enhance coverage and appearance:

  1. Train Young Vines: Gently tie or guide vines to the support structure.
  2. Prune Excess Growth: Remove weak or overly long shoots to encourage bushier growth.
  3. Deadheading: Remove faded flowers to encourage new blooms and maintain aesthetic appeal.
  4. Seasonal Maintenance: Trim after flowering season to prepare for next growth cycle.

Pruning and training promote dense coverage, improve airflow, and enhance flower production.


Step 8: Pest and Disease Management

Morning glories are relatively hardy but susceptible to certain pests:

  1. Common Pests: Aphids, spider mites, and caterpillars.
  2. Preventive Measures: Inspect leaves regularly and remove infested foliage.
  3. Organic Remedies: Use neem oil, insecticidal soap, or introduce beneficial insects.
  4. Diseases: Fungal infections can occur in humid climates; ensure proper spacing and airflow.

Early detection and management protect plants from stress and maintain healthy foliage for privacy.


Step 9: Achieving Maximum Privacy Coverage

For a dense natural screen:

  1. Plant in Rows: Use multiple plants along fences or balcony edges for uninterrupted coverage.
  2. Layer Growth: Train vines to grow both vertically and horizontally for thicker foliage.
  3. Staggered Planting: Plant in stages for continuous coverage and bloom periods.
  4. Maintenance: Regular pruning and training ensure vines fill gaps and remain healthy.

Dense foliage creates an effective privacy barrier, blocking unwanted views while providing greenery.


Step 10: Additional Tips for Morning Glory Success

  1. Sunlight Needs: Morning glories perform best in full to partial sun; at least 4–6 hours of sunlight per day ensures vibrant blooms.
  2. Wind Protection: Use windbreaks on balconies or exposed areas to prevent vine damage.
  3. Companion Plants: Plant smaller flowers at the base to add color and texture beneath the climbing vines.
  4. Container Selection: Use deep containers to accommodate the extensive root system of climbing vines.
  5. Seed Collection: Allow some flowers to set seed at the end of the season for easy propagation next year.

Following these tips ensures long-lasting privacy, abundant blooms, and vigorous plant health.


Benefits of Morning Glories as Natural Privacy Plants

  • Fast Growth: Provide a green screen in a single growing season.
  • Aesthetic Appeal: Vibrant flowers and lush leaves enhance balcony or garden beauty.
  • Functional Privacy: Effective natural barrier against neighbors or unsightly views.
  • Pollinator-Friendly: Attracts bees, butterflies, and hummingbirds.
  • Low Maintenance: Hardy annuals requiring minimal care.

Morning glories combine functionality, beauty, and ecological benefits, making them ideal for urban and balcony gardens.


Conclusion

Growing morning glories for natural privacy is a practical and beautiful solution for urban gardens, balconies, fences, and pergolas. By selecting the right variety, preparing fertile soil, providing support structures, and following proper watering, fertilization, and pruning practices, gardeners can create dense, vibrant, and functional screens.

Morning glories’ rapid growth, lush foliage, and vibrant blooms provide both aesthetic appeal and effective privacy. With attentive care, pest management, and strategic planting, balcony or garden spaces can be transformed into green, tranquil sanctuaries that combine beauty, privacy, and ecological benefits.

Whether planted in containers, directly in the ground, or along trellises, morning glories offer an accessible and rewarding solution for gardeners seeking natural privacy while adding a touch of floral elegance to outdoor spaces.

10 Native Wildflowers That Attract Pollinators Instantly

10 Native Wildflowers That Attract Pollinators Instantly

Pollinators—such as bees, butterflies, hummingbirds, and other beneficial insects—play a critical role in maintaining healthy ecosystems. They are responsible for pollinating flowers, fruits, and vegetables, ensuring biodiversity and food production. One of the most effective ways to support pollinators is by planting native wildflowers, which are adapted to local conditions and provide essential nectar, pollen, and habitat.

This guide highlights ten native wildflowers that attract pollinators instantly, along with detailed care tips for creating a thriving, pollinator-friendly garden.


1. Black-Eyed Susan (Rudbeckia hirta)

Why It Attracts Pollinators

  • Produces bright yellow flowers with dark centers that are highly visible to bees and butterflies.
  • Blooms continuously throughout the summer, providing long-lasting nectar sources.
  • Native to many regions in North America and hardy in various soil types.

Care Tips

  • Sunlight: Full sun for optimal growth.
  • Watering: Moderate; drought-tolerant once established.
  • Soil: Well-draining soil with moderate fertility.
  • Maintenance: Deadhead to encourage prolonged blooming.

Bonus: Black-Eyed Susans are easy to grow from seeds and provide vibrant summer color.


2. Purple Coneflower (Echinacea purpurea)

Why It Attracts Pollinators

  • Features striking purple petals and a spiky orange center that draws bees, butterflies, and hummingbirds.
  • Long blooming season from mid-summer to early fall.
  • Known for medicinal properties, making it a dual-purpose garden plant.

Care Tips

  • Sunlight: Full sun; tolerates partial shade.
  • Watering: Moderate; drought-tolerant once established.
  • Soil: Well-draining soil; adapts to rocky or sandy soils.
  • Maintenance: Cut back in late fall to prepare for winter growth.

Bonus: Coneflowers attract a variety of pollinators while adding vertical interest to garden beds.


3. Milkweed (Asclepias spp.)

Why It Attracts Pollinators

  • Essential host plant for monarch butterflies, providing both nectar and habitat for larvae.
  • Produces clusters of fragrant flowers in pink, orange, or white.
  • Highly attractive to bees, hummingbirds, and other butterflies.

Care Tips

  • Sunlight: Full sun is ideal.
  • Watering: Low to moderate; drought-tolerant once established.
  • Soil: Well-draining soil; adapts to various soil types.
  • Maintenance: Cut back stems in early spring to promote healthy new growth.

Bonus: Planting milkweed supports pollinator conservation and monarch butterfly populations.


4. Bee Balm (Monarda didyma)

Why It Attracts Pollinators

  • Produces bright red, pink, or purple tubular flowers that are a magnet for bees, hummingbirds, and butterflies.
  • Aromatic foliage repels pests naturally.
  • Blooms from summer to early fall, providing continuous nectar.

Care Tips

  • Sunlight: Full sun to partial shade.
  • Watering: Moderate; prefers moist but well-draining soil.
  • Soil: Fertile soil enriched with organic matter.
  • Maintenance: Divide plants every 2–3 years to prevent overcrowding.

Bonus: Bee Balm adds vivid color and fragrance while actively supporting pollinators.


5. Blanket Flower (Gaillardia spp.)

Why It Attracts Pollinators

  • Heat-tolerant and sun-loving perennial with vivid red, yellow, and orange flowers.
  • Long blooming season attracts bees, butterflies, and hummingbirds.
  • Thrives in poor, well-draining soil.

Care Tips

  • Sunlight: Full sun is essential.
  • Watering: Low; drought-tolerant once established.
  • Soil: Well-draining sandy or rocky soils.
  • Maintenance: Deadhead to prolong flowering.

Bonus: Blanket Flowers are low-maintenance and resilient, perfect for hot, sunny pollinator gardens.


6. Wild Bergamot (Monarda fistulosa)

Why It Attracts Pollinators

  • Produces lavender-pink flowers with a minty fragrance.
  • Nectar-rich blooms attract bees, butterflies, and hummingbirds.
  • Provides structural beauty in wildflower or native gardens.

Care Tips

  • Sunlight: Full sun to partial shade.
  • Watering: Moderate; prefers moist soil but tolerates drought.
  • Soil: Well-draining soil with average fertility.
  • Maintenance: Cut back after flowering to maintain shape and vigor.

Bonus: Wild Bergamot’s minty aroma and pollinator appeal make it a dual-purpose garden plant.


7. Coreopsis (Coreopsis spp.)

Why It Attracts Pollinators

  • Also called tickseed, Coreopsis produces bright yellow or red blooms that last all summer.
  • Nectar-rich flowers attract bees, butterflies, and hummingbirds.
  • Extremely hardy and tolerant of poor soils, making it ideal for wildflower meadows.

Care Tips

  • Sunlight: Full sun for vibrant blooms.
  • Watering: Low; drought-tolerant once established.
  • Soil: Well-draining soil; tolerates rocky or sandy conditions.
  • Maintenance: Deadhead regularly for continuous flowering.

Bonus: Coreopsis adds long-lasting color and resilience to pollinator gardens.


8. Goldenrod (Solidago spp.)

Why It Attracts Pollinators

  • Goldenrod produces dense spikes of bright yellow flowers, highly attractive to bees, butterflies, and beneficial insects.
  • Blooms in late summer, extending the nectar season.
  • Native to many regions and well-adapted to various soil types.

Care Tips

  • Sunlight: Full sun to partial shade.
  • Watering: Low; drought-tolerant.
  • Soil: Adaptable to poor, rocky, or sandy soils.
  • Maintenance: Cut back after flowering to encourage new growth and prevent self-seeding.

Bonus: Goldenrod is a pollinator magnet that also adds late-season color to gardens.


9. Lupine (Lupinus spp.)

Why It Attracts Pollinators

  • Lupines produce tall, spiky flowers in shades of blue, purple, pink, and white, which are highly attractive to bees and butterflies.
  • Nitrogen-fixing roots improve soil fertility, benefiting neighboring plants.
  • Thrives in sunny, well-draining areas.

Care Tips

  • Sunlight: Full sun for best blooms.
  • Watering: Moderate; avoid waterlogged soil.
  • Soil: Sandy or rocky soil preferred; ensure good drainage.
  • Maintenance: Cut back after flowering to encourage rebloom and prevent overcrowding.

Bonus: Lupines not only attract pollinators but also improve soil quality naturally.


10. Blanketflower’s Cousin: Firewheel (Gaillardia pulchella)

Why It Attracts Pollinators

  • Firewheel produces bright red and yellow daisy-like blooms that attract bees, butterflies, and hummingbirds.
  • Drought-tolerant and thrives in poor soils.
  • Long blooming season from early summer to fall.

Care Tips

  • Sunlight: Full sun is required for vibrant color.
  • Watering: Low; drought-tolerant.
  • Soil: Well-draining sandy or rocky soils.
  • Maintenance: Deadhead to encourage more flowers and maintain appearance.

Bonus: Firewheel’s striking bicolor flowers make it a visually appealing and pollinator-friendly choice.


General Tips for Attracting Pollinators With Native Wildflowers

  1. Group Plants: Plant clusters of the same species to make them more attractive to pollinators.
  2. Provide Water Sources: Small birdbaths or shallow water dishes help sustain pollinators.
  3. Avoid Pesticides: Minimize chemicals that can harm beneficial insects.
  4. Mix Flowering Times: Plant species that bloom at different times to provide continuous nectar throughout the season.
  5. Include Host Plants: Plants like milkweed provide food for larvae, enhancing pollinator populations.

Following these tips ensures a thriving garden ecosystem that benefits both pollinators and humans.


Conclusion: Create a Pollinator Paradise

By planting Black-Eyed Susans, Purple Coneflowers, Milkweed, Bee Balm, Blanket Flower, Wild Bergamot, Coreopsis, Goldenrod, Lupines, and Firewheel, gardeners can instantly attract pollinators and beneficial insects. These native wildflowers are adapted to local climates, require minimal maintenance, and provide continuous blooms, making them ideal for creating a colorful and lively garden.

A pollinator-friendly garden not only enhances biodiversity but also contributes to healthy ecosystems and improved yields in vegetable and fruit gardens. Choosing native wildflowers ensures that your garden thrives naturally while supporting pollinator populations, making it a sustainable and beautiful space that delights both humans and wildlife.

The Best Flowers to Grow in Rocky Soil

The Best Flowers to Grow in Rocky Soil

Gardening in rocky soil can be a challenge for many plant enthusiasts. Rocky soil is often well-drained, nutrient-poor, and compacted, making it difficult for traditional garden plants to thrive. However, many beautiful, resilient flowers are perfectly suited to such conditions, offering vibrant blooms and low-maintenance growth. By selecting the right species and preparing your rocky garden thoughtfully, you can create a stunning, colorful landscape even in challenging terrain.

This guide highlights the best flowers to grow in rocky soil and provides detailed tips to ensure success.


Understanding Rocky Soil

Before planting, it’s important to understand the characteristics of rocky soil:

  • Drainage: Rocky soil drains quickly, which can limit moisture retention.
  • Nutrient Levels: Often low in organic matter, requiring the addition of compost or fertilizers.
  • Root Growth: Rocks can obstruct root expansion, making plants with deep or extensive roots more suitable.
  • Temperature: Rocks can heat up in the sun, which may benefit heat-loving plants but stress sensitive species.

By understanding these traits, you can choose plants that are naturally adapted to rocky environments and take steps to enhance soil fertility.


1. Sedum (Stonecrop)

Why It’s Ideal for Rocky Soil

  • Sedums are succulent perennials that thrive in dry, rocky conditions.
  • They come in a variety of colors and shapes, including low-growing mats and upright stems.
  • Their star-shaped flowers bloom in late spring and summer, attracting pollinators.

Care Tips

  • Light: Full sun for best flowering and color.
  • Watering: Extremely drought-tolerant; water sparingly.
  • Soil: Prefers well-drained rocky or sandy soil.
  • Maintenance: Minimal; trim dead stems after flowering for a tidy appearance.

Bonus: Sedums are perfect for rock gardens, containers, or edging, adding texture and color to rocky landscapes.


2. Lavender (Lavandula spp.)

Why It’s Ideal for Rocky Soil

  • Lavender thrives in well-draining, rocky soil with full sun exposure.
  • Produces fragrant purple blooms that attract bees and butterflies.
  • Its aromatic foliage and flowers add sensory appeal to gardens.

Care Tips

  • Light: Full sun for at least 6 hours daily.
  • Watering: Low; overwatering can cause root rot.
  • Soil: Rocky or sandy soil enriched with compost for better growth.
  • Pruning: Cut back after flowering to maintain shape and encourage new growth.

Bonus: Lavender is drought-resistant and low-maintenance, making it perfect for dry, rocky gardens.


3. Coneflower (Echinacea spp.)

Why It’s Ideal for Rocky Soil

  • Coneflowers are native perennials that tolerate poor, rocky soils.
  • Their daisy-like flowers with prominent centers bloom from mid-summer to fall.
  • They attract pollinators and beneficial insects, enhancing garden biodiversity.

Care Tips

  • Light: Full sun to partial shade.
  • Watering: Moderate; drought-tolerant once established.
  • Soil: Well-draining soil; rocky conditions suit them well.
  • Maintenance: Deadhead spent flowers to encourage continuous blooming.

Bonus: Coneflowers are long-lived and deer-resistant, making them practical for low-maintenance gardens.


4. Blanket Flower (Gaillardia spp.)

Why It’s Ideal for Rocky Soil

  • Blanket flowers are heat-tolerant, sun-loving perennials that thrive in poor, rocky soils.
  • Their vivid red, orange, and yellow blooms provide striking summer color.
  • Flowers attract butterflies and hummingbirds, adding vibrancy to the landscape.

Care Tips

  • Light: Full sun for maximum flowering.
  • Watering: Low; prefers dry, well-draining soil.
  • Soil: Rocky or sandy soils work well; minimal organic matter needed.
  • Maintenance: Deadhead regularly to extend flowering.

Bonus: Blanket flowers are resilient and easy to propagate from seeds, making them perfect for rocky garden beginners.


5. Coreopsis (Coreopsis spp.)

Why It’s Ideal for Rocky Soil

  • Coreopsis, also known as tickseed, is a drought-tolerant perennial with bright yellow, red, or bi-colored flowers.
  • Blooms continuously from early summer through fall.
  • Adapted to poor, rocky soils, making it a reliable choice for challenging gardens.

Care Tips

  • Light: Full sun for abundant blooms.
  • Watering: Low; moderate watering during prolonged drought.
  • Soil: Well-draining rocky or sandy soil.
  • Maintenance: Deadhead to encourage more flowers; cut back in fall for tidy winter appearance.

Bonus: Coreopsis is low-maintenance, pest-resistant, and attracts pollinators, making it an excellent addition to rocky landscapes.


6. Yarrow (Achillea millefolium)

Why It’s Ideal for Rocky Soil

  • Yarrow is a hardy perennial with feathery foliage and clusters of flowers in white, yellow, red, or pink.
  • Thrives in poor, dry, rocky soil and withstands hot summers.
  • Attracts beneficial insects like ladybugs and bees.

Care Tips

  • Light: Full sun for best flowering.
  • Watering: Low; extremely drought-tolerant.
  • Soil: Rocky or sandy soil; minimal fertility required.
  • Maintenance: Cut back after flowering to maintain shape and encourage rebloom.

Bonus: Yarrow’s medicinal properties and ease of growth make it a multifunctional garden choice.


7. Ice Plant (Delosperma spp.)

Why It’s Ideal for Rocky Soil

  • Ice plants are succulent ground covers that flourish in well-draining, rocky soils.
  • Produces vivid daisy-like flowers in shades of pink, purple, yellow, or white.
  • Low-growing, spreading habit makes them perfect for rock gardens, slopes, and containers.

Care Tips

  • Light: Full sun for best flowering.
  • Watering: Minimal; drought-tolerant once established.
  • Soil: Rocky or sandy soils with excellent drainage.
  • Maintenance: Trim after flowering to maintain neat appearance.

Bonus: Ice plants are resilient and low-maintenance, ideal for gardeners dealing with rocky terrain and hot climates.


8. Gaura (Gaura lindheimeri)

Why It’s Ideal for Rocky Soil

  • Gaura, or bee blossom, produces delicate, airy flowers in pink or white that bloom from spring through fall.
  • Heat and drought-tolerant, it adapts well to rocky and sandy soils.
  • Its long, slender stems create movement and texture in garden beds.

Care Tips

  • Light: Full sun for abundant flowering.
  • Watering: Low; drought-tolerant once established.
  • Soil: Well-draining rocky or sandy soil.
  • Maintenance: Cut back in late winter or early spring to encourage bushier growth.

Bonus: Gaura’s graceful, fluttering flowers make it an excellent companion plant for other rocky soil perennials.


Tips for Gardening in Rocky Soil

  1. Amend Soil: Mix compost or organic matter with soil to improve fertility without reducing drainage.
  2. Mulching: Apply a thin layer of mulch around plants to retain moisture and regulate temperature.
  3. Proper Watering: Water deeply but infrequently to encourage strong root systems.
  4. Choose Native Plants: Native species are often adapted to poor, rocky soils and require less maintenance.
  5. Plan Planting Layout: Use rocks creatively for drainage, microclimates, and decorative appeal.

By understanding your rocky soil’s characteristics and choosing adapted plants, you can maintain a thriving, colorful garden year-round.


Conclusion: Turn Rocky Challenges into Gardening Success

Rocky soil doesn’t have to limit your gardening ambitions. By selecting hardy, drought-tolerant, and visually striking flowers like Sedum, Lavender, Coneflower, Blanket Flower, Coreopsis, Yarrow, Ice Plant, and Gaura, you can create a vibrant and low-maintenance landscape.

With the right soil preparation, watering practices, and plant selection, rocky gardens can become eye-catching displays of color, texture, and resilience. These flowers not only survive but thrive in challenging conditions, providing continuous beauty and attracting pollinators that enhance your garden’s ecosystem.

Embracing these species allows gardeners to transform rocky, seemingly infertile areas into flourishing gardens, proving that even difficult soil can yield stunning floral success.