How To Keep Squirrels Away From Your Bird Feeders

How To Keep Squirrels Away From Your Bird Feeders

There’s nothing quite as relaxing as sitting in your yard, sipping your morning coffee, and watching colorful birds flutter to your feeder. But for many homeowners, this peaceful scene is often interrupted by a furry intruder—the squirrel. Clever, agile, and persistent, squirrels are notorious for raiding bird feeders, scaring away feathered visitors, and devouring food meant for them.

If you’ve ever wondered how to keep squirrels away from your bird feeders without harming them, you’re not alone. With the right strategies, you can deter these acrobatic critters and enjoy birdwatching as it was meant to be. This guide covers effective, humane, and practical ways to squirrel-proof your feeders.


Why Squirrels Love Bird Feeders
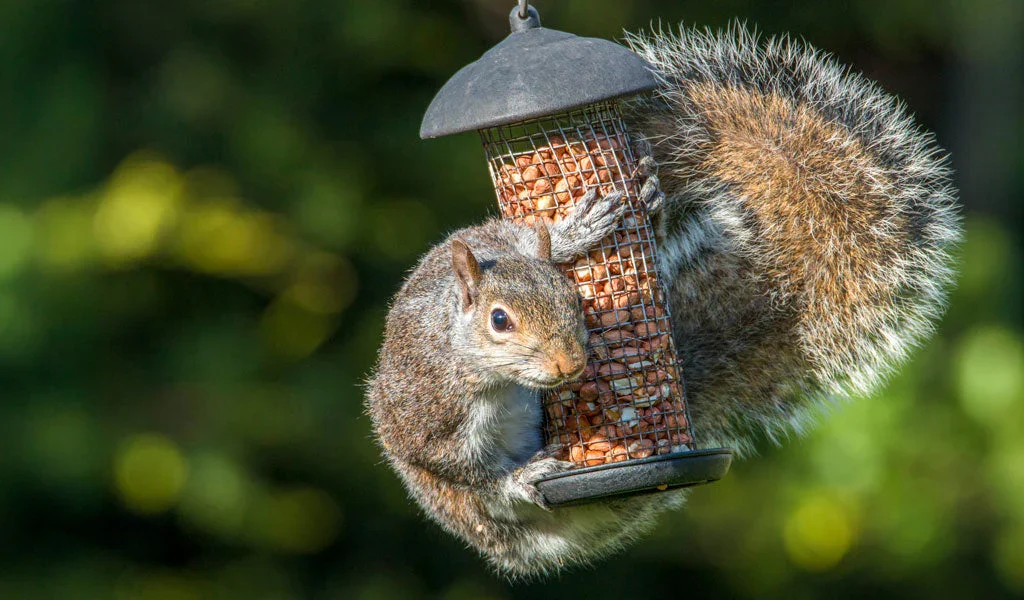
Before we dive into solutions, it helps to understand why squirrels are so drawn to bird feeders.

  • Easy Food Source: Birdseed, especially sunflower seeds and nuts, is irresistible to squirrels.
  • High Energy Need: Squirrels burn a lot of calories climbing, running, and leaping—bird feeders provide quick fuel.
  • Opportunistic Behavior: Squirrels are problem-solvers. If they see a reliable food source, they’ll figure out how to reach it.

Knowing this makes it clear that a successful squirrel-proofing strategy involves both physical barriers and behavioral deterrents.


Step 1: Choose the Right Feeder
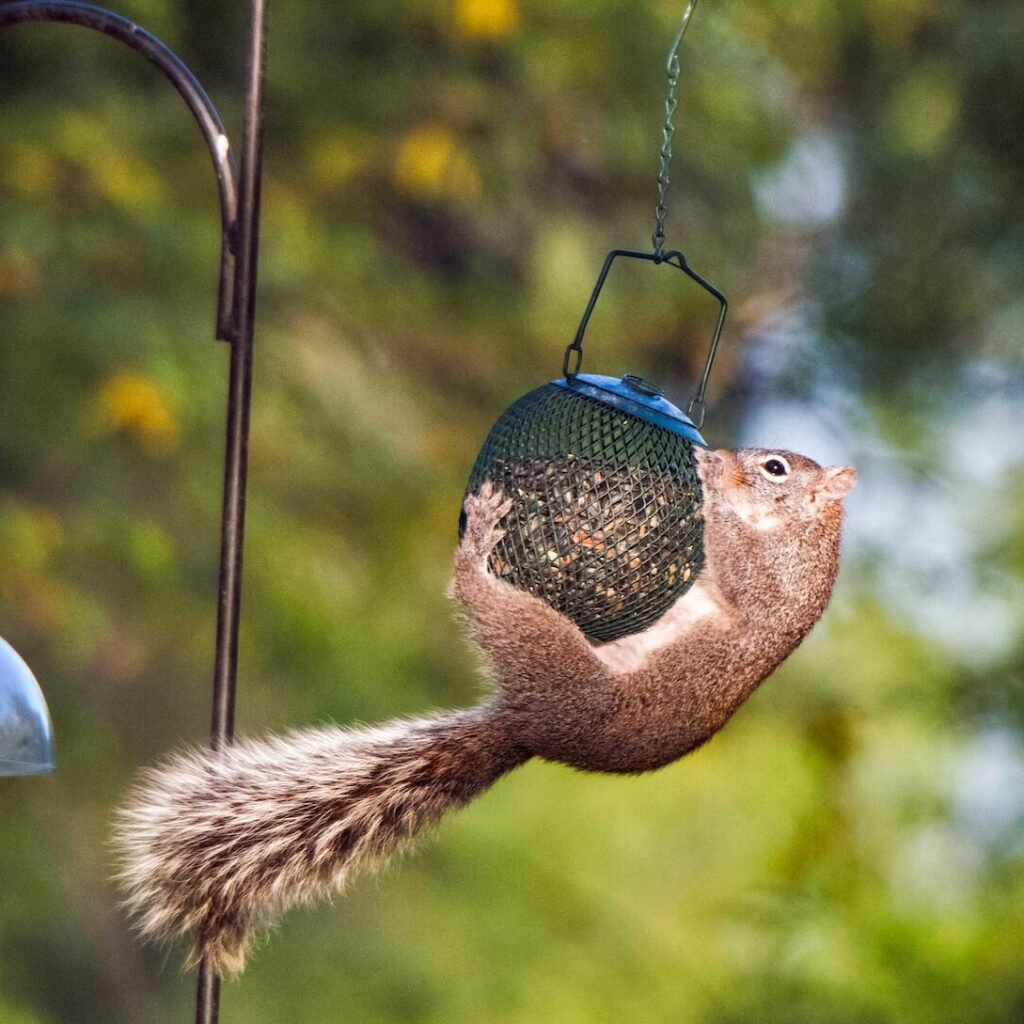
Not all bird feeders are created equal. Some are designed specifically to deter squirrels.

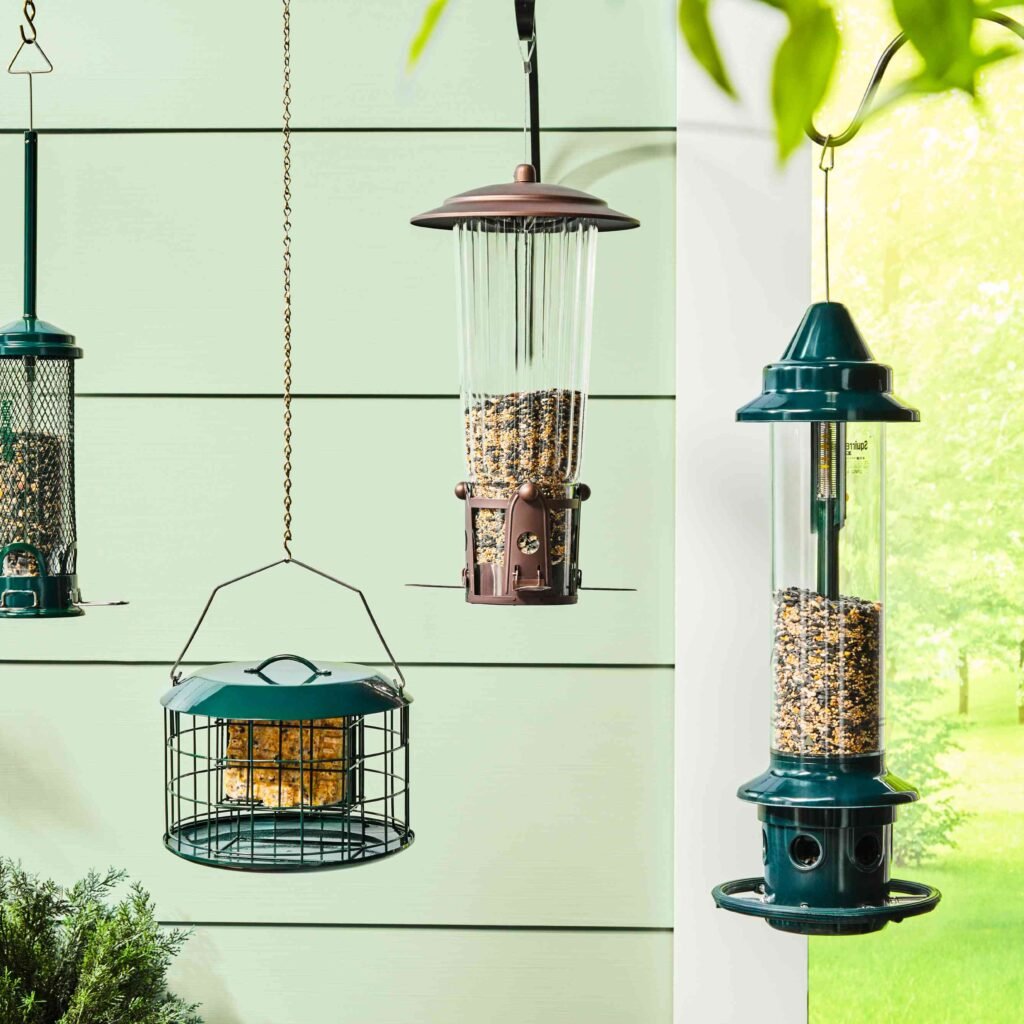
  • Weight-Activated Feeders: These close feeding ports under the weight of a squirrel but remain open for lightweight birds.
  • Caged Feeders: Surrounded by a metal cage that allows small birds in but keeps squirrels out.
  • Tube Feeders with Metal Ports: Prevent squirrels from chewing through to the seeds.

Tip: Avoid cheap plastic feeders—squirrels can chew through them in no time.


Step 2: Use Squirrel Baffles
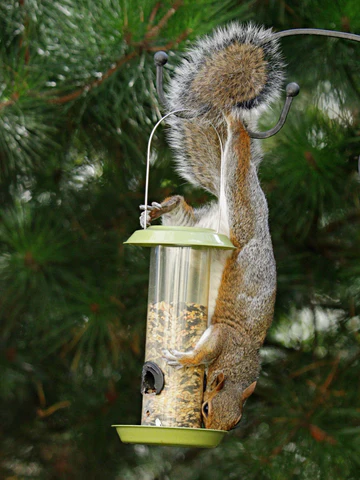
A squirrel baffle is one of the most effective tools against these critters.

  • Pole-Mounted Baffles: Dome- or cone-shaped barriers placed below a feeder to stop squirrels from climbing up.
  • Hanging Baffles: Installed above hanging feeders, they prevent squirrels from dropping down from branches or wires.

For best results, ensure the baffle is smooth, wide, and at least 16–18 inches in diameter so squirrels can’t grab around it.


Step 3: Placement Is Everything

Squirrels are excellent jumpers—capable of leaping 8–10 feet horizontally and 4–5 feet vertically. Proper feeder placement makes a big difference.

  • Distance from Trees & Structures: Place feeders at least 10 feet away from fences, trees, or rooftops.
  • Height from Ground: Mount feeders on poles at least 5–6 feet high.
  • Use Thin Poles: Squirrels can’t climb slick or narrow poles easily.

Pro Tip: Mount your feeder on a metal pole with a baffle for maximum effectiveness.


Step 4: Choose Birdseed Wisely
Birds love sunflower seeds and peanuts, but so do squirrels. Switching to less squirrel-friendly food can help.

  • Safflower Seeds: Many birds (like cardinals and chickadees) love them, but squirrels often don’t.
  • Nyjer (Thistle) Seeds: Favored by finches but ignored by squirrels.
  • White Proso Millet: Attracts small ground-feeding birds, less appealing to squirrels.

You can also buy pre-treated seed with capsaicin (hot pepper). Birds can’t taste the heat, but squirrels sure can.


Step 5: Add Spicy Deterrents

Capsaicin, the compound that makes chili peppers hot, is safe for birds but unpleasant for squirrels.

  • Hot Pepper Seed Mixes: Available at garden centers.
  • DIY Option: Mix a small amount of cayenne pepper into birdseed (wear gloves when handling).

Note: Be cautious—some wildlife advocates recommend buying commercial blends to avoid irritation to your own hands or eyes.


Step 6: Create Distractions
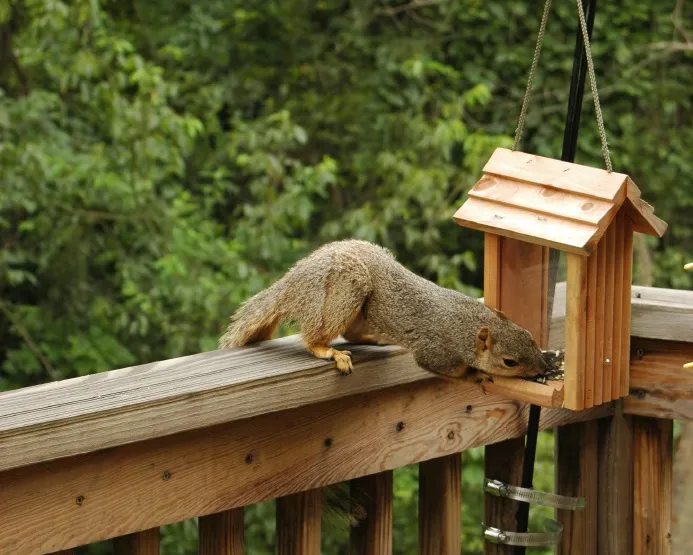
Sometimes, the best way to protect your bird feeders is to give squirrels an alternative food source.

  • Squirrel Feeders: Place them far from bird feeders, stocked with corn, nuts, or specially formulated squirrel food.
  • Ground Feeding: Scatter food for squirrels in another part of the yard so they leave the bird feeder alone.

This “decoy method” works especially well if you enjoy watching squirrels too, but want to keep the peace.


Step 7: Maintain and Monitor

Squirrel-proofing is not a one-and-done task. These animals are persistent, so stay vigilant.

  • Check Feeders Regularly: Look for chew marks or damage.
  • Move Feeders Occasionally: If squirrels figure out one setup, change locations.
  • Rotate Strategies: Combine baffles, placement, and spicy seeds for best results.

Humane Methods vs. What to Avoid

While it may be tempting to use traps or harmful substances, humane methods are always best.

Safe Methods: Baffles, spicy seeds, placement strategies, squirrel feeders.
Avoid: Poison, sticky substances, or harmful traps—they can injure not only squirrels but also birds and pets.

Remember, squirrels are simply doing what comes naturally—searching for food. The goal is to deter, not harm.


Common Mistakes Homeowners Make

  1. Placing Feeders Too Close to Trees – Makes it easy for squirrels to jump.
  2. Using Plastic Feeders – Squirrels chew through them quickly.
  3. Neglecting Maintenance – Once squirrels find a weak spot, they’ll exploit it.
  4. Feeding Birds Exclusively with Sunflower Seeds – A squirrel’s favorite treat.
  5. Thinking One Solution Will Do It All – Often, a combination of methods works best.

Final Thoughts

Keeping squirrels away from your bird feeders may feel like a never-ending battle, but with the right mix of smart feeder choices, proper placement, baffles, seed selection, and spicy deterrents, you can tip the balance in favor of the birds.

Squirrels are clever, but so are you. By using these humane strategies, you’ll ensure that your feeders remain a safe, reliable haven for feathered friends—while still appreciating the occasional antics of those bushy-tailed acrobats from a distance.

A peaceful backyard full of bird songs instead of squirrel raids is possible—and it all starts with being one step ahead of your furry visitors.
5 Ways To Revive Your Garden After A Hot Summer

5 Ways To Revive Your Garden After A Hot Summer

A blazing summer sun, long dry spells, and scorching heat waves can leave even the healthiest gardens looking tired and wilted. Lawns turn brown, flowers droop, soil dries out, and vegetable beds may struggle to produce. If your garden has endured a tough summer, don’t worry—there are plenty of practical ways to bring it back to life. With the right techniques, you can restore soil health, encourage plant recovery, and prepare your garden for vibrant growth in the seasons ahead.

In this article, we’ll explore five proven ways to revive your garden after a hot summer, complete with detailed tips and strategies for gardeners of all levels.


1. Rehydrate and Refresh the Soil

One of the biggest challenges after a hot summer is dry, compacted soil. Extreme heat evaporates moisture quickly, leaving your garden’s foundation weak and unable to support healthy roots. To revive your plants, the first step is rehydrating and restoring soil structure.

Tips for Soil Recovery:

  • Deep Watering: Instead of frequent shallow watering, give your garden a long soak. This encourages roots to grow deeper, making plants more resilient.
  • Soaker Hoses or Drip Irrigation: These tools deliver water slowly at the root zone, minimizing evaporation and waste.
  • Compost and Organic Mulch: Add a 2–3 inch layer of compost to replenish lost nutrients, then cover with mulch (like shredded bark, straw, or leaves). Mulch locks in moisture, regulates temperature, and prevents further soil drying.
  • Loosening Compacted Soil: Use a garden fork to gently aerate compacted areas. Avoid aggressive tilling, which can disturb beneficial microorganisms.

Healthy soil is the foundation of revival—once it’s recharged, your plants will quickly bounce back.


2. Prune and Deadhead to Encourage New Growth

Heat-stressed plants often have scorched leaves, wilted stems, or faded flowers. Removing this damage not only improves appearance but also directs the plant’s energy toward new, healthy growth.
How to Prune After Summer:

  • Deadhead Flowers: Remove spent blooms from annuals and perennials. This encourages more flowers to develop in the cooler months.
  • Trim Damaged Leaves: Snip away brown or crispy foliage. This helps prevent pests and diseases from settling in weak tissue.
  • Rejuvenation Pruning: For overgrown shrubs or perennials, consider cutting them back by one-third to stimulate fresh growth.
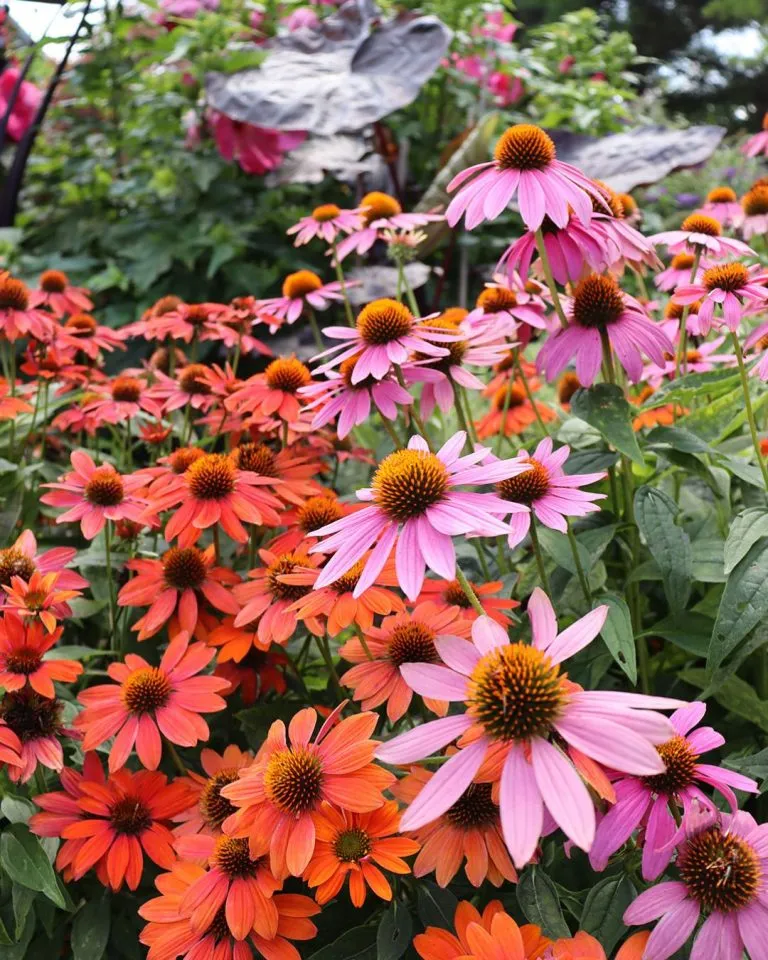
  • Focus on Perennials: Many perennials like coneflowers, black-eyed Susans, and salvias respond well to a post-summer trim and may even bloom again in early fall.

Pruning is like giving your garden a fresh haircut—it looks cleaner and helps plants use their energy wisely.


3. Reseed and Repair the Lawn

Lawns often suffer the most in summer heat, especially without regular watering. If yours looks more brown than green, early autumn is the perfect time to repair and revive it.

Steps to Lawn Recovery:

  1. Rake and Remove Debris: Clear dead grass and weeds to make room for new growth.
  2. Aerate the Lawn: Use an aerator tool to create small holes that improve airflow and allow water and nutrients to penetrate.
  3. Overseed with Cool-Season Grasses: Spreading grass seed over the existing lawn fills bare patches and restores density.
  4. Topdress with Compost: A thin layer of compost over new seed improves soil health and boosts germination.
  5. Regular Watering: Keep the soil consistently moist until the new grass is established.

By reseeding in late summer or early fall, your lawn will have time to establish strong roots before winter, ensuring lush green growth in spring.


4. Plant Fall-Friendly Crops and Flowers

Instead of just nursing tired plants, take advantage of cooler weather by planting crops and flowers that thrive in autumn. A hot summer may have taken its toll, but fall is a season of opportunity.

Best Vegetables to Plant After Summer:

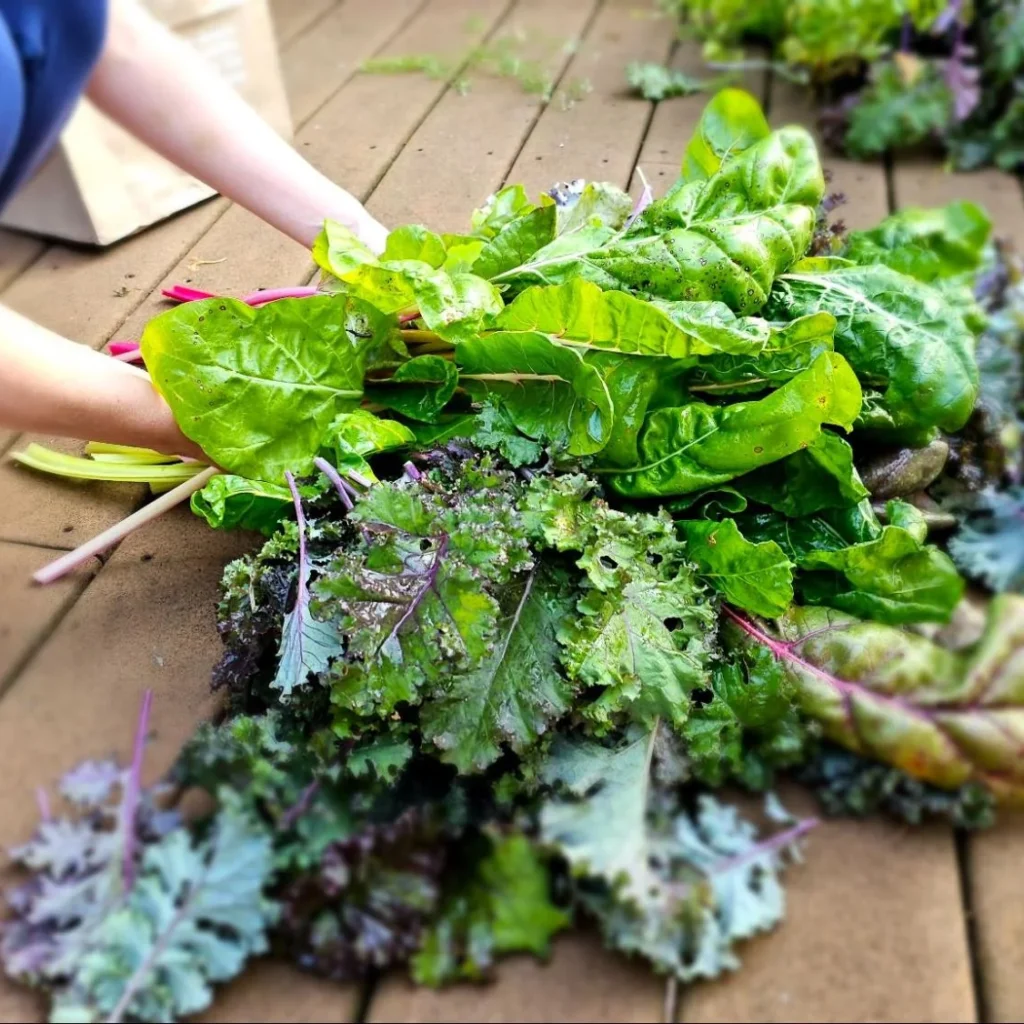
  • Leafy Greens: Spinach, kale, and lettuce thrive in cooler temperatures.
  • Root Vegetables: Carrots, beets, radishes, and turnips do well in refreshed soil.
  • Broccoli and Cauliflower: These crops love the mild fall climate.

Best Fall Flowers:

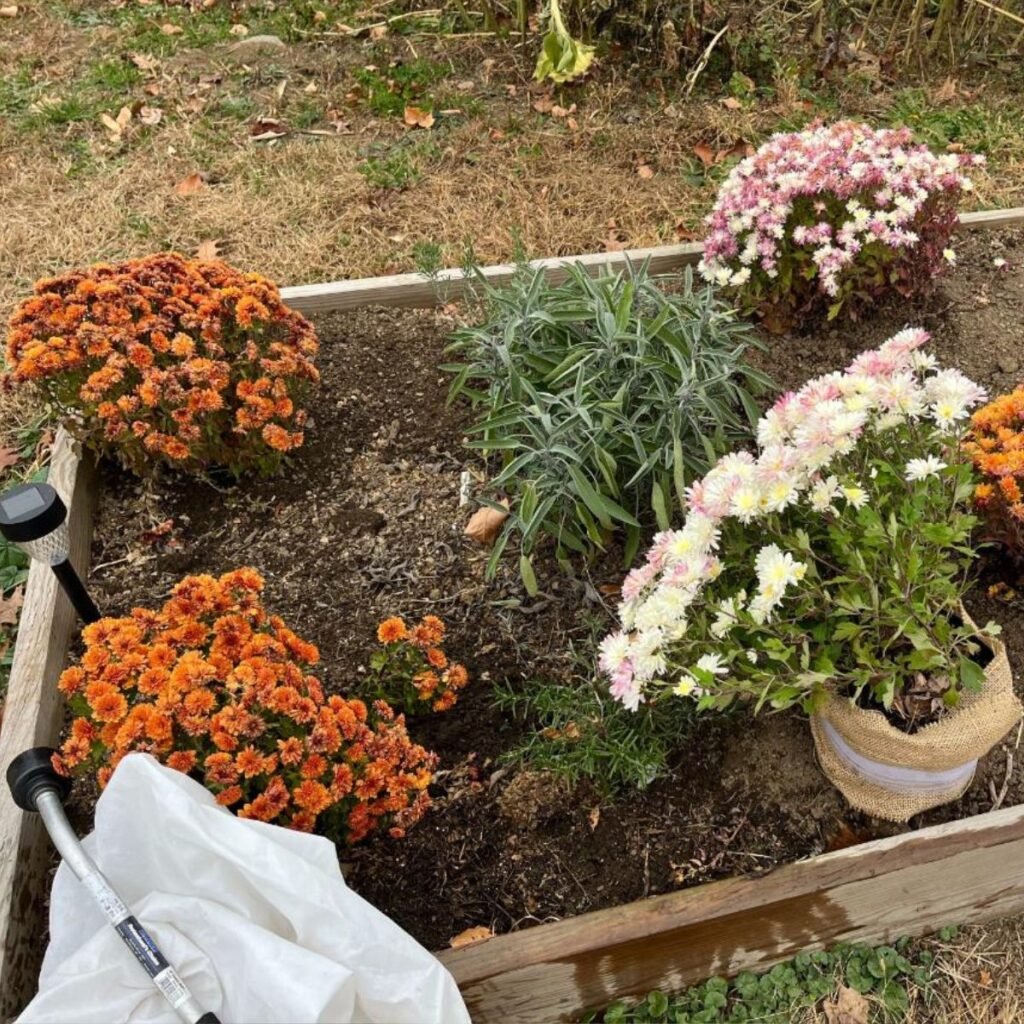
  • Mums (Chrysanthemums): Known as the classic fall flower, mums bring vibrant color.
  • Pansies and Violas: Hardy flowers that bloom into winter in many regions.
  • Asters and Sedum: Add long-lasting color to perennial beds.

By introducing fall plants, your garden goes from survival mode to thriving again, filling it with freshness and life.


5. Fertilize and Plan for Long-Term Health

Finally, a tired summer garden needs a nutritional boost. Plants deplete soil nutrients over time, and extreme heat accelerates the process. A balanced fertilization routine ensures recovery and prepares your garden for future seasons.

Fertilizing Tips:

  • Organic Fertilizers: Use compost tea, worm castings, or fish emulsion for gentle, slow-release feeding.
  • Balanced NPK Fertilizers: Choose one with equal nitrogen, phosphorus, and potassium to encourage both root and leaf growth.
  • Timing Matters: Fertilize early in the morning or evening when temperatures are cooler.
  • Don’t Overdo It: Too much fertilizer can stress plants further—always follow package instructions.

In addition to feeding, plan for the months ahead by:

  • Cover Crops: Plant clover or rye to improve soil fertility over winter.
  • Protecting with Mulch: Insulate perennials and bulbs with an extra layer of mulch before frost.
  • Garden Cleanup: Remove dead plants and weeds to prevent disease carryover.

This step ensures that your garden not only recovers now but also enters the next growing season stronger than ever.


Conclusion

A hot summer may leave your garden looking worn out, but it’s far from the end of its beauty. By rehydrating the soil, pruning damaged plants, repairing your lawn, planting fall crops, and replenishing nutrients, you can revive your outdoor space and set the stage for months of lush growth.

Gardening is a cycle of renewal, and every season presents a chance to start fresh. With these five strategies, you’ll transform your garden from heat-stressed to vibrant, ensuring it thrives well into fall and beyond.

How to Protect Your Fall Plants from Early Frost

How to Protect Your Fall Plants from Early Frost

Fall is a magical time in the garden—the crisp air, the fiery hues of autumn foliage, and the late-season blooms create a breathtaking outdoor space. However, this beauty can quickly be cut short when early frost arrives. Even a single cold snap can damage or kill tender plants, ruin flowers, and cut short your vegetable harvest. For gardeners who want to extend their fall displays or continue enjoying fresh produce, protecting plants from early frost is essential.

The good news is that with some preparation and the right strategies, you can safeguard your garden from frost damage. This guide explores why frost occurs, which plants are most vulnerable, and effective methods to shield your garden when the temperatures drop.


Understanding Frost and Its Effects on Plants

What Is Frost?
Frost occurs when temperatures drop to near or below freezing, causing water vapor in the air to form ice crystals on surfaces like soil, leaves, and stems. While frost might look delicate and beautiful, those ice crystals can rupture plant cells, leading to wilted, blackened, or dead foliage.

Types of Frost:

  1. Light Frost: Occurs around 32°F (0°C); damages tender annuals and vegetables.
  2. Hard Frost (Freeze): Below 28°F (-2°C); harms even many hardy plants and can kill root systems.

Plants Most at Risk:

  • Tender annuals like marigolds, zinnias, impatiens, and petunias.
  • Warm-season vegetables such as tomatoes, peppers, cucumbers, and beans.
  • Herbs like basil and cilantro.
  • Late-season perennials or newly planted shrubs not yet established.

Hardier plants (like kale, pansies, or chrysanthemums) can tolerate light frost, but even they may suffer if temperatures dip sharply overnight.


Signs of Frost Damage

Recognizing early frost injury is important so you can act quickly:

  • Darkened, water-soaked leaves that later turn brown and crispy.
  • Wilted growth that doesn’t recover in sunlight.
  • Flower buds and fruits turning black or mushy.
  • In severe cases, plant death if the root zone freezes.

Prevention, rather than cure, is key to keeping fall gardens thriving.


7 Effective Ways to Protect Fall Plants from Early Frost

1. Cover Plants with Protective Materials

One of the easiest and most effective methods is to cover plants when frost is expected.

Materials You Can Use:

  • Old bedsheets, blankets, or towels.
  • Frost cloths or row covers (lightweight fabrics designed to trap heat while allowing airflow).
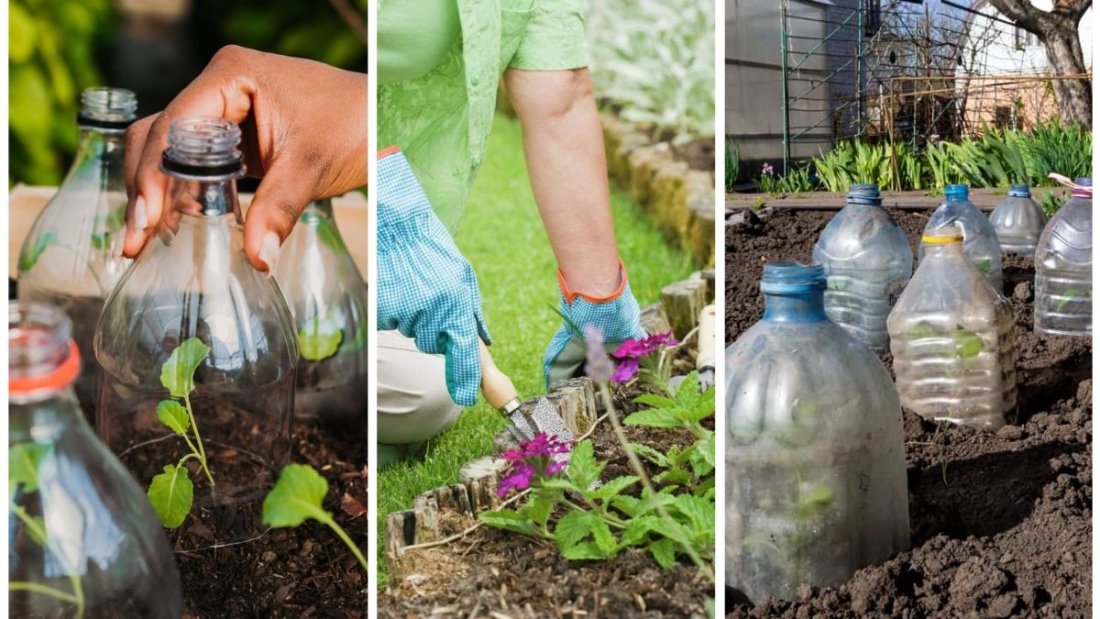
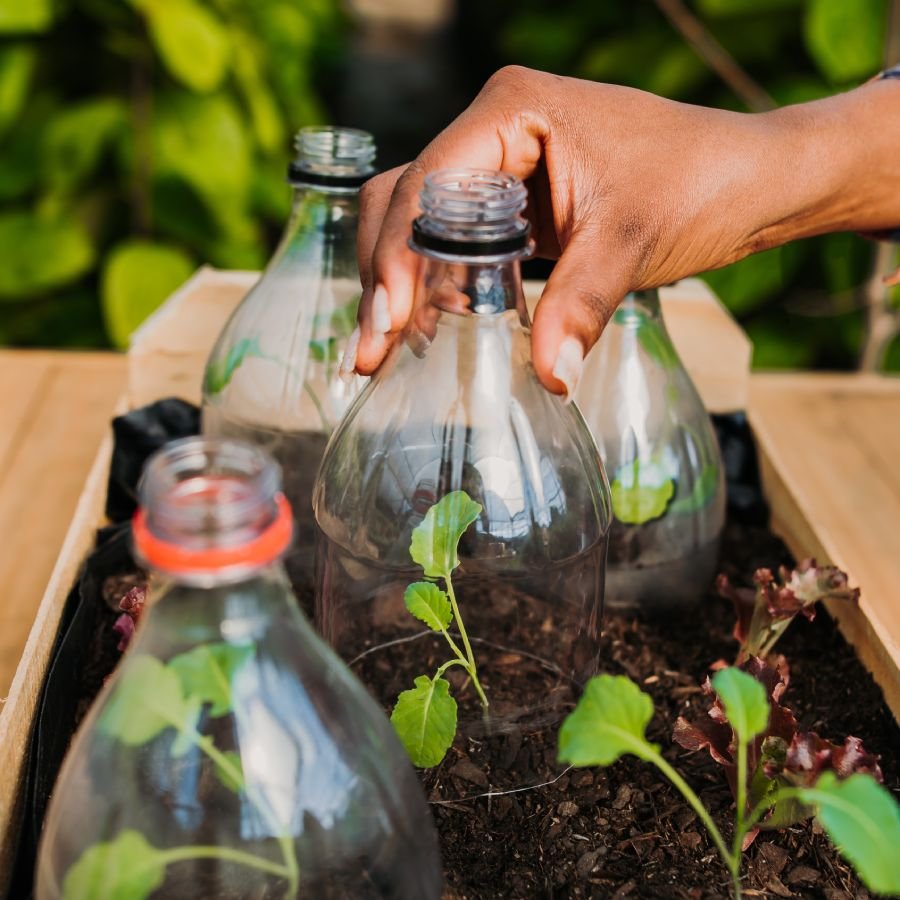
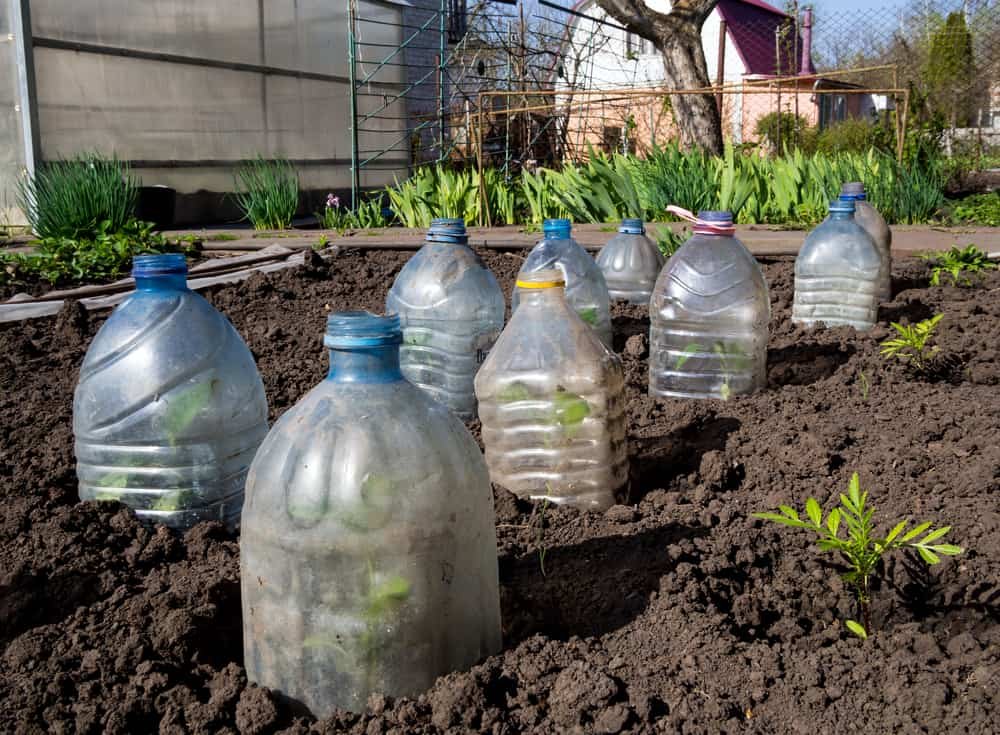
  • Cardboard boxes or overturned buckets for small plants.

Tips:

  • Cover plants in the evening before frost is predicted.
  • Anchor fabric with rocks or stakes to prevent wind from blowing it away.
  • Remove covers in the morning once the sun rises to prevent overheating.

This method traps warm air radiating from the soil, keeping temperatures under the cover a few degrees higher.


2. Water Your Garden Before Frost

Moist soil retains heat better than dry soil. Watering your plants in the afternoon before a predicted frost helps insulate roots and raises the temperature around plants.

Pro Tip: Avoid overwatering—soggy soil can cause root rot. The goal is to provide consistent moisture, not puddles.


3. Use Mulch as Insulation

A thick layer of mulch around the base of plants helps regulate soil temperature and prevents roots from freezing.

Best Mulch Options for Fall:

  • Straw or hay.
  • Shredded leaves.
  • Pine needles.
  • Compost or bark chips.

Apply 2–4 inches around perennials, shrubs, and late-season vegetables. Mulch also reduces temperature fluctuations, which can stress plants.


4. Relocate Container Plants

Plants in pots are more vulnerable to frost because their roots are above ground and exposed to temperature swings.

Solutions:

  • Move pots closer to your home, garage, or shed where radiated heat offers protection.
  • Group pots together to create a microclimate.
  • Wrap containers with bubble wrap, burlap, or blankets for insulation.

Even shifting containers a few feet can make a big difference in temperature.


5. Cold Frames and Cloches

For gardeners who want a more permanent solution, cold frames and cloches are excellent tools for frost protection.

  • Cold Frames: Small, transparent enclosures built close to the ground, often with hinged lids. They capture solar energy and shield plants from frost. Perfect for greens, herbs, and seedlings.
  • Cloches: Dome-shaped covers (traditionally made of glass, now available in plastic) placed over individual plants. They create a mini-greenhouse effect.

Both options are reusable and extend the growing season well into winter.


6. Harvest Before Frost Strikes

Sometimes, despite best efforts, frost is inevitable. In these cases, harvesting tender crops before the cold hits is the wisest option.

Best Candidates for Pre-Frost Harvesting:

  • Tomatoes (pick and let them ripen indoors).
  • Peppers, cucumbers, zucchini.
  • Basil and tender herbs.

For root vegetables like carrots or beets, a light frost can actually sweeten flavor, but they should still be harvested before a hard freeze.


7. Choose Frost-Tolerant Plants for Fall Gardening

Another preventive strategy is to fill your fall garden with hardy varieties that naturally withstand cooler temperatures.

Frost-Tolerant Fall Plants:

  • Flowers: Pansies, violas, chrysanthemums, ornamental kale.
  • Vegetables: Kale, spinach, lettuce, cabbage, broccoli, carrots.
  • Herbs: Thyme, rosemary, sage, parsley.

By selecting plants adapted to autumn’s challenges, you reduce the risk of losing your garden to an unexpected frost.


Long-Term Strategies for Frost Protection

While temporary fixes work well, long-term planning ensures your garden thrives year after year.

  1. Monitor Weather Forecasts: Keep an eye on local frost alerts. Apps and gardening websites often issue warnings days in advance.
  2. Plant in Microclimates: Take advantage of sheltered spots near walls, fences, or rocks where heat lingers longer.
  3. Stagger Planting Times: Plant a mix of early, mid-, and late-season crops to spread your harvest window.
  4. Install Raised Beds: They warm up faster in the day, protecting roots during chilly nights.
  5. Invest in Greenhouses or Polytunnels: For serious gardeners, these structures provide reliable protection and extend the growing season significantly.

Common Mistakes to Avoid

  • Leaving covers on during sunny mornings: Plants can overheat quickly.
  • Using plastic directly on foliage: It transfers cold and can damage plants—always prop plastic above with stakes.
  • Overwatering before frost: Water is helpful, but too much can cause rot when temperatures drop.
  • Ignoring root protection: Even if foliage survives, unprotected roots can die in frozen soil.

Conclusion

Early frost doesn’t have to spell the end of your fall garden. With preparation and a mix of short-term and long-term strategies, you can keep your flowers blooming and vegetables producing well into the season. Covering plants, watering strategically, using mulch, relocating containers, and employing tools like cloches or cold frames all provide a layer of security when temperatures dip unexpectedly.

By understanding how frost works and planning ahead, you’ll not only save your fall plants but also extend the beauty and productivity of your garden. Remember, gardening is about working with nature’s rhythms—and with the right protective steps, your autumn garden can thrive even against the chill of early frost.

5 Best Perennials to Plant This Autumn for Spring Blooms

5 Best Perennials to Plant This Autumn for Spring Blooms

One of the secrets to a stunning spring garden is starting in the fall. While many gardeners see autumn as the end of the growing season, it’s actually the perfect time to prepare for the next. Cooler weather, moist soil, and less intense sun create ideal conditions for planting perennials. By tucking them into the ground now, you give them time to establish strong root systems before winter arrives. Come spring, these plants will reward you with vibrant color, fragrance, and vitality.

If you’re wondering where to begin, here are five of the best perennials to plant this autumn for spectacular spring blooms—along with tips on planting, care, and design.


1. Tulips (Tulipa spp.)

Why They’re Perfect for Spring:
Tulips are one of the most iconic spring flowers. With their cup-shaped blooms in a rainbow of colors, they bring bold, cheerful beauty to any garden. They’re versatile, easy to grow, and ideal for borders, beds, and containers.

When and How to Plant:

  • Timing: Plant bulbs in mid to late autumn, about 6–8 weeks before the ground freezes.
  • Soil: Well-drained soil is essential—tulips rot in soggy conditions. Adding sand or compost helps improve drainage.
  • Depth & Spacing: Plant bulbs about 6–8 inches deep, with the pointed end facing upward. Space them 4–6 inches apart.
  • Light: Full sun encourages the best blooms.

Care Tips:

  • Fertilize with a bulb-specific fertilizer at planting time.
  • After blooming, allow foliage to die back naturally to feed the bulb for next year.
  • Plant in groups for maximum visual impact.

Design Idea:
Mix early-, mid-, and late-blooming tulip varieties to enjoy color from March through May. Pair them with daffodils for a classic spring display.


2. Daffodils (Narcissus spp.)

Why They’re Perfect for Spring:
Daffodils are hardy, reliable, and deer-resistant, making them an excellent choice for gardens of all sizes. Their bright yellow or white trumpet-shaped blooms are among the first signs of spring, symbolizing renewal and joy.

When and How to Plant:

  • Timing: Plant bulbs in early to mid-autumn before the ground freezes.
  • Soil: Loose, fertile, and well-drained soil. Enrich with compost or leaf mold for best results.
  • Depth & Spacing: Plant bulbs 6 inches deep and 4–6 inches apart.
  • Light: Full sun to partial shade.

Care Tips:

  • Naturalize daffodils by planting them in clusters or drifts for a natural look.
  • Water well after planting and during dry autumn spells.
  • Deadhead spent flowers but leave foliage until it yellows to strengthen bulbs.

Design Idea:
Scatter daffodils through lawns, under trees, or along pathways for a naturalized, meadow-like effect. They pair beautifully with grape hyacinths or crocuses.


3. Hyacinths (Hyacinthus orientalis)

Why They’re Perfect for Spring:
Known for their rich fragrance and dense clusters of flowers, hyacinths bring both beauty and aroma to spring gardens. They bloom in shades of blue, pink, purple, and white, making them a favorite for sensory appeal.

When and How to Plant:

  • Timing: Plant in mid-autumn, about 6 weeks before frost.
  • Soil: Well-drained soil with added compost or bulb fertilizer.
  • Depth & Spacing: Plant bulbs 4–6 inches deep, spaced 3–4 inches apart.
  • Light: Full sun to light shade.

Care Tips:

  • Wear gloves when planting—hyacinth bulbs can irritate skin.
  • Avoid waterlogging, as bulbs are prone to rot.
  • After blooming, remove spent flower spikes but leave foliage intact until it dies back.

Design Idea:
Plant hyacinths near patios, entrances, or walkways where their fragrance can be enjoyed up close. Combine with tulips for layers of color and texture.


4. Peonies (Paeonia spp.)

Why They’re Perfect for Spring:
Peonies are long-lived perennials that can thrive for decades with minimal care. Their large, fragrant blooms—ranging from soft pastels to bold reds—make them show-stoppers in spring gardens.

When and How to Plant:

  • Timing: Plant bare-root peonies in autumn, allowing them time to establish roots before winter.
  • Soil: Deep, fertile, well-drained soil enriched with organic matter.
  • Depth & Spacing: Place tubers with eyes (buds) no more than 2 inches below the surface. Plant 3–4 feet apart for airflow.
  • Light: Full sun, though partial shade is tolerated in hot regions.

Care Tips:

  • Avoid planting too deep, as this prevents flowering.
  • Water regularly until established but avoid soggy soil.
  • Provide support stakes for heavy blooms.

Design Idea:
Use peonies as focal points in mixed perennial borders. Pair them with iris or alliums for a dramatic spring combination.


5. Irises (Iris spp.)

Why They’re Perfect for Spring:
Irises are striking perennials with unique, sword-like foliage and intricate blooms. With varieties ranging from bearded to Siberian and Japanese irises, they add elegance, color, and architectural flair to gardens.

When and How to Plant:

  • Timing: Plant rhizomes in late summer to early autumn.
  • Soil: Well-drained, neutral to slightly acidic soil. Irises dislike standing water.
  • Depth & Spacing: Plant rhizomes just below the soil surface, with part of the rhizome exposed. Space 12–18 inches apart.
  • Light: Full sun is ideal.

Care Tips:

  • Divide clumps every 3–4 years to maintain vigor.
  • Avoid heavy mulch over rhizomes, as it can cause rot.
  • Deadhead spent blooms to keep plants tidy.

Design Idea:
Plant irises in clumps along borders or near water features. Their vertical foliage provides structure long after blooms fade.


Additional Planting & Care Tips for Autumn Perennials

  1. Prepare the Soil: Enrich beds with compost or well-rotted manure before planting to provide nutrients.
  2. Water Well: Give plants a deep watering after planting and during dry autumn spells.
  3. Mulch for Protection: Apply a light layer of mulch to insulate bulbs and roots from extreme cold.
  4. Plan for Successive Blooms: Choose perennials with staggered bloom times for color from early to late spring.
  5. Mark Your Plantings: Use plant markers to remember where bulbs and roots are placed—important for spring maintenance.

Conclusion

Planting perennials in autumn is an investment in the beauty of your spring garden. By choosing tried-and-true performers like tulips, daffodils, hyacinths, peonies, and irises, you ensure a stunning display of color, fragrance, and texture once winter fades away. With thoughtful planting and care, these perennials will return year after year, rewarding your fall efforts with unforgettable spring blooms.

So, grab your trowel this autumn, prepare your beds, and plant for the future—because spring’s beauty begins in fall.

The Best Tools Every Gardener Needs

The Best Tools Every Gardener Needs

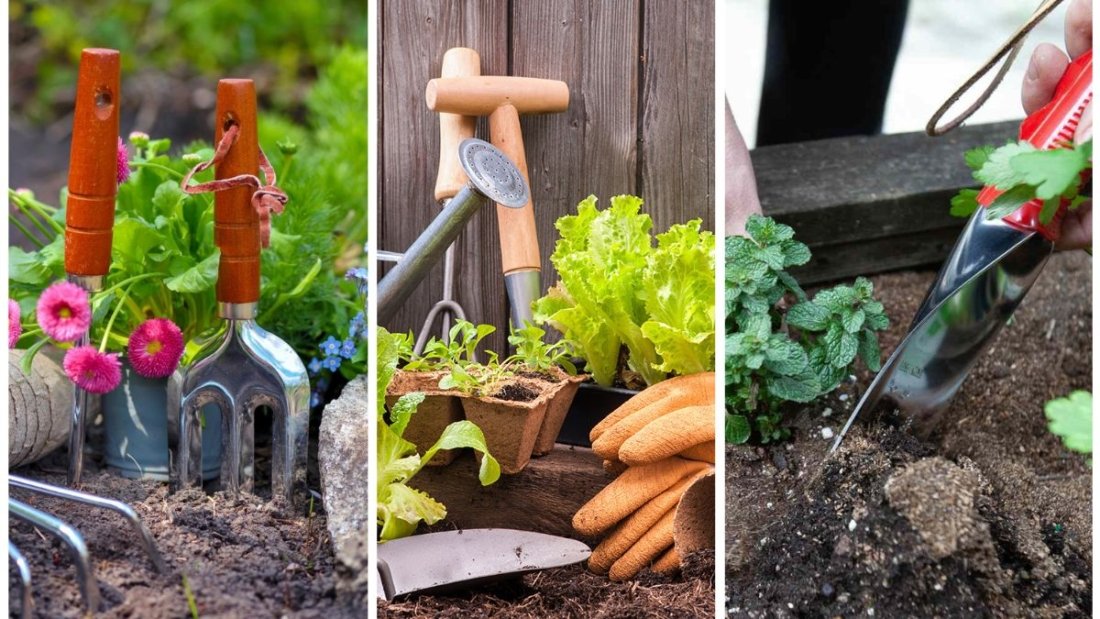
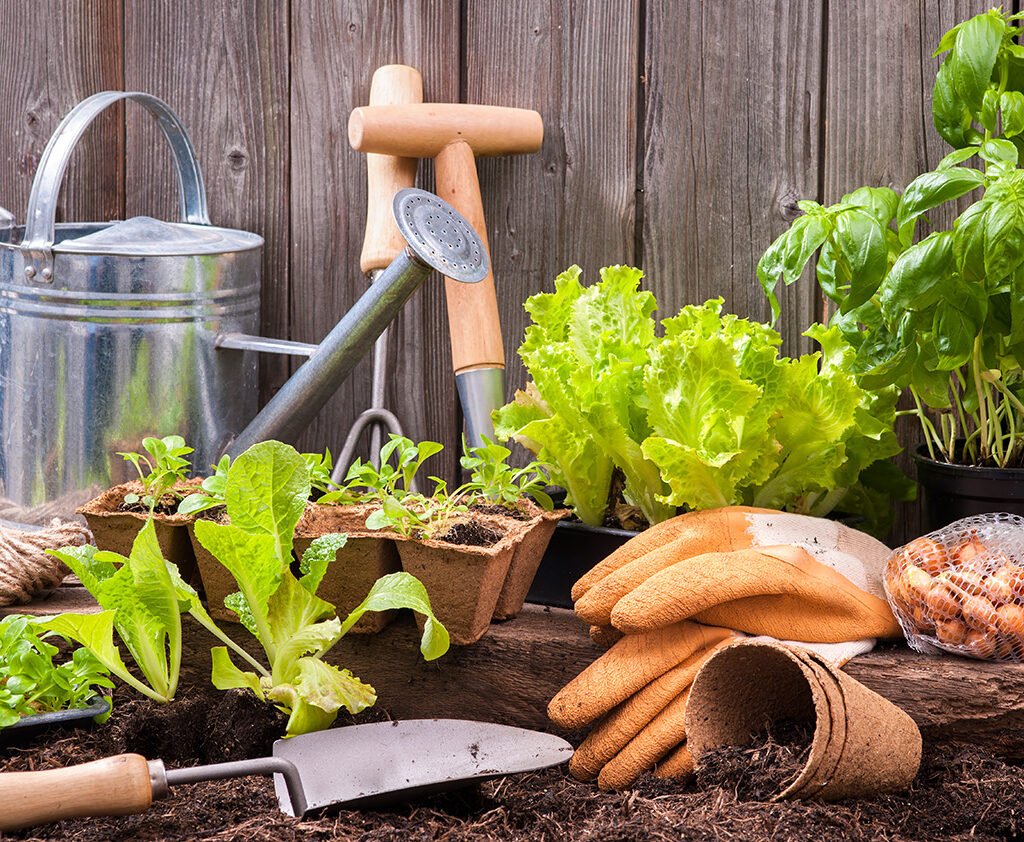
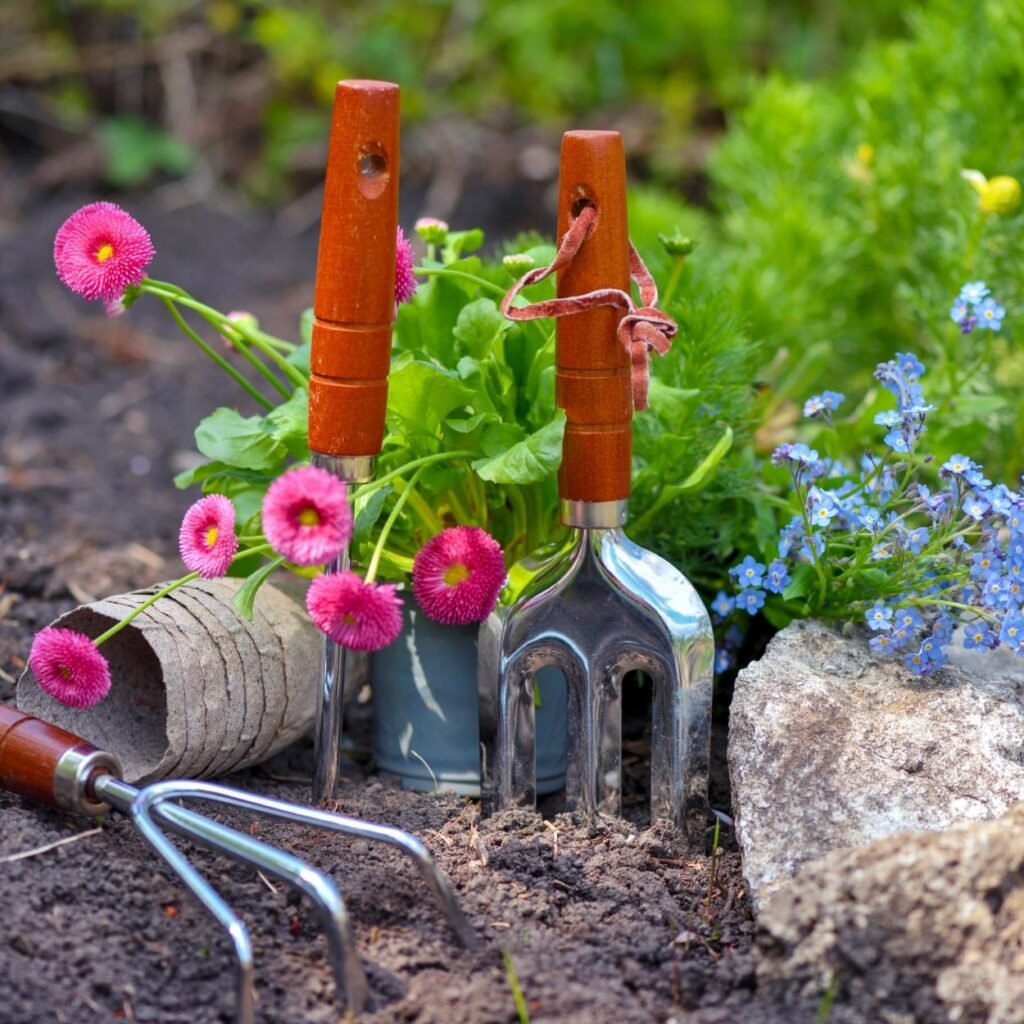
Behind every thriving garden is a gardener equipped with the right tools. Whether you’re growing vegetables, tending to flowers, or landscaping your backyard, having the proper gardening tools makes the process more efficient, enjoyable, and successful. Tools are not just about convenience; they also help protect your body from unnecessary strain and give your plants the best care possible.

In this guide, we’ll explore the essential gardening tools every gardener should own, explain their uses, and provide tips on choosing and maintaining them. From simple hand tools to specialized equipment, these are the must-haves that form the foundation of any well-kept garden.


Why Gardening Tools Matter

Some might think gardening requires little more than soil, seeds, and water. However, quality tools make a huge difference by:

  1. Saving Time and Effort – The right tool can cut work in half.
  2. Improving Precision – Tools help with accurate planting, pruning, and shaping.
  3. Reducing Strain – Ergonomic tools prevent injury to your back, knees, and hands.
  4. Boosting Plant Health – Proper pruning, digging, and watering techniques promote growth.
  5. Enhancing Enjoyment – Gardening becomes more fun and less frustrating with efficient tools.

Now let’s dive into the must-have tools every gardener should keep in their shed or toolbox.


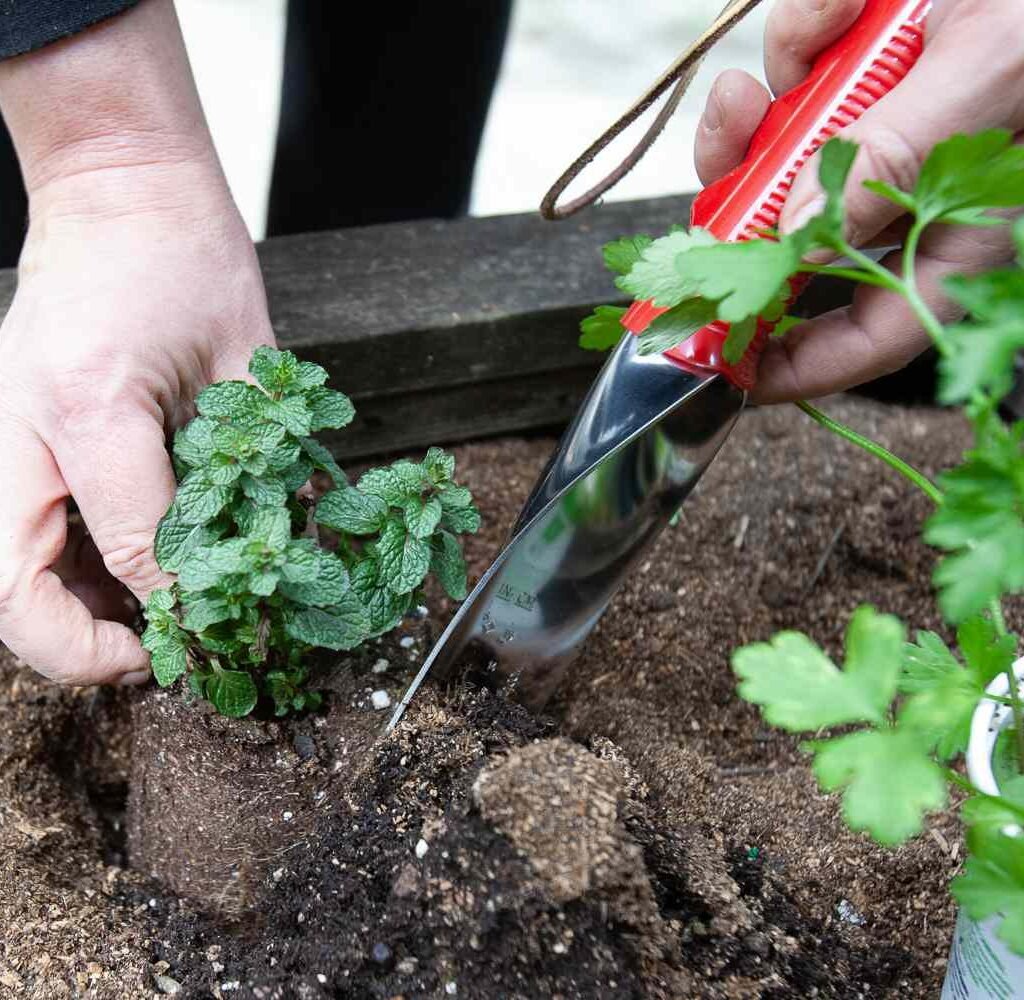
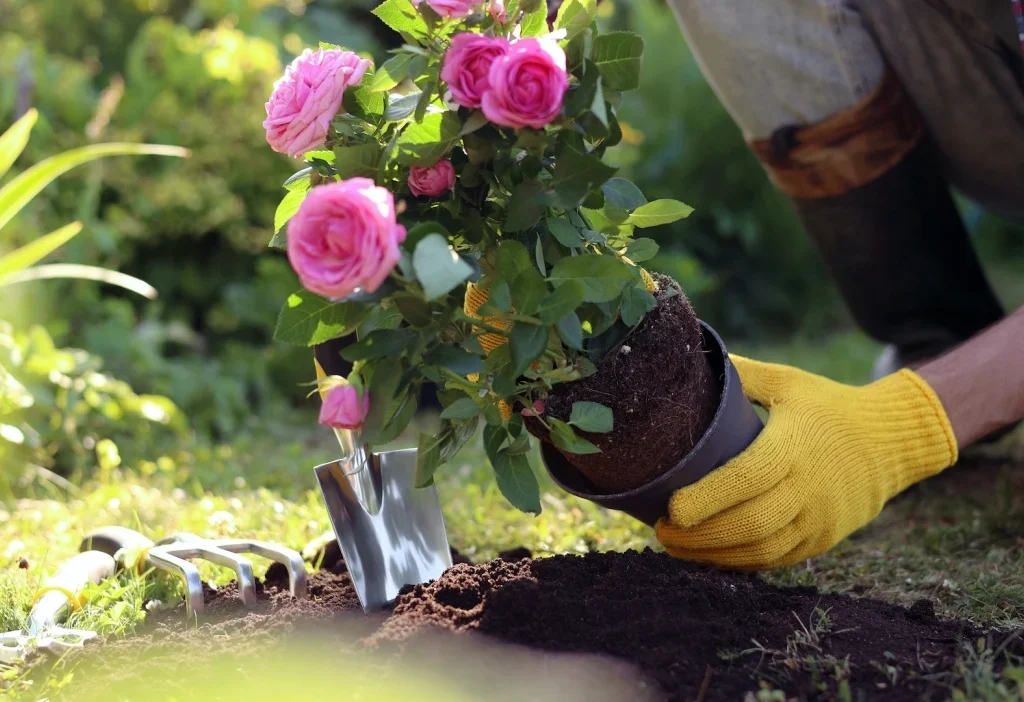
1. Hand Trowel

A hand trowel is the most basic and indispensable gardening tool. It’s perfect for digging small holes, transplanting seedlings, and loosening soil in flower beds or pots.

  • Best Use: Planting bulbs, removing weeds, mixing soil.
  • Tips for Choosing: Look for a sturdy, rust-resistant metal blade with a comfortable, ergonomic handle. Stainless steel blades last longer than aluminum ones.

2. Pruning Shears (Secateurs)

Pruning shears are essential for cutting stems, deadheading flowers, and shaping plants. A good pair ensures clean cuts without damaging plant tissue.

  • Best Use: Trimming branches up to ¾ inch thick, harvesting herbs, or cutting flowers.
  • Tips for Choosing: Bypass pruners are ideal for live plants, while anvil pruners work better for deadwood. Select shears with cushioned grips for comfort.

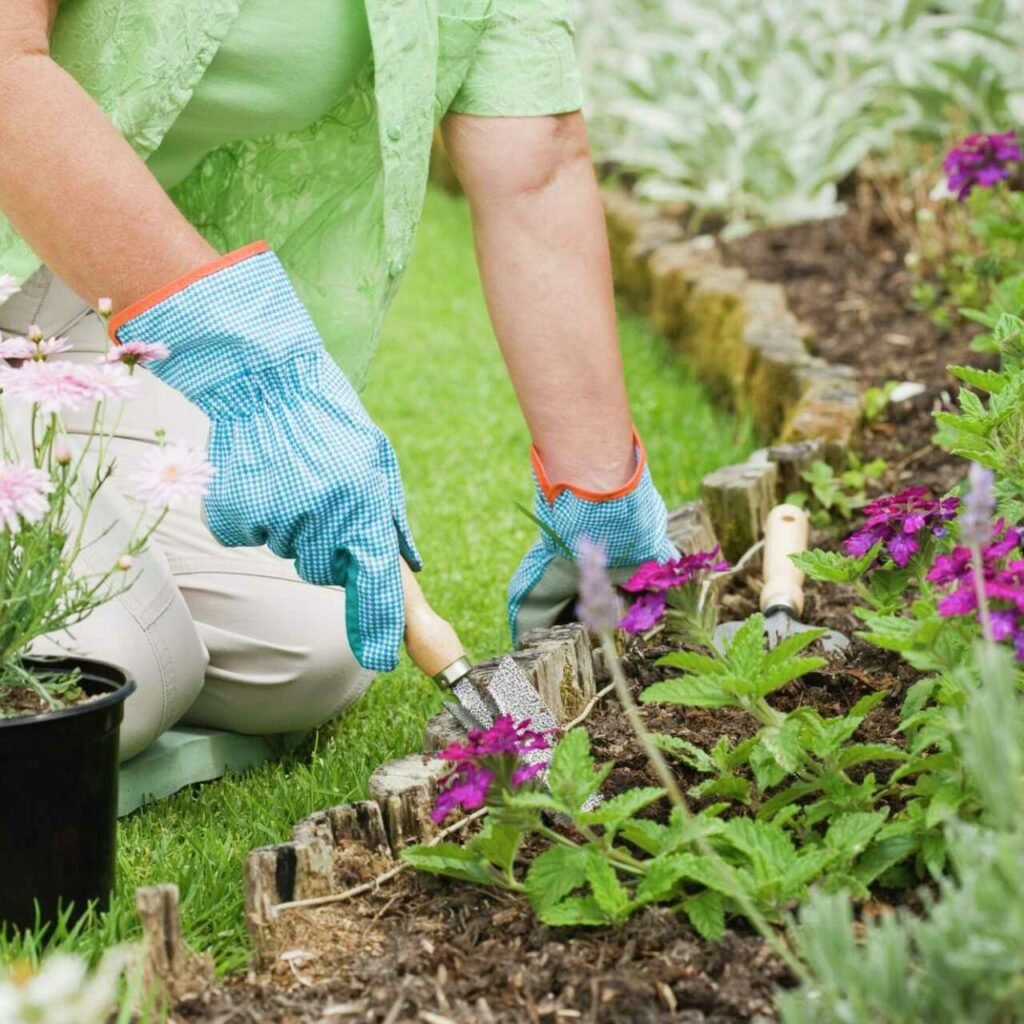
3. Gardening Gloves

Gardening without gloves can lead to blisters, scratches, and exposure to thorns or harmful chemicals. A good pair of gloves protects your hands while offering flexibility.

  • Best Use: Digging, pruning roses, handling soil, or spreading mulch.
  • Tips for Choosing: Go for durable, water-resistant gloves with breathable fabric. Leather gloves are excellent for heavy-duty work.

4. Garden Fork

A garden fork (or digging fork) is a versatile tool for loosening soil, turning compost, and breaking up clumps. Unlike shovels, forks penetrate compacted soil more easily.

  • Best Use: Aerating soil, digging up root vegetables, and moving mulch or compost.
  • Tips for Choosing: Look for strong, stainless-steel tines that won’t bend in tough soil.

5. Spade

A spade is different from a shovel—it has a flat, sharp blade designed for edging, cutting sod, and digging precise holes.

  • Best Use: Defining garden bed edges, digging trenches, and transplanting shrubs.
  • Tips for Choosing: A long-handled spade provides leverage, while shorter handles give more control.

6. Watering Can or Garden Hose

Water is life for your plants, and how you deliver it matters. A sturdy watering can is essential for potted plants and delicate seedlings, while a garden hose with a spray nozzle is ideal for larger beds.

  • Best Use: Watering indoor plants, outdoor containers, or expansive beds.
  • Tips for Choosing: Select a lightweight can with a detachable spout for versatility. For hoses, opt for kink-resistant models with adjustable nozzles.

7. Wheelbarrow

Moving heavy loads of soil, compost, or stones is nearly impossible without a wheelbarrow. It’s a back-saving tool for large-scale gardening projects.

  • Best Use: Transporting soil, plants, mulch, or garden debris.
  • Tips for Choosing: Look for a sturdy steel tray and a wheel with good balance. Two-wheel models provide more stability than single-wheel ones.

8. Hoe

A hoe is indispensable for preparing soil and controlling weeds. It cuts into the soil surface, preventing weed growth and loosening compacted ground.

  • Best Use: Weeding between rows, shaping beds, and mixing soil amendments.
  • Tips for Choosing: A stirrup hoe is excellent for weeding, while a flat hoe is better for breaking soil.

9. Rake

Gardening requires two main types of rakes:

  1. Leaf Rake – Lightweight, with flexible tines for gathering leaves.
  2. Garden Rake – Heavy-duty, with rigid tines for leveling soil and removing rocks.
  • Best Use: Cleaning up debris, smoothing soil, and spreading mulch.
  • Tips for Choosing: Choose a rake with strong metal tines for soil work and a wide plastic or bamboo rake for leaves.

10. Garden Knife (Hori-Hori)

The Japanese Hori-Hori knife is a multipurpose tool that works as a trowel, weeder, and saw. It’s a favorite among serious gardeners.

  • Best Use: Digging, cutting roots, dividing perennials, and transplanting.
  • Tips for Choosing: Go for a stainless-steel blade with depth markings for accurate planting.

11. Pruning Saw

For branches too thick for pruning shears, a pruning saw is essential. Its serrated blade makes cutting woody stems and small tree branches easy.

  • Best Use: Pruning trees, cutting thick shrubs, and shaping hedges.
  • Tips for Choosing: Foldable saws are convenient and safe to store.

12. Garden Kneeler or Pad

Gardening often involves hours on your knees, which can strain joints. A kneeler or cushioned pad makes planting and weeding more comfortable.

  • Best Use: Prolonged weeding, planting, or harvesting at ground level.
  • Tips for Choosing: Select a thick, waterproof pad or a kneeler with side handles for support.

13. Garden Scissors

Garden scissors may seem simple, but they’re invaluable for snipping herbs, deadheading flowers, and opening seed packets or bags of soil.

  • Best Use: Light trimming, harvesting, and general garden tasks.
  • Tips for Choosing: Stainless-steel blades with comfortable handles are best.

14. Soil Testing Kit

Healthy soil is the foundation of every garden. A soil testing kit allows you to measure pH levels and nutrient content, ensuring your plants get the right balance.

  • Best Use: Testing garden beds before planting, diagnosing nutrient deficiencies.
  • Tips for Choosing: Opt for digital meters for quick results or chemical kits for detailed analysis.

15. Plant Markers and Twine

Organization is key in gardening. Plant markers help identify seedlings, while garden twine supports climbing plants and ties stems gently.

  • Best Use: Labeling rows of vegetables, supporting vines, and organizing plant beds.
  • Tips for Choosing: Weatherproof labels last longer, and biodegradable twine is eco-friendly.

Maintaining Your Gardening Tools

Even the best tools won’t last long without proper care. Follow these steps to extend their life:

  1. Clean After Use – Rinse soil and debris to prevent rust.
  2. Sharpen Blades – Keep pruners, knives, and shears sharp for clean cuts.
  3. Oil Metal Parts – Prevent rust by applying light machine oil after cleaning.
  4. Store Properly – Keep tools in a dry, covered place, preferably hung up to avoid damage.
  5. Inspect Regularly – Check handles for cracks and replace if needed.

Well-maintained tools perform better, keep your plants healthier, and save you money in the long run.


Conclusion

A gardener is only as effective as the tools they use. From the humble hand trowel to advanced soil testing kits, each tool has its role in creating a flourishing, low-stress garden. Investing in the best gardening tools ensures you work smarter, not harder, and enjoy the process as much as the results.

By equipping yourself with these essentials—and keeping them well-maintained—you’ll transform gardening from a chore into a rewarding experience. With the right tools in hand, your garden will not only look more beautiful but will also thrive season after season.

The Ultimate Guide to Growing Maple Trees

The Ultimate Guide to Growing Maple Trees

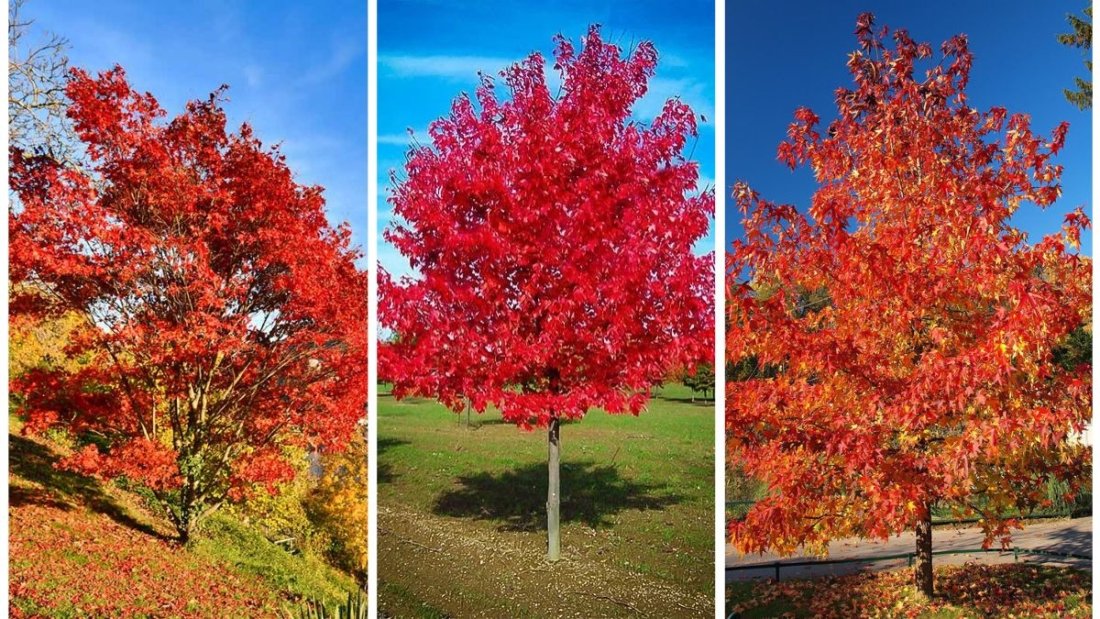
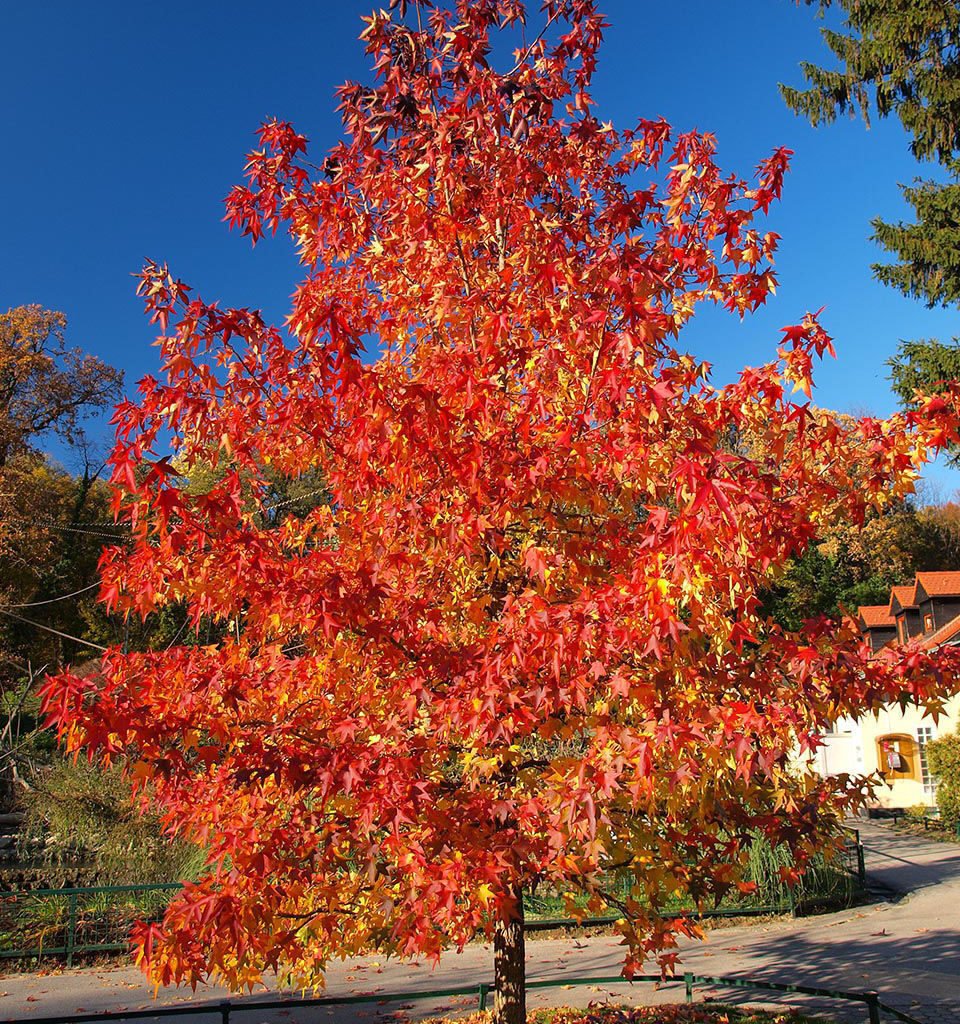
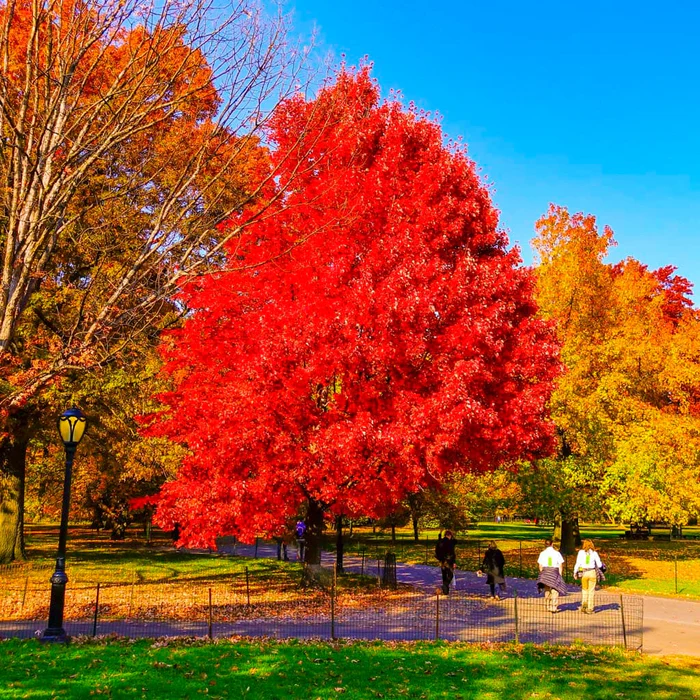
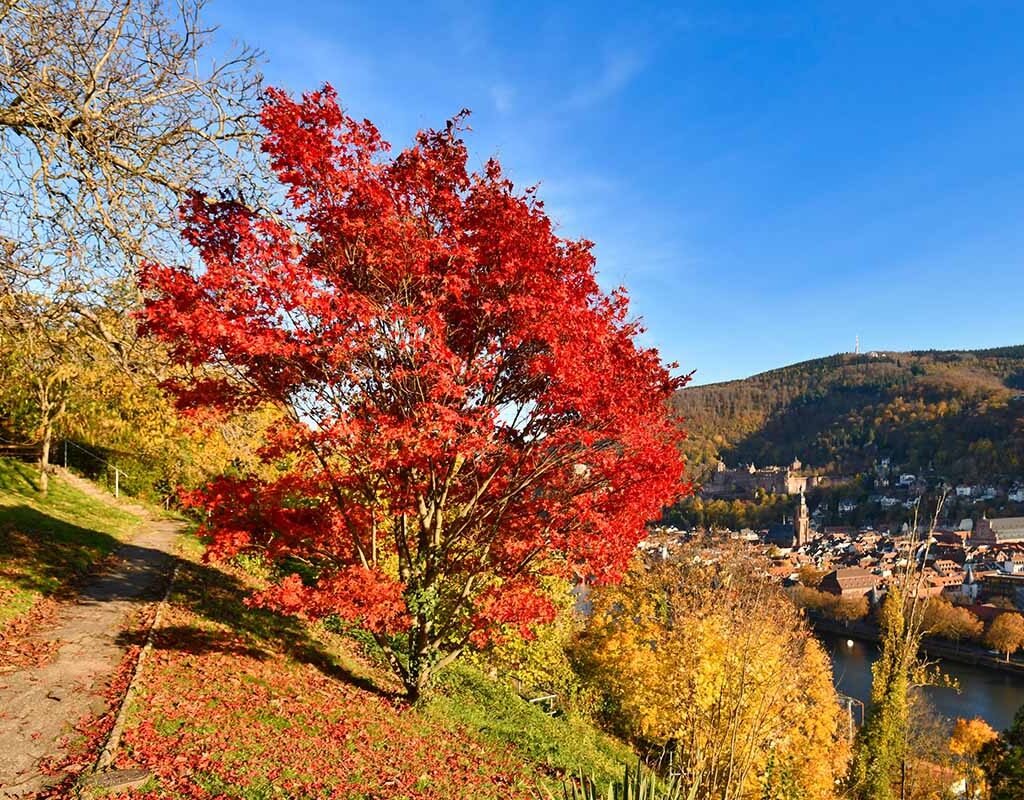
Maple trees (Acer spp.) are among the most iconic and versatile trees in landscapes worldwide. Known for their stunning fall foliage, graceful shape, and adaptability, maples enhance any garden or yard with both aesthetic and ecological benefits. From providing shade and privacy to supporting wildlife and producing sap for syrup, maples are a valuable addition to residential and public spaces.

This ultimate guide offers a comprehensive approach to growing maple trees, including selection, planting, care, and maintenance, ensuring healthy growth and vibrant beauty year after year.


Why Grow Maple Trees?

Maples are cherished by gardeners and landscapers for numerous reasons:

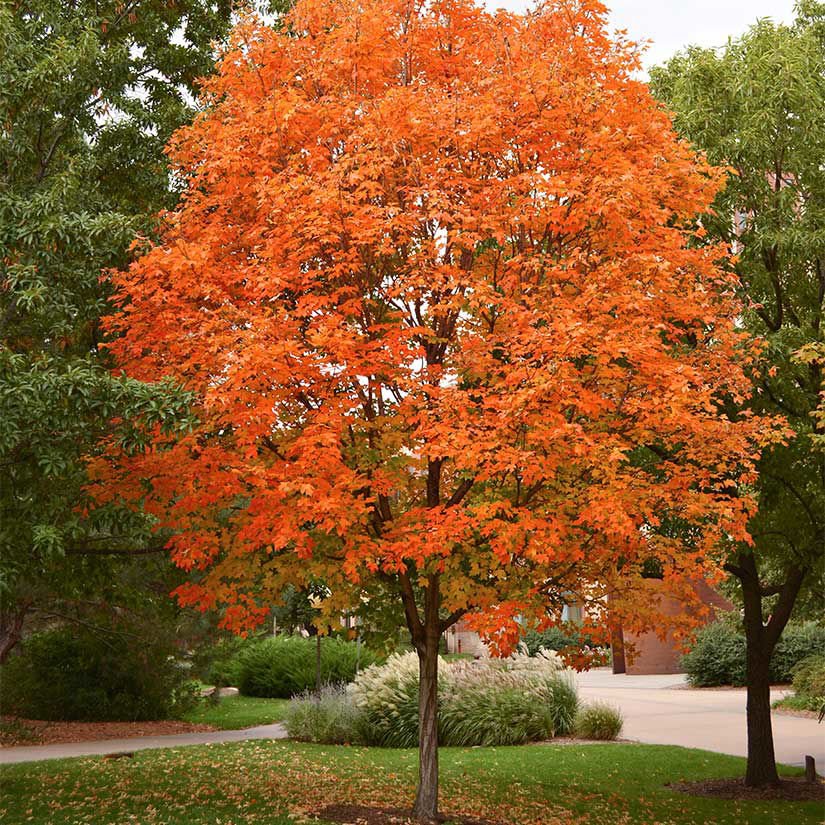
  • Spectacular Foliage: Many varieties exhibit vibrant reds, oranges, and yellows in autumn.
  • Shade and Shelter: Large canopy provides shade, cooling the surrounding environment.
  • Wildlife-Friendly: Supports birds, pollinators, and beneficial insects.
  • Versatility: Suitable for streetscapes, gardens, parks, and yards of all sizes.
  • Maple Syrup Production: Certain species, like sugar maples, can be tapped for syrup.

Understanding these benefits can help homeowners and gardeners appreciate the long-term value of planting maple trees.


Step 1: Choosing the Right Maple Variety

Selecting the right maple species is critical to match your climate, soil, and landscaping goals. Popular varieties include:

  1. Sugar Maple (Acer saccharum)
    • Famous for brilliant fall colors and maple syrup production.
    • Prefers cool climates and well-drained, fertile soil.
    • Can grow 60–75 feet tall.
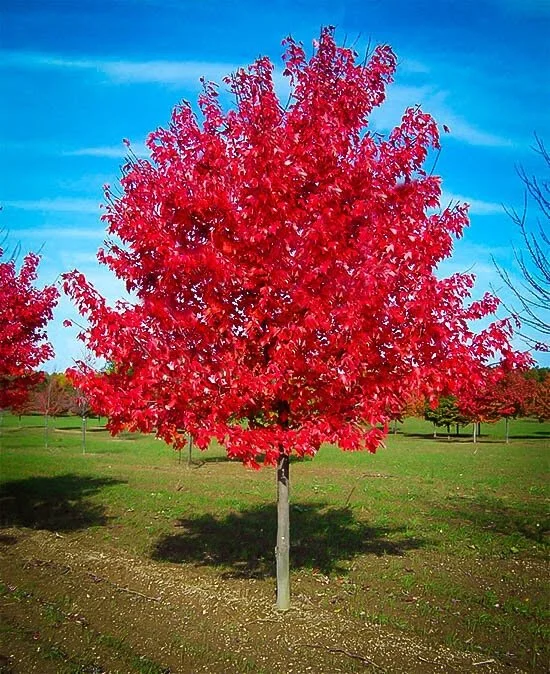
  2. Red Maple (Acer rubrum)
    • Noted for red flowers, new spring growth, and stunning fall foliage.
    • Tolerates a wide range of soil types and moisture conditions.
    • Height: 40–70 feet.
  3. Japanese Maple (Acer palmatum)
    • Small, ornamental tree with striking foliage and delicate form.
    • Perfect for smaller yards or container planting.
    • Height: 10–25 feet.
  4. Silver Maple (Acer saccharinum)
    • Fast-growing and hardy, with silvery undersides on leaves.
    • Ideal for quick shade, but weaker wood is prone to storm damage.
    • Height: 50–70 feet.
  5. Norway Maple (Acer platanoides)
    • Adaptable, tolerant of urban conditions.
    • Excellent for street planting or large landscapes.
    • Height: 40–60 feet.

Tip: Consider the tree’s mature height, growth rate, and soil and light requirements before selecting a variety.


Step 2: Selecting the Perfect Location

Maples require thoughtful placement for optimal growth:

  • Sunlight: Most maple species prefer full sun to partial shade. Japanese maples thrive in partial shade.
  • Soil: Well-drained, fertile soil is ideal. Avoid heavy clay or compacted soils.
  • Space: Allow sufficient room for canopy spread and root growth. Sugar and red maples need large spaces, while Japanese maples suit smaller areas.
  • Protection: Shelter young trees from strong winds and harsh conditions.

Pro Tip: Avoid planting too close to buildings or structures, as mature maples have extensive root systems that can interfere with foundations.


Step 3: Planting Maple Trees

Proper planting ensures a strong, healthy start:

  1. Timing: Plant in early spring or fall to avoid extreme heat or frost.
  2. Digging the Hole: Make the hole twice as wide and slightly deeper than the root ball.
  3. Soil Preparation: Mix native soil with compost or well-rotted organic matter to improve fertility and drainage.
  4. Planting Depth: Position the tree so the root collar is slightly above soil level to prevent crown rot.
  5. Backfilling: Fill the hole with amended soil, gently firming to eliminate air pockets.
  6. Watering: Water thoroughly immediately after planting to help roots settle.
  7. Mulching: Apply 2–3 inches of mulch around the base to retain moisture and regulate soil temperature, keeping mulch away from the trunk.

Step 4: Watering and Moisture Management

Consistent moisture is critical, particularly during the first few years:

  • Frequency: Water deeply once or twice a week, adjusting for rainfall and soil type.
  • New Trees: Require regular watering until fully established.
  • Established Trees: Deep watering during dry spells helps maintain health.
  • Avoid Overwatering: Waterlogged soil can lead to root rot.

Tip: Use a soaker hose or drip irrigation to deliver water efficiently to the root zone.


Step 5: Fertilizing Maple Trees

Fertilization promotes healthy growth and vibrant foliage:

  • Timing: Apply fertilizer in early spring as new growth begins. Avoid late fall fertilization.
  • Type: Use a balanced, slow-release fertilizer or one designed for trees and shrubs.
  • Method: Spread fertilizer evenly around the drip line, not directly at the trunk.
  • Organic Options: Compost or well-rotted manure can supplement nutrients naturally.

Pro Tip: Soil testing before fertilization helps determine nutrient deficiencies and prevents over-fertilization.


Step 6: Pruning and Maintenance

Pruning helps maintain shape, remove deadwood, and improve airflow:

  • Timing: Late winter or early spring before new growth is ideal. Light pruning can be done in summer if necessary.
  • Technique:
    • Remove dead, damaged, or crossing branches.
    • Thin dense areas to improve airflow and sunlight penetration.
    • Avoid excessive pruning that reduces leaf canopy.
  • Shaping: Keep natural form for most maples, but Japanese maples can be pruned for aesthetic shapes.

Step 7: Pest and Disease Management

Maple trees are generally hardy but can encounter a few pests and diseases:

Common Pests

  • Aphids: Cause leaf curling and sap damage. Treat with insecticidal soap.
  • Scale Insects: Small, sap-sucking insects that weaken trees. Use horticultural oil or insecticides.
  • Leafhoppers: Cause stippling and yellowing leaves. Control with insecticides if severe.

Common Diseases

  • Verticillium Wilt: Soil-borne fungus causing branch dieback. Remove affected branches promptly.
  • Tar Spot: Fungal disease causing black spots on leaves; mostly cosmetic.
  • Anthracnose: Fungal infection leading to leaf browning. Prune affected leaves and improve airflow.

Prevention:

  • Maintain healthy soil and proper watering.
  • Space trees adequately to reduce humidity and increase airflow.
  • Remove fallen leaves to prevent fungal buildup.

Step 8: Seasonal Care for Maple Trees

Spring

  • Fertilize to encourage new growth.
  • Inspect for early signs of pests or disease.
  • Apply mulch to retain soil moisture.

Summer

  • Water deeply during dry spells.
  • Monitor for pests like aphids and leafhoppers.
  • Provide light shade for sensitive species like Japanese maples during heatwaves.

Fall

  • Mulch to protect roots during winter.
  • Collect fallen leaves to prevent fungal diseases.
  • Avoid late fertilization to allow dormancy preparation.

Winter

  • Protect young trees from frost with burlap wraps if needed.
  • Avoid heavy pruning that can damage vulnerable branches.
  • Water during dry winter spells when soil is not frozen.

Common Mistakes to Avoid

  • Planting Too Deep: Can suffocate roots and cause poor growth.
  • Overwatering: Leads to root rot and fungal diseases.
  • Underwatering: Can stress the tree, leading to leaf drop or stunted growth.
  • Neglecting Pruning: Results in weak branches, poor shape, and disease susceptibility.
  • Ignoring Soil Conditions: Maples require fertile, well-drained soil for optimal health.

Final Thoughts

Maple trees are a long-term investment in beauty, shade, and ecological value for any yard or garden. By carefully selecting the right variety, planting in the proper location, and providing ongoing care—including watering, fertilization, pruning, and pest management—you can enjoy vibrant, healthy trees for decades.

Whether you seek a majestic sugar maple for fall foliage, a delicate Japanese maple for ornamental beauty, or a hardy red maple for urban landscapes, following these guidelines ensures that your trees will thrive. With patience and consistent care, maple trees will provide shade, shelter, and spectacular seasonal displays that enhance the character and value of your landscape.

Planting and nurturing maples is not only a rewarding gardening experience but also a contribution to a greener, healthier environment. Their shade, wildlife support, and striking appearance make maples indispensable in creating sustainable and beautiful landscapes.

How to Grow and Maintain Boxwood Hedges

How to Grow and Maintain Boxwood Hedges

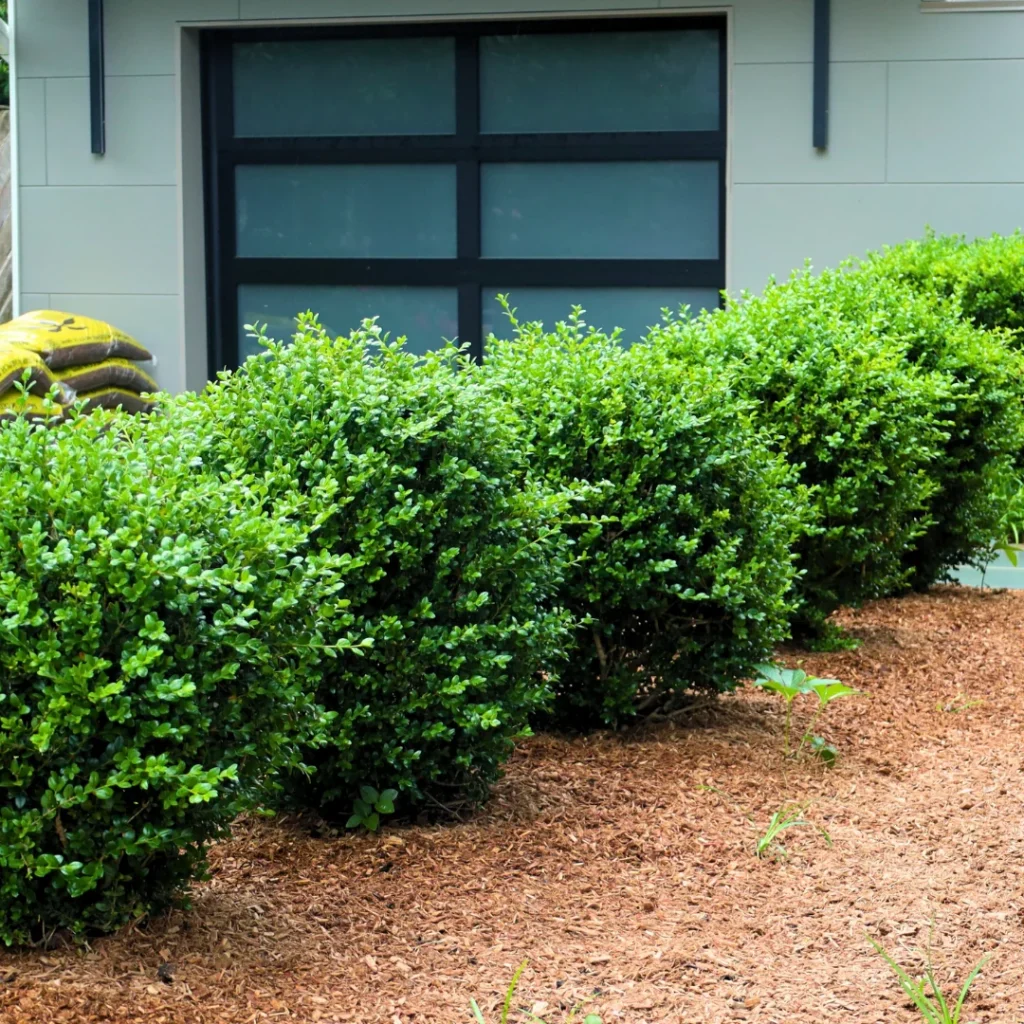
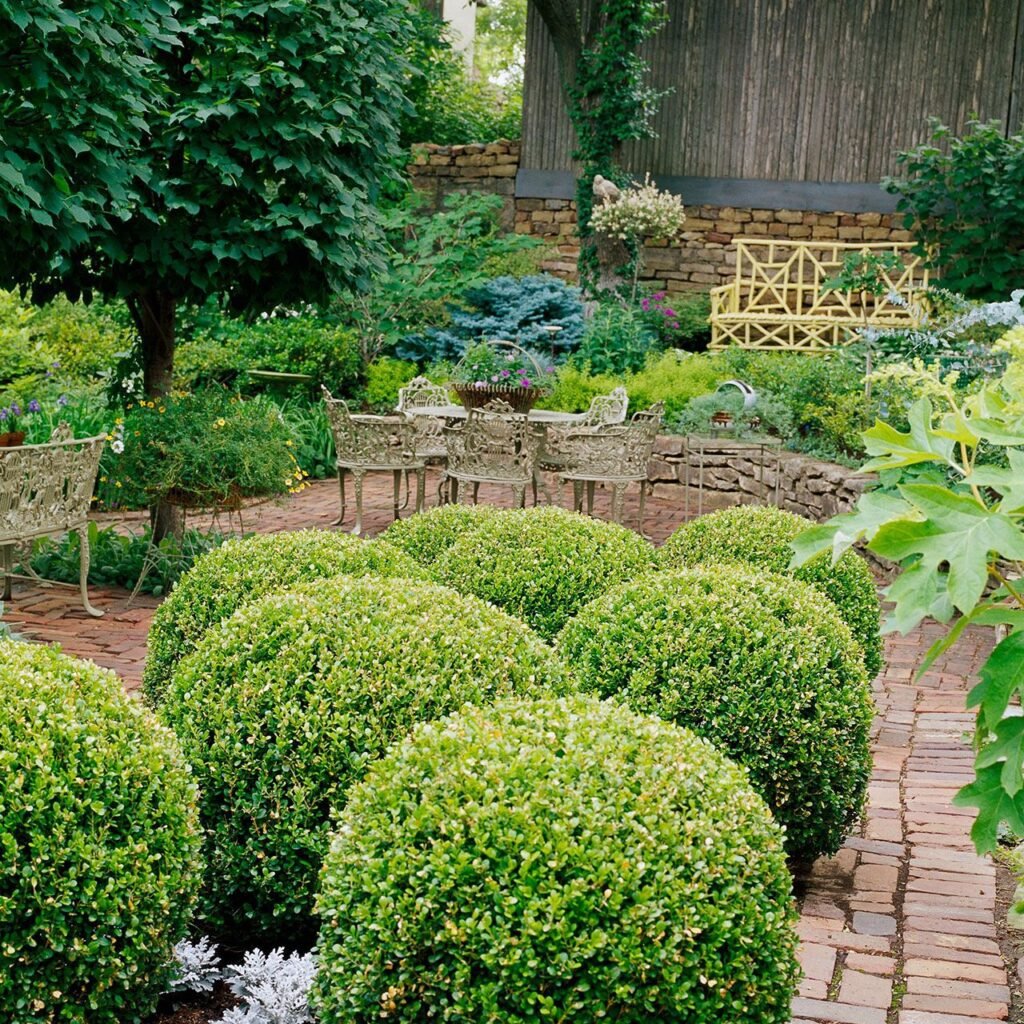
Boxwood hedges are classic elements of landscaping that provide structure, elegance, and year-round greenery. Known for their dense foliage and slow, steady growth, boxwoods can be shaped into formal hedges, topiaries, or natural borders. Their versatility and aesthetic appeal make them a favorite choice for gardeners, homeowners, and landscape designers.

This guide offers a comprehensive, beginner-friendly approach to growing, shaping, and maintaining boxwood hedges, ensuring lush, healthy, and well-manicured plants year-round.


Why Choose Boxwood Hedges?

Boxwoods (Buxus spp.) are widely used in landscaping because of their unique qualities:

  • Evergreen Foliage: Maintains a rich green color throughout the year.
  • Versatility: Can be grown as formal hedges, low borders, topiaries, or foundation plants.
  • Slow Growth: Makes them easier to shape and maintain.
  • Adaptability: Tolerates a range of soil types and partial shade.
  • Low-Maintenance: Once established, boxwoods are hardy and resilient.

Understanding these benefits highlights why boxwoods are ideal for structured garden designs and ornamental hedging.


Step 1: Selecting the Right Boxwood Variety

Several boxwood varieties are suitable for hedges, each with distinct characteristics:

  1. English Boxwood (Buxus sempervirens ‘Suffruticosa’)
    • Slow-growing, dense, and compact.
    • Ideal for low formal hedges and topiaries.
  2. American Boxwood (Buxus sempervirens ‘American’)
    • Larger leaves and slightly faster growth.
    • Suitable for medium-height hedges and privacy screens.
  3. Japanese Boxwood (Buxus microphylla var. japonica)
    • Compact, adaptable, and tolerant of heat.
    • Perfect for sunny and coastal regions.
  4. Wintergreen Boxwood (Buxus microphylla var. compacta)
    • Small, dense, and slow-growing.
    • Works well in small gardens and container hedges.

Tip: Choose a variety that fits your garden size, climate, and desired hedge height.


Step 2: Choosing the Right Location

Boxwoods thrive under specific conditions:

  • Sunlight: Prefer partial shade to full sun. Avoid harsh afternoon sun in hot climates, which may scorch leaves.
  • Soil: Well-draining soil is critical; boxwoods do not tolerate waterlogged roots. Loamy soil enriched with organic matter works best.
  • Spacing: Space plants 12–24 inches apart for low hedges, and up to 36 inches for taller hedges. Proper spacing allows airflow and healthy growth.

Pro Tip: Avoid planting too close to large trees, which compete for nutrients, water, and light.


Step 3: Planting Boxwood Hedges

Planting correctly is essential for establishing a healthy hedge:

  1. Timing: Early spring or fall is ideal to avoid extreme heat or cold.
  2. Planting Hole: Dig a hole twice as wide and slightly deeper than the root ball.
  3. Soil Amendment: Mix native soil with compost or well-rotted organic matter for improved drainage and fertility.
  4. Planting Depth: Place the boxwood at the same depth as it was in the container or nursery. Avoid burying the crown.
  5. Watering: Water thoroughly after planting to settle soil and remove air pockets.
  6. Mulching: Apply 2–3 inches of mulch around the base to conserve moisture and regulate soil temperature, keeping mulch away from the trunk to prevent rot.

Step 4: Watering and Moisture Management

Consistent watering is crucial, especially during establishment:

  • Frequency: Water deeply once or twice a week, depending on rainfall.
  • Newly Planted Hedges: Require more frequent watering for the first year.
  • Established Hedges: Less frequent watering; monitor during droughts.
  • Avoid Overwatering: Boxwoods are prone to root rot if soil remains soggy.

Tip: Use drip irrigation or soaker hoses for efficient watering without wetting foliage.


Step 5: Fertilizing Boxwoods

Proper fertilization supports healthy growth and vibrant foliage:

  • Timing: Early spring before new growth appears. Optionally, a light application in mid-summer.
  • Type: Use a balanced, slow-release fertilizer or one formulated for evergreen shrubs.
  • Application: Follow manufacturer instructions, and avoid over-fertilization, which can cause excessive leaf growth and reduce density.

Pro Tip: Mulching with compost also provides gradual nutrient release.


Step 6: Pruning and Shaping

Pruning is essential for maintaining neat, dense hedges:

  • Timing:
    • Light shaping can be done throughout the growing season.
    • Major pruning should be done in late winter or early spring before new growth begins.
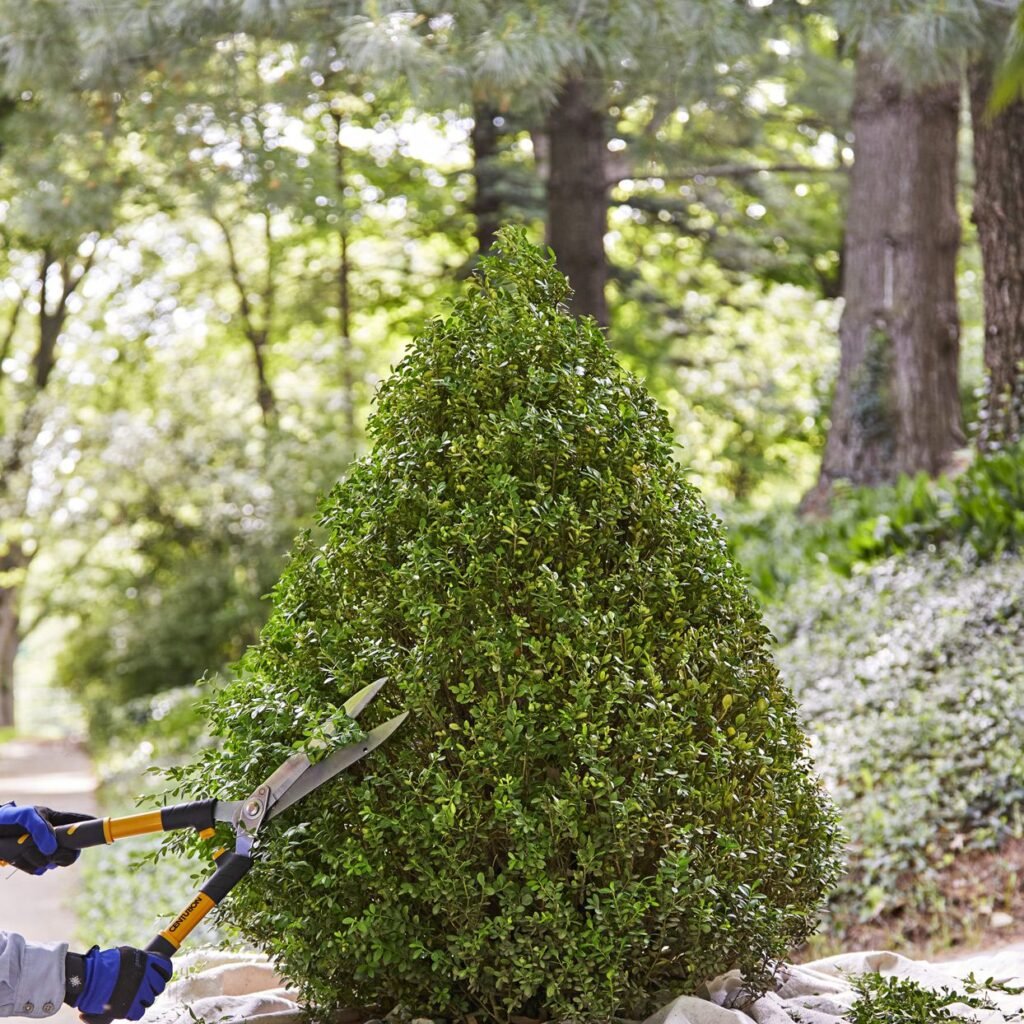
  • Tools: Use sharp hedge shears for large hedges and hand pruners for detailed shaping.
  • Technique:
    • Trim the top slightly narrower than the base to allow sunlight to reach lower leaves.
    • Remove dead, damaged, or crossing branches to maintain airflow.
    • Avoid cutting into old wood that may not regrow.
  • Shaping Ideas:
    • Formal hedge: Even, straight lines.
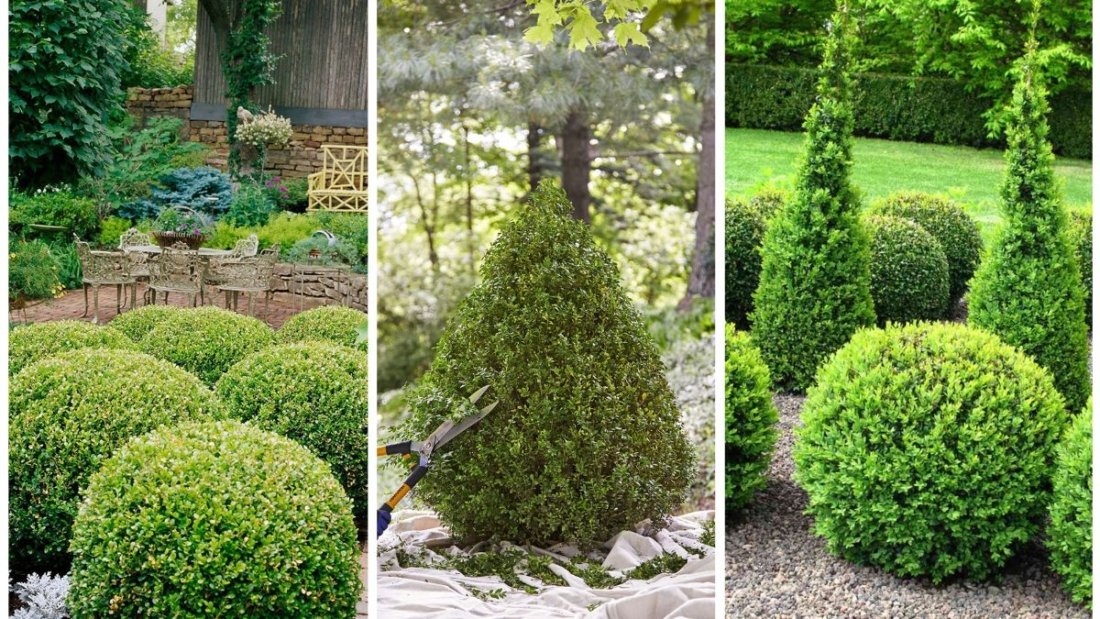
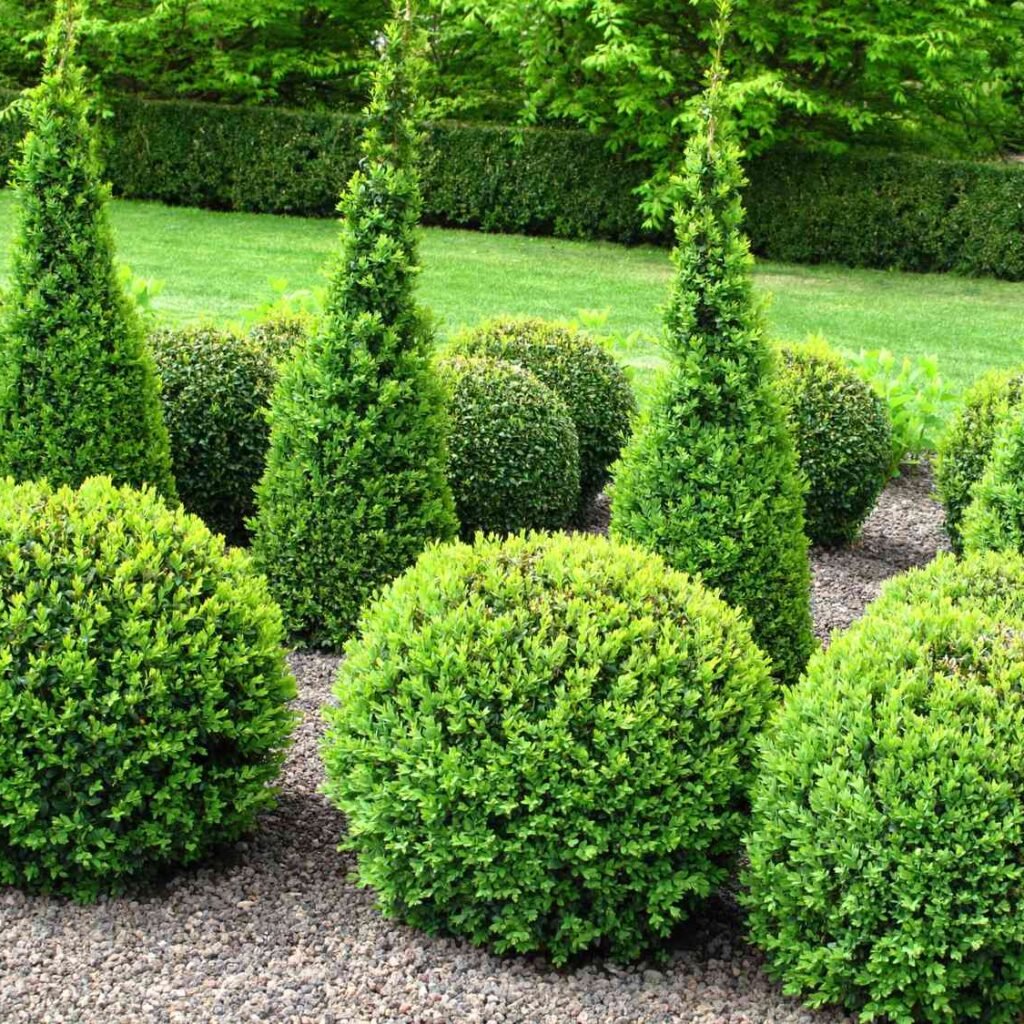
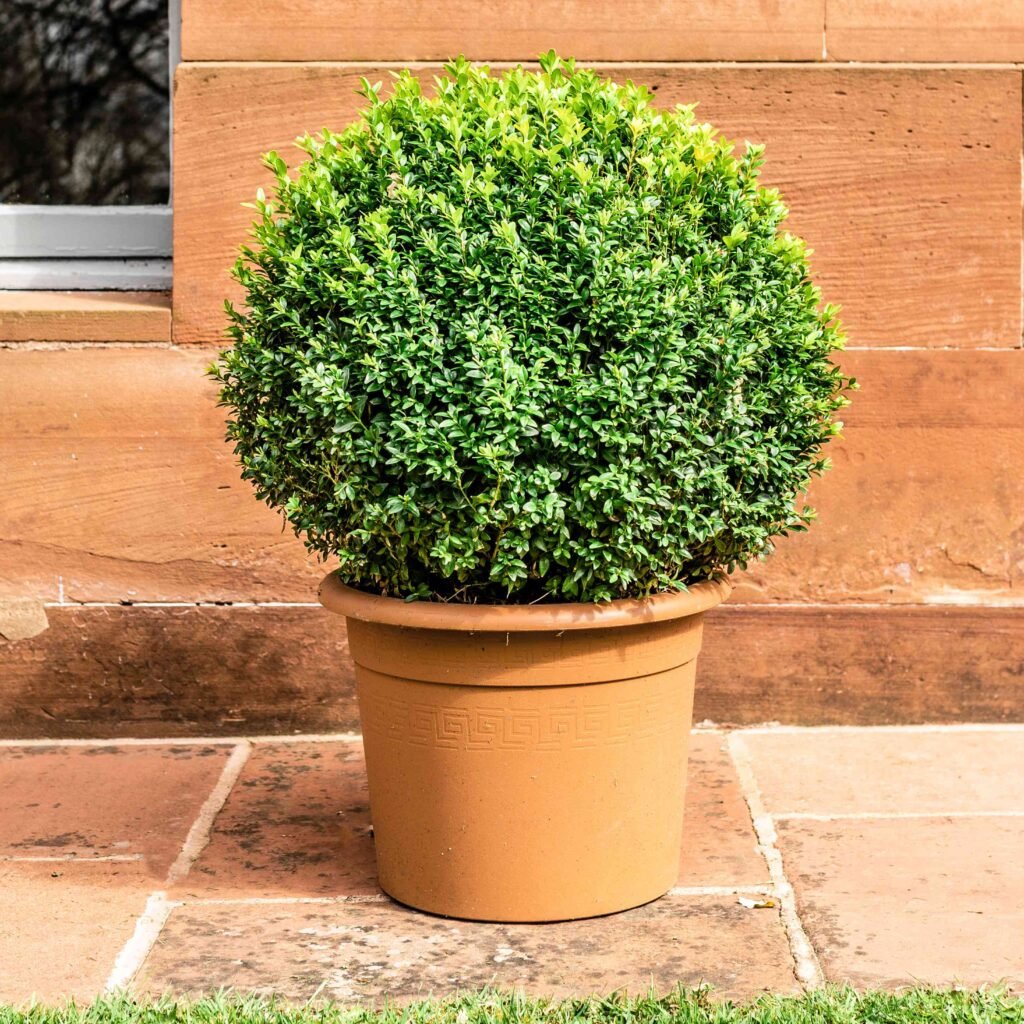
    • Topiary: Shapes like spheres, cones, or spirals.
    • Informal hedge: Soft, natural form for a less structured look.

Step 7: Pest and Disease Management

Boxwoods are generally hardy but can be affected by pests and diseases:

Common Pests

  • Boxwood Leafminer: Causes blistered leaves; treat with systemic insecticides in early spring.
  • Boxwood Mite: Leads to stippled, discolored leaves; use miticides if infestation is severe.
  • Boxwood Psyllid: Causes cupped leaves; prune affected areas.

Common Diseases

  • Boxwood Blight: Fungal disease causing leaf spots, defoliation, and stem dieback. Maintain proper spacing and remove infected debris.
  • Volutella Blight: Fungal disease leading to leaf discoloration; prune infected branches and apply fungicide.
  • Root Rot: Caused by waterlogged soil; ensure proper drainage.

Prevention:

  • Avoid overcrowding and ensure good air circulation.
  • Water at the base of plants to keep foliage dry.
  • Inspect plants regularly for early signs of pests and disease.

Step 8: Seasonal Care for Boxwoods

Spring

  • Fertilize to encourage healthy growth.
  • Lightly prune to shape and remove dead wood.
  • Monitor for pests and fungal diseases.

Summer

  • Water deeply during hot periods.
  • Mulch to retain soil moisture.
  • Inspect for leafminer and mite infestations.

Fall

  • Reduce watering as temperatures drop.
  • Apply mulch for winter protection.
  • Avoid heavy pruning to prevent new growth vulnerable to frost.

Winter

  • Protect young or sensitive plants from freezing temperatures using burlap or frost cloth.
  • Water during dry spells when the ground is not frozen.
  • Avoid fertilizing during dormancy.

Common Mistakes to Avoid

  • Planting Too Deep: Can lead to crown rot and poor growth.
  • Overwatering: Leads to root rot and fungal problems.
  • Underwatering: Can cause leaf drop and stunted growth.
  • Neglecting Pruning: Leads to sparse, uneven growth.
  • Crowding Plants: Reduces airflow, increasing the risk of disease.

Final Thoughts

Boxwood hedges are elegant, durable, and versatile landscaping elements that enhance any yard or garden. With careful selection, proper planting, and consistent care, boxwoods can provide structure, privacy, and beauty for decades.

By following this step-by-step guide—from choosing the right variety, planting, watering, fertilizing, and pruning, to managing pests and diseases—gardeners can enjoy dense, healthy hedges that maintain their form and lush greenery year-round.

Whether you aim for a formal hedge lining your walkway, a sculpted topiary, or a natural privacy screen, boxwoods offer a timeless appeal that complements both traditional and contemporary landscapes. Patience, attention to detail, and seasonal care are the keys to achieving thriving, long-lasting boxwood hedges in your yard.

5 DIY Garden Bench Ideas for Outdoor Spaces

5 DIY Garden Bench Ideas for Outdoor Spaces

A garden bench is more than just a seating option—it’s a statement piece, a cozy nook for reading, a gathering spot for friends, and a decorative element that elevates your outdoor space. While store-bought benches can be expensive or generic, DIY garden benches allow you to customize your seating, fit your space perfectly, and add a personal touch to your garden.

In this article, we’ll explore five creative DIY garden bench ideas, complete with detailed instructions, materials, and tips, so you can build a functional and stylish bench that enhances your backyard or patio.


Why Add a Garden Bench?

Before diving into DIY projects, it’s important to understand why a garden bench is a great addition:

  • Comfortable Seating: Provides a dedicated spot to relax and enjoy your garden.
  • Focal Point: Acts as a decorative centerpiece, especially when paired with plants or garden art.
  • Multi-Functional: Can serve as seating, a display surface for pots, or even storage if designed creatively.
  • Encourages Outdoor Time: Creates inviting spaces to enjoy fresh air, read, or entertain.
  • Customizable: DIY benches can fit any style, size, or material preference.

1. Classic Wooden Slat Bench

A timeless design that fits most gardens, patios, and balconies.

Materials Needed:

  • Wooden planks (cedar, pine, or redwood)
  • Wood screws or nails
  • Wood glue
  • Sandpaper
  • Outdoor wood sealant or paint

Steps to Build:

  1. Cut Planks: Measure and cut planks for the seat, backrest, and legs.
  2. Assemble the Seat: Arrange planks side by side and attach to two perpendicular supports.
  3. Attach Legs: Secure four legs with screws and glue.
  4. Add Backrest: Attach a backrest plank at a slight angle for comfort.
  5. Finish: Sand edges and apply sealant or outdoor paint for durability.

Tip: Customize length to fit your space; add cushions for extra comfort.


2. Rustic Log Bench

Perfect for natural or woodland-style gardens, a log bench uses minimal cutting and brings rustic charm.

Materials Needed:

  • Thick wooden logs for legs
  • Long, flat wooden plank for the seat
  • Wood screws or metal brackets

Steps to Build:

  1. Select Logs: Choose logs with flat surfaces for stability.
  2. Cut Seat Plank: Ensure it’s long enough to rest on both sets of logs.
  3. Attach Seat: Secure the plank to the logs using screws or brackets.
  4. Level Bench: Make sure the legs are stable and level for safe seating.

Tip: Leave the wood natural for a rustic feel or treat with outdoor sealant to prevent rot.


3. Pallet Wood Garden Bench

A cost-effective and eco-friendly option, ideal for casual or modern gardens.

Materials Needed:

  • Wooden pallets (1–2, depending on size)
  • Screws and nails
  • Sandpaper
  • Outdoor paint or stain

Steps to Build:

  1. Disassemble Pallets: Remove nails carefully and sand planks.
  2. Build Seat: Use multiple planks to form the seat and attach them to side supports.
  3. Add Legs and Backrest: Use additional pallet wood to create sturdy legs and a simple backrest.
  4. Finishing Touches: Sand rough edges and apply paint or wood stain.

Tip: You can also add storage under the seat using leftover pallet wood.


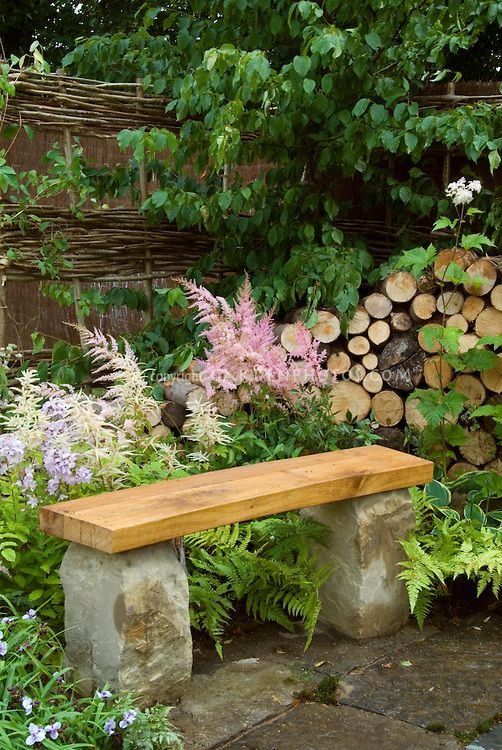
4. Concrete and Wood Bench

For a modern, durable garden accent, combine concrete legs with a wooden seat.

Materials Needed:

  • Concrete blocks or cast legs
  • Wooden plank for the seat
  • Wood screws and brackets
  • Sandpaper and sealant

Steps to Build:

  1. Prepare Legs: Place concrete blocks or cast legs at both ends.
  2. Cut Seat Plank: Ensure it’s wide enough to cover the legs.
  3. Secure Seat: Attach plank to legs with screws and brackets for stability.
  4. Finish: Sand edges and treat wood with outdoor sealant to resist weather.

Tip: Concrete legs can be painted or left natural for a minimalist aesthetic.


5. Reclaimed Wood and Storage Bench

This design doubles as seating and storage, perfect for small patios or garden sheds.

Materials Needed:

  • Reclaimed wood or old furniture pieces
  • Hinges
  • Screws and nails
  • Sandpaper
  • Outdoor sealant

Steps to Build:

  1. Construct the Box: Create a rectangular box from reclaimed wood to act as storage.
  2. Attach Seat with Hinges: Place a wooden plank on top, securing it with hinges for easy lifting.
  3. Add Legs or Base Supports: Ensure the box is stable and slightly elevated off the ground.
  4. Finishing Touches: Sand and seal the wood to protect from rain and sun.

Tip: Store gardening tools, cushions, or outdoor toys inside while keeping a functional seating area.


Placement and Styling Tips

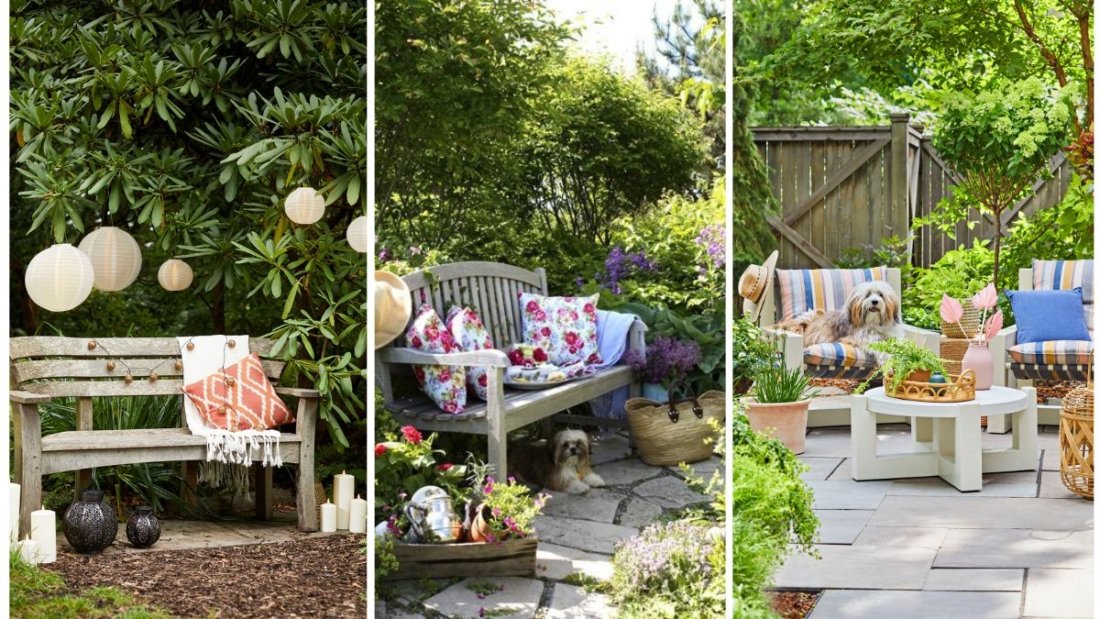
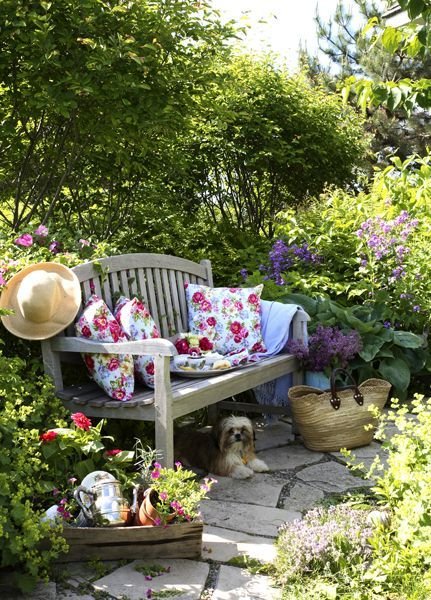
  • Choose a Spot: Place your bench in a shaded area, near a flower bed, under a tree, or along a pathway.
  • Add Cushions and Throws: Make your bench more comfortable and inviting.
  • Pair with Planters: Surround your bench with potted plants, flowers, or small shrubs for a cozy nook.
  • Lighting: Consider string lights or solar garden lamps to create a warm evening ambiance.
  • Functional Arrangement: Ensure space around the bench for walking or adding side tables for drinks and snacks.

Maintenance Tips

  • Wood Treatment: Apply outdoor sealant annually to protect against moisture and sun damage.
  • Cleaning: Wipe down the bench regularly to remove dust, dirt, and debris.
  • Inspect for Damage: Check screws, nails, and joints to maintain stability.
  • Cushion Care: Remove and store cushions during rain or winter months to extend their life.
  • Repaint or Stain: Refresh your bench every few years to maintain its appearance and durability.

Benefits of DIY Garden Benches

  • Customizable: Choose the size, style, and materials to match your garden.
  • Cost-Effective: Use reclaimed wood, pallets, or inexpensive materials to save money.
  • Eco-Friendly: Repurposing wood reduces waste and environmental impact.
  • Creative Expression: Personalize designs with paint, cushions, and decorative touches.
  • Functional and Decorative: Provides comfortable seating while enhancing garden aesthetics.

Conclusion

Building a DIY garden bench is a rewarding project that combines creativity, functionality, and style. From the timeless wooden slat bench to the rustic charm of a log bench, the cost-effective pallet wood bench, modern concrete and wood design, or storage bench, there are countless ways to craft a bench that fits your outdoor space and needs.

By carefully selecting materials, following construction steps, and maintaining your bench properly, you can create a durable, comfortable, and beautiful seating area. A well-placed garden bench not only provides a spot to relax but also enhances the overall design, making your backyard or patio a welcoming retreat for family, friends, and even wildlife.

Whether you’re enjoying morning coffee, reading a book, or hosting garden gatherings, a DIY garden bench adds comfort, style, and personality to your outdoor space.

How to Construct a Backyard Fire Pit

How to Construct a Backyard Fire Pit

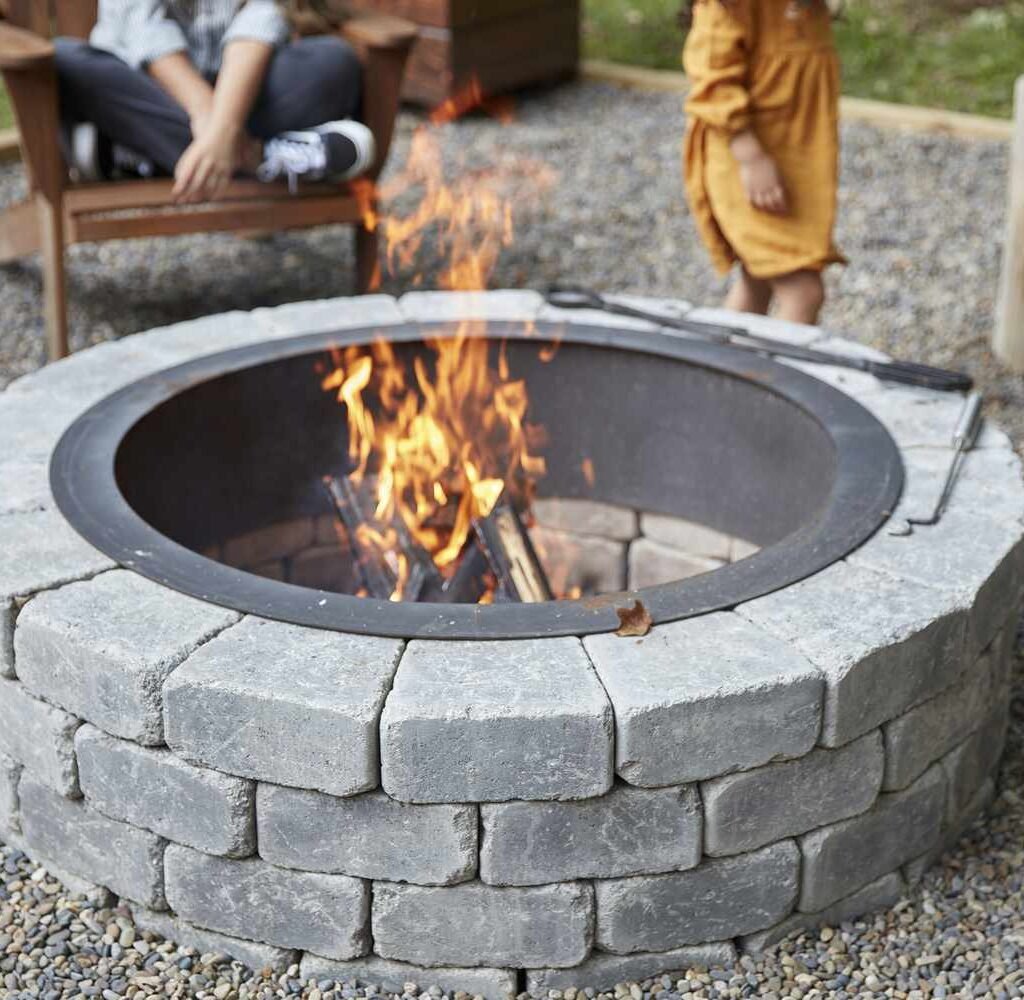
A backyard fire pit transforms any outdoor space into a cozy, inviting retreat. Whether it’s for roasting marshmallows, enjoying a cool evening with friends, or creating a warm ambiance for family gatherings, a fire pit is both functional and stylish. The best part is that building a backyard fire pit doesn’t require professional help or a massive budget. With proper planning, the right materials, and some DIY effort, you can construct a beautiful, safe, and durable fire pit in your backyard.

In this article, we’ll guide you through step-by-step instructions, material choices, safety tips, and creative design ideas to help you construct a backyard fire pit that will become the centerpiece of your outdoor living area.


Why Build a Backyard Fire Pit?

Before starting construction, it’s helpful to understand the benefits of having a fire pit in your backyard:

  • Entertainment: Fire pits provide a natural gathering point for family and friends.
  • Ambiance: The flickering flames create a cozy, relaxing atmosphere.
  • Cooking: Ideal for roasting marshmallows, hot dogs, or even grilling.
  • Year-Round Use: Adds warmth, making your outdoor space usable even in cooler weather.
  • Aesthetic Appeal: Enhances landscape design with a rustic or modern focal point.

With a well-constructed fire pit, you can enjoy all these benefits while increasing the charm and functionality of your backyard.


Step 1: Plan Your Fire Pit

Proper planning ensures safety, durability, and an attractive design.

  1. Choose the Location:
    • Place the fire pit at least 10–15 feet away from your house, trees, fences, and other flammable structures.
    • Ensure the area is level and has proper drainage.
    • Avoid low spots where smoke or rain could accumulate.
  2. Decide on Size and Shape:
    • Common sizes range from 36 to 48 inches in diameter for circular fire pits.
    • Rectangular or square designs are also popular for modern or built-in seating arrangements.
  3. Check Local Regulations:
    • Many cities have rules about open fires, so check permits, burn restrictions, and setback requirements.
  4. Choose Fuel Type:
    • Wood-burning: Traditional, authentic fire experience.
    • Propane or Natural Gas: Cleaner, easy to control, and convenient for instant flames.

Step 2: Gather Materials and Tools

Materials for a Masonry Fire Pit:

  • Concrete pavers, bricks, or natural stones
  • Fire-rated mortar or construction adhesive
  • Gravel or crushed stone for the base
  • Sand for leveling
  • Optional: Metal fire ring insert

Materials for a Gas Fire Pit:

  • Gas burner kit (propane or natural gas)
  • Lava rocks, fire glass, or ceramic logs
  • Gas tubing and valve (included in most kits)

Tools Needed:

  • Tape measure
  • Shovel
  • Level
  • Rubber mallet
  • Trowel
  • Drill (if using a metal ring or gas line)
  • Wheelbarrow (for mixing or moving gravel)

Step 3: Prepare the Site

  1. Mark the Area:
    • Use a rope, spray paint, or garden hose to outline the shape and size of your fire pit.
  2. Excavate the Ground:
    • Dig 6–12 inches deep for wood-burning pits.
    • Remove grass, roots, and debris.
  3. Level the Base:
    • Fill the hole with 2–3 inches of gravel or crushed stone for drainage.
    • Compact the gravel with a tamper or your foot.
    • Add a thin layer of sand for leveling if needed.

Pro Tip: Proper base preparation prevents the fire pit from shifting or sinking over time.


Step 4: Build the Fire Pit Walls

Option 1: Using Concrete Blocks or Bricks

  1. Start laying your first layer of bricks or blocks in a circle (or chosen shape).
  2. Use a level to ensure even placement.
  3. Apply fire-rated mortar or adhesive between blocks for stability.
  4. Continue stacking additional layers, staggering seams for strength.
  5. For circular designs, a metal fire ring can be placed inside to protect masonry from heat.

Option 2: Dry Stack Stone Design

  1. Use flat stones to create the desired shape without mortar.
  2. Stack stones tightly and level each layer as you go.
  3. Ensure the wall height is comfortable for seating and safe for flames.

Tips:

  • Maintain 12–24 inches height for safety and visibility.
  • For gas fire pits, leave space for the burner and lava rocks or fire glass.

Step 5: Install Gas Components (Optional)

If building a gas fire pit:

  1. Place the gas burner in the center according to the kit instructions.
  2. Connect the gas line to propane or natural gas supply.
  3. Fill the pit with lava rocks or fire glass to cover the burner.
  4. Test the gas system for leaks and proper ignition before use.

Safety Tip: Follow manufacturer instructions strictly and consult a professional if unsure about gas connections.


Step 6: Finishing Touches

  • Top Edge: Smooth the top layer of bricks or stones for a polished look.
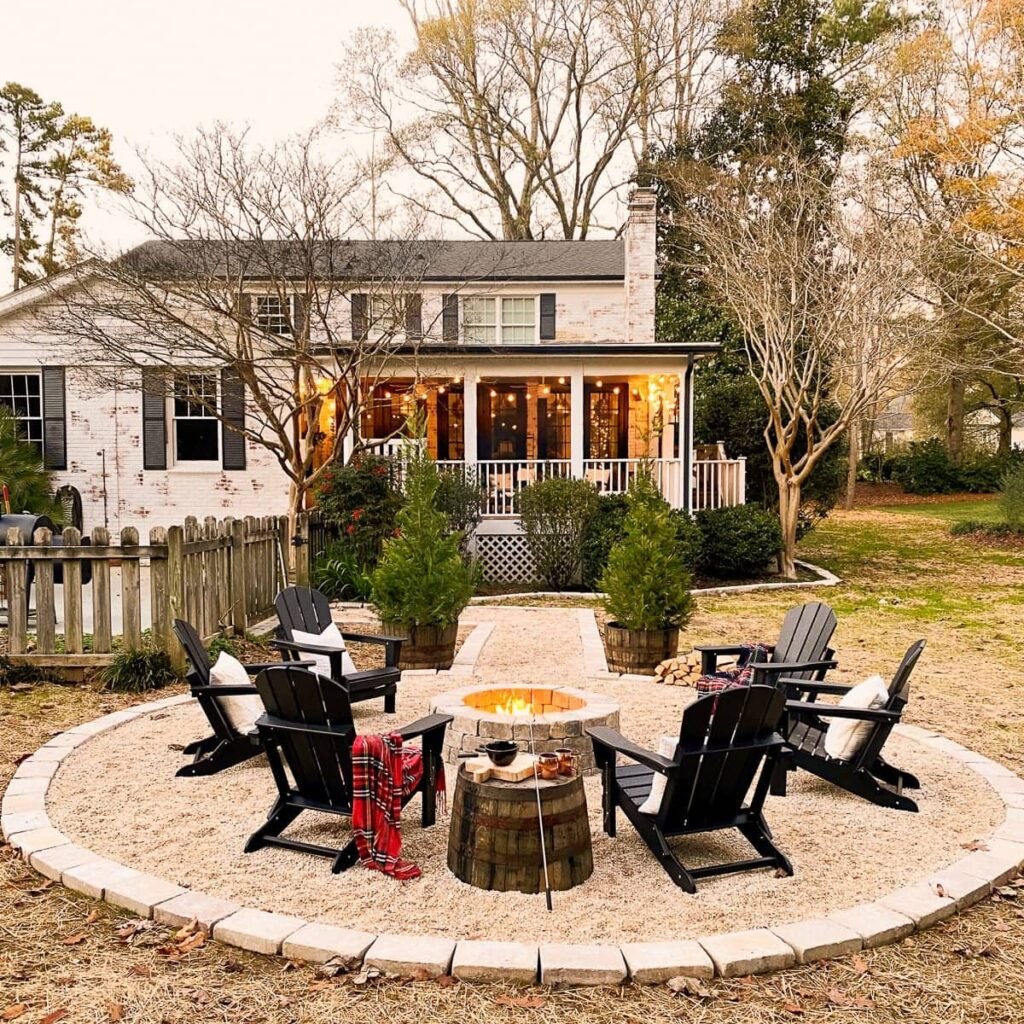
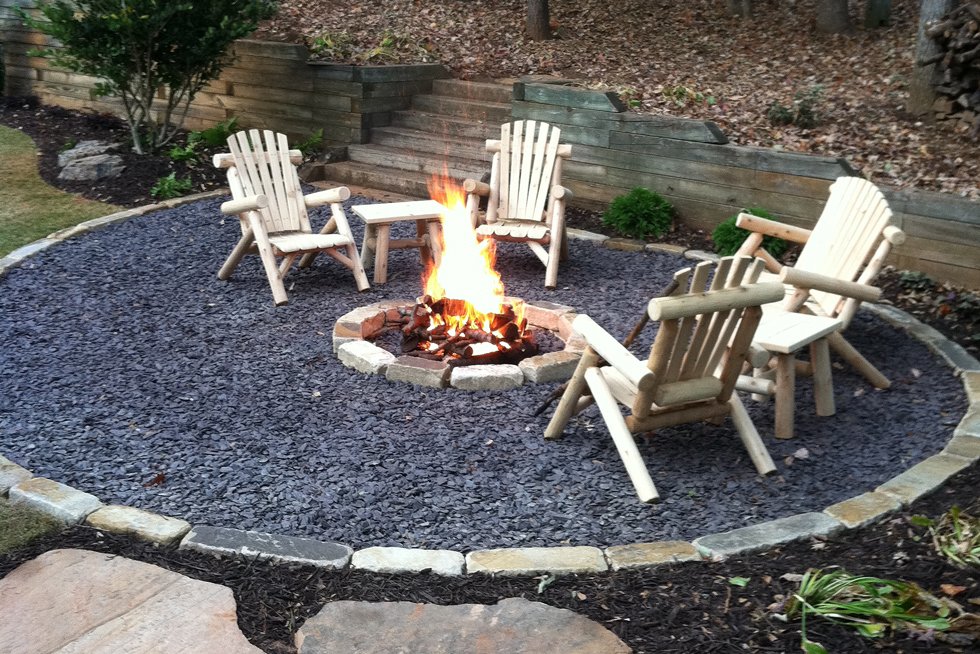
  • Seating: Add benches, chairs, or built-in seating around the fire pit.
  • Decorative Stones or Pavers: Surround the pit with a patio area for aesthetics and safety.
  • Fire Safety Tools: Keep a fire extinguisher, bucket of sand, or garden hose nearby.

Pro Tip: Use heat-resistant paint or sealant on the outer stones for long-lasting appearance.


Step 7: Safety Considerations

Safety is critical when constructing and using a fire pit:

  • Keep children and pets at a safe distance.
  • Never leave a fire unattended.
  • Avoid using flammable liquids to start a fire.
  • Ensure proper ventilation if the fire pit is in a partially covered area.
  • Use a screen or spark guard to prevent embers from flying.

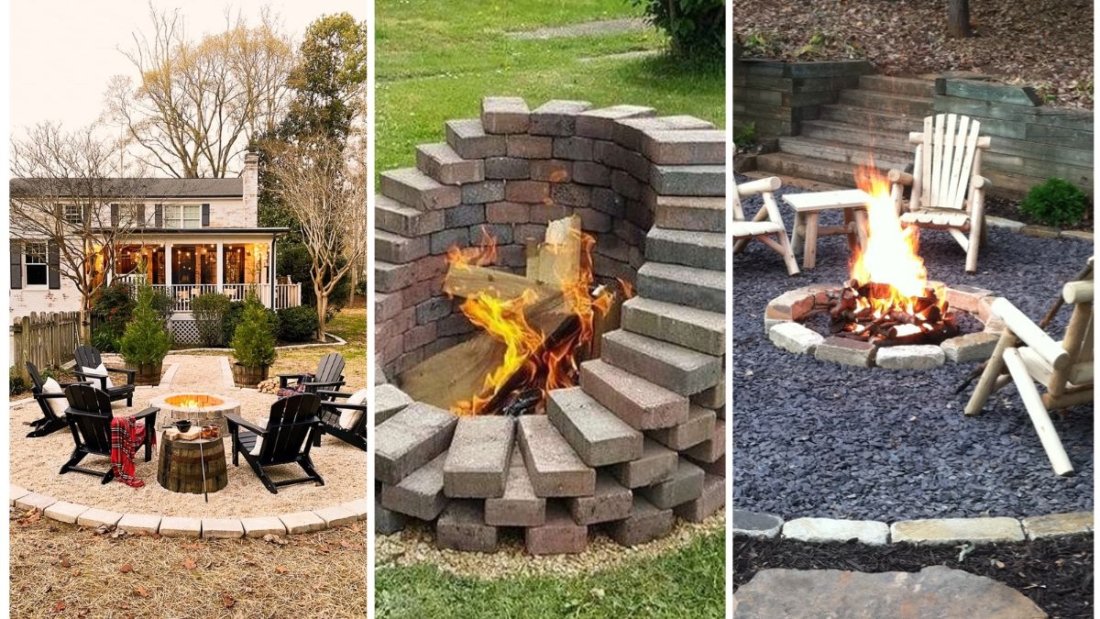
Creative Design Ideas for Backyard Fire Pits

  • Rustic Stone Circle: Use natural stones for a classic, earthy look.
  • Modern Concrete Fire Pit: Smooth concrete or geometric designs complement contemporary patios.
  • In-Ground Fire Pit: Build a sunken fire pit with seating around it for a cozy, intimate feel.
  • Tabletop Fire Pit: Small, portable gas fire pits for balconies or small patios.
  • Integrated Seating Fire Pit: Build benches or low walls around the fire pit for a complete entertainment area.

Maintenance Tips

  • Clean Ashes Regularly: Remove ashes after each use to prevent buildup.
  • Check Masonry: Inspect for cracks or loose stones and repair as needed.
  • Cover When Not in Use: Protect the pit from rain and debris with a fire pit cover.
  • Gas Systems: Periodically inspect hoses, valves, and connections for safety.

Benefits of a Backyard Fire Pit

  • Enhances Outdoor Living: Extends the usability of your backyard throughout the year.
  • Social Hub: Ideal for gatherings, parties, and quiet evenings.
  • Cooking Opportunities: Enjoy outdoor cooking with friends and family.
  • Aesthetic Appeal: Creates a visually appealing focal point in any garden or patio.
  • Versatility: Works with wood, propane, or natural gas depending on your preference.

Conclusion

Constructing a backyard fire pit is a rewarding DIY project that combines functionality, safety, and design. Whether you choose a rustic stone circle, a modern concrete fire pit, or a gas-powered centerpiece, the key steps include planning, preparing the base, building stable walls, and ensuring safety measures.

By following the tips outlined in this guide, you can create a fire pit that becomes the heart of your backyard, providing warmth, ambiance, and enjoyment year-round. With proper placement, quality materials, and regular maintenance, your backyard fire pit will be a cherished gathering spot for family and friends while enhancing the beauty and functionality of your outdoor space.

Creative DIY Birdhouses to Attract Birds

Creative DIY Birdhouses to Attract Birds

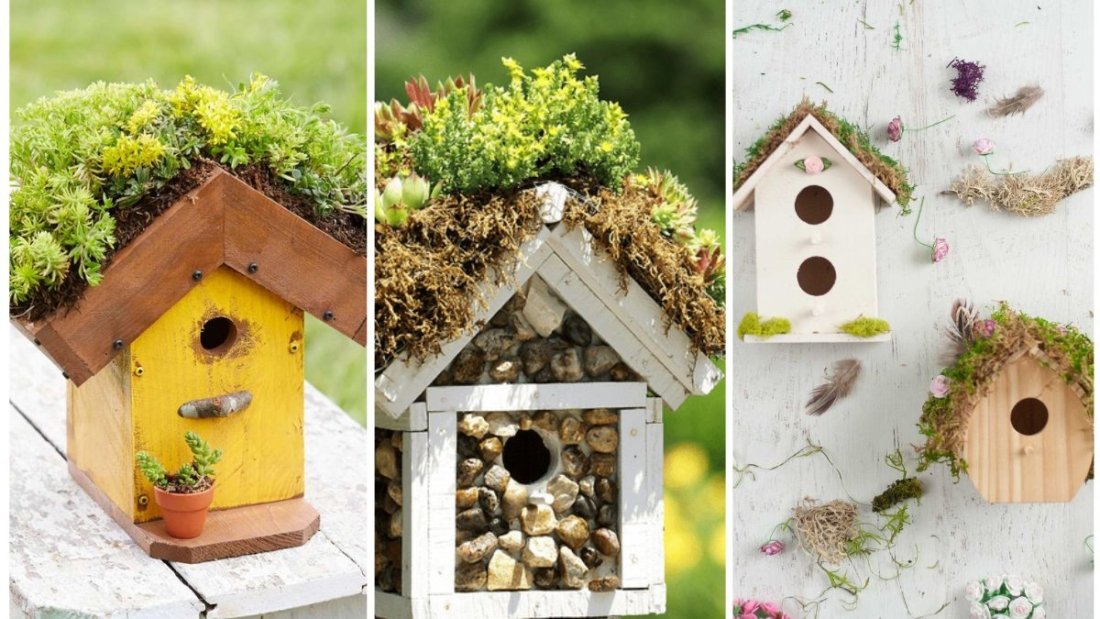
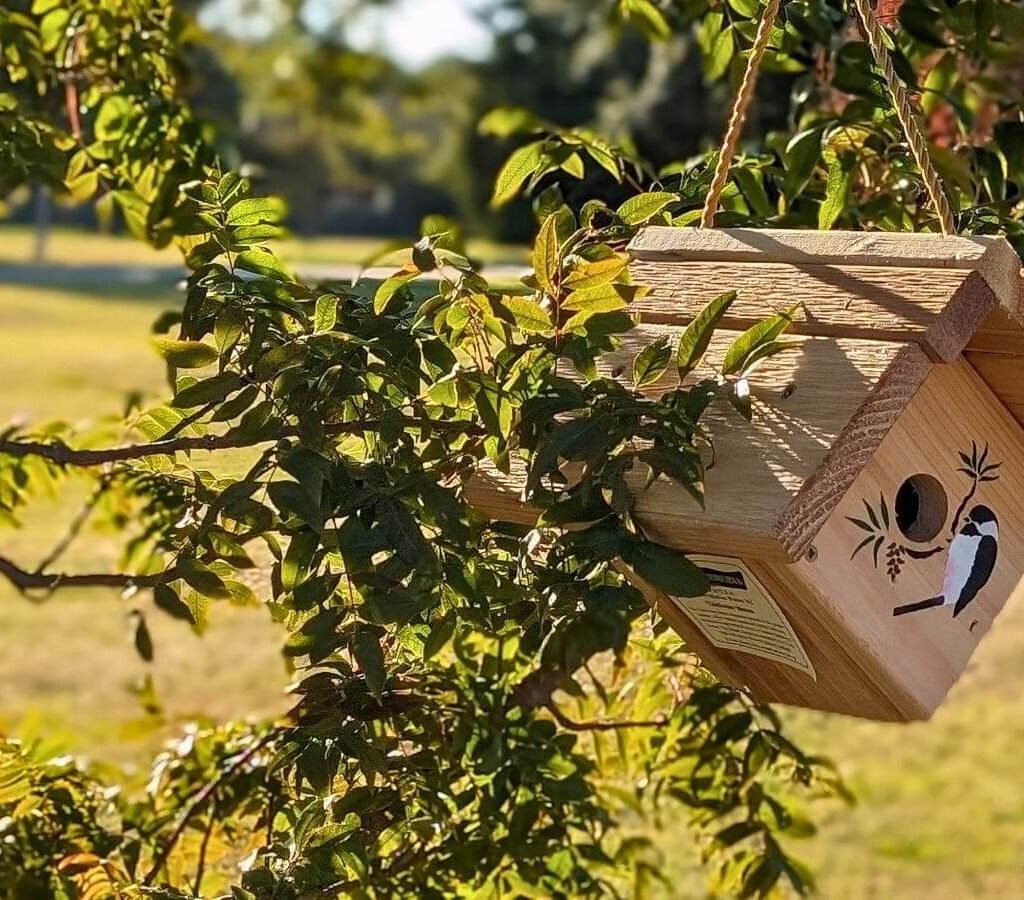
Birds bring life, color, and a sense of serenity to any garden. Their songs can transform a quiet backyard into a lively oasis, and watching them up close can be a deeply rewarding experience. One of the best ways to attract birds to your yard is by offering a cozy, safe place for them to nest: a birdhouse.

The great news is that building birdhouses doesn’t require a large budget or professional carpentry skills. With a little creativity and some basic materials, you can craft DIY birdhouses that are functional, attractive, and perfectly suited to your garden’s aesthetic. In this article, we’ll explore creative DIY birdhouse ideas, step-by-step construction tips, and advice on placement and maintenance to welcome feathered friends into your outdoor space.


Why Build a Birdhouse?

Before diving into DIY ideas, it’s important to understand the benefits of adding birdhouses to your garden:

  • Provides Shelter: Protects birds from predators and harsh weather.
  • Encourages Nesting: Attracts a variety of bird species, supporting local biodiversity.
  • Natural Pest Control: Birds help control insects and other pests in your garden.
  • Educational and Fun: Great for children to learn about birds and nature.
  • Decorative Appeal: Birdhouses add charm, color, and creativity to any outdoor space.

A well-designed birdhouse meets the needs of specific bird species while complementing your garden décor.


Step 1: Choose the Right Materials

The first step in building a birdhouse is selecting safe, durable, and weather-resistant materials. Common options include:

  • Wood: Cedar, pine, or redwood are ideal as they resist rot and provide insulation. Avoid treated or painted wood that may be toxic to birds.
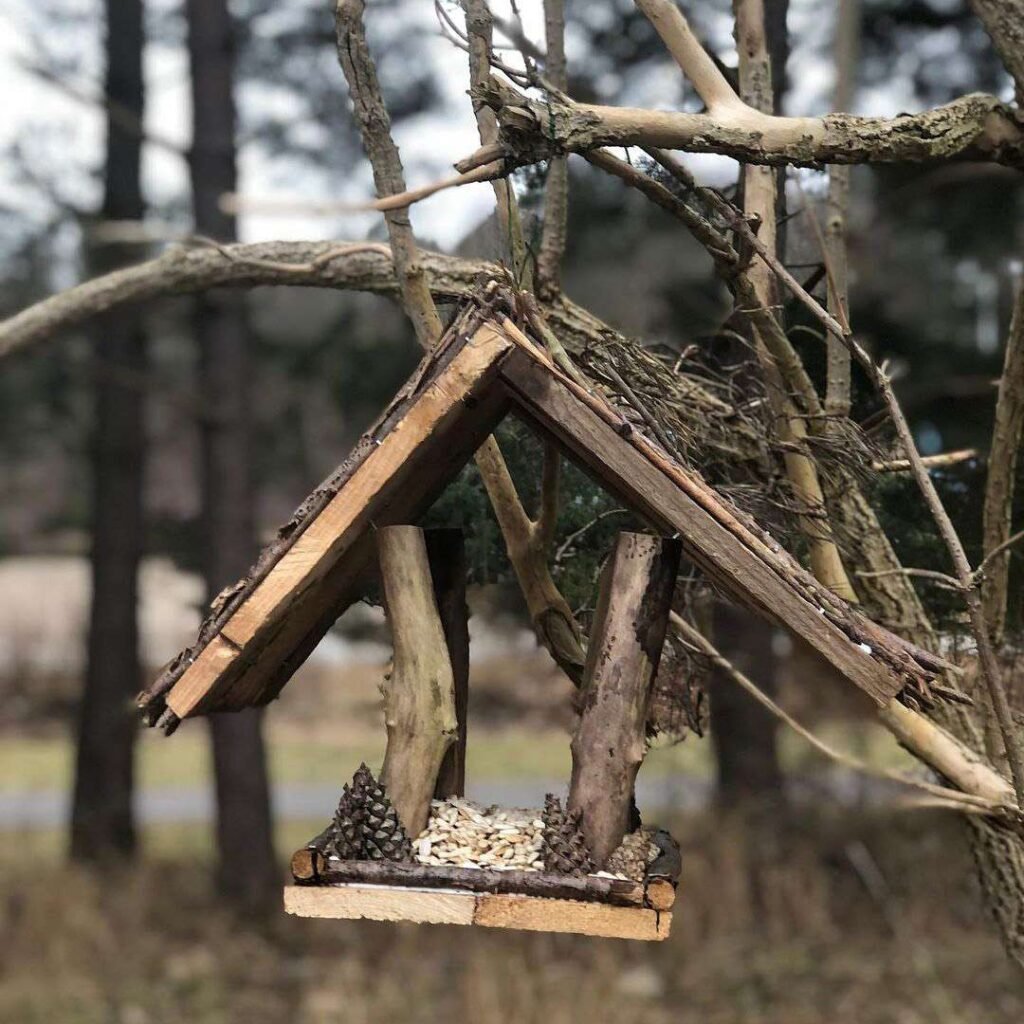
  • Recycled Materials: Old wooden crates, boxes, or pallets can be repurposed into charming birdhouses.
  • Plastic or PVC: Lightweight and waterproof, though less natural in appearance.
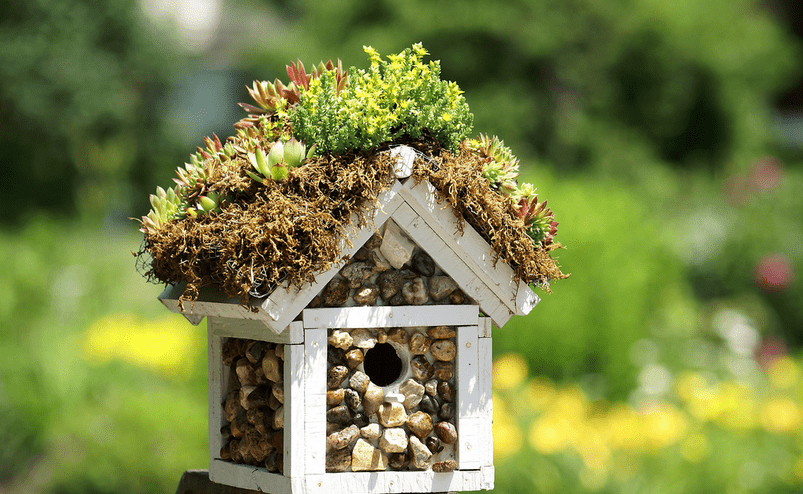
  • Natural Elements: Bamboo, gourds, or logs for rustic, eco-friendly birdhouses.

Pro Tip: Avoid materials that absorb too much heat, like thin metal or dark-painted surfaces, which can overheat the birds inside.


Step 2: Design Your Birdhouse

Different bird species prefer different house designs. Consider:

  • Size of the Entrance Hole:
    • Small songbirds (wrens, chickadees): 1–1.25 inches in diameter.
    • Bluebirds: 1.5 inches.
    • Larger birds (woodpeckers, owls): 2 inches or more.
  • House Dimensions: Ensure enough room for nesting but avoid excessive interior space that may be difficult to keep warm.
  • Ventilation and Drainage: Small holes or gaps at the top and bottom allow airflow and prevent water buildup.
  • Roof Design: Sloped or overhanging roofs protect against rain and snow.
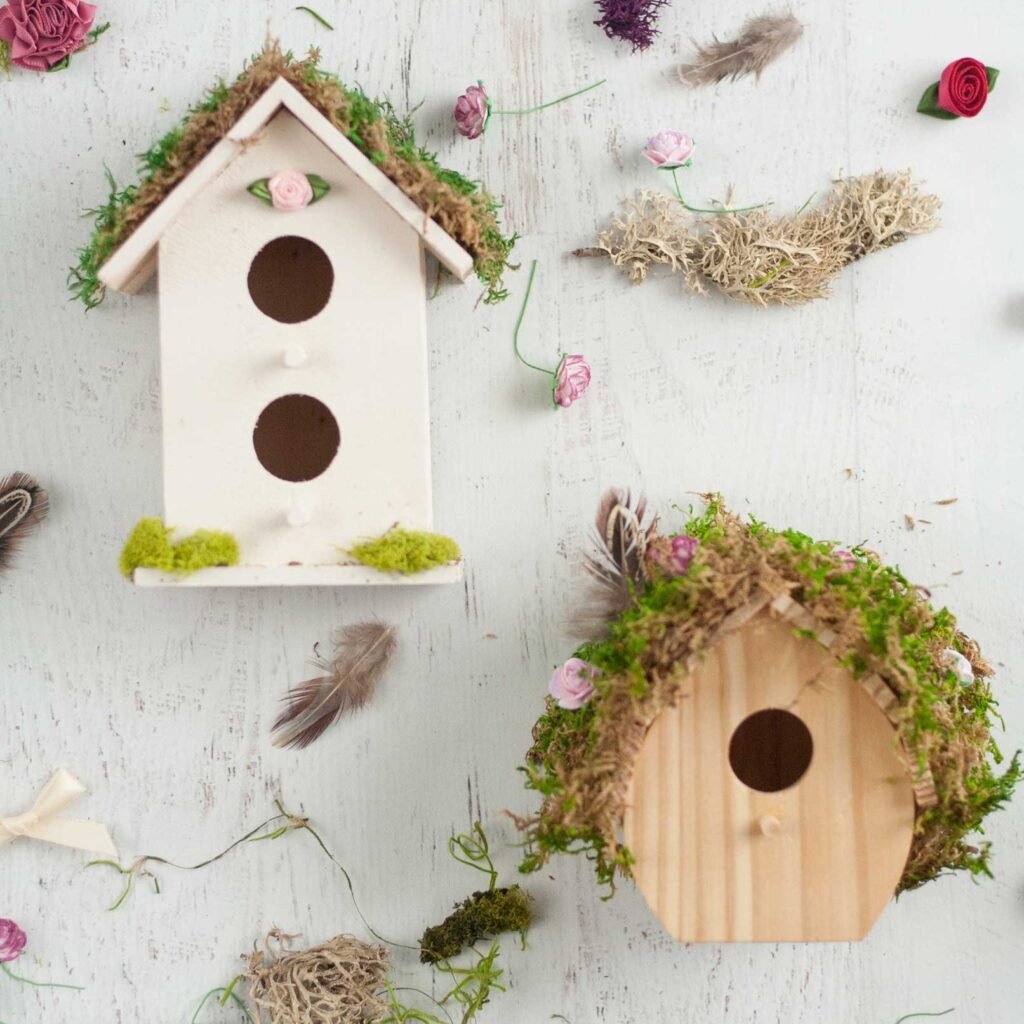
  • Decorative Touches: Paint, stencils, or natural textures can add charm but avoid bright colors that may scare birds.

Step 3: Simple DIY Birdhouse Ideas

Here are some creative and easy-to-build birdhouse designs:

1. Classic Wooden Box Birdhouse

A traditional design that suits most backyard birds:

Materials: Wooden planks, nails, wood glue, hinges (optional), sandpaper.

Steps:

  1. Cut wooden planks for the base, walls, and roof.
  2. Assemble walls with nails or screws, ensuring a tight fit.
  3. Attach the roof with a slight overhang.
  4. Drill an entrance hole sized for your target bird species.
  5. Sand edges to avoid splinters.

Tip: Add a small perch below the entrance if desired, but many species don’t need it.


2. Recycled Milk Carton Birdhouse

An eco-friendly option using everyday materials:

Materials: Empty milk or juice cartons, scissors, string, paint (optional).

Steps:

  1. Clean and dry the carton thoroughly.
  2. Cut a small entrance hole near the top.
  3. Punch two holes on opposite sides for hanging.
  4. Decorate with paint or natural patterns.
  5. Fill the bottom with a small amount of straw or nesting material.

Tip: Hang in a sheltered area to protect from rain.


3. Gourd Birdhouse

Gourds provide natural insulation and a rustic look:

Materials: Dried gourd, drill, sandpaper, wire for hanging.

Steps:

  1. Clean the gourd thoroughly and remove seeds.
  2. Drill an entrance hole appropriate for your bird species.
  3. Sand rough edges.
  4. Drill small drainage holes at the bottom.
  5. Hang with wire or rope from a tree branch.

Tip: Natural gourds blend seamlessly with gardens and forests.


4. Upcycled Wooden Crate Birdhouse

Perfect for a rustic or cottage-style garden:

Materials: Small wooden crate, nails or screws, paint or varnish, twine.

Steps:

  1. Turn the crate on its side.
  2. Cut an entrance hole in one side.
  3. Secure a roof or cover with additional wood planks.
  4. Drill drainage holes at the bottom.
  5. Hang or place on a post.

Tip: Use untreated crates to ensure safety for birds.


5. Pallet Birdhouse with Multiple Compartments

Ideal for attracting multiple families of birds or small species colonies:

Materials: Wooden pallet, nails, wood glue, small planks for roofs.

Steps:

  1. Separate pallet slats and create multiple box compartments.
  2. Attach slats to form individual birdhouse units.
  3. Drill entrance holes for each compartment.
  4. Add overhanging roofs to protect from rain.
  5. Secure on a wall, post, or tree.

Tip: Great for wrens and sparrows that enjoy colony-style nesting.


Step 4: Placement Tips

Where you place your birdhouse can make all the difference in attracting birds:

  • Height: 5–10 feet above ground is ideal for most small birds.
  • Protection: Avoid placing near predators such as cats.
  • Shelter: Choose a location with partial shade and some wind protection.
  • Spacing: Leave enough distance between multiple birdhouses to prevent territorial disputes.
  • Orientation: Face the entrance away from prevailing winds and direct sunlight.

Pro Tip: Trees and shrubs nearby provide birds with cover while they enter and leave the birdhouse.


Step 5: Maintain Your Birdhouse

Regular maintenance ensures your birdhouses remain safe and inviting:

  • Clean Annually: Remove old nests and debris to prevent parasites.
  • Check for Damage: Repair or replace rotting wood, broken roofs, or loose panels.
  • Monitor Occupancy: Keep track of which bird species are using your houses.
  • Protect from Pests: Use predator guards or baffles if necessary.
  • Repaint Sparingly: Avoid toxic paints; natural wood or bird-safe stains are ideal.

Benefits of DIY Birdhouses

  • Cost-Effective: Use inexpensive or recycled materials.
  • Customizable: Tailor designs for specific bird species or garden aesthetics.
  • Eco-Friendly: Supports local wildlife and promotes biodiversity.
  • Educational: Engages children and adults in learning about nature and bird behavior.
  • Decorative: Adds charm and creativity to your outdoor space.

Conclusion

Building DIY birdhouses is a rewarding project that benefits both your garden and the birds that visit. From classic wooden boxes to recycled gourds and cartons, there are countless creative ways to craft safe and attractive homes for your feathered friends.

By choosing the right materials, designing birdhouses for specific species, placing them thoughtfully, and maintaining them regularly, you can create a welcoming environment that encourages birds to nest, sing, and thrive in your backyard. Not only will you enjoy their beauty and music, but you’ll also contribute to local wildlife conservation while adding a decorative, personalized touch to your garden.

A backyard filled with chirping birds is a living testament to your creativity, care, and connection to nature. DIY birdhouses make that vision achievable for gardeners of all skill levels.