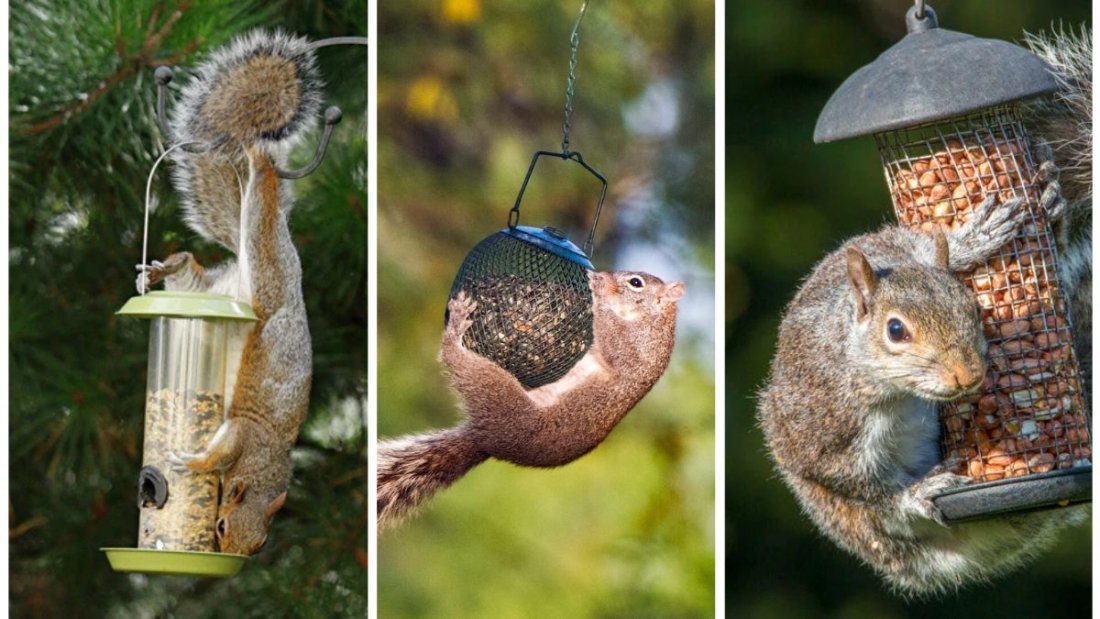
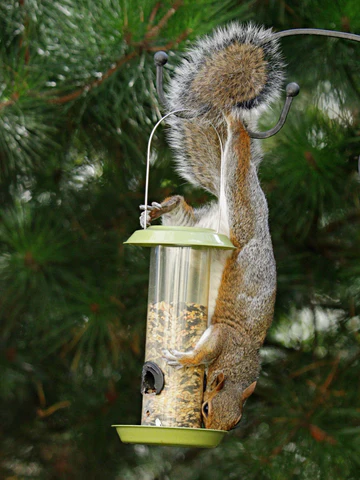
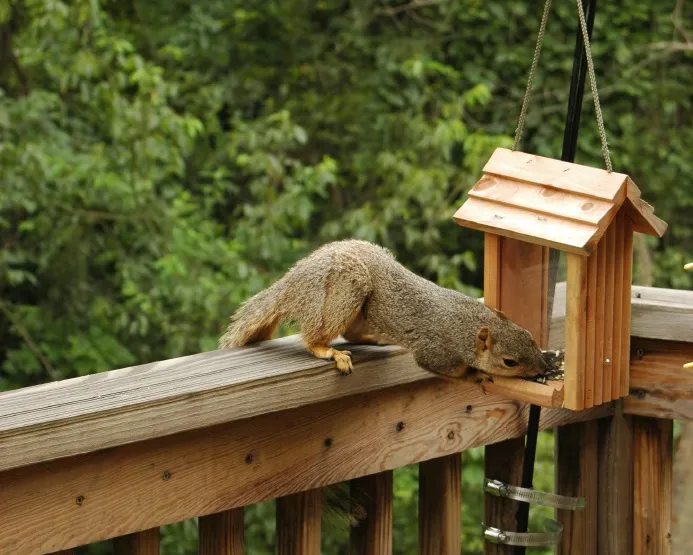
There’s nothing quite as relaxing as sitting in your yard, sipping your morning coffee, and watching colorful birds flutter to your feeder. But for many homeowners, this peaceful scene is often interrupted by a furry intruder—the squirrel. Clever, agile, and persistent, squirrels are notorious for raiding bird feeders, scaring away feathered visitors, and devouring food meant for them.
If you’ve ever wondered how to keep squirrels away from your bird feeders without harming them, you’re not alone. With the right strategies, you can deter these acrobatic critters and enjoy birdwatching as it was meant to be. This guide covers effective, humane, and practical ways to squirrel-proof your feeders.
Why Squirrels Love Bird Feeders

Before we dive into solutions, it helps to understand why squirrels are so drawn to bird feeders.
- Easy Food Source: Birdseed, especially sunflower seeds and nuts, is irresistible to squirrels.
- High Energy Need: Squirrels burn a lot of calories climbing, running, and leaping—bird feeders provide quick fuel.
- Opportunistic Behavior: Squirrels are problem-solvers. If they see a reliable food source, they’ll figure out how to reach it.
Knowing this makes it clear that a successful squirrel-proofing strategy involves both physical barriers and behavioral deterrents.
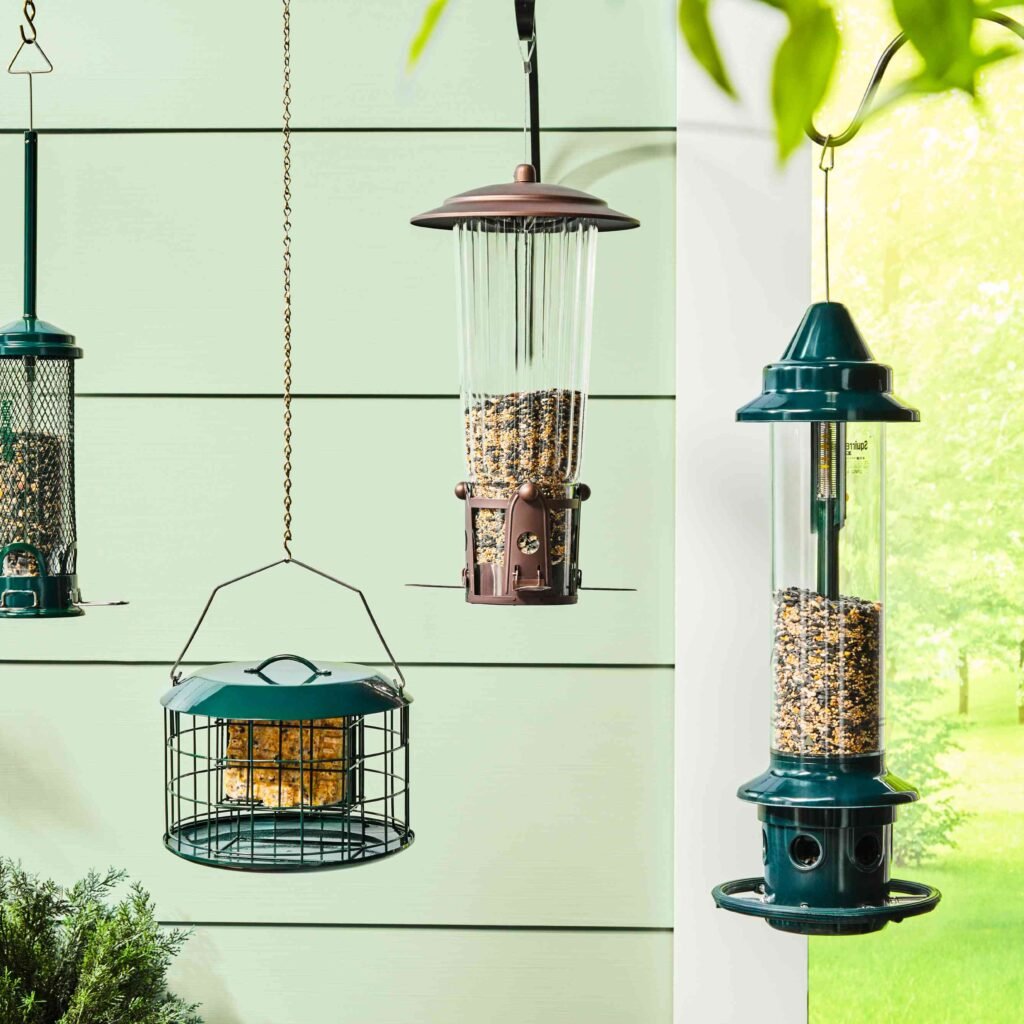
Step 1: Choose the Right Feeder

Not all bird feeders are created equal. Some are designed specifically to deter squirrels.
- Weight-Activated Feeders: These close feeding ports under the weight of a squirrel but remain open for lightweight birds.
- Caged Feeders: Surrounded by a metal cage that allows small birds in but keeps squirrels out.
- Tube Feeders with Metal Ports: Prevent squirrels from chewing through to the seeds.
Tip: Avoid cheap plastic feeders—squirrels can chew through them in no time.
Step 2: Use Squirrel Baffles
A squirrel baffle is one of the most effective tools against these critters.
- Pole-Mounted Baffles: Dome- or cone-shaped barriers placed below a feeder to stop squirrels from climbing up.
- Hanging Baffles: Installed above hanging feeders, they prevent squirrels from dropping down from branches or wires.
For best results, ensure the baffle is smooth, wide, and at least 16–18 inches in diameter so squirrels can’t grab around it.
Step 3: Placement Is Everything
Squirrels are excellent jumpers—capable of leaping 8–10 feet horizontally and 4–5 feet vertically. Proper feeder placement makes a big difference.
- Distance from Trees & Structures: Place feeders at least 10 feet away from fences, trees, or rooftops.
- Height from Ground: Mount feeders on poles at least 5–6 feet high.
- Use Thin Poles: Squirrels can’t climb slick or narrow poles easily.
Pro Tip: Mount your feeder on a metal pole with a baffle for maximum effectiveness.
Step 4: Choose Birdseed Wisely
Birds love sunflower seeds and peanuts, but so do squirrels. Switching to less squirrel-friendly food can help.
- Safflower Seeds: Many birds (like cardinals and chickadees) love them, but squirrels often don’t.
- Nyjer (Thistle) Seeds: Favored by finches but ignored by squirrels.
- White Proso Millet: Attracts small ground-feeding birds, less appealing to squirrels.
You can also buy pre-treated seed with capsaicin (hot pepper). Birds can’t taste the heat, but squirrels sure can.
Step 5: Add Spicy Deterrents
Capsaicin, the compound that makes chili peppers hot, is safe for birds but unpleasant for squirrels.
- Hot Pepper Seed Mixes: Available at garden centers.
- DIY Option: Mix a small amount of cayenne pepper into birdseed (wear gloves when handling).
Note: Be cautious—some wildlife advocates recommend buying commercial blends to avoid irritation to your own hands or eyes.
Step 6: Create Distractions
Sometimes, the best way to protect your bird feeders is to give squirrels an alternative food source.
- Squirrel Feeders: Place them far from bird feeders, stocked with corn, nuts, or specially formulated squirrel food.
- Ground Feeding: Scatter food for squirrels in another part of the yard so they leave the bird feeder alone.
This “decoy method” works especially well if you enjoy watching squirrels too, but want to keep the peace.
Step 7: Maintain and Monitor
Squirrel-proofing is not a one-and-done task. These animals are persistent, so stay vigilant.
- Check Feeders Regularly: Look for chew marks or damage.
- Move Feeders Occasionally: If squirrels figure out one setup, change locations.
- Rotate Strategies: Combine baffles, placement, and spicy seeds for best results.
Humane Methods vs. What to Avoid
While it may be tempting to use traps or harmful substances, humane methods are always best.
Safe Methods: Baffles, spicy seeds, placement strategies, squirrel feeders.
Avoid: Poison, sticky substances, or harmful traps—they can injure not only squirrels but also birds and pets.
Remember, squirrels are simply doing what comes naturally—searching for food. The goal is to deter, not harm.
Common Mistakes Homeowners Make
- Placing Feeders Too Close to Trees – Makes it easy for squirrels to jump.
- Using Plastic Feeders – Squirrels chew through them quickly.
- Neglecting Maintenance – Once squirrels find a weak spot, they’ll exploit it.
- Feeding Birds Exclusively with Sunflower Seeds – A squirrel’s favorite treat.
- Thinking One Solution Will Do It All – Often, a combination of methods works best.
Final Thoughts
Keeping squirrels away from your bird feeders may feel like a never-ending battle, but with the right mix of smart feeder choices, proper placement, baffles, seed selection, and spicy deterrents, you can tip the balance in favor of the birds.
Squirrels are clever, but so are you. By using these humane strategies, you’ll ensure that your feeders remain a safe, reliable haven for feathered friends—while still appreciating the occasional antics of those bushy-tailed acrobats from a distance.
A peaceful backyard full of bird songs instead of squirrel raids is possible—and it all starts with being one step ahead of your furry visitors.