8 Flowers That Bloom All Summer in Hot Climates

8 Flowers That Bloom All Summer in Hot Climates

Gardening in hot climates presents unique challenges. High temperatures, intense sunlight, and low humidity can make it difficult to maintain lush, colorful flower beds throughout the summer. However, some flowers are heat-tolerant, drought-resistant, and capable of producing vibrant blooms even in harsh conditions. Selecting the right plants ensures your garden remains colorful, lively, and low-maintenance throughout the hot season.

This article highlights eight flowers that bloom all summer in hot climates, providing detailed care tips to help gardeners create a thriving summer garden.


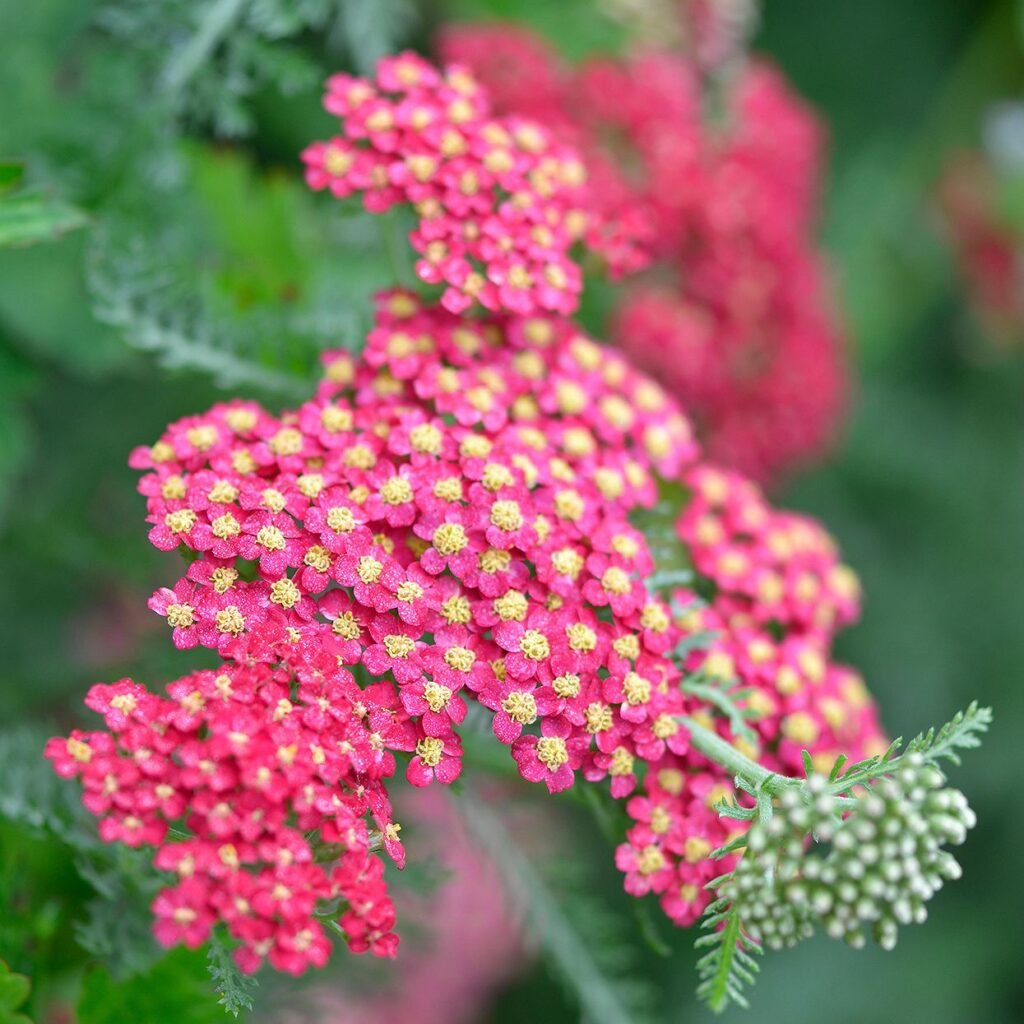
1. Lantana (Lantana camara)

Why It’s Perfect for Hot Climates

  • Lantana is exceptionally heat-tolerant and thrives in full sun.
  • Produces clusters of vibrant flowers in red, orange, yellow, pink, or multicolor.
  • Attracts butterflies and pollinators, adding life to your garden.

Care Tips

  • Sunlight: Full sun for at least 6–8 hours daily.
  • Watering: Drought-tolerant once established; water moderately during extreme heat.
  • Soil: Well-draining soil; tolerant of poor soils.
  • Pruning: Light pruning encourages continuous blooming.

Bonus: Lantana can be used as borders, containers, or hanging baskets, making it versatile for small and large gardens.


2. Portulaca (Portulaca grandiflora)

Why It’s Perfect for Hot Climates

  • Commonly known as moss rose, Portulaca thrives in intense heat and drought.
  • Produces bright, vibrant blooms in red, orange, yellow, and pink.
  • Spreads as a low-growing ground cover, ideal for rock gardens or sunny borders.

Care Tips

  • Sunlight: Full sun; blooms more profusely in direct sunlight.
  • Watering: Minimal; avoid overwatering.
  • Soil: Sandy or well-draining soil preferred.
  • Maintenance: Deadheading is optional; flowers open during the day and close at night.

Bonus: Portulaca’s succulent-like leaves retain water, making it nearly indestructible in hot conditions.


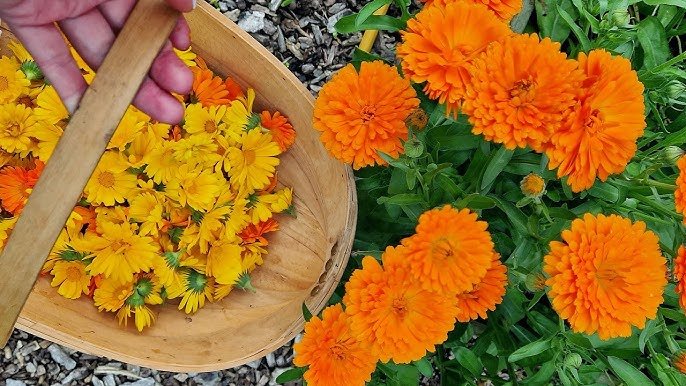
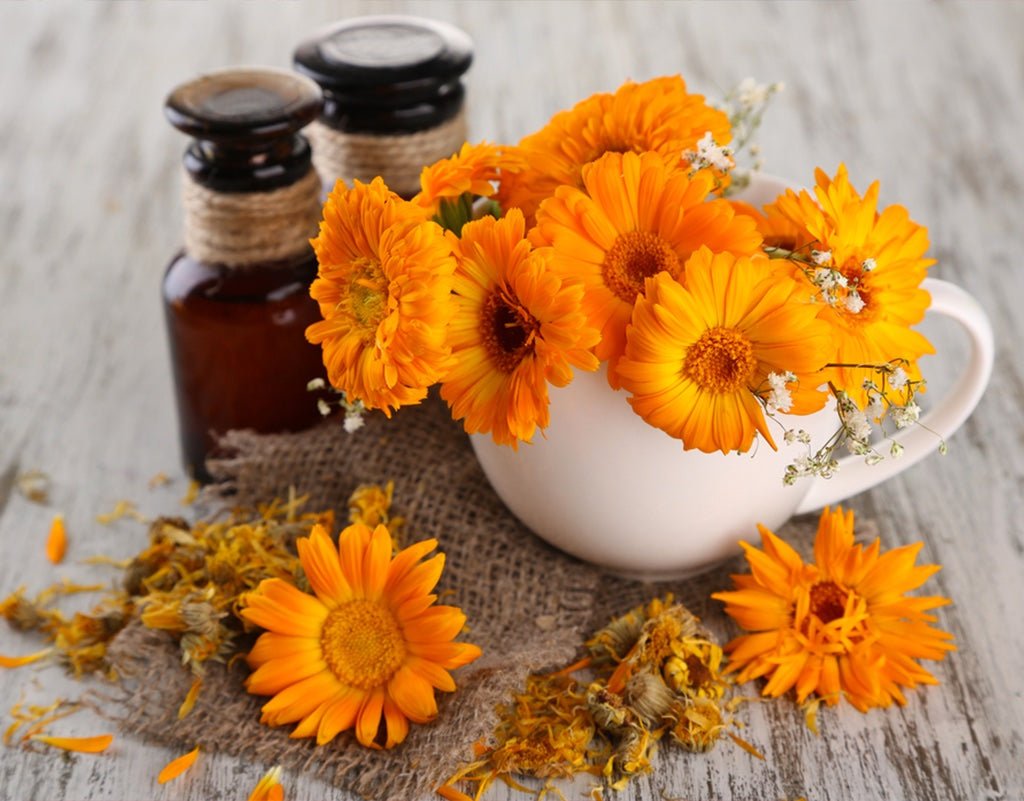
3. Marigold (Tagetes spp.)

Why It’s Perfect for Hot Climates

  • Marigolds are classic summer flowers, known for resilience under heat.
  • Produces bright yellow, orange, and gold blooms throughout the season.
  • Repels some pests naturally, making it useful in vegetable gardens.

Care Tips

  • Sunlight: Full sun; tolerates hot conditions well.
  • Watering: Moderate; avoid wetting foliage to prevent disease.
  • Soil: Well-draining soil with moderate fertility.
  • Pruning: Deadhead spent flowers to encourage continuous blooms.

Bonus: Marigolds are easy to grow from seeds, making them a favorite for beginner gardeners in hot climates.


4. Zinnia (Zinnia elegans)

Why It’s Perfect for Hot Climates

  • Zinnias are heat and sun lovers that thrive even in arid conditions.
  • Available in a wide range of colors and forms, from singles to double blooms.
  • Attracts pollinators like bees and butterflies, enhancing garden biodiversity.

Care Tips

  • Sunlight: Full sun for best flowering.
  • Watering: Moderate watering; avoid overhead watering to prevent mildew.
  • Soil: Well-draining soil with organic matter.
  • Maintenance: Deadhead regularly to promote new blooms.

Bonus: Zinnias bloom from early summer until frost, providing long-lasting color.


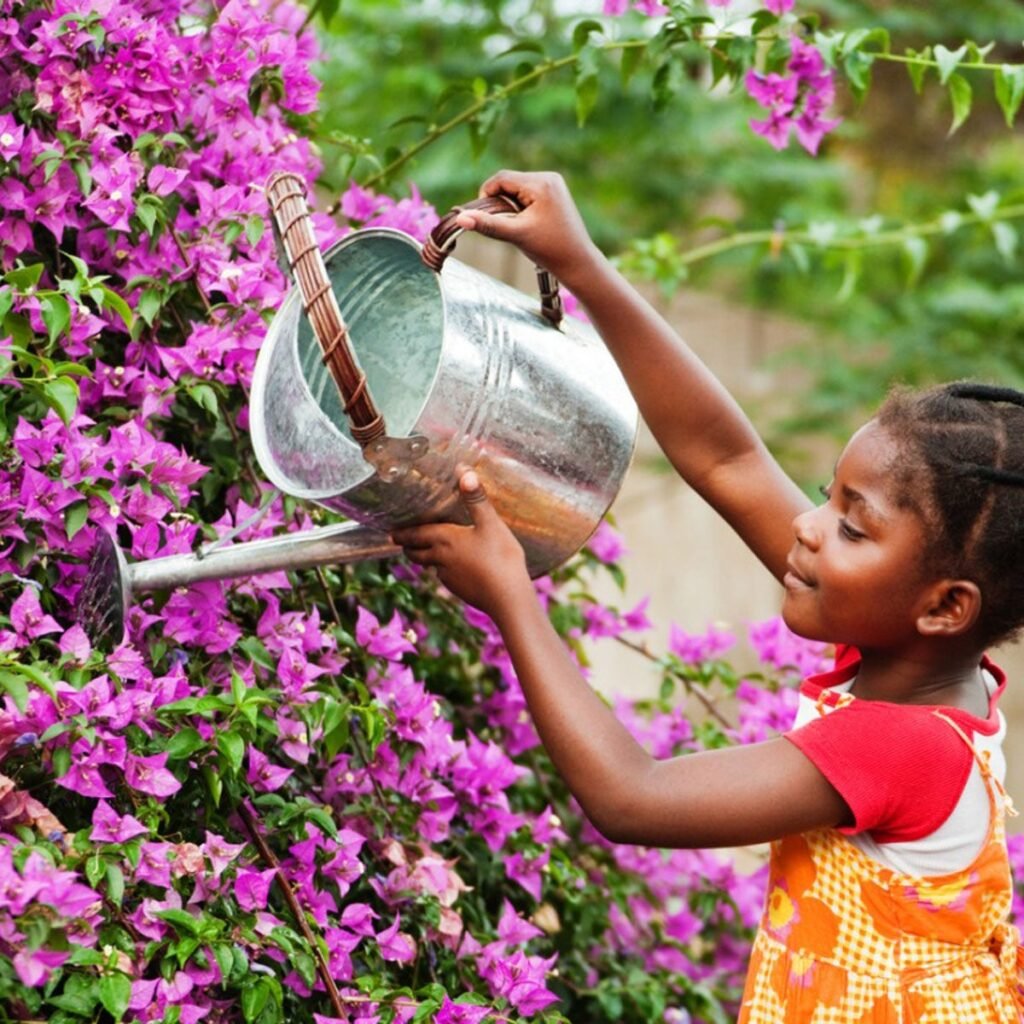
5. Bougainvillea (Bougainvillea spp.)

Why It’s Perfect for Hot Climates

  • Bougainvillea is a tropical vine or shrub renowned for its bright, papery bracts.
  • Thrives in full sun and hot, dry conditions.
  • Adds dramatic color to fences, walls, trellises, or balconies.

Care Tips

  • Sunlight: Full sun is essential for abundant flowering.
  • Watering: Water deeply but infrequently; tolerates drought once established.
  • Soil: Well-draining soil with moderate fertility.
  • Pruning: Prune after flowering to maintain shape and encourage more blooms.

Bonus: Bougainvillea is low-maintenance and long-lived, making it ideal for hot-climate landscapes.


6. Pentas (Pentas lanceolata)

Why It’s Perfect for Hot Climates

  • Pentas, also called Egyptian starcluster, produces clusters of star-shaped flowers in red, pink, purple, and white.
  • Extremely heat and drought-tolerant, thriving in summer gardens.
  • Attracts butterflies and hummingbirds, enhancing garden appeal.

Care Tips

  • Sunlight: Full sun for vibrant blooms; tolerates partial shade.
  • Watering: Moderate; well-drained soil prevents root rot.
  • Soil: Fertile, well-draining soil enriched with compost.
  • Maintenance: Deadhead to prolong blooming.

Bonus: Pentas are ideal for containers or borders, making them versatile for hot climates.


7. Celosia (Celosia argentea)

Why It’s Perfect for Hot Climates

  • Celosia is a heat-loving annual with unusual flower shapes resembling flames or cockscombs.
  • Blooms in vibrant reds, yellows, oranges, and pinks, creating eye-catching accents.
  • Thrives in hot, sunny conditions with minimal care.

Care Tips

  • Sunlight: Full sun; blooms are brightest with ample sunlight.
  • Watering: Moderate; allow soil to dry slightly between watering.
  • Soil: Well-draining soil enriched with organic matter.
  • Maintenance: Deadhead to extend flowering season.

Bonus: Celosia’s unique flower shapes make it a conversation starter in any garden or bouquet.


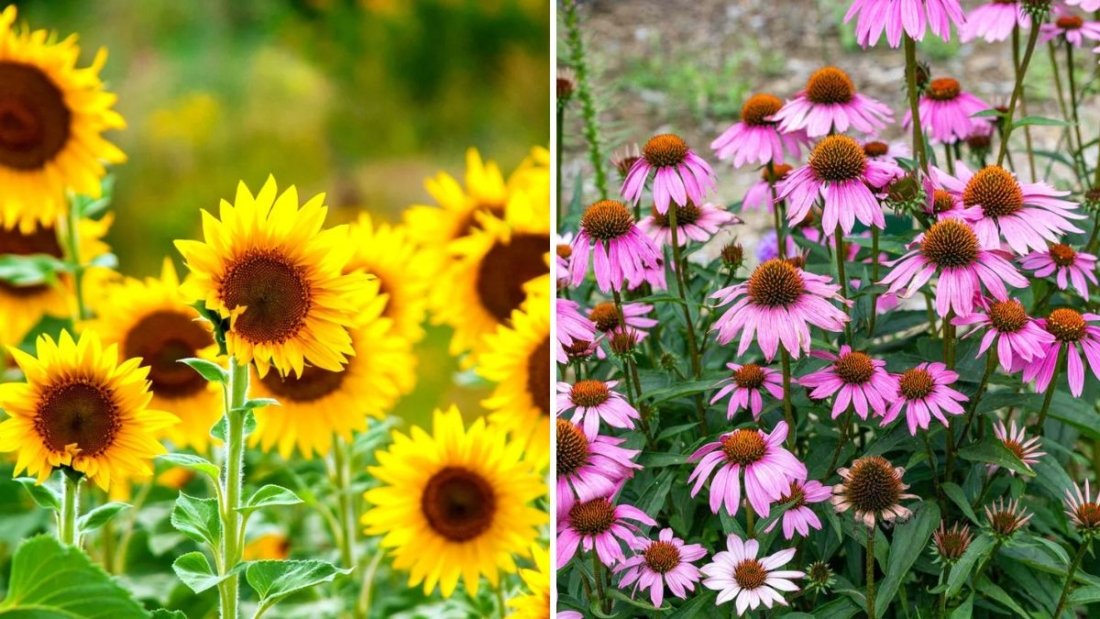
8. Sunflower (Helianthus annuus)

Why It’s Perfect for Hot Climates

  • Sunflowers are tall, hardy, and sun-loving, producing bright yellow blooms that track the sun.
  • Ideal for creating dramatic focal points in gardens or balcony containers.
  • Many varieties bloom all summer, attracting birds and pollinators.

Care Tips

  • Sunlight: Full sun; at least 6–8 hours per day.
  • Watering: Deep watering; drought-tolerant once established.
  • Soil: Well-draining soil with moderate fertility.
  • Maintenance: Remove spent flowers for continuous blooms; provide support for tall varieties.

Bonus: Sunflowers are easy to grow from seeds, making them accessible for gardeners of all levels.


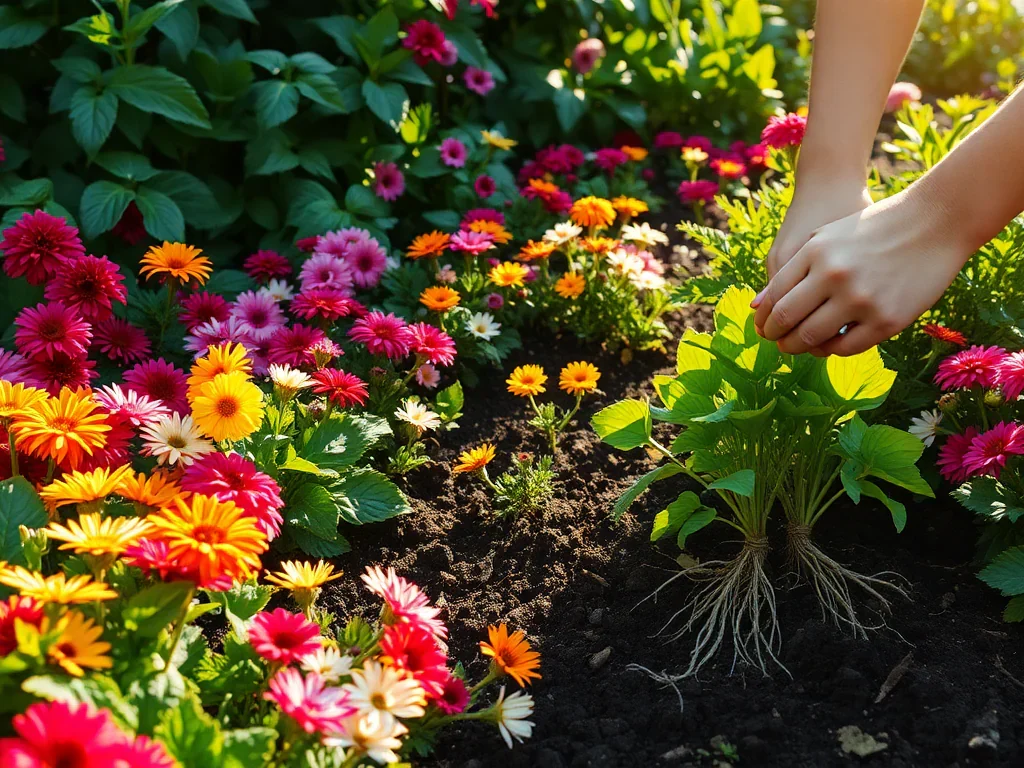
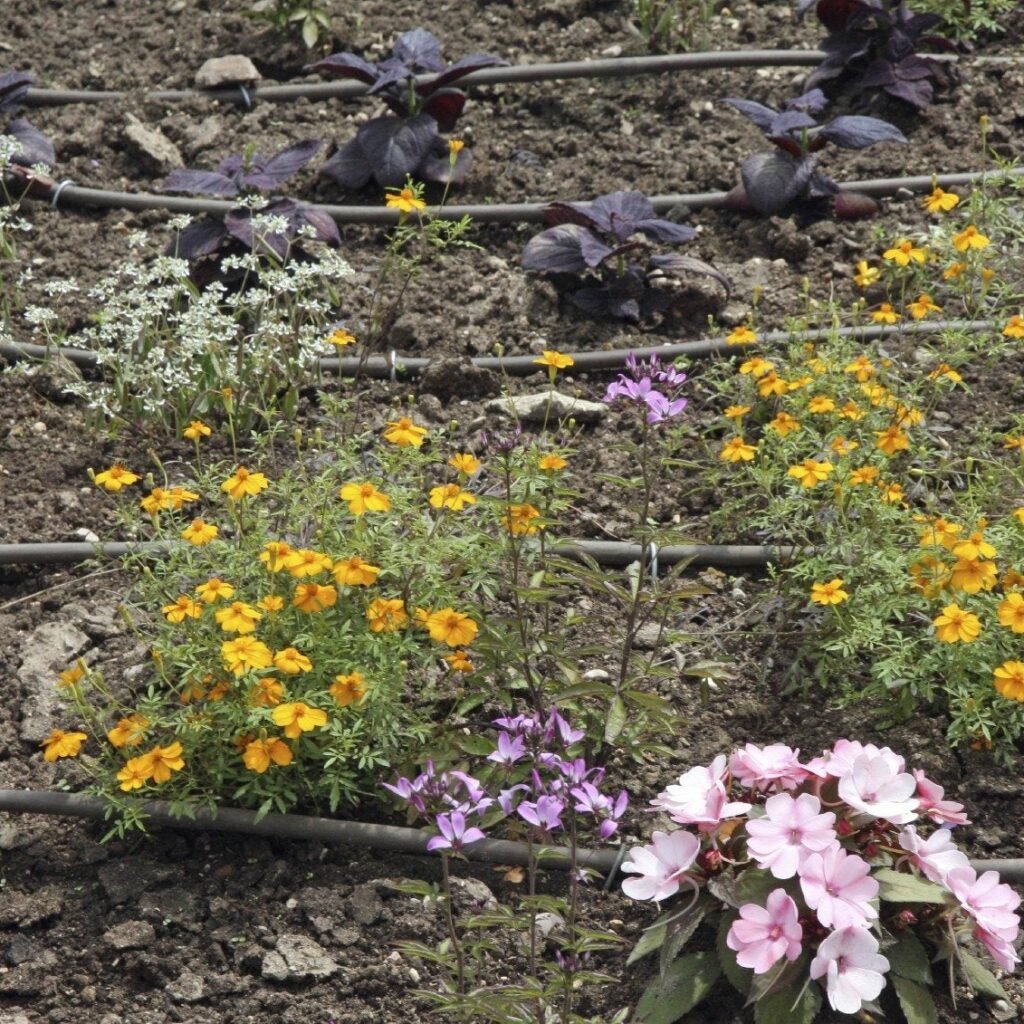
General Tips for Maintaining Summer Blooms in Hot Climates

  1. Mulching: Apply organic mulch around plants to retain soil moisture and reduce heat stress.
  2. Soil Preparation: Use well-draining soil to prevent root rot during summer rains.
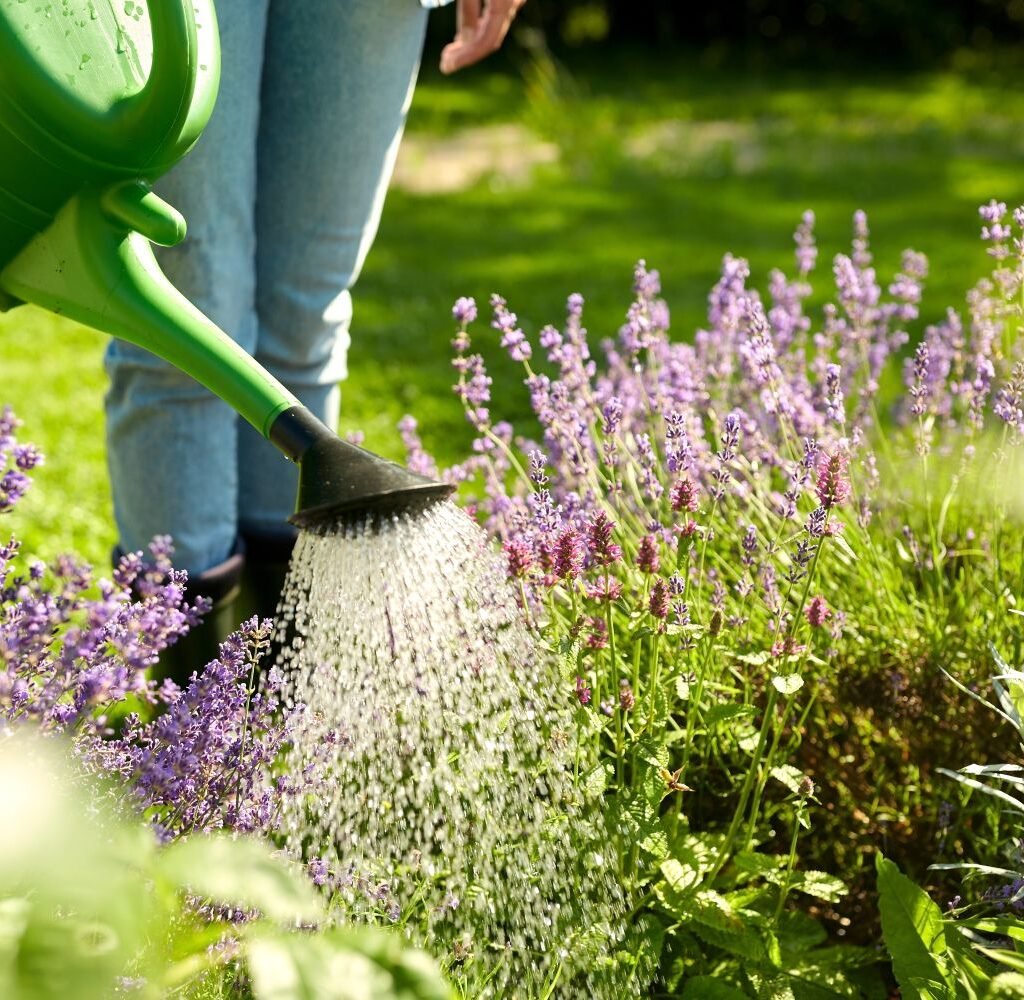
  3. Watering Techniques: Water early in the morning or late in the evening to minimize evaporation.
  4. Fertilization: Use slow-release or balanced fertilizers to support continuous blooms.
  5. Plant Grouping: Group plants with similar water and sunlight needs together for easier care.

By following these strategies, you can maximize flower performance even in extreme summer heat.


Conclusion: Keep Your Garden Vibrant All Summer

Hot climates don’t have to mean dull, dry, or lifeless gardens. By selecting heat-tolerant flowers like Lantana, Portulaca, Marigolds, Zinnias, Bougainvillea, Pentas, Celosia, and Sunflowers, gardeners can enjoy vibrant color, continuous blooms, and minimal maintenance throughout the summer.

Combining these flowers with proper soil, watering, sunlight, and care techniques ensures your garden remains alive, colorful, and inviting, even under scorching temperatures. Whether for home gardens, balconies, patios, or landscape beds, these flowers provide long-lasting beauty, attract pollinators, and create a cheerful summer ambiance.

With these eight resilient and striking blooms, every gardener can transform their hot-climate garden into a summer paradise that delights the eyes and lifts the spirits.

5 Flowers That Bloom in Partial Shade

5 Flowers That Bloom in Partial Shade

Many gardeners believe that vibrant flowers require full sunlight, but partial shade gardens can be equally stunning with the right plant selection. Partial shade is defined as an area that receives 3–6 hours of direct sunlight or filtered light throughout the day. This condition is common on balconies, under trees, or alongside buildings. While some flowers thrive in full sun, many ornamental plants are well-adapted to lower light conditions and reward gardeners with extended blooming periods and rich foliage.

This guide explores five beautiful flowers that flourish in partial shade, their care requirements, soil preferences, watering needs, and tips for designing a shaded garden with colorful blooms.


Why Choose Shade-Tolerant Flowers?

Gardening in partial shade offers multiple benefits:

  1. Protection from Harsh Sun: Plants are less likely to suffer sunburn or leaf scorch.
  2. Cooler Growing Conditions: Reduced sunlight helps maintain soil moisture and reduces heat stress.
  3. Extended Blooming: Many shade-loving flowers bloom for longer periods than sun-loving counterparts.
  4. Enhanced Foliage Colors: Partial shade often intensifies leaf color, providing a lush backdrop for flowers.
  5. Versatility: Ideal for spaces where full sunlight is not available, such as under trees or near walls.

Shade-tolerant plants enable gardeners to create vibrant, layered, and dynamic landscapes in areas that would otherwise remain bare.


Step 1: Impatiens (Busy Lizzie)

Description: Impatiens are popular shade-loving annuals known for their bright, colorful flowers in shades of red, pink, purple, white, and orange.

Growing Conditions:

  • Light: Partial shade; tolerate morning sun but avoid harsh afternoon sun.
  • Soil: Moist, well-draining soil rich in organic matter.
  • Watering: Keep soil consistently moist; avoid waterlogging.
  • Temperature: Thrive in temperatures between 60–75°F (15–24°C).

Care Tips:

  • Deadhead spent blooms to encourage continuous flowering.
  • Fertilize every 2–3 weeks with a balanced liquid fertilizer.
  • Ideal for containers, hanging baskets, or borders, adding color to shaded areas.

Impatiens are excellent for brightening dim corners of a garden or balcony.


Step 2: Astilbe

Description: Astilbes are perennial plants with feathery, plume-like flowers in shades of pink, red, white, and purple. They add height, texture, and elegance to shade gardens.

Growing Conditions:

  • Light: Partial to full shade; tolerates filtered sunlight.
  • Soil: Rich, moist, well-draining soil; amend with compost for best results.
  • Watering: Requires consistent moisture, especially during flowering.
  • Temperature: Hardy in USDA zones 3–8.

Care Tips:

  • Mulch around roots to maintain soil moisture.
  • Divide clumps every 3–4 years to prevent overcrowding.
  • Perfect for shade borders, woodland gardens, or container plantings.

Astilbe provides dramatic vertical interest and thrives where sunlight is limited.


Step 3: Hellebores (Lenten Rose)

Description: Hellebores are perennial flowers known for early spring blooms, often appearing while snow is still on the ground. Colors range from white and pink to deep purples and greens.

Growing Conditions:

  • Light: Partial shade; protect from hot afternoon sun.
  • Soil: Rich, well-draining soil with organic matter.
  • Watering: Moderate watering; drought-tolerant once established.
  • Temperature: Hardy in USDA zones 4–9; withstand cold winters.

Care Tips:

  • Remove old foliage in late winter to promote new growth.
  • Mulch to retain moisture and regulate soil temperature.
  • Ideal for woodland gardens, shaded borders, or under trees.

Hellebores are low-maintenance, long-lived perennials that reward gardeners with early spring color.


Step 4: Begonias (Wax Begonia and Fibrous-Rooted Begonia)

Description: Begonias are versatile flowers suitable for containers, hanging baskets, and garden beds. Wax begonias have glossy leaves, while fibrous-rooted types produce continuous blooms in red, pink, white, or orange.

Growing Conditions:

  • Light: Partial shade; can tolerate filtered sunlight.
  • Soil: Well-draining, fertile soil enriched with organic matter.
  • Watering: Keep soil moist but avoid soggy conditions.
  • Temperature: Prefers warm conditions (60–75°F / 15–24°C).

Care Tips:

  • Remove spent flowers to encourage new blooms.
  • Fertilize with a balanced liquid fertilizer every 2–4 weeks.
  • Resistant to heat and humidity, making them suitable for balcony containers and indoor shade gardens.

Begonias are perfect for adding continuous color to shaded garden areas.


Step 5: Foxglove (Digitalis)

Description: Foxgloves are tall, elegant biennials or short-lived perennials with tubular flowers that attract bees and pollinators. Colors include purple, pink, white, and yellow.

Growing Conditions:

  • Light: Partial shade; prefers morning sun and afternoon shade.
  • Soil: Moist, well-draining soil; rich in organic matter.
  • Watering: Consistent moisture, especially during flowering.
  • Temperature: Hardy in USDA zones 4–9.

Care Tips:

  • Mulch to retain soil moisture and maintain cooler root temperatures.
  • Cut back spent flower spikes to promote second bloom in some varieties.
  • Excellent for woodland gardens, shaded borders, and balcony containers.

Foxgloves add vertical drama and attract pollinators to shaded areas.


Tips for Growing Flowers in Partial Shade

  1. Soil Preparation: Enrich soil with compost to enhance fertility and moisture retention.
  2. Watering: Shade plants may still require consistent watering; check soil regularly.
  3. Fertilization: Use balanced, slow-release fertilizers to promote flowering without overstimulating foliage growth.
  4. Mulching: Apply organic mulch to retain moisture, regulate soil temperature, and reduce weeds.
  5. Container Placement: Rotate containers to ensure even light exposure and avoid weak, leggy growth.
  6. Spacing: Avoid overcrowding; ensure adequate airflow to reduce fungal diseases.
  7. Companion Planting: Mix shade-loving flowers with ferns or ornamental grasses to create texture and depth.

Following these tips ensures healthy growth and vibrant blooms even in low-light conditions.


Design Ideas for Partial Shade Gardens

  • Layered Borders: Combine tall foxgloves or astilbes with lower begonias and impatiens for a multi-dimensional display.
  • Container Gardens: Use shade-tolerant flowers in pots and hanging baskets to brighten balcony corners.
  • Woodland Theme: Incorporate hellebores and astilbes under trees with dappled sunlight.
  • Mix Foliage and Flowers: Contrast flowering plants with ornamental foliage like hostas for texture and visual interest.
  • Succession Planting: Stagger planting times to ensure continuous blooms throughout the season.

Thoughtful design maximizes color, texture, and visual appeal in shaded areas.


Benefits of Partial Shade Flowers

  • Continuous Color: Many shade-tolerant flowers bloom for extended periods.
  • Adaptability: Suitable for balconies, patios, under trees, and alongside buildings.
  • Low Heat Stress: Plants are less susceptible to scorching or wilting.
  • Attract Pollinators: Bees, butterflies, and other beneficial insects thrive in shaded flower gardens.
  • Improved Air Quality: Dense foliage contributes to oxygen production and dust filtration.

Partial shade gardens combine beauty, sustainability, and functionality in urban and small-space settings.


Conclusion

Growing flowers in partial shade proves that limited sunlight does not mean limited beauty. By selecting the right species, preparing fertile soil, ensuring proper watering, and providing seasonal care, gardeners can enjoy vibrant blooms, lush foliage, and ecological benefits even in shaded areas.

Impatiens, astilbes, hellebores, begonias, and foxgloves are standout choices for colorful, low-maintenance shade gardens. Their unique foliage, varied colors, and adaptability make them ideal for balconies, woodland gardens, and partially shaded landscapes.

With thoughtful plant selection, strategic placement, and attentive care, gardeners can transform partial shade areas into visually stunning gardens that flourish year-round, providing beauty, pollinator support, and a peaceful retreat in urban spaces.

How to Prevent Overcrowding in Flower Beds

How to Prevent Overcrowding in Flower Beds

A well-designed flower bed is a symphony of color, texture, and form. However, when flowers are planted too closely together, the results can be far from ideal. Overcrowding in flower beds can lead to poor air circulation, increased disease risk, stunted growth, and reduced flowering. Preventing overcrowding is essential for maintaining healthy, visually appealing, and sustainable garden spaces. This article provides detailed insights and practical strategies to prevent overcrowding in flower beds, ensuring that each plant thrives while contributing to the overall beauty of the garden.


1. Understanding the Problems of Overcrowding

Overcrowding occurs when plants are placed too close together, either during initial planting or due to lack of maintenance. Some common consequences include:

  • Stunted Growth: Plants compete for sunlight, water, and nutrients, limiting their development.
  • Reduced Flowering: Overcrowded plants often produce fewer blooms or smaller flowers.
  • Poor Air Circulation: Crowded foliage creates a humid microclimate, promoting fungal diseases such as powdery mildew and botrytis.
  • Pest Infestation: Dense growth provides hiding places for pests, increasing the risk of infestations.
  • Weed Competition: Dense plantings make it harder to spot and remove weeds, which can further compete for resources.

Understanding these problems emphasizes the importance of proper spacing and thoughtful planning in flower bed design.


2. Start with a Well-Designed Layout

Prevention begins at the planning stage. A thoughtful layout reduces the risk of overcrowding:

a) Consider Mature Size

Every plant has a natural growth size. Check seed packets, nursery tags, or plant databases for expected height and spread.

  • Rule of Thumb: Give each plant enough space for its mature size to avoid overcrowding as it grows.

b) Layering and Grouping

Arrange plants based on height, with taller plants at the back or center and shorter plants at the edges. This approach not only prevents shading but also creates a visually balanced bed.

c) Allow Pathways

Include pathways or stepping stones for easy access. This prevents accidental damage when tending plants and provides airflow between clusters.


3. Proper Plant Spacing

Spacing is the most effective way to prevent overcrowding. Proper spacing depends on plant type and growth habit:

  • Small Perennials and Annuals: 6–12 inches apart.
  • Medium-Sized Perennials: 12–18 inches apart.
  • Large Perennials and Shrubs: 18–36 inches or more apart.

Spacing ensures that each plant receives adequate sunlight, water, and nutrients, while reducing the risk of fungal diseases.


4. Choose Compatible Plants

Not all plants are suitable for tight arrangements. Select species that complement each other in growth habit, root depth, and light requirements:

  • Vertical Growers: Plants that grow upright, such as foxgloves or delphiniums, reduce horizontal crowding.
  • Ground Covers: Low-growing plants like creeping thyme or ajuga can fill spaces without competing with taller plants.
  • Similar Water and Light Needs: Group plants with similar care requirements to ensure healthy growth and reduce stress.

Selecting compatible plants prevents competition and maintains harmony in the flower bed.


5. Succession Planting and Rotation

Succession planting involves staggering plantings so that flowers bloom at different times, reducing the density at any given period:

  • Example: Plant early spring bulbs such as tulips with summer perennials like coneflowers. When tulips fade, perennials take over the space.
  • Rotation: Periodically rotating annuals and perennials helps maintain soil health and prevents one species from dominating the bed.

These strategies ensure continuous blooms without overcrowding.


6. Regular Maintenance

Preventing overcrowding is an ongoing task that requires regular attention:

a) Thinning

Remove some seedlings or young plants if they are too dense. Thinning provides remaining plants with more resources and encourages robust growth.

b) Pruning and Pinching

  • Pruning: Trim branches or stems to maintain airflow and shape.
  • Pinching: Remove early flower buds in some annuals to encourage bushier growth.

c) Dividing Perennials

Every few years, divide perennials such as daylilies, hostas, and phlox to prevent them from taking over the bed. Dividing not only reduces overcrowding but also rejuvenates the plants.


7. Mulching and Soil Management

Mulching and proper soil care indirectly prevent overcrowding by promoting healthy plant growth:

  • Mulch: Organic mulch prevents weeds from competing with your plants, maintaining space for intended species.
  • Soil Fertility: Well-fertilized soil ensures plants grow as expected, reducing competition for nutrients.
  • Soil Aeration: Loosen soil periodically to support healthy root systems and prevent plants from encroaching on each other underground.

Healthy soil encourages balanced growth, reducing the tendency for plants to become overcrowded.


8. Container and Raised Bed Solutions

Containers and raised beds offer better control over spacing:

  • Containers: Planting in pots or individual containers ensures each plant has its own space. This method is especially useful for tender plants that need protection or controlled soil conditions.
  • Raised Beds: Raised beds allow for defined planting zones and prevent natural spreading of aggressive species. They also improve drainage, reducing fungal risk.

These methods are ideal for small gardens or urban settings where space is limited.


9. Use Edging and Barriers

Physical barriers can help control plant spread:

  • Edging: Use stone, brick, or metal edging to prevent creeping plants from invading neighboring beds.
  • Root Barriers: Install root barriers for aggressive perennials to contain their growth underground.

Proper use of barriers ensures that each plant respects its designated space and does not overtake others.


10. Monitor Growth Patterns

Every plant grows differently depending on climate, soil, and care:

  • Observation: Regularly monitor plants to identify early signs of overcrowding.
  • Intervention: Move, prune, or divide plants as needed to maintain optimal spacing.
  • Record Keeping: Keep notes on growth patterns and bloom timing to plan future plantings more effectively.

Continuous observation is the key to maintaining a healthy, overcrowding-free flower bed.


11. Designing for Visual Impact

Preventing overcrowding is not only about plant health; it also enhances the visual appeal of your flower beds:

  • Contrast and Texture: Provide breathing space to highlight individual plants and textures.
  • Seasonal Planning: Combine early, mid, and late bloomers to ensure continuous visual interest without overcrowding.
  • Focal Points: Use taller plants or garden ornaments as focal points to draw the eye and maintain structure.

A well-spaced flower bed looks organized, vibrant, and inviting, while overcrowded beds appear chaotic and dull.


Conclusion

Preventing overcrowding in flower beds is essential for creating a healthy, vibrant, and visually appealing garden. By understanding plant growth habits, planning layouts thoughtfully, providing proper spacing, selecting compatible species, and performing regular maintenance such as thinning, pruning, and dividing, gardeners can ensure that each plant thrives. Additional strategies, including container gardening, raised beds, mulching, and using barriers, help maintain structure and prevent aggressive growth. Ultimately, a well-spaced flower bed not only reduces disease and pest problems but also enhances the beauty of your garden, making it a sustainable and enjoyable outdoor space throughout the growing season.

How to Water Flower Gardens During Droughts

How to Water Flower Gardens During Droughts

Flower gardens are a source of beauty, tranquility, and personal satisfaction, but prolonged drought conditions can make maintaining them a significant challenge. Water scarcity, high temperatures, and intense sunlight can stress plants, reduce flowering, and even cause plant death. Efficient watering practices during droughts are essential not only to conserve water but also to ensure that your garden continues to thrive. This article provides in-depth guidance on how to water flower gardens during droughts, covering techniques, timing, soil management, and plant selection for sustainable and healthy gardens.


1. Understanding Plant Water Needs

Different plants have varying water requirements, and understanding these needs is crucial during drought conditions:

  • Deep-Rooted Plants: Perennials like daylilies, coneflowers, and lavender can access deeper soil moisture and require less frequent watering.
  • Shallow-Rooted Plants: Annuals, petunias, and pansies need more frequent watering due to limited root depth.
  • Flowering Stage: Plants in bloom require more water to support flower production and prevent wilting.

By identifying which plants need more or less water, gardeners can prioritize watering efforts, ensuring that resources are used efficiently.


2. Timing Is Everything

Watering at the right time of day maximizes absorption and minimizes evaporation:

  • Early Morning: The best time to water is before sunrise. Cooler temperatures reduce water loss through evaporation, and plants can absorb water before the heat of the day.
  • Evening Watering: If morning watering is not possible, water in the early evening, allowing plants to absorb moisture before nightfall. Avoid late-night watering in humid climates to reduce the risk of fungal diseases.
  • Avoid Midday Watering: Watering during the hottest part of the day leads to high evaporation rates and reduces the effectiveness of irrigation.

Consistent timing also helps plants develop predictable hydration patterns, which improves drought resilience.


3. Efficient Watering Techniques

Using proper watering methods is key to maximizing water use during droughts:

a) Deep Watering

  • Water at the base of plants slowly and deeply to encourage deep root growth.
  • Shallow watering leads to weak, surface-level roots that are more susceptible to drought stress.
  • Use soaker hoses, drip irrigation, or hand-watering at the soil level to target the root zone directly.

b) Mulching

  • Apply a 2–4 inch layer of organic mulch, such as wood chips, straw, or compost.
  • Mulch retains soil moisture, moderates soil temperature, and suppresses weed growth that competes for water.
  • Keep mulch slightly away from the plant crown to prevent rot.

c) Water-Retaining Amendments

  • Incorporate water-holding additives like compost, coconut coir, or vermiculite into garden soil.
  • These amendments improve water retention and reduce the frequency of irrigation.

4. Prioritize Plants

During severe droughts, it may not be feasible to water every plant equally. Prioritize:

  • High-Value Plants: Plants with high ornamental or sentimental value, such as roses, lilies, and hydrangeas.
  • Recent Plantings: Young plants or transplants that have not yet established deep roots.
  • Flowering Plants: Blooms require more water to maintain their shape, color, and fragrance.

Less critical or drought-tolerant plants can survive with minimal watering, allowing limited water to be used where it has the most impact.


5. Grouping and Zoning

Creating watering zones improves efficiency:

  • Hydrozoning: Group plants with similar water needs together. This prevents overwatering drought-tolerant plants and ensures water-intensive plants receive enough moisture.
  • Container Zoning: Place potted plants with similar watering requirements together for targeted irrigation.
  • Sun and Shade Consideration: Group plants according to sun exposure, as shaded plants generally require less water than those in full sun.

Zoning reduces water waste and ensures optimal hydration for all plants.


6. Use of Water-Saving Tools

Modern gardening provides several tools that conserve water:

  • Drip Irrigation: Delivers water directly to the root zone, reducing evaporation and runoff.
  • Soaker Hoses: Low-pressure hoses that evenly saturate soil around plants.
  • Rain Barrels: Collect rainwater for irrigation, providing a sustainable and cost-effective water source.
  • Moisture Meters: Measure soil moisture to avoid unnecessary watering.

These tools maximize efficiency, particularly in regions with strict water restrictions.


7. Soil Management Practices

Healthy soil improves water retention and reduces plant stress:

  • Organic Matter: Incorporate compost or leaf mold to improve soil structure and moisture-holding capacity.
  • Avoid Compaction: Loosen soil around plants to allow better infiltration and root expansion.
  • Raised Beds: Elevating soil can improve drainage while allowing water to penetrate deeper into the root zone.

Well-maintained soil ensures that plants make the most of limited water supplies.


8. Drought-Tolerant and Native Plants

Plant selection is a critical component of managing flower gardens during droughts:

  • Drought-Tolerant Species: Lavender, sedum, coneflowers, and yarrow thrive with minimal water.
  • Native Plants: Native flowers are adapted to local climate conditions, making them resilient to dry spells.
  • Succulents and Perennials: These plants store water in their leaves or roots, reducing dependency on frequent irrigation.

Using these plants reduces the need for supplemental watering while maintaining garden aesthetics.


9. Reduce Evaporation

Simple practices can minimize water loss:

  • Wind Protection: Planting shrubs or using fences can reduce wind exposure that accelerates evaporation.
  • Shading: Use temporary shade cloths for sensitive flowers during peak sunlight hours.
  • Avoid Overhead Sprinkling: Watering at the base instead of overhead ensures water reaches the roots and reduces evaporation.

These small adjustments help water reach plants more effectively.


10. Monitor and Adjust

During droughts, constant observation is necessary:

  • Check Soil Moisture: Use a trowel or moisture meter to determine soil conditions before watering.
  • Inspect Plants: Signs of wilting, leaf curling, or discoloration indicate water stress.
  • Adjust Frequency: Watering needs may change with temperature, rainfall, and plant growth stage.

Regular monitoring ensures plants receive water only when necessary, conserving resources while maintaining health.


11. Seasonal and Long-Term Strategies

Beyond immediate watering, long-term planning reduces drought stress:

  • Mulch Year-Round: Maintain a layer of mulch even outside peak drought periods.
  • Planting Calendars: Plan bloom cycles so water-intensive plants do not peak during the hottest months.
  • Soil Improvement: Continuous addition of organic matter improves soil resilience.
  • Rain Gardens: Design areas to capture and store rainwater for later use in drought periods.

These strategies make gardens more resilient to future droughts and reduce reliance on supplemental irrigation.


Conclusion

Watering flower gardens during droughts requires a combination of planning, efficient techniques, and plant selection. By understanding plant water needs, watering at optimal times, using deep watering and mulching techniques, prioritizing critical plants, grouping by water needs, and incorporating drought-tolerant species, gardeners can maintain healthy and vibrant flower beds even under water-scarce conditions. Tools such as drip irrigation, rain barrels, and moisture meters further enhance water efficiency. With consistent monitoring, soil improvement, and long-term planning, gardeners can conserve water while ensuring their flower gardens continue to bloom beautifully, providing color, fragrance, and ecological benefits throughout the season.

How to Save Dahlias From Frost and Replant Next Year

How to Save Dahlias From Frost and Replant Next Year

Dahlias are among the most stunning and versatile garden flowers, prized for their dazzling array of colors, shapes, and sizes. Blooming from mid-summer until the first frost, dahlias can transform any garden into a vibrant tapestry. However, these tender tuberous plants are sensitive to frost, which can damage or kill them if left in the ground during the winter months. To enjoy their spectacular blooms year after year, gardeners must learn how to save dahlias from frost and replant them successfully in the following season. This article provides a comprehensive guide for protecting, harvesting, storing, and replanting dahlias, ensuring healthy and robust flowers year after year.


Why Saving Dahlias From Frost Matters

Dahlias are tender perennials, meaning they can survive multiple years if protected from freezing temperatures. Failing to save them can result in lost tubers and the need to purchase new plants annually. Proper preservation:

  1. Protects Tubers From Freezing: Frost can turn the tubers mushy or kill them entirely.
  2. Ensures Early and Strong Blooms: Healthy overwintered tubers produce vigorous stems and abundant flowers.
  3. Maintains Specific Varieties: Saving tubers preserves hybrid varieties, colors, and flower forms.
  4. Cost-Effective Gardening: Reduces the need to buy new plants every season.
  5. Supports Sustainable Practices: Encourages reuse of garden resources and reduces plant waste.

Step 1: Identifying the First Frost

The first frost typically signals the end of the dahlia growing season. Tubers are most vulnerable at this stage:

  • Light Frost: Slightly wilts leaves but may not harm tubers.
  • Hard Frost: Freezes stems and foliage, potentially damaging the tubers.

Tip: Track your local frost dates using weather forecasts or historical records. In most regions, the first frost occurs in late fall.


Step 2: Preparing Dahlias for Digging

Before digging, ensure plants are ready for winter storage:

Timing:

  • Wait until the first light frost has blackened the foliage. The frost helps the tubers enter dormancy.
  • Avoid digging too early, as tubers may not be fully matured and stored energy may be insufficient for next year’s growth.

Tools Needed:

  • Garden fork or spade
  • Clean containers (baskets, crates, or boxes)
  • Garden shears
  • Paper towels or dry sawdust for temporary storage

Tip: Water the soil lightly a day or two before digging to soften it, making it easier to lift tubers.


Step 3: Digging Up Dahlia Tubers

Proper technique ensures tubers remain intact:

  1. Cut Back Foliage: Trim stems to about 4–6 inches above the ground.
  2. Loosen the Soil: Use a garden fork to gently loosen the soil around the base of the plant.
  3. Lift Tubers Carefully: Lift the clump carefully, avoiding piercing or bruising the tubers.
  4. Brush Off Excess Soil: Remove loose dirt gently without washing, which can promote rot.

Tip: Leave some soil clinging to the tubers during initial storage to prevent drying out.


Step 4: Cleaning and Inspecting Tubers

After digging, sort and inspect tubers:

  • Separate Healthy From Damaged: Discard tubers that are soft, moldy, or damaged.
  • Identify the “Eye” or Bud: Ensure each tuber has at least one healthy growing point for replanting.
  • Remove Excess Soil: Brush gently to remove soil, but avoid washing until just before planting.

Healthy tubers are firm, plump, and free of disease.


Step 5: Curing and Drying Tubers

Curing tubers helps prevent rot during winter storage:

  1. Air Dry: Lay tubers in a single layer on trays in a cool, shaded, and ventilated area for 1–2 days.
  2. Avoid Direct Sunlight: Sunlight can dry out or damage the tubers’ skin.
  3. Ensure Ventilation: Prevent moisture buildup that can encourage fungal growth.

Tip: Curing is especially important if you live in humid regions.


Step 6: Storing Dahlia Tubers Over Winter

Proper storage is key to survival until spring:

Storage Medium:

  • Peat moss, vermiculite, sawdust, or shredded newspaper helps absorb excess moisture.
  • Place tubers in single layers or lightly cover clumps to prevent contact and mold formation.

Storage Conditions:

  • Temperature: 40–50°F (4–10°C). Avoid freezing temperatures.
  • Humidity: Moderate (not too wet) to prevent mold and shriveling.
  • Ventilation: Ensure airflow around tubers to prevent fungal growth.

Storage Containers:

  • Cardboard boxes, wooden crates, or paper bags
  • Avoid plastic unless it is perforated for airflow

Tip: Check tubers periodically during winter and remove any that show signs of rot.


Step 7: Preparing Tubers for Replanting

As spring approaches:

  • Inspect tubers for firm texture and healthy eyes.
  • Discard any that are shriveled or moldy.
  • Optional: Soak tubers in lukewarm water for a few hours to wake them from dormancy.
  • Divide tubers carefully if needed, ensuring each division has at least one healthy eye.

Step 8: Planting Dahlias in Spring

To ensure a successful season:

Planting Site:

  • Full sun (6–8 hours of direct sunlight)
  • Well-draining, fertile soil with compost or organic matter

Planting Depth:

  • Plant tubers 4–6 inches deep with the growing point facing upward
  • Space tubers 18–24 inches apart depending on variety

Watering:

  • Water lightly at planting to encourage root growth
  • Avoid overwatering, which can lead to rot

Fertilizing:

  • Use balanced fertilizers high in phosphorus and potassium to promote root and flower development

Tip: Support taller varieties with stakes or cages early to prevent stem breakage.


Step 9: Tips for Long-Term Dahlia Success

  1. Label Varieties: Keep records of tuber colors, bloom types, and planting locations.
  2. Rotate Planting Sites: Prevent soil-borne diseases by avoiding the same location year after year.
  3. Monitor Pests: Watch for aphids, snails, and slugs that target young shoots.
  4. Regular Deadheading: Encourages more blooms and prolongs flowering season.
  5. Continuous Harvest: Cut flowers regularly for indoor arrangements without affecting tuber health.

Advantages of Saving Dahlias from Frost

  • Cost-Effective: Reduces the need for new tuber purchases.
  • Variety Preservation: Maintains favorite flower types, colors, and forms.
  • Early Blooming: Well-stored tubers produce strong, early-season growth.
  • Sustainable Gardening: Supports eco-friendly practices by reusing tubers.
  • Aesthetic and Functional Benefits: Provides vibrant blooms and cut flowers season after season.

Conclusion

Saving dahlias from frost is a vital practice for gardeners who wish to enjoy their stunning blooms year after year. By understanding frost timing, carefully digging, curing, storing, and replanting tubers, gardeners can preserve the vitality and beauty of their plants. Proper winter care ensures early, strong, and abundant flowering in the next season, while also preserving specific varieties and promoting sustainable gardening. With careful attention to storage conditions, inspection, and spring planting techniques, dahlias can become a long-lasting, colorful centerpiece in any garden, bringing joy and vibrancy from one year to the next.

5 Flowers You Should Never Grow in Sandy Soil

5 Flowers You Should Never Grow in Sandy Soil

Gardening success often hinges on matching plants to the right soil type. While sandy soil offers excellent drainage and warmth, it also drains nutrients quickly and retains little moisture, making it unsuitable for certain flowers. Planting flowers that cannot tolerate sandy conditions can lead to stunted growth, poor blooms, and even plant death.

Understanding which flowers to avoid in sandy soil allows gardeners to plan more effectively, improve soil conditions, and choose suitable plants for each garden zone. This article explores five flowers you should never grow in sandy soil, explains why they struggle, and provides tips for creating ideal growing conditions.


1. Hydrangeas

Why Sandy Soil Is Harmful

Hydrangeas are moisture-loving shrubs that thrive in rich, humus-filled soil. Sandy soil drains too quickly, leaving roots unable to access sufficient water or nutrients.

Effects of Sandy Soil

  • Wilting leaves and drooping stems due to insufficient moisture.
  • Smaller or fewer blooms.
  • Nutrient deficiencies leading to yellowing foliage and weak growth.

Best Practices

  • Grow hydrangeas in loamy or clay-rich soil that retains moisture.
  • Add organic matter, such as compost or peat, if sandy soil is unavoidable.
  • Mulch generously to conserve soil moisture.

2. Gardenias

Why Sandy Soil Is Harmful

Gardenias are acid-loving, tropical shrubs that require consistently moist, nutrient-rich soil. Sandy soil’s low nutrient retention and fast drainage stress the plant and inhibit flowering.

Effects of Sandy Soil

  • Leaf drop due to nutrient deficiencies.
  • Reduced fragrance and fewer blooms.
  • Poor root development, making the plant more susceptible to pests.

Best Practices

  • Grow gardenias in acidic, well-drained yet moisture-retentive soil.
  • Use mulch to keep soil cool and moist.
  • Fertilize with acidic, slow-release fertilizer suitable for tropical shrubs.

3. Peonies

Why Sandy Soil Is Harmful

Peonies are hardy perennials that require fertile, well-drained soil with good moisture retention. Sandy soil drains too quickly, depriving peonies of the water and nutrients needed for strong stems and abundant flowers.

Effects of Sandy Soil

  • Weak stems prone to bending or breaking under the weight of blooms.
  • Poor flower size and reduced bloom numbers.
  • Slower growth and delayed flowering.

Best Practices

  • Plant peonies in loamy or clay-based soil amended with organic matter.
  • Ensure consistent watering, especially during dry spells.
  • Avoid sandy sites unless soil is significantly amended with compost.

4. Lilies

Why Sandy Soil Is Harmful

Lilies thrive in rich, well-drained soil, but sandy soil is often too dry and nutrient-poor to support vigorous growth. While some drainage is good, excessive drainage leads to weak roots and poor flowering.

Effects of Sandy Soil

  • Stunted growth and short flower stems.
  • Reduced flower size and fewer blooms.
  • Susceptibility to disease due to stressed plants.

Best Practices

  • Grow lilies in loamy, fertile soil with moderate drainage.
  • Amend sandy soil with organic compost to retain moisture and nutrients.
  • Regular watering and fertilization are essential for healthy growth.

5. Camellias

Why Sandy Soil Is Harmful

Camellias are acid-loving evergreen shrubs that require moist, humus-rich soil. Sandy soil cannot provide the consistent moisture and nutrient availability they need.

Effects of Sandy Soil

  • Leaf yellowing due to nutrient deficiencies.
  • Poor flower bud development and reduced flowering.
  • Weak root system, leading to reduced winter hardiness.

Best Practices

  • Plant camellias in well-draining, acidic soil amended with organic matter.
  • Mulch to retain soil moisture and protect roots.
  • Avoid planting in sites where sandy soil dominates unless amended heavily.

Challenges of Sandy Soil

  1. Poor Water Retention: Sandy soil drains water quickly, depriving plants of consistent moisture.
  2. Low Nutrient Content: Essential nutrients like nitrogen, phosphorus, and potassium are washed away easily.
  3. Inconsistent Temperature: Sandy soil heats up quickly but also cools rapidly, causing stress to sensitive plants.
  4. Root Stress: Many flowers cannot establish strong root systems in fast-draining, nutrient-poor soil.

How to Improve Sandy Soil for Sensitive Flowers

  1. Add Organic Matter: Compost, well-rotted manure, or leaf mold helps retain moisture and nutrients.
  2. Mulching: Apply a thick layer of mulch to reduce evaporation and maintain soil temperature.
  3. Regular Fertilization: Use slow-release fertilizers to compensate for nutrient leaching.
  4. Watering Techniques: Frequent, deep watering ensures roots get enough moisture.
  5. Raised Beds: Constructing raised beds with amended soil can provide optimal conditions for sensitive flowers.

Conclusion

Sandy soil offers excellent drainage, but it is unsuitable for many flowers that require consistent moisture and nutrient-rich soil. Planting flowers in sandy soil without proper amendments can lead to stunted growth, weak blooms, and plant stress. The five flowers you should never grow in sandy soil are:

  1. Hydrangeas – need rich, moisture-retentive soil.
  2. Gardenias – acid-loving and nutrient-demanding.
  3. Peonies – require fertile soil to support blooms.
  4. Lilies – need moderate moisture and nutrients for strong growth.
  5. Camellias – thrive in humus-rich, acidic soil.

By understanding plant requirements and improving sandy soil through amendments, mulching, and proper watering, gardeners can create thriving, vibrant gardens even in challenging soil conditions. Choosing the right plant for the right soil is key to healthy flowers, abundant blooms, and long-term garden success.

How to Harvest Calendula for Teas and Salves

How to Harvest Calendula for Teas and Salves

Calendula (Calendula officinalis), commonly known as pot marigold, is a vibrant, medicinal, and culinary herb prized for its bright yellow and orange flowers. Known for its soothing and healing properties, calendula is often used in teas, salves, tinctures, and skin-care remedies. Harvesting calendula correctly ensures that the flowers retain their therapeutic qualities, vibrant color, and aroma, providing maximum benefits for both culinary and medicinal uses. This article provides a comprehensive guide on harvesting calendula for teas and salves, including selection, timing, harvesting techniques, drying, storage, and preparation methods.


Why Harvest Calendula?

Calendula is a versatile herb with numerous benefits:

  1. Medicinal Uses: Calendula flowers contain anti-inflammatory, antifungal, and antibacterial compounds, making them ideal for skin salves and soothing teas.
  2. Culinary Uses: Adds color, mild flavor, and nutrition to salads, soups, and herbal teas.
  3. Home Remedies: Calendula is often used in balms, salves, and infused oils to treat minor cuts, burns, and skin irritations.
  4. Sustainability: Home harvesting reduces dependence on store-bought dried flowers and ensures freshness and purity.
  5. Economic and Educational Value: Growing and harvesting calendula can be a cost-effective way to produce herbal remedies while learning about plant life cycles.

Step 1: Selecting the Right Calendula Plants

The quality of harvested flowers starts with selecting healthy plants:

Traits to Consider:

  • Healthy Growth: Choose plants free from pests, diseases, and discoloration.
  • Vibrant Blooms: Look for large, brightly colored yellow, gold, or orange flowers.
  • Continuous Flowering: Select plants that produce multiple blooms for an extended harvest season.
  • Open-Pollinated Varieties: Ideal for seed saving if you wish to continue growing calendula in subsequent years.

Tip: Ensure your calendula garden is in full sun with well-draining soil to maximize flower production.


Step 2: Understanding Calendula Flower Development

Knowing the right stage to harvest ensures maximum potency and color retention:

Flower Maturity:

  • Calendula flowers are at peak potency when fully open but not over-mature.
  • Petals should be vibrant, firm, and free from wilting.
  • Avoid harvesting flowers with signs of damage, disease, or browning petals.

Timing:

  • Harvesting is best done in the morning after the dew has evaporated, when essential oils and active compounds are most concentrated.
  • Regular harvesting encourages further blooming throughout the season.

Step 3: Tools and Preparation for Harvest

Gather the necessary tools and materials for a smooth harvesting process:

  • Sharp scissors or garden shears: For cleanly cutting flower heads without damaging the plant.
  • Baskets or paper bags: To collect flowers gently without crushing petals.
  • Gloves (optional): Protect hands from rough stems or sap.
  • Drying racks or trays: Prepare a ventilated area for air drying.

Tip: Avoid plastic bags for collection, as they can trap moisture and cause flowers to mold.


Step 4: Harvesting Calendula Flowers

Proper technique ensures flowers retain their color, aroma, and medicinal properties:

Step 1: Cutting the Flowers

  • Cut the flower head with 1–2 inches of stem attached.
  • Handle flowers gently to avoid bruising or tearing petals.

Step 2: Sorting and Quality Control

  • Remove damaged, wilted, or insect-affected blooms.
  • Use only firm, vibrant flowers for teas and salves to maximize potency and visual appeal.

Step 5: Drying Calendula Flowers

Drying is crucial to preserve calendula’s color, flavor, and medicinal properties:

Air Drying:

  • Spread flowers in a single layer on a drying rack, tray, or screen.
  • Keep in a cool, dark, well-ventilated area away from direct sunlight.
  • Drying usually takes 1–2 weeks, depending on humidity.
  • Turn flowers occasionally for even drying.

Alternative Drying:

  • Hang small bundles upside down in a dark, ventilated area.
  • Ensure good airflow to prevent mold and discoloration.

Tip: Flowers are ready for storage when petals are crisp, dry to the touch, and stems snap easily.


Step 6: Storing Dried Calendula Flowers

Proper storage maintains freshness and medicinal properties:

Storage Containers:

  • Glass jars with airtight lids
  • Paper envelopes or cloth bags for short-term storage
  • Avoid plastic containers unless airtight and moisture-free

Storage Conditions:

  • Cool, dark, and dry location
  • Avoid humidity and temperature fluctuations
  • Label containers with harvest date and variety for easy tracking

Tip: Dried calendula flowers can retain their potency for up to one year when stored correctly.


Step 7: Using Calendula Flowers in Teas

Calendula teas are soothing, anti-inflammatory, and aromatic:

Step 1: Preparation

  • Use 1–2 teaspoons of dried petals per cup of hot water.
  • Steep for 5–10 minutes, depending on desired strength.
  • Strain flowers before drinking.

Health Benefits:

  • Calendula tea may aid digestion, soothe sore throats, and provide mild anti-inflammatory effects.
  • Combining with herbs like chamomile, mint, or lemon balm can enhance flavor and medicinal properties.

Step 8: Using Calendula Flowers in Salves

Calendula-infused oils are the base for medicinal salves:

Step 1: Making Calendula Oil

  • Place dried or fresh petals in a jar with a carrier oil such as olive or almond oil.
  • Infuse using a slow heat method (double boiler or sun-infused) for 2–6 weeks.
  • Strain petals to obtain a golden, aromatic calendula oil.

Step 2: Making Salve

  • Combine infused oil with beeswax in a 4:1 ratio (oil:beeswax).
  • Melt gently, stir, and pour into containers.
  • Let solidify to create a healing salve for cuts, burns, and dry skin.

Tip: Store salves in cool, dark places to maintain effectiveness.


Step 9: Tips for Continuous Calendula Harvest

  1. Succession Planting: Sow seeds every 2–3 weeks to ensure a continuous bloom and harvest.
  2. Deadhead Regularly: Encourage more flowers and prolonged harvesting season.
  3. Avoid Chemical Sprays: Ensure flowers are pesticide-free if used for teas or salves.
  4. Record Keeping: Track bloom times, flower size, and oil/salve yields for future planning.
  5. Companion Planting: Plant near vegetables or herbs to attract pollinators and support garden health.

Advantages of Harvesting Calendula for Teas and Salves

  • Medicinal and Culinary Uses: Provides a natural remedy for skin ailments and soothing herbal teas.
  • Visual Appeal: Bright orange and yellow petals enhance aesthetic value in dishes and remedies.
  • Cost-Effective: Reduces dependence on store-bought herbal products.
  • Sustainable Gardening: Supports home-grown, eco-friendly practices.
  • Year-Round Benefits: Dried petals can be stored for use during winter months when fresh flowers are unavailable.

Conclusion

Harvesting calendula for teas and salves is a rewarding practice that combines gardening, culinary arts, and herbal medicine. By selecting healthy plants, harvesting flowers at peak maturity, drying properly, and storing under optimal conditions, gardeners can maximize the therapeutic and culinary potential of calendula. Using calendula in teas, infused oils, and salves not only enhances health and wellness but also brings vibrant color, aroma, and flavor to everyday life. With careful attention and sustainable practices, calendula can become a versatile and cherished addition to any home garden, providing both beauty and practical benefits throughout the year.

5 Perennials You Should Never Fertilize in Fall

5 Perennials You Should Never Fertilize in Fall

Fertilizing perennials is an essential part of ensuring healthy growth, vibrant blooms, and strong root systems. However, timing is just as important as the type of fertilizer used. Fertilizing at the wrong time, especially in the fall, can harm plants instead of helping them. Applying fertilizer late in the season encourages new growth that is vulnerable to frost and winter damage, potentially weakening or killing perennials.

Understanding which perennials should never be fertilized in fall is crucial for gardeners aiming for a thriving garden year after year. This article explores five perennials you should avoid fertilizing in the fall, the reasons behind it, and best practices for fertilization timing.


1. Peonies (Paeonia)

Why Fall Fertilization Is Harmful

Peonies are slow-growing perennials that form buds for the following year during late summer. Fertilizing in fall encourages late-season shoot growth, which is tender and highly susceptible to frost.

Effects of Fall Fertilization

  • Tender shoots may be damaged or killed by frost.
  • Nutrients are diverted to leaves instead of strengthening roots.
  • Reduced flower production in the following spring.

Best Fertilization Practice

  • Fertilize peonies in early spring when new shoots emerge.
  • Use a balanced, slow-release fertilizer to promote strong root and bud development.
  • Avoid heavy nitrogen applications in late summer or fall.

2. Hostas

Why Fall Fertilization Is Harmful

Hostas store energy in their roots and crowns to survive winter dormancy. Fertilizing in fall encourages foliage growth instead of root storage, making them more vulnerable to cold damage.

Effects of Fall Fertilization

  • Foliage may remain tender and susceptible to frost.
  • Reduced energy stored in roots for spring growth.
  • Increased risk of disease due to weakened plant tissue.

Best Fertilization Practice

  • Fertilize hostas in early spring as new shoots emerge.
  • Use a low-nitrogen, phosphorus-rich fertilizer to encourage strong root growth.
  • Mulch in late fall to protect crowns from freezing temperatures.

3. Daylilies (Hemerocallis)

Why Fall Fertilization Is Harmful

Daylilies naturally slow down in the fall, entering dormancy. Fertilizing during this period encourages unnecessary growth, which may not harden off before winter.

Effects of Fall Fertilization

  • New foliage and shoots may be killed by frost.
  • Root system may be compromised due to nutrient misallocation.
  • Reduced flower production the following season.

Best Fertilization Practice

  • Apply fertilizer in early spring or after the first flush of blooms in summer.
  • Use balanced fertilizers with a higher phosphorus content for root development.
  • Avoid high-nitrogen fertilizers late in the season.

4. Lavender (Lavandula)

Why Fall Fertilization Is Harmful

Lavender is a drought-tolerant, Mediterranean perennial that thrives in low-nutrient, well-drained soil. Fertilizing in fall encourages soft, lush growth that is prone to frost damage.

Effects of Fall Fertilization

  • Tender shoots may freeze in winter.
  • Increased susceptibility to fungal diseases due to excess moisture and nitrogen.
  • Reduced flower quality in the next season.

Best Fertilization Practice

  • Fertilize lavender in early spring before active growth begins.
  • Use a low-nitrogen fertilizer to promote compact growth and abundant blooms.
  • Avoid heavy organic or synthetic fertilizers in late summer or fall.

5. Coneflowers (Echinacea)

Why Fall Fertilization Is Harmful

Coneflowers are hardy perennials that naturally slow down in fall. Fertilizing them too late stimulates vulnerable new growth, which can be damaged by cold temperatures.

Effects of Fall Fertilization

  • New shoots may be killed by frost.
  • Plants may become weak and less resilient during winter.
  • Reduced flowering and vigor in the following season.

Best Fertilization Practice

  • Fertilize coneflowers in spring or early summer when they are actively growing.
  • Use a phosphorus-rich fertilizer to strengthen roots and enhance blooms.
  • Allow the plants to harden off naturally in fall.

Why Fertilizing in Fall Can Be Harmful

  1. Encourages Vulnerable Growth: Fertilizer, especially nitrogen-rich types, stimulates tender shoot and leaf growth that cannot withstand frost.
  2. Reduces Winter Hardiness: Plants need to store energy in roots and crowns to survive winter; late fertilization diverts nutrients away from storage.
  3. Increases Disease Risk: Fertilized, soft tissue is more prone to fungal infections during damp, cold conditions.
  4. Wastes Fertilizer: Nutrients are less effectively used during dormancy, leading to inefficiency and potential nutrient runoff.

General Fertilization Guidelines for Perennials

  1. Timing Is Key: Fertilize in early spring or post-bloom, not in fall.
  2. Know Your Plant’s Needs: Use fertilizers suited to each perennial’s growth habit and nutrient requirements.
  3. Balanced Fertilizer Use: Avoid high-nitrogen fertilizers late in the season. Focus on phosphorus and potassium for root and flower development.
  4. Mulching Instead of Fertilizing: In fall, apply mulch to protect roots and conserve soil moisture rather than applying fertilizer.
  5. Observe Plant Health: Fertilize based on plant vigor, soil test results, and local climate conditions.

Conclusion

Fertilizing perennials is essential for healthy growth, vibrant blooms, and longevity, but timing is critical. Applying fertilizer in fall can stimulate vulnerable growth, weaken plants, and reduce their ability to survive winter. The five perennials you should never fertilize in fall are:

  1. Peonies – encourage frost-sensitive late growth.
  2. Hostas – reduce energy storage in roots.
  3. Daylilies – risk frost damage to tender shoots.
  4. Lavender – soft growth is prone to freezing and fungal disease.
  5. Coneflowers – late fertilization weakens winter resilience.

By fertilizing at the right time, gardeners can ensure perennials develop strong root systems, resilient growth, and abundant blooms in the following season. Avoiding fall fertilization preserves plant health and supports a thriving, sustainable garden year after year.

5 Flowers That Make the Best Edible Garnishes

5 Flowers That Make the Best Edible Garnishes

Flowers are no longer confined to gardens or decorative vases—they are increasingly finding their way into kitchens as edible garnishes. Not only do they add vibrant colors and aesthetic appeal to dishes, but many flowers also contribute subtle flavors, aromas, and nutritional benefits. Using edible flowers in culinary creations can transform simple meals into visually stunning, gourmet experiences. This article explores five flowers that make the best edible garnishes, detailing their flavors, culinary uses, growing tips, and safety considerations for incorporating them into your meals.


Why Use Edible Flowers as Garnishes?

Adding flowers to food is both an art and a science. Edible flowers provide several advantages:

  1. Visual Appeal: Flowers can instantly elevate the presentation of any dish, making it more inviting and sophisticated.
  2. Flavor Enhancement: Many edible flowers offer subtle flavors ranging from sweet and citrusy to peppery or herbaceous.
  3. Aromatic Benefits: Some flowers release delicate fragrances that enhance the sensory experience of dining.
  4. Nutritional Boost: Certain edible flowers contain antioxidants, vitamins, and minerals.
  5. Culinary Creativity: Chefs and home cooks can experiment with plating, color combinations, and flavor pairings.

Safety Tip: Only use flowers specifically known to be edible. Avoid flowers treated with pesticides or chemicals, and never consume ornamental flowers that haven’t been verified as safe.


1. Nasturtiums (Tropaeolum majus)

Flavor Profile:

  • Peppery, slightly spicy, similar to arugula or mustard greens.
  • Leaves and flowers are both edible, though flowers are preferred for garnishing.

Culinary Uses:

  • Sprinkle bright orange, red, or yellow petals over salads for color and flavor.
  • Use as a topping on cream cheeses, canapés, and savory tarts.
  • Freeze petals in ice cubes for use in beverages and cocktails.

Growing Tips:

  • Thrive in full sun with well-draining soil.
  • Grow quickly from seeds sown in spring.
  • Deadhead regularly to prolong flowering and garnish availability.

Fun Fact: Nasturtiums attract pollinators like bees and butterflies, adding an ecological benefit to gardens.


2. Pansies (Viola × wittrockiana)

Flavor Profile:

  • Mild, slightly grassy, and sometimes honey-like.
  • Petals are the primary edible portion, while leaves are less commonly consumed.

Culinary Uses:

  • Decorate desserts, cupcakes, and cookies with vibrant purple, yellow, and white petals.
  • Add to salads for a touch of color and subtle flavor.
  • Candied pansy petals can be used for elaborate cake decoration.

Growing Tips:

  • Prefer cooler temperatures and partial sunlight.
  • Sow seeds indoors 8–10 weeks before the last frost or purchase seedlings.
  • Deadhead spent blooms to encourage continuous flowering.

Fun Fact: Pansies are edible and safe to eat raw, making them perfect for fresh salads and cold dishes.


3. Calendula (Calendula officinalis)

Flavor Profile:

  • Slightly tangy, with a mild peppery or saffron-like taste.
  • Often referred to as “pot marigold,” calendula petals can be used as a natural food colorant.

Culinary Uses:

  • Sprinkle petals over soups, risottos, and grain salads for visual and flavor enhancement.
  • Infuse petals in butter, oil, or vinegar for cooking.
  • Use as a colorful garnish on deviled eggs, cheese platters, and roasted vegetables.

Growing Tips:

  • Prefers full sun and moderately fertile, well-draining soil.
  • Sow seeds directly outdoors after the last frost.
  • Deadhead flowers regularly to prolong blooming and garnish availability.

Fun Fact: Calendula petals are often called “poor man’s saffron” due to their bright color and culinary versatility.


4. Borage (Borago officinalis)

Flavor Profile:

  • Mild cucumber-like taste, fresh and slightly sweet.
  • Both flowers and leaves are edible, but flowers are particularly popular as garnishes.

Culinary Uses:

  • Add blue, star-shaped petals to cocktails, lemonade, or iced tea.
  • Garnish salads, soups, and seafood dishes for visual appeal.
  • Freeze in ice cubes for an elegant touch in beverages.

Growing Tips:

  • Grow in full sun with well-draining soil.
  • Self-seeds easily, so allow some flowers to mature and drop seeds.
  • Remove old or wilted flowers to encourage continuous blooming.

Fun Fact: Borage flowers are edible for humans and also highly attractive to bees, supporting pollinator populations in the garden.


5. Violas (Viola odorata)

Flavor Profile:

  • Sweet, floral, and delicate, often compared to honey or violets.
  • Both petals and leaves are edible, though petals are commonly used for garnishing.

Culinary Uses:

  • Decorate desserts, pastries, and chocolates with vibrant purple or white petals.
  • Infuse sugar or syrups with violets for flavoring baked goods and beverages.
  • Add a fragrant touch to spring salads or fruit platters.

Growing Tips:

  • Prefers cooler weather and partial shade.
  • Plant in well-draining soil with consistent moisture.
  • Deadhead regularly to promote extended flowering.

Fun Fact: Viola flowers have been used historically in syrups and candied confections for centuries, making them a classic edible garnish.


Step-by-Step Guide to Using Flowers as Garnishes

  1. Harvesting: Pick flowers in the morning when petals are fresh and turgid. Avoid flowers exposed to pesticides.
  2. Cleaning: Rinse gently with cool water and pat dry with a paper towel.
  3. Trimming: Remove stems, sepals, and any damaged petals for a neat appearance.
  4. Storage: Use immediately for freshness or store in airtight containers in the refrigerator for up to 2 days.
  5. Presentation: Place flowers delicately on dishes just before serving to preserve color, texture, and flavor.

Tip: Combining flowers with complementary herbs, edible leaves, or microgreens can enhance both flavor and visual appeal.


Safety Considerations for Edible Flowers

  • Ensure flowers are 100% edible; not all garden blooms are safe to consume.
  • Avoid flowers treated with chemical pesticides or fertilizers.
  • Introduce new edible flowers gradually to test for allergic reactions.
  • If harvesting from the wild, verify the plant species and avoid contaminated areas.

Advantages of Using Edible Flowers as Garnishes

  • Enhanced Culinary Presentation: Makes dishes more visually appealing for professional or home settings.
  • Flavor Innovation: Introduces subtle, unique flavors that complement a wide variety of dishes.
  • Health Benefits: Some flowers contain antioxidants and vitamins that provide added nutritional value.
  • Sustainability: Encourages the use of home-grown flowers rather than commercially packaged decorations.
  • Creative Flexibility: Offers endless opportunities for experimentation in plating, color combinations, and seasonal menus.

Conclusion

Edible flowers are a delightful addition to any kitchen, offering both visual appeal and subtle flavor enhancements. Nasturtiums, pansies, calendula, borage, and violas stand out as some of the best flowers for garnishing, thanks to their vibrant colors, unique flavors, and ease of cultivation. By understanding how to grow, harvest, clean, and store these flowers, home cooks and chefs alike can elevate their culinary creations while embracing sustainable and creative practices. Whether decorating salads, desserts, beverages, or main courses, edible flowers provide a sophisticated touch that transforms ordinary dishes into extraordinary experiences. With proper care and selection, these blooms can bring beauty, flavor, and elegance to the dining table year after year.

8 Flowers You Should Never Harvest Too Early

8 Flowers You Should Never Harvest Too Early

Harvesting flowers is a rewarding part of gardening, allowing gardeners to enjoy fresh blooms, create stunning arrangements, or preserve flowers for drying. However, picking flowers too early can harm the plant, reduce bloom longevity, and compromise their beauty. Many flowers develop their full color, fragrance, and longevity only after reaching maturity or a certain stage of bloom.

Understanding when to harvest flowers is key to maximizing their aesthetic and practical value. This article explores eight flowers you should never harvest too early, why timing matters, and tips for proper harvesting to keep your garden thriving.


1. Roses

Why Timing Matters

Roses are perhaps the most cherished flowers for bouquets and gardens. Harvesting them before the bud opens fully can reduce fragrance and bloom longevity.

Effects of Early Harvest

  • Buds may not fully open indoors, resulting in a weak display.
  • Fragrance is less intense in immature blooms.
  • Plants may produce fewer blooms if energy is diverted to premature harvesting.

Best Harvesting Practice

  • Cut roses when petals just begin to unfurl.
  • Use sharp, clean pruners at an angle to prevent damage.
  • Harvest in the morning when stems are hydrated for maximum vase life.

2. Peonies

Why Timing Matters

Peonies are prized for their large, fragrant blooms, but harvesting too early can prevent flowers from opening fully. Early cutting reduces vase life and affects fragrance.

Effects of Early Harvest

  • Buds may remain tightly closed, leading to poor display.
  • Flowers may not reach their full size or vibrancy.
  • Premature cutting can stress the plant and reduce future blooms.

Best Harvesting Practice

  • Wait until buds show color and start to swell.
  • Cut with a long stem to allow arrangement flexibility.
  • Place immediately in cool water to prolong life.

3. Lilies

Why Timing Matters

Lilies are stunning focal points in gardens and bouquets. Cutting too early can prevent petals from opening, and stamens may not fully develop, which affects pollen production and aesthetic appeal.

Effects of Early Harvest

  • Shortened vase life.
  • Less vibrant blooms.
  • Premature harvesting can weaken the plant for future flowering.

Best Harvesting Practice

  • Harvest lilies when buds are just starting to show color but are still closed.
  • Ensure a portion of the stem and leaves remain intact.
  • Allow buds to open indoors in water for full display.

4. Dahlias

Why Timing Matters

Dahlias produce vibrant, layered blooms. Picking them too early can result in underdeveloped petals and reduced longevity in arrangements.

Effects of Early Harvest

  • Flowers may not open fully.
  • Petals may remain soft or small.
  • Premature harvesting can reduce energy for tuber development.

Best Harvesting Practice

  • Harvest when petals begin to separate but before full bloom.
  • Cut early in the morning and place stems in water immediately.
  • Rotate harvesting to allow some flowers to mature fully on the plant.

5. Sunflowers

Why Timing Matters

Sunflowers are iconic for their bold appearance, but cutting too early can result in small, weak blooms with less vibrant color.

Effects of Early Harvest

  • Heads may droop and petals may curl.
  • Reduced vase life and seed development if harvesting seeds.
  • Plants may struggle to produce additional blooms.

Best Harvesting Practice

  • Cut sunflowers when petals just start to open but before full bloom for arrangements.
  • If growing for seeds, allow the flower to mature fully.
  • Use sharp tools to avoid crushing stems.

6. Gladiolus

Why Timing Matters

Gladiolus are striking spikes of color. Harvesting too early can prevent lower florets from opening, resulting in incomplete floral displays.

Effects of Early Harvest

  • Only partial blooms open in arrangements.
  • Flowers may wilt faster if immature.
  • Reduced energy for future spike production.

Best Harvesting Practice

  • Harvest when the bottom third of florets open while the upper buds remain closed.
  • Cut long stems to allow flexibility in vases.
  • Place immediately in water with floral preservative.

7. Zinnias

Why Timing Matters

Zinnias are beloved for their bright, colorful flowers. Early harvesting can result in small blooms with shortened lifespan.

Effects of Early Harvest

  • Flowers may fade quickly or appear undersized.
  • Reduced energy for the plant to produce subsequent blooms.
  • Poor aesthetic impact in bouquets.

Best Harvesting Practice

  • Harvest zinnias when petals are fully separated and vibrant in color.
  • Use sharp shears and cut stems in the morning for maximum hydration.
  • Deadhead older flowers to encourage more blooms.

8. Marigolds

Why Timing Matters

Marigolds are hardy, vibrant flowers that brighten gardens and containers. Picking too early reduces color intensity and flower longevity.

Effects of Early Harvest

  • Flowers may not open fully.
  • Shortened vase life.
  • Premature removal can reduce plant vigor and bloom frequency.

Best Harvesting Practice

  • Harvest marigolds once petals are fully open.
  • Use a sharp knife or shears to avoid damaging stems.
  • Regular harvesting encourages more blooms.

Signs a Flower Is Ready to Harvest

  • Color Development: Flowers show true color of the species.
  • Petal Separation: Petals begin to unfurl without fully opening.
  • Fragrance: Aromatic blooms are most fragrant when approaching full bloom.
  • Stem Health: Strong, green stems indicate flowers can support themselves in arrangements.
  • Vase Longevity: Flowers cut at the right stage last longer in water.

Recognizing these signs ensures flowers last longer in bouquets and maintain their beauty.


Tips for Successful Flower Harvesting

  1. Harvest in the Morning: Plants are hydrated, and flowers are firm.
  2. Use Sharp Tools: Prevent crushing stems or damaging buds.
  3. Cut at an Angle: Increases water uptake and vase life.
  4. Immediate Hydration: Place flowers in clean water with floral preservative.
  5. Leave Some Flowers on Plant: To maintain energy for continued blooming.
  6. Know Your Flower Type: Timing varies between species and varieties.

By combining observation and proper technique, gardeners can maximize bloom longevity, fragrance, and beauty.


Conclusion

Harvesting flowers too early is a common mistake that reduces bloom quality, longevity, and plant health. Understanding the right stage to cut ensures optimal color, fragrance, and vase life. The eight flowers you should never harvest too early are:

  1. Roses – harvest when buds begin to unfurl.
  2. Peonies – wait until buds swell and show color.
  3. Lilies – cut when buds begin to show color.
  4. Dahlias – harvest as petals start to separate.
  5. Sunflowers – cut when petals just start to open.
  6. Gladiolus – harvest when the lower third of florets open.
  7. Zinnias – wait until petals are fully separated and vibrant.
  8. Marigolds – harvest once flowers are fully open.

By following these guidelines, gardeners can enjoy long-lasting blooms, beautiful arrangements, and healthier plants, ensuring a garden that continues to thrive and delight year after year.