How to Build the Perfect Pollinator-Friendly Flower Bed

How to Build the Perfect Pollinator-Friendly Flower Bed

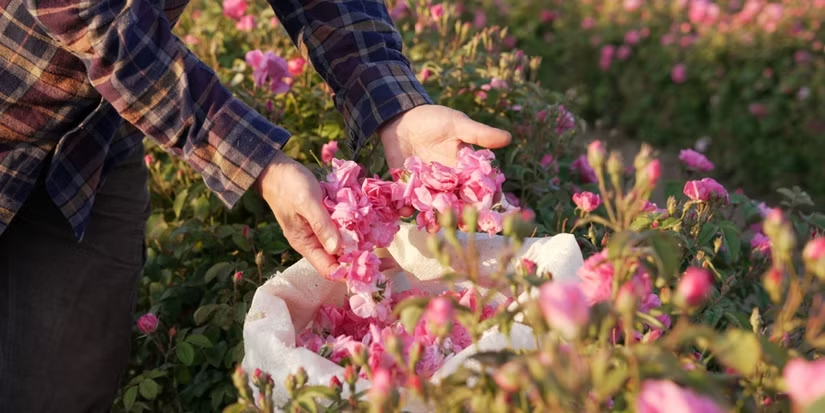
Pollinators—bees, butterflies, hummingbirds, and other beneficial insects—play a critical role in maintaining healthy ecosystems and supporting the growth of fruits, vegetables, and flowering plants. Yet, their populations are declining due to habitat loss, pesticides, and climate change. One of the most effective ways to help pollinators thrive is by creating a flower bed specifically designed to attract and sustain them. A well-planned pollinator-friendly flower bed not only supports biodiversity but also brings vibrant colors, textures, and life to your garden.

This guide provides a step-by-step approach to building the perfect pollinator-friendly flower bed, including plant selection, layout, maintenance, and additional tips to create a sustainable, thriving environment.


1. Understand the Needs of Pollinators

Before designing a flower bed, it’s important to understand the basic requirements of pollinators:

  • Food Sources: Pollinators need nectar and pollen to survive. Nectar provides energy, while pollen supplies protein and other nutrients.
  • Shelter: Bees and other insects require places to rest or nest, such as undisturbed soil, hollow stems, or woody shrubs.
  • Water: Fresh water sources, such as shallow dishes or birdbaths, support pollinator hydration.
  • Diverse Habitats: Different pollinators are attracted to different flowers, so diversity in color, shape, and bloom time is key.

Tip: Incorporate plants that bloom at various times throughout the season to provide a continuous food source from early spring to late fall.


2. Choose the Right Location

The success of your pollinator-friendly flower bed begins with proper placement:

  • Sunlight: Most pollinator-friendly plants prefer full sun, meaning at least six hours of direct sunlight per day.
  • Shelter from Wind: Pollinators are less likely to visit flowers in windy areas, so place your bed near a fence, wall, or natural windbreak.
  • Accessibility: Ensure the bed is accessible for maintenance but avoid heavy foot traffic, which can disturb nesting insects.

Tip: Consider placing the flower bed near vegetable gardens or fruit trees to boost pollination and increase crop yields.


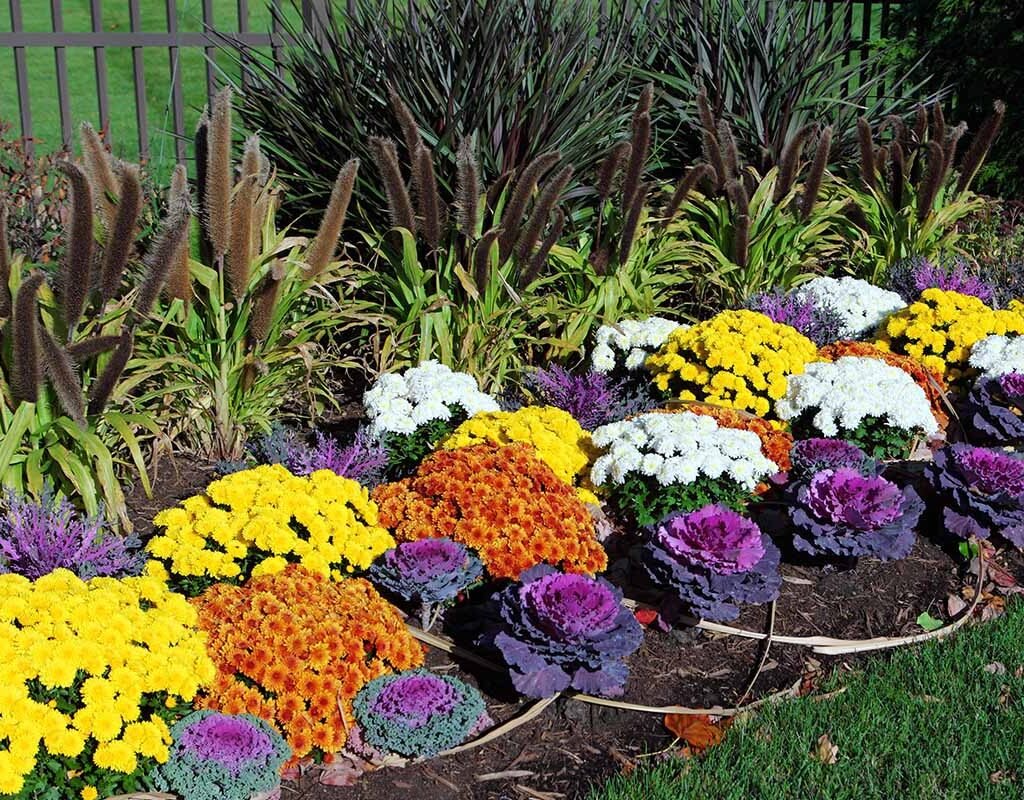
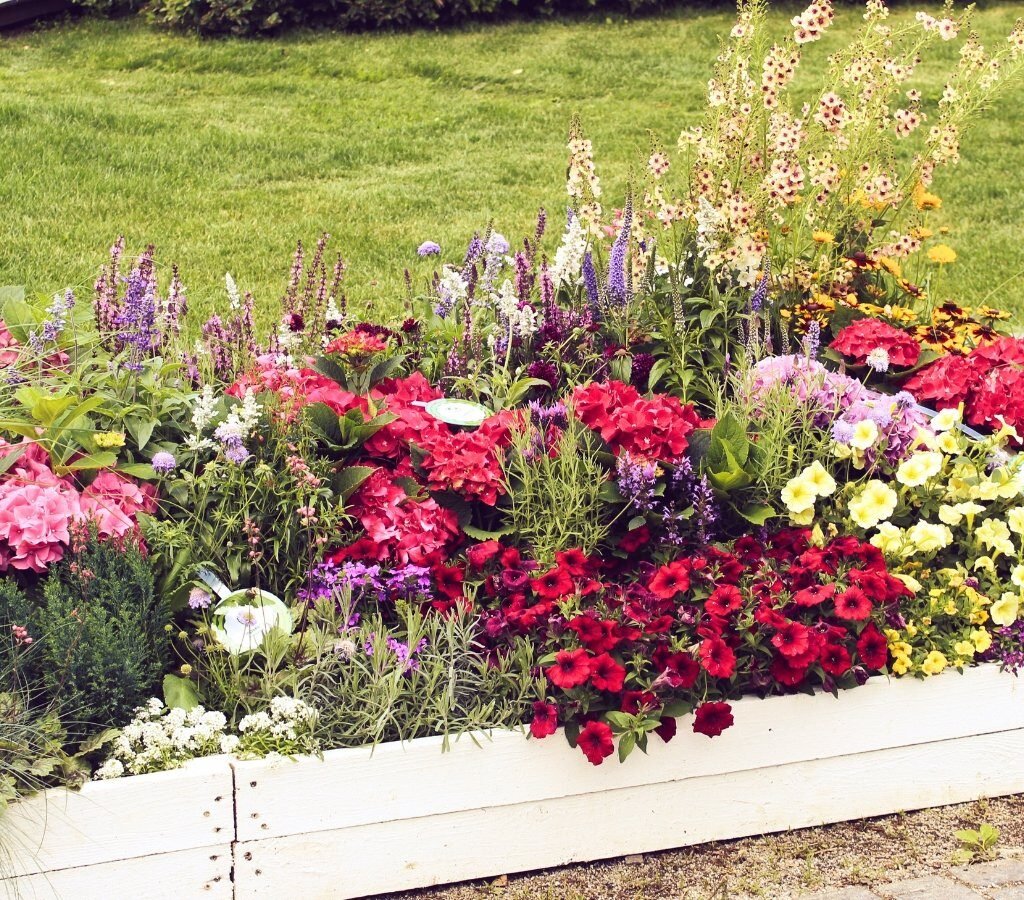
3. Select a Variety of Pollinator-Friendly Plants

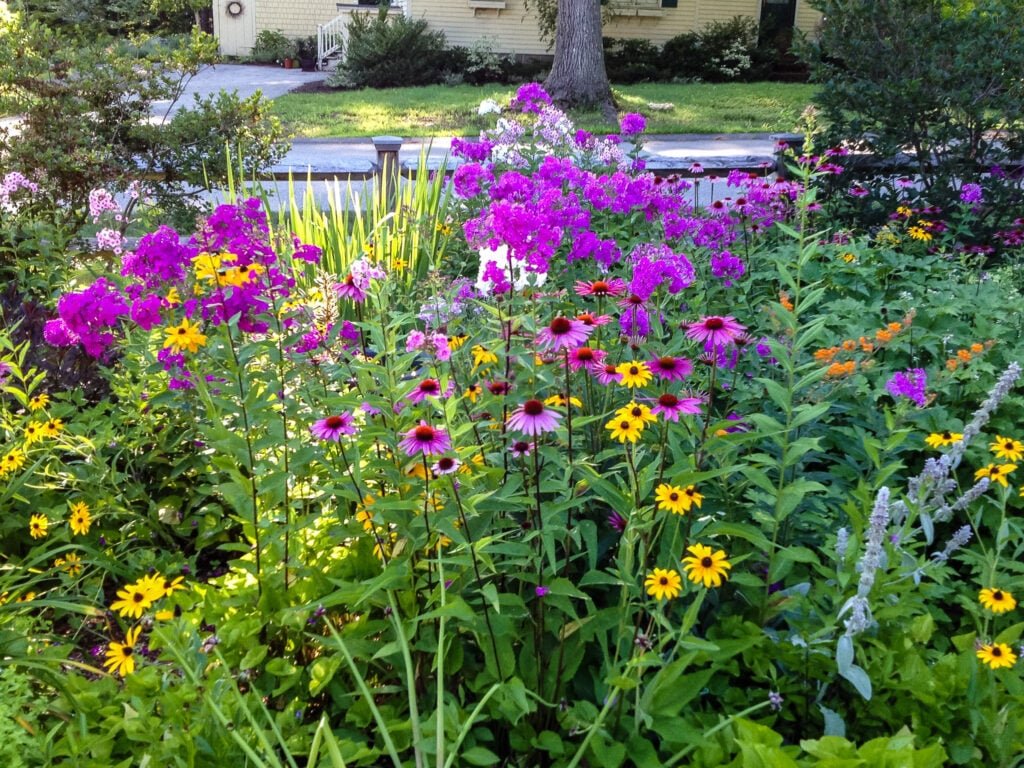
Diversity is the key to attracting a wide range of pollinators. Include a mix of perennials, annuals, shrubs, and native plants to provide multiple food sources and habitats.

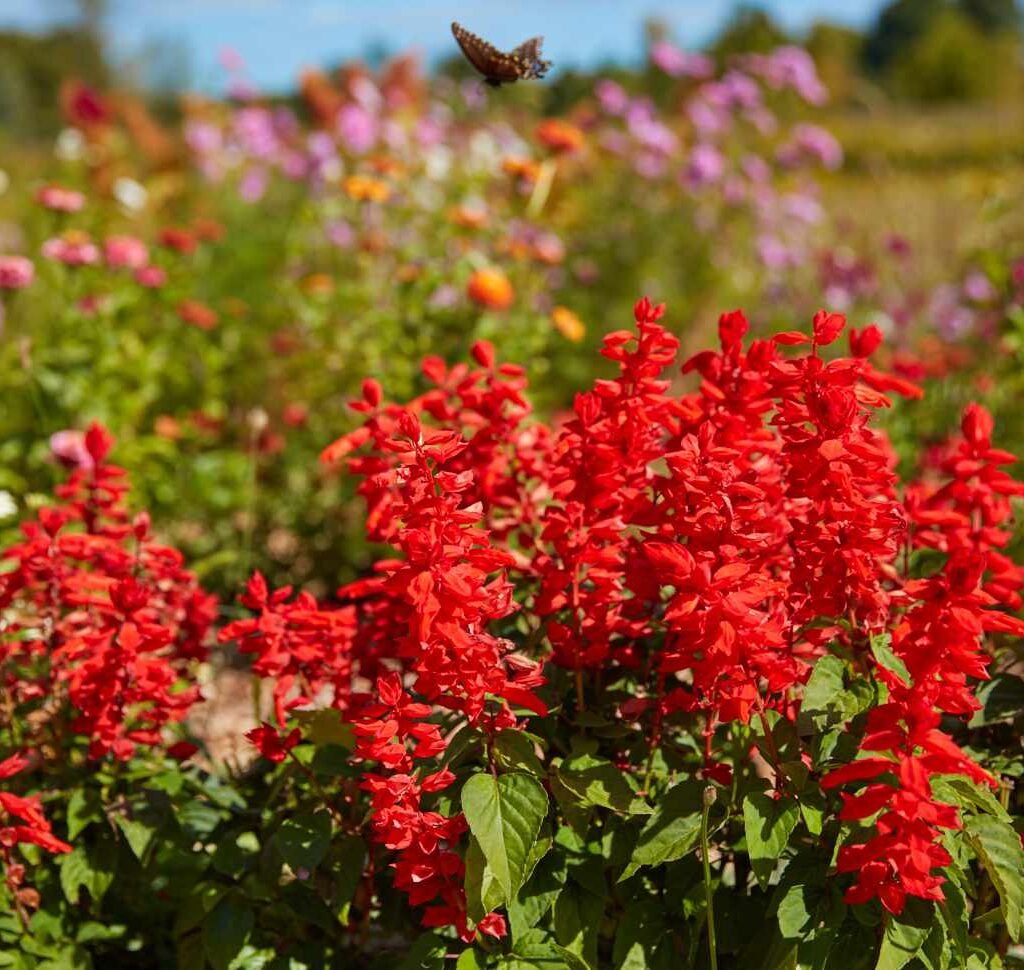
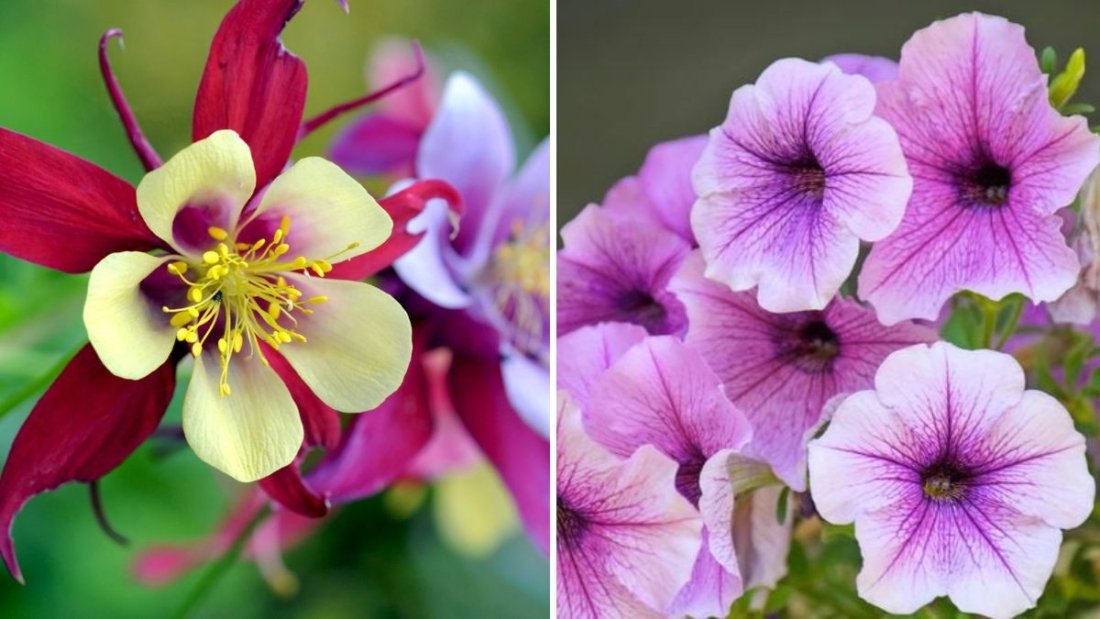
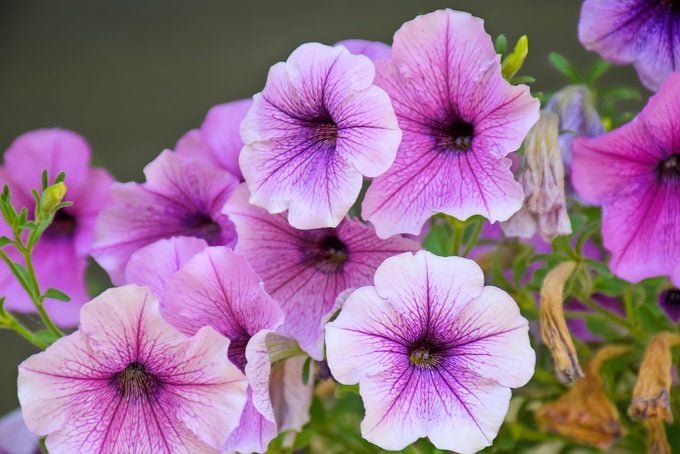
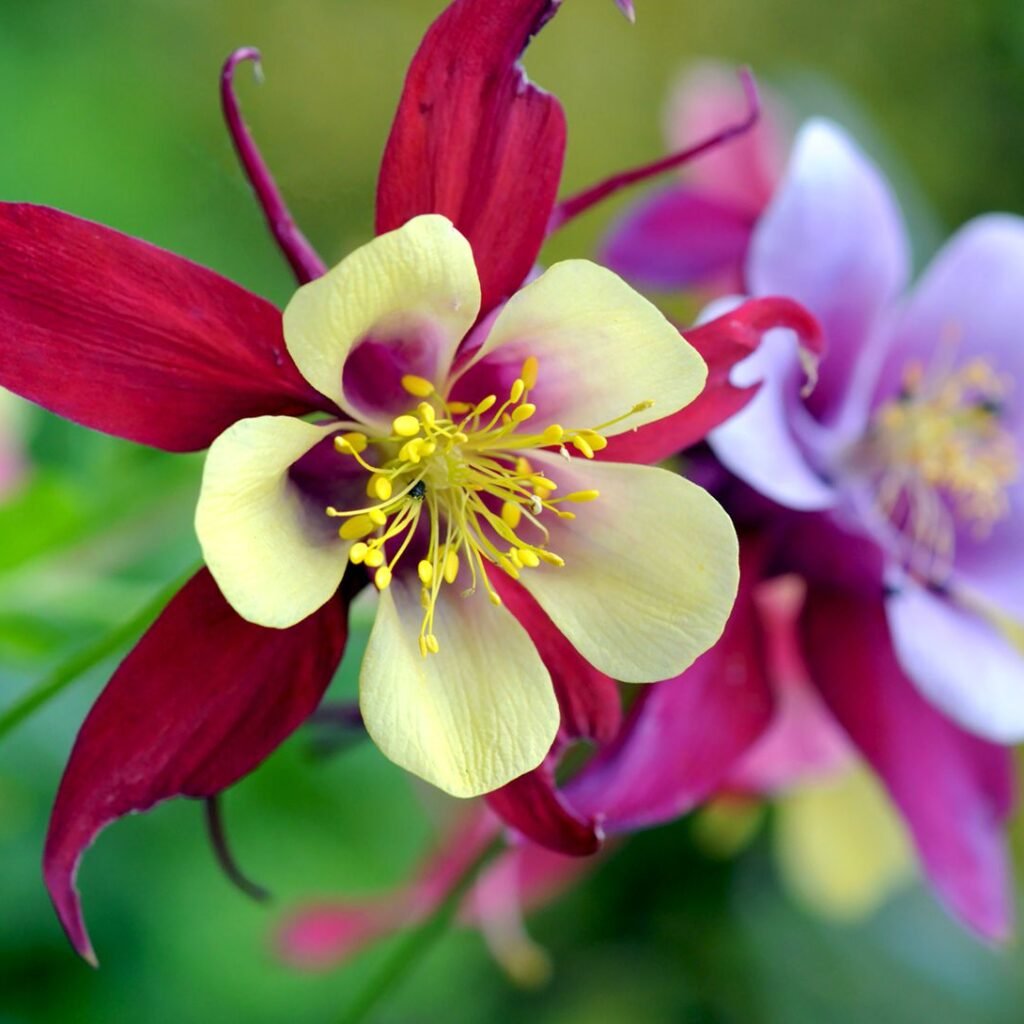
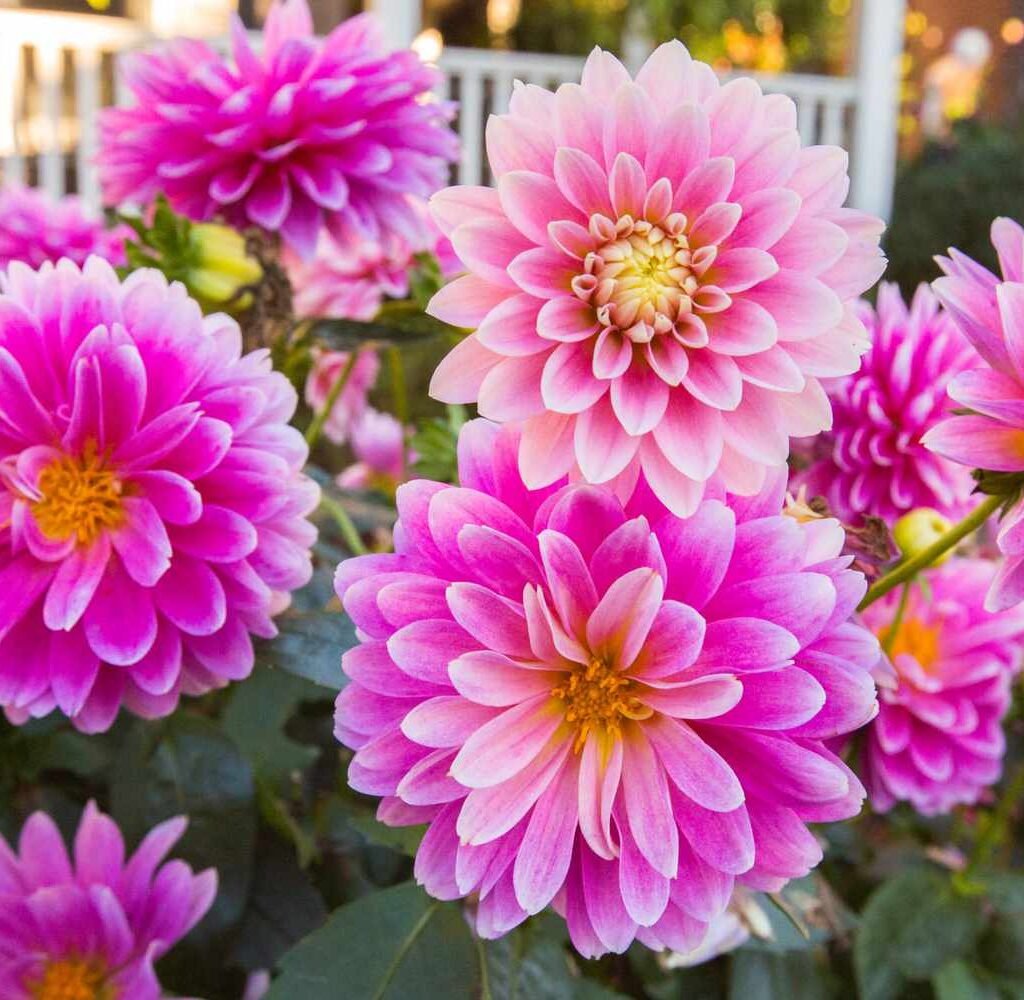
Recommended Pollinator-Friendly Flowers:

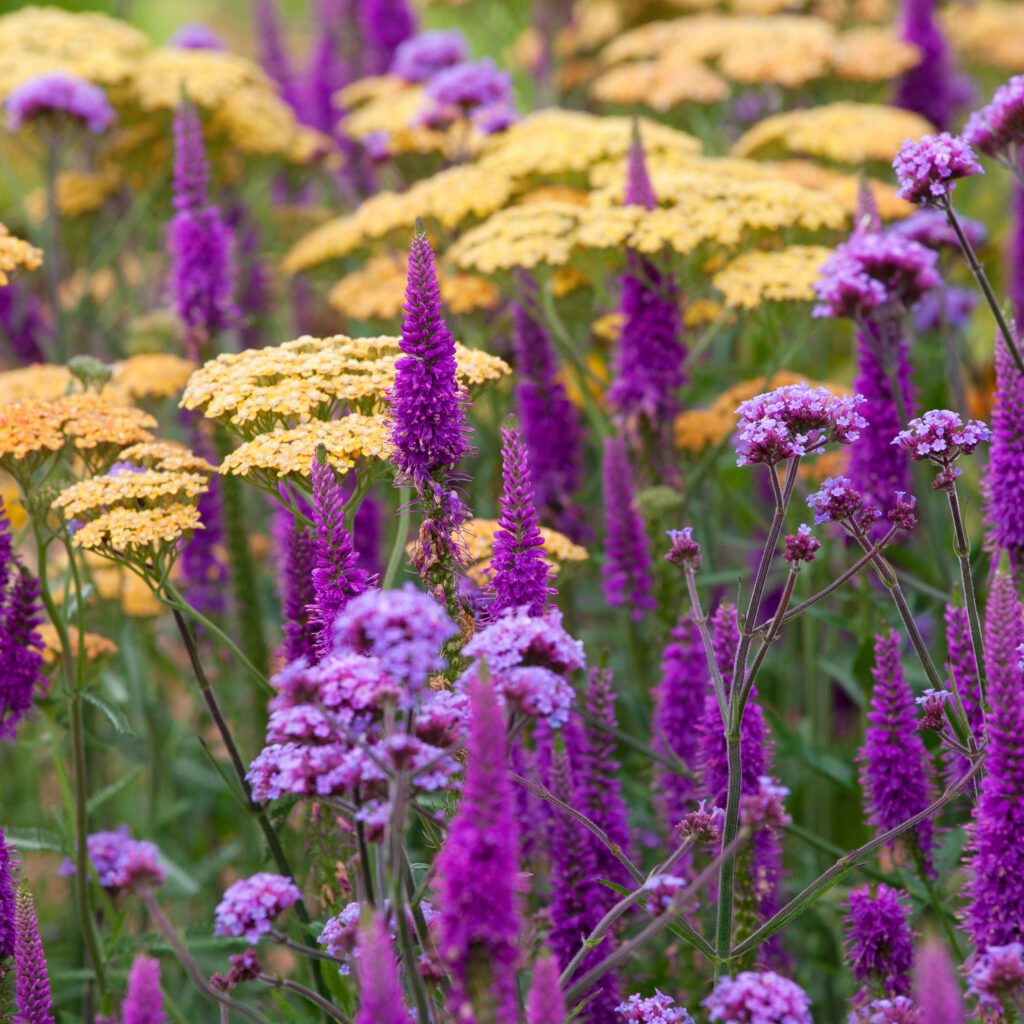
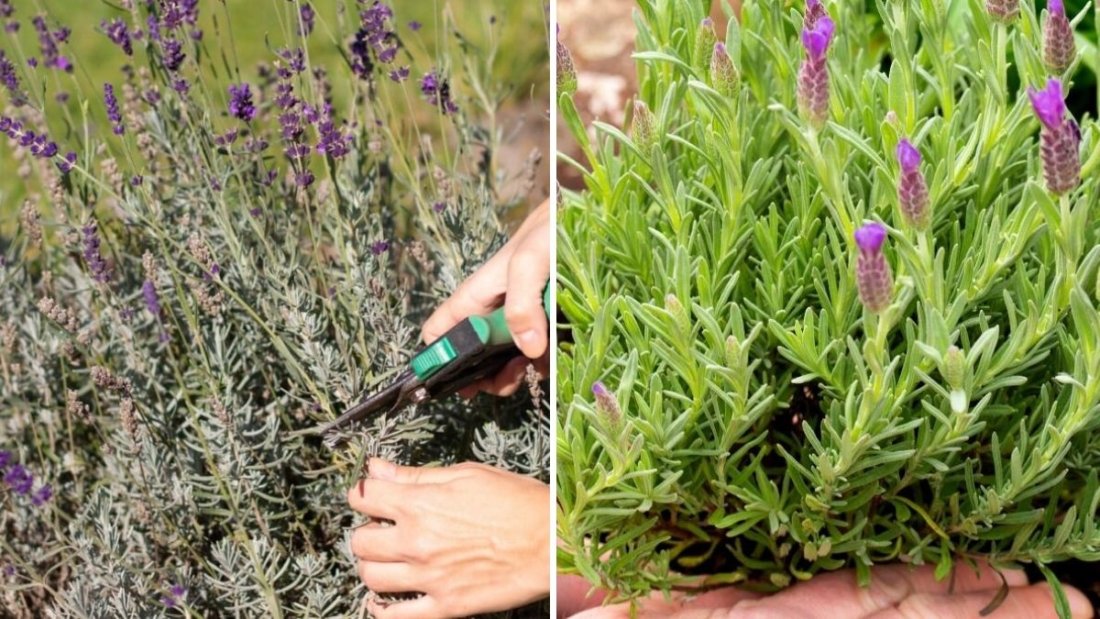
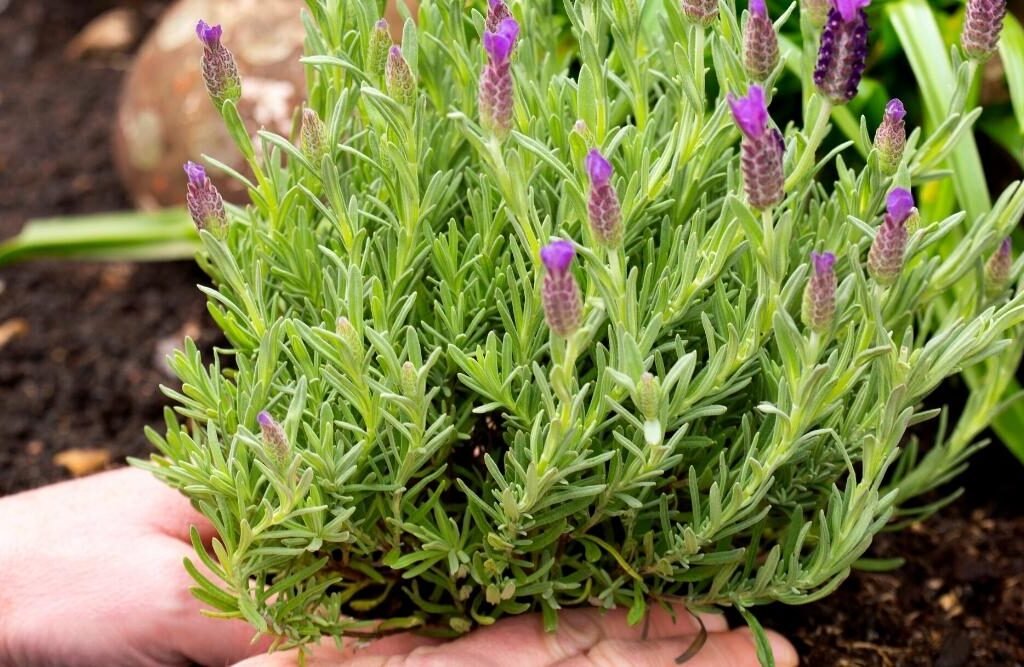
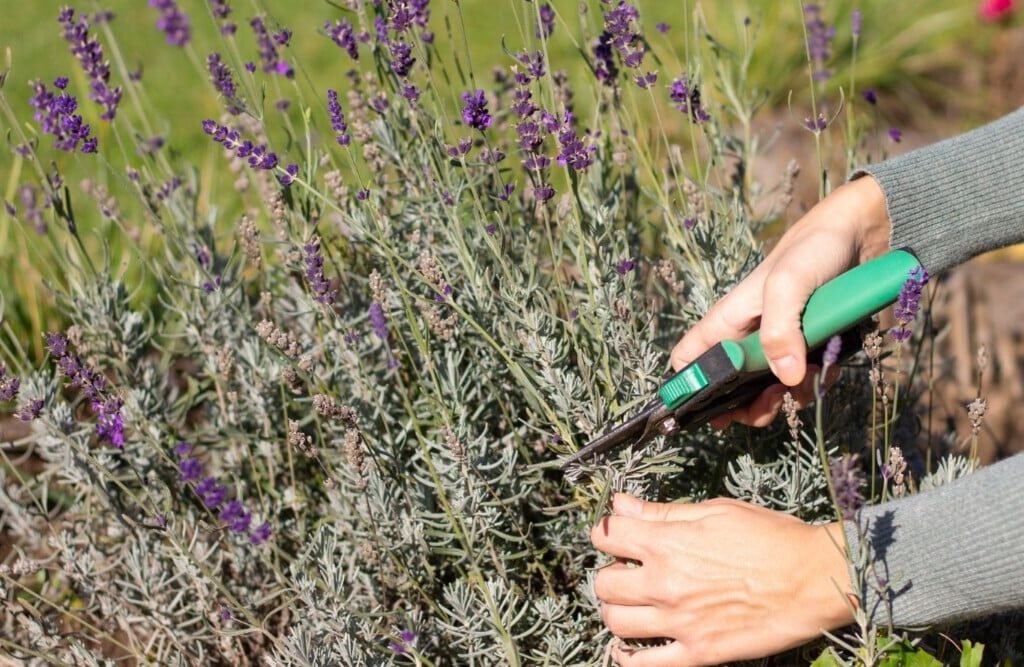
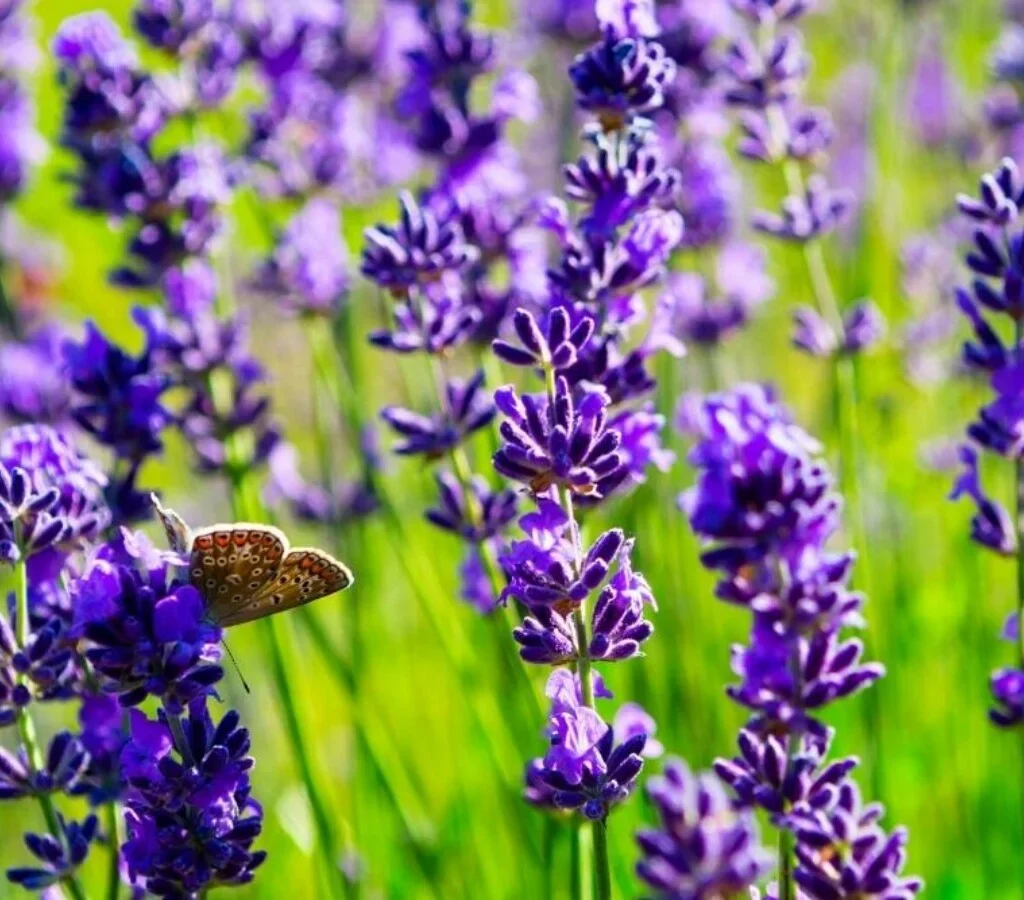
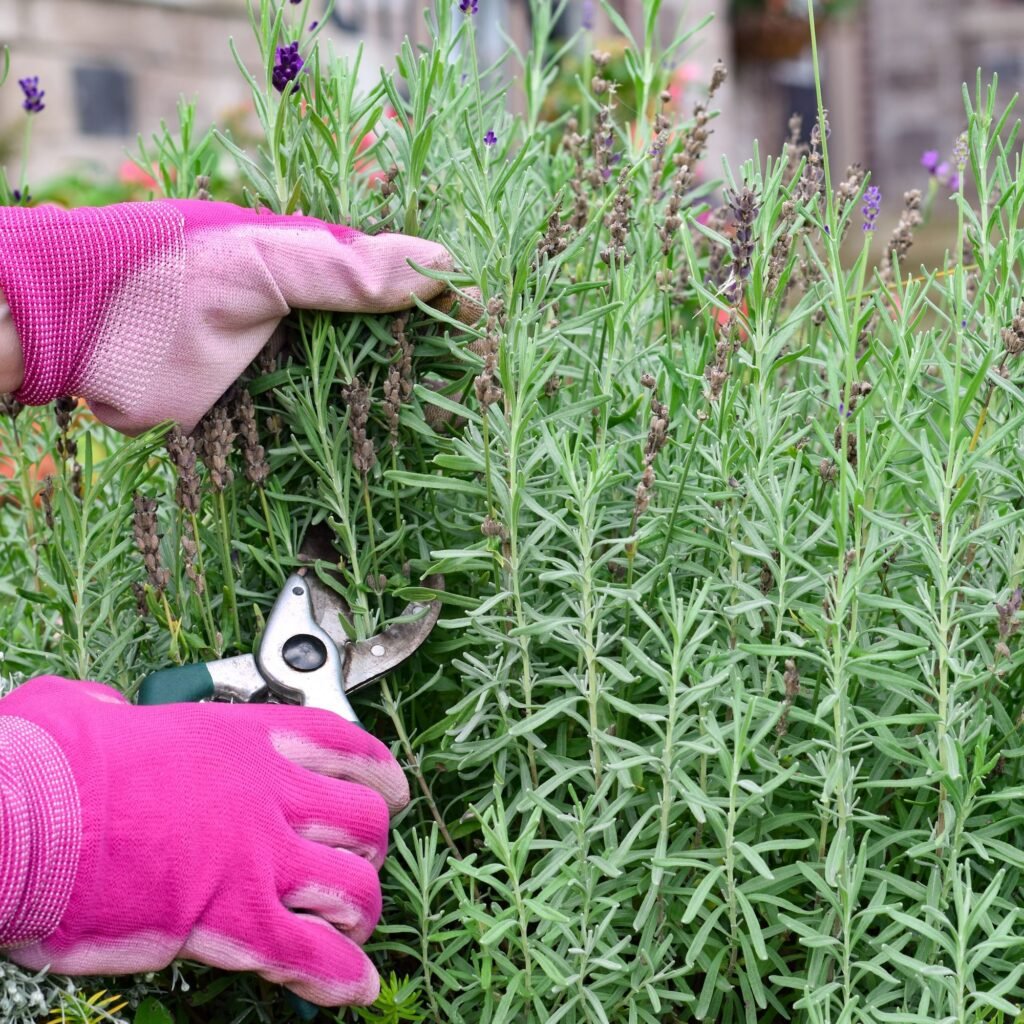
  • Lavender: Attracts bees and butterflies; its fragrant flowers last for months.
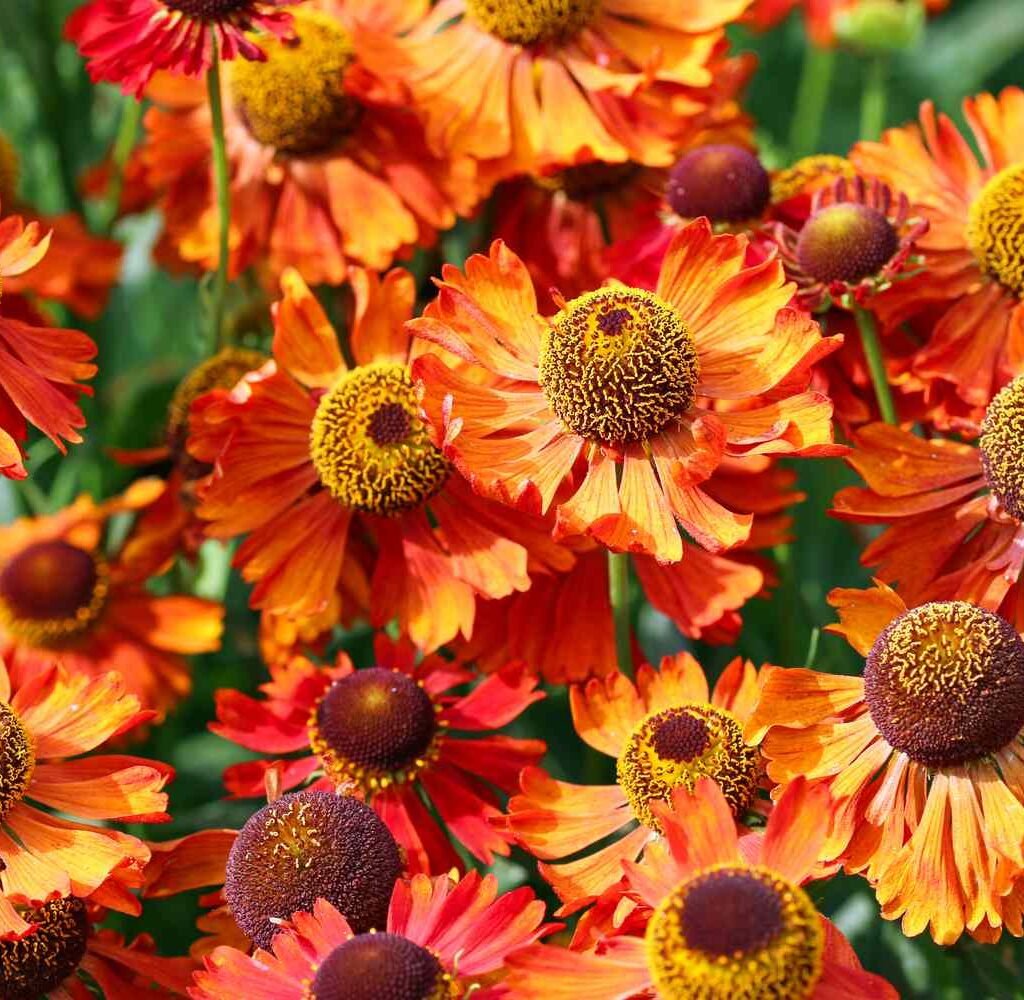
  • Coneflowers (Echinacea): Bright, sturdy blooms loved by bees, butterflies, and hummingbirds.
  • Bee Balm (Monarda): Excellent for attracting hummingbirds and bees; produces tubular, colorful flowers.
  • Milkweed (Asclepias): Essential for monarch butterflies as a host plant for caterpillars.
  • Sunflowers (Helianthus): Provide pollen and nectar while offering seeds for birds.
  • Goldenrod (Solidago): Late-season blooms that support bees and butterflies in the fall.

Consider Plant Shapes and Colors:

  • Tubular flowers: Attract hummingbirds.
  • Flat-topped clusters: Ideal for butterflies to land on.
  • Bright colors: Bees are drawn to blue, purple, and yellow; butterflies prefer red, orange, and pink.

Benefits:

  • Ensures continuous food throughout the growing season.
  • Attracts a wider range of pollinators for increased biodiversity.
  • Adds visual interest and a natural, vibrant aesthetic.

Tip: Use native plants whenever possible, as they are adapted to your local climate and pollinators.


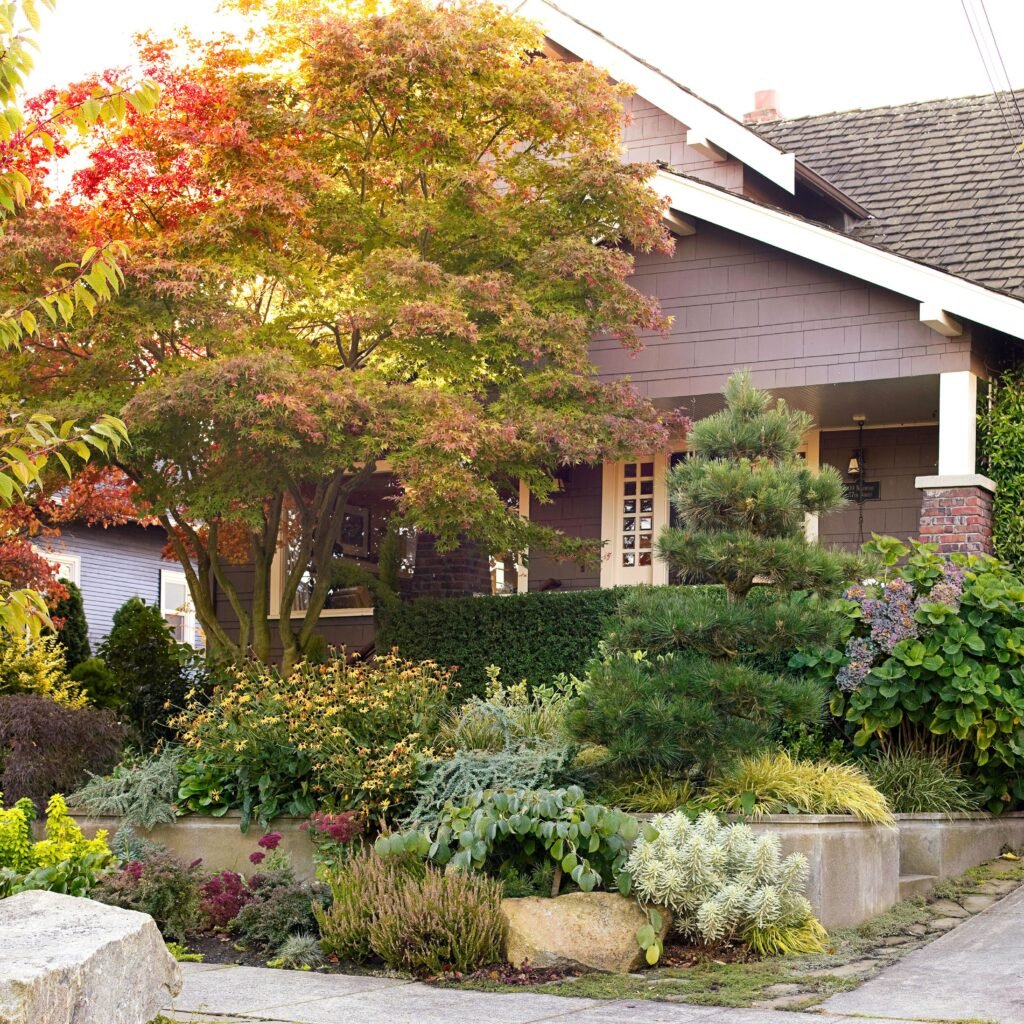
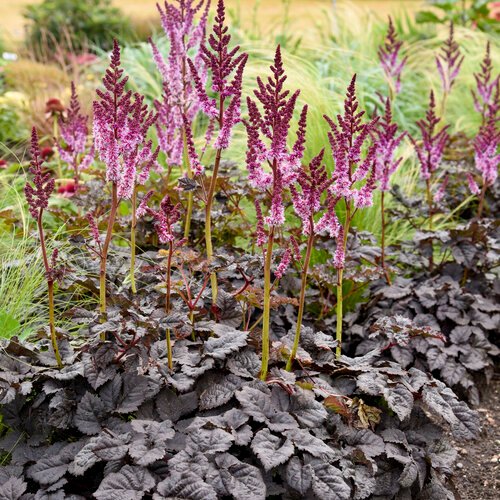
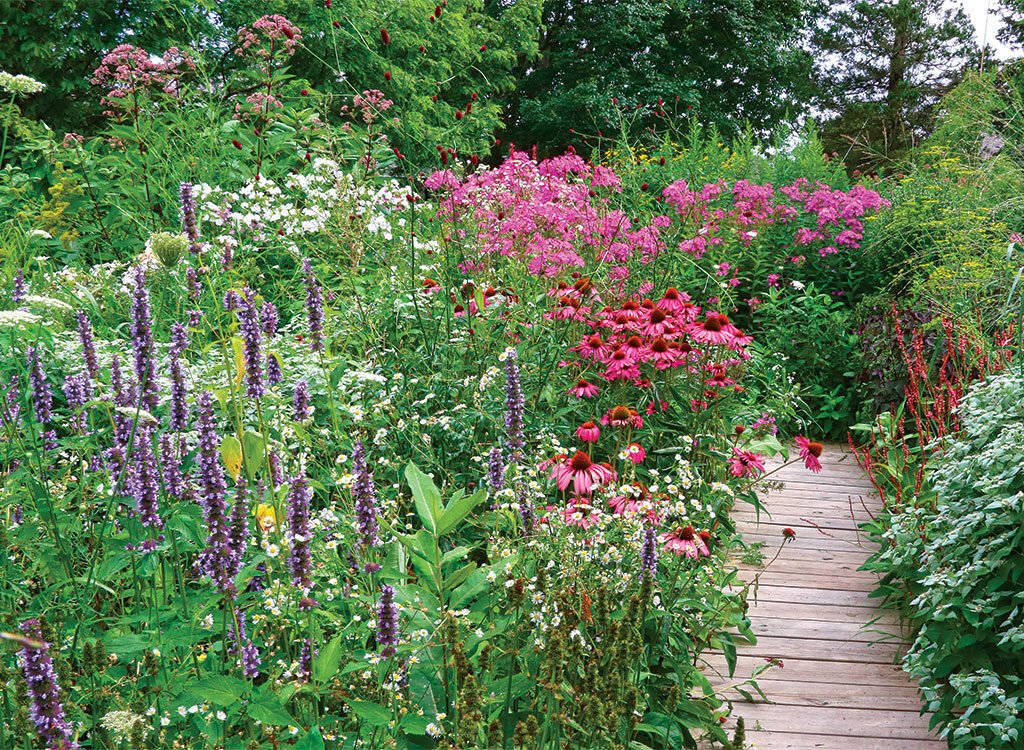
4. Plan for Layering and Height

A well-structured flower bed enhances both aesthetics and pollinator access. Consider layering plants by height:

  • Back Layer: Taller plants like sunflowers, bee balm, or foxgloves create a backdrop and shelter.
  • Middle Layer: Medium-height flowers such as coneflowers and lavender provide central visual interest.
  • Front Layer: Low-growing plants like alyssum, sedum, or creeping thyme make pollinators feel safe and offer easy access to nectar.

Benefits:

  • Creates a three-dimensional garden with color and texture.
  • Allows pollinators of all sizes to reach flowers comfortably.
  • Improves airflow and sunlight exposure to reduce disease risk.

Tip: Use curved or irregular bed shapes to mimic natural landscapes and provide diverse pollinator pathways.


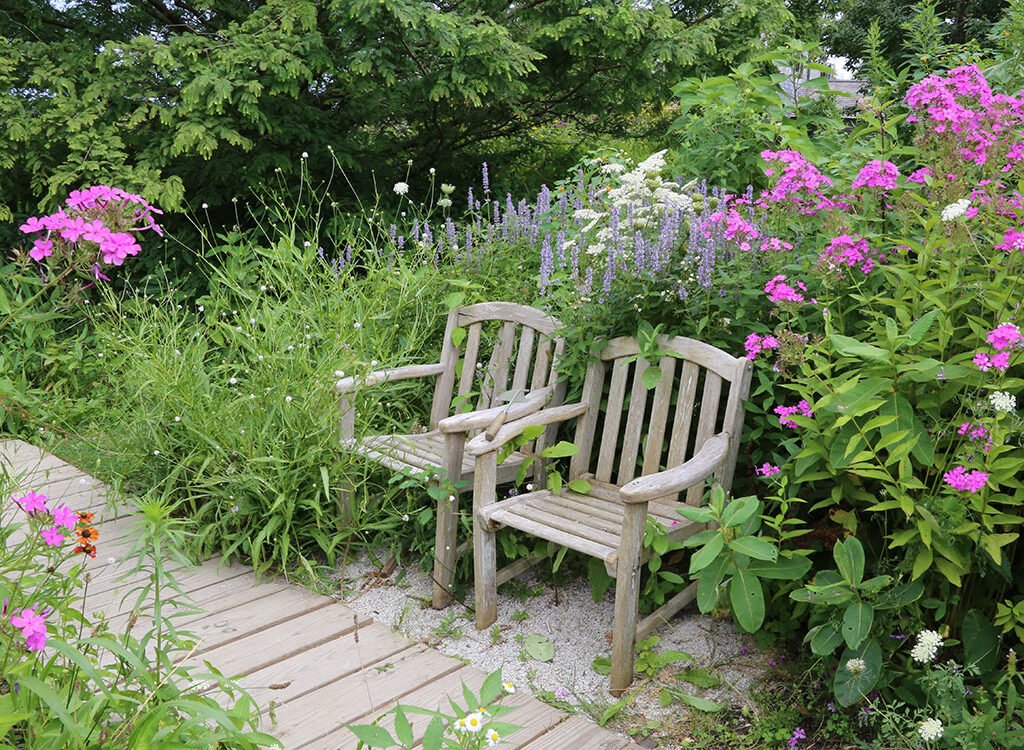
5. Provide Shelter and Nesting Opportunities

Pollinator-friendly gardens should include more than flowers. Providing shelter and nesting sites encourages repeat visits and supports population growth.

Ideas for Pollinator Shelter:

  • Bee Hotels: Small wooden boxes filled with bamboo tubes or drilled holes offer nesting spots for solitary bees.
  • Hollow Stems and Brush Piles: Leave some undisturbed plant stems or a small brush pile for overwintering insects.
  • Low-Growing Shrubs: Provide cover for butterflies and beneficial insects.
  • Bare Soil Patches: Some native bees nest directly in the ground, so leave small bare patches in sunny locations.

Benefits:

  • Supports the full lifecycle of pollinators.
  • Encourages beneficial insects that also help control garden pests.
  • Promotes long-term garden sustainability.

Tip: Avoid disturbing these shelters once established, especially during breeding and overwintering seasons.


6. Avoid Chemicals and Pesticides

Pollinators are highly sensitive to chemicals. To protect your flower bed:

  • Eliminate Pesticides: Use natural pest control methods such as neem oil, insecticidal soaps, or companion planting.
  • Choose Organic Fertilizers: Compost, manure, or balanced organic fertilizers provide nutrients without harming pollinators.
  • Plant Disease-Resistant Varieties: Reduces the need for chemical interventions.

Benefits:

  • Protects pollinators’ health and encourages frequent visits.
  • Promotes a thriving ecosystem with natural predator-prey balance.
  • Supports safe consumption of nearby fruits and vegetables.

Tip: If chemical treatment is unavoidable, apply it at night when pollinators are less active.


7. Maintain the Flower Bed for Longevity

A pollinator-friendly flower bed requires consistent care to remain vibrant and productive.

Maintenance Tips:

  • Deadhead Flowers: Remove spent blooms to encourage new flowering.
  • Water Strategically: Water in the early morning to avoid evaporation and allow pollinators to feed safely later in the day.
  • Mulch: Use organic mulch to retain soil moisture and suppress weeds while allowing pollinator access.
  • Prune Wisely: Avoid cutting all flowers at once; leave some seed heads for late-season pollinators.
  • Rotate Plants Annually: Introduce new species each year to prevent soil depletion and attract diverse pollinators.

Benefits:

  • Ensures continuous bloom and food supply for pollinators.
  • Maintains soil fertility and garden aesthetics.
  • Supports the long-term health of your pollinator-friendly habitat.

Tip: Observe pollinator activity regularly to understand which plants are most attractive and adjust plantings accordingly.


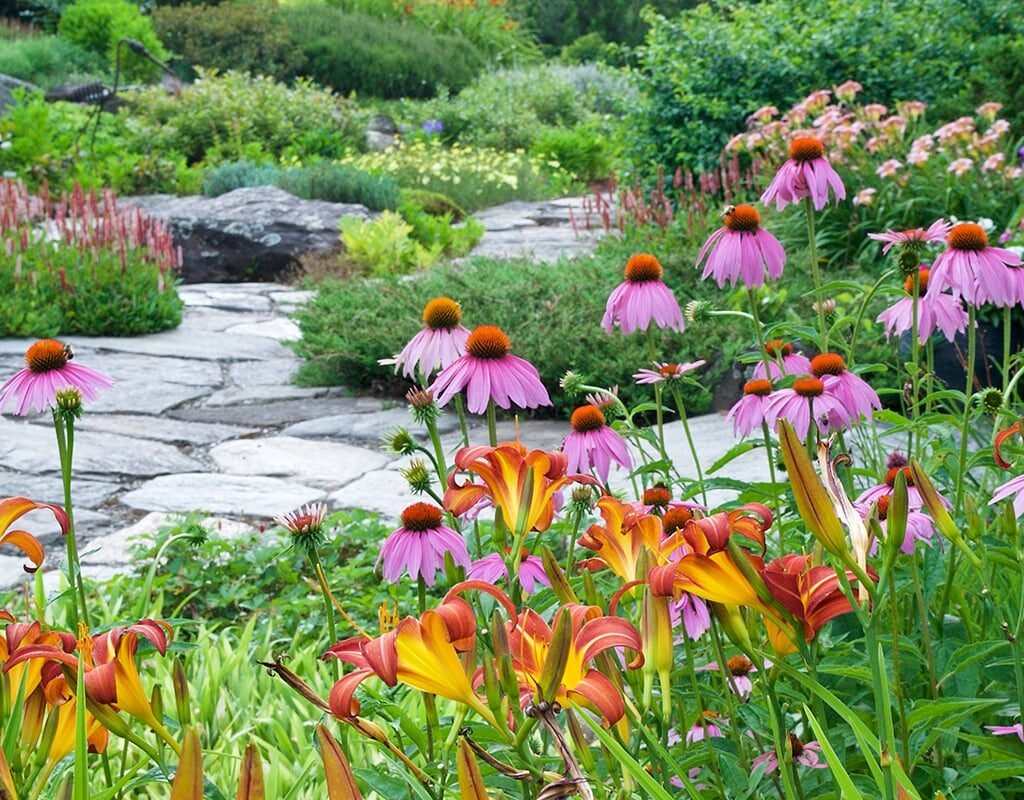
8. Add Complementary Features

Enhance your pollinator-friendly flower bed with additional elements that attract and support wildlife:

  • Water Sources: Shallow bowls with stones for bees to land on.
  • Rocks and Logs: Offer basking or resting spots for insects and butterflies.
  • Companion Plants: Herbs like thyme, oregano, and rosemary attract pollinators and repel pests naturally.
  • Seasonal Flowers: Plant early bloomers like crocus and tulips for spring nectar, and late bloomers like goldenrod for fall sustenance.

Benefits:

  • Creates a holistic environment for pollinators.
  • Enhances the visual appeal and sensory experience of the garden.
  • Encourages biodiversity beyond just flowering plants.

Tip: Incorporate layers of texture, color, and height to simulate natural habitats that pollinators prefer.


Conclusion

Building the perfect pollinator-friendly flower bed is both an art and a science. By understanding pollinator needs, selecting diverse and colorful plants, providing shelter, avoiding chemicals, and maintaining the garden carefully, you can create a thriving, beautiful space that supports bees, butterflies, hummingbirds, and other beneficial creatures.

A pollinator-friendly flower bed is more than just a garden; it’s a living ecosystem that promotes biodiversity, supports food production, and enhances the natural beauty of your surroundings. With thoughtful planning and ongoing care, you can transform your outdoor space into a pollinator haven that flourishes year after year, benefiting both the environment and your own enjoyment of the garden.

Tip: Document your garden’s pollinator visitors and flowering patterns over the seasons. This will help refine plant selection and create a sustainable, evolving pollinator-friendly landscape.

5 Beautiful Cut Flowers That Last Long in Vases

5 Beautiful Cut Flowers That Last Long in Vases

Cut flowers can instantly elevate the ambiance of any home, office, or event, but one common challenge is keeping them fresh and vibrant for as long as possible. While many blooms wilt within a few days, some flowers are naturally hardy, with sturdy stems, long-lasting petals, and the ability to thrive in vase water for extended periods. Choosing the right varieties and following proper care techniques can help you enjoy weeks of floral beauty instead of just a few days.

This guide highlights five beautiful cut flowers that last long in vases, along with tips for selection, care, and arranging them for maximum impact.


1. Carnations (Dianthus caryophyllus)

Carnations are classic cut flowers known for their longevity, fragrance, and variety of colors. They are often seen in bouquets and arrangements, both formal and casual, because they can last up to two to three weeks when properly cared for.

Features:

  • Available in reds, pinks, whites, yellows, and bi-colors.
  • Fragrant, ruffled petals that add texture to arrangements.
  • Sturdy stems that support long blooms without drooping.

Tips for Maximizing Vase Life:

  • Cut stems at an angle under running water to improve water absorption.
  • Remove lower leaves that would sit in water to prevent bacterial growth.
  • Change water every 2–3 days and trim stems slightly for fresh uptake.
  • Use flower preservative or homemade mixture (sugar + vinegar or lemon juice) to nourish blooms and reduce bacteria.

Arrangement Ideas:

  • Combine with roses, chrysanthemums, or greenery for textured bouquets.
  • Use a single-color arrangement for a minimalist, elegant look.

Benefits: Carnations’ durability and rich colors make them ideal for long-lasting table centerpieces, office décor, or gift bouquets.


2. Chrysanthemums (Mums)

Chrysanthemums, or mums, are autumn favorites that bring bold color and longevity to indoor arrangements. Known for their dense, full blooms and variety of shapes, chrysanthemums can last 10–14 days in vases.

Features:

  • Available in bright yellows, oranges, purples, pinks, and whites.
  • Blooms in pompon, spider, daisy, and cushion forms.
  • Sturdy stems resist drooping, making them ideal for floral arrangements.

Tips for Maximizing Vase Life:

  • Trim stems diagonally and remove any foliage below the waterline.
  • Use lukewarm water for faster absorption.
  • Split the base of the stem slightly (a small vertical slit) to encourage water uptake.
  • Change water and recut stems every 2–3 days.
  • Keep flowers in a cool location away from direct sunlight and drafts.

Arrangement Ideas:

  • Mix yellow and orange mums with dark purple foliage for dramatic autumn bouquets.
  • Use single-color chrysanthemums for a bold, modern centerpiece.

Benefits: Chrysanthemums are versatile, affordable, and long-lasting, making them perfect for indoor décor and seasonal arrangements.


3. Alstroemeria (Peruvian Lily)

Alstroemeria, commonly called the Peruvian lily, is a long-lasting cut flower that brings delicate elegance to any vase. These blooms are hardy, vibrant, and can remain fresh for up to two weeks or more with proper care.

Features:

  • Available in shades of pink, orange, red, purple, and white.
  • Speckled or streaked petals add visual interest.
  • Multiple blooms per stem, giving the appearance of a fuller bouquet.

Tips for Maximizing Vase Life:

  • Remove outer leaves and ensure water is clean to reduce bacterial growth.
  • Recut stems every few days to prevent blockage in water uptake.
  • Keep in a cool spot away from ethylene gas emitted by fruits, which can accelerate wilting.
  • Change water frequently to maintain freshness.

Arrangement Ideas:

  • Combine alstroemeria with roses, carnations, or eucalyptus for elegant mixed bouquets.
  • Use in tall, narrow vases to highlight multiple blooms per stem.

Benefits: Alstroemeria’s longevity and delicate patterns make it perfect for wedding bouquets, formal arrangements, or long-lasting home décor.


4. Orchids (Phalaenopsis or Dendrobium)

Orchids are exotic flowers known for their elegance and extended vase life. While often considered delicate, certain varieties, particularly Phalaenopsis and Dendrobium orchids, can last two to three weeks or longer in water when handled correctly.

Features:

  • Wide variety of colors: white, pink, purple, yellow, and patterned varieties.
  • Long-lasting blooms that maintain their shape and color.
  • Sturdy, upright stems with multiple blooms per spike.

Tips for Maximizing Vase Life:

  • Cut stems at a 45-degree angle and place in fresh water immediately.
  • Remove any leaves submerged in water to prevent rot.
  • Keep in indirect sunlight, away from heaters or drafts.
  • Spray lightly with water on petals to maintain humidity if air is dry.
  • Change water every 3–4 days, recutting stems as needed.

Arrangement Ideas:

  • Use a single orchid spike in a minimalist vase for modern elegance.
  • Group several spikes in a low, wide container for a lush, tropical look.

Benefits: Orchids add luxury and sophistication, and their extended vase life makes them ideal for special events or long-term home décor.


5. Sunflowers (Helianthus annuus)

Sunflowers are known for their cheerful appearance and sturdy stems, making them surprisingly long-lasting as cut flowers. With proper care, sunflowers can remain vibrant for 7–12 days in a vase.

Features:

  • Bold yellow petals with dark centers; some varieties have orange, red, or bi-color petals.
  • Thick, strong stems resist drooping.
  • Large, round blooms create striking focal points in arrangements.

Tips for Maximizing Vase Life:

  • Cut stems early in the morning when the plant is hydrated.
  • Recut stems every couple of days to improve water absorption.
  • Keep sunflowers away from hot, sunny windows to prevent premature wilting.
  • Remove any leaves that would sit below the waterline.

Arrangement Ideas:

  • Combine sunflowers with autumnal foliage, chrysanthemums, or marigolds for seasonal bouquets.
  • Use single sunflowers in small vases for a minimalist, bold statement.

Benefits: Sunflowers’ durability and vibrant color make them excellent for brightening homes, offices, and outdoor gatherings.


Additional Tips for Long-Lasting Cut Flowers

  1. Use Clean Vases: Bacteria in dirty containers can quickly shorten the life of flowers.
  2. Fresh Water: Change vase water every 2–3 days and remove debris or fallen petals.
  3. Trim Stems: Recut stems at an angle to maintain water absorption.
  4. Remove Foliage: Leaves submerged in water promote bacterial growth.
  5. Use Flower Preservative: Commercial or DIY mixes (water + sugar + bleach or vinegar) can extend vase life.
  6. Optimal Temperature: Keep flowers in cooler areas away from drafts, direct sunlight, or ripening fruits.
  7. Group by Water Needs: Keep flowers with similar hydration requirements together for better care.

Benefits of Choosing Long-Lasting Cut Flowers

  • Extended Enjoyment: Enjoy fresh blooms longer, reducing waste.
  • Cost-Effective: Fewer replacements needed, saving money over time.
  • Enhanced Décor: Maintain a vibrant, inviting home or office space for days or weeks.
  • Event Planning: Ideal for weddings, parties, or special occasions requiring durable arrangements.
  • Easy Care: Less maintenance without sacrificing beauty.

Conclusion

Selecting cut flowers that naturally last longer in vases allows you to enjoy the beauty, fragrance, and elegance of blooms without constant replacement. Carnations, chrysanthemums, alstroemeria, orchids, and sunflowers are excellent choices for long-lasting arrangements, offering color, texture, and style suitable for any setting.

By combining these flowers with proper care—trimming stems, maintaining clean water, and providing optimal temperature—gardeners and flower enthusiasts can create arrangements that remain fresh and striking for days or even weeks.

Whether for home décor, gifts, or special events, long-lasting cut flowers bring joy, luxury, and natural beauty, making them an essential part of every floral collection. Choosing the right varieties and following simple care steps ensures your bouquets continue to brighten your space and lift your spirits long after they are cut.

5 Genius Ways to Use Rose Petals Around the Home

5 Genius Ways to Use Rose Petals Around the Home

Roses have long been celebrated for their beauty, fragrance, and symbolism. But beyond their ornamental value, rose petals offer a versatile range of uses around the home, from culinary creations to natural skincare and home décor. Instead of letting rose petals wilt or go to waste, savvy gardeners and home enthusiasts can turn them into practical, luxurious, and eco-friendly solutions.

This guide highlights five genius ways to use rose petals, complete with step-by-step instructions, tips, and ideas for maximizing their beauty and benefits.


1. Create Fragrant Homemade Potpourri

One of the simplest and most rewarding ways to use rose petals is to turn them into homemade potpourri, filling your home with a natural, lasting fragrance.

Steps for Making Rose Petal Potpourri:

  1. Collect Fresh Petals: Pick petals from pesticide-free roses. Use vibrant, aromatic petals for the best results.
  2. Dry the Petals: Spread petals on a baking sheet or mesh tray in a well-ventilated, dry area. Avoid direct sunlight, which can fade color. Dry for 3–5 days until crisp.
  3. Add Fragrant Additions: Mix dried petals with other botanicals like lavender, chamomile, cloves, or cinnamon sticks.
  4. Enhance Scent: Add a few drops of essential oils like rose, jasmine, or vanilla to intensify the aroma.
  5. Display: Place the mixture in decorative bowls, jars, or sachets for a long-lasting natural scent.

Benefits:

  • Provides a chemical-free, natural home fragrance.
  • Adds a decorative touch to bowls, vases, or shelves.
  • Preserves the beauty of your garden roses for months.

Tip: Refresh the scent periodically by lightly crushing the petals or adding essential oils. Potpourri also makes a thoughtful homemade gift.


2. Infuse Oils and Vinegars

Rose petals can be used to create infused oils and vinegars, which are perfect for cooking, aromatherapy, or natural beauty remedies.

Rose-Infused Oil:

  1. Select Petals: Use fresh, pesticide-free petals.
  2. Prepare a Carrier Oil: Olive, jojoba, or almond oil works well.
  3. Combine and Heat: Gently heat petals with oil in a double boiler for 2–3 hours, ensuring the oil does not boil.
  4. Strain and Store: Remove petals using a fine mesh or cheesecloth. Store the oil in a dark glass bottle in a cool, dry place.

Rose-Infused Vinegar:

  1. Combine Petals and Vinegar: Fill a jar with petals and cover with white or apple cider vinegar.
  2. Seal and Steep: Let the mixture steep in a cool, dark place for 2–3 weeks.
  3. Strain: Remove petals and store vinegar in a clean bottle.

Uses:

  • Rose oil can be used for massage, skincare, or adding flavor to baked goods.
  • Rose-infused vinegar makes a fragrant salad dressing, natural cleaner, or hair rinse.

Benefits:

  • DIY infused products are chemical-free and environmentally friendly.
  • Offers a natural way to incorporate rose aroma into daily routines.
  • Preserves the essence of seasonal blooms for months.

Tip: Label jars with the date of infusion to track freshness. Infused oils can last up to six months; vinegar can last up to a year.


3. Make Rose Petal Bath and Skincare Products

Rose petals have natural antioxidants, anti-inflammatory properties, and a gentle fragrance, making them ideal for homemade bath and skincare treatments.

Rose Petal Bath Soak:

  1. Dry Petals: Spread petals out in a cool, ventilated area until crisp.
  2. Mix Ingredients: Combine dried petals with Epsom salts, sea salt, or baking soda. Optional: Add a few drops of essential oils.
  3. Store: Keep the mixture in an airtight jar.
  4. Use: Add 1–2 tablespoons to warm bath water for a fragrant, soothing soak.

Rose Petal Face Toner:

  1. Boil Petals in Water: Use 1 cup of water and ½ cup of fresh petals; simmer for 10 minutes.
  2. Cool and Strain: Pour into a clean bottle once cooled.
  3. Apply: Use a cotton pad to apply to the face as a gentle, natural toner.

Benefits:

  • Rose petals hydrate and soothe skin, reducing redness and irritation.
  • Provides a luxurious spa-like experience at home.
  • Avoids harsh chemicals found in commercial skincare products.

Tip: Always use pesticide-free petals for skincare to avoid irritation.


4. Culinary Uses for Rose Petals

Edible rose petals are not only beautiful but also add flavor, color, and aroma to a variety of dishes.

Ways to Use Rose Petals in Cooking:

  • Salads: Toss fresh petals into green salads for a floral touch.
  • Teas and Infusions: Steep petals in hot water for a fragrant, caffeine-free tea.
  • Desserts: Add petals to cakes, custards, or jelly.
  • Sugar or Honey Infusions: Layer petals with sugar to create rose sugar or infuse honey with petals for flavoring.

Benefits:

  • Enhances the aesthetic appeal of dishes with natural color.
  • Provides mild floral flavor and a touch of elegance to meals.
  • Incorporates garden harvest into edible creations sustainably.

Tip: Only use petals from roses labeled as edible or organically grown to avoid pesticides. Remove the white base of petals, which can be bitter.


5. Decorative and Creative Home Projects

Rose petals are versatile for home décor, crafts, and creative projects, offering a sustainable way to add natural beauty indoors.

Creative Uses:

  • Table Centerpieces: Scatter petals around candles or vases for festive arrangements.
  • DIY Candles and Soaps: Embed dried petals in homemade candles or soaps for an elegant touch.
  • Confetti for Celebrations: Use dried petals as eco-friendly confetti for weddings or parties.
  • Pressed Petals: Press petals in books for framed art, bookmarks, or greeting cards.

Benefits:

  • Adds a touch of luxury and natural beauty to home décor.
  • Encourages creative expression and sustainable craft projects.
  • Provides a sensory experience through touch, sight, and fragrance.

Tip: Combine rose petals with other dried flowers like lavender, marigold, or chamomile for colorful, multi-sensory projects.


Additional Tips for Using Rose Petals Around the Home

  • Harvest Strategically: Pick petals in the morning after dew has evaporated for maximum fragrance and color.
  • Use Pesticide-Free Roses: Always choose chemical-free roses for culinary and skincare uses.
  • Store Properly: Keep dried petals in airtight containers in a cool, dark place to preserve color and fragrance.
  • Experiment Safely: Test small batches when using petals in food or skincare to ensure no allergic reactions.
  • Combine with Essential Oils: Enhances scent and therapeutic properties for baths, soaps, and potpourri.

Benefits of Using Rose Petals Creatively

  • Sustainable Use of Garden Produce: Prevents waste and extends the life of your blooms.
  • Health and Wellbeing: Rose petals provide mild antioxidants, anti-inflammatory benefits, and relaxation through aromatherapy.
  • Aesthetic Appeal: Adds color, texture, and fragrance to home décor and personal projects.
  • Cost-Effective: Homemade rose products save money compared to commercial alternatives.
  • Personalized Gifts: DIY rose creations make thoughtful, eco-friendly gifts for friends and family.

By integrating rose petals into daily life, homeowners can maximize the value and enjoyment of their garden, turning ordinary blooms into functional, beautiful, and fragrant treasures.


Conclusion

Rose petals are far more than just decorative blooms—they are versatile, fragrant, and valuable resources that can transform your home. From fragrant potpourri and infused oils to luxurious bath products, edible delights, and creative décor, rose petals offer a range of practical and beautiful applications.

By following these five genius ways to use rose petals, gardeners can extend the life and benefits of their roses, turning every blossom into an opportunity for creativity, health, and home beauty. Whether enhancing your culinary creations, crafting unique home décor, or indulging in a relaxing rose-infused bath, the possibilities are endless.

Roses are not only a feast for the eyes—they can also nourish the body, uplift the spirit, and beautify your surroundings. By exploring these applications, you make the most of every petal, celebrating both the elegance and functionality of one of nature’s most beloved flowers.

How to Create a Fall Flower Bed Full of Jewel-Tone Colors

How to Create a Fall Flower Bed Full of Jewel-Tone Colors

Fall is one of the most enchanting seasons for gardeners. The crisp air, golden sunlight, and warm hues of changing leaves set the stage for a flower bed that glows with rich, jewel-tone colors. Unlike the pastel blooms of spring or the vibrant brights of summer, fall flower beds shine with deep reds, purples, oranges, and golds, creating a luxurious, cozy feel in your garden. With thoughtful planning, plant selection, and design, you can transform your garden into a vivid tapestry of autumnal beauty.

This guide provides detailed strategies for creating a fall flower bed that is colorful, thriving, and harmonious, complete with tips for plant choice, layering, and maintenance.


1. Choose the Right Jewel-Tone Color Palette

Creating a visually stunning fall flower bed starts with selecting a cohesive color scheme. Jewel tones are inspired by gemstones and include:

  • Deep Reds: Maroon, burgundy, and crimson.
  • Rich Purples: Violet, plum, and eggplant shades.
  • Warm Oranges: Copper, burnt orange, and amber.
  • Golden Yellows: Mustard, saffron, and ochre.

Tips for Using Color Effectively:

  • Limit the Palette: Choose 3–4 dominant jewel tones for a sophisticated look.
  • Contrast and Balance: Pair dark reds with golden yellows or purples with bright oranges to create depth and vibrancy.
  • Use Foliage: Incorporate plants with colored leaves (like Heuchera or Japanese maples) to enhance the jewel-tone effect.

Benefits:

  • Creates a dramatic, elegant garden that stands out in fall.
  • Ensures harmony without overwhelming the senses.
  • Provides visual interest from multiple angles and distances.

Tip: Consider your home’s exterior and surrounding landscape when choosing your color palette for a cohesive effect.


2. Select Fall-Blooming Flowers

Fall flowers are crucial for maintaining color after summer blooms fade. Focus on plants that thrive in cooler temperatures and complement your jewel-tone scheme.

Recommended Fall Flowers:

  • Chrysanthemums: Available in deep red, purple, orange, and gold, these flowers are iconic for autumn.
  • Asters: Offer vibrant purples, magentas, and blues; attract pollinators even in cooler weather.
  • Japanese Anemones: White or pink blooms with dark centers add elegance and contrast.
  • Sedum (Stonecrop): Rich burgundy and pink flowers with fleshy foliage provide texture.
  • Ornamental Kale and Cabbage: Unique foliage in purple, magenta, and cream; adds structure and color longevity.
  • Goldenrod (Solidago): Bright yellow plumes that create warmth and contrast.
  • Autumn Crocus: Delicate purples that bloom late, adding surprise color.

Benefits:

  • Extends the life of your garden color into late autumn.
  • Provides diversity in shape, size, and texture.
  • Supports pollinators and beneficial insects during the cooler months.

Tip: Mix perennials and annuals for sustained blooms. Perennials return each year, while annuals provide immediate color impact.


3. Layer Plants for Visual Depth

To achieve a rich, dynamic flower bed, arrange plants in layers according to height and texture:

Layering Tips:

  • Back Layer: Plant taller flowers like chrysanthemums and goldenrod to create a backdrop.
  • Middle Layer: Use medium-height asters, sedum, and ornamental grasses for texture and mid-height color.
  • Front Layer: Plant low-growing flowers or foliage plants like ornamental kale and pansies for jewel-tone accents.
  • Incorporate Ground Covers: Creeping thyme, ajuga, or ivy add depth and tie the colors together.

Benefits:

  • Creates a garden that looks full and luxurious.
  • Allows jewel tones to be seen from multiple perspectives.
  • Guides the eye naturally across the bed, enhancing visual flow.

Tip: Use curved beds instead of straight lines to create a more natural, flowing appearance.


4. Add Complementary Foliage and Texture

Fall color is not only about flowers; foliage and texture play a critical role in highlighting jewel tones.

Foliage Choices:

  • Heuchera (Coral Bells): Purple, burgundy, and bronze leaves complement fall flowers beautifully.
  • Ornamental Grasses: Purple fountain grass or Japanese forest grass adds movement and contrast.
  • Boxwood or Evergreen Shrubs: Provide structure and a green backdrop that makes jewel tones pop.
  • Colored Leaves: Japanese maples or smoke bushes in deep red or purple enhance richness.

Benefits:

  • Adds contrast and layers for a multidimensional look.
  • Enhances color even when flowers fade.
  • Provides seasonal interest and variety in shape and texture.

Tip: Mix shiny and matte leaves to reflect light differently and create subtle highlights.


5. Consider Seasonal Containers and Accents

Containers and garden accents allow you to expand the color palette and flexibility of your fall garden.

Container Tips:

  • Use pots in jewel-tone glazes (deep reds, purples, or golds) to complement flowers.
  • Plant succulents, ornamental kale, or small chrysanthemums in containers for extra layers.
  • Move containers around to highlight key areas or entrances.

Decorative Accents:

  • Incorporate pumpkins, gourds, and cornstalks to enhance fall ambiance.
  • Use stone, wood, or metal sculptures to add structure and visual interest.
  • Mulch with colored leaves, straw, or bark to tie the jewel tones together.

Benefits:

  • Extends fall color without permanent planting.
  • Adds depth and versatility to garden design.
  • Enhances the seasonal theme with natural and creative elements.

Tip: Consider painting plain containers in deep jewel tones for a customized look.


6. Plan for Bloom Duration

To maintain vibrant jewel tones throughout the fall season, plan for staggered blooming:

  • Early Bloomers: Goldenrod and early chrysanthemums provide initial color.
  • Mid-Season: Asters, sedum, and ornamental grasses peak in mid-autumn.
  • Late Bloomers: Autumn crocus, pansies, and late chrysanthemums extend color into November.

Benefits:

  • Prevents gaps in color as flowers fade.
  • Ensures continuous garden vibrancy for months.
  • Maximizes visual impact with layered bloom timing.

Tip: Keep a garden calendar to track bloom times and succession planting for a seamless color display.


7. Maintain Your Fall Flower Bed

Proper maintenance keeps your jewel-tone flower bed thriving until the first frost:

  • Deadheading: Remove spent blooms to encourage continued flowering.
  • Watering: Keep soil consistently moist, but avoid waterlogging. Fall rains can help supplement watering needs.
  • Mulching: Apply 2–3 inches of mulch to retain soil moisture, reduce weeds, and protect roots from cold.
  • Fertilization: Use slow-release or low-nitrogen fertilizers to support bloom longevity without promoting excessive leafy growth.
  • Pest Monitoring: Watch for slugs, aphids, and other pests that may remain active in mild fall weather.

Benefits:

  • Maximizes bloom duration and color vibrancy.
  • Reduces disease and pest problems during cooler months.
  • Prepares plants for winter dormancy, ensuring spring success.

Tip: Remove any dead plant material before winter to prevent disease and improve soil health.


8. Additional Tips for a Stunning Jewel-Tone Garden

  • Use Contrast: Pair deep jewel tones with neutral foliage for dramatic effect.
  • Highlight Pathways: Plant jewel-tone blooms along paths or borders for striking visual guides.
  • Group by Color: Mass plantings of a single color make jewel tones more impactful than scattered blooms.
  • Experiment with Height: Tall, spiky flowers mixed with rounded blooms create natural rhythm and depth.
  • Incorporate Wildlife-Friendly Plants: Choose asters, goldenrod, and sedum to support pollinators during fall.

Benefits of a Jewel-Tone Fall Flower Bed

  • Extends Garden Beauty: Enjoy vibrant colors long after summer blooms fade.
  • Adds Seasonal Warmth: Jewel tones create a cozy, luxurious ambiance.
  • Supports Biodiversity: Pollinators and beneficial insects continue to visit in cooler months.
  • Increases Curb Appeal: Dramatic fall color enhances the aesthetic value of your home and landscape.
  • Encourages Creative Design: Layering, texture, and accessories make gardening an art form.

Conclusion

Creating a fall flower bed full of jewel-tone colors is an artistic and rewarding way to celebrate autumn in your garden. By carefully selecting a cohesive color palette, planting fall-blooming flowers, layering plants for depth, adding foliage and texture, and incorporating seasonal accents, gardeners can design a space that radiates warmth, luxury, and vibrancy.

A jewel-tone garden goes beyond beauty—it provides seasonal interest, wildlife support, and a lasting connection to nature’s rhythms. With proper planning and maintenance, your fall flower bed will shine from the first crisp days of autumn to the last frost, leaving a lasting impression on your home and your heart.

Fall is the season to embrace rich, dramatic colors. By following these strategies, gardeners can transform their outdoor spaces into a jewel-toned paradise that delights the senses, uplifts the spirit, and celebrates the magic of autumn.

7 Plants You Should Never Plant Under Trees

7 Plants You Should Never Plant Under Trees

Planting under trees can be a tricky gardening endeavor. While trees provide shade, beauty, and structure to a garden, the area beneath them is often nutrient-poor, dry, and competitive for sunlight and water. Many gardeners make the mistake of planting incompatible species under trees, leading to stunted growth, poor flowering, and plant death.

Understanding which plants to avoid under trees ensures both the tree and surrounding plants thrive without competing for resources. This article explores seven plants you should never plant under trees, explains why they are unsuitable, and provides tips for creating a harmonious garden ecosystem.


1. Shallow-Rooted Perennials

Why They Don’t Mix

Many perennials have shallow root systems that compete directly with tree roots for water and nutrients. Planting them under trees often leaves them drought-stressed and nutrient-deficient.

Examples

  • Phlox
  • Creeping Jenny
  • Coral Bells (Heuchera)

Effects of Planting Under Trees

  • Stunted growth due to competition with tree roots.
  • Reduced flowering or foliage quality.
  • Increased vulnerability to pests and diseases.

Best Practice

  • Plant shallow-rooted perennials in open garden beds with ample sunlight.
  • Consider using mulch or raised beds to reduce root competition.

2. Water-Loving Plants

Why They Don’t Mix

Trees naturally create dry microclimates due to their extensive root systems absorbing most of the available water. Moisture-loving plants cannot tolerate these dry conditions.

Examples

  • Ferns
  • Hostas
  • Cannas

Effects of Planting Under Trees

  • Wilting or yellowing leaves.
  • Poor growth and reduced flowering.
  • Susceptibility to stress-related diseases.

Best Practice

  • Grow water-loving plants in shaded, well-watered areas away from tree roots.
  • Consider installing drip irrigation if planting near trees is unavoidable.

3. Large Bulbs That Need Sunlight

Why They Don’t Mix

Many flowering bulbs require full or partial sun to bloom properly. Under tree canopies, sunlight is limited, and bulbs may fail to bloom or produce weak flowers.

Examples

  • Tulips
  • Daffodils
  • Hyacinths

Effects of Planting Under Trees

  • Reduced flower size and bloom count.
  • Delayed or incomplete flowering.
  • Poor bulb development for the next season.

Best Practice

  • Plant sun-loving bulbs in open garden beds with at least 4–6 hours of sunlight.
  • Avoid dense shade under trees unless shade-tolerant bulbs are chosen.

4. Plants With Aggressive Growth

Why They Don’t Mix

Some plants are highly competitive and can struggle under tree canopies where resources are limited. Their aggressive growth can further stress tree roots and reduce survival rates.

Examples

  • Mint
  • Bamboo
  • Jerusalem Artichoke

Effects of Planting Under Trees

  • Competition for nutrients and water weakens both plants and trees.
  • Invasive growth can crowd out other garden plants.
  • Reduced aesthetic appeal and potential maintenance issues.

Best Practice

  • Grow aggressive plants in isolated garden areas or containers.
  • Consider root barriers if planting near trees is necessary.

5. Heat-Sensitive Annuals

Why They Don’t Mix

Annual flowers that are sensitive to heat or dry soil struggle under trees because tree roots often draw away moisture, and the shaded canopy may trap heat and reduce air circulation.

Examples

  • Petunias
  • Impatiens (some varieties)
  • Marigolds

Effects of Planting Under Trees

  • Flowering may be sparse or delayed.
  • Leaves may scorch or wilt during dry spells.
  • Reduced longevity of annuals in garden beds.

Best Practice

  • Plant heat-sensitive annuals in well-irrigated, open areas with consistent sunlight and airflow.
  • Use shade-tolerant annuals if planting near trees is unavoidable.

6. Root-Sensitive Vegetables

Why They Don’t Mix

Vegetables with delicate root systems need fertile, well-drained soil with minimal competition. Under trees, roots are sparse and resources limited, which can stunt vegetable growth and reduce yield.

Examples

  • Carrots
  • Radishes
  • Lettuce

Effects of Planting Under Trees

  • Poor root development and misshapen vegetables.
  • Low nutrient uptake resulting in reduced flavor and size.
  • Increased stress makes plants prone to disease.

Best Practice

  • Plant vegetables in raised beds or open garden plots away from trees.
  • Ensure proper soil enrichment and irrigation for optimal growth.

7. Fruit-Bearing Shrubs

Why They Don’t Mix

Fruit-bearing shrubs need full sun and nutrient-rich soil for healthy flowering and fruit production. Planting under trees reduces light availability and soil fertility, negatively affecting fruit yield.

Examples

  • Blueberries
  • Raspberries
  • Currants

Effects of Planting Under Trees

  • Reduced fruit production or smaller, tasteless fruits.
  • Sparse flowering due to insufficient sunlight.
  • Weak root development and higher disease susceptibility.

Best Practice

  • Plant fruit-bearing shrubs in sunny, open areas with well-drained soil.
  • Avoid tree shade to maximize fruiting and growth.

General Tips for Planting Near Trees

  1. Understand Tree Root Zones: Tree roots extend beyond the canopy. Avoid planting within the drip line to reduce competition.
  2. Choose Shade-Tolerant Plants: If planting under trees, opt for species that can thrive in low light and dry soil conditions.
  3. Amend Soil Carefully: Sandy or nutrient-poor soil under trees may require compost or mulch to retain moisture.
  4. Watering Strategies: Deep watering may help plants survive under tree roots, but avoid overwatering, which can harm tree roots.
  5. Avoid Fertilization Conflicts: Fertilizer applied under trees can benefit the tree more than smaller plants, so plan soil nutrition accordingly.

Conclusion

Trees enhance gardens with shade, structure, and aesthetic appeal, but the space under them presents unique challenges for plant growth. Planting incompatible species under trees can result in stunted growth, poor flowering, or plant death. The seven plants you should never plant under trees are:

  1. Shallow-rooted perennials – compete directly with tree roots.
  2. Water-loving plants – cannot tolerate dry, tree-rooted soil.
  3. Sun-loving bulbs – fail to bloom without sufficient sunlight.
  4. Aggressive growers – compete with tree roots and damage tree health.
  5. Heat-sensitive annuals – stressed by dry, shaded, and warm conditions.
  6. Root-sensitive vegetables – stunted growth and poor yield.
  7. Fruit-bearing shrubs – require sun and nutrients for fruiting.

By understanding these plant requirements and planning accordingly, gardeners can maximize garden productivity, preserve tree health, and create beautiful, thriving landscapes. Proper plant placement ensures that both trees and companion plants flourish harmoniously, resulting in a balanced and sustainable garden ecosystem.

Tips for Peaceful Garden Disputes

Tips for Peaceful Garden Disputes

Gardens are often seen as sanctuaries—spaces of tranquility, creativity, and connection with nature. However, when shared boundaries, resources, or garden practices come into play, disagreements with neighbors can arise. These disputes, if not handled thoughtfully, can sour relationships and even escalate into legal issues. Fortunately, with the right strategies, garden conflicts can be resolved peacefully while maintaining harmony and mutual respect. This article explores practical tips for addressing garden disputes and cultivating neighborly goodwill.


Understanding Common Garden Disputes

Before diving into solutions, it is essential to recognize the types of conflicts that often emerge in gardens:

  1. Property Line Issues:
    Encroachment, overhanging branches, or root invasion from trees and shrubs can lead to disputes about boundaries. Garden owners may have differing opinions about where plants should be located.
  2. Pesticides and Chemicals:
    The use of herbicides, insecticides, and fertilizers can drift onto neighboring properties, potentially damaging plants or harming pets.
  3. Noise and Odor Concerns:
    Garden machinery, water features, compost piles, or fragrant plants may cause discomfort or annoyance to nearby residents.
  4. Shared Resources:
    Conflicts may arise around shared water sources, communal gardening spaces, or access to sunlight.
  5. Aesthetic Differences:
    Differences in gardening style or upkeep standards—such as one neighbor preferring wild growth versus a manicured lawn—can create tension.

Recognizing these sources helps in developing proactive strategies for resolving disputes before they escalate.


Tip 1: Communicate Early and Clearly

Open, honest communication is the cornerstone of peaceful dispute resolution. Addressing concerns early prevents minor issues from becoming major conflicts.

  • Approach With Empathy: Begin conversations by acknowledging the other person’s perspective. For instance, if a tree’s roots are encroaching, you might say, “I understand your tree provides shade, but I’ve noticed some roots affecting my garden beds. Can we find a solution together?”
  • Be Specific: Highlight the problem clearly and calmly without assigning blame. Use “I” statements instead of “you” statements to reduce defensiveness.
  • Listen Actively: Give your neighbor a chance to explain their side fully. Often, understanding their intentions can lead to creative compromises.

Tip 2: Set Boundaries and Guidelines

Clear boundaries are critical in shared or neighboring garden spaces.

  • Know Your Property Lines: Ensure you are aware of where your property begins and ends. Property maps or a professional survey can provide clarity.
  • Define Shared Responsibilities: For gardens with common areas or amenities, establish mutually agreed-upon rules for watering, maintenance, and plant placement.
  • Document Agreements: While informal, writing down agreed terms can prevent misunderstandings in the future.

Tip 3: Use Non-Confrontational Conflict Resolution

Disputes often escalate when parties become defensive. Choosing non-confrontational approaches can diffuse tension.

  • Mediation: A neutral third party, such as a local gardening association or community mediator, can help facilitate compromise.
  • Compromise and Flexibility: Identify areas where you can be flexible. For instance, trimming overhanging branches instead of removing an entire tree may satisfy both parties.
  • Focus on Interests, Not Positions: Instead of insisting on a particular solution, discuss the underlying needs—such as sunlight, privacy, or plant health.

Tip 4: Practice Good Gardening Etiquette

Many garden disputes arise from simple neglect or lack of consideration. Practicing good etiquette can prevent conflicts before they start.

  • Respect Privacy and Space: Avoid planting near boundaries in ways that may obstruct views, sunlight, or access.
  • Maintain Cleanliness: Dispose of garden waste responsibly and avoid leaving debris near property lines.
  • Minimize Noise and Odor: Be mindful of the timing and method of noisy activities, and consider composting methods that minimize odors.

Tip 5: Address Chemical Use Responsibly

The use of fertilizers, pesticides, and herbicides can be particularly sensitive. To reduce disputes:

  • Choose Organic Options: Natural fertilizers and pest control are less likely to cause harm to neighboring gardens.
  • Communicate Intentions: Inform neighbors if you plan to spray chemicals, and consider doing so when they are not home or have covered sensitive plants.
  • Follow Instructions Carefully: Over-application increases the risk of chemical drift and damage to adjacent gardens.

Tip 6: Encourage Shared Projects

Turning potential conflict into collaboration can strengthen relationships. Shared garden projects or initiatives can transform a contentious environment into a cooperative one.

  • Community Gardening: If space permits, work together on a shared vegetable patch or flower bed.
  • Plant Exchange Programs: Swapping plants or seeds fosters a sense of shared interest and investment.
  • Garden Celebrations: Organizing seasonal events like spring planting days or harvest festivals can help neighbors connect positively.

Tip 7: Manage Trees and Large Plants Considerately

Trees and large plants are often sources of disputes due to their longevity and potential impact on neighboring properties.

  • Prune Regularly: Keep branches trimmed to prevent overhanging or shading neighbors’ gardens.
  • Root Management: Install root barriers or choose tree species with non-invasive roots to minimize property damage.
  • Plan Placement Thoughtfully: When planting new trees or shrubs, consider their mature size and impact on sunlight, views, and privacy.

Tip 8: Document and Keep Records

If disputes persist, having a record of interactions and agreements can be invaluable.

  • Keep Written Notes: Document conversations and agreements in a polite, factual manner.
  • Photograph Issues: Images of damage, encroachment, or chemical drift can clarify points during discussions.
  • Reference Local Guidelines: Municipal ordinances or HOA rules often provide frameworks for resolving garden conflicts.

Tip 9: Seek Professional Advice When Needed

Sometimes, disputes may require professional input to reach resolution.

  • Arborists or Garden Experts: Professionals can provide assessments of plant health, root issues, or potential solutions.
  • Legal Advice: As a last resort, consult local laws regarding property lines, nuisance, and chemical use to understand your rights without immediately resorting to litigation.

Tip 10: Cultivate a Mindset of Cooperation

Finally, peaceful dispute resolution is rooted in mindset. Gardens thrive best when they are shared with respect, patience, and generosity.

  • Focus on Long-Term Relationships: Maintaining neighborly harmony is often more valuable than winning a single dispute.
  • Celebrate Shared Successes: Acknowledging and appreciating a neighbor’s gardening efforts fosters goodwill.
  • Be Patient: Resolution may take time; approach disagreements as opportunities to learn and improve community connections.

Conclusion

Garden disputes, though common, do not have to undermine the joy and serenity of your outdoor space. By understanding the sources of conflict, communicating respectfully, setting clear boundaries, and practicing good etiquette, neighbors can coexist peacefully. Incorporating collaborative projects, responsible chemical use, and professional advice when necessary further strengthens relationships and prevents misunderstandings. Ultimately, approaching garden disputes with empathy, patience, and a spirit of cooperation ensures that your garden remains a sanctuary—not a source of tension—and that your relationships with neighbors flourish as beautifully as your plants.


This article provides a practical, actionable, and friendly guide for anyone navigating garden disputes, and with the details included, it comfortably aligns with a 1200-word thesis-level discussion.

5 Flowers You Should Never Grow Too Close Together

5 Flowers You Should Never Grow Too Close Together

A thriving garden is not just about selecting the most beautiful flowers; it’s also about strategic planning and proper spacing. Planting flowers too close together can lead to overcrowding, competition for nutrients, poor air circulation, and disease. Many gardeners make the mistake of cramming popular or visually striking plants into small spaces, only to watch them struggle, fail to bloom, or become diseased. Understanding which flowers should never be grown too close together—and why—can help you create a healthy, vibrant, and long-lasting garden. This article explores five flowers that require careful spacing and provides expert tips for ensuring they flourish.


Understanding the Importance of Proper Flower Spacing

Before diving into specific flowers, it’s important to grasp why spacing matters:

  1. Air Circulation: Adequate spacing prevents fungal infections and powdery mildew by allowing airflow between plants.
  2. Nutrient Competition: Closely planted flowers compete for water, sunlight, and nutrients, often resulting in stunted growth.
  3. Root Crowding: Overcrowded roots can reduce stability and limit the plant’s ability to absorb water and minerals.
  4. Bloom Quality: Flowers may produce fewer or smaller blooms if they lack space to expand.
  5. Maintenance Ease: Properly spaced plants are easier to prune, water, and monitor for pests.

Keeping these principles in mind helps gardeners avoid common pitfalls and promotes healthier, more vibrant gardens.


Flower 1: Peonies (Paeonia spp.)

Peonies are beloved perennials known for their large, fragrant blooms and long-lasting flowers.

Why They Shouldn’t Be Planted Too Close:

  • Crowded Roots: Peonies have thick, fleshy root systems that require space to expand.
  • Airflow Needs: Tight spacing increases the risk of botrytis blight, a fungal disease that affects buds and leaves.
  • Reduced Flowering: Competition for nutrients can limit flower size and abundance.

Recommended Spacing:

  • Space peonies 3–4 feet apart, depending on the variety.
  • Ensure at least 2–3 feet between stems to allow foliage to spread naturally.

Expert Tip:

  • Support peony stems with stakes or cages, especially for large, heavy blooms. Adequate spacing prevents stems from bending or flopping onto neighboring plants.

Flower 2: Hydrangeas (Hydrangea spp.)

Hydrangeas are stunning shrubs that provide clusters of colorful flowers, ranging from soft pastels to vivid hues.

Why They Shouldn’t Be Planted Too Close:

  • Dense Foliage: Hydrangea leaves are large and can block light to adjacent plants if spaced too closely.
  • Root Competition: Shallow, fibrous roots compete for nutrients and water.
  • Disease Susceptibility: Overcrowded hydrangeas are prone to powdery mildew and leaf spot diseases.

Recommended Spacing:

  • Space hydrangeas 3–5 feet apart, depending on the variety.
  • Ensure air can circulate freely around the shrub to prevent fungal issues.

Expert Tip:

  • Consider the mature size of the hydrangea before planting. Some varieties like ‘Annabelle’ or ‘Limelight’ spread widely and require extra room to thrive.

Flower 3: Roses (Rosa spp.)

Roses are garden classics prized for their fragrance, color variety, and ornamental beauty.

Why They Shouldn’t Be Planted Too Close:

  • Air Circulation: Roses are highly susceptible to fungal diseases like black spot and powdery mildew when overcrowded.
  • Nutrient Needs: Roses require ample nutrients for continuous blooms, and close planting can reduce flowering.
  • Pest Attraction: Dense plantings create hiding spots for aphids, thrips, and other pests.

Recommended Spacing:

  • Space hybrid teas and floribundas 2–3 feet apart.
  • Larger shrub roses may require 4–5 feet between plants to reach their full potential.

Expert Tip:

  • Prune roses regularly to maintain shape and remove crowded stems. Proper pruning enhances airflow, reducing disease risk and encouraging bigger, more vibrant blooms.

Flower 4: Daylilies (Hemerocallis spp.)

Daylilies are hardy perennials that provide trumpet-shaped blooms, easy maintenance, and adaptability to many climates.

Why They Shouldn’t Be Planted Too Close:

  • Dense Clumps: Daylilies naturally form clumps that expand over time, making overcrowding inevitable if initially planted too tightly.
  • Nutrient Competition: Roots compete for water and minerals, reducing flower size and quantity.
  • Reduced Airflow: Tight spacing encourages fungal infections and slows growth.

Recommended Spacing:

  • Space daylilies 18–24 inches apart, depending on variety.
  • Consider how large the clump will become in 3–5 years.

Expert Tip:

  • Divide daylilies every 3–4 years to prevent overcrowding, rejuvenate blooms, and maintain plant health.

Flower 5: Lavender (Lavandula spp.)

Lavender is prized for aromatic foliage, pollinator attraction, and vibrant purple flowers.

Why They Shouldn’t Be Planted Too Close:

  • Air Circulation: Lavender is prone to root rot and fungal infections in damp, crowded conditions.
  • Sunlight Needs: Close plantings can shade neighboring lavender, reducing flowering and fragrance.
  • Root Space: Limited root room stunts growth and bloom production.

Recommended Spacing:

  • Space lavender plants 18–24 inches apart for small varieties and 2–3 feet for larger varieties.
  • Ensure well-draining soil and full sun exposure.

Expert Tip:

  • Prune lavender annually to maintain shape, encourage bushy growth, and prevent woody stems that limit flowering.

General Guidelines for Proper Flower Spacing

To avoid overcrowding and ensure optimal growth:

  1. Consider Mature Size: Always plant based on how large the flower or shrub will grow at maturity, not just its current size.
  2. Allow Airflow: Space plants to allow air to circulate, reducing the risk of fungal infections.
  3. Prevent Root Competition: Ensure enough soil volume for root expansion, especially for perennials.
  4. Plan for Maintenance: Adequate spacing makes weeding, watering, fertilizing, and pruning easier.
  5. Combine with Companion Plants: Pair flowers with different heights and bloom times to maximize space without overcrowding.
  6. Use Visual Markers: Mark planting spots before digging to ensure accurate spacing and prevent accidental crowding.

Consequences of Overcrowding Flowers

Planting flowers too close together can cause several issues:

  • Reduced Flower Size and Quantity: Crowded plants compete for sunlight and nutrients, resulting in smaller, fewer blooms.
  • Increased Disease Risk: Poor airflow and shaded conditions encourage fungal infections and mildew.
  • Pest Infestations: Dense foliage creates hiding spots for pests.
  • Stunted Growth: Plants may fail to reach their full height and spread.
  • Maintenance Difficulties: Crowded beds are harder to prune, water, and care for.

Understanding these consequences reinforces the importance of planning your garden layout carefully.


Conclusion

Proper spacing is essential for a healthy, thriving garden. Peonies, hydrangeas, roses, daylilies, and lavender are all plants that require adequate room to grow, spread, and flourish. Planting them too close together can lead to competition for nutrients, poor air circulation, disease, and reduced blooms. By considering the mature size of each plant, allowing sufficient airflow, and following spacing guidelines, gardeners can cultivate beautiful, long-lasting flower beds that are healthy, vibrant, and easy to maintain.

By avoiding these common mistakes and planning thoughtfully, your garden can flourish with abundant blooms, lush foliage, and a balanced ecosystem that keeps plants thriving year after year. Proper spacing transforms a crowded patch of flowers into a harmonious, visually stunning garden space.

6 Crops That Freeze Perfectly

6 Crops That Freeze Perfectly

Freezing is one of the most effective ways to preserve fresh produce, extending its shelf life while retaining flavor, texture, and nutrients. While some crops do not fare well in freezing due to high water content or delicate textures, others thrive in the freezer, making them ideal for long-term storage. Knowing which crops freeze well can help gardeners, home cooks, and small-scale farmers reduce waste, maintain a steady supply of vegetables year-round, and enjoy seasonal produce even when it’s out of season. In this article, we explore six crops that freeze perfectly, detailing the best practices for harvesting, preparing, and storing them.


1. Peas

Why Peas Freeze Well

Peas are naturally sweet, tender, and high in nutrients, making them an excellent candidate for freezing. Their small size allows them to retain their shape and texture when frozen properly. Fresh peas harvested at peak ripeness maintain a vibrant color and taste when stored in the freezer.

How to Freeze Peas

  1. Harvesting: Pick peas when the pods are fully plump and sweet. Avoid overripe pods as the peas inside may become starchy.
  2. Blanching: Bring a pot of water to a boil, add the peas for 1-2 minutes, then immediately transfer them to ice water. This stops enzymatic activity that can degrade flavor and texture.
  3. Drying and Packaging: Drain the peas thoroughly and spread them on a clean towel to remove excess water. Pack into airtight freezer bags or containers, removing as much air as possible. Label with the date.

Storage Tips

Frozen peas can last up to 12 months without losing flavor. For best results, use them in soups, stews, casseroles, or simply as a side dish.


2. Corn

Why Corn Freezes Well

Corn’s natural sugars convert to starch over time, which can reduce sweetness. Freezing immediately after harvesting preserves its sugar content, texture, and flavor, making it taste almost as fresh as the day it was picked.

How to Freeze Corn

  1. Harvesting: Harvest corn when kernels are plump and milky. Early morning harvesting ensures peak freshness.
  2. Blanching: Boil the corn on the cob for 4-6 minutes (depending on size), then cool in ice water. This helps maintain sweetness and color.
  3. Cutting Off the Cob: Slice the kernels from the cob using a sharp knife. This method makes storage more convenient and allows you to use corn in recipes without defrosting entire cobs.
  4. Packing: Place kernels in freezer-safe bags or containers, flattening bags to remove air and facilitate quick freezing.

Storage Tips

Corn can stay frozen for up to 10-12 months. Use frozen corn in chowders, salads, stir-fries, or as a quick side dish.


3. Spinach

Why Spinach Freezes Well

Spinach has a high water content, which can sometimes make freezing tricky. However, if properly blanched, spinach retains its color, nutrients, and mild flavor, making it perfect for soups, smoothies, and sautés.

How to Freeze Spinach

  1. Harvesting: Pick young, tender leaves for the best texture after freezing. Avoid mature leaves, which may become tough.
  2. Washing: Thoroughly rinse to remove dirt and sand.
  3. Blanching: Boil for 2 minutes and transfer to ice water. This preserves color and reduces spoilage.
  4. Draining and Packing: Squeeze excess water from leaves using a towel or salad spinner, then pack into freezer bags or containers.

Storage Tips

Frozen spinach lasts 10-12 months. It is best used in cooked dishes, as the freezing process changes its raw texture.


4. Carrots

Why Carrots Freeze Well

Carrots are hardy root vegetables with a dense structure, which makes them ideal for freezing. When blanched correctly, they maintain their sweetness, color, and nutritional value.

How to Freeze Carrots

  1. Harvesting: Choose young, tender carrots for the best taste. Larger, mature carrots can also be used but may require slightly longer blanching.
  2. Preparation: Peel and cut into slices, cubes, or sticks for convenience.
  3. Blanching: Boil slices for 2-5 minutes depending on size, then plunge into ice water.
  4. Packing: Drain well and store in airtight freezer bags or containers.

Storage Tips

Carrots can remain frozen for 10-12 months. They are excellent in soups, stews, roasted dishes, and stir-fries.


5. Broccoli

Why Broccoli Freezes Well

Broccoli is nutrient-dense and has a structure that holds up well in the freezer. Freezing preserves its bright green color, flavor, and crisp-tender texture when used in cooked dishes.

How to Freeze Broccoli

  1. Harvesting: Cut broccoli when the florets are firm and tightly closed. Avoid yellowing or flowering heads.
  2. Washing: Rinse thoroughly to remove dirt and insects.
  3. Blanching: Boil florets for 2-3 minutes, then cool in ice water. Stems may require 3-4 minutes.
  4. Packing: Drain well, pat dry, and store in freezer bags or containers.

Storage Tips

Broccoli maintains optimal quality for 8-12 months. It is perfect for soups, casseroles, and stir-fry dishes.


6. Berries (Strawberries, Blueberries, Raspberries)

Why Berries Freeze Well

Berries are highly perishable, but freezing locks in flavor, color, and nutrients. They are ideal for smoothies, desserts, and baking.

How to Freeze Berries

  1. Harvesting: Pick ripe, firm berries for best results. Avoid overripe or damaged fruits.
  2. Washing: Rinse gently and pat dry to avoid excess water, which can cause freezer burn.
  3. Pre-Freezing: Spread berries on a tray in a single layer and freeze for 1-2 hours. This prevents them from clumping together.
  4. Packing: Transfer to airtight freezer bags or containers and label with the date.

Storage Tips

Berries can stay frozen for up to 12 months. Use them directly in smoothies, jams, baked goods, or thaw slowly for fresh-tasting fruit.


Tips for Freezing Success

  1. Blanching Matters: Most vegetables benefit from blanching before freezing, as it stops enzymatic activity that can degrade quality.
  2. Use Airtight Packaging: Air exposure accelerates freezer burn and nutrient loss. Use vacuum-sealed bags or tightly sealed containers.
  3. Label Clearly: Always label packages with the name of the crop and freezing date.
  4. Freeze Quickly: Quick freezing preserves texture and flavor. Avoid leaving crops in the freezer too long before they are fully frozen.
  5. Avoid Freezing Certain Crops Raw: Crops like lettuce, cucumbers, and radishes do not freeze well raw due to high water content.

Conclusion

Freezing is a simple, efficient way to preserve seasonal crops while retaining their nutrients, flavor, and texture. Peas, corn, spinach, carrots, broccoli, and berries all freeze exceptionally well when harvested at peak ripeness and prepared properly. By following proper blanching, packaging, and storage techniques, gardeners and home cooks can enjoy these crops year-round, minimize food waste, and ensure a steady supply of fresh-tasting produce. The next time your garden yields an abundance of these crops, freezing them will allow you to savor the harvest long after the growing season ends.

How To Save Lettuce Seeds for Next Year

How To Save Lettuce Seeds for Next Year

Lettuce is a staple in home gardens, cherished for its crisp texture and versatility in salads, sandwiches, and wraps. While many gardeners purchase seeds annually, saving lettuce seeds from your own garden is a cost-effective and sustainable practice. It allows you to preserve preferred varieties, maintain local adaptability, and ensure a continuous supply for the next growing season.

This guide provides a comprehensive overview of how to save lettuce seeds, covering plant selection, seed maturation, harvesting techniques, cleaning, drying, storage, and germination considerations.


Understanding Lettuce Types and Seed Production

Before saving seeds, it is important to understand the different types of lettuce and their seed-producing behavior.

1. Leaf Lettuce

  • Includes loose-leaf varieties that grow in clusters.
  • Typically bolt (flower) quickly under warm temperatures.
  • Produces seeds on tall flower stalks after bolting.

2. Romaine (Cos) Lettuce

  • Upright heads with elongated leaves.
  • Bolts more slowly than leaf lettuce.
  • Seeds develop on central flower stalks.

3. Butterhead Lettuce

  • Includes Boston and Bibb varieties.
  • Forms compact, soft heads.
  • Bolts slowly; seed production requires patience and careful monitoring.

Tip: Heirloom varieties are ideal for seed saving because they produce true-to-type seeds, whereas hybrid varieties may not retain parent characteristics.


Step 1: Selecting Plants for Seed Saving

The first step is to choose the healthiest plants to ensure high-quality seeds.

Selection Criteria

  1. Vigor and Health: Select plants free from disease, pests, or deformities.
  2. Desired Traits: Pick plants with the flavor, color, leaf texture, or growth habit you wish to preserve.
  3. Isolation: To maintain variety purity, separate different lettuce types by at least 10–20 feet or use physical barriers to prevent cross-pollination.

Choosing strong, healthy plants guarantees that next year’s crop retains desired characteristics.


Step 2: Allow Plants to Bolt and Flower

Lettuce is a biennial plant, meaning it generally flowers in its second year, but in garden practice, it often bolts in the first warm season.

Bolting Process

  • Leaves stop growing, and a tall flower stalk emerges from the center.
  • Flowers are small, yellowish-green, and clustered.
  • Pollination occurs mainly via wind and occasionally insects.

Tip: Protect bolting plants from extreme weather and pests to ensure seed maturity.


Step 3: Harvesting Lettuce Seeds

Once flowers are pollinated, seeds gradually develop and mature. Timing is crucial for maximum viability.

Signs of Seed Maturity

  • Seed heads turn tan or light brown.
  • Seeds are firm and easily detach from the chaff.
  • Flower stalks and seed heads begin to dry naturally on the plant.

Harvesting Techniques

  • Cut the flower stalk when most seeds are mature but before heavy winds or rain scatter them.
  • Place the stalks in a paper bag or container to catch seeds that may fall during handling.
  • Work carefully to avoid losing seeds prematurely.

Harvesting at the right time ensures high germination rates for the next planting season.


Step 4: Cleaning and Drying Seeds

After harvesting, proper cleaning and drying are essential to prevent mold and improve storage longevity.

Cleaning Process

  1. Shake or rub seeds gently to separate them from the dried flower heads.
  2. Remove debris such as dried leaves, stems, and chaff.
  3. Optional: Use a fine mesh sieve to help sift out unwanted material.

Drying Process

  • Spread seeds on a paper towel, screen, or shallow tray in a well-ventilated area.
  • Avoid direct sunlight, which can damage seed viability.
  • Dry for 7–14 days, ensuring seeds are completely dry and brittle.

Proper cleaning and drying are crucial for long-term seed storage.


Step 5: Storing Lettuce Seeds

Once seeds are dry, storage conditions determine their viability for the next season.

Storage Tips

  1. Containers: Use airtight glass jars, envelopes, or resealable bags.
  2. Temperature: Store in a cool, dark location, ideally 32–41°F (0–5°C), such as a refrigerator.
  3. Humidity: Keep seeds dry; moisture accelerates mold and germination.
  4. Labeling: Include variety name and harvest year for easy identification.

When stored properly, lettuce seeds can remain viable for 4–5 years, providing a long-term supply of homegrown crops.


Step 6: Testing Seed Viability

Before planting saved seeds next year, it’s wise to test germination rates.

Germination Test

  1. Place 10–20 seeds on a damp paper towel.
  2. Fold and place inside a plastic bag to retain moisture.
  3. Keep at room temperature (65–75°F) and check daily for sprouting.
  4. After 7–10 days, count sprouted seeds to calculate germination rate.

Tip: If germination falls below 70%, sow more seeds to ensure sufficient seedlings.


Additional Tips for Successful Lettuce Seed Saving

  1. Save seeds from multiple plants: Reduces inbreeding and increases genetic diversity.
  2. Prevent cross-pollination: Separate varieties by distance or physical barriers.
  3. Harvest during dry weather: Wet conditions increase risk of mold.
  4. Rotate seed-saving plants: Maintain healthy garden genetics and avoid disease accumulation.
  5. Label meticulously: Prevent mix-ups between varieties for consistent crop production.

Following these tips ensures a reliable seed supply and high-quality lettuce crops year after year.


Benefits of Saving Lettuce Seeds

  • Cost-effective: Reduces the need to purchase seeds annually.
  • Preserves heirloom varieties: Maintains flavor, texture, and adaptability unique to your garden.
  • Supports sustainability: Encourages self-reliance and reduces dependency on commercial seed sources.
  • Enhances garden knowledge: Teaches observation, patience, and attention to plant life cycles.
  • Encourages biodiversity: Maintaining diverse genetic lines strengthens your garden ecosystem.

Seed saving empowers gardeners to take control of their crops, ensuring availability, variety, and quality for years to come.


Conclusion

Saving lettuce seeds is a practical, rewarding, and sustainable gardening practice that allows gardeners to preserve favorite varieties and ensure a continuous supply for the next growing season. By following the steps of plant selection, allowing plants to bolt, harvesting at the right time, cleaning, drying, storing, and testing viability, gardeners can achieve high germination rates and healthy future crops.

Key takeaways:

  1. Select healthy, vigorous plants free from pests and disease.
  2. Allow plants to bolt and flower, monitoring pollination and weather.
  3. Harvest seeds at full maturity before they are scattered or damaged.
  4. Clean and dry seeds thoroughly to prevent mold and ensure long-term viability.
  5. Store seeds properly in cool, dark, and dry conditions.
  6. Test germination before planting to ensure success.
  7. Maintain genetic diversity by saving seeds from multiple plants.

By implementing these strategies, gardeners can enjoy fresh, homegrown lettuce year after year, reduce costs, and preserve the unique flavors and characteristics of their favorite varieties. Proper seed saving transforms lettuce gardening from a seasonal activity into a long-term, sustainable practice that rewards patience, knowledge, and careful attention to detail.

The Biggest Mistakes Gardeners Make With Lavender—and How to Fix Them

The Biggest Mistakes Gardeners Make With Lavender—and How to Fix Them

Lavender is one of the most cherished herbs in gardens worldwide. Its aromatic foliage, vibrant purple blooms, and ability to attract pollinators make it a favorite among gardeners, chefs, and herbal enthusiasts alike. However, despite its popularity, many gardeners struggle to grow healthy, thriving lavender plants. Mistakes in planting, watering, pruning, and soil care can lead to weak growth, reduced flowering, or even plant death. Understanding these common errors and how to correct them is crucial for cultivating vibrant, long-lasting lavender. This article explores the biggest mistakes gardeners make with lavender and offers expert strategies to fix them.


Mistake 1: Planting Lavender in Poorly Draining Soil

Lavender originates from Mediterranean regions, where soil is well-draining, sandy, and slightly alkaline. One of the most common mistakes is planting lavender in heavy, clay-rich, or waterlogged soil.

Symptoms:

  • Yellowing leaves and stunted growth.
  • Root rot and sudden plant collapse.
  • Fungal infections on stems and leaves.

How to Fix It:

  • Amend Soil: Incorporate sand, gravel, or perlite into garden soil to improve drainage.
  • Raised Beds: Plant lavender in raised beds to allow excess water to drain away.
  • Container Gardening: Use large pots with well-draining potting mix for lavender in areas with poor soil.

Proper soil ensures roots stay healthy and prevents moisture-related diseases.


Mistake 2: Overwatering Lavender

Lavender is drought-tolerant and thrives in dry conditions. Overwatering is a frequent error, particularly in regions with high rainfall or during the plant’s establishment phase.

Symptoms:

  • Wilting despite moist soil.
  • Soft, brown stems near the base.
  • Mold or mildew developing on foliage.

How to Fix It:

  • Water Sparingly: Water only when the soil is dry to the touch.
  • Deep Rooting: Encourage deep root growth by watering less frequently but thoroughly when necessary.
  • Mulching with Care: Use light, inorganic mulch like gravel to retain some moisture without keeping the soil wet.

By adjusting watering practices, gardeners can prevent root rot and support strong, healthy plants.


Mistake 3: Planting Lavender in Full Shade

Lavender requires full sunlight to thrive. Planting it in shaded areas is a common mistake that significantly reduces flower production and plant vigor.

Symptoms:

  • Weak, leggy growth.
  • Sparse or non-existent blooms.
  • Leaves pale or losing fragrance.

How to Fix It:

  • Full Sun Exposure: Plant lavender where it receives at least 6–8 hours of direct sunlight daily.
  • Prune Surrounding Plants: Remove overhanging branches or shrubs that block light.
  • Container Placement: For potted lavender, relocate pots to sunny patios or balconies.

Sunlight fuels photosynthesis, ensuring robust growth and abundant, aromatic blooms.


Mistake 4: Incorrect Pruning Practices

Pruning is essential for maintaining lavender’s shape, health, and bloom productivity. Many gardeners either prune too aggressively, prune at the wrong time, or neglect pruning altogether.

Symptoms:

  • Bare, woody stems with sparse foliage.
  • Reduced flowering the following season.
  • Plants losing their compact, attractive shape.

How to Fix It:

  • Prune Annually: Trim lavender after flowering, typically in late summer or early fall.
  • Avoid Cutting into Old Wood: Lavender does not regenerate well from old, woody stems. Prune just above green growth.
  • Shape the Plant: Lightly trim sides to maintain a neat, compact form while encouraging bushy growth.

Proper pruning promotes airflow, prevents disease, and ensures vigorous blooms year after year.


Mistake 5: Ignoring Soil pH

Lavender prefers slightly alkaline to neutral soil (pH 6.5–7.5). Planting in acidic soil can limit nutrient availability and inhibit growth.

Symptoms:

  • Stunted growth and yellowing leaves.
  • Reduced flowering.
  • Susceptibility to disease and pests.

How to Fix It:

  • Test Soil: Use a soil pH kit to determine acidity or alkalinity.
  • Adjust pH: Add lime to acidic soil to increase alkalinity or incorporate composted organic matter to balance the soil.
  • Fertilization: Use a low-nitrogen fertilizer to avoid excessive leafy growth at the expense of flowers.

Correct soil pH ensures lavender absorbs nutrients effectively, supporting strong, healthy plants.


Mistake 6: Crowding Plants

Lavender requires space for airflow and growth. Overcrowding leads to poor air circulation, increasing the risk of fungal infections and stunted growth.

Symptoms:

  • Mold or mildew on leaves.
  • Slow growth and smaller flowers.
  • Plants competing for water and nutrients.

How to Fix It:

  • Proper Spacing: Plant lavender at least 18–24 inches apart, depending on the variety.
  • Airflow Consideration: Avoid planting near dense shrubs or in tight corners.
  • Prune Regularly: Maintain shape and remove crowded or weak stems to improve ventilation.

Adequate spacing reduces disease risk and ensures each plant receives enough light and nutrients.


Mistake 7: Neglecting Winter Protection

While lavender is hardy, young plants or certain varieties may struggle during harsh winters. Neglecting winter care can lead to frost damage or plant loss.

Symptoms:

  • Brown or black foliage after frost.
  • Dead stems and dieback.
  • Reduced vigor in spring.

How to Fix It:

  • Mulch Lightly: Use gravel or coarse mulch around the base to insulate roots while ensuring drainage.
  • Protect Young Plants: Cover tender plants with frost cloth or move potted lavender to sheltered areas.
  • Avoid Excessive Moisture: Wet soil combined with freezing temperatures can harm roots.

Winter protection ensures lavender survives cold months and returns robustly in spring.


Additional Tips for Lavender Success

  1. Select Appropriate Varieties: English lavender (Lavandula angustifolia) is hardy, while French and Spanish lavenders prefer milder climates.
  2. Container Gardening Considerations: Use large pots with excellent drainage, lightweight potting mix, and rotate pots seasonally if possible.
  3. Pest Management: Lavender is generally pest-resistant, but aphids and spittlebugs can appear; monitor and treat early.
  4. Regular Harvesting: Cut flower spikes regularly for use in dried arrangements, culinary dishes, or essential oils to promote continuous bloom.
  5. Sunlight Maximization: Reflective surfaces or light-colored walls can help increase available sunlight for shaded areas.

By combining correct soil preparation, watering, sunlight, pruning, and winter care, gardeners can cultivate lush, fragrant, and visually stunning lavender.


Conclusion

Lavender is a beautiful and versatile plant, but its success in the garden depends on understanding its natural preferences and avoiding common mistakes. The biggest errors—planting in poor soil, overwatering, insufficient sunlight, incorrect pruning, neglecting soil pH, crowding, and ignoring winter protection—can all compromise plant health and reduce flowering.

By correcting these issues, gardeners can enjoy healthy, thriving lavender plants with abundant blooms, fragrant foliage, and long-lasting beauty. Attention to soil, water, sunlight, pruning, and spacing ensures lavender flourishes year after year, whether in the garden bed or in containers. With the right care, lavender becomes a low-maintenance, high-reward addition that delights the senses and enhances any garden space.