Why Adding Pathway Lighting Elevates Your Garden Look

Why Adding Pathway Lighting Elevates Your Garden Look

A well-designed garden is a combination of natural beauty, thoughtful layout, and functional enhancements. While plants, flowers, and structures form the foundation of a garden, lighting plays a pivotal role in transforming it into a visually captivating, welcoming, and safe space—especially after the sun sets. Among various lighting options, pathway lighting is one of the most effective and versatile ways to elevate the look and feel of your garden. This article explores why adding pathway lighting enhances your garden and provides practical guidance for implementing it seamlessly.


1. Enhances Safety and Navigation

The most immediate and practical benefit of pathway lighting is safety. Gardens, especially those with steps, uneven surfaces, or winding paths, can become hazardous in low light. Well-placed pathway lights illuminate walkways, reducing the risk of trips and falls.

  • Highlight Obstacles: Lighting near steps, slopes, or garden edges ensures that all obstacles are clearly visible.
  • Guides Visitors: Lights act as a visual guide, subtly directing visitors along intended paths, preventing accidental trampling of plants or flower beds.
  • Improves Nighttime Usability: With adequate lighting, gardens become accessible and enjoyable during evenings, extending their usability and social potential.

By combining safety with design, pathway lighting ensures your garden is both practical and aesthetically pleasing.


2. Creates Visual Interest and Ambiance

Pathway lighting is more than functional; it transforms the garden into an enchanting nighttime space. Properly designed lighting enhances textures, colors, and focal points in the garden.

  • Highlighting Features: Lights can draw attention to trees, shrubs, sculptures, water features, or flowering beds, turning ordinary elements into nighttime focal points.
  • Creating Depth: By placing lights at intervals or layering them with different intensities, you can create depth and perspective, making your garden appear larger and more structured.
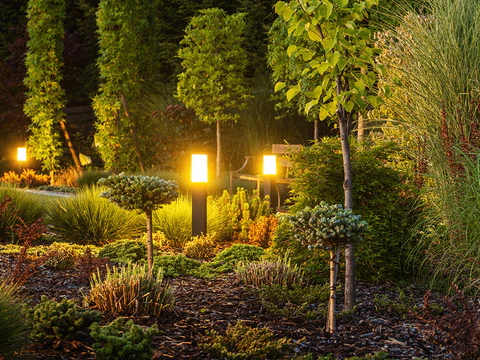
  • Mood and Atmosphere: Warm-toned lights evoke a cozy, inviting feel, while cooler tones add a contemporary and serene ambiance. String lights or low-voltage pathway lights can create a magical atmosphere, perfect for evening gatherings or quiet reflection.

Lighting is an art form in the garden, providing a subtle glow that elevates the beauty of every plant and pathway.


3. Defines Pathways and Garden Zones

Pathway lighting helps define spatial organization in your garden. Even in well-maintained gardens, unclear borders or transitions between zones can make spaces feel cluttered. Lighting provides structure by visually guiding visitors and creating distinct garden areas.

  • Entrance and Exit: Illuminated paths make entrances and exits clear, improving orientation and welcoming guests.
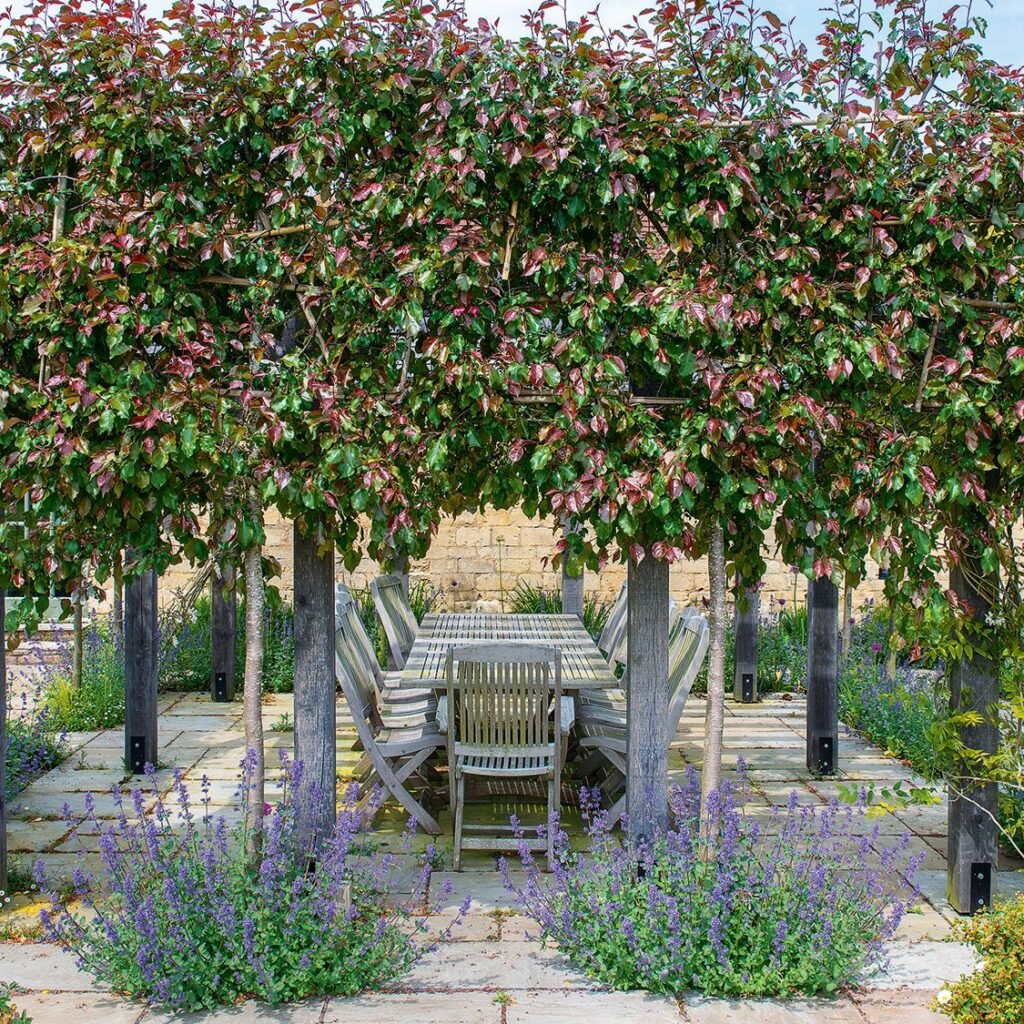
  • Zoning: Use lighting to separate functional areas such as dining spaces, flower beds, water features, or seating corners.
  • Layered Illumination: Combining pathway lights with accent lights or spotlights creates layered effects, adding sophistication and elegance to your garden design.

Defined pathways enhance both the visual appeal and usability of your garden, making nighttime visits as enjoyable as daytime strolls.


4. Increases Safety and Security

Beyond aesthetics, pathway lighting contributes significantly to security. Well-lit gardens deter potential intruders by eliminating dark areas that could serve as hiding spots.

  • Deterrent Effect: Uniform illumination along garden paths signals a well-maintained and monitored property, discouraging unwanted visitors.
  • Integration with Motion Sensors: Motion-activated pathway lights enhance security while conserving energy. Sudden illumination can startle intruders while drawing attention to your garden’s layout.
  • Safe Outdoor Activities: Adequate lighting allows families to safely enjoy the garden at night, whether for social gatherings, children’s play, or evening walks.

By blending safety, security, and design, pathway lighting elevates your garden in multiple dimensions.


5. Types of Pathway Lighting

Selecting the right type of pathway lighting is key to achieving both functionality and aesthetic appeal. Here are popular options:

  • Solar Pathway Lights: Energy-efficient and easy to install, these lights charge during the day and automatically illuminate at dusk. They’re ideal for sustainable, low-maintenance gardens.
  • Low-Voltage LED Lights: Provide bright, consistent lighting, ideal for formal pathways or high-traffic areas. LEDs are long-lasting, customizable, and available in warm or cool tones.
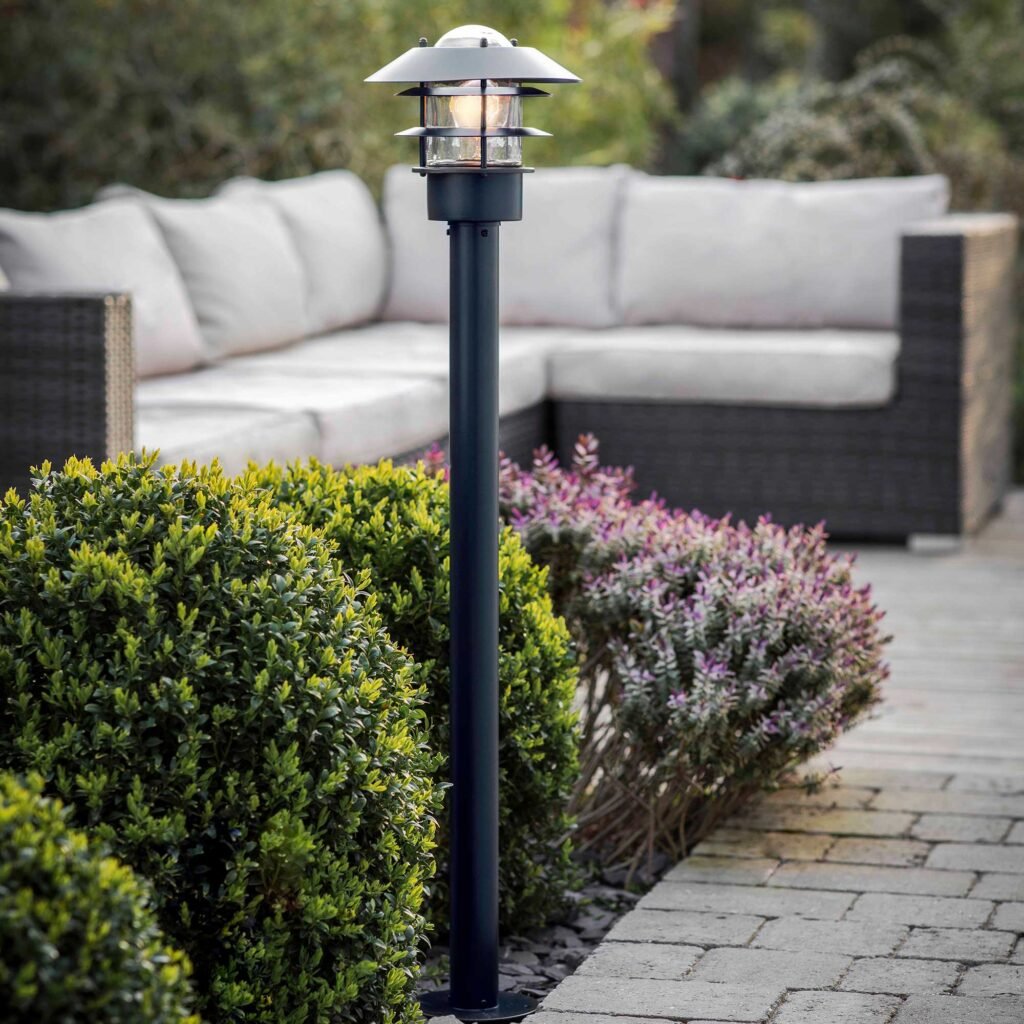
  • Bollard Lights: Short posts with mounted lights create a modern, elegant look. Bollards work well in contemporary gardens and larger pathways.
  • Recessed or In-Ground Lights: Installed flush with the surface, these lights provide subtle illumination without obstructing the pathway, offering a minimalist and sleek appearance.
  • Accent and Spotlighting: Used in combination with pathway lights, these direct attention to key features such as trees, fountains, or sculptures, enhancing the garden’s visual depth.

Choosing the right combination of lighting ensures both safety and style.


6. Placement and Design Tips

Proper placement and design are crucial for achieving maximum impact with pathway lighting. Consider the following principles:

  • Spacing: Position lights 6–10 feet apart for even illumination along pathways. Adjust spacing depending on light intensity and the width of the path.
  • Height and Angle: Low-level lights keep glare minimal while casting a warm, inviting glow. For taller posts or bollards, ensure the light is angled slightly downward to avoid disturbing neighbors or pedestrians.
  • Consistency: Use matching fixtures or complementary designs for a cohesive look. Mismatched lights can create visual clutter.
  • Layering: Combine pathway lights with other garden lighting, such as spotlights for trees or soft uplighting for water features, to add depth and texture.
  • Energy Efficiency: Use LED or solar-powered lights to reduce electricity consumption while maintaining brightness. Timers and motion sensors can further optimize efficiency.

Well-planned placement ensures that pathway lighting enhances both safety and visual appeal without overpowering the natural beauty of the garden.


7. Complementary Landscaping Enhancements

Pathway lighting works best when integrated with surrounding landscaping. Consider combining lighting with:

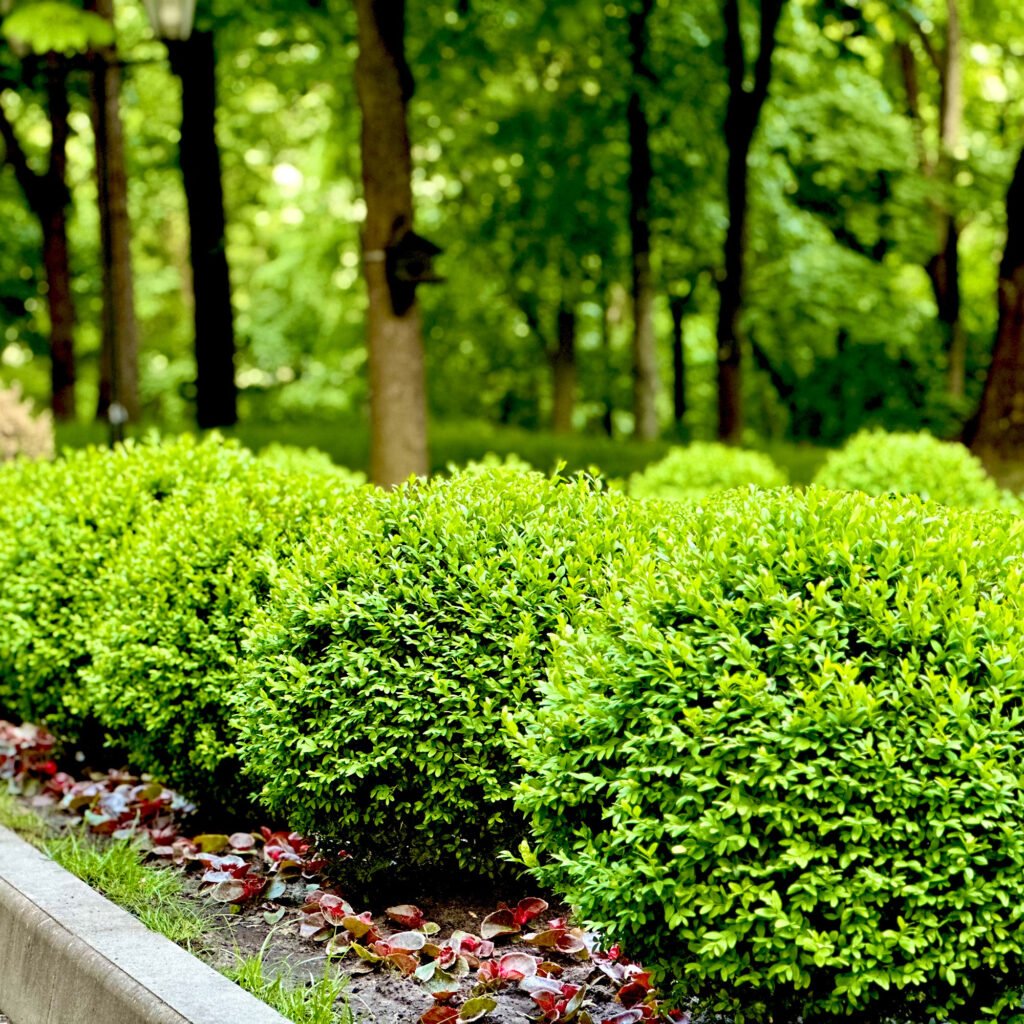
  • Borders and Edging: Plants like low shrubs, ornamental grasses, or ground covers soften the light and add texture.
  • Seasonal Flowers: Highlight colorful blooms for added nighttime interest. For example, late-blooming chrysanthemums or asters glow beautifully under soft lighting.
  • Hardscape Elements: Stone paths, wooden decks, and water features reflect light and create captivating nighttime visuals.
  • Trees and Vines: Uplighting or spotlighting trees and climbing plants adds vertical interest, making pathways feel more immersive and layered.

By coordinating lighting with plants and hardscape elements, your garden becomes a cohesive, multi-dimensional space.


Conclusion

Pathway lighting is one of the most effective ways to elevate your garden’s look and functionality. It provides safety, enhances aesthetics, defines spaces, improves security, and creates a captivating nighttime ambiance. By selecting the right type of lighting, planning placement strategically, and integrating it with landscaping features, you can transform a simple garden path into a visual masterpiece that draws attention and invites visitors to explore.

Investing in pathway lighting is more than a decorative choice—it’s a design strategy that extends the usability of your garden, highlights its beauty, and adds lasting value to your property. A well-lit garden pathway is not only functional but also a symbol of thoughtful design, turning your outdoor space into a luminous, enchanting haven after the sun sets.

The Secret to Keeping Your Sunflowers Tall and Strong All Season

The Secret to Keeping Your Sunflowers Tall and Strong All Season

Sunflowers are one of the most iconic and cheerful flowers in any garden, admired for their vibrant blooms, towering stems, and heliotropic nature. Their striking appearance makes them a favorite for both gardeners and photographers alike. However, growing sunflowers that remain tall, strong, and resilient throughout the season requires more than just planting seeds in the soil and waiting for the sun. Understanding soil preparation, watering, fertilization, support, and pest management is crucial for achieving healthy, sturdy plants.

In this guide, we explore the secrets to keeping your sunflowers tall and strong, including essential techniques, expert tips, and seasonal care recommendations.


Why Sunflowers Can Struggle

Despite being hardy, sunflowers face several challenges that can compromise their height and strength:

  1. Weak Stems – Often caused by inadequate sunlight, poor soil, or lack of nutrients.
  2. Root Instability – Shallow or weak roots can lead to leaning or falling plants.
  3. Nutrient Deficiencies – Lack of nitrogen, phosphorus, or potassium can stunt growth.
  4. Pests and Diseases – Insects, fungal infections, and viruses can weaken the plant.
  5. Environmental Stress – Wind, heavy rain, and uneven watering can damage stems.

By addressing these factors early, gardeners can enjoy sunflowers that stand tall and flourish throughout the season.


Step 1: Choosing the Right Variety

Sunflowers come in a wide range of sizes and growth habits, so choosing the right variety is the first step toward tall, strong plants:

  • Giant Varieties – Ideal for maximum height and large blooms; can reach 8–12 feet. Examples: ‘Mammoth’, ‘American Giant’.
  • Tall Varieties – Moderate height with strong stems; suitable for borders or cut flowers. Examples: ‘Titan’, ‘Autumn Beauty’.
  • Dwarf or Bush Varieties – Compact plants for containers or smaller gardens. Not suitable if your goal is maximum height.

Expert Tip: Giant and tall varieties require full sun, deep soil, and consistent care to achieve their potential height.


Step 2: Soil Preparation for Strong Growth

Healthy soil is the foundation of tall sunflowers:

  • Well-Draining Soil – Sunflowers do not tolerate waterlogged roots; ensure soil drains easily.
  • Rich in Nutrients – Incorporate compost or organic matter to provide essential nutrients for strong stems and roots.
  • Loamy Texture – Loose, loamy soil allows roots to penetrate deeply, stabilizing tall plants.
  • pH Levels – Aim for a slightly acidic to neutral pH (6.0–7.5) for optimal nutrient uptake.

Planting Tip: Work a few inches of compost into the planting area to encourage deep root development, which supports taller, sturdier stems.


Step 3: Proper Planting Techniques

How you plant sunflowers can directly impact their strength:

  • Spacing – Provide adequate spacing (12–36 inches depending on variety) to reduce competition for light and nutrients.
  • Depth – Sow seeds about 1–2 inches deep. Planting too shallow can cause instability; too deep can delay germination.
  • Staggered Planting – For continuous blooms and healthy growth, plant in succession every 2–3 weeks.

Expert Insight: Avoid crowding plants; adequate airflow reduces disease risk and allows stems to thicken naturally.


Step 4: Watering for Height and Strength

Sunflowers require consistent, deep watering to thrive:

  • Establishment Phase – Keep soil moist but not waterlogged during the first 2–3 weeks of germination.
  • Growth Phase – Water deeply once or twice a week, especially during dry spells. Deep watering encourages strong root systems, which support taller stems.
  • Avoid Overhead Watering – Wet foliage can encourage fungal diseases. Water at the base of the plant.

Expert Tip: Mulch around the base to retain moisture, regulate soil temperature, and prevent weeds.


Step 5: Fertilizing for Taller Stems

Sunflowers are nutrient-hungry plants, and proper fertilization is key for height and strong stems:

  • Nitrogen (N) – Promotes lush, leafy growth. Apply a balanced fertilizer early in the season.
  • Phosphorus (P) – Supports root development and flowering. Bone meal or phosphorus-rich fertilizers are ideal.
  • Potassium (K) – Strengthens stems and enhances disease resistance.
  • Fertilization Schedule – Feed sunflowers every 3–4 weeks with a balanced fertilizer (e.g., 10-10-10) during the growing season.

Organic Option: Compost tea or seaweed extract can provide micronutrients for healthy, vigorous growth.


Step 6: Supporting Sunflowers

Tall sunflowers are prone to bending or toppling under wind or heavy blooms:

  • Stakes or Supports – Use bamboo stakes or garden canes for giant varieties. Tie stems loosely with soft garden twine.
  • Fencing or Windbreaks – Protect plants from strong winds by planting near fences or windbreaks.
  • Self-Supporting Varieties – Some hybrids have thicker stems and can withstand wind better without stakes.

Expert Tip: Tie plants loosely and adjust ties as they grow to avoid cutting into the stem.


Step 7: Pruning and Deadheading

While pruning is minimal, some practices encourage stronger growth:

  • Remove Weak Stems – Thin out spindly shoots to concentrate energy on main stems.
  • Deadheading – Remove faded blooms on smaller varieties to encourage continuous flowering.
  • Avoid Cutting Giant Varieties Early – Cutting too early may reduce height and overall strength.

Step 8: Pest and Disease Management

Healthy plants grow taller and stronger. Keep sunflowers free from:

  • Aphids – Can weaken stems; treat with insecticidal soap or neem oil.
  • Fungal Diseases – Powdery mildew or downy mildew; prevent with proper spacing and watering at the base.
  • Birds – Cover young buds or use scare tactics to prevent seed-eating birds.

Expert Insight: Regular inspection ensures early intervention, preventing damage that could stunt growth or reduce stem strength.


Step 9: Sunlight – The Ultimate Growth Factor

Sunflowers are aptly named for their love of the sun:

  • Full Sun – Minimum of 6–8 hours daily is essential for height and flower production.
  • Avoid Shade – Plants in partial or full shade will grow spindly and weak.
  • Heliotropism – Young plants follow the sun, optimizing photosynthesis and encouraging taller growth.

Expert Tip: Choose a planting location with unobstructed sunlight for the longest stems and largest blooms.


Common Mistakes to Avoid

  1. Planting Too Closely – Causes competition for light and nutrients, leading to weak stems.
  2. Overwatering or Waterlogging – Weakens roots and stems, making plants prone to falling.
  3. Neglecting Fertilization – Leads to smaller, less vigorous flowers and shorter stems.
  4. Ignoring Support Needs – Tall varieties require staking to prevent lodging.
  5. Late Planting – Sunflowers need warm soil; planting too late reduces potential height.

Conclusion

The secret to tall, strong sunflowers lies in a combination of proper variety selection, soil preparation, fertilization, watering, sunlight exposure, and support. By choosing giant or tall varieties, planting in nutrient-rich, well-draining soil, providing consistent deep watering, and regularly feeding with a balanced fertilizer, gardeners can enjoy vibrant, towering blooms all season long.

Supporting plants with stakes or windbreaks, managing pests, and ensuring adequate sunlight completes the care plan for healthy, resilient sunflowers. By avoiding common mistakes and following a structured care routine, you can transform your sunflower garden into a breathtaking, enduring display, admired from seedling emergence to full bloom.

How Often to Fertilize Roses for Bigger, Healthier Blooms

How Often to Fertilize Roses for Bigger, Healthier Blooms

Roses are one of the most iconic and beloved flowers in gardens worldwide. Known for their stunning colors, intoxicating fragrance, and symbolic beauty, roses require more than just sunlight and water to thrive—they need proper nutrition to produce bigger, healthier blooms. Fertilization plays a key role in ensuring that rose plants have the essential nutrients for strong growth, vibrant flowers, and disease resistance.

In this guide, we explore how often to fertilize roses, the types of fertilizers available, seasonal fertilization schedules, and best practices to maintain lush, blooming rose gardens.


Why Fertilizing Roses Matters

Roses are heavy feeders. Without adequate nutrients, even the healthiest rose varieties may produce small flowers, weak stems, and poor foliage. Fertilizing roses:

  1. Promotes Flower Production – Ensures bigger, more abundant blooms throughout the growing season.
  2. Supports Root and Stem Growth – Strengthens the plant for better resilience against pests, diseases, and harsh weather.
  3. Enhances Leaf Health – Vibrant, deep-green leaves are an indicator of a healthy, well-nourished rose.
  4. Prevents Nutrient Deficiencies – Yellowing leaves, stunted growth, or poor flowering often indicate nutrient shortages.

Proper fertilization keeps roses in peak health, maximizing both beauty and longevity.


Understanding Rose Nutrient Needs

Roses require three primary macronutrients:

  1. Nitrogen (N) – Promotes leafy growth and lush foliage.
  2. Phosphorus (P) – Encourages strong root development and flower formation.
  3. Potassium (K) – Enhances overall plant health, disease resistance, and bloom quality.

In addition, roses benefit from micronutrients such as iron, magnesium, and calcium, which contribute to vibrant foliage and strong stems.


Types of Fertilizers for Roses

Selecting the right fertilizer is crucial for consistent growth and flowering. Options include:

  1. Granular Fertilizers – Slow-release, easy to apply, and provide nutrients over several weeks. Examples: balanced 10-10-10 or rose-specific formulations.
  2. Liquid Fertilizers – Fast-acting and ideal for boosting blooms during peak flowering. Apply every 2–4 weeks for immediate nutrient absorption.
  3. Organic Fertilizers – Composted manure, bone meal, fish emulsion, or seaweed extracts improve soil fertility naturally and enhance microbial activity.
  4. Specialized Rose Fertilizers – Formulated for roses, often with added micronutrients for optimal growth and flower production.

Expert Tip: Combining organic and synthetic fertilizers can provide immediate nutrition and long-term soil improvement.


How Often to Fertilize Roses

The frequency of fertilization depends on the rose variety, soil fertility, and climate:

1. Newly Planted Roses

  • Avoid fertilizing immediately after planting.
  • Wait 4–6 weeks to allow roots to establish.
  • Apply a light dose of balanced fertilizer to encourage early growth.

2. Established Roses

  • Fertilize every 4–6 weeks from early spring through late summer.
  • Stop fertilizing 6–8 weeks before the first expected frost to allow plants to harden off for winter.

3. Liquid Fertilizer Boost

  • Apply liquid fertilizers every 2–3 weeks during active flowering periods for bigger, more vibrant blooms.

4. Seasonal Considerations

  • Spring: Apply a balanced fertilizer as new growth emerges.
  • Early Summer: Fertilize when the first flush of flowers appears.
  • Mid-Summer: Provide additional feeding for continuous bloom.
  • Late Summer/Fall: Avoid heavy fertilization to prevent tender new growth susceptible to frost.

Expert Insight: Regular feeding encourages a succession of blooms rather than a single peak flowering period.


Tips for Effective Fertilization

  1. Apply Fertilizer Around the Base – Spread evenly around the drip line, where roots actively absorb nutrients.
  2. Water After Fertilizing – Ensures nutrients penetrate the soil and prevents fertilizer burn.
  3. Follow Manufacturer Instructions – Over-fertilizing can damage roots, foliage, and flowers.
  4. Combine with Mulching – Organic mulch retains moisture, regulates soil temperature, and slowly adds nutrients.
  5. Monitor Plant Response – Adjust fertilizer type or frequency based on growth, leaf color, and bloom production.

Common Fertilization Mistakes to Avoid

  1. Over-Fertilizing – Leads to lush foliage but fewer blooms and increased susceptibility to pests and diseases.
  2. Under-Fertilizing – Results in weak growth, smaller flowers, and yellowing leaves.
  3. Ignoring Soil Health – Fertilizers are less effective in compacted or nutrient-depleted soil. Amend soil with compost regularly.
  4. Fertilizing at the Wrong Time – Avoid late-season feeding that encourages tender growth vulnerable to frost.
  5. Using the Wrong Type – Not all fertilizers are suitable for roses; choose balanced, rose-specific, or organic options.

Enhancing Fertilization with Companion Practices

  • Pruning – Prune dead or weak stems in early spring to direct nutrients toward healthy growth and flower production.
  • Mulching – Organic mulch improves nutrient retention, reduces water evaporation, and moderates soil temperature.
  • Soil Testing – Test soil pH (ideal 6.0–6.5) and nutrient levels to customize fertilization schedules.
  • Pest and Disease Management – Healthy roses absorb nutrients efficiently; controlling pests and diseases is critical for optimal growth.

Organic Fertilizer Options for Healthier Roses

  1. Composted Manure – Rich in nitrogen and organic matter.
  2. Bone Meal – Provides phosphorus for strong root and bloom development.
  3. Fish Emulsion – Quick-acting liquid fertilizer that stimulates rapid growth and flowering.
  4. Seaweed Extract – Supplies trace minerals, encourages strong roots, and improves disease resistance.

Expert Tip: Organic fertilizers improve soil structure over time, making roses more resilient and reducing the need for chemical fertilizers.


Conclusion

Fertilizing roses correctly is key to achieving bigger, healthier blooms and maintaining a vibrant, long-lasting garden display. Understanding rose nutrient requirements, selecting the right fertilizer, and following a proper fertilization schedule ensures strong roots, lush foliage, and abundant flowers from spring through late summer.

For newly planted roses, wait 4–6 weeks before the first light feeding. Established roses benefit from fertilization every 4–6 weeks, with liquid fertilizer boosts every 2–3 weeks during peak flowering. Avoid late-season fertilization to protect the plant from frost damage.

By combining regular fertilization with proper watering, pruning, mulching, and soil care, gardeners can maximize the potential of their roses. This holistic approach produces vibrant blooms, healthy foliage, and long-lasting plants, making your rose garden the centerpiece of seasonal beauty and fragrance.

6 Garden Structures That Transform Outdoor Spaces

6 Garden Structures That Transform Outdoor Spaces

A thoughtfully designed garden is more than just plants and flowers—it’s a dynamic outdoor living space that can inspire, relax, and entertain. While lush greenery and colorful blooms provide beauty, the addition of well-planned garden structures can dramatically transform the way a garden is experienced. From creating focal points and adding height to defining spaces and enhancing functionality, garden structures are the secret behind truly remarkable landscapes. In this article, we explore six transformative garden structures and how each can elevate your outdoor space.


1. Arbors and Pergolas: Elegance and Shade Combined

Arbors and pergolas are classic garden structures that combine aesthetic appeal with practical benefits. These structures are perfect for creating entryways, framing views, or defining outdoor seating areas.

  • Arbors: Typically smaller and often used as gateways or entrances, arbors can be adorned with climbing plants like roses, clematis, or wisteria. The lush greenery creates a welcoming, romantic feel, and seasonal flowers add a burst of color.
  • Pergolas: Larger than arbors, pergolas provide shade while maintaining an open, airy feel. Ideal for patios or dining areas, they can be enhanced with retractable canopies, hanging plants, or fairy lights to create an inviting outdoor room.

Benefits:

  • Adds vertical interest to flat gardens.
  • Creates natural shade and a comfortable retreat.
  • Frames focal points, pathways, or seating areas for a more structured garden design.

By strategically placing an arbor or pergola, you can transform a simple backyard into a sophisticated, layered outdoor space.


2. Gazebos: Outdoor Retreats with Style

Gazebos are freestanding structures that serve as focal points while providing shelter from sun and rain. They are ideal for entertaining, relaxing, or simply enjoying the garden in comfort.

  • Design Options: Gazebos come in various styles—classic wooden, modern metal, or charming Victorian. Choose one that complements the architectural style of your home and the overall garden aesthetic.
  • Functional Enhancements: Add outdoor furniture, curtains, or climbing vines for privacy. String lights, hanging lanterns, or even a small fountain nearby can elevate the ambiance.

Benefits:

  • Provides a dedicated space for relaxation and social gatherings.
  • Enhances garden symmetry and balance.
  • Offers an elevated viewpoint for enjoying surrounding landscapes.

A well-placed gazebo turns a garden from purely decorative to functional, offering a private sanctuary or entertaining hub.


3. Garden Fences and Trellises: Structure and Privacy

Fences and trellises do more than mark boundaries; they can shape your garden visually and functionally.

  • Fences: Available in wood, vinyl, or metal, fences can provide privacy, security, and structure. When combined with climbing plants like jasmine, honeysuckle, or ivy, fences become living walls that add texture and color.
  • Trellises: These vertical supports are perfect for training climbing plants. A trellis can divide spaces, create intimate garden “rooms,” or act as a dramatic backdrop for flower beds.

Benefits:

  • Enhances privacy while maintaining a natural aesthetic.
  • Adds vertical dimension and visual interest.
  • Guides the flow of movement and frames specific garden areas.

Fences and trellises are versatile tools that help define space without overwhelming the natural beauty of your garden.


4. Raised Garden Beds and Planters: Functional Beauty

Raised beds and planters are practical structures that also elevate the visual appeal of your garden. These structures allow for organized planting, easier maintenance, and better soil management.

  • Raised Beds: These can be constructed from wood, stone, or metal and are ideal for growing vegetables, herbs, and flowers. Raised beds reduce back strain during gardening and improve drainage, promoting healthier plants.
  • Decorative Planters: Large ceramic, terracotta, or wooden planters can be strategically placed to create focal points or pathways. Use a mix of colors, heights, and textures for visual impact.

Benefits:

  • Improves plant health by enhancing soil drainage and quality.
  • Allows for creative design through geometric arrangements and layering.
  • Adds structure, color, and definition to open garden areas.

Incorporating raised beds and decorative planters is an easy way to combine beauty and functionality in outdoor spaces.


5. Water Features and Ponds: Tranquility in Motion

Water features, including fountains, ponds, and small waterfalls, transform a garden by introducing movement, sound, and reflection. Even small installations can have a significant impact on the overall ambiance.

  • Fountains: Vertical or tiered fountains add elegance and the soothing sound of flowing water. Perfect for patios or entrance areas, they attract birds and create a calming focal point.
  • Ponds: Ponds introduce natural biodiversity, from fish and frogs to water-loving plants. Incorporate lilies, reeds, or marginal plants for a balanced ecosystem.
  • Mini Waterfalls: Adding a cascading feature enhances both visual and auditory appeal. The sound of trickling water reduces stress and creates a meditative garden atmosphere.

Benefits:

  • Adds sensory depth through sound and reflection.
  • Supports wildlife and enhances biodiversity.
  • Provides a natural cooling effect and a relaxing environment.

Water features turn a standard garden into a serene retreat, combining aesthetic beauty with therapeutic qualities.


6. Outdoor Seating and Decks: Inviting Spaces for Living

A garden is not only for viewing but also for living. Seating areas and decks encourage interaction, relaxation, and enjoyment of the outdoors.

  • Benches and Swings: Strategically placed benches or swing seats allow visitors to enjoy scenic views and focal points within the garden. Choose materials and colors that complement surrounding plants.
  • Decks and Patios: A wooden or stone deck provides a level surface for furniture, making outdoor dining, gatherings, or quiet reading possible. Add pergolas, planters, or lighting to integrate decks seamlessly into the garden.
  • Fire Pits or Outdoor Kitchens: Adding functional elements enhances usability, making the garden a year-round retreat.

Benefits:

  • Encourages longer use and enjoyment of the garden.
  • Creates social or contemplative spaces.
  • Blends utility and aesthetics, making the garden a fully functional extension of the home.

By incorporating seating and deck areas, gardens shift from purely decorative spaces to livable outdoor rooms.


Bonus Tips for Maximizing Garden Structures

  • Integration: Ensure all structures harmonize with the garden’s style and color palette. A cohesive design prevents clutter and enhances flow.
  • Vertical and Horizontal Balance: Mix tall and low structures to create visual interest. Arbors, trellises, and pergolas provide vertical height, while raised beds and seating areas balance the horizontal plane.
  • Material Choices: Use materials that complement both your home and natural surroundings—wood, stone, metal, or composite materials all offer unique textures and aesthetics.
  • Seasonal Interest: Consider how structures will interact with seasonal changes. Climbing plants, flowering shrubs, and water features can enhance beauty year-round.

Conclusion

Transforming an outdoor space goes beyond planting flowers or mowing lawns. Garden structures like arbors, gazebos, fences, raised beds, water features, and seating areas add functionality, depth, and aesthetic appeal. By carefully selecting and integrating these elements, you can create a garden that is not only visually stunning but also enjoyable, practical, and engaging throughout the year.

Whether it’s a small backyard or an expansive landscape, the thoughtful use of garden structures transforms ordinary outdoor spaces into extraordinary retreats, offering beauty, relaxation, and enhanced living experiences. These six structures are versatile tools that can guide the design of your garden, ensuring that every corner is purposeful, attractive, and inviting.

7 Summer Flowers That Still Bloom in Early Fall

7 Summer Flowers That Still Bloom in Early Fall

As the warmth of summer fades and the days grow shorter, many gardeners fear that their vibrant flower beds will lose color too soon. However, several summer-blooming flowers are resilient enough to extend their flowering into early fall, providing continuity, beauty, and seasonal charm. By selecting the right species and providing proper care, gardeners can enjoy colorful landscapes well into September and October.

In this guide, we explore seven summer flowers that continue blooming in early fall, along with planting tips, care recommendations, and design ideas to maintain a long-lasting garden display.


Why Choosing Late-Blooming Summer Flowers Matters

Selecting summer flowers that bloom into early fall offers several benefits:

  1. Extended Garden Color – Maintain vibrant blooms as the growing season winds down.
  2. Pollinator Support – Provide nectar for bees, butterflies, and hummingbirds during late-season feeding.
  3. Seamless Seasonal Transition – Bridges the gap between summer annuals and fall perennials.
  4. Low Maintenance – Many late-summer bloomers are hardy and drought-tolerant.

Choosing the right flowers ensures your garden remains lively, visually appealing, and ecologically beneficial as temperatures begin to drop.


1. Zinnias (Zinnia elegans): Colorful and Long-Lasting

Zinnias are among the most versatile summer flowers, known for their bold colors and extended bloom period.

  • Bloom Time – Summer through early fall, often until the first frost.
  • Appearance – Available in shades of red, orange, yellow, pink, and white, with single and double blooms.
  • Care Tips – Full sun is essential. Deadhead spent flowers regularly to encourage continuous blooming. Water consistently but avoid overwatering.
  • Additional Benefits – Zinnias attract butterflies and hummingbirds, enhancing garden activity.

Expert Tip: Plant zinnias in well-draining soil and space plants adequately to prevent disease and ensure air circulation.


2. Marigolds (Tagetes spp.): Bright and Hardy

Marigolds are classic summer flowers that persist into early fall, even in cooler nights.

  • Bloom Time – Late spring through early fall.
  • Appearance – Vibrant yellow, gold, and orange blooms with bushy foliage.
  • Care Tips – Grow in full sun with well-draining soil. Fertilize lightly to prolong flowering. Deadhead regularly to maintain color.
  • Additional Benefits – Marigolds deter pests such as nematodes and aphids, making them excellent companion plants.

Expert Tip: French and African marigolds are especially long-blooming and heat-tolerant.


3. Cosmos (Cosmos bipinnatus): Airy, Elegant Blooms

Cosmos add delicate, airy color to gardens and continue blooming well into early fall.

  • Bloom Time – Summer through early autumn.
  • Appearance – Daisy-like flowers in pink, white, red, and orange with fine, fern-like foliage.
  • Care Tips – Thrive in poor to average soil with full sun. Deadhead regularly for continuous blooms. Avoid over-fertilizing, which encourages leaf growth over flowers.
  • Additional Benefits – Attract pollinators and provide a light, naturalistic aesthetic.

Expert Tip: Cosmos are ideal for mass planting or mixed borders, creating a soft, colorful backdrop for other late-season flowers.


4. Sunflowers (Helianthus annuus): Tall and Cheerful

Sunflowers are iconic summer plants that can continue blooming into early fall, depending on the variety.

  • Bloom Time – Summer through early autumn. Dwarf varieties flower faster; taller varieties may take longer to mature.
  • Appearance – Bright yellow blooms with dark centers, ranging from 1–12 feet in height.
  • Care Tips – Full sun and well-draining soil are essential. Provide support for tall varieties and water consistently. Deadhead spent blooms for continued flowering.
  • Additional Benefits – Attract pollinators and provide seeds for birds and wildlife.

Expert Tip: Plant a succession of sunflower varieties with staggered bloom times to enjoy flowers well into fall.


5. Petunias (Petunia spp.): Cascading Color in Borders and Containers

Petunias are highly adaptable and maintain their blooms well into early fall if cared for properly.

  • Bloom Time – Summer through early fall.
  • Appearance – Available in a wide range of colors and patterns, including single, double, and ruffled blooms.
  • Care Tips – Full sun is preferred. Fertilize regularly with a balanced, water-soluble fertilizer. Pinch back stems to encourage bushy growth and prolong flowering.
  • Additional Benefits – Ideal for containers, window boxes, and cascading effects in garden beds.

Expert Tip: Choose heat-tolerant or wave-type petunias for long-lasting color in hot summer and early fall conditions.


6. Celosia (Celosia argentea): Unique Texture and Vibrant Color

Celosia, with its distinctive feathery or cockscomb-like blooms, continues producing color into early fall.

  • Bloom Time – Summer to early autumn.
  • Appearance – Bright red, orange, pink, and yellow plumes with dramatic texture.
  • Care Tips – Full sun with well-draining soil. Water consistently and avoid overhead watering to prevent fungal diseases. Deadhead for prolonged flowering.
  • Additional Benefits – Adds striking vertical interest and contrast in mixed beds or containers.

Expert Tip: Celosia thrives in warm soil; late plantings in August can still produce blooms by early fall.


7. Salvia (Salvia splendens and Salvia farinacea): Elegant Spikes of Color

Salvia is a hardy, heat-tolerant flower that continues to bloom as summer wanes.

  • Bloom Time – Mid-summer through early autumn.
  • Appearance – Spikes of deep blue, purple, red, or pink flowers. Attractive, aromatic foliage adds sensory appeal.
  • Care Tips – Full sun is essential. Regular watering encourages longer blooming periods. Deadhead or cut back spent flower spikes to prolong color.
  • Additional Benefits – Salvia attracts bees, butterflies, and hummingbirds, providing ecological benefits to the garden.

Expert Tip: Salvia’s vertical form makes it ideal for borders, mixed beds, or container planting with trailing flowers.


Tips for Extending Bloom into Early Fall

  1. Deadheading – Regularly remove spent flowers to encourage continuous blooming.
  2. Fertilization – Use a balanced, water-soluble fertilizer every 2–3 weeks to sustain flowering.
  3. Watering – Provide consistent moisture, especially during hot summer days, but avoid waterlogging.
  4. Succession Planting – Stagger plantings every few weeks for continuous color into early fall.
  5. Sunlight and Location – Most summer flowers need full sun to maintain vigor; ensure at least 6–8 hours of sunlight daily.

Common Mistakes to Avoid

  1. Neglecting Deadheading – Failing to remove spent blooms shortens flowering duration.
  2. Overcrowding Plants – Dense planting reduces airflow, increasing disease risk.
  3. Ignoring Water Needs – Summer flowers require consistent watering to thrive into fall.
  4. Fertilizing Improperly – Excess nitrogen may produce foliage at the expense of flowers.
  5. Planting in Poor Soil – Adequate drainage and fertility are key for long-lasting blooms.

Designing a Summer-to-Fall Transition Garden

  • Layer Colors and Heights – Combine tall sunflowers or salvia with mid-height zinnias and lower violas or petunias.
  • Mix Textures – Use celosia for vertical accents, petunias for cascading color, and cosmos for airy softness.
  • Container Gardening – Extend blooming into fall by moving containers to sunny spots or protected areas.
  • Companion Planting – Pair flowers with ornamental grasses or hardy perennials for a natural transition from summer to autumn.

Conclusion

By choosing zinnias, marigolds, cosmos, sunflowers, petunias, celosia, and salvia, gardeners can enjoy a vibrant, colorful landscape well into early fall. These resilient flowers provide continuous blooms, attract pollinators, and help bridge the seasonal gap between summer and fall.

Proper care—including deadheading, consistent watering, fertilization, and sunlight management—ensures that these summer flowers continue thriving even as temperatures begin to dip. With thoughtful selection and garden design, it is possible to extend the beauty of summer blooms, creating a seamless transition into the cooler months and maintaining a lively, colorful garden into early autumn.

5 Evergreen Shrubs That Keep Your Garden Vibrant Year-Round

5 Evergreen Shrubs That Keep Your Garden Vibrant Year-Round

A thriving garden is not just about seasonal flowers—it’s about structure, texture, and color throughout the year. Evergreen shrubs are the backbone of a year-round landscape, providing foliage, visual interest, and habitat for wildlife regardless of the season. Unlike deciduous plants, which lose their leaves in autumn, evergreens maintain their greenery, helping gardens look lush, vibrant, and well-maintained even in winter.

This guide explores five outstanding evergreen shrubs that enhance your garden, along with planting tips, care instructions, and ideas to keep your landscape attractive all year long.


Why Evergreen Shrubs Are Essential for a Year-Round Garden

Evergreen shrubs serve multiple purposes in the landscape:

  1. Constant Visual Appeal – Provide greenery and structure even when other plants are dormant.
  2. Privacy and Screening – Ideal for hedges, windbreaks, and garden borders.
  3. Wildlife Habitat – Offer shelter and food for birds and beneficial insects during colder months.
  4. Low Maintenance – Many evergreen shrubs are hardy and resilient, reducing seasonal upkeep.

Incorporating these shrubs into your garden ensures that it remains appealing, cohesive, and lively throughout the year.


1. Boxwood (Buxus spp.): Classic, Elegant Foliage

Boxwood is a timeless evergreen shrub, renowned for its dense, glossy foliage and adaptability.

  • Growth Habit – Slow-growing, compact, and ideal for hedges, borders, and topiaries.
  • Foliage – Small, dark green leaves that retain color year-round.
  • Planting Tips – Prefers well-draining soil and partial to full sun. Plant in spring or fall for best results.
  • Care Tips – Minimal pruning required; trim to shape in late spring or early summer. Fertilize lightly in early spring.
  • Additional Benefits – Resistant to deer and rabbits; provides excellent foundation planting for flower beds.

Expert Insight: Boxwood’s versatility allows gardeners to create formal hedges, geometric topiaries, or natural-looking borders that anchor garden design.


2. Azaleas (Evergreen Varieties): Colorful Spring and Lush Foliage

Evergreen azaleas combine year-round greenery with stunning spring blooms, offering seasonal excitement.

  • Growth Habit – Compact to medium-sized shrubs with a rounded form.
  • Foliage – Glossy green leaves that persist through winter.
  • Planting Tips – Prefer acidic, well-draining soil and partial shade. Mulch to retain soil moisture and regulate temperature.
  • Care Tips – Fertilize with acid-loving plant fertilizer in early spring and after flowering. Prune lightly after blooms fade.
  • Additional Benefits – Blooms in spring add seasonal color; evergreen foliage maintains garden vibrancy in fall and winter.

Expert Insight: Plant azaleas near walkways, patios, or garden entrances to enjoy greenery and color throughout the year.


3. Holly (Ilex spp.): Festive, Berries, and Year-Round Green

Holly is a standout evergreen shrub with distinctive foliage and bright berries that persist through winter.

  • Growth Habit – Upright or spreading, depending on variety; some are ideal for hedges.
  • Foliage – Dark green, glossy leaves, often with spiny edges.
  • Planting Tips – Prefers acidic, well-drained soil with full sun to partial shade. Plant male and female varieties for berry production.
  • Care Tips – Minimal pruning; water during dry periods. Fertilize in spring with an acid-loving plant fertilizer.
  • Additional Benefits – Bright red berries attract birds, providing natural winter interest.

Expert Insight: Holly adds a festive touch during winter and is perfect for creating privacy screens, foundation plantings, or natural wildlife gardens.


4. Rhododendrons (Evergreen Varieties): Majestic Blooms and Lush Greenery

Evergreen rhododendrons provide large, glossy leaves and spectacular flowers, combining year-round greenery with seasonal drama.

  • Growth Habit – Medium to large shrubs; can serve as focal points in landscapes.
  • Foliage – Broad, dark green leaves that remain through winter.
  • Planting Tips – Thrive in acidic, well-draining soil with partial shade. Avoid heavy clay soils that retain water.
  • Care Tips – Mulch to maintain soil moisture and protect roots. Fertilize with acid-loving plant fertilizer in early spring. Prune lightly after flowering.
  • Additional Benefits – Spring blooms attract pollinators and create a dramatic landscape feature.

Expert Insight: Plant rhododendrons as backdrop shrubs or combined with perennials to provide continuous interest and structure.


5. Camellias (Evergreen Varieties): Glossy Leaves and Winter Blooms

Evergreen camellias are prized for their glossy foliage and winter blooms, providing color when most plants are dormant.

  • Growth Habit – Medium-sized, upright shrubs with rounded form.
  • Foliage – Glossy, deep green leaves that persist year-round.
  • Planting Tips – Prefer acidic, well-draining soil and partial shade. Protect from harsh winds and winter sun.
  • Care Tips – Water consistently; mulch to retain moisture. Fertilize with acid-loving fertilizer in spring. Prune after flowering to maintain shape.
  • Additional Benefits – Winter blooms offer color and fragrance, brightening gardens when few other plants are flowering.

Expert Insight: Camellias work beautifully as specimen plants, mixed borders, or container plantings, providing structure, greenery, and seasonal blooms.


Tips for Maintaining Evergreen Shrubs Year-Round

  1. Proper Planting – Ensure well-draining soil, correct spacing, and appropriate sunlight for each species.
  2. Mulching – Apply a 2–3 inch layer of mulch to retain moisture, regulate soil temperature, and protect roots.
  3. Watering – Evergreen shrubs need consistent water, especially during dry winter months. Avoid overwatering, which can cause root rot.
  4. Fertilization – Use slow-release or species-specific fertilizers to support growth and maintain vibrant foliage.
  5. Pruning – Minimal pruning maintains natural shape; prune after flowering for flowering varieties. Remove dead or diseased branches promptly.

Common Mistakes to Avoid

  1. Planting in Poorly Draining Soil – Can lead to root rot and weakened plants.
  2. Overcrowding Shrubs – Reduces airflow and increases disease risk.
  3. Neglecting Winter Protection – Some evergreen shrubs benefit from windbreaks or burlap wrapping in harsh climates.
  4. Over-Fertilizing – Excess nitrogen can promote leafy growth at the expense of flowers or hardiness.
  5. Ignoring Pest and Disease Management – Monitor for aphids, scale, or fungal issues, especially in humid climates.

Designing a Year-Round Evergreen Garden

  • Layering and Structure – Combine tall holly and rhododendrons with mid-height azaleas and compact boxwoods for a dynamic, multi-layered landscape.
  • Color and Texture – Use camellias and rhododendrons for glossy foliage and seasonal blooms, and boxwoods for structural contrast.
  • Borders and Hedges – Holly, boxwood, and camellias can form formal or informal hedges, adding privacy and aesthetic appeal.
  • Wildlife-Friendly Planting – Plant berry-producing hollies near shrubs and trees to provide food and shelter for birds during winter.

Conclusion

Evergreen shrubs are essential for creating gardens that remain vibrant year-round. By planting boxwood, azaleas, holly, rhododendrons, and camellias, gardeners can enjoy constant greenery, structural interest, and seasonal blooms from spring through winter.

Proper selection, planting, care, and maintenance ensure that these shrubs thrive, providing low-maintenance, visually appealing landscapes throughout the year. Evergreen shrubs not only enhance aesthetic value but also contribute to ecological balance, offering shelter and sustenance to wildlife.

Incorporating these resilient plants into your garden ensures perennial beauty, structure, and color, making your outdoor space a thriving, attractive sanctuary no matter the season.

5 Hardy Flowers That Survive the First Frost

5 Hardy Flowers That Survive the First Frost

As the days grow shorter and temperatures dip, many gardeners face the challenge of keeping their gardens vibrant through the first frost. While tender annuals fade with the cold, some hardy flowers can withstand chilly nights, frost, and even early snow. Planting these resilient species allows you to maintain color, texture, and life in your garden well into late autumn, bridging the gap between summer blooms and spring perennials.

In this guide, we explore five frost-tolerant flowers that can survive the first frost, along with planting tips, care instructions, and ideas for creating a hardy, colorful autumn garden.


Why Frost-Hardy Flowers Matter

Frost-hardy flowers provide several advantages for late-season gardeners:

  1. Extended Garden Color – Enjoy blooms even as temperatures drop.
  2. Low Maintenance – These flowers are tough and resilient, requiring minimal protection from cold.
  3. Wildlife Support – Many frost-tolerant flowers provide food for pollinators and birds when other plants fade.
  4. Winter Preparation – Some hardy flowers also help prepare the soil and landscape for overwintering plants.

Choosing the right species ensures your garden stays lively and attractive as other plants succumb to frost.


1. Pansies (Viola x wittrockiana): Vibrant and Versatile

Pansies are among the most popular frost-hardy flowers, appreciated for their colorful, cheerful faces.

  • Frost Tolerance – Pansies can survive temperatures as low as 20°F (-6°C).
  • Bloom Time – Ideal for late summer through early winter in mild climates.
  • Planting Tips – Plant in well-draining soil with full sun to partial shade. Mulch around roots to maintain soil warmth.
  • Care Tips – Deadhead spent blooms to encourage continuous flowering. Fertilize lightly every 3–4 weeks for sustained color.
  • Additional Benefits – Edible flowers add charm to salads and desserts.

Expert Insight: Pansies are ideal for container gardens, window boxes, and flower beds, bringing bold color when many other plants have wilted.


2. Chrysanthemums (Mums): Classic Autumn Bloomers

Chrysanthemums are iconic fall flowers that are naturally hardy and long-lasting.

  • Frost Tolerance – Hardy varieties withstand light frost and cooler nights.
  • Bloom Time – Late summer through early fall, with blooms peaking just as other flowers fade.
  • Planting Tips – Choose garden mums over florist varieties for better frost resistance. Plant in well-draining soil with full sun exposure.
  • Care Tips – Pinch back stems in early summer to encourage bushy growth and more blooms. Water regularly but avoid waterlogging.
  • Additional Benefits – Mums come in rich colors such as gold, bronze, red, and white, adding autumn warmth to the landscape.

Expert Insight: Chrysanthemums are perfect for garden beds and borders, creating a layered autumn display when paired with ornamental grasses.


3. Snapdragons (Antirrhinum majus): Towering Color Survivors

Snapdragons are hardy flowers that maintain structure and color even after a frost.

  • Frost Tolerance – Survive light frost and even tolerate a few nights of freezing temperatures.
  • Bloom Time – Late summer to early winter, depending on planting time and climate.
  • Planting Tips – Grow in fertile, well-draining soil with full sun to partial shade. Space plants 6–12 inches apart for proper airflow.
  • Care Tips – Deadhead regularly to extend blooming. Taller varieties may need staking for support during windy autumn weather.
  • Additional Benefits – Attractive to pollinators such as bees and hummingbirds.

Expert Insight: Snapdragons’ vertical spikes and variety of colors make them excellent for containers and borders, adding structure to late-season gardens.


4. Violas (Viola cornuta): Compact and Colorful Companions

Violas are close relatives of pansies, offering smaller flowers but similar frost-hardiness and extended bloom.

  • Frost Tolerance – Can survive temperatures around 20–25°F (-6 to -4°C).
  • Bloom Time – Late summer through early winter. Repeat flowering possible with deadheading.
  • Planting Tips – Plant in moist, well-draining soil in partial to full sun. They perform well in containers, hanging baskets, or edging beds.
  • Care Tips – Remove faded flowers to encourage new blooms. Fertilize monthly for continuous growth.
  • Additional Benefits – Compact size makes violas ideal for mass planting, creating a carpet of color.

Expert Insight: Violas are perfect companions to pansies, providing extended color and versatility in garden design.


5. Ornamental Kale and Cabbage (Brassica oleracea): Foliage That Endures

While not flowering in the traditional sense, ornamental kale and cabbage provide dramatic foliage that survives frost, adding texture and color to the garden.

  • Frost Tolerance – Extremely hardy; leaves become more vibrant after frost exposure.
  • Appearance – Rosette-shaped foliage in shades of purple, pink, white, and green.
  • Planting Tips – Plant in full sun to partial shade in fertile, well-draining soil. Space 12–18 inches apart for large rosettes.
  • Care Tips – Water consistently to prevent leaf scorching. Remove yellowing leaves to maintain appearance.
  • Additional Benefits – Long-lasting landscape impact; pairs well with flowering frost-tolerant plants.

Expert Insight: Ornamental kale and cabbage add a structural, colorful base to autumn flower beds, complementing pansies, mums, and snapdragons.


Tips for Growing Frost-Hardy Flowers

  1. Timing Planting – Plant hardy flowers 4–6 weeks before the first expected frost to allow establishment.
  2. Soil Preparation – Enrich soil with compost and ensure good drainage to prevent frost-related root damage.
  3. Mulching – Apply a 2–3 inch layer of mulch to protect roots and maintain soil warmth.
  4. Watering – Water deeply but infrequently; frost-hardy plants tolerate cooler temperatures but still need moisture.
  5. Protection Measures – Use frost cloths or cloches for tender varieties during unexpected freezes.

Common Mistakes to Avoid

  1. Planting Too Late – Frost-tolerant flowers need time to establish roots before the first freeze.
  2. Overcrowding – Dense planting reduces airflow and increases disease risk.
  3. Ignoring Sunlight Requirements – Even frost-hardy flowers need adequate sunlight for maximum color.
  4. Excess Fertilization – Too much nitrogen can weaken plants, making them less frost-resistant.
  5. Neglecting Maintenance – Remove dead foliage and spent flowers to promote continued growth.

Designing a Late-Season Frost-Hardy Garden

  • Layer Colors and Heights – Use taller snapdragons or chrysanthemums at the back and compact pansies or violas at the front.
  • Combine Foliage and Flowers – Incorporate ornamental kale with flowering plants for texture and extended interest.
  • Use Containers and Borders – Frost-hardy flowers thrive in containers, raised beds, and borders for flexible design.
  • Succession Planting – Plant a mix of early and late-season varieties to maintain continuous color through the first frost.

Conclusion

The first frost does not mean the end of garden beauty. By planting pansies, chrysanthemums, snapdragons, violas, and ornamental kale, gardeners can enjoy colorful, resilient, and low-maintenance blooms well into late autumn.

Frost-hardy flowers extend the gardening season, provide habitat and food for pollinators, and create visually stunning landscapes when other plants fade. Proper timing, soil preparation, watering, and maintenance are key to ensuring these flowers thrive despite colder temperatures.

With strategic selection and care, your garden can remain vibrant, lively, and colorful even after the first frost, offering both aesthetic delight and ecological benefits during the transition from autumn to winter.

The Best Time to Plant Tulips for a Stunning Spring Display

The Best Time to Plant Tulips for a Stunning Spring Display

Tulips are among the most iconic and beloved spring flowers, known for their vibrant colors, elegant shapes, and ability to transform gardens into dazzling landscapes. Whether planted in borders, containers, or massed beds, tulips create a breathtaking display that signals the arrival of spring. However, achieving a stunning tulip display requires more than just choosing the right variety—it starts with planting at the optimal time.

In this guide, we explore the best time to plant tulip bulbs, how to prepare soil, select varieties, care for bulbs, and maximize blooms for a spectacular spring garden.


Why Timing Matters for Tulip Planting

Tulips are spring-blooming bulbs, which means their growth cycle depends on a period of cold dormancy. Planting at the correct time ensures that the bulbs:

  1. Develop Strong Roots – Adequate time in cool soil allows roots to grow before winter.
  2. Bloom Abundantly – Properly timed planting enhances flower size, color, and uniformity.
  3. Avoid Rot and Disease – Planting too early in warm soil increases the risk of bulb rot or fungal infections.
  4. Synchronize with Spring Conditions – Bulbs planted at the right time bloom when temperatures and daylight are ideal.

Timing is critical because tulips require a cool period of 12–16 weeks to break dormancy and bloom successfully.


The Ideal Planting Window

The best time to plant tulip bulbs generally depends on climate and soil temperature:

  • Northern Climates (USDA Zones 3–7)
    • Plant bulbs in mid-September to late October before the ground freezes.
    • Soil temperatures should ideally be 45–60°F (7–16°C).
  • Southern Climates (USDA Zones 8–10)
    • Pre-chill bulbs in the refrigerator for 8–12 weeks before planting in late November to January.
    • Avoid placing bulbs near fruits, as ethylene gas can damage them.
  • General Rule – Plant bulbs 6–8 weeks before the first hard frost, allowing roots to establish before winter.

Expert Tip: Tulips require a cool period to bloom properly. In warmer regions, pre-chilling bulbs replicates winter conditions to ensure flowers develop in spring.


Choosing the Right Tulip Varieties

Tulips come in hundreds of varieties, offering a spectrum of colors, shapes, and bloom times. Consider the following for a stunning display:

  1. Early Bloomers – Tulipa ‘Apricot Beauty’ or ‘Strong Gold’ for blooms in early spring.
  2. Mid-Season Bloomers – Tulipa ‘Queen of Night’ or ‘Apeldoorn’ provide rich colors during peak spring.
  3. Late Bloomers – Tulipa ‘Angelique’ or ‘Rem’s Favorite’ extend the flowering season.
  4. Height and Form – Mix tall, single tulips with shorter, fringed or parrot varieties for texture and interest.

Planting Tip: Plant multiple varieties together to create continuous blooms throughout spring rather than a single flush.


Preparing the Soil for Tulips

Tulips thrive in well-drained, fertile soil. Proper soil preparation ensures strong growth and abundant blooms:

  • Soil Type – Light, sandy, or loamy soil is ideal. Avoid heavy clay, which retains moisture and promotes bulb rot.
  • Soil pH – Slightly acidic to neutral soil (6.0–7.0) is preferred.
  • Amending Soil – Incorporate organic matter such as compost, well-rotted manure, or bulb fertilizer to improve fertility and drainage.
  • Raised Beds or Mounds – In areas with heavy rainfall, plant bulbs in raised beds to prevent standing water.

Planting Tulip Bulbs

Follow these steps to ensure tulips thrive:

  1. Depth and Spacing
    • Plant bulbs 6–8 inches deep (measured from the base of the bulb).
    • Space bulbs 4–6 inches apart for small bulbs and 6–8 inches for larger bulbs.
  2. Orientation
    • Place bulbs pointed end up. Roots grow downward while the flower stems grow upward.
  3. Watering
    • Water bulbs thoroughly after planting to encourage root development.
    • Avoid overwatering; tulip bulbs do not like soggy soil.
  4. Mulching
    • Apply a 2–3 inch layer of mulch to regulate soil temperature, retain moisture, and protect bulbs from frost.

Caring for Tulips Through Winter

Once planted, tulips require minimal care until spring:

  • Temperature Needs – A cold period of 12–16 weeks is essential for flowering.
  • Protection from Animals – Tulip bulbs are susceptible to squirrels, deer, and rodents. Use chicken wire or repellents to prevent digging.
  • Avoid Fertilizing in Winter – Fertilize in fall at planting time or early spring when shoots appear.

Spring Care for a Stunning Display

Proper care in early spring ensures vibrant blooms:

  1. Watering – Water sparingly; tulips generally rely on winter moisture. Excess water can lead to fungal disease.
  2. Fertilizing – Apply a low-nitrogen fertilizer at the base of emerging shoots to support flowering.
  3. Supporting Tall Varieties – Stake tall tulips if heavy blooms or wind threatens stems.
  4. Deadheading – Remove spent blooms to encourage bulb energy storage for the next season. Avoid cutting foliage too early; leaves should die back naturally to replenish the bulb.

Common Mistakes to Avoid

  1. Planting Too Shallow or Too Deep – Shallow planting risks frost damage; too deep delays or prevents blooming.
  2. Ignoring Soil Drainage – Waterlogged bulbs are prone to rot.
  3. Late Planting – Planting after the optimal window may result in poor root development and weak blooms.
  4. Over-Fertilizing – Excess nitrogen can lead to lush foliage but weak flowers.
  5. Premature Leaf Removal – Cutting leaves too early prevents energy storage, reducing next year’s bloom quality.

Extending Your Tulip Display

To maximize visual impact:

  • Plant in Drifts or Groups – Massed bulbs create a stronger visual effect than single rows.
  • Mix Heights and Colors – Combine early, mid, and late-blooming varieties to extend the flowering season.
  • Companion Planting – Pair tulips with low-growing perennials or groundcovers like pansies, forget-me-nots, or creeping phlox to hide fading foliage and maintain color in the garden.
  • Succession Planting – Plant additional bulbs in late fall for staggered blooming.

Conclusion

Tulips are the crown jewels of spring gardens, and their beauty starts with planting at the right time. By understanding the optimal planting window, selecting the right varieties, preparing well-drained soil, and following proper care techniques, gardeners can ensure a stunning display of color each spring.

Planting bulbs in mid-September to late October in cooler climates—or pre-chilling bulbs in warmer regions—sets the stage for vigorous growth, strong roots, and abundant flowers. Combine early, mid, and late-blooming varieties for continuous spring color, and pay attention to soil, watering, and deadheading practices for long-lasting beauty.

With careful planning and attention to detail, tulips will reward gardeners with brilliant blooms, elegant form, and a sense of seasonal delight, making every spring garden a show-stopping spectacle.

5 Easy-Care Annuals That Bloom From Spring Until Autumn

5 Easy-Care Annuals That Bloom From Spring Until Autumn

If you’re looking for long-lasting color in your garden without constant fuss, easy-care annuals are the perfect solution. Unlike perennials, which return each year, annuals complete their life cycle in one growing season. However, many are known for their vibrant flowers and extended blooming periods, often from spring right through until the first frost. With minimal maintenance, these plants can provide non-stop beauty, attract pollinators, and fill your garden beds, containers, or hanging baskets with cheerful displays.

In this article, we’ll explore five easy-care annuals that bloom continuously from spring until autumn, along with practical care tips to help you enjoy a low-maintenance yet colorful garden.


Why Choose Easy-Care Annuals?

Before diving into the plant list, let’s look at why easy-care annuals are such valuable additions to the garden:

  • Extended Bloom Time: Many annuals flower nonstop from spring to fall.
  • Low Maintenance: These plants generally require little more than watering and occasional deadheading.
  • Versatility: They grow well in garden beds, borders, pots, and hanging baskets.
  • Instant Impact: Annuals grow quickly, providing color faster than many perennials.
  • Pollinator-Friendly: Their bright flowers attract bees, butterflies, and hummingbirds.

For beginner gardeners or those with limited time, these plants provide the perfect balance of beauty and simplicity.


1. Marigolds (Tagetes spp.)

Marigolds are among the most popular and foolproof annuals, cherished for their sunny blooms and resilience.

Features and Care

  • Bloom Colors: Shades of yellow, orange, red, and bi-color blends.
  • Height: 6 inches to 3 feet, depending on the variety.
  • Planting: Full sun with well-draining soil.
  • Watering: Moderate; avoid waterlogging.
  • Maintenance: Remove spent flowers to encourage continuous blooms.

Why Marigolds Are Easy-Care Annuals

Marigolds are heat-tolerant, pest-resistant, and versatile in their uses. They repel harmful insects, making them excellent companion plants for vegetables. Their bright flowers create a cheerful display in beds, borders, or containers, blooming consistently until frost.


2. Petunias (Petunia spp.)

Petunias are another garden classic, prized for their abundant flowers and wide range of colors and patterns.

Features and Care

  • Bloom Colors: Pink, purple, red, white, blue, and striped varieties.
  • Height: 6–18 inches, depending on type.
  • Planting: Full sun; fertile, well-drained soil.
  • Watering: Keep soil evenly moist, especially in containers.
  • Maintenance: Deadhead regularly or choose modern “wave” petunias that self-clean.

Why Petunias Are Long-Blooming

Petunias provide continuous waves of color from spring until frost. With cascading and upright varieties, they suit hanging baskets, window boxes, and garden beds. Their ability to thrive with just sunlight, water, and occasional fertilizer makes them a top choice for low-maintenance gardeners.


3. Zinnias (Zinnia elegans)

Zinnias are beloved for their vibrant, daisy-like blooms and ability to thrive in hot summer conditions.

Features and Care

  • Bloom Colors: Nearly every shade except true blue.
  • Height: 12 inches to 4 feet, depending on the variety.
  • Planting: Full sun with well-draining soil.
  • Watering: Moderate; drought-tolerant once established.
  • Maintenance: Deadhead for extended flowering; avoid overhead watering to reduce mildew.

Why Zinnias Are Garden Favorites

Zinnias bloom prolifically from late spring until frost, even in poor soils. They are pollinator magnets, attracting bees and butterflies, and make excellent cut flowers. Their resilience, vibrant palette, and ease of care make them a must-have for extended seasonal color.


4. Geraniums (Pelargonium spp.)

Garden geraniums (technically pelargoniums) are another easy-care annual with a reputation for resilience and continuous blooms.

Features and Care

  • Bloom Colors: Red, pink, white, salmon, and bi-colors.
  • Height: 12–24 inches.
  • Planting: Full sun to partial shade; well-draining soil.
  • Watering: Allow soil to dry slightly between waterings.
  • Maintenance: Deadhead to promote new growth; avoid soggy soil.

Why Geraniums Shine in Gardens

Geraniums are perfect for containers, borders, and window boxes, offering rich blooms throughout the growing season. They’re drought-tolerant once established and withstand summer heat, making them reliable for long-lasting color with minimal effort.


5. Impatiens (Impatiens walleriana)

For gardeners with shady spots, impatiens are the go-to choice. These shade-loving annuals bloom abundantly, filling darker corners with vibrant hues.

Features and Care

  • Bloom Colors: White, pink, red, purple, orange, and coral.
  • Height: 6–24 inches.
  • Planting: Partial to full shade; rich, moist, well-draining soil.
  • Watering: Keep soil consistently moist but not waterlogged.
  • Maintenance: Low-maintenance; little to no deadheading needed.

Why Impatiens Are Shade Champions

Impatiens bloom from spring until frost, thriving where other flowering plants may struggle. Their dense, colorful displays brighten shady borders, woodland gardens, and containers, making them a versatile and easy-care option.


Tips for Maximizing Bloom Time

Even easy-care annuals need a little attention to perform their best. Here are a few tips to keep them blooming from spring through fall:

  1. Start with Healthy Soil: Use quality potting mix for containers or enrich garden soil with compost.
  2. Provide Adequate Sunlight: Match plants with their light requirements for optimal blooms.
  3. Water Consistently: Avoid letting containers dry out completely, especially in summer.
  4. Fertilize Regularly: Use a balanced, slow-release fertilizer or liquid feed every 2–4 weeks.
  5. Deadhead and Prune: Removing spent blooms encourages new flowers (unless using self-cleaning varieties).
  6. Protect From Pests: Monitor for aphids, slugs, or fungal issues, and address problems early.

With these practices, your annuals will reward you with continuous color until frost.


Designing With Easy-Care Annuals

These annuals aren’t just practical—they can also be used creatively in garden design:

  • Containers & Hanging Baskets: Petunias and geraniums thrive in pots, creating colorful displays for patios and balconies.
  • Borders & Beds: Marigolds and zinnias add vibrant swaths of color and structure.
  • Shady Corners: Impatiens brighten darker spaces where sun-loving flowers won’t grow.
  • Pollinator Gardens: Zinnias and marigolds attract bees and butterflies, supporting local ecosystems.

By mixing colors, heights, and textures, you can create dynamic seasonal displays with minimal maintenance.


Conclusion

For gardeners seeking vibrant, long-lasting color without excessive upkeep, marigolds, petunias, zinnias, geraniums, and impatiens are unbeatable choices. These five easy-care annuals bloom reliably from spring until autumn, adapting well to beds, borders, containers, and shady corners. With just basic care—regular watering, occasional feeding, and some deadheading—you can enjoy a continuous display of flowers that brighten your outdoor spaces and support pollinators.

Incorporating these low-maintenance annuals into your garden ensures not only seasonal beauty but also gardening success, whether you’re a beginner or an experienced grower. With their resilience, versatility, and charm, these plants prove that a vibrant, colorful garden doesn’t have to mean hard work—it just requires smart choices.

5 Fast-Growing Flowers to Plant in August for a Quick Burst of Color

5 Fast-Growing Flowers to Plant in August for a Quick Burst of Color

August can be a challenging time for gardeners. The heat of late summer, coupled with declining daylight hours, can make planting new flowers feel daunting. However, it is still possible to achieve a vibrant garden in just a few weeks by choosing fast-growing flowers that establish quickly, bloom abundantly, and thrive even in warm conditions. These flowers not only brighten your garden but also provide a sense of accomplishment when you see instant results.

In this guide, we explore five fast-growing flowers that are perfect for planting in August, how to care for them, and tips for maximizing color and bloom.


Why Choose Fast-Growing Flowers in Late Summer

Planting fast-growing flowers in August offers several advantages:

  1. Instant Gratification – See blooms in weeks rather than months, providing a quick burst of color.
  2. Flexibility – Ideal for filling gaps in existing flower beds or refreshing tired landscapes.
  3. Pollinator Support – Many fast-blooming flowers attract bees, butterflies, and other beneficial insects.
  4. Seasonal Extension – Certain flowers continue blooming into fall, extending garden color.

By selecting the right species, you can transform a garden that feels empty or worn from summer heat into a lively, colorful oasis.


1. Zinnias: Bold, Vibrant, and Easy to Grow

Zinnias are among the most popular late-summer flowers due to their rapid growth and striking colors.

  • Growth Rate – Zinnias germinate within 5–7 days and produce blooms in 3–4 weeks.
  • Appearance – Available in shades of red, pink, orange, yellow, and white, with both single and double blooms.
  • Light and Soil Requirements – Full sun and well-draining soil with moderate fertility. Avoid heavy, soggy soil.
  • Care Tips – Deadhead spent blooms to encourage continuous flowering. Space plants 8–12 inches apart for proper airflow.
  • Additional Benefits – Attracts butterflies and hummingbirds, enhancing garden activity.

Expert Tip: Zinnias are heat-tolerant, making them ideal for August planting in warmer regions.


2. Calendula (Pot Marigold): Cheerful Orange and Yellow Blooms

Calendula, also known as pot marigold, is a fast-growing flower that thrives in late summer conditions.

  • Growth Rate – Germinates in 7–14 days and blooms in as little as 4–6 weeks.
  • Appearance – Bright orange, yellow, or gold flowers that add cheerful accents to gardens.
  • Soil and Water Needs – Prefers well-draining soil and regular watering to maintain vibrant blooms.
  • Care Tips – Deadhead regularly to prolong flowering. Calendula is relatively pest-resistant and low-maintenance.
  • Additional Benefits – Flowers are edible and can be used in salads, teas, and garnishes.

Expert Tip: Calendula tolerates cooler nights, allowing blooms to persist into early fall.


3. Sunflowers (Dwarf and Fast-Growing Varieties): Tall and Bold Statements

Sunflowers are iconic summer flowers that bring instant height and drama to any garden.

  • Growth Rate – Dwarf varieties germinate in 7–10 days and bloom in 6–8 weeks.
  • Appearance – Bright yellow, daisy-like blooms with a dark central disk. Tall varieties can reach 6–8 feet, while dwarf types stay 1–3 feet tall.
  • Light Requirements – Full sun is essential; sunflowers thrive in direct sunlight for at least 6–8 hours per day.
  • Care Tips – Provide a trellis or support for taller varieties. Ensure regular watering, especially during initial growth stages.
  • Additional Benefits – Sunflowers attract pollinators and produce seeds for birds or human consumption.

Expert Tip: Dwarf sunflowers are perfect for containers or small garden beds, offering quick blooms without overwhelming space.


4. Cosmos: Delicate, Airy Blooms for a Natural Look

Cosmos are fast-growing, daisy-like flowers with a soft, airy appearance that adds movement and color to gardens.

  • Growth Rate – Germination in 7–10 days and flowering in 5–7 weeks.
  • Appearance – Available in pink, white, orange, and red shades with finely divided foliage.
  • Soil and Light Needs – Tolerant of poor soil but prefer well-draining conditions. Full sun ensures prolific blooms.
  • Care Tips – Deadhead frequently to maintain continuous flowering. Cosmos self-seed easily, providing future blooms.
  • Additional Benefits – Attracts butterflies, bees, and other pollinators.

Expert Tip: Cosmos are excellent for filling in gaps and creating a “wildflower” effect in the garden.


5. Nasturtiums: Edible, Colorful, and Pest-Resistant

Nasturtiums are versatile, fast-growing flowers that bring color and function to your garden.

  • Growth Rate – Germinates in 7–10 days and blooms in 4–6 weeks.
  • Appearance – Vibrant red, orange, and yellow blooms with rounded leaves.
  • Soil and Sun Requirements – Grow best in moderately fertile, well-draining soil under full sun. Too much fertilizer can reduce flowering.
  • Care Tips – Pinch back young plants to encourage bushy growth. Nasturtiums are excellent companion plants for vegetables, repelling pests naturally.
  • Additional Benefits – Flowers and leaves are edible, adding color and peppery flavor to salads.

Expert Tip: Nasturtiums are low-maintenance and ideal for containers, hanging baskets, or garden beds.


Tips for Planting Fast-Growing Flowers in August

  1. Start from Seeds – Direct sowing is often faster and more economical than transplanting.
  2. Use Quality Soil – Enriched, well-draining soil ensures faster germination and strong growth.
  3. Water Consistently – Keep soil evenly moist during germination and early growth, then reduce slightly to prevent fungal issues.
  4. Provide Adequate Sunlight – Most fast-growing flowers need 6–8 hours of full sun for optimal blooms.
  5. Succession Planting – Stagger seed sowing every 1–2 weeks to maintain a continuous burst of color throughout late summer and early fall.

Common Mistakes to Avoid

  1. Planting Too Late – While August is suitable for fast-growers, planting in extremely hot or dry regions may reduce germination success.
  2. Overcrowding – Ensure proper spacing to prevent disease and allow airflow.
  3. Neglecting Deadheading – Removing spent flowers encourages continuous blooming.
  4. Ignoring Water Needs – Inconsistent watering can stunt growth and reduce flower quality.
  5. Fertilizing Excessively – High nitrogen levels promote foliage over flowers; use balanced or bloom-focused fertilizers.

Conclusion

Planting fast-growing flowers in August is a rewarding way to add instant beauty and vibrancy to your garden. Zinnias, calendula, sunflowers, cosmos, and nasturtiums are all excellent choices, providing color, pollinator support, and even edible options.

By understanding each plant’s growth requirements, sunlight preferences, and care tips, gardeners can enjoy quick blooms and a visually stunning late-summer garden. With proper watering, soil, and deadheading, these flowers can continue brightening your landscape well into fall.

Fast-growing flowers are perfect for gardeners who want immediate results, whether for containers, flower beds, or pollinator-friendly gardens. By planting these five species in August, you can transform an ordinary summer garden into a lush, colorful retreat in just a matter of weeks.