How to Deadhead Flowers for More Blooms

How to Deadhead Flowers for More Blooms

One of the most effective yet often overlooked gardening practices is deadheading—the removal of spent or faded flowers from plants. Deadheading is essential for maintaining garden aesthetics, promoting healthier growth, and encouraging repeated blooming throughout the season. By removing old flowers, gardeners redirect the plant’s energy from seed production to flower and foliage development, resulting in a more vibrant and productive garden. This article provides a detailed guide on why, when, and how to deadhead flowers, along with tips for maximizing blooms in flower beds, containers, and borders.


1. Understanding the Purpose of Deadheading

Deadheading serves several important functions in garden care:

a. Encourages Continuous Flowering

  • Plants naturally divert energy to seed production after blooming.
  • Removing spent blooms prevents seed formation, allowing the plant to focus on producing new flowers.
  • This process prolongs the flowering season for both annuals and perennials.

b. Improves Plant Health

  • Faded flowers can attract pests and diseases if left on the plant.
  • Deadheading reduces fungal infections like powdery mildew or botrytis by improving air circulation around flowers.

c. Enhances Garden Aesthetics

  • Removing wilted or discolored flowers keeps the garden looking fresh, vibrant, and well-maintained.

Understanding these benefits demonstrates that deadheading is both a practical and aesthetic gardening practice.


2. Identifying Which Flowers to Deadhead

Not all flowers require deadheading, but many benefit from this practice:

a. Annual Flowers

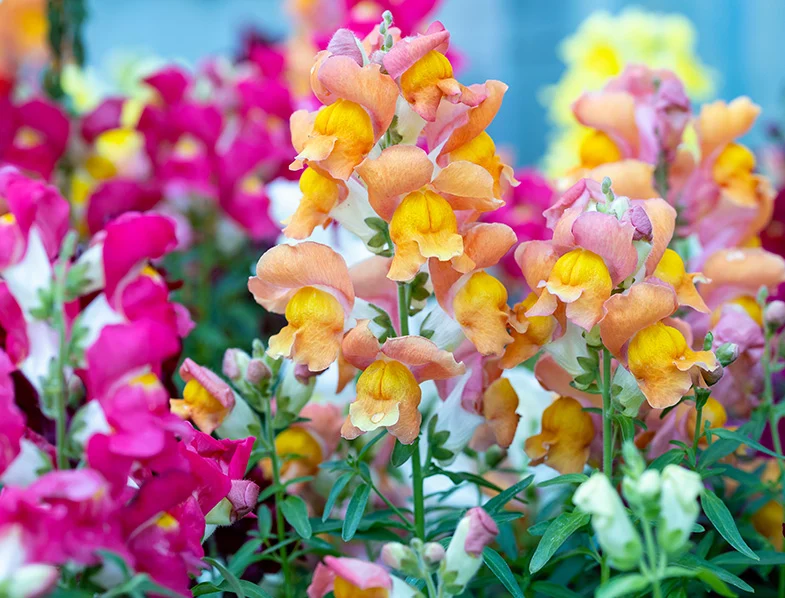
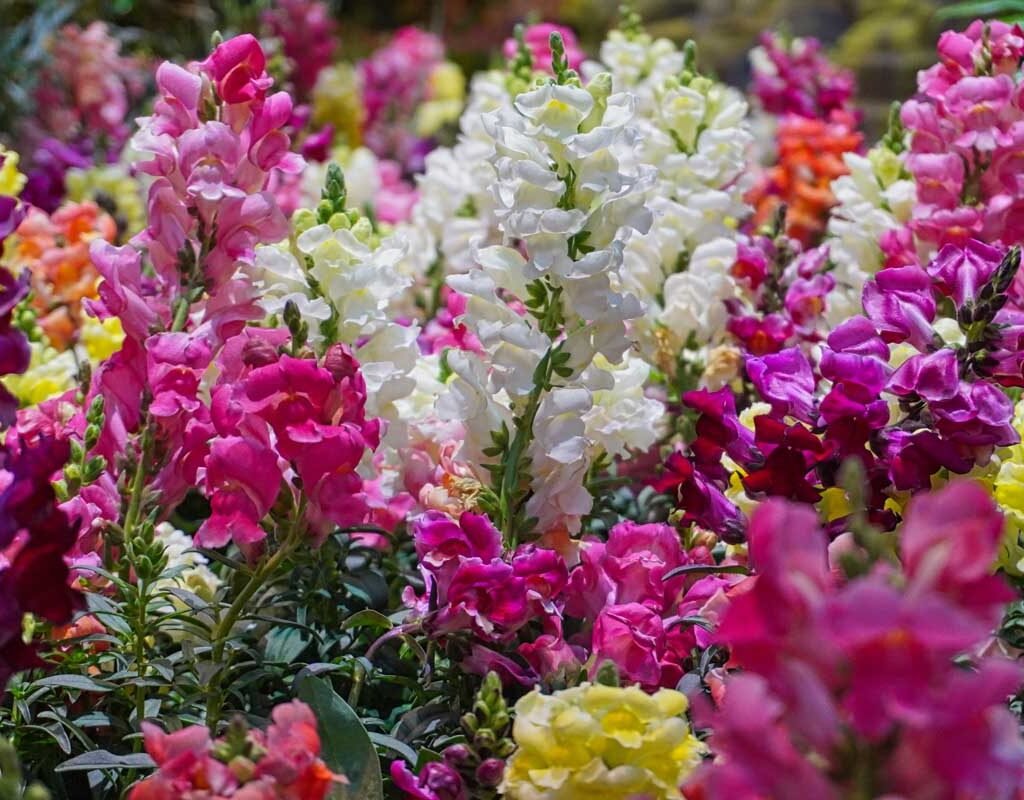
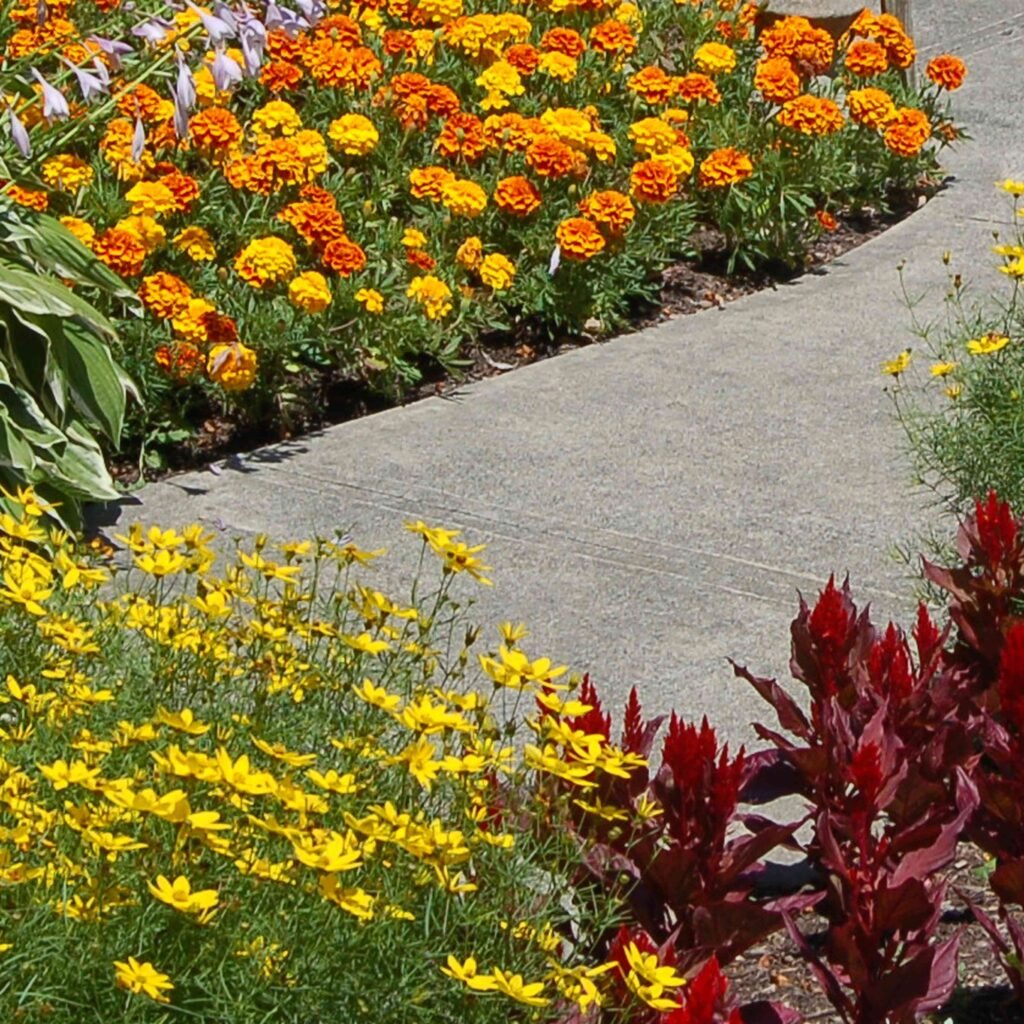
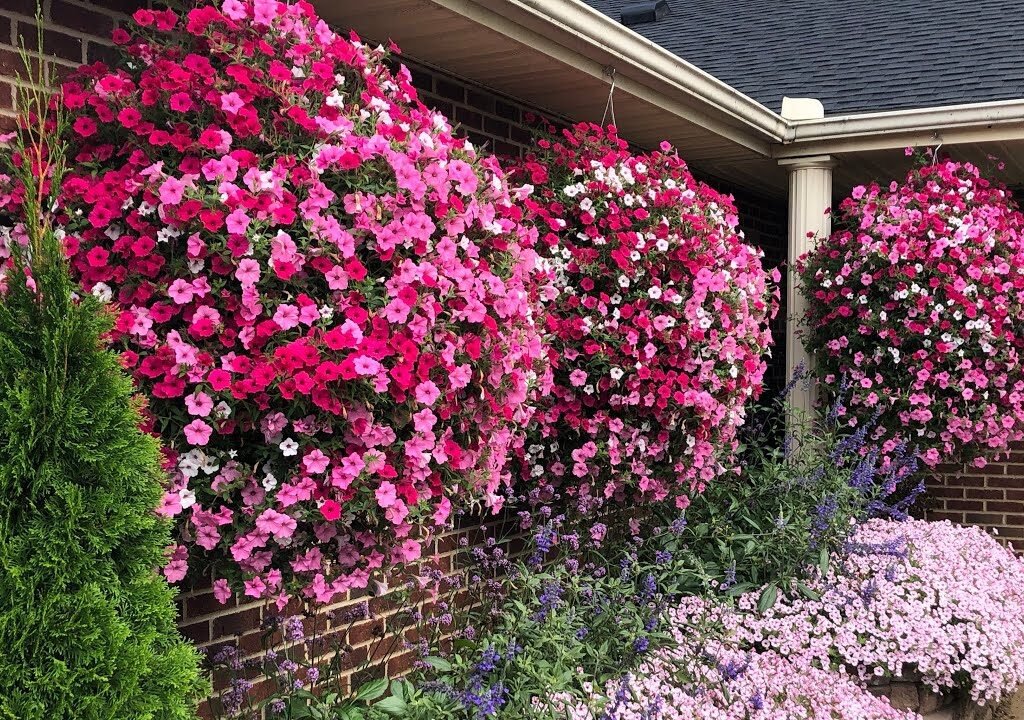
  • Annuals, such as petunias, marigolds, zinnias, and snapdragons, stop blooming after flowers fade if spent blooms are not removed.
  • Deadheading encourages continuous production of vibrant flowers.

b. Perennial Flowers

  • Perennials like coneflowers, roses, and daisies benefit from deadheading to promote a second bloom.
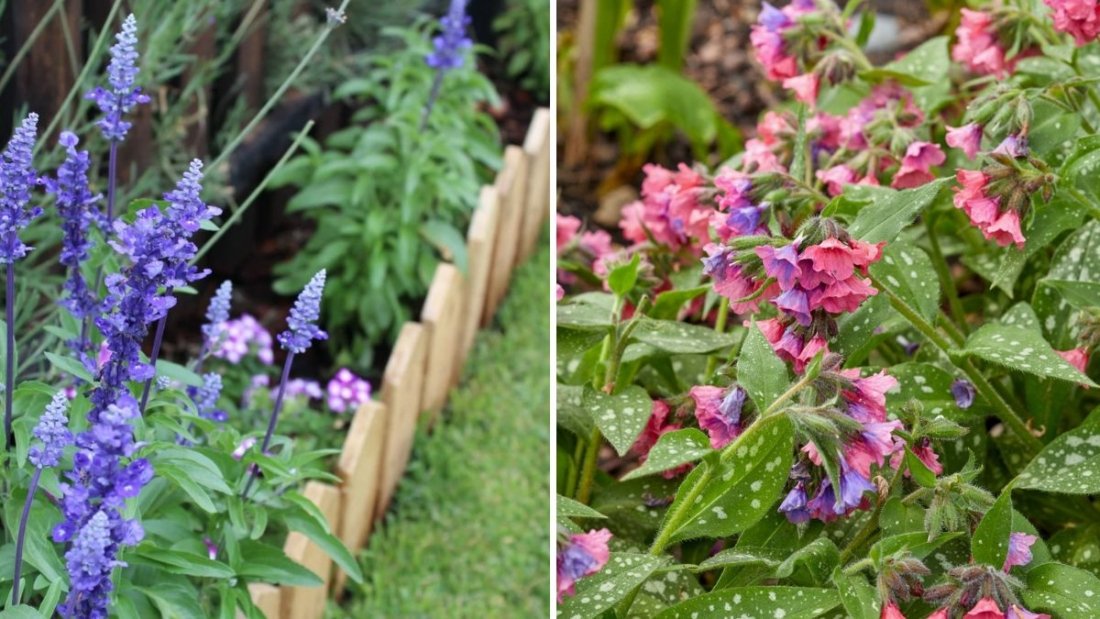
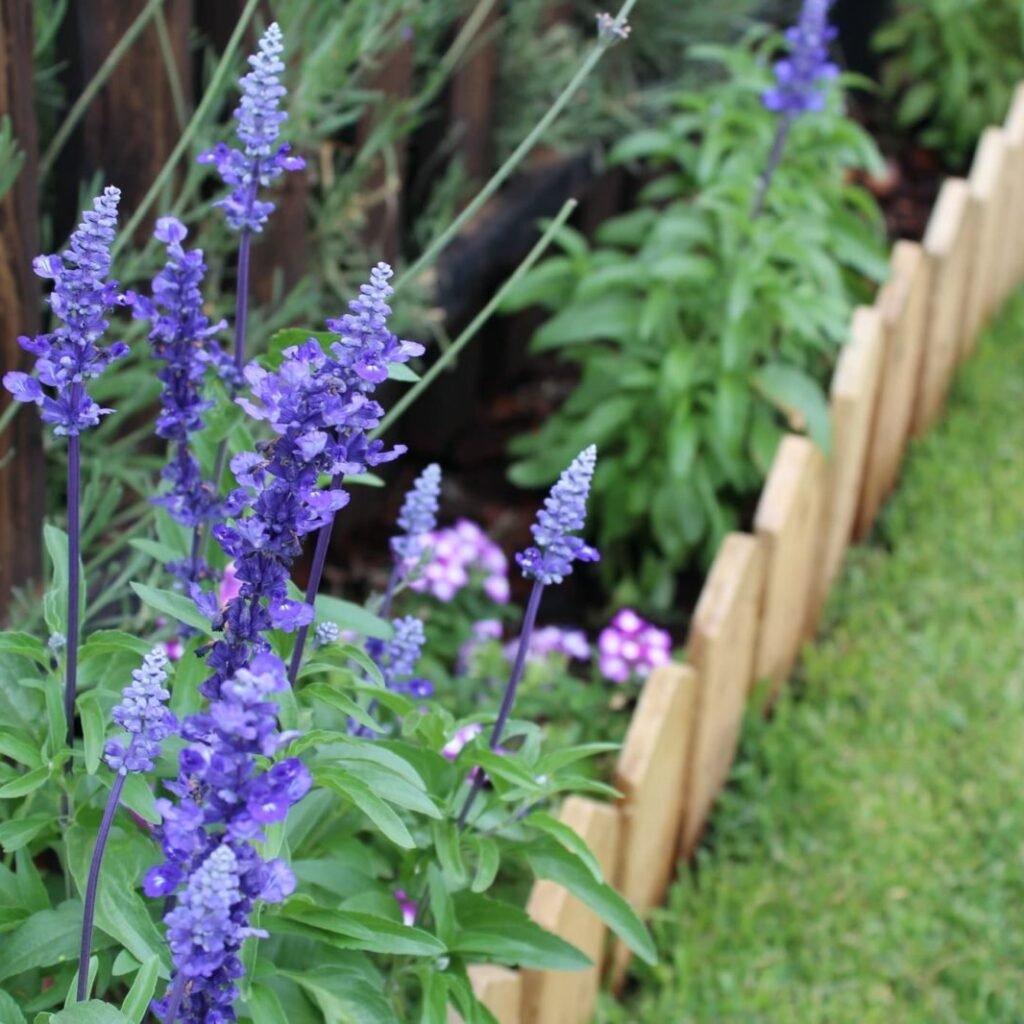
  • Some perennials, such as lavender or ornamental grasses, may not require deadheading but benefit aesthetically when old flowers are removed.

c. Flowering Shrubs

  • Shrubs like hydrangeas and hibiscus benefit from selective deadheading to stimulate new blooms while maintaining shape.

By identifying which plants require deadheading, gardeners can maximize bloom longevity and beauty.


3. Tools for Deadheading Flowers

Using the right tools makes deadheading efficient, precise, and safe for plants:

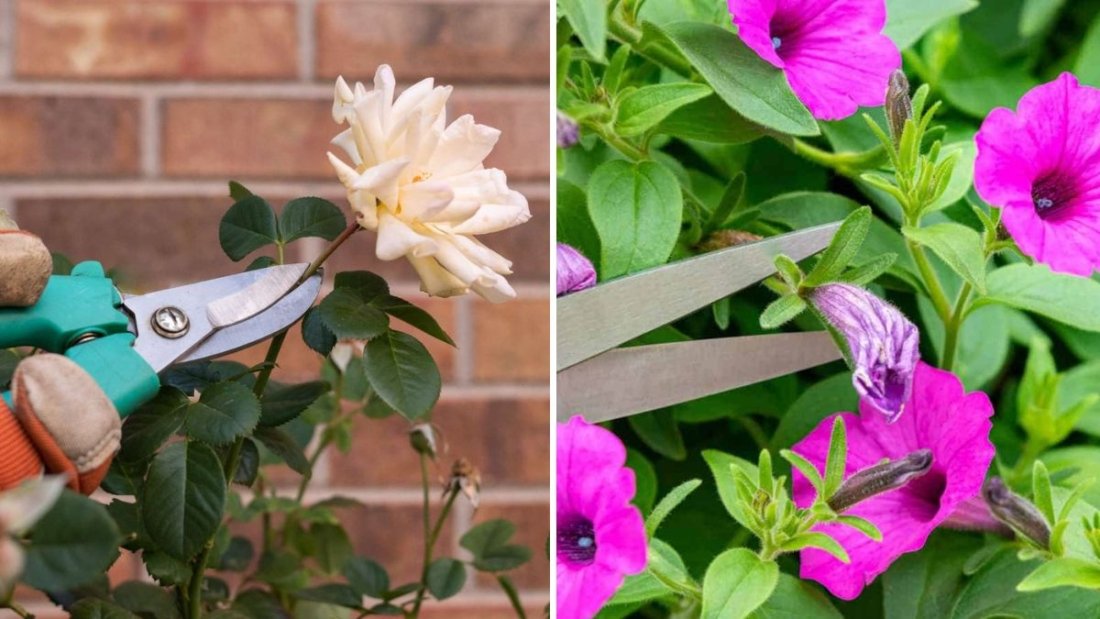
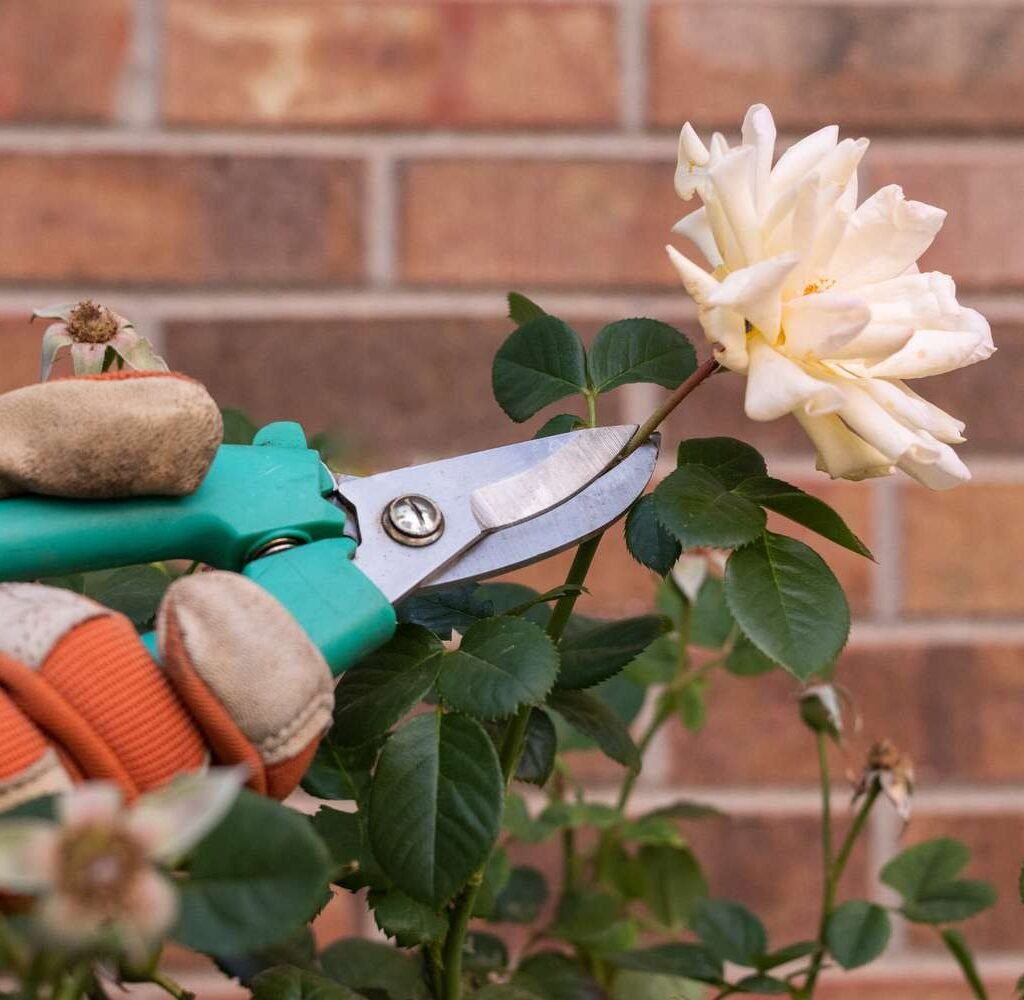
  • Hand Pruners or Secateurs: Ideal for thick stems or woody plants like roses and hydrangeas.
  • Pinching with Fingers: Effective for tender-stemmed annuals like petunias and impatiens.
  • Scissors or Garden Shears: Useful for container plants and low-growing perennials.
  • Gloves: Protect hands from thorns or prickly stems.

Proper tools minimize damage to plant tissue, preventing infection and ensuring optimal growth.


4. Step-by-Step Deadheading Techniques

Different plants require different deadheading methods:

a. Pinching

  • Suitable for soft-stemmed annuals.
  • Use fingers to pinch off the faded flower just above the first set of healthy leaves or lateral buds.
  • Pinching encourages new lateral growth and more blooms.

b. Cutting with Scissors or Pruners

  • Ideal for taller flowers like snapdragons, coneflowers, and roses.
  • Cut faded flowers just above a leaf node or side shoot, ensuring the plant can produce new stems.
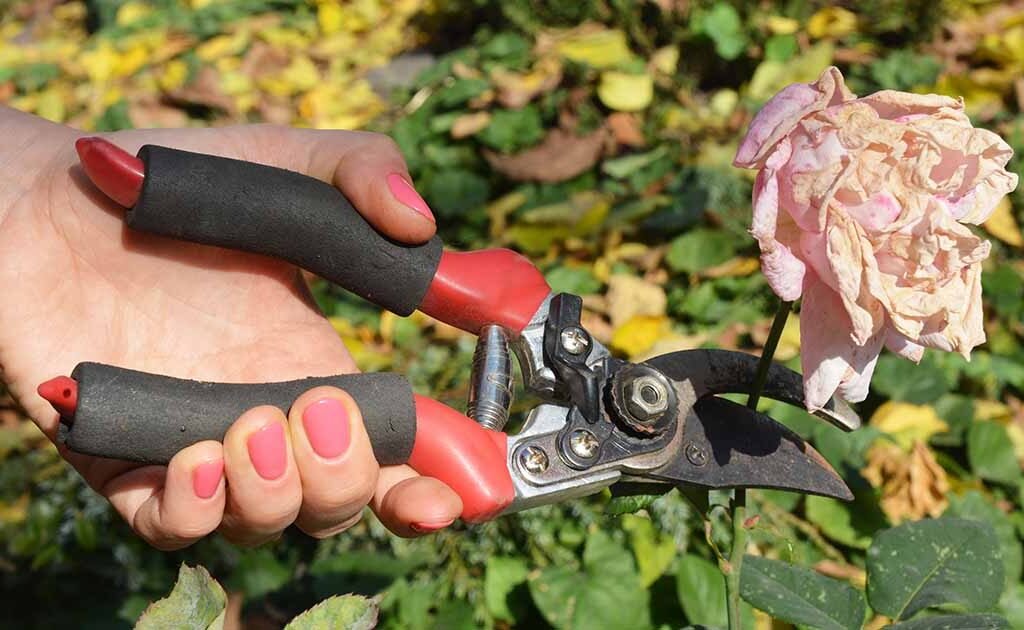
  • For roses, remove flowers at an angle to prevent water from settling on cut stems, reducing disease risk.

c. Removing Seed Heads

  • Some perennials like coneflowers and daisies can be deadheaded by removing old seed heads.
  • This not only improves appearance but also encourages additional flowering.

By following these techniques, gardeners can stimulate continuous flowering while maintaining plant health.


5. Timing Deadheading for Maximum Blooms

Proper timing ensures plants respond with new flowers:

  • During Blooming Season: Deadhead flowers regularly as soon as they start to fade.
  • Morning or Afternoon: Deadhead during cooler parts of the day to minimize plant stress.
  • Consistent Maintenance: Weekly deadheading prevents buildup of old flowers, keeping the garden vibrant.

Timing is critical because delayed deadheading may allow plants to divert energy to seed production, reducing bloom frequency.


6. Deadheading Specific Popular Garden Flowers

Different plants have unique deadheading requirements:

a. Petunias

  • Pinch or cut faded flowers at the base of the flower stem.
  • Regular removal encourages continuous blooming.

b. Roses

  • Cut back to the first outward-facing leaf with five leaflets.
  • Remove diseased or yellow leaves along with the flower to maintain plant health.

c. Snapdragons

  • Snip faded blooms along the flower spike to encourage secondary flowering.

d. Marigolds

  • Remove spent flowers at the base of the stem to stimulate new blooms.

e. Perennials (Coneflowers, Daisies)

  • Deadhead by removing old flowers, leaving some foliage intact.
  • This promotes a second round of blooms later in the season.

By tailoring deadheading practices to specific flowers, gardeners ensure maximum bloom production and prolonged beauty.


7. The Impact of Deadheading on Plant Growth

Deadheading does more than just remove faded flowers:

  • Redirects Energy: Plants channel energy into producing new blooms and stronger stems.
  • Encourages Lateral Growth: Many plants develop additional flower shoots when old flowers are removed.
  • Reduces Disease Risk: Faded blooms are often entry points for pathogens; removing them reduces infection rates.

In essence, deadheading enhances both quantity and quality of blooms.


8. Combining Deadheading with Fertilization

Deadheading is most effective when combined with proper nutrition:

  • Apply a balanced fertilizer after deadheading to provide nutrients for new growth.
  • For flowering plants, use phosphorus-rich fertilizers to promote flower development.
  • Organic options like compost tea or fish emulsion also encourage lush, colorful blooms.

Nutrient supplementation after deadheading ensures plants respond vigorously with additional flowers.


9. Seasonal Considerations in Deadheading

Deadheading practices may vary with seasons:

  • Spring: Focus on promoting the first blooms and maintaining plant shape.
  • Summer: Deadhead regularly to sustain continuous flowering during peak heat.
  • Fall: Some perennials can be deadheaded to extend flowering until frost.
  • Winter: Indoor flowering plants like geraniums or African violets may still benefit from selective deadheading to maintain aesthetics.

Adapting deadheading to seasonal conditions helps maximize flowering potential throughout the year.


10. Common Mistakes to Avoid When Deadheading

Avoid these errors to ensure effective deadheading:

  • Removing Too Much Foliage: Only remove faded flowers; leaves are essential for photosynthesis.
  • Ignoring Seed Heads: Allowing seed formation reduces energy for new blooms.
  • Using Dirty Tools: Can transmit diseases; always clean pruners or scissors.
  • Waiting Too Long: Plants may start diverting energy to seed production, reducing flower frequency.

Awareness of these mistakes ensures safe, productive deadheading practices.


11. Additional Tips for Maximum Flower Productivity

  • Combine deadheading with watering and mulching to maintain healthy plants.
  • Observe plant growth patterns to identify ideal cutting points for maximum blooms.
  • Encourage pollinator activity to complement deadheading and enhance flower quality.
  • Keep a deadheading schedule for larger gardens to ensure consistent maintenance.

By integrating deadheading into a comprehensive plant care routine, gardeners achieve a vibrant, long-lasting garden display.


12. Conclusion

Deadheading is a simple yet powerful gardening practice that promotes continuous flowering, improves plant health, and maintains garden aesthetics. By understanding which plants require deadheading, using the right tools, and employing proper techniques, gardeners can maximize blooms and extend the flowering season.

Key Takeaways:

  1. Regularly remove faded flowers to redirect plant energy toward new blooms.
  2. Tailor deadheading techniques to specific plant types, such as pinching, cutting, or removing seed heads.
  3. Combine deadheading with fertilization to stimulate vigorous flower production.
  4. Time deadheading properly and maintain a consistent schedule to sustain continuous blooming.
  5. Monitor plant health and avoid common mistakes for optimal results.

By practicing careful and timely deadheading, gardeners can enjoy vibrant, long-lasting, and abundant blooms throughout the growing season. Deadheading not only beautifies the garden but also enhances the vitality and productivity of flowering plants, making it an essential skill for gardeners of all experience levels.

Creative DIY: Recycle Plastic Bottles to Make Beautiful Two-Tier Flower Pots for Moss Rose (Portulaca)

Creative DIY: Recycle Plastic Bottles to Make Beautiful Two-Tier Flower Pots for Moss Rose (Portulaca)

Gardening doesn’t have to be expensive or complicated. With a bit of creativity and some recycled materials, you can create stunning plant displays that are both functional and eco-friendly. One of the most innovative ways to achieve this is by recycling plastic bottles to make two-tier flower pots for growing Moss Rose (Portulaca). These two-tiered pots not only save space but also create a vibrant, cascading display of colorful blooms that brighten any balcony, terrace, or garden.

In this guide, we’ll explore step-by-step methods to transform ordinary plastic bottles into beautiful two-tier flower pots and provide tips to grow Moss Rose successfully.


Why Recycle Plastic Bottles for Two-Tier Flower Pots?

Plastic pollution is a growing concern worldwide, and repurposing plastic bottles for gardening helps reduce waste. Two-tier flower pots have several advantages:

  1. Sustainable Gardening: Reusing plastic bottles prevents them from ending up in landfills or oceans.
  2. Space Efficiency: Vertical or stacked designs maximize planting area, perfect for small gardens or balconies.
  3. Cost-Effective: Using materials you already have saves money compared to buying store-bought planters.
  4. Creative Expression: Customizing bottles allows you to add personal style to your garden.
  5. Better Plant Growth: Two-tier designs allow trailing plants like Moss Rose to cascade beautifully while compact plants grow in the lower tier.

By combining sustainability with creativity, you can enhance your garden without spending a fortune.


Materials Needed

Creating two-tier flower pots is simple and requires basic materials:

  • Plastic bottles (preferably 1–2 liters for the base, 500 ml–1 liter for the top tier)
  • Scissors or utility knife
  • Lightweight potting soil
  • Moss Rose (Portulaca) seedlings or seeds
  • String, twine, or wire (for hanging or securing tiers)
  • Decorative paint, markers, or stickers (optional)
  • Hot glue or tape (optional for securing tiers)
  • Watering can or spray bottle

These materials are easily available at home or at low cost, making this project accessible for all gardeners.


Preparing Plastic Bottles

Proper preparation is crucial for creating sturdy and functional flower pots:

  1. Cleaning: Wash bottles thoroughly to remove labels and residues.
  2. Cutting the Bottles:
    • Cut the bottom portion of a large bottle to serve as the base.
    • Cut a smaller bottle to create the upper tier. Ensure it fits snugly over or inside the base bottle.
  3. Creating Drainage Holes: Poke small holes at the bottom of each bottle to prevent waterlogging.
  4. Decorating (Optional):
    • Paint the bottles with bright, weather-resistant colors.
    • Wrap bottles in jute or twine for a rustic look.
    • Add stickers or designs for personalization.

Well-prepared bottles ensure healthy plant growth and allow your two-tier flower pots to be both functional and visually appealing.


Planting Moss Rose in Two-Tier Pots

Moss Rose is an ideal plant for vertical or stacked pots because of its trailing habit and vibrant flowers. Here’s how to plant it:

  1. Soil Preparation: Use lightweight, well-draining soil mixed with compost for nutrients. Moss Rose thrives in sandy or loamy soils.
  2. Planting the Base Tier:
    • Fill the bottom bottle with soil.
    • Plant Moss Rose seedlings or seeds, spacing them to allow growth.
  3. Planting the Upper Tier:
    • Fill the upper bottle with soil.
    • Plant additional Moss Rose or complementary trailing plants.
  4. Watering: Water lightly after planting. Moss Rose prefers moderately dry conditions, so avoid overwatering.

Planting properly ensures lush, cascading growth and creates a full, visually appealing two-tier arrangement.


Assembling the Two-Tier Flower Pot

After planting, it’s time to assemble your two-tier design:

  1. Stacking the Bottles:
    • Place the smaller bottle on top of the larger base.
    • Use hot glue, tape, or a small peg system to secure the tiers.
  2. Hanging Option (Optional):
    • Thread string or twine through the top bottle’s neck.
    • Hang from a balcony, railing, or tree branch for a vertical garden effect.
  3. Placement:
    • Position in a sunny location, as Moss Rose requires full sun for vibrant blooms.
    • Ensure even spacing for airflow and light.

Stacking and hanging options allow flexibility in design and placement, perfect for small or unconventional gardening spaces.


Watering and Maintenance

Maintaining two-tier flower pots is easy with regular care:

  • Watering: Moss Rose is drought-tolerant, but check soil moisture daily in hot weather. Water moderately and avoid waterlogging.
  • Fertilizing: Apply a balanced liquid fertilizer every 2–3 weeks during the growing season to encourage blooms.
  • Pruning: Remove dead flowers and leaves to promote new growth and maintain a tidy appearance.
  • Sunlight: Ensure at least 6–8 hours of direct sunlight daily for healthy, colorful blooms.

Proper maintenance ensures your two-tier pots remain lush, vibrant, and full throughout the season.


Decorating and Personalizing Your Two-Tier Flower Pots

Enhance the visual appeal of your recycled bottle pots with these creative touches:

  • Painted Designs: Add bright colors, patterns, or geometric designs.
  • Natural Wraps: Wrap bottles with jute, rope, or burlap for a rustic aesthetic.
  • Stickers or Labels: Use plant labels to identify different flowers or herbs.
  • Seasonal Decor: Change decorations seasonally for a fresh, dynamic look.

Decorative touches turn your recycled bottles into functional garden art, making your two-tier pots a centerpiece of your space.


Benefits of Two-Tier Flower Pots

Two-tier flower pots offer unique advantages:

  1. Space Efficiency: Ideal for balconies, terraces, or small gardens.
  2. Vertical Gardening: Allows multiple plants to thrive in a compact area.
  3. Eco-Friendly: Reduces plastic waste while adding beauty to your garden.
  4. Aesthetic Appeal: Creates a layered, cascading effect with colorful blooms.
  5. Low Maintenance: Moss Rose is hardy, requiring minimal care while producing vibrant flowers.

These benefits make two-tier flower pots an excellent choice for sustainable and creative gardening.


Common Challenges and Solutions

Even simple DIY pots can face challenges:

  • Drying Out Quickly: Hanging or stacked pots dry faster. Check soil moisture frequently and water as needed.
  • Toppling: Secure tiers with glue, tape, or support rods to prevent tipping.
  • Limited Root Space: Choose compact plants that thrive in small containers.
  • Insufficient Sunlight: Moss Rose requires full sun; move pots to brighter locations if flowering is limited.

By addressing these challenges proactively, you ensure a thriving and visually appealing two-tier arrangement.


Creative Expansion Ideas

Once you’ve mastered basic two-tier pots, try these creative variations:

  1. Multi-Tiered Vertical Garden: Stack three or more bottles for a cascading vertical display.
  2. Mixed Planting: Combine Moss Rose with trailing herbs, succulents, or other flowering plants.
  3. Seasonal Themes: Change plants, paint, or decorations according to seasons or festivals.
  4. Interactive Projects: Encourage children to participate in planting, decorating, and caring for the pots for an educational and fun experience.

Creative expansion adds variety and vibrancy to your garden while making the most of limited space.


Conclusion

Recycling plastic bottles to create two-tier flower pots for Moss Rose is an innovative, eco-friendly, and visually appealing gardening project. These pots save space, reduce plastic waste, and allow gardeners to craft stunning vertical arrangements that cascade with vibrant blooms.

By following the steps of preparing bottles, planting Moss Rose, assembling tiers, and adding decorative touches, anyone can transform ordinary bottles into beautiful garden art. These DIY pots are perfect for small gardens, terraces, balconies, or indoor spaces with plenty of sunlight.

Start your own two-tier flower pot project today, and enjoy a colorful, sustainable, and creative garden display that is both practical and environmentally conscious. Your Moss Rose plants will thrive, adding life and vibrancy to your home while showcasing your ingenuity and care for the environment.

How to Grow Snapdragons for Vertical Color

How to Grow Snapdragons for Vertical Color

Snapdragons (Antirrhinum majus) are one of the most beloved garden flowers for adding vertical color, texture, and charm to any outdoor or container garden. Known for their tall, spiked blooms and vibrant hues, snapdragons are perfect for creating eye-catching flower beds, borders, and vertical arrangements. Cultivating them successfully requires careful attention to soil, light, watering, pruning, and support strategies. This article provides a comprehensive guide for growing snapdragons to achieve dramatic vertical displays that brighten gardens and patios alike.


1. Understanding Snapdragons and Their Appeal

Snapdragons are prized for several reasons:

  • Vertical growth habit: They naturally grow tall and upright, making them ideal for adding height and structure.
  • Wide color range: Available in reds, pinks, yellows, oranges, whites, and purples, often in mixed tones.
  • Extended bloom period: With proper care, snapdragons can flower from spring into fall.
  • Attracts pollinators: Bees and butterflies are drawn to snapdragon flowers, enhancing garden biodiversity.

Their vertical form makes them suitable for background planting, vertical garden structures, and mixed flower arrangements.


2. Selecting the Right Snapdragon Varieties

Snapdragons come in a range of heights and flower types, which influence vertical display potential:

a. Tall Varieties

  • Ideal for vertical color and structural interest in flower beds or borders.
  • Grow between 24–36 inches (60–90 cm) tall.
  • Examples: ‘Rocket Series,’ ‘Liberty Classic,’ and ‘Madame Butterfly.’

b. Medium Varieties

  • Height: 12–24 inches (30–60 cm); suitable for containers or mid-border placement.
  • Examples: ‘Sonnet Series,’ ‘Sultan Mix.’

c. Dwarf Varieties

  • Height: 6–12 inches (15–30 cm); ideal for front borders, container edges, or mixed beds.
  • Examples: ‘Happy Faces,’ ‘Bugfire Mix.’

For vertical impact, choose tall or medium varieties and pair them with shorter plants in front for a layered, dynamic effect.


3. Preparing the Soil

Snapdragons thrive in well-draining, fertile soil:

  • pH: Slightly acidic to neutral (6.2–7.0) for optimal nutrient uptake.
  • Soil texture: Light, loamy soil enriched with organic matter is ideal.
  • Soil amendment: Mix in compost or well-rotted manure to improve fertility and drainage.

Healthy soil supports strong root systems, allowing snapdragons to reach their full vertical potential.


4. Planting Snapdragons for Vertical Color

Proper planting ensures tall, upright growth and abundant blooms:

a. Timing

  • Snapdragons are cool-season plants; they perform best in spring or fall.
  • In mild climates, they can bloom nearly year-round.

b. Spacing

  • Plant 6–12 inches apart for dwarf varieties, 12–18 inches apart for tall varieties.
  • Adequate spacing ensures good air circulation, reducing the risk of fungal diseases and encouraging vertical growth.

c. Planting Technique

  • Dig a hole slightly larger than the root ball.
  • Place the plant at the same depth as in its nursery container.
  • Backfill with soil and gently firm it.
  • Water thoroughly to settle the soil.

Proper planting promotes upright stems and healthy blooms.


5. Light Requirements

Snapdragons flourish in full sun, which supports:

  • Strong stems that prevent flopping or bending.
  • Abundant flowering with vibrant color.
  • Longer bloom periods during cool seasons.

In areas with hot summers, partial afternoon shade can prevent heat stress, especially for taller varieties.


6. Watering Practices

Consistent watering is crucial, particularly for vertical varieties:

  • Keep soil evenly moist but not waterlogged.
  • Avoid wetting the foliage excessively to reduce fungal disease risk.
  • Apply mulch to retain moisture and regulate soil temperature, especially around taller plants with extensive root systems.

Proper watering ensures sturdy stems capable of supporting vertical blooms.


7. Fertilization for Continuous Blooming

Snapdragons are moderate feeders, requiring nutrients to maintain colorful, upright flowers:

  • Apply a balanced, water-soluble fertilizer every 3–4 weeks during the growing season.
  • Avoid high-nitrogen fertilizers, which promote excessive foliage at the expense of blooms.
  • Incorporate slow-release fertilizers or compost at planting time to provide steady nutrition.

Adequate fertilization encourages tall growth and abundant, long-lasting flowers.


8. Supporting Tall Snapdragons

Tall varieties may require staking or support to prevent bending or flopping:

  • Use stakes, cages, or trellises for plants exceeding 2 feet in height.
  • Tie stems loosely with soft twine to avoid damage.
  • For windy areas, cluster plants together to provide mutual support.

Supporting stems maintains vertical structure and visual appeal.


9. Deadheading and Pruning

Regular maintenance promotes repeated flowering and vertical vigor:

  • Deadhead spent blooms by pinching or cutting flowers just above the next leaf node.
  • Remove yellowing or damaged foliage to improve airflow.
  • Lightly trim tall stems if they become leggy to encourage bushier growth and additional flowering.

Pruning extends the bloom period and enhances vertical appearance.


10. Pest and Disease Management

Snapdragons are generally resilient but can encounter problems, especially in dense plantings:

a. Common Pests

  • Aphids: Suck sap from leaves and stems, weakening plants.
  • Caterpillars: Feed on foliage and flowers.
  • Spider mites: Cause yellowing and leaf damage.

b. Common Diseases

  • Powdery mildew: Appears as white powder on leaves; prevent with good airflow.
  • Rust: Orange or brown pustules; avoid overhead watering.
  • Root rot: Caused by waterlogged soil; ensure proper drainage.

c. Preventive Measures

  • Maintain spacing and airflow between plants.
  • Inspect regularly and remove affected foliage promptly.
  • Use organic pest controls like neem oil or insecticidal soap.

Healthy plants maintain strong stems and vibrant vertical flowers.


11. Companion Planting for Enhanced Vertical Displays

Snapdragons can be combined with other plants to create layered vertical color:

  • Shorter flowers (pansies, violas) in front: Creates a multi-layered visual effect.
  • Climbing plants (sweet peas) behind or near: Complements tall snapdragons in vertical arrangements.
  • Edging plants (dusty miller, ornamental grasses): Adds contrast and highlights vertical lines.

Strategic companion planting enhances the visual impact and biodiversity of the garden.


12. Seasonal Care for Prolonged Blooming

Snapdragons are cool-season bloomers, so seasonal care is important:

  • In spring, plant early to avoid heat stress and extend flowering.
  • In summer, provide partial shade or extra water in hot climates.
  • In fall, replanting or succession planting maintains continuous vertical color.
  • Mulch around the base to protect roots in cooler temperatures.

Seasonal adjustments ensure consistent vertical displays and prolonged bloom cycles.


13. Container Gardening for Vertical Snapdragons

Snapdragons can also thrive in containers, making them ideal for patios, balconies, or small gardens:

  • Use deep containers (12–14 inches) for tall varieties.
  • Ensure good drainage with multiple holes and a layer of gravel at the bottom.
  • Combine snapdragons with trailing flowers like lobelia or ivy for a vertical and cascading effect.
  • Fertilize regularly and rotate containers for even light exposure.

Container planting allows flexible placement and creates dramatic vertical color displays anywhere.


14. Benefits of Growing Snapdragons for Vertical Color

Growing snapdragons for vertical color provides numerous advantages:

  • Aesthetic appeal: Tall spikes add height, structure, and a dynamic look.
  • Pollinator support: Flowers attract bees and butterflies, enhancing garden ecology.
  • Continuous flowering: Deadheading ensures blooms for months.
  • Versatility: Suitable for borders, containers, and cut flower arrangements.

Vertical snapdragons make gardens vibrant, structured, and ecologically friendly.


15. Conclusion

Snapdragons are a must-have plant for gardeners seeking vertical color and year-round charm. Success in growing tall, vibrant snapdragons depends on:

  1. Choosing the right variety for vertical impact.
  2. Preparing fertile, well-draining soil to support root and stem growth.
  3. Providing adequate light, water, and balanced fertilization.
  4. Supporting tall stems and performing regular deadheading for prolonged blooms.
  5. Monitoring for pests and diseases to maintain plant health.

By following these guidelines, gardeners can achieve striking vertical color, abundant blooms, and dynamic garden displays, transforming ordinary beds into captivating floral showcases. Snapdragons not only enhance beauty but also support pollinators, making them an essential addition to any garden focused on color, height, and ecological harmony.

The Best Border Flowers for Small Gardens

The Best Border Flowers for Small Gardens

Small gardens present unique opportunities and challenges for gardeners. Limited space requires careful selection of plants that maximize beauty, provide structure, and bloom consistently without overwhelming the area. Border flowers are essential in small gardens because they define garden edges, add visual interest, and create a sense of depth and continuity. Choosing the right border flowers ensures that even compact spaces look lush, organized, and vibrant throughout the growing season.

This article provides a comprehensive guide to selecting, planting, and maintaining the best border flowers for small gardens, covering factors such as plant height, bloom duration, foliage texture, and care requirements.


1. Understanding the Role of Border Flowers

Border flowers serve several important functions in small gardens:

  • Visual Definition: They create clear edges, separating pathways, lawns, or different planting areas.
  • Aesthetic Appeal: Continuous blooms along garden edges enhance color and texture.
  • Space Optimization: Compact or low-growing border plants add beauty without encroaching on limited space.
  • Habitat Creation: They attract pollinators like bees and butterflies, supporting biodiversity even in small urban gardens.

Understanding these roles helps gardeners choose plants that complement both the garden layout and other planting elements.


2. Criteria for Selecting Border Flowers

Choosing the right border flowers requires careful consideration of several factors:

  • Height: For small gardens, select low to medium-height flowers (6–24 inches) to avoid visual overcrowding.
  • Spread: Compact, well-behaved plants prevent crowding and reduce the need for constant pruning.
  • Bloom Duration: Prefer plants with long flowering periods or successive blooms for continuous color.
  • Maintenance: Low-maintenance plants save time and keep small gardens neat.
  • Climate Adaptation: Choose species suited to local temperature, sunlight, and soil conditions.

Evaluating these factors ensures a cohesive and sustainable garden design.


3. Top Border Flowers for Small Gardens

A. Lavender (Lavandula spp.)

  • Height/Spread: 12–18 inches tall, 18–24 inches wide
  • Features: Fragrant purple flowers, silvery-green foliage
  • Benefits: Drought-tolerant, attracts pollinators, evergreen in mild climates
  • Care Tips: Requires full sun and well-drained soil; prune lightly after flowering to maintain shape

B. Marigolds (Tagetes spp.)

  • Height/Spread: 6–18 inches tall, compact habit
  • Features: Bright yellow, orange, or bi-colored blooms
  • Benefits: Natural pest deterrent, long blooming period, easy to grow
  • Care Tips: Plant in full sun; deadhead regularly for continuous flowering

C. Salvia (Salvia spp.)

  • Height/Spread: 12–24 inches tall, 12–18 inches wide
  • Features: Spikes of purple, red, or blue flowers
  • Benefits: Attracts bees and butterflies, drought-tolerant once established
  • Care Tips: Needs full sun; cut back after flowering to promote rebloom

D. Alyssum (Lobularia maritima)

  • Height/Spread: 4–6 inches tall, spreads up to 12 inches
  • Features: Tiny, fragrant white, purple, or pink blooms
  • Benefits: Excellent ground cover, fills gaps between taller plants, attracts pollinators
  • Care Tips: Thrives in full sun to partial shade; trim occasionally to encourage fresh blooms

E. Pansies (Viola tricolor var. hortensis)

  • Height/Spread: 6–9 inches tall, 6–12 inches wide
  • Features: Large, colorful blooms with striking patterns
  • Benefits: Cool-season flowering, ideal for seasonal color in spring and fall
  • Care Tips: Prefers full to partial sun; regular watering and deadheading enhance performance

F. Boxwood (Buxus spp.)

  • Height/Spread: 12–24 inches tall, naturally dense and compact
  • Features: Evergreen foliage provides structure year-round
  • Benefits: Adds formal definition to borders, low-maintenance once established
  • Care Tips: Prune lightly to maintain shape; grows best in well-drained soil with partial to full sun

G. Coreopsis (Coreopsis spp.)

  • Height/Spread: 12–18 inches tall, 12–24 inches wide
  • Features: Bright yellow, daisy-like blooms
  • Benefits: Long flowering season, attracts butterflies, tolerant of poor soils
  • Care Tips: Plant in full sun; deadhead spent flowers to encourage continued blooming

H. Sweet Alyssum & Creeping Phlox

  • Height/Spread: 4–6 inches tall, spreads up to 18 inches
  • Features: Masses of tiny flowers in white, pink, purple
  • Benefits: Excellent for filling edges and creating a low carpet of color
  • Care Tips: Prefers full sun; trim after flowering to encourage a fresh flush

4. Planting Techniques for Small Garden Borders

A. Layering

  • Arrange taller plants toward the back and shorter ones at the front for visual depth.
  • Alternating flower colors and textures adds interest and prevents monotony.

B. Succession Planting

  • Combine early, mid, and late-season bloomers to ensure continuous color along borders.
  • Stagger plantings of annuals every 2–3 weeks to extend the flowering period.

C. Companion Planting

  • Mix perennials and annuals to maintain interest year-round.
  • Select pollinator-friendly combinations to support biodiversity.

D. Container Borders

  • For extremely small gardens, consider using containers to define borders.
  • Containers allow mobility, easy soil control, and layering of multiple flowering types.

5. Soil Preparation and Fertilization

Healthy soil promotes robust border flowers:

  • Soil Type: Most border flowers prefer well-drained, fertile soil.
  • Organic Matter: Add compost or leaf mold to improve texture, fertility, and water retention.
  • Fertilization: Apply slow-release fertilizer at planting; supplement with liquid feed during peak bloom.
  • Mulching: Use organic mulch to retain moisture, suppress weeds, and regulate soil temperature.

Proper soil care ensures dense foliage, abundant flowers, and reduced maintenance.


6. Watering Practices for Small Borders

  • Regular Moisture: Keep soil evenly moist but not waterlogged.
  • Drip Irrigation: Ideal for narrow borders to reduce water waste and prevent foliage diseases.
  • Watering Timing: Early morning watering minimizes evaporation and fungal risks.

Consistent watering supports healthy root systems and prolonged flowering.


7. Pruning, Deadheading, and Maintenance

Maintaining tidy borders encourages bushy growth and continuous flowering:

  • Deadheading: Remove spent blooms from annuals like marigolds and pansies to stimulate new growth.
  • Pruning: Trim perennials lightly to maintain shape and prevent legginess.
  • Pest Management: Monitor for aphids, slugs, and fungal infections; treat promptly to avoid damage.

Ongoing maintenance ensures vibrant and compact borders throughout the season.


8. Maximizing Space and Visual Appeal

In small gardens, space optimization is critical:

  • Plant in Groups: Mass planting creates the illusion of a larger, more colorful border.
  • Contrasting Colors: Use complementary or analogous colors for visual interest and depth.
  • Texture Variation: Mix foliage textures (e.g., fine-leaved lavender with broad-leaved pansies) for a dynamic, layered appearance.

Creative arrangements make borders stand out without overwhelming small garden areas.


9. Seasonal Considerations

  • Spring Borders: Use tulips, pansies, alyssum, and early perennials for vibrant early-season color.
  • Summer Borders: Marigolds, salvias, and coreopsis thrive in full sun and heat.
  • Autumn Borders: Add chrysanthemums, ornamental kale, and asters to extend visual appeal.
  • Winter Interest: Evergreen borders like boxwood or heather provide structure when flowers are dormant.

Seasonal planning ensures year-round appeal, even in compact gardens.


10. Benefits of Thoughtful Border Planting

  • Enhanced Aesthetic Appeal: Borders provide definition, structure, and continuous color.
  • Space Efficiency: Compact, layered plantings make small gardens look full and well-designed.
  • Pollinator Support: Flowering borders attract beneficial insects, improving overall garden health.
  • Low Maintenance: Selecting well-suited plants reduces frequent interventions while maintaining beauty.

Well-planned borders transform small gardens into visually engaging, productive, and sustainable spaces.


11. Common Challenges and Solutions

  • Overcrowding: Leads to poor airflow and disease. Solution: Space plants appropriately and thin overcrowded areas.
  • Leggy Growth: Often caused by insufficient light or uneven watering. Solution: Ensure full sun exposure and consistent moisture.
  • Short Bloom Duration: Select long-flowering species and practice deadheading to extend flowering periods.
  • Pest Pressure: Monitor regularly and use organic treatments to prevent damage.

Addressing these challenges ensures healthy, full, and vibrant borders.


12. Conclusion

Border flowers are the key to defining and beautifying small gardens, creating structure, continuity, and color that enhances the entire landscape. By carefully selecting species that are compact, long-blooming, and low-maintenance, and by implementing best practices in planting, soil care, watering, pruning, and seasonal planning, gardeners can maintain dense, vibrant, and sustainable borders.

Strategic layering, companion planting, and thoughtful design allow even small spaces to feel full, lush, and visually dynamic, providing months of enjoyment. Incorporating evergreens or late-season bloomers extends interest through winter and autumn, ensuring that the border remains an attractive focal point year-round.

Ultimately, successful border planting combines knowledge, planning, and regular care. When executed correctly, it transforms a small garden into a compact paradise, showcasing vibrant blooms, attracting pollinators, and maximizing the beauty of every inch of space.

Amazing DIY Ideas: Create Hanging Lanterns with Moss Rose and Recycled Plastic Bottles

Amazing DIY Ideas: Create Hanging Lanterns with Moss Rose and Recycled Plastic Bottles

Transforming your garden into a vibrant and creative oasis doesn’t always require expensive materials. With a little imagination, everyday items like plastic bottles can be repurposed to make stunning decorative elements. One of the most striking ways to do this is by creating hanging lanterns filled with Moss Rose (Portulaca) using recycled plastic bottles. These DIY lanterns not only brighten your garden but also combine the charm of flowering plants with eco-friendly creativity. In this guide, we’ll explore step-by-step ideas to craft hanging lanterns that are both beautiful and functional.

Why Hanging Lanterns with Moss Rose?

Moss Rose is a low-maintenance, colorful flowering plant known for thriving in sunny spots. Combining it with hanging lanterns made from plastic bottles brings several advantages:

  1. Eco-Friendly: Reuse plastic bottles that would otherwise contribute to waste.
  2. Space-Saving: Ideal for balconies, patios, and small gardens.
  3. Visual Appeal: Bright, cascading flowers enhance any garden’s aesthetic.
  4. Easy Maintenance: Moss Rose thrives in poor soil and requires minimal care.
  5. DIY Creativity: Crafting hanging lanterns is a fun, artistic project suitable for all ages.

This combination allows gardeners to enjoy both sustainability and stunning garden décor.

Materials Needed

Creating hanging lanterns with Moss Rose is simple and requires minimal materials:

  • Plastic Bottles: Recycled 1–2 liter bottles work best.
  • Utility Knife or Scissors: For cutting bottles safely.
  • Potting Soil: Lightweight, well-draining soil for optimal plant growth.
  • Moss Rose Plants or Seeds: Compact flowering plants that thrive in containers.
  • String, Twine, or Wire: To hang your lanterns securely.
  • Decorative Items: Optional paint, markers, or stickers for personalization.
  • Watering Can or Spray Bottle: For daily care.

With these materials, you can turn ordinary bottles into stunning hanging garden lanterns that capture attention.

Preparing Plastic Bottles

Proper preparation is essential for creating functional and durable hanging lanterns:

  1. Cleaning: Wash the bottles thoroughly to remove any residue or labels.
  2. Cutting the Bottles:
    • Decide the lantern’s shape and cut the bottle accordingly.
    • Typically, cut the bottom section of the bottle to create a small pot for planting.
    • Keep the top portion for a decorative cover or handle if desired.
  3. Drainage Holes:
    • Poke small holes at the base of each bottle to prevent waterlogging.
  4. Decorative Touches:
    • Paint, wrap with twine, or decorate the bottles for an aesthetic appeal.

Well-prepared bottles ensure healthy plant growth and make the lanterns sturdy and attractive.

Planting Moss Rose

Moss Rose is perfect for these hanging lanterns due to its trailing habit and bright flowers:

  1. Soil Preparation: Use lightweight, well-draining soil mixed with compost for nutrients.
  2. Planting:
    • Place Moss Rose seedlings or seeds in the bottom portion of the bottle.
    • Ensure plants have enough room to grow and spread.
  3. Watering:
    • Water the plants lightly after planting. Moss Rose prefers moderately dry conditions, so avoid overwatering.

Planting Moss Rose in hanging lanterns creates a cascading effect that enhances the overall beauty of your garden.

Creating Hanging Lanterns

Once your bottles and plants are ready, it’s time to assemble the lanterns:

  1. Attaching the Hanging Mechanism:
    • Use string, twine, or wire to create a secure loop around the bottle neck.
    • Ensure it can hold the bottle’s weight when filled with soil and plants.
  2. Stacking or Layering:
    • For added visual interest, create multi-tiered hanging lanterns by stacking smaller bottles above larger ones.
  3. Placement:
    • Hang lanterns in sunny spots where Moss Rose thrives.
    • Ensure they are spaced evenly and have proper airflow.

Hanging lanterns are flexible and can be arranged in clusters, along fences, or in vertical garden setups.

Watering and Care

Maintaining healthy Moss Rose in hanging lanterns requires regular attention:

  • Watering Frequency: Moss Rose is drought-tolerant. Water moderately, allowing soil to dry slightly between watering.
  • Sunlight: Full sun exposure encourages abundant blooms and healthy foliage.
  • Fertilizing: Use a balanced liquid fertilizer once every two weeks to promote growth and flowering.
  • Pruning: Trim dead flowers and leaves to encourage new blooms and maintain a neat appearance.

Proper care ensures your hanging lanterns remain colorful, lush, and vibrant throughout the growing season.

Decorating Your Hanging Lanterns

To make your lanterns visually stunning, consider adding decorative elements:

  • Painted Bottles: Use weather-resistant paints to create patterns or bright colors.
  • Twine Wraps: Wrap the bottle with natural twine for a rustic, charming look.
  • Labels or Tags: Add plant names or decorative labels for a personalized touch.
  • Mini Lights: Incorporate small LED fairy lights for a magical evening effect.

Decorating your hanging lanterns adds character and ensures they stand out as a centerpiece in your garden.

Benefits of Hanging Lantern Gardens

Creating hanging lanterns with Moss Rose offers numerous benefits for gardeners:

  1. Maximizes Space: Perfect for small balconies or terraces where ground space is limited.
  2. Recycles Plastic: Gives new life to discarded plastic bottles, promoting sustainability.
  3. Visual Impact: Cascading flowers in hanging lanterns create a stunning garden focal point.
  4. Low Maintenance: Moss Rose is hardy and resilient, requiring minimal care.
  5. Fun DIY Project: Ideal for gardening enthusiasts, families, and students interested in eco-friendly crafts.

Hanging lantern gardens are not just functional—they are also a statement of creativity, sustainability, and aesthetic appeal.

Common Challenges and Solutions

Even simple DIY hanging lanterns can face challenges:

  • Drying Out Quickly: Hanging containers dry faster. Water consistently but avoid waterlogging.
  • Toppling or Falling: Ensure strings or wires are secure and capable of holding the weight.
  • Limited Soil Space: Choose compact plants or herbs that thrive in smaller pots.
  • Sun Exposure: Moss Rose needs full sun; insufficient light can reduce flowering.

Addressing these issues proactively ensures your hanging lanterns remain thriving and visually appealing.

Creative Ideas for Expansion

Once you’ve mastered basic hanging lanterns, consider these ideas for enhancing your garden:

  1. Multi-Tiered Lanterns: Create a cascading vertical garden using multiple lanterns at different heights.
  2. Mixed Plantings: Combine Moss Rose with trailing succulents, small herbs, or other flowering plants for a diverse look.
  3. Seasonal Themes: Change decorations, paint, or plant varieties according to the season for dynamic displays.
  4. Interactive Garden: Encourage children to participate in planting and decorating lanterns to make gardening fun and educational.

These creative approaches can turn your simple hanging lantern project into a vibrant, ever-evolving garden feature.

Conclusion

Creating hanging lanterns using Moss Rose and recycled plastic bottles is an innovative, eco-friendly, and visually stunning way to enhance your garden. By repurposing plastic bottles, you reduce waste while crafting functional and beautiful planters. Moss Rose thrives in sunny, well-drained conditions, making it perfect for hanging arrangements that cascade with bright, cheerful blooms.

From preparing bottles, planting, and assembling hanging lanterns to decorating and maintaining them, this DIY project combines sustainability, creativity, and gardening expertise. These lanterns are perfect for small spaces, balconies, patios, or vertical gardens, bringing life and color to areas that might otherwise be underutilized.

Start your own hanging lantern garden today and enjoy the satisfaction of turning ordinary plastic bottles into extraordinary, flowering garden art. Not only will your space become more beautiful, but you’ll also contribute to a greener, more sustainable environment while having fun in the process.

Creative Ideas to Recycle Plastic Bottles into Beautiful Two-Tiered Flower Pots

Creative Ideas to Recycle Plastic Bottles into Beautiful Two-Tiered Flower Pots

Recycling plastic bottles is not only environmentally responsible, but it can also be an exciting way to enhance your garden. With a little creativity, discarded plastic bottles can be transformed into stunning two-tiered flower pots that maximize space and bring life to balconies, terraces, and small gardens. This guide will walk you through practical ideas and step-by-step methods to turn plastic bottles into beautiful, eco-friendly, and functional planters.

Why Recycle Plastic Bottles for Gardening?

Plastic pollution is one of the biggest environmental challenges today. Recycling plastic bottles into flower pots provides numerous benefits:

  1. Sustainability: Reduces plastic waste while giving it a new purpose.
  2. Cost-Effective: Saves money on purchasing expensive planters.
  3. Creative Expression: Allows you to design unique, colorful, and decorative garden displays.
  4. Space Optimization: Two-tiered pots are ideal for vertical gardening, especially in small spaces.
  5. Accessibility: Plastic bottles are widely available, making this project accessible to anyone.

By repurposing plastic bottles, you contribute to environmental conservation and add functional art to your garden.

Materials Needed

Creating two-tiered flower pots from plastic bottles requires just a few simple materials:

  • Plastic Bottles: Any size, preferably 1–2 liters for the base and 500 ml–1 liter for the top tier.
  • Utility Knife or Scissors: To cut the bottles safely.
  • Soil: Good-quality potting mix suitable for your plants.
  • Plants or Seeds: Flowers, herbs, or small vegetables.
  • String or Twine: For hanging vertical arrangements (optional).
  • Paint and Decorative Items: Optional for customization and aesthetics.
  • Hot Glue or Tape: Optional for securing tiers if needed.

With these materials, you can transform ordinary plastic bottles into charming garden planters.

Preparing the Plastic Bottles

Before planting, the bottles need to be prepared properly:

  1. Cleaning: Wash the bottles thoroughly to remove any residues.
  2. Cutting:
    • For a two-tiered pot, cut one bottle to create the base and another for the top tier.
    • Typically, cut the bottom half of a larger bottle for the base.
    • Cut the top portion of a smaller bottle for the second tier, making sure it fits securely above the base.
  3. Drainage Holes:
    • Use a small knife or screwdriver to make holes at the bottom of each tier.
    • Proper drainage prevents waterlogging and root rot.

Proper preparation ensures a healthy growing environment for your plants and prevents common problems like overwatering.

Designing Two-Tiered Flower Pots

Two-tiered flower pots are ideal for creating compact, visually appealing arrangements:

  1. Stacked Design:
    • Place the smaller bottle directly above the larger base.
    • You can use hot glue, strong tape, or a simple peg system to secure them.
    • Fill both tiers with soil and plant your chosen flowers.
  2. Hanging Design:
    • Use string or twine to suspend both tiers vertically.
    • Secure the tiers by threading the string through the bottles’ necks.
    • Hang in balconies, windows, or small patios for a vertical garden effect.
  3. Staggered Design:
    • Arrange multiple two-tiered bottles at different heights on a wall or railing.
    • This adds depth and dimension to your garden display.

These designs not only save space but also create eye-catching arrangements that suit various garden sizes and layouts.

Choosing the Right Plants

The success of your two-tiered flower pots depends on selecting suitable plants:

  • Small Flowering Plants: Petunias, marigolds, lobelia, and begonias work well.
  • Herbs: Basil, mint, thyme, and parsley thrive in small containers.
  • Succulents: Perfect for low-maintenance vertical arrangements.
  • Vegetables: Lettuce, radish, and cherry tomatoes can be grown in these compact pots.

Choose plants that are appropriate for the pot size and sunlight availability. Trailing plants look particularly attractive in hanging or stacked designs.

Planting Your Two-Tiered Flower Pots

Planting properly ensures your recycled pots are both beautiful and functional:

  1. Fill With Soil:
    • Add potting mix to the bottom tier first.
    • Ensure it’s evenly packed but not compacted.
  2. Add Plants:
    • Place the plants or seeds in the soil, leaving space around the edges.
    • Cover roots gently with more soil and press lightly.
  3. Watering:
    • Water thoroughly but avoid overwatering.
    • Ensure excess water drains from the bottom holes.
  4. Top Tier:
    • Fill the top bottle with soil and plant smaller or trailing plants.
    • Water carefully to prevent soil from spilling into the lower tier.

Proper planting technique ensures plants receive adequate nutrients and water while preventing root crowding.

Decorating Your Plastic Bottle Pots

Recycled plastic bottles can be transformed into visually stunning planters with a few simple touches:

  • Paint: Use waterproof acrylic paint to add color and patterns.
  • Stickers or Decals: Apply garden-themed stickers for a playful look.
  • Natural Elements: Wrap bottles with jute or twine for a rustic charm.
  • Labels: Add plant labels for organization and identification.

Creative decoration enhances the visual appeal of your garden and makes recycled bottles look like professional planters.

Maintenance Tips for Two-Tiered Flower Pots

Maintaining your recycled flower pots is essential for healthy, thriving plants:

  • Watering: Check soil moisture daily, especially in hanging arrangements that dry faster.
  • Fertilizing: Use a balanced liquid fertilizer every 2–3 weeks for healthy growth.
  • Pruning: Remove dead leaves and flowers to encourage continuous growth.
  • Pest Management: Watch for pests like aphids or spider mites and use safe treatments if needed.
  • Rotation: Rotate pots occasionally to ensure even sunlight exposure.

Regular maintenance ensures your two-tiered flower pots remain lush, vibrant, and productive throughout the growing season.

Benefits of Two-Tiered Flower Pots

Two-tiered flower pots offer unique advantages for gardeners:

  1. Space Efficiency: Ideal for small gardens, balconies, or apartments.
  2. Vertical Gardening: Allows multiple plants in a compact vertical space.
  3. Environmental Impact: Reduces plastic waste while creating functional decor.
  4. Versatility: Can be used for flowers, herbs, succulents, or vegetables.
  5. Aesthetic Appeal: Provides a layered, dynamic look that draws attention.

Two-tiered pots are not only practical but also a creative statement, showcasing your gardening skills and environmental awareness.

Common Challenges and Solutions

Even simple recycled pots can encounter challenges:

  • Overwatering: Ensure drainage holes are clear and soil drains freely.
  • Toppling: Secure tiers with glue, tape, or supports to prevent tipping.
  • Limited Root Space: Select smaller plants or herbs that thrive in compact containers.
  • Sun Exposure: Choose plants based on the light conditions of your balcony or garden.

Addressing these challenges proactively keeps your recycled pots functional and attractive.

Conclusion

Recycling plastic bottles into two-tiered flower pots is an environmentally friendly, cost-effective, and creative way to enhance any garden space. By selecting the right bottles, preparing them properly, choosing suitable plants, and applying decorative touches, you can create stunning vertical displays that save space and reduce waste.

These pots are perfect for flowers, herbs, succulents, or small vegetables, making them versatile additions to balconies, terraces, and small gardens. With consistent watering, feeding, and maintenance, your two-tiered flower pots will thrive, bringing color, beauty, and a touch of eco-conscious creativity to your home.

Start your DIY recycled garden project today, and transform everyday plastic bottles into vibrant, two-tiered floral masterpieces. Not only will you enjoy lush, healthy plants, but you’ll also contribute to reducing plastic waste and promoting sustainable gardening practices.

How to Keep Petunias Full and Bushy

How to Keep Petunias Full and Bushy

Petunias are among the most popular garden flowers, cherished for their vibrant colors, prolific blooms, and adaptability to containers, beds, and hanging baskets. While their charm is undeniable, many gardeners struggle with petunias that become leggy, sparse, or unevenly flowering. Achieving full, bushy petunias requires a combination of proper planting, regular maintenance, and attentive care.

This article explores the principles, strategies, and best practices to maintain healthy, lush petunias, ensuring continuous and visually striking blooms throughout the growing season.


1. Understanding Petunia Growth Habits

Petunias (Petunia × hybrida) are herbaceous annuals that thrive in sunny environments and well-drained soil. They naturally produce trailing or spreading stems, which can become leggy if not managed. Understanding their growth patterns is key to promoting bushiness:

  • Growth Type: Some varieties are upright, while others are trailing or spreading. Compact varieties generally form fuller mounds naturally.
  • Blooming Cycle: Petunias produce flowers continuously from spring through fall when conditions are favorable.
  • Leggy Growth Causes: Insufficient light, lack of pruning, nutrient deficiencies, and overcrowding can lead to sparse plants.

By recognizing these growth tendencies, gardeners can implement strategies to enhance foliage density and bloom coverage.


2. Selecting the Right Variety

Choosing the appropriate petunia variety sets the foundation for bushiness:

  • Grandiflora: Large blooms, suitable for beds and containers, but may require regular pruning to prevent legginess.
  • Multiflora: Smaller flowers, naturally bushy, and continuous bloomers, ideal for dense displays.
  • Spreading/Trailing: Perfect for hanging baskets and window boxes; vigorous growth fills space quickly.

Selecting compact or spreading types is particularly helpful when aiming for dense, visually appealing plants.


3. Planting for Bushiness

Proper planting techniques influence how full petunias will grow:

  • Spacing: Plant petunias 10–12 inches apart to allow air circulation while encouraging lateral growth. Crowding may limit bushiness and increase disease risk.
  • Soil: Well-drained, fertile soil promotes strong root development. Add compost or organic matter to enhance nutrient availability.
  • Light: Petunias require full sun (6–8 hours daily). Insufficient light leads to leggy, sparse growth.

Attention to these factors ensures petunias establish a strong, dense framework for flowering.


4. Pruning and Pinching

One of the most effective ways to keep petunias bushy is regular pruning and pinching:

  • Pinching: Remove the tips of young stems when plants are 4–6 inches tall. This encourages lateral branching, resulting in a fuller plant.
  • Deadheading: Regularly remove spent flowers to stimulate new blooms and prevent energy loss in seed production.
  • Mid-Season Pruning: If petunias become leggy mid-season, cut back stems by one-third to promote regeneration and new growth.

These techniques prevent petunias from becoming sparse and ensure continuous flowering throughout the season.


5. Fertilization Strategies

Proper nutrition is essential for bushy petunias:

  • Balanced Fertilizer: Use a water-soluble fertilizer with equal parts nitrogen, phosphorus, and potassium. Nitrogen promotes lush foliage, phosphorus supports flowering, and potassium strengthens stems.
  • Slow-Release Fertilizer: Incorporate slow-release granules into the soil at planting to sustain growth over weeks.
  • Liquid Feeding: Feed petunias every 1–2 weeks during peak growing season for vigorous, continuous blooms.

A well-fed petunia is denser, healthier, and more resilient against pests and stress.


6. Watering Practices

Watering affects both growth and bloom quality:

  • Consistent Moisture: Petunias prefer evenly moist soil; avoid letting the soil dry completely.
  • Drainage: Ensure pots or beds have good drainage to prevent root rot.
  • Watering Technique: Water at the base of the plant rather than overhead to minimize fungal diseases on leaves and flowers.

Proper watering promotes strong root systems, which support bushier foliage and abundant blooms.


7. Light and Environmental Considerations

Sunlight and environment play a critical role in petunia fullness:

  • Full Sun Exposure: At least 6–8 hours of direct sunlight encourages lateral growth and abundant flowering.
  • Wind Protection: Petunias can be damaged by strong winds, which break stems and reduce fullness. Plant near a natural barrier or use windbreaks.
  • Temperature: Ideal daytime temperatures are 60–75°F. Extreme heat can cause flowers to fade, while cooler temperatures slow growth.

Optimizing light and environmental conditions ensures petunias grow dense and vibrant.


8. Soil and Mulching Techniques

Healthy soil structure and mulching support bushy growth:

  • Soil Aeration: Loosen soil around plants periodically to allow roots to expand and improve oxygen availability.
  • Mulching: Apply a thin layer of organic mulch around the base to retain moisture, suppress weeds, and regulate soil temperature.
  • pH Management: Slightly acidic to neutral soil (pH 6–7) is ideal for nutrient uptake.

A favorable soil environment encourages lateral branching and strong stems, contributing to bushiness.


9. Pests and Disease Management

Maintaining petunias free from stressors promotes fuller growth:

  • Common Pests: Aphids, spider mites, and whiteflies can sap plant energy. Use insecticidal soap or neem oil as needed.
  • Fungal Diseases: Powdery mildew or botrytis can reduce foliage density. Ensure proper spacing, good air circulation, and avoid overhead watering.
  • Early Intervention: Inspect plants weekly to detect pests or diseases early. Healthy plants allocate more energy to foliage and flowering.

Effective pest and disease management supports strong, bushy growth.


10. Companion Planting and Design

Petunias can benefit from strategic companion planting:

  • Tall Plants: Plant petunias in front of taller perennials to protect from wind and sun scorch.
  • Ground Covers: Low-growing companion plants can reduce soil moisture loss and provide visual contrast.
  • Color Coordination: Combine petunias of different colors and varieties for fuller visual appeal and diverse garden textures.

Thoughtful design enhances both garden aesthetics and plant vigor.


11. Seasonal Maintenance

Ongoing maintenance ensures long-term bushiness:

  • Regular Deadheading: Prevents seed formation and directs energy into foliage and flower production.
  • Pruning for Shape: Maintain desired size and shape by trimming back overgrown stems.
  • Fertilizer Adjustment: Reduce nitrogen slightly after mid-season to encourage flowers rather than excessive leafy growth.
  • Re-potting Containers: For container-grown petunias, refresh soil mid-season to provide new nutrients and space for roots.

Consistent care throughout the season ensures dense, lush, and colorful plants.


12. Troubleshooting Common Issues

  • Leggy Growth: Often caused by low light or overcrowding. Solution: provide full sun, space plants properly, and pinch back tips.
  • Sparse Flowering: Could be due to nutrient deficiency or stress. Solution: fertilize regularly, deadhead spent blooms, and maintain consistent moisture.
  • Wilting or Yellowing Leaves: Often a result of overwatering or root stress. Solution: improve drainage and adjust watering frequency.

Proactive troubleshooting keeps petunias healthy, vigorous, and visually appealing.


13. Conclusion

Petunias are dynamic and rewarding plants, but achieving a full and bushy appearance requires intentional care. By understanding their growth habits, selecting the right varieties, and implementing strategies such as pinching, pruning, proper fertilization, consistent watering, and pest management, gardeners can maintain lush, vibrant plants throughout the growing season.

Container gardening, raised beds, and companion planting offer additional opportunities to enhance fullness and flowering density. Regular maintenance, including deadheading and mid-season pruning, ensures petunias continue to produce abundant blooms while maintaining a compact, bushy form.

Ultimately, the key to success lies in observation, timely intervention, and strategic care. With these practices, petunias can flourish, creating colorful, dense, and long-lasting displays in gardens, balconies, and hanging baskets, delighting gardeners and visitors alike.

How to Grow Bigger Hanging Baskets: Expert Tips for Lush, Colorful Displays

How to Grow Bigger Hanging Baskets: Expert Tips for Lush, Colorful Displays

Hanging baskets are a stunning way to add color, texture, and life to your porch, balcony, or garden. They can transform any space into a vibrant and inviting area. However, many gardeners struggle with keeping their hanging baskets full, lush, and thriving. The secret to growing bigger, healthier hanging baskets lies in choosing the right plants, proper soil, feeding, watering, pruning, and maintenance. In this guide, we’ll show you how to grow bigger hanging baskets step by step, so you can enjoy eye-catching displays all season long.

Why Bigger Hanging Baskets Matter

Full, overflowing hanging baskets make a dramatic impact on your home’s aesthetic. Larger baskets with healthy, robust plants provide several benefits:

  1. Visual Appeal: Bigger baskets are more noticeable and create a striking focal point.
  2. Better Plant Health: Properly maintained baskets allow plants to thrive without stress or overcrowding.
  3. Continuous Bloom: Larger, well-fed baskets encourage abundant flowers that last longer.
  4. Space Optimization: Hanging baskets make use of vertical space, perfect for small gardens or balconies.

By focusing on growth, structure, and plant health, you can achieve larger, more impressive hanging baskets.

Choosing the Right Hanging Basket

The first step to growing bigger hanging baskets is selecting the right container:

  • Size: Choose a basket with a larger diameter and depth. A 12–16 inch basket is ideal for a fuller display.
  • Material: Wire baskets lined with coco liners, plastic baskets, or ceramic baskets with drainage holes all work well.
  • Weight Considerations: Make sure your support system can handle a heavier basket once plants and soil are added.

A bigger basket naturally allows more space for roots to grow, supporting more vigorous plants and fuller growth.

Selecting the Best Plants

Choosing the right plants is crucial for a successful hanging basket. Consider:

  1. Trailing Plants: Ideal for cascading effects. Examples: Petunias, Bacopa, Lobelia, Fuchsia, Ivy.
  2. Upright Plants: Provide height and structure. Examples: Geraniums, Begonias, Salvias, Impatiens.
  3. Filler Plants: Fill gaps and provide lush foliage. Examples: Sweet Alyssum, Plectranthus, Ferns.
  4. Color and Bloom Cycle: Choose a mix of colors and bloom times for a continuous show.

Selecting a combination of trailing, upright, and filler plants ensures a dense, full basket that attracts the eye.

Preparing the Soil

The right soil mix is key to healthy, fast-growing plants:

  • Well-Draining Mix: Hanging baskets can dry out quickly, so a soil mix that drains well yet retains moisture is essential.
  • Nutrient-Rich: Use a potting mix enriched with compost, slow-release fertilizer, or organic matter.
  • Lightweight: Avoid heavy garden soil, which can compact and weigh down the basket.

A high-quality potting mix provides plants with the nutrients and space they need to develop strong roots and larger growth.

Planting Your Hanging Basket

Planting properly ensures that plants have room to grow and thrive:

  1. Layering: Place larger plants in the center and trailing plants near the edges.
  2. Spacing: Avoid overcrowding, but plant close enough to fill the basket as plants grow.
  3. Watering-In: After planting, water the basket thoroughly to settle the soil around the roots.

Proper planting techniques allow plants to spread evenly, ensuring a bigger and fuller appearance over time.

Watering and Moisture Management

Hanging baskets tend to dry out faster than ground plants, so consistent watering is critical:

  • Check Daily: During hot or windy weather, water daily or twice daily if needed.
  • Even Moisture: Ensure water reaches the roots by watering slowly and thoroughly.
  • Self-Watering Options: Consider baskets with reservoirs or coco liners that retain moisture.

Maintaining the right moisture level promotes strong root development, leading to larger, healthier plants.

Feeding and Fertilization

Bigger, fuller hanging baskets require consistent feeding to maintain growth:

  • Liquid Fertilizer: Apply a balanced liquid fertilizer every 1–2 weeks during the growing season.
  • Slow-Release Fertilizer: Incorporate slow-release fertilizer into the potting mix at planting time.
  • Specialized Formulas: Some fertilizers are specifically designed for flowering hanging baskets, providing extra nutrients for blooms.

Regular feeding ensures continuous growth, vibrant foliage, and prolific flowering, all contributing to bigger baskets.

Pruning and Maintenance

Proper pruning encourages fuller growth and prevents leggy plants:

  1. Deadheading: Remove spent flowers regularly to stimulate new blooms.
  2. Pinching Back: Trim trailing plants to encourage branching and fuller growth.
  3. Removing Weak Stems: Cut out weak, diseased, or overcrowded stems to direct energy to healthier growth.

Routine maintenance ensures that your hanging basket remains lush, vibrant, and well-shaped throughout the season.

Positioning and Light

Light is essential for healthy growth and flowering:

  • Sun Requirements: Most flowering plants prefer 6–8 hours of sunlight, while shade-loving plants like Impatiens need indirect light.
  • Air Circulation: Place baskets in areas with good airflow to prevent fungal diseases.
  • Adjusting Position: Rotate baskets if sunlight is uneven to ensure even growth.

Correct placement ensures plants receive the light they need for vigorous growth and bigger blooms.

Dealing with Common Problems

Even well-maintained hanging baskets can face challenges. Here’s how to manage common issues:

  • Drying Out: Water more frequently and consider adding a water-retentive gel to the soil.
  • Pests: Watch for aphids, spider mites, and whiteflies. Use organic insecticidal sprays if necessary.
  • Nutrient Deficiency: Yellowing leaves may indicate lack of nutrients. Adjust feeding frequency or fertilizer type.
  • Leggy Growth: Pinch back stems and ensure adequate light to promote compact, fuller plants.

Proactive management keeps plants healthy and supports continuous growth, contributing to a bigger basket.

Tips for Bigger, Lusher Baskets

  1. Start With Healthy Plants: Choose vigorous, disease-free plants from the nursery.
  2. Mix Plant Types: Combine trailing, upright, and filler plants for maximum visual impact.
  3. Use High-Quality Potting Mix: Nutrient-rich and well-draining soil promotes strong roots.
  4. Regular Watering and Feeding: Keep plants hydrated and nourished for continuous growth.
  5. Prune and Deadhead: Encourage branching, fullness, and repeated blooms.
  6. Rotate and Monitor: Check plants regularly and rotate for even growth.
  7. Consider Fertilizer Spikes: Slow-release spikes help maintain nutrients over time.

By following these tips, you can grow bigger, fuller hanging baskets that wow every guest and enhance your home or garden space.

Conclusion

Growing bigger hanging baskets requires a combination of the right container, quality soil, carefully chosen plants, consistent watering, feeding, and routine maintenance. By understanding the needs of your plants and providing proper care, you can achieve lush, vibrant baskets that overflow with foliage and flowers.

Whether you are a beginner gardener or an experienced grower, these techniques allow you to maximize growth, encourage continuous flowering, and create stunning displays that last throughout the season. Hanging baskets are not just decorations—they’re living works of art that can transform any space with color, texture, and life.

Start with the right plan, invest in quality materials, and maintain consistent care. Soon, you’ll enjoy hanging baskets that are bigger, fuller, and more beautiful than ever, impressing everyone who sees them.

How to Plant Bulbs for Successive Flowering

How to Plant Bulbs for Successive Flowering

Bulbous plants are a cornerstone of vibrant and dynamic gardens, offering bursts of color and texture throughout the year. From tulips and daffodils to hyacinths and crocuses, bulbs have the power to transform outdoor and indoor spaces into seasonal showcases. One of the most effective ways to maximize their aesthetic impact is through successive flowering, a technique that ensures continuous blooms over extended periods. By carefully planning planting times, selecting appropriate species, and employing strategic layering, gardeners can enjoy months of uninterrupted color and fragrance.

This article explores the principles, methods, and best practices for planting bulbs for successive flowering, including soil preparation, timing, species selection, and ongoing care.


1. Understanding Successive Flowering

Successive flowering refers to the staggered blooming of plants so that as one set of bulbs fades, another begins to flower. This approach provides:

  • Continuous color in garden beds and containers
  • Extended visual interest in landscaping
  • Opportunities for combining early, mid, and late-season bloomers

Achieving this requires an understanding of each bulb’s growth cycle, chilling requirements, and bloom duration.


2. Selecting Bulbs for Successive Blooming

Bulb selection is crucial for continuous flowering. Consider these categories:

A. Early-Season Bulbs

  • Examples: Crocus, Snowdrops, Glory-of-the-Snow
  • Bloom Time: Late winter to early spring
  • Features: Provide early bursts of color when other plants are dormant

B. Mid-Season Bulbs

  • Examples: Daffodils, Tulips, Hyacinths
  • Bloom Time: Mid to late spring
  • Features: Serve as the centerpiece of spring beds, offering height and vibrant hues

C. Late-Season Bulbs

  • Examples: Alliums, Lilies, Autumn Crocus
  • Bloom Time: Late spring to early summer or autumn
  • Features: Extend flowering season and complement earlier blooms

By combining bulbs from these categories, gardeners can ensure a continuous display for several months.


3. Planning Your Planting Schedule

Proper timing is key for successive flowering:

  • Fall Planting: Most spring-flowering bulbs are planted in autumn to allow root development during winter.
  • Winter Forcing: Some bulbs like tulips and hyacinths can be pre-chilled indoors to bloom in early spring.
  • Staggered Planting: Plant bulbs of the same species at intervals of 1–2 weeks to extend the blooming period.

Creating a planting calendar helps gardeners visualize bloom sequences and plan for peak display times.


4. Soil Preparation for Bulbs

Healthy soil is essential for robust flowering:

  • Well-Drained Soil: Bulbs are prone to rot in waterlogged soil. Add sand or organic matter to improve drainage.
  • Fertile Medium: Incorporate compost or slow-release fertilizer to provide essential nutrients.
  • pH Balance: Most bulbs prefer slightly acidic to neutral soil (pH 6–7).

Proper soil preparation ensures strong root development and vigorous flowering.


5. Planting Techniques for Successive Flowering

A. Depth and Spacing

  • Plant bulbs at a depth 2–3 times their height for stability and protection.
  • Space bulbs to prevent overcrowding, allowing sufficient air circulation and root growth.

B. Layering (Lasagna Planting)

  • Plant multiple bulb species in the same bed in layers: early bloomers on top, mid-season in the middle, late bloomers deeper.
  • This technique ensures a continuous progression of blooms as each layer emerges in sequence.

C. Container Planting

  • Use pots or raised beds for staggered blooms, adjusting depth according to each bulb’s requirements.
  • Containers allow mobility, enabling gardeners to move blooms for optimal sunlight or display.

6. Companion Planting and Design

Strategic pairing of bulbs with other plants enhances aesthetics:

  • Ground Covers: Low-growing plants like creeping phlox or thyme can mask bare soil between bulbs.
  • Perennials: Interplanting with perennials ensures that foliage covers fading bulbs, maintaining garden appeal.
  • Color Harmony: Combine complementary colors and textures to create a visually cohesive display throughout the season.

Effective design supports both aesthetic and ecological benefits, attracting pollinators like bees and butterflies.


7. Watering and Fertilization

Bulbs require proper moisture and nutrition:

  • Initial Watering: After planting, water thoroughly to settle the soil around roots.
  • Regular Moisture: Maintain consistent soil moisture during growth and flowering. Avoid overwatering, which can cause rot.
  • Fertilization: Apply bulb-specific or balanced fertilizers in early growth stages. Avoid excessive nitrogen, which encourages foliage at the expense of flowers.

Consistent care ensures maximum bloom size, color intensity, and duration.


8. Aftercare and Maintenance

Post-bloom care is vital for successive flowering:

  • Deadheading: Remove spent flowers to prevent energy loss in seed production.
  • Leaf Retention: Allow foliage to die back naturally; leaves photosynthesize, replenishing bulb energy reserves for next season.
  • Dividing Bulbs: After 2–3 years, lift and divide crowded bulbs to maintain vigor and prevent disease.

Proper maintenance preserves bulb health and ensures predictable, successive flowering in future seasons.


9. Pests and Disease Management

Bulbs are susceptible to several threats:

  • Rodents: Mice and squirrels can dig up bulbs. Use mesh coverings or plant in rodent-resistant containers.
  • Fungal Diseases: Avoid overwatering and maintain airflow to prevent rot and mildew.
  • Nematodes and Pests: Inspect soil and bulbs regularly; treat infestations early with organic solutions if necessary.

Effective management protects bulbs and ensures uninterrupted flowering.


10. Seasonal Adjustments and Climate Considerations

Climate influences flowering schedules:

  • Cold Climates: Chilling requirements must be met naturally or artificially (refrigeration) for certain bulbs.
  • Warm Climates: Some spring bulbs may require pre-chilling to bloom properly.
  • Rainfall Management: Excessive rain can cause rot; ensure drainage or use raised beds.

Adjusting planting strategies according to climate guarantees reliable successive blooms.


11. Tips for Maximizing Successive Flowering

  1. Select Varieties with Different Bloom Times: Choose early, mid, and late-season varieties for continuous interest.
  2. Stagger Planting Dates: Plant the same species in intervals of 1–2 weeks.
  3. Layered Planting: Create vertical layers in beds or containers to extend bloom sequences.
  4. Monitor Soil Conditions: Maintain fertility, drainage, and moisture for optimal growth.
  5. Record Keeping: Keep a gardening journal to track bloom times and adjust future planting schedules.

These techniques combine planning, observation, and care to produce a vibrant, ever-changing garden.


12. Benefits of Successive Flowering with Bulbs

  • Extended Visual Appeal: Enjoy weeks to months of uninterrupted color.
  • Pollinator Support: Continuous blooms provide nectar for bees, butterflies, and other beneficial insects.
  • Efficient Use of Space: Maximizes garden impact without expanding bed size.
  • Seasonal Interest: Keeps the garden visually engaging across early spring, mid-spring, and late spring or summer.

Successive flowering transforms gardens into dynamic landscapes that evolve throughout the season.


13. Conclusion

Planting bulbs for successive flowering is a combination of art, science, and careful planning. By selecting bulbs with staggered bloom times, preparing well-draining and fertile soil, employing layered and staggered planting techniques, and maintaining proper care routines, gardeners can enjoy months of vibrant blooms and lush foliage.

Successive flowering not only enhances garden aesthetics but also supports pollinators, improves garden biodiversity, and maximizes the utility of limited space. Strategic planning, attentive care, and climate-aware adjustments ensure that bulbs remain healthy and productive year after year.

Ultimately, the key to a thriving successive-bloom garden lies in understanding each bulb’s growth cycle, providing optimal conditions, and carefully coordinating planting schedules. With these strategies, gardeners can create a living, ever-changing masterpiece that blooms continuously, bringing beauty, fragrance, and life to any garden space.

How to Grow Mung Bean Sprouts at Home: A Step-by-Step Guide

How to Grow Mung Bean Sprouts at Home: A Step-by-Step Guide

Mung bean sprouts are a highly nutritious and versatile food, widely used in salads, stir-fries, soups, and sandwiches. Known for their crunchy texture, mild flavor, and abundance of vitamins and minerals, mung bean sprouts are a staple in many Asian cuisines. The great news is that you don’t need a garden or special equipment to grow them—they can be easily cultivated at home with minimal space and effort. In this guide, we’ll show you how to grow mung bean sprouts step by step, from selecting seeds to harvesting fresh, crunchy sprouts in just a few days.

Why Grow Mung Bean Sprouts at Home?

Growing mung bean sprouts at home comes with numerous advantages:

  1. Freshness: Homegrown sprouts are tender, crisp, and free from preservatives or chemicals.
  2. Nutritional Value: Mung bean sprouts are rich in protein, fiber, vitamins A, C, and K, folate, and essential minerals.
  3. Cost-Effective: Growing your own sprouts is much cheaper than buying packaged sprouts from stores.
  4. Quick Growth: Sprouts are ready to harvest in just 4–6 days, making them perfect for fast home gardening.
  5. Space-Saving: Sprouting mung beans requires very little space—ideal for apartments and small kitchens.
  6. Control Over Cleanliness: You decide the water quality, hygiene, and environment, reducing the risk of contamination.

With these benefits, mung bean sprouts are an excellent choice for anyone looking to add fresh, nutrient-rich vegetables to their diet.

Materials Needed

To grow mung bean sprouts at home, you will need the following materials:

  1. Mung Bean Seeds: Fresh, whole, and undamaged seeds are best.
  2. Containers: Glass jars, plastic cups, or trays can be used. Transparent containers are preferable to monitor growth.
  3. Water: Clean, filtered water is ideal for soaking and rinsing.
  4. Cheesecloth or Mesh Lid: Optional, helps cover jars while allowing drainage.
  5. Tray or Plate: To catch excess water when draining.
  6. Spray Bottle: For gentle misting if needed.

These simple materials make the sprouting process accessible for beginners and easy to manage.

Choosing the Right Seeds

Selecting healthy mung bean seeds is crucial for successful sprouting:

  • Quality: Look for firm, whole seeds without cracks or discoloration.
  • Freshness: Fresh seeds germinate more quickly and produce better sprouts.
  • Source: Purchase from a trusted supplier or grocery store to ensure seed viability.

Good-quality seeds result in uniform, healthy sprouts and reduce the risk of mold or spoilage.

Preparing the Seeds

Proper preparation jumpstarts germination and ensures a high yield:

  1. Sorting: Remove any damaged or broken seeds.
  2. Rinsing: Wash the seeds thoroughly under clean running water.
  3. Soaking:
    • Place seeds in a bowl or jar and cover with water.
    • Soak for 8–12 hours or overnight.
    • The seeds will swell, and small roots may begin to appear.

Soaking softens the seed coat, activates enzymes, and accelerates the sprouting process.

Choosing the Sprouting Method

There are several methods for sprouting mung beans, depending on your preference and available space:

  1. Jar Method:
    • Place soaked seeds in a glass jar and cover with cheesecloth or a mesh lid.
    • Rinse and drain seeds 2–3 times daily.
    • Tilt the jar to allow excess water to drain.
  2. Tray Method:
    • Spread soaked seeds evenly in a shallow tray.
    • Cover with a damp cloth or paper towel to maintain moisture.
    • Rinse 2–3 times daily to keep seeds moist.
  3. Cup Method:
    • Place seeds in a plastic or glass cup lined with damp paper towels.
    • Keep covered to maintain humidity and rinse twice daily.

For beginners, the jar method is simple, clean, and effective.

Sprouting Process

Once seeds are soaked and placed in your chosen container, follow these steps for optimal growth:

  1. Rinsing:
    • Rinse sprouts twice daily with clean water to remove toxins and prevent mold.
  2. Draining:
    • Ensure water drains completely after each rinse to avoid waterlogging.
  3. Covering:
    • Keep sprouts covered to maintain humidity while allowing airflow.
  4. Temperature:
    • Ideal sprouting temperature is 68–75°F (20–24°C).
    • Avoid direct sunlight, which can make sprouts bitter.

Within 2–3 days, mung bean seeds begin to sprout small white shoots, and by day 4–6, sprouts are ready for harvest.

Caring for Your Sprouts

Even though mung bean sprouts are easy to grow, a few tips help ensure healthy, crunchy results:

  • Consistency: Rinse and drain regularly to maintain moisture and prevent bacterial growth.
  • Airflow: Provide proper ventilation to reduce the risk of mold.
  • Light: Keep sprouts in a dimly lit area; direct sunlight can turn them bitter.
  • Hygiene: Always use clean water and sanitized containers to ensure food safety.

Consistent care ensures sprouts remain tender, crisp, and safe to eat.

Harvesting Mung Bean Sprouts

Harvesting is simple and quick:

  • Timing: Sprouts are usually ready in 4–6 days when they reach 1–2 inches in length.
  • Method: Remove sprouts from the container, rinse thoroughly under clean water, and trim any remaining seed coats if desired.
  • Storage: Store sprouts in a sealed container in the refrigerator for 3–5 days.

Freshly harvested sprouts can be eaten raw in salads or lightly cooked in stir-fries, soups, and sandwiches.

Benefits of Growing Mung Bean Sprouts at Home

  • Nutrition: Packed with protein, vitamins, and minerals.
  • Cost-Effective: Save money compared to buying commercial sprouts.
  • Quick Results: Sprouts grow in less than a week.
  • Hygienic: You control water quality and cleanliness.
  • Space-Saving: Ideal for small kitchens, countertops, and apartments.
  • Sustainable: Reuse jars, cups, and trays, reducing waste.

Homegrown sprouts combine nutrition, convenience, and sustainability in one simple process.

Tips for Success

  • Always use clean, filtered water to rinse and soak seeds.
  • Avoid overcrowding seeds to ensure uniform growth.
  • Rinse sprouts consistently 2–3 times per day.
  • Keep sprouts in a cool, dim area to prevent bitterness.
  • Harvest promptly when sprouts are tender to maintain crispness.
  • Reuse containers after thorough cleaning for the next batch.

Following these tips ensures a steady supply of fresh, healthy mung bean sprouts at home.

Common Challenges and Solutions

  • Mold or Bad Odor: Caused by excess moisture or poor drainage. Solution: Rinse twice daily and ensure proper drainage.
  • Uneven Sprouting: Seeds may be overcrowded or old. Solution: Spread seeds evenly and use fresh seeds.
  • Bitter Sprouts: Occurs from exposure to direct sunlight. Solution: Keep sprouts in a dimly lit or shaded area.
  • Slow Growth: Low temperatures can delay sprouting. Solution: Move sprouts to a warmer location (68–75°F / 20–24°C).

Addressing these challenges promptly ensures healthy, uniform sprouts.

Conclusion

Growing mung bean sprouts at home is simple, fast, and rewarding. With just a few materials—mung bean seeds, plastic cups or jars, water, and a little patience—you can enjoy fresh, crunchy, and nutrient-rich sprouts in under a week.

From selecting high-quality seeds, soaking, and rinsing to providing proper drainage and harvest, the process is beginner-friendly and requires minimal space. Whether you’re adding them to salads, stir-fries, or soups, homegrown mung bean sprouts are tastier, healthier, and more satisfying than store-bought options.

Starting your own mung bean sprout garden at home is not only cost-effective and nutritious but also a fun and educational experience. With regular care and attention, you can enjoy a continuous supply of fresh, crunchy sprouts year-round—right from your kitchen countertop.