The Best Tools Every Gardener Needs

The Best Tools Every Gardener Needs

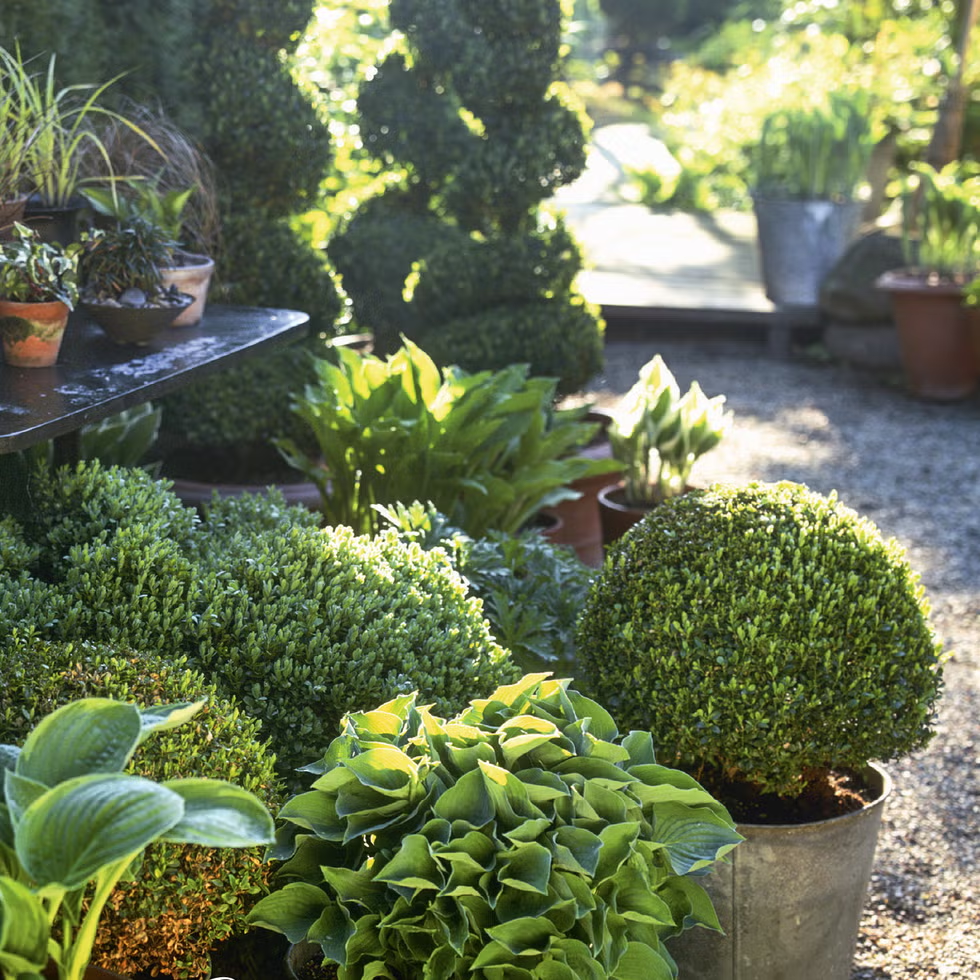
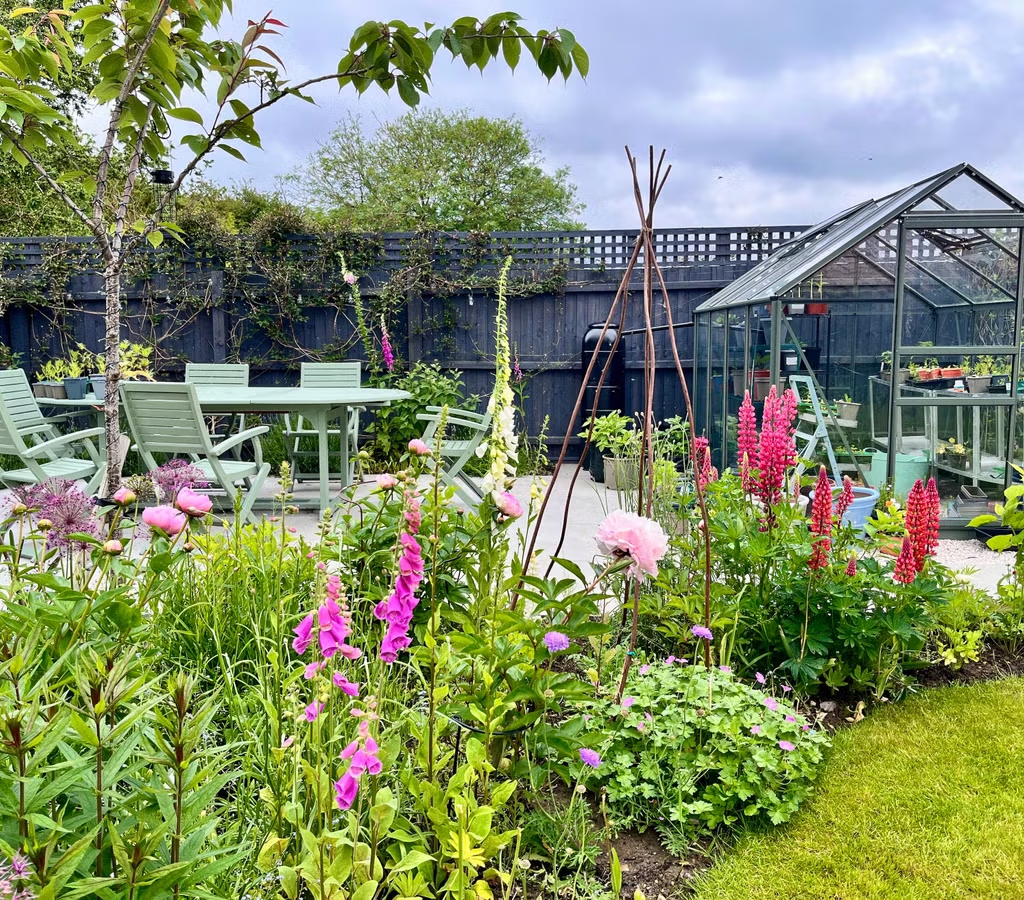
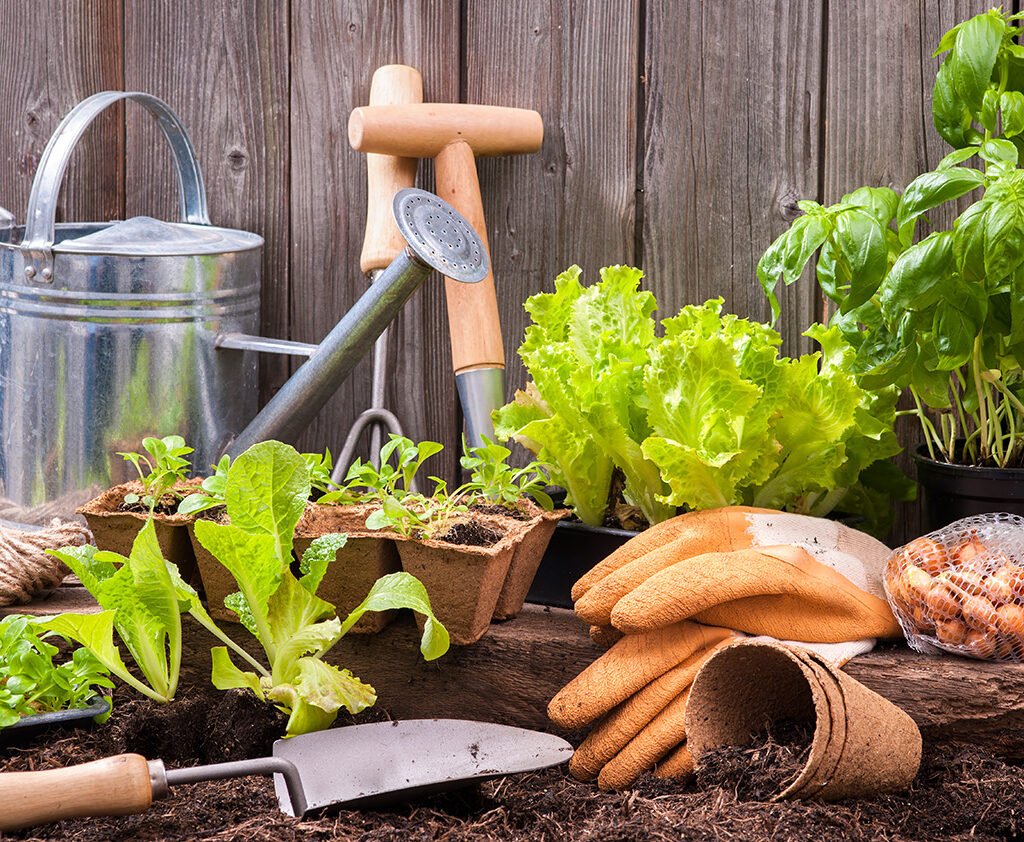
Behind every thriving garden is a gardener equipped with the right tools. Whether you’re growing vegetables, tending to flowers, or landscaping your backyard, having the proper gardening tools makes the process more efficient, enjoyable, and successful. Tools are not just about convenience; they also help protect your body from unnecessary strain and give your plants the best care possible.

In this guide, we’ll explore the essential gardening tools every gardener should own, explain their uses, and provide tips on choosing and maintaining them. From simple hand tools to specialized equipment, these are the must-haves that form the foundation of any well-kept garden.


Why Gardening Tools Matter

Some might think gardening requires little more than soil, seeds, and water. However, quality tools make a huge difference by:

  1. Saving Time and Effort – The right tool can cut work in half.
  2. Improving Precision – Tools help with accurate planting, pruning, and shaping.
  3. Reducing Strain – Ergonomic tools prevent injury to your back, knees, and hands.
  4. Boosting Plant Health – Proper pruning, digging, and watering techniques promote growth.
  5. Enhancing Enjoyment – Gardening becomes more fun and less frustrating with efficient tools.

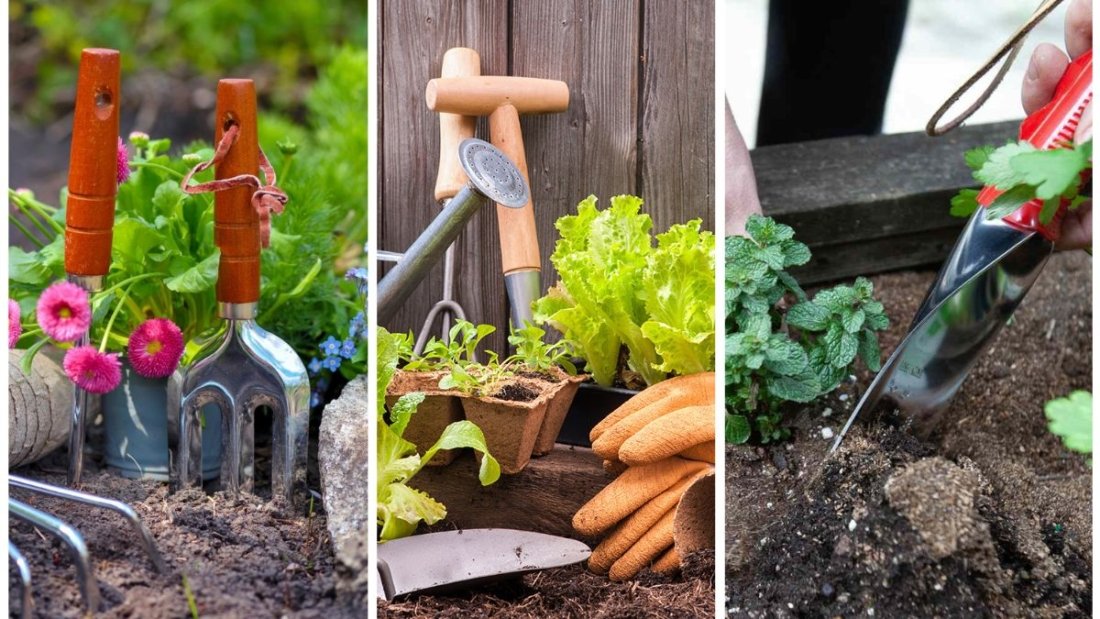
Now let’s dive into the must-have tools every gardener should keep in their shed or toolbox.
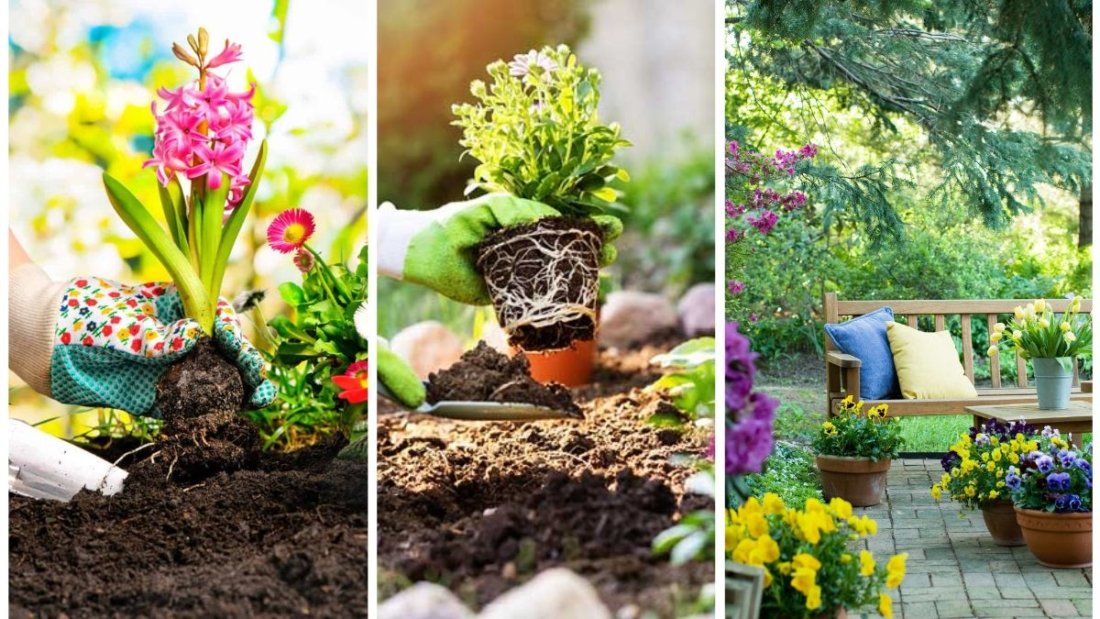
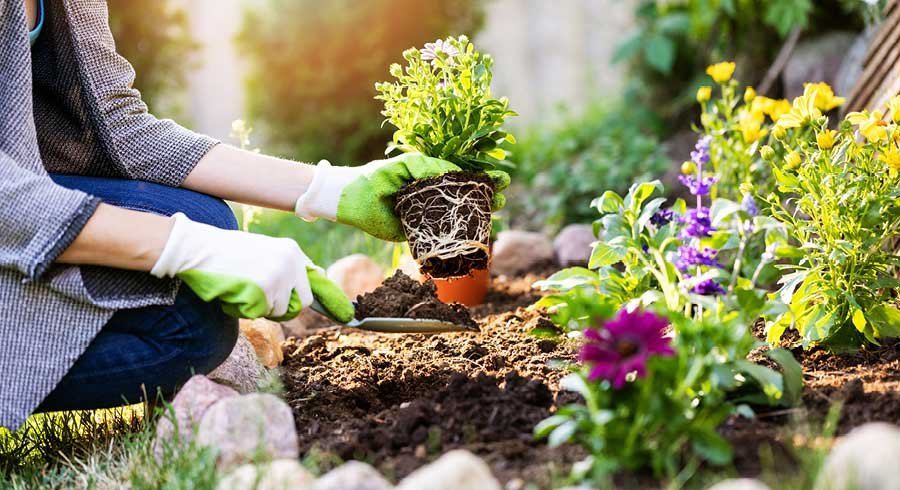
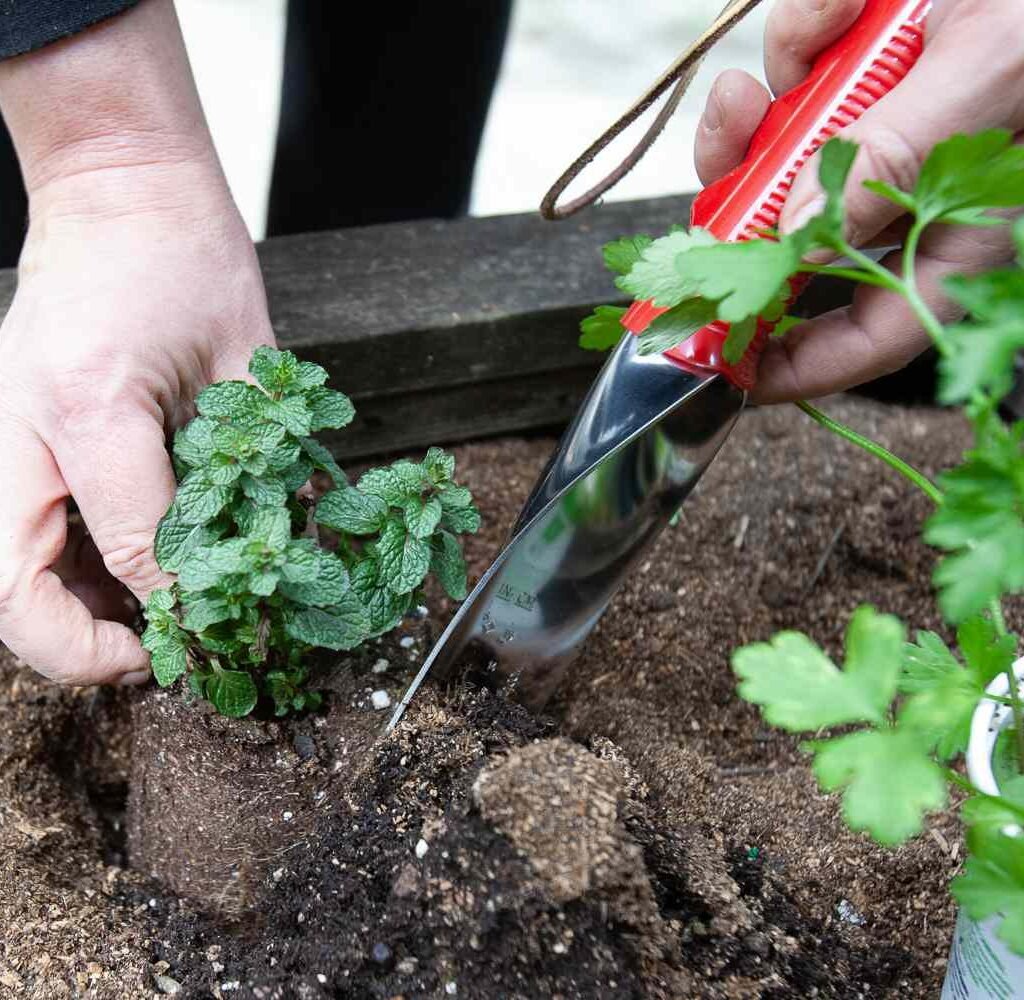

1. Hand Trowel

A hand trowel is the most basic and indispensable gardening tool. It’s perfect for digging small holes, transplanting seedlings, and loosening soil in flower beds or pots.

  • Best Use: Planting bulbs, removing weeds, mixing soil.
  • Tips for Choosing: Look for a sturdy, rust-resistant metal blade with a comfortable, ergonomic handle. Stainless steel blades last longer than aluminum ones.

2. Pruning Shears (Secateurs)

Pruning shears are essential for cutting stems, deadheading flowers, and shaping plants. A good pair ensures clean cuts without damaging plant tissue.

  • Best Use: Trimming branches up to ¾ inch thick, harvesting herbs, or cutting flowers.
  • Tips for Choosing: Bypass pruners are ideal for live plants, while anvil pruners work better for deadwood. Select shears with cushioned grips for comfort.
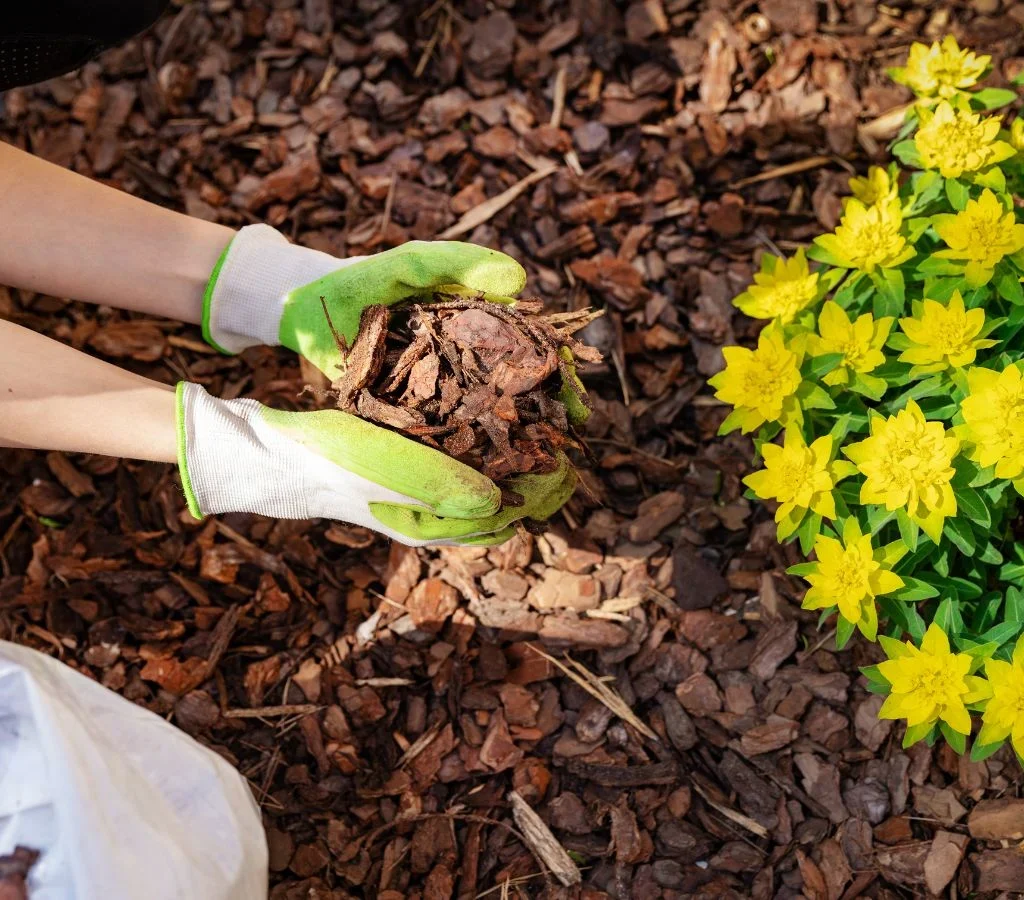
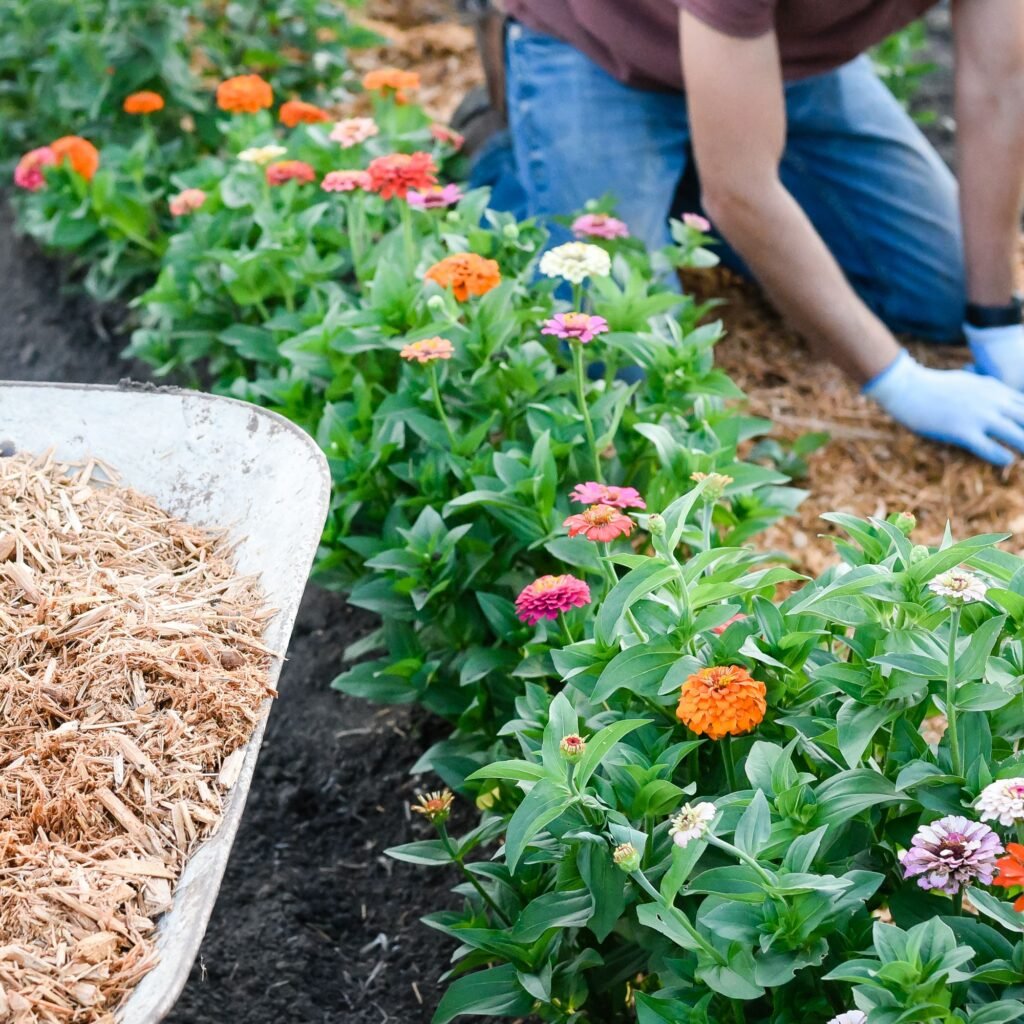
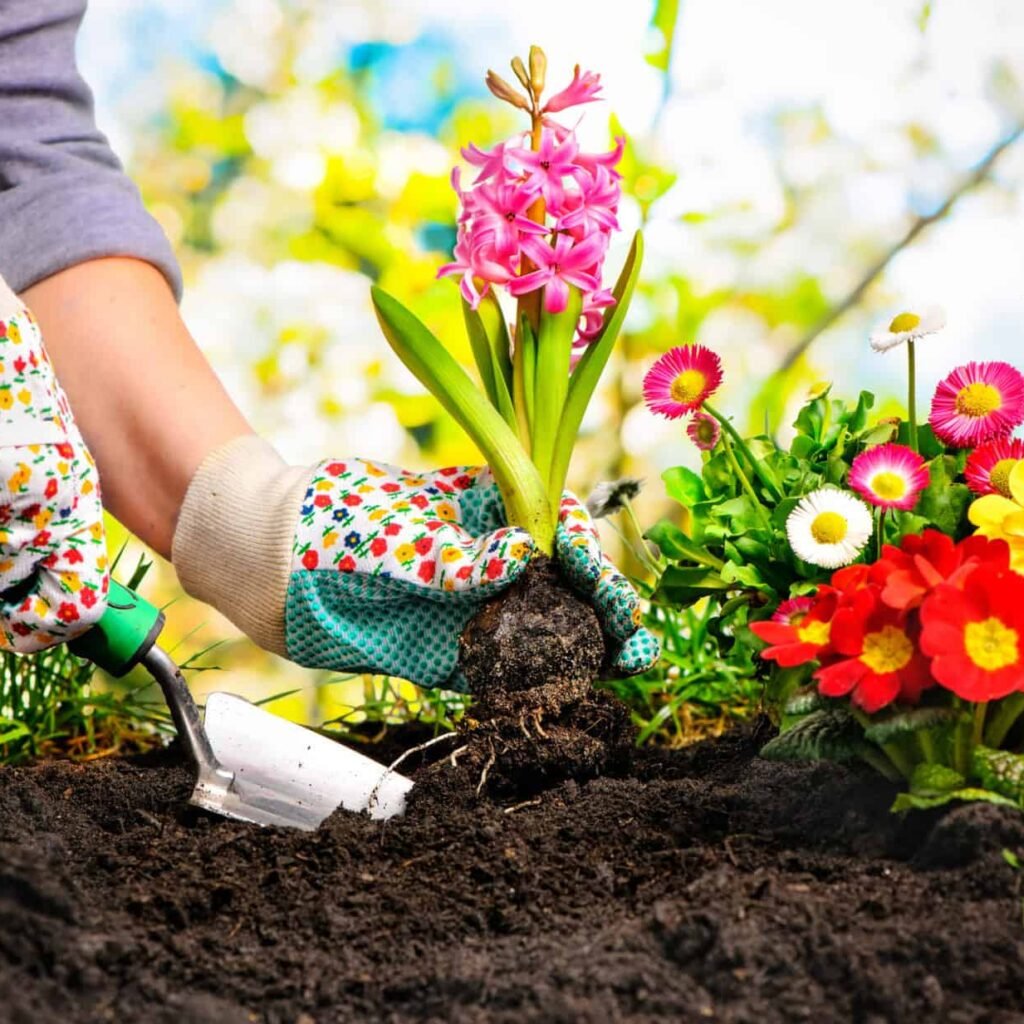
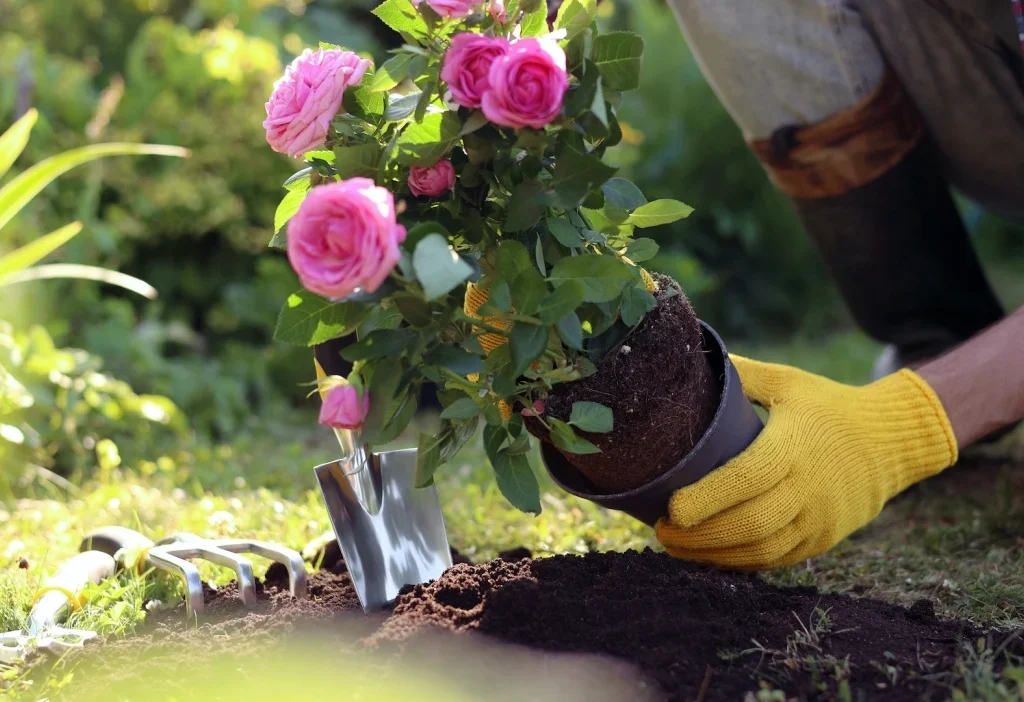
3. Gardening Gloves

Gardening without gloves can lead to blisters, scratches, and exposure to thorns or harmful chemicals. A good pair of gloves protects your hands while offering flexibility.

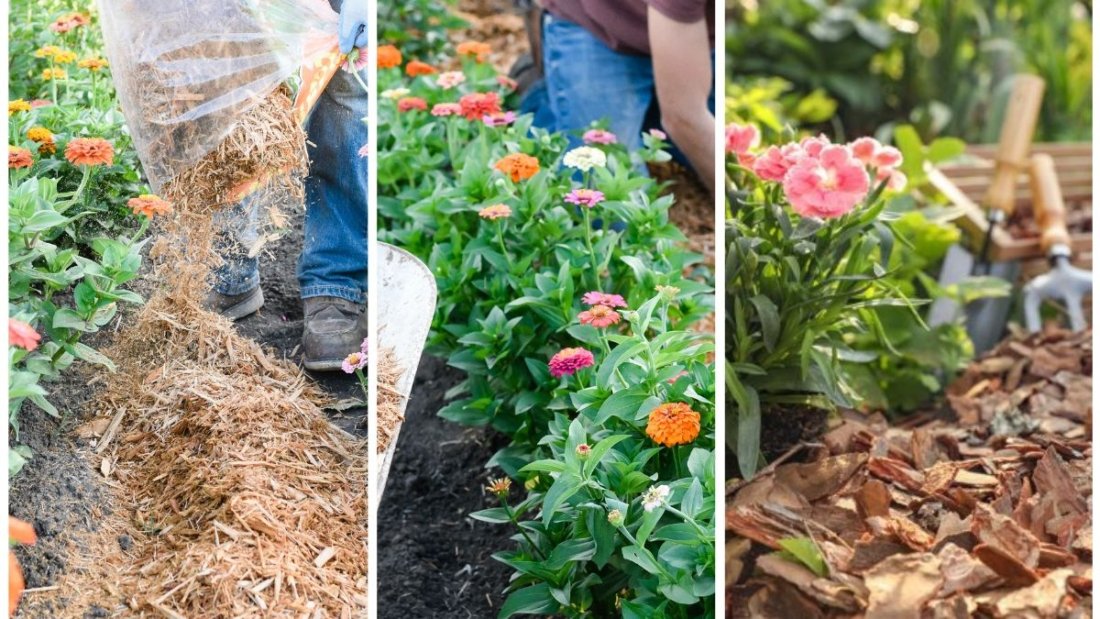
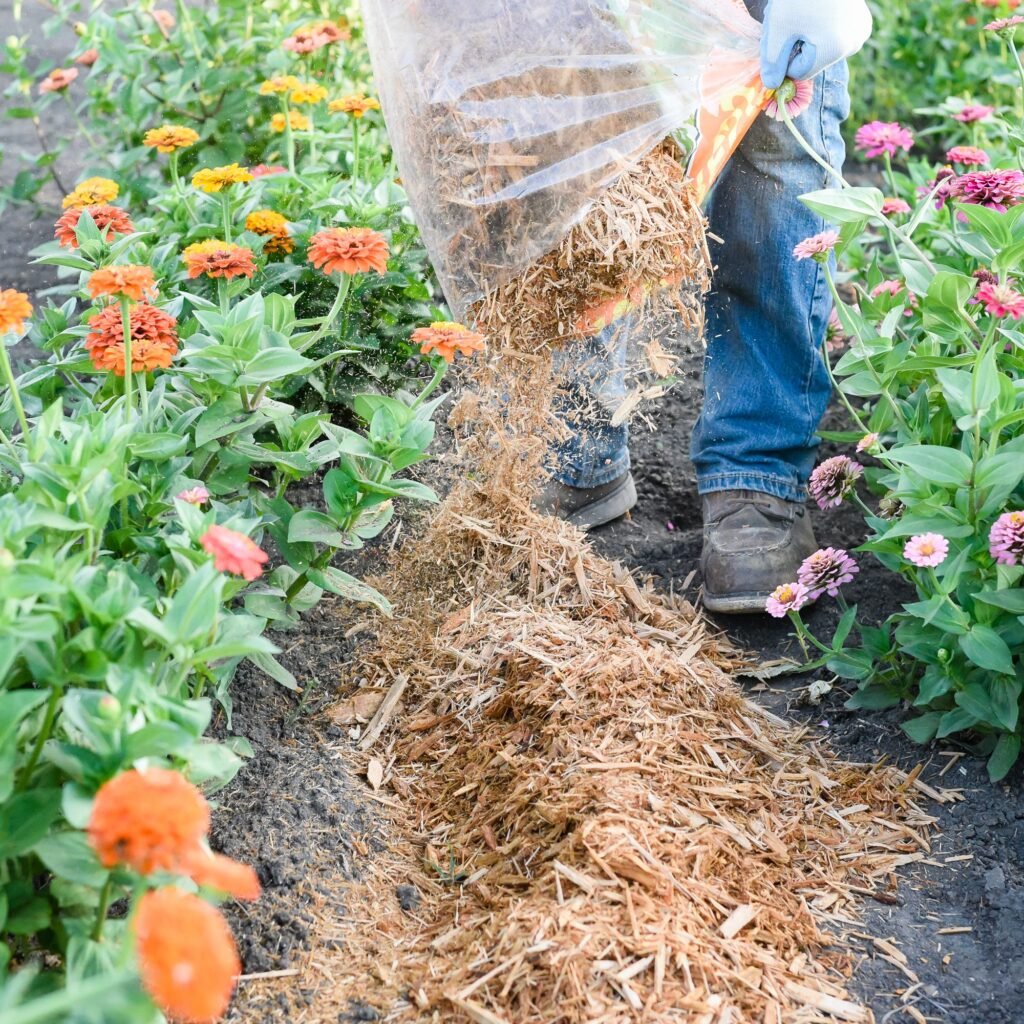
  • Best Use: Digging, pruning roses, handling soil, or spreading mulch.
  • Tips for Choosing: Go for durable, water-resistant gloves with breathable fabric. Leather gloves are excellent for heavy-duty work.
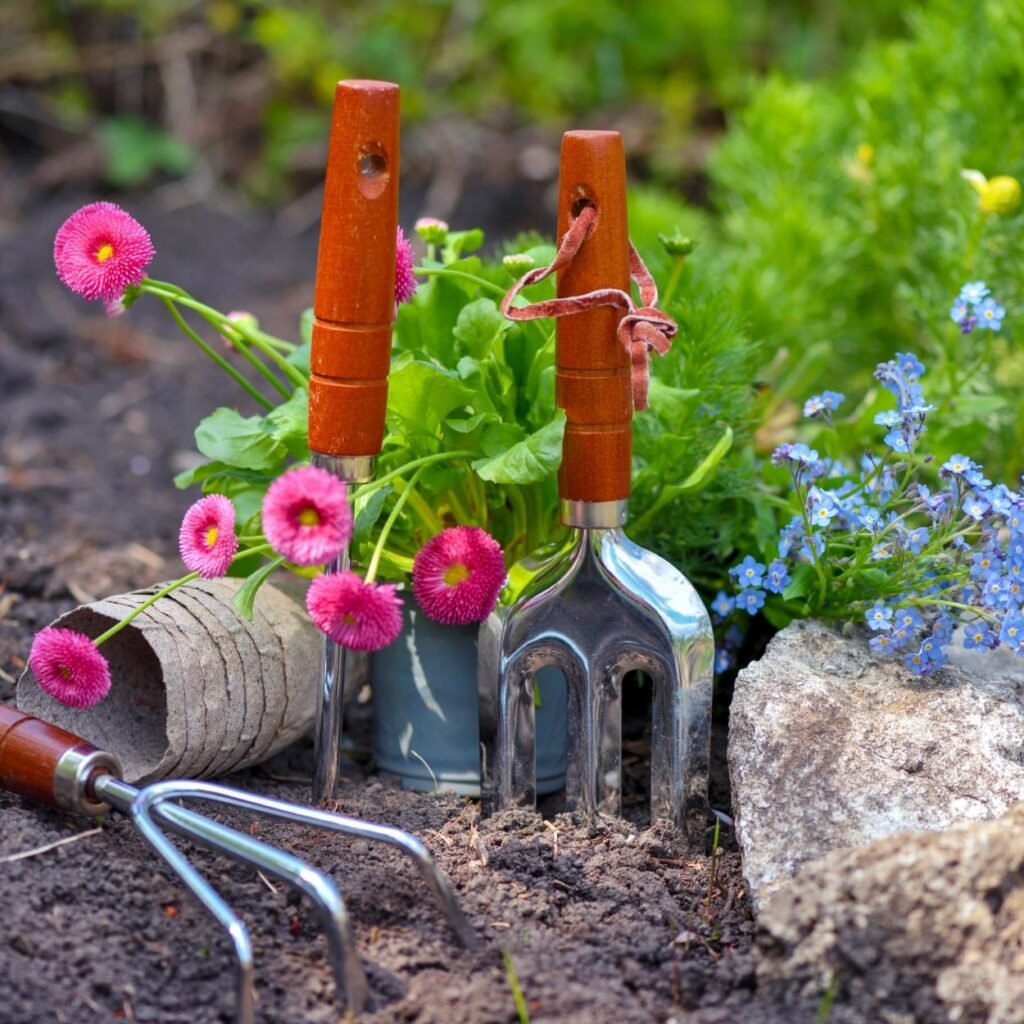
4. Garden Fork

A garden fork (or digging fork) is a versatile tool for loosening soil, turning compost, and breaking up clumps. Unlike shovels, forks penetrate compacted soil more easily.

  • Best Use: Aerating soil, digging up root vegetables, and moving mulch or compost.
  • Tips for Choosing: Look for strong, stainless-steel tines that won’t bend in tough soil.
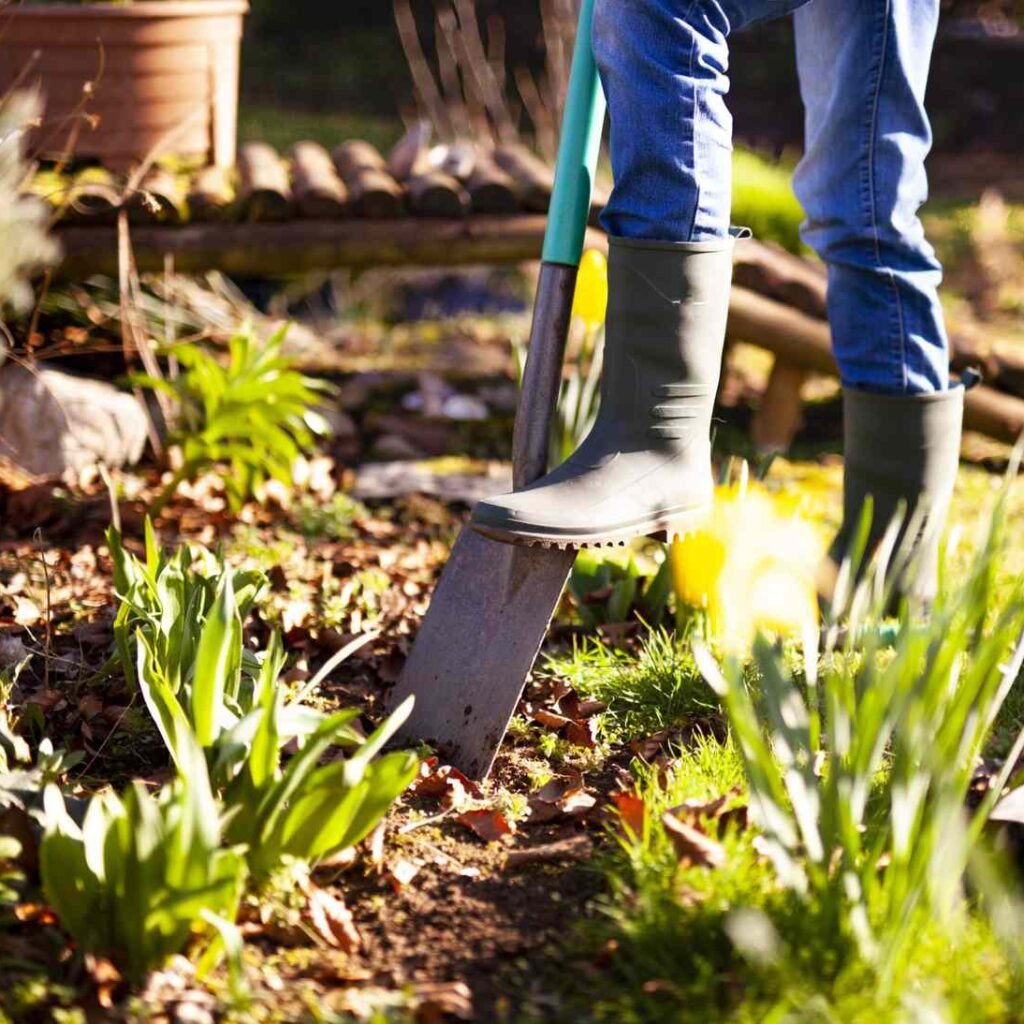
5. Spade

A spade is different from a shovel—it has a flat, sharp blade designed for edging, cutting sod, and digging precise holes.

  • Best Use: Defining garden bed edges, digging trenches, and transplanting shrubs.
  • Tips for Choosing: A long-handled spade provides leverage, while shorter handles give more control.

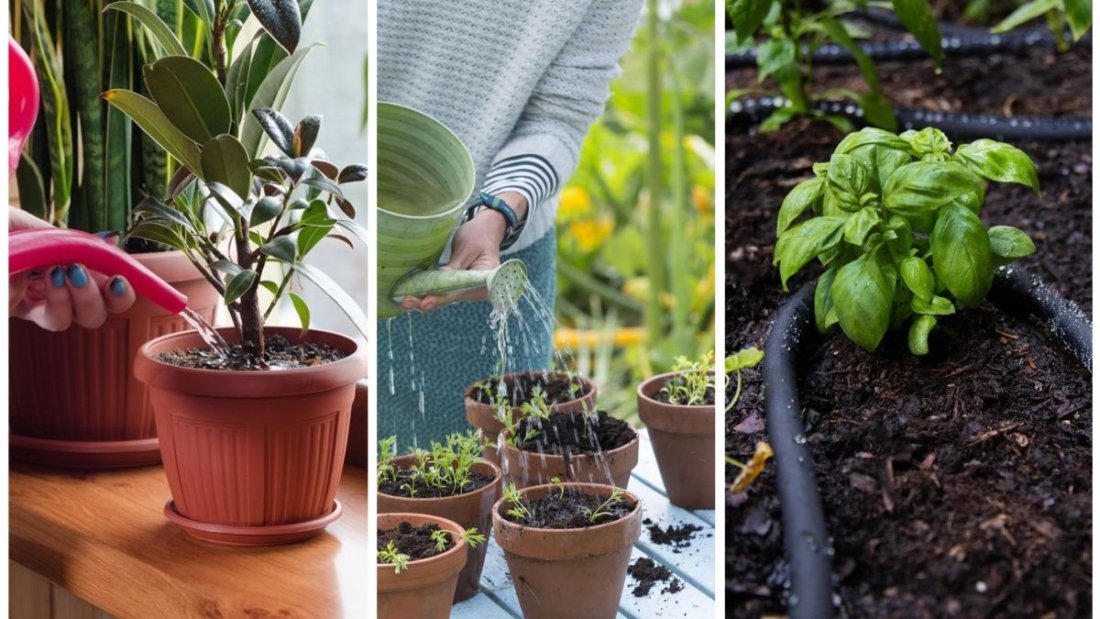
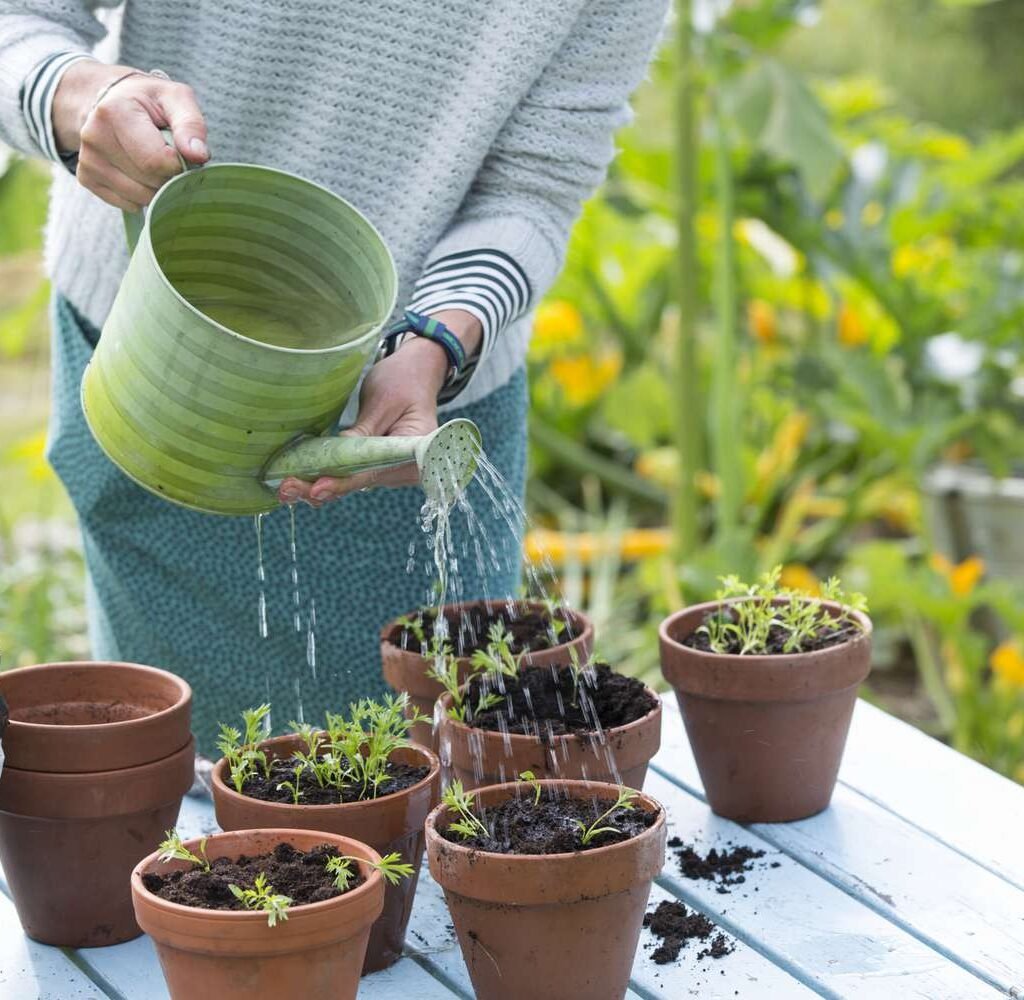
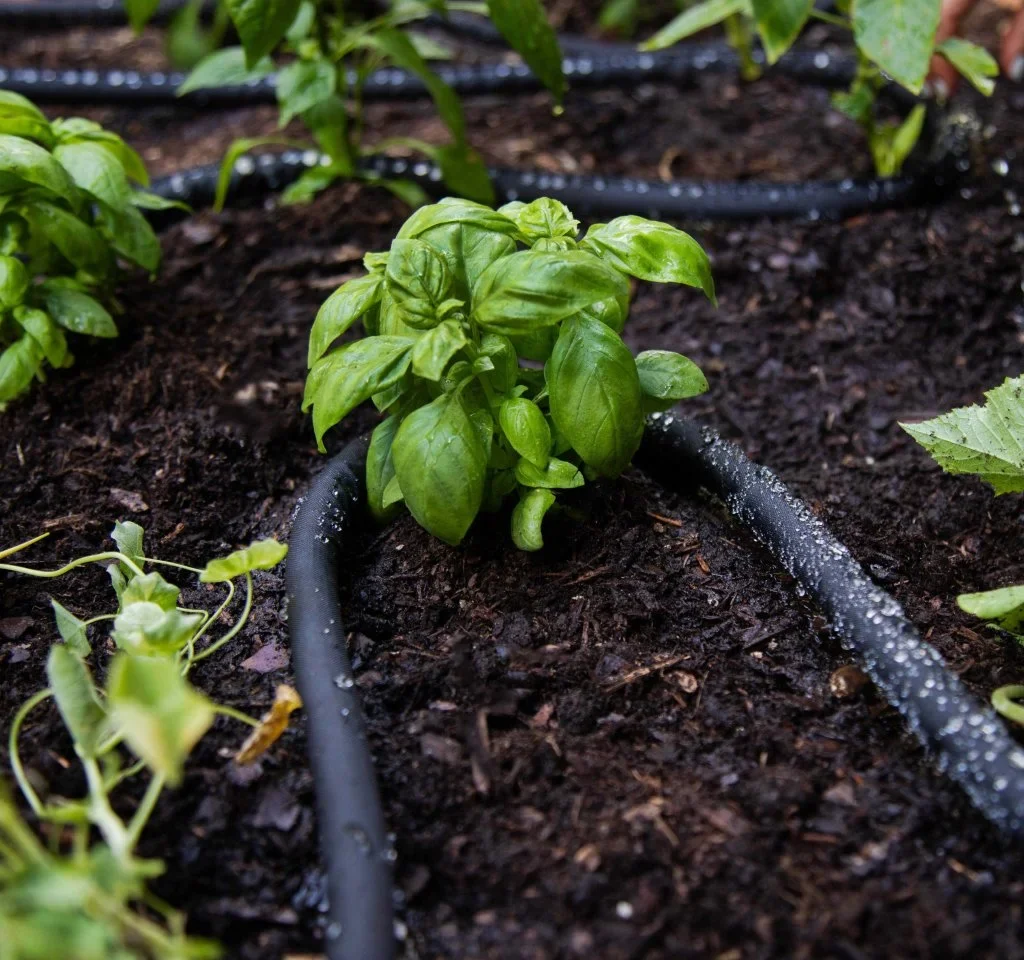
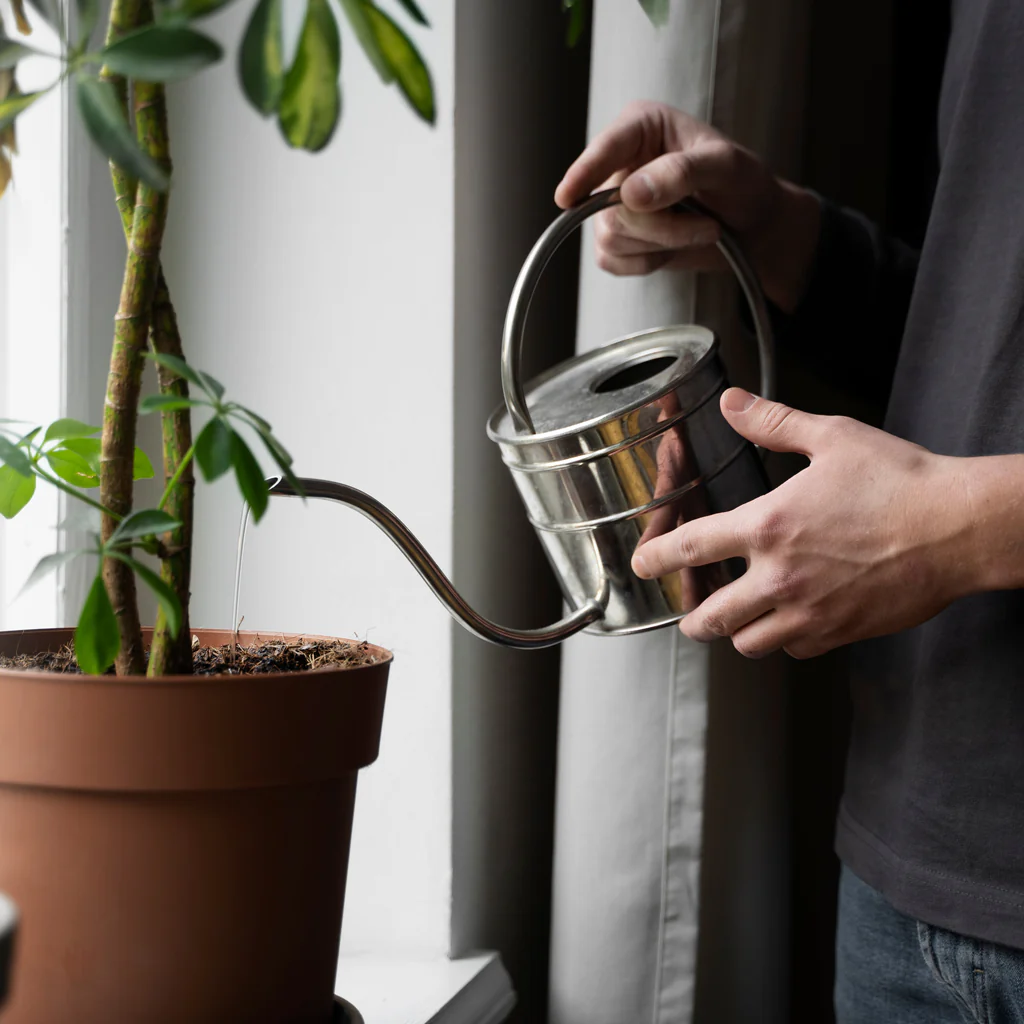
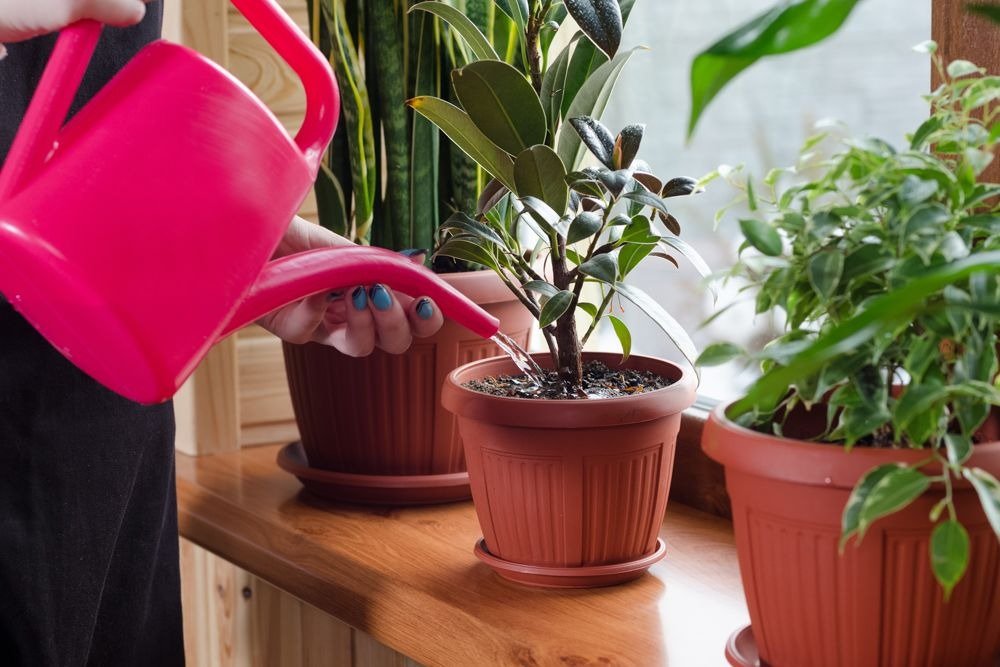
6. Watering Can or Garden Hose

Water is life for your plants, and how you deliver it matters. A sturdy watering can is essential for potted plants and delicate seedlings, while a garden hose with a spray nozzle is ideal for larger beds.

  • Best Use: Watering indoor plants, outdoor containers, or expansive beds.
  • Tips for Choosing: Select a lightweight can with a detachable spout for versatility. For hoses, opt for kink-resistant models with adjustable nozzles.

7. Wheelbarrow

Moving heavy loads of soil, compost, or stones is nearly impossible without a wheelbarrow. It’s a back-saving tool for large-scale gardening projects.

  • Best Use: Transporting soil, plants, mulch, or garden debris.
  • Tips for Choosing: Look for a sturdy steel tray and a wheel with good balance. Two-wheel models provide more stability than single-wheel ones.

8. Hoe

A hoe is indispensable for preparing soil and controlling weeds. It cuts into the soil surface, preventing weed growth and loosening compacted ground.

  • Best Use: Weeding between rows, shaping beds, and mixing soil amendments.
  • Tips for Choosing: A stirrup hoe is excellent for weeding, while a flat hoe is better for breaking soil.

9. Rake

Gardening requires two main types of rakes:

  1. Leaf Rake – Lightweight, with flexible tines for gathering leaves.
  2. Garden Rake – Heavy-duty, with rigid tines for leveling soil and removing rocks.
  • Best Use: Cleaning up debris, smoothing soil, and spreading mulch.
  • Tips for Choosing: Choose a rake with strong metal tines for soil work and a wide plastic or bamboo rake for leaves.

10. Garden Knife (Hori-Hori)

The Japanese Hori-Hori knife is a multipurpose tool that works as a trowel, weeder, and saw. It’s a favorite among serious gardeners.

  • Best Use: Digging, cutting roots, dividing perennials, and transplanting.
  • Tips for Choosing: Go for a stainless-steel blade with depth markings for accurate planting.

11. Pruning Saw

For branches too thick for pruning shears, a pruning saw is essential. Its serrated blade makes cutting woody stems and small tree branches easy.

  • Best Use: Pruning trees, cutting thick shrubs, and shaping hedges.
  • Tips for Choosing: Foldable saws are convenient and safe to store.

12. Garden Kneeler or Pad

Gardening often involves hours on your knees, which can strain joints. A kneeler or cushioned pad makes planting and weeding more comfortable.

  • Best Use: Prolonged weeding, planting, or harvesting at ground level.
  • Tips for Choosing: Select a thick, waterproof pad or a kneeler with side handles for support.

13. Garden Scissors

Garden scissors may seem simple, but they’re invaluable for snipping herbs, deadheading flowers, and opening seed packets or bags of soil.

  • Best Use: Light trimming, harvesting, and general garden tasks.
  • Tips for Choosing: Stainless-steel blades with comfortable handles are best.

14. Soil Testing Kit

Healthy soil is the foundation of every garden. A soil testing kit allows you to measure pH levels and nutrient content, ensuring your plants get the right balance.

  • Best Use: Testing garden beds before planting, diagnosing nutrient deficiencies.
  • Tips for Choosing: Opt for digital meters for quick results or chemical kits for detailed analysis.

15. Plant Markers and Twine

Organization is key in gardening. Plant markers help identify seedlings, while garden twine supports climbing plants and ties stems gently.

  • Best Use: Labeling rows of vegetables, supporting vines, and organizing plant beds.
  • Tips for Choosing: Weatherproof labels last longer, and biodegradable twine is eco-friendly.

Maintaining Your Gardening Tools

Even the best tools won’t last long without proper care. Follow these steps to extend their life:

  1. Clean After Use – Rinse soil and debris to prevent rust.
  2. Sharpen Blades – Keep pruners, knives, and shears sharp for clean cuts.
  3. Oil Metal Parts – Prevent rust by applying light machine oil after cleaning.
  4. Store Properly – Keep tools in a dry, covered place, preferably hung up to avoid damage.
  5. Inspect Regularly – Check handles for cracks and replace if needed.

Well-maintained tools perform better, keep your plants healthier, and save you money in the long run.


Conclusion

A gardener is only as effective as the tools they use. From the humble hand trowel to advanced soil testing kits, each tool has its role in creating a flourishing, low-stress garden. Investing in the best gardening tools ensures you work smarter, not harder, and enjoy the process as much as the results.

By equipping yourself with these essentials—and keeping them well-maintained—you’ll transform gardening from a chore into a rewarding experience. With the right tools in hand, your garden will not only look more beautiful but will also thrive season after season.

5 Hardy Fall Vegetables You Can Still Plant Now

5 Hardy Fall Vegetables You Can Still Plant Now

Gardening is often associated with the warmth of spring and the vibrant greenery of summer. Yet, for those who understand the rhythm of nature, fall is just as promising a season to sow seeds and harvest nourishing crops. In fact, many vegetables thrive in the cooler temperatures of autumn. If you think you missed your chance to grow fresh produce this year, you’ll be delighted to know that several hardy vegetables can still be planted in fall and harvested before or even after the first frost.

This article explores five hardy fall vegetables you can still plant now, highlighting why they are ideal for the season, how to plant and care for them, and what makes them resilient in cooler weather. By the end, you’ll see that fall isn’t the end of the gardening season—it’s just a new beginning.


Why Fall Gardening Works

Before diving into the list, it’s important to understand why fall is such a good time for certain vegetables. Cooler temperatures reduce pest pressure, meaning your plants face fewer challenges from aphids, caterpillars, and beetles. Soil moisture tends to be more stable as autumn rains arrive, helping seedlings establish themselves with less stress. Furthermore, many vegetables taste sweeter when grown in cool conditions, as cold weather causes plants to concentrate natural sugars as a form of protection.

These factors combine to create an ideal environment for hardy crops that can tolerate light frosts or even thrive after them. Now, let’s look at five vegetables you can still plant for a rewarding fall harvest.


1. Kale – The Frost-Friendly Super Green

Kale is one of the most cold-tolerant vegetables you can grow. In fact, its flavor actually improves after a frost because the plant produces sugars that give the leaves a milder, sweeter taste. That makes fall the perfect time to grow kale, especially if you missed planting it in summer.

Planting Tips

  • Soil: Kale prefers well-drained, fertile soil with plenty of organic matter.
  • Spacing: Sow seeds about 12–18 inches apart. Thin seedlings to ensure good airflow.
  • Timing: Direct sow seeds in early to mid-fall. If you’re in a region with harsh winters, plant them 6–8 weeks before the first expected frost.

Care and Harvest

Keep the soil moist but not waterlogged. Mulch around the base of plants to retain warmth and protect roots during cold nights. You can begin harvesting baby leaves within 30 days or wait for larger leaves around 50–60 days. Pick the outer leaves first, allowing the center to keep producing.

Why It’s Hardy

Kale can survive temperatures as low as 20°F (-6°C). In mild climates, it may continue growing all winter long, making it one of the most reliable fall crops.


2. Spinach – A Quick and Cold-Loving Green

Spinach is another leafy green that thrives in cool weather and can tolerate light frosts. Its rapid growth makes it perfect for fall planting, since you can harvest within just a few weeks of sowing.

Planting Tips

  • Soil: Spinach prefers neutral to slightly alkaline soil with good drainage.
  • Spacing: Plant seeds about 1 inch apart, in rows 12 inches apart. Thin seedlings to about 3 inches.
  • Timing: Sow seeds directly outdoors 6–8 weeks before the first frost date. In regions with milder winters, you can even sow into late fall.

Care and Harvest

Water regularly, as spinach doesn’t like drying out. Cover with row fabric or cold frames if frost is predicted, which can extend your harvest season. You can harvest baby spinach leaves in as little as 3–4 weeks. For mature leaves, wait 6–8 weeks.

Why It’s Hardy

Spinach is frost-resistant and will keep producing until temperatures dip into the low 20s°F (-6°C). In fact, with protection, spinach can overwinter and provide early spring harvests the following year.


3. Carrots – Sweetened by the Cold

Carrots are a root vegetable that truly shines in the fall garden. The cool weather causes them to store sugars in their roots, resulting in sweeter, crisper carrots than those grown in summer.

Planting Tips

  • Soil: Loose, sandy soil free from rocks is essential for straight, healthy roots.
  • Spacing: Sow seeds thinly, about 2 inches apart, in rows spaced 12–18 inches.
  • Timing: Direct sow seeds in late summer to early fall. Carrots need about 70–80 days to mature, but baby carrots can be harvested earlier.

Care and Harvest

Keep soil consistently moist for even germination. Thin seedlings to prevent crowding, which leads to misshapen roots. Mulch to maintain soil temperature and protect against early frost. Harvest once roots reach finger thickness or wait until they are full-sized.

Why It’s Hardy

Carrots tolerate frost very well and can even be left in the ground after the first freeze. In fact, leaving them in the soil longer often enhances their sweetness. Covering rows with straw can help preserve carrots for winter harvests.


4. Radishes – The Speedy Root Vegetable

Radishes are one of the quickest crops to grow, often ready to harvest in less than a month. This makes them a perfect choice for fall planting, as you can still get multiple successions before winter sets in.

Planting Tips

  • Soil: Radishes prefer light, well-drained soil with plenty of organic matter.
  • Spacing: Sow seeds about 1 inch apart in rows spaced 8–12 inches.
  • Timing: Plant every 7–10 days for continuous harvests until frost.

Care and Harvest

Radishes need consistent moisture to avoid becoming woody or overly spicy. Harvest as soon as roots are mature, usually within 25–30 days, to avoid a tough texture.

Why It’s Hardy

While radishes don’t last as long in freezing weather as carrots or kale, they grow so quickly that you can enjoy several crops before winter. Some winter radish varieties, like daikon, are even more tolerant and can grow into late fall.


5. Garlic – The Fall Planting Powerhouse

While garlic isn’t harvested in the same season, fall is the ideal time to plant it. Garlic needs a long growing period and performs best when planted in autumn and allowed to overwinter. By spring and summer, you’ll be rewarded with large, flavorful bulbs.

Planting Tips

  • Soil: Garlic prefers rich, well-drained soil with plenty of compost.
  • Spacing: Plant cloves 2 inches deep, 6 inches apart, with the pointed end facing up.
  • Timing: Plant garlic 4–6 weeks before the ground freezes.

Care and Harvest

Mulch heavily with straw or leaves to protect cloves from freezing. Water lightly until the soil freezes, then resume watering in spring. Harvest when the lower leaves begin to turn brown in early summer.

Why It’s Hardy

Garlic is perfectly adapted to overwintering in cold conditions. By planting now, you’re essentially preparing for one of next year’s most rewarding harvests.


Final Thoughts

Just because summer has passed doesn’t mean your gardening season is over. By planting hardy fall vegetables like kale, spinach, carrots, radishes, and garlic, you can extend your harvest window and enjoy fresh produce well into the cooler months. These crops not only tolerate chilly temperatures but often thrive in them, offering sweeter flavors, tender leaves, and crisp roots.

Whether you want fast-growing greens, sweetened root crops, or the promise of next year’s garlic bounty, fall gardening has something to offer. All it takes is a little planning, the right varieties, and an understanding of your region’s frost dates. So, grab your seeds, prepare your soil, and embrace the beauty of the fall garden—you’ll be glad you did.

How to Water Plants the Right Way

How to Water Plants the Right Way

Water is life, and for plants, it is the single most important factor that determines their growth, resilience, and productivity. Many gardeners assume watering is as simple as turning on a hose or filling a watering can, but in reality, proper watering is both an art and a science. Too little water leaves plants stressed and weak, while too much water suffocates roots and invites diseases. Learning how to water plants the right way ensures that your garden thrives beautifully in every season.

This guide will take you through the science of plant hydration, the best watering techniques, tools, and timing, along with common mistakes to avoid—helping you become a more mindful and effective gardener.


Why Proper Watering Matters

Watering correctly goes beyond just keeping plants alive. It influences nearly every aspect of plant health, including:

  1. Root Development – Deep watering encourages roots to grow downward, making plants more drought-resistant.
  2. Nutrient Absorption – Water dissolves essential minerals in the soil, transporting them to the plant roots.
  3. Photosynthesis – Without adequate water, plants cannot convert sunlight into energy effectively.
  4. Temperature Regulation – Water cools plants and soil, protecting them from heat stress.
  5. Disease Prevention – Correct watering practices reduce risks of fungal infections and root rot.

Simply put, water is the lifeblood of your garden, and learning how to manage it properly is key to long-term success.


Step 1: Understand Your Plants’ Needs

Not all plants require the same amount of water. A cactus thrives on minimal watering, while vegetables like lettuce need consistent moisture. Understanding plant types helps tailor your approach.

Plant Categories Based on Water Needs

  • Drought-Tolerant Plants (succulents, lavender, rosemary): Prefer dry conditions; water sparingly.
  • Moisture-Loving Plants (ferns, hostas, hydrangeas): Need consistent soil moisture.
  • Vegetables and Fruits: Require regular deep watering, especially during flowering and fruiting stages.
  • Young Plants and Seedlings: Need frequent light watering until roots are established.

Tip: Research the water requirements of each plant species in your garden to avoid over- or under-watering.


Step 2: Learn to Read the Soil

The soil is your best indicator of when to water. Watering by schedule alone can lead to problems; instead, focus on soil conditions.

  • Dry Soil: Appears light in color, crumbly, and pulls away from edges of pots.
  • Moist Soil: Feels cool and damp when you stick a finger 1–2 inches deep.
  • Waterlogged Soil: Feels soggy, muddy, or gives off a foul smell—signs of poor drainage and overwatering.

A simple finger test (pressing your finger into the soil) or a moisture meter can help determine when watering is truly needed.


Step 3: Use the Right Watering Techniques

How you deliver water is just as important as how much you provide.

1. Water Deeply and Infrequently

  • Encourage strong root growth by soaking the soil deeply rather than giving light, shallow sips.
  • Shallow watering results in weak, surface-level roots that dry out quickly.

2. Target the Roots, Not the Leaves

  • Apply water directly to the base of the plant where roots can absorb it.
  • Wet foliage invites fungal diseases like powdery mildew.

3. Use Slow and Steady Watering

  • Allow water to soak in gradually, preventing runoff.
  • Drip irrigation systems or soaker hoses work best for this.

4. Adapt to Plant Type

  • Containers and Pots: Dry out faster; require more frequent watering.
  • Garden Beds: Hold moisture longer, especially with mulch.
  • Trees and Shrubs: Benefit from deep watering less frequently but for longer durations.

Step 4: Time Your Watering Right

When you water matters as much as how you water.

  • Early Morning (Best Time)
    • Plants absorb water before the heat of the day.
    • Reduces evaporation and prepares plants for hot conditions.
  • Evening (Alternative)
    • Works if mornings are not possible, but water must soak roots before nightfall to avoid fungal growth.
  • Avoid Midday
    • High sun causes water to evaporate quickly.
    • Can scorch leaves if droplets act like magnifying glasses.

Golden Rule: Morning watering sets plants up for a healthier, more productive day.


Step 5: Use Mulch to Retain Moisture

Mulching is one of the best strategies to improve watering efficiency. A 2–3 inch layer of organic mulch (like bark, straw, or shredded leaves) around plants helps:

  • Reduce evaporation.
  • Keep soil temperature stable.
  • Suppress weeds that compete for water.
  • Prevent soil crusting, allowing better water penetration.

Combine mulching with deep watering for optimal results.


Step 6: Choose the Right Watering Tools

Different tools serve different purposes, and using the right one makes watering more efficient.

  • Watering Can: Best for indoor plants or small garden beds.
  • Garden Hose with Nozzle: Versatile for larger areas; use a gentle spray setting.
  • Soaker Hose: Delivers water directly to the soil, ideal for rows of vegetables.
  • Drip Irrigation System: Most efficient method; minimizes water waste and targets plant roots.
  • Sprinklers: Cover large lawns, but less efficient for flower beds due to water loss from evaporation.

Investing in a good watering system saves time and conserves water.


Step 7: Adjust for Climate and Seasons

Your watering routine should change based on weather conditions.

  • Hot, Dry Climates: Water more frequently, especially for shallow-rooted plants.
  • Rainy Seasons: Cut back on watering to avoid over-saturation.
  • Cold Weather: Plants need less water, but evergreens and perennials still benefit from occasional hydration.

Seasonal awareness prevents water waste and plant stress.


Common Watering Mistakes to Avoid

Even experienced gardeners make errors when watering. Avoid these pitfalls:

  1. Overwatering – Causes root rot and nutrient leaching.
  2. Underwatering – Leads to wilting, stunted growth, and poor yields.
  3. Frequent Light Watering – Promotes shallow root systems.
  4. Watering at the Wrong Time – Midday watering wastes water and stresses plants.
  5. Ignoring Soil Type – Sandy soils drain quickly, while clay retains water; each requires different watering frequency.

Sustainable Watering Practices

With increasing concern over water conservation, gardeners can adopt eco-friendly techniques:

  • Collect rainwater in barrels to use for watering.
  • Reuse household water (greywater) from rinsing vegetables if it’s chemical-free.
  • Group plants with similar water needs together (a method known as hydrozoning).
  • Install automatic drip irrigation systems with timers to minimize waste.

Sustainable watering ensures your garden thrives without straining natural resources.


Conclusion

Watering plants the right way is not about giving them more or less water—it’s about giving them what they need, when they need it, and in the most efficient way possible. By understanding your plants, monitoring soil moisture, watering deeply and at the right times, using mulch, and selecting the proper tools, you’ll create a thriving garden that’s healthier, more productive, and environmentally friendly.

Whether you’re tending a small indoor collection, a backyard flower bed, or a vegetable patch, mastering proper watering techniques is the foundation of successful gardening. With the right approach, every drop counts, and your plants will reward you with vibrant growth and abundant beauty.

The Best Plants for a Low-Maintenance Garden

The Best Plants for a Low-Maintenance Garden

Creating a beautiful garden doesn’t have to mean endless hours of pruning, watering, fertilizing, and weeding. In today’s fast-paced world, more and more homeowners are embracing low-maintenance gardens—landscapes that are not only aesthetically pleasing but also sustainable, drought-tolerant, and easy to care for.

Whether you’re a beginner gardener, a busy professional, or someone who simply prefers a laid-back approach to landscaping, choosing the right plants is the key to building a garden that thrives with minimal input. This article explores the best plants for a low-maintenance garden, offering a mix of perennials, shrubs, succulents, and ground covers that require little care but deliver big visual impact.


What Makes a Plant Low-Maintenance?

Before diving into plant selections, it’s important to define what “low-maintenance” actually means in the gardening context. Plants considered low-maintenance usually have the following characteristics:

  • Drought Tolerance – Requires little or infrequent watering once established.
  • Pest and Disease Resistance – Not prone to common plant problems.
  • Minimal Pruning or Deadheading – Grows well without constant grooming.
  • Self-Sustaining Growth Habit – Can thrive without regular fertilization or staking.
  • Hardy and Adaptable – Tolerates a wide range of soil types and weather conditions.

Now, let’s explore the top plant picks that meet these criteria.


1. Lavender (Lavandula spp.)

Type: Perennial Shrub

Ideal Conditions: Full sun, well-drained soil

Zones: 5–9

Why it’s low-maintenance:
Lavender is not only visually stunning with its purple blooms, but it’s also aromatic, deer-resistant, and highly drought-tolerant. Once established, it needs very little watering and can go years without fertilizer.

Maintenance Tips:

  • Prune once a year after flowering to keep its shape.
  • Avoid overwatering; too much moisture can cause root rot.
  • Use it as a border plant or in containers for flexibility.

Bonus: Lavender attracts pollinators like bees and butterflies but repels pests like mosquitoes and moths.


2. Sedum (Stonecrop)

Type: Succulent ground cover or perennial

Ideal Conditions: Full sun to part shade, dry soil

Zones: 3–9

Why it’s low-maintenance:
Sedums are among the easiest plants to grow. These succulents store water in their leaves, making them exceptionally drought-tolerant. They thrive in poor soils and are rarely troubled by pests or diseases.

Top Varieties:

  • Sedum ‘Autumn Joy’: Upright with pink blooms.
  • Sedum spurium: Ground cover with colorful foliage.
  • Sedum acre: Fast-spreading yellow-flowered mat.

Maintenance Tips:

  • Requires little to no fertilization.
  • Cut back dead growth in early spring for neatness.
  • Excellent for rock gardens and borders.

3. Hostas

Type: Perennial (especially shade-tolerant)

Ideal Conditions: Partial to full shade, moist but well-drained soil

Zones: 3–9

Why it’s low-maintenance:
Hostas are beloved for their lush foliage and ability to fill shady spaces with texture and color. Once planted, they return reliably every year and require minimal care aside from occasional watering during dry spells.

Top Features:

  • Comes in a variety of sizes and shades (blue, green, variegated).
  • Resistant to most diseases.
  • Pairs well with ferns and other shade plants.

Maintenance Tips:

  • Mulch to retain soil moisture and reduce weeds.
  • Divide every 3–5 years if clumps become too large.
  • Watch for slugs in humid areas.

4. Coneflowers (Echinacea spp.)

Type: Flowering perennial

Ideal Conditions: Full sun, well-drained soil

Zones: 3–9

Why it’s low-maintenance:
Echinacea is a native North American wildflower that tolerates drought, poor soil, and urban pollution. It blooms for months, attracts beneficial insects, and reseeds itself generously.

Popular Varieties:

  • Echinacea purpurea: Classic purple petals.
  • ‘Cheyenne Spirit’: Mix of red, yellow, and orange tones.
  • ‘White Swan’: Elegant white blooms.

Maintenance Tips:

  • Cut back spent flowers to encourage reblooming.
  • Leave late-season seed heads for winter bird food.
  • Excellent for cottage gardens and meadow-style landscapes.

5. Russian Sage (Perovskia atriplicifolia)

Type: Woody perennial

Ideal Conditions: Full sun, sandy or rocky soil

Zones: 4–9

Why it’s low-maintenance:
Russian sage produces long spikes of silvery lavender-blue flowers that bloom from summer into fall. It’s extremely drought-tolerant and pest-free, thriving in tough conditions.

Maintenance Tips:

  • Cut back to 6–8 inches in early spring to promote fresh growth.
  • Avoid heavy clay soils—this plant prefers excellent drainage.
  • Looks great in mass plantings or paired with ornamental grasses.

6. Ornamental Grasses (Various Species)

Type: Perennial Grass

Ideal Conditions: Full sun to partial shade, average soil

Zones: Varies by species

Why they’re low-maintenance:
Ornamental grasses add movement, texture, and sound to the garden. Most require no fertilization, minimal water, and are deer-resistant. They come in a wide variety of shapes and colors.

Top Picks:

  • Miscanthus sinensis (Maiden Grass): Tall and elegant.
  • Pennisetum alopecuroides (Fountain Grass): Soft, feathery blooms.
  • Festuca glauca (Blue Fescue): Compact and colorful.

Maintenance Tips:

  • Cut back to the ground in late winter or early spring.
  • Divide every few years to maintain vigor.
  • Use as borders, backdrops, or standalone features.

7. Coral Bells (Heuchera spp.)

Type: Perennial

Ideal Conditions: Partial shade, moist but well-drained soil

Zones: 4–9

Why it’s low-maintenance:
With its vibrant foliage colors—ranging from lime green to deep burgundy—Heuchera offers year-round interest without the need for constant care. It’s also a great choice for shady spots and containers.

Maintenance Tips:

  • Remove dead leaves in spring.
  • Divide every 3–4 years if needed.
  • Avoid overwatering; it’s more susceptible to root rot than drought.

8. Yarrow (Achillea millefolium)

Type: Perennial

Ideal Conditions: Full sun, dry soil

Zones: 3–9

Why it’s low-maintenance:
Yarrow is a tough-as-nails wildflower with ferny foliage and clusters of blooms in various colors. It’s drought-tolerant, self-sustaining, and a pollinator magnet.

Maintenance Tips:

  • Deadhead spent blooms for extended flowering.
  • Divide plants every few years to prevent overcrowding.
  • Tolerates neglect and poor soils.

9. Creeping Thyme (Thymus serpyllum)

Type: Ground Cover

Ideal Conditions: Full sun, well-drained soil

Zones: 4–9

Why it’s low-maintenance:
This aromatic, low-growing herb forms dense mats that suppress weeds and tolerate foot traffic. It’s excellent between stepping stones or as a lawn alternative in dry areas.

Maintenance Tips:

  • Requires no mowing.
  • Minimal watering once established.
  • Produces lovely pink-purple flowers in summer.

Design Tips for a Truly Low-Maintenance Garden

To maximize the benefits of low-maintenance plants, consider the following strategies:

1. Group Plants by Water Needs

Place drought-tolerant species together so you don’t overwater plants that prefer dry conditions.

2. Use Mulch Generously

Mulch retains moisture, suppresses weeds, and reduces the need for frequent watering.

3. Choose Native Plants

Native species are naturally adapted to your region’s soil and climate, making them more resilient and easier to care for.

4. Limit the Lawn

Grass requires frequent mowing and watering. Replace sections of lawn with ground covers or gravel for lower maintenance.


Conclusion: Beauty Without the Burden

Low-maintenance gardening doesn’t mean sacrificing beauty or diversity. With the right plant choices, you can create a dynamic, colorful, and environmentally-friendly landscape that essentially takes care of itself. By incorporating drought-resistant, pest-free, and self-sustaining species, your garden becomes a space of relaxation rather than obligation.

Whether you’re planning a new garden or looking to reduce the workload of an existing one, the plants listed above are proven performers that offer high impact for minimal effort. A low-maintenance garden is not just a dream—it’s a smart, sustainable reality.

Step-by-Step Guide to Mulching Your Garden Beds

Step-by-Step Guide to Mulching Your Garden Beds

Mulching is one of the simplest yet most effective gardening practices that every gardener should master. Whether you’re cultivating vegetables, flowers, shrubs, or trees, mulch provides both functional and aesthetic benefits. It helps conserve soil moisture, suppress weeds, regulate temperature, and enrich the soil—all while giving your garden beds a neat and polished look.

If you’ve ever wondered how to mulch properly, this step-by-step guide will walk you through everything you need to know, from choosing the right mulch to applying it effectively.


Why Mulching Matters

Before diving into the process, it’s important to understand why mulching is such a powerful tool in gardening.

  1. Moisture Retention: Mulch slows water evaporation, keeping soil moist longer.
  2. Weed Suppression: A thick layer blocks sunlight, preventing weeds from sprouting.
  3. Temperature Regulation: Keeps soil cooler in summer and insulates roots in winter.
  4. Soil Enrichment: Organic mulches break down over time, adding nutrients.
  5. Erosion Control: Reduces the impact of heavy rain and prevents soil runoff.
  6. Aesthetic Appeal: Creates a tidy, uniform look across garden beds.

With these benefits in mind, let’s explore the steps to successful mulching.


Step 1: Choose the Right Mulch

The first decision is selecting the mulch that best suits your garden’s needs.

Types of Mulch

  1. Organic Mulches (break down and enrich the soil)
    • Wood Chips or Bark: Long-lasting, great for trees and shrubs.
    • Straw or Hay: Ideal for vegetable gardens; lightweight and easy to apply.
    • Grass Clippings: Readily available, but apply in thin layers to avoid matting.
    • Compost: Rich in nutrients, perfect for improving soil quality.
    • Leaves: Shredded leaves work well as a natural, eco-friendly mulch.
  2. Inorganic Mulches (do not decompose but offer lasting coverage)
    • Gravel or Pebbles: Great for pathways or drought-tolerant gardens.
    • Landscape Fabric: Suppresses weeds but should be combined with a top layer for aesthetics.
    • Rubber Mulch: Made from recycled tires; durable and long-lasting.

Tip: For flower and vegetable gardens, organic mulches are best because they feed the soil as they decompose. For decorative or low-maintenance landscapes, inorganic options work well.


Step 2: Prepare the Garden Bed

Mulching works best when applied to clean, well-prepared soil.

  1. Remove Weeds: Pull out weeds by hand or with a hoe to prevent them from regrowing under the mulch.
  2. Clear Debris: Remove sticks, leaves, and old mulch that may harbor pests.
  3. Loosen the Soil: Use a rake or garden fork to aerate the top few inches of soil. This improves water infiltration and root growth.
  4. Water the Soil: Apply a thorough watering before mulching. Moist soil helps plants establish and keeps mulch in place.

Preparing your bed properly ensures mulch has maximum effect.


Step 3: Apply the Mulch

Now comes the fun part—laying down the mulch.

  1. Spread Evenly: Apply mulch in a 2–4 inch layer across the garden bed.
    • Too thin: Weeds may grow through.
    • Too thick: Roots may suffocate, and water may not penetrate.
  2. Keep Mulch Away from Plant Stems: Leave a small gap (about 2–3 inches) around plant bases, tree trunks, or shrub crowns. This prevents rot, mold, and pest damage.
  3. Cover All Bare Soil: Ensure no patches of soil are left exposed, as these areas invite weeds and erosion.

Tip: For vegetable gardens, use lighter mulches like straw or compost. For trees and shrubs, wood chips and bark are ideal.


Step 4: Special Mulching Techniques

Different parts of your garden may require unique mulching approaches.

  • Vegetable Beds: Use straw or shredded leaves for quick decomposition and soil enrichment. Avoid mulch with weed seeds.
  • Flower Beds: Choose bark or compost for a neat appearance and soil improvement.
  • Trees and Shrubs: Create a “mulch donut” around the base—thick around the outer edge but thinner near the trunk.
  • Pathways: Gravel or wood chips provide durability and weed suppression.
  • Container Gardens: A thin layer of mulch (like moss or compost) helps retain moisture in pots.

Step 5: Maintain Your Mulch

Mulching isn’t a one-time job. Proper maintenance keeps it effective year-round.

  1. Replenish Regularly: Organic mulch decomposes, so top it up every season or as needed.
  2. Check Depth: Maintain a consistent 2–4 inch layer. Remove excess if it becomes too thick.
  3. Fluff the Mulch: Rake or turn over compacted mulch to improve airflow and prevent mold.
  4. Monitor for Pests: Occasionally check under mulch for slugs or rodents, which sometimes hide in thick layers.
  5. Replace Old Mulch: Every 1–2 years, remove decomposed mulch and refresh the layer to maintain aesthetics and soil health.

Step 6: Seasonal Considerations

Mulching strategies vary depending on the season.

  • Spring: Apply fresh mulch after soil warms up. Too early may keep soil cold.
  • Summer: Mulch conserves water and keeps roots cool. Water deeply before applying.
  • Fall: Add mulch to protect perennials and root systems from frost.
  • Winter: Mulch acts as insulation, but avoid piling it too close to stems, which can cause rot.

Adjusting mulch practices to the season ensures plants stay healthy year-round.


Step 7: Combine Mulching with Other Gardening Practices

Mulching works best as part of a holistic garden care routine.

  • Irrigation: Pair mulch with drip irrigation or soaker hoses for efficient watering.
  • Fertilization: Add compost or organic fertilizer under mulch to feed roots directly.
  • Companion Planting: Use mulch alongside beneficial plant pairings for pest control and soil improvement.

Together, these practices create a thriving, low-maintenance garden ecosystem.


Common Mulching Mistakes to Avoid

  1. Volcano Mulching Around Trees: Piling mulch against tree trunks can suffocate roots and invite pests.
  2. Using the Wrong Material: Fresh grass clippings or hay with seeds may cause odor or weed growth.
  3. Too Much Mulch: Layers thicker than 4 inches may prevent water and air from reaching roots.
  4. Skipping Bed Preparation: Applying mulch over weeds or compacted soil reduces its effectiveness.
  5. Neglecting Maintenance: Old, compacted mulch can harbor disease and pests.

Avoiding these pitfalls ensures mulch remains beneficial rather than harmful.


Conclusion

Mulching your garden beds is one of the most rewarding and practical steps in gardening. By following this step-by-step guide—choosing the right mulch, preparing the soil, applying it correctly, and maintaining it over time—you’ll enjoy healthier plants, fewer weeds, better moisture retention, and a polished, professional-looking garden.

Whether you’re tending a vegetable patch, a flower border, or ornamental trees, mulching is a time-saving, cost-effective practice that pays off in every season. With proper technique, your garden beds will thrive and bring you beauty and abundance year after year.

5 Low-Cost Garden Upgrades With Big Impact

5 Low-Cost Garden Upgrades With Big Impact

A well-maintained garden is more than just an outdoor space—it’s a sanctuary, a personal retreat, and a statement of style. However, many homeowners and garden enthusiasts shy away from upgrading their garden spaces due to the perceived high costs. The truth is, creating a beautiful, functional garden doesn’t require a massive budget. With a few clever and cost-effective upgrades, you can transform your outdoor area into a vibrant, inviting oasis.

In this article, we explore five low-cost garden upgrades that deliver high visual and functional impact, suitable for homeowners, renters, and garden lovers alike. Whether you’re working with a small urban backyard or a larger rural garden, these tips are adaptable, sustainable, and budget-friendly.


1. Add Definition with Garden Edging

Estimated Cost: $20–$100
Impact Level: High Visual Appeal and Organization

Why It Works:

Garden edging is a subtle yet powerful design element. It defines borders between garden beds, lawns, and pathways, giving the garden a clean and organized appearance. When implemented well, it brings a professional touch to even the most basic outdoor spaces.

Budget-Friendly Materials:

  • Recycled bricks or concrete blocks
  • Natural logs or tree branches
  • Flexible plastic or rubber edging
  • DIY stone borders

Implementation Tips:

  • Use a shovel to create a shallow trench before placing your edging material.
  • For curved designs, choose flexible materials like rubber edging or cut logs.
  • Combine edging with mulch or gravel to further reduce weed growth and improve drainage.

Bonus Tip:

Consider using reclaimed materials from demolition sites or recycling centers. Not only is this environmentally friendly, but it can significantly cut costs while adding rustic charm.


2. Incorporate Vertical Gardening

Estimated Cost: $15–$80
Impact Level: Space Maximization and Visual Interest

Why It Works:

Vertical gardening is perfect for small spaces and urban settings. By growing upwards instead of outwards, you make efficient use of available space and add a striking visual element. It’s ideal for herbs, leafy greens, succulents, and even flowering vines.

Budget-Friendly Options:

  • Wooden pallets turned into plant walls
  • Hanging shoe organizers used as vertical planters
  • DIY trellises made from bamboo or scrap wood
  • Repurposed shelves or crates

How to Get Started:

  1. Choose a sturdy vertical surface (fence, wall, balcony railing).
  2. Ensure adequate drainage and sunlight.
  3. Use lightweight soil and water-retaining materials to reduce maintenance.

Bonus Tip:

Install a drip irrigation system made from repurposed plastic bottles for a low-maintenance watering solution.


3. DIY Stepping Stone Pathways

Estimated Cost: $25–$100
Impact Level: Functional Access and Aesthetic Appeal

Why It Works:

Stepping stone pathways not only guide foot traffic and prevent soil compaction but also create visual flow in your garden. Paths connect different zones of your garden and offer a whimsical or elegant touch depending on the material used.

Cost-Effective Materials:

  • Broken concrete slabs (urbanite)
  • Homemade concrete molds (using plastic containers or baking pans)
  • Flat rocks or leftover tiles
  • Gravel and sand for filling

Step-by-Step:

  1. Plan the pathway layout with rope or garden hose.
  2. Clear the area and dig shallow holes for the stones.
  3. Level the stones and secure with sand or gravel.
  4. Surround with mulch or grass for a polished look.

Bonus Tip:

Add decorative mosaics to your stepping stones using leftover tiles, marbles, or pebbles to personalize your path.


4. Upgrade Lighting with Solar Fixtures

Estimated Cost: $30–$120
Impact Level: Nighttime Ambiance and Safety

Why It Works:

Garden lighting extends the usability of your space into the evening hours while adding ambiance and security. Solar-powered lights are an eco-friendly, low-maintenance solution that requires no wiring or electricity.

Affordable Solar Lighting Ideas:

  • Solar stake lights along pathways
  • Hanging solar lanterns from trees or hooks
  • LED string lights across patios or fences
  • Mason jar solar lights as table centerpieces

Installation Guide:

  1. Place lights in areas that receive ample sun during the day.
  2. Space lights evenly for balance and aesthetics.
  3. Choose warm-toned bulbs for a cozy atmosphere.

Bonus Tip:

Combine lighting with reflective surfaces (like mirrors or metallic planters) to amplify light without adding more fixtures.


5. Create a Focal Point with Upcycled Decor

Estimated Cost: $10–$70
Impact Level: Personalization and Artistic Flair

Why It Works:

A garden focal point draws the eye and gives the space character. Upcycled garden decor lets you showcase creativity while minimizing waste and expenses. The result is a personalized outdoor area that feels curated and cohesive.

Ideas for Upcycled Focal Points:

  • Painted old wheelbarrows turned into flower beds
  • Vintage bicycles adorned with baskets of blooms
  • Reused wooden ladders as tiered plant stands
  • Broken ceramic pots arranged into fairy gardens

Tips for Impact:

  • Choose a spot that’s easily visible—near the entrance, at the end of a path, or in the center of a flower bed.
  • Use bright colors or contrasting textures to make your focal point pop.
  • Keep it proportionate to your space—large items can overwhelm small gardens.

Bonus Tip:

Rotate focal points seasonally (e.g., pumpkins in fall, lanterns in winter) to keep your garden feeling fresh and dynamic all year.


Final Thoughts: Small Changes, Big Rewards

Transforming your garden doesn’t have to be expensive or labor-intensive. The key is to maximize impact through thoughtful, intentional upgrades that enhance beauty, function, and sustainability. By focusing on inexpensive materials, reusing what you already have, and putting in a bit of creativity, you can breathe new life into your garden without stretching your budget.

Whether it’s defining your garden with clean edges, adding vertical interest, illuminating your nights, or showcasing your personality with upcycled decor, these five low-cost upgrades offer big returns for minimal investment. More importantly, they inspire a deeper connection with your outdoor space and allow your garden to reflect your unique taste and lifestyle.

So roll up your sleeves, gather your materials, and get started—your dream garden is more achievable than you think!

How to Prepare Your Garden for Spring Planting

How to Prepare Your Garden for Spring Planting

Spring is one of the most exciting seasons for gardeners. After months of winter dormancy, nature begins to awaken, and your garden is ready for a fresh start. Preparing your garden properly for spring planting ensures healthier soil, stronger plants, and a more productive growing season. Whether you’re growing vegetables, flowers, or herbs, the steps you take now can make all the difference in your garden’s success.

This guide will walk you through effective strategies to prepare your garden for spring planting, from cleaning and soil preparation to planning, fertilizing, and protecting young plants.


Step 1: Clean Up the Garden Beds

The first step in spring preparation is giving your garden a thorough cleanup.

  • Remove Debris: Clear away leaves, twigs, and branches that accumulated over winter. This prevents pests and diseases from lingering.
  • Pull Weeds: Tackle weeds before they spread. Removing them early reduces competition for nutrients.
  • Dispose of Old Plants: Uproot any dead annuals or perennials that didn’t survive the winter.

Tip: Add organic material, such as leaves or pulled weeds, to a compost pile rather than discarding them. This will provide free fertilizer later in the season.


Step 2: Inspect and Repair Garden Structures

Winter weather can be harsh on fences, trellises, raised beds, and irrigation systems.

  • Check Fences and Borders: Ensure structures are intact to keep out pests like rabbits or deer.
  • Repair Raised Beds: Replace broken boards or reinforce loose corners.
  • Test Watering Systems: Check hoses, sprinklers, or drip irrigation for leaks or blockages.

A well-maintained structure saves time during the busy planting season.


Step 3: Test and Prepare the Soil

Healthy soil is the foundation of a productive garden.

Test the Soil

Use a home soil testing kit or send a sample to a local extension service. Tests will reveal the pH level and nutrient content, guiding your choice of amendments.

  • Ideal pH: Most vegetables and flowers thrive in slightly acidic to neutral soil (6.0–7.0).
  • Nutrient Balance: Look for deficiencies in nitrogen, phosphorus, or potassium.

Improve Soil Quality

  • Add Compost: Enriches soil with organic matter and improves structure.
  • Mix in Fertilizer: Apply balanced organic or slow-release fertilizers based on soil test results.
  • Loosen Compacted Soil: Use a garden fork or tiller to aerate. Good drainage prevents root rot.

Tip: Incorporating organic matter like composted manure or leaf mold in early spring ensures nutrients are available once plants begin growing.


Step 4: Plan Your Planting Layout

A successful garden begins with thoughtful planning.

  • Rotate Crops: Don’t plant the same crops in the same place every year. Crop rotation reduces soil depletion and pest buildup.
  • Consider Sunlight: Place sun-loving plants like tomatoes, peppers, and sunflowers in the brightest spots. Shade-tolerant plants like lettuce or spinach do better in partial shade.
  • Companion Planting: Pair plants that benefit each other, such as tomatoes with basil or beans with corn.

Sketch a simple layout on paper to visualize where everything will go.


Step 5: Start Seeds Indoors

Many plants benefit from being started indoors weeks before the last frost.

  • Vegetables: Tomatoes, peppers, and eggplants thrive when started indoors.
  • Flowers: Marigolds, zinnias, and cosmos grow well from seeds indoors.
  • Timing: Check seed packets for recommended starting times, typically 6–8 weeks before transplanting.

Use seed trays with good-quality potting mix, keep them warm, and ensure they get adequate light (grow lights can be useful).


Step 6: Prune and Divide Perennials

Spring is the perfect time to encourage healthy growth in established plants.

  • Prune Shrubs and Trees: Remove dead or damaged branches to allow new growth.
  • Divide Overgrown Perennials: Plants like hostas, daylilies, and irises can be dug up, divided, and replanted. This keeps them healthy and provides free plants for other areas.

Pruning and dividing rejuvenate plants and keep your garden looking neat.


Step 7: Mulch for Moisture and Weed Control

Mulching is one of the simplest yet most effective steps for preparing your garden.

  • Suppress Weeds: A layer of mulch prevents weed seeds from germinating.
  • Retain Moisture: Mulch reduces water evaporation, keeping soil evenly moist.
  • Regulate Temperature: Helps soil warm gradually in early spring and protects roots from sudden frosts.

Choose natural mulches such as shredded bark, straw, or compost. Apply 2–3 inches around plants, leaving space around stems to prevent rot.


Step 8: Set Up Pest and Disease Prevention

A proactive approach is key to avoiding infestations.

  • Install Barriers: Use row covers or netting to keep insects away.
  • Encourage Beneficial Insects: Ladybugs, lacewings, and bees help control pests and improve pollination.
  • Rotate Crops: Prevents pests from establishing permanent homes.
  • Practice Good Hygiene: Remove diseased plants immediately and disinfect tools regularly.

Taking preventive measures now saves effort later in the season.


Step 9: Water Wisely

Spring weather can be unpredictable. Prepare your watering strategy early.

  • Drip Irrigation: Conserves water and delivers it directly to roots.
  • Rain Barrels: Collect rainwater for an eco-friendly supply.
  • Monitor Moisture: Use your finger to check soil; water when the top 2 inches are dry.

Avoid overwatering, as soggy soil can damage seedlings and roots.


Step 10: Add Finishing Touches for Beauty and Function

Gardening is not just about productivity—it’s about creating a space you love.

  • Install Decorative Borders: Define garden beds with stones or wooden edges.
  • Add Pathways: Use gravel or stepping stones for easy access.
  • Incorporate Garden Art: Trellises, birdbaths, or sculptures enhance beauty.

These finishing touches make your spring garden inviting and enjoyable.


Maintenance Through the Season

Once planting begins, ongoing maintenance will keep your garden thriving.

  • Weed Weekly: Prevent weeds from taking over.
  • Fertilize Appropriately: Feed plants based on growth stage and soil needs.
  • Monitor Pests: Catch issues early before they spread.
  • Harvest Regularly: Picking fruits and vegetables encourages more production.

Conclusion

Preparing your garden for spring planting is about more than just putting seeds in the soil. It’s a process of cleaning, repairing, planning, enriching, and protecting your outdoor space so that plants have the best possible start. By following these steps—from soil testing and seed starting to mulching and pest prevention—you’ll set the stage for a vibrant, productive garden all season long.

With preparation complete, your spring planting will not only be easier but far more rewarding. A well-prepared garden is a thriving garden—full of color, growth, and life that will bring joy throughout the year.

Why Raised Beds Make Gardening So Much Easier

Why Raised Beds Make Gardening So Much Easier

Gardening is one of the most rewarding hobbies you can pursue, offering benefits that range from fresh produce to stress relief. But ask any experienced gardener, and they’ll tell you—not all garden setups are created equal.

One method that continues to grow in popularity among beginners and seasoned green thumbs alike is raised bed gardening. Why? Because it simply makes everything easier.

From better soil control to fewer weeds and less strain on your back, raised beds offer a long list of advantages that can transform the way you garden. In this article, we’ll explore the science, structure, and simplicity behind raised bed gardening, and why this method has become a favorite among modern gardeners.


What Are Raised Beds?

A raised bed is essentially a garden bed that is elevated above the natural ground level. It’s usually contained within a frame made of wood, stone, metal, or other materials, and filled with a curated mix of soil and compost.

Raised beds can vary in size and height depending on your needs. Some are as low as 6 inches, while others are tall enough to eliminate bending entirely.


1. Better Soil Control = Better Plant Growth

One of the biggest advantages of raised bed gardening is the ability to control your soil quality.

In traditional in-ground gardening, you’re stuck with whatever soil nature has given you—which may be clay-heavy, sandy, rocky, or lacking in nutrients. Raised beds allow you to create a customized soil mix that’s perfect for the plants you’re growing.

Benefits of Soil Control:

  • Improved drainage: Raised beds prevent water from pooling, reducing the risk of root rot.
  • Soil warmth: The soil in raised beds warms up faster in the spring, allowing for an earlier start to planting.
  • Nutrient density: You can add compost, worm castings, and organic matter to supercharge your growing medium.
  • Fewer toxins: If you live in an urban area or on previously developed land, raised beds help isolate your plants from potentially contaminated native soil.

Ideal Soil Mix for Raised Beds:

  • 50% topsoil
  • 30% compost
  • 20% aerators like perlite, vermiculite, or coarse sand

This rich, loose blend promotes strong root development and higher yields.


2. Fewer Weeds and Easier Weed Management

Weeding is one of the most dreaded chores in gardening. Raised beds make this task significantly easier for two key reasons:

A. Less Weed Seed Exposure

When you fill your raised bed with fresh, high-quality soil and compost, you avoid much of the weed seed bank that lives in the ground. Fewer weed seeds = fewer weeds.

B. Easier Maintenance

The defined edges and smaller surface area make it easier to spot and pull weeds before they spread. Plus, adding a layer of mulch on top (like straw, bark, or leaf mold) helps smother weeds and retain moisture.

You can also lay weed-blocking fabric at the bottom of the raised bed during installation to further reduce weed intrusion from below.


3. Better Accessibility = Less Strain on Your Body

Traditional ground-level gardens require a lot of bending, kneeling, and squatting—movements that can be tough on your back, knees, and joints, especially as you get older.

Raised beds bring the garden up to a more comfortable height, which:

  • Reduces back strain
  • Makes planting, weeding, and harvesting easier
  • Is wheelchair-friendly when built at appropriate height

In fact, raised bed gardening is often recommended for:

  • Elderly gardeners
  • People with mobility challenges
  • Those recovering from injury or surgery

Even a 12–18 inch tall raised bed can make a huge difference in comfort.


4. Improved Drainage and Water Control

Drainage is critical in gardening. Plants need water, but they don’t want to sit in soggy soil. Poor drainage leads to root rot, fungus, and disease.

Raised beds are naturally excellent at draining excess water. Since they’re elevated and not compacted by foot traffic, water can flow freely through the soil.

Tips to Maximize Drainage:

  • Use loose, organic-rich soil
  • Avoid walking on the soil inside the bed
  • If needed, drill holes in the bottom or use gravel layers

At the same time, raised beds retain moisture better when mulched correctly, making watering more efficient.


5. Extended Growing Season

Because raised beds warm up faster in the spring and drain better after snow or rain, you can often start planting earlier than you would in the ground.

In some regions, raised beds can extend the growing season by several weeks, giving you an edge for cool-season crops like lettuce, spinach, and carrots.

Additionally, the contained design allows for easy use of:

  • Row covers
  • Cold frames
  • Mini hoop houses
    These additions can protect plants from frost, wind, and pests—giving you even more control over your garden’s microclimate.

6. Space Efficiency and Higher Yields

Raised beds encourage intensive planting methods, such as square-foot gardening, which helps maximize production in small spaces.

Benefits include:

  • Tighter plant spacing = fewer weeds
  • Denser planting = better use of water and nutrients
  • Optimized design = easier access from all sides (no stepping in the bed!)

A 4×8 foot raised bed can feed a family of four with seasonal vegetables throughout spring, summer, and fall when managed properly.


7. Pest Control Made Easier

Raised beds don’t eliminate pests entirely, but they make them easier to manage.

Advantages:

  • Barrier from burrowing pests like gophers or moles (use wire mesh at the base)
  • Easier to install fencing or netting for rabbits, deer, or birds
  • Visual access helps you spot insect infestations sooner
  • You can easily cover crops with floating row covers or cloches

By elevating your plants, you reduce the chances of random ground pests reaching them unnoticed.


8. Tidy, Organized Appearance

A well-maintained raised bed garden looks structured and intentional, which is especially appealing in urban or suburban settings. It enhances curb appeal and can even add value to your property.

Aesthetic Benefits:

  • Clean lines and defined spaces
  • Easier to maintain symmetry and design
  • Great for showcasing edible landscapes or ornamental plants

Raised beds can also be customized with trellises, arches, or decorative edging to create a visually stunning garden that doubles as a design feature.


9. Customizable for Any Location or Climate

Whether you’re working with clay soil, rocky terrain, or limited space, raised beds are versatile and adaptable.

You can build them:

  • On top of poor soil
  • In small patios or balconies (with container beds)
  • With materials suited for your climate (e.g., rot-resistant cedar for wet areas, galvanized steel for dry zones)

Raised beds also allow for crop rotation, companion planting, and vertical gardening, making them a flexible choice for any gardener.


Summary: Why Raised Beds Make Gardening Easier

BenefitHow It Helps
Better soil controlBoosts plant health and yields
Weed reductionSaves time and labor
Easier on the bodyReduces physical strain
Improved drainagePrevents root rot and overwatering
Longer growing seasonMore harvests per year
Space efficiencyIdeal for small or urban gardens
Easier pest controlProtects crops and simplifies defense
Cleaner designEnhances beauty and structure
CustomizationAdapts to your environment and goals

Final Thoughts

Raised bed gardening isn’t just a trend—it’s a smart, efficient, and rewarding way to garden. Whether you’re growing flowers, vegetables, herbs, or all of the above, raised beds give you greater control, better results, and a more enjoyable experience.

By solving common gardening problems—like poor soil, weeds, and accessibility—raised beds empower both beginners and experts to grow more with less effort.

If you’re looking for a way to make gardening easier, more productive, and more beautiful, raised beds are the answer.

The Ultimate Guide to Growing Maple Trees

The Ultimate Guide to Growing Maple Trees

Maple trees (Acer spp.) are among the most iconic and versatile trees in landscapes worldwide. Known for their stunning fall foliage, graceful shape, and adaptability, maples enhance any garden or yard with both aesthetic and ecological benefits. From providing shade and privacy to supporting wildlife and producing sap for syrup, maples are a valuable addition to residential and public spaces.

This ultimate guide offers a comprehensive approach to growing maple trees, including selection, planting, care, and maintenance, ensuring healthy growth and vibrant beauty year after year.


Why Grow Maple Trees?

Maples are cherished by gardeners and landscapers for numerous reasons:

  • Spectacular Foliage: Many varieties exhibit vibrant reds, oranges, and yellows in autumn.
  • Shade and Shelter: Large canopy provides shade, cooling the surrounding environment.
  • Wildlife-Friendly: Supports birds, pollinators, and beneficial insects.
  • Versatility: Suitable for streetscapes, gardens, parks, and yards of all sizes.
  • Maple Syrup Production: Certain species, like sugar maples, can be tapped for syrup.

Understanding these benefits can help homeowners and gardeners appreciate the long-term value of planting maple trees.


Step 1: Choosing the Right Maple Variety

Selecting the right maple species is critical to match your climate, soil, and landscaping goals. Popular varieties include:

  1. Sugar Maple (Acer saccharum)
    • Famous for brilliant fall colors and maple syrup production.
    • Prefers cool climates and well-drained, fertile soil.
    • Can grow 60–75 feet tall.
  2. Red Maple (Acer rubrum)
    • Noted for red flowers, new spring growth, and stunning fall foliage.
    • Tolerates a wide range of soil types and moisture conditions.
    • Height: 40–70 feet.
  3. Japanese Maple (Acer palmatum)
    • Small, ornamental tree with striking foliage and delicate form.
    • Perfect for smaller yards or container planting.
    • Height: 10–25 feet.
  4. Silver Maple (Acer saccharinum)
    • Fast-growing and hardy, with silvery undersides on leaves.
    • Ideal for quick shade, but weaker wood is prone to storm damage.
    • Height: 50–70 feet.
  5. Norway Maple (Acer platanoides)
    • Adaptable, tolerant of urban conditions.
    • Excellent for street planting or large landscapes.
    • Height: 40–60 feet.

Tip: Consider the tree’s mature height, growth rate, and soil and light requirements before selecting a variety.


Step 2: Selecting the Perfect Location

Maples require thoughtful placement for optimal growth:

  • Sunlight: Most maple species prefer full sun to partial shade. Japanese maples thrive in partial shade.
  • Soil: Well-drained, fertile soil is ideal. Avoid heavy clay or compacted soils.
  • Space: Allow sufficient room for canopy spread and root growth. Sugar and red maples need large spaces, while Japanese maples suit smaller areas.
  • Protection: Shelter young trees from strong winds and harsh conditions.

Pro Tip: Avoid planting too close to buildings or structures, as mature maples have extensive root systems that can interfere with foundations.


Step 3: Planting Maple Trees

Proper planting ensures a strong, healthy start:

  1. Timing: Plant in early spring or fall to avoid extreme heat or frost.
  2. Digging the Hole: Make the hole twice as wide and slightly deeper than the root ball.
  3. Soil Preparation: Mix native soil with compost or well-rotted organic matter to improve fertility and drainage.
  4. Planting Depth: Position the tree so the root collar is slightly above soil level to prevent crown rot.
  5. Backfilling: Fill the hole with amended soil, gently firming to eliminate air pockets.
  6. Watering: Water thoroughly immediately after planting to help roots settle.
  7. Mulching: Apply 2–3 inches of mulch around the base to retain moisture and regulate soil temperature, keeping mulch away from the trunk.

Step 4: Watering and Moisture Management

Consistent moisture is critical, particularly during the first few years:

  • Frequency: Water deeply once or twice a week, adjusting for rainfall and soil type.
  • New Trees: Require regular watering until fully established.
  • Established Trees: Deep watering during dry spells helps maintain health.
  • Avoid Overwatering: Waterlogged soil can lead to root rot.

Tip: Use a soaker hose or drip irrigation to deliver water efficiently to the root zone.


Step 5: Fertilizing Maple Trees

Fertilization promotes healthy growth and vibrant foliage:

  • Timing: Apply fertilizer in early spring as new growth begins. Avoid late fall fertilization.
  • Type: Use a balanced, slow-release fertilizer or one designed for trees and shrubs.
  • Method: Spread fertilizer evenly around the drip line, not directly at the trunk.
  • Organic Options: Compost or well-rotted manure can supplement nutrients naturally.

Pro Tip: Soil testing before fertilization helps determine nutrient deficiencies and prevents over-fertilization.


Step 6: Pruning and Maintenance

Pruning helps maintain shape, remove deadwood, and improve airflow:

  • Timing: Late winter or early spring before new growth is ideal. Light pruning can be done in summer if necessary.
  • Technique:
    • Remove dead, damaged, or crossing branches.
    • Thin dense areas to improve airflow and sunlight penetration.
    • Avoid excessive pruning that reduces leaf canopy.
  • Shaping: Keep natural form for most maples, but Japanese maples can be pruned for aesthetic shapes.

Step 7: Pest and Disease Management

Maple trees are generally hardy but can encounter a few pests and diseases:

Common Pests

  • Aphids: Cause leaf curling and sap damage. Treat with insecticidal soap.
  • Scale Insects: Small, sap-sucking insects that weaken trees. Use horticultural oil or insecticides.
  • Leafhoppers: Cause stippling and yellowing leaves. Control with insecticides if severe.

Common Diseases

  • Verticillium Wilt: Soil-borne fungus causing branch dieback. Remove affected branches promptly.
  • Tar Spot: Fungal disease causing black spots on leaves; mostly cosmetic.
  • Anthracnose: Fungal infection leading to leaf browning. Prune affected leaves and improve airflow.

Prevention:

  • Maintain healthy soil and proper watering.
  • Space trees adequately to reduce humidity and increase airflow.
  • Remove fallen leaves to prevent fungal buildup.

Step 8: Seasonal Care for Maple Trees

Spring

  • Fertilize to encourage new growth.
  • Inspect for early signs of pests or disease.
  • Apply mulch to retain soil moisture.

Summer

  • Water deeply during dry spells.
  • Monitor for pests like aphids and leafhoppers.
  • Provide light shade for sensitive species like Japanese maples during heatwaves.

Fall

  • Mulch to protect roots during winter.
  • Collect fallen leaves to prevent fungal diseases.
  • Avoid late fertilization to allow dormancy preparation.

Winter

  • Protect young trees from frost with burlap wraps if needed.
  • Avoid heavy pruning that can damage vulnerable branches.
  • Water during dry winter spells when soil is not frozen.

Common Mistakes to Avoid

  • Planting Too Deep: Can suffocate roots and cause poor growth.
  • Overwatering: Leads to root rot and fungal diseases.
  • Underwatering: Can stress the tree, leading to leaf drop or stunted growth.
  • Neglecting Pruning: Results in weak branches, poor shape, and disease susceptibility.
  • Ignoring Soil Conditions: Maples require fertile, well-drained soil for optimal health.

Final Thoughts

Maple trees are a long-term investment in beauty, shade, and ecological value for any yard or garden. By carefully selecting the right variety, planting in the proper location, and providing ongoing care—including watering, fertilization, pruning, and pest management—you can enjoy vibrant, healthy trees for decades.

Whether you seek a majestic sugar maple for fall foliage, a delicate Japanese maple for ornamental beauty, or a hardy red maple for urban landscapes, following these guidelines ensures that your trees will thrive. With patience and consistent care, maple trees will provide shade, shelter, and spectacular seasonal displays that enhance the character and value of your landscape.

Planting and nurturing maples is not only a rewarding gardening experience but also a contribution to a greener, healthier environment. Their shade, wildlife support, and striking appearance make maples indispensable in creating sustainable and beautiful landscapes.

5 Garden Features That Instantly Increase Home Value

5 Garden Features That Instantly Increase Home Value

When it comes to increasing the value of a home, most people think of renovating kitchens or updating bathrooms. However, there’s another area that can offer an impressive return on investment: the garden. A beautifully designed outdoor space doesn’t just enhance your quality of life—it also has the power to dramatically boost your home’s market value.

According to real estate and landscaping experts, certain garden features can yield up to 200% ROI (Return on Investment). These elements create curb appeal, extend living spaces, and offer functional beauty that resonates with potential buyers.

In this article, we’ll explore 5 garden features that instantly increase home value, along with tips on implementation, design inspiration, and cost-effective options for any budget.


1. Well-Designed Outdoor Living Areas

Why It Boosts Value:

In today’s real estate market, outdoor living spaces are seen as extensions of the home. A patio, deck, or pergola transforms a simple garden into a functional space for entertaining, relaxing, and dining.

Buyers are drawn to homes that offer lifestyle enhancements, and a stylish, usable outdoor area can set your property apart from others.

Key Features to Include:

  • Deck or patio: Use materials like composite decking, stone, or pavers.
  • Seating area: Include weatherproof furniture, cushions, and maybe a fire pit or coffee table.
  • Pergola or shade structure: Adds privacy and sun protection.
  • Lighting: String lights, lanterns, or in-ground lighting for ambiance.

Return on Investment:

  • Up to 80% ROI for professionally installed patios/decks.
  • DIY versions can still yield high returns, especially in warmer climates.

Pro Tip:

Choose materials that complement your home’s architecture and use low-maintenance finishes to appeal to busy homeowners.


2. Landscaped Front Yard with Curb Appeal

Why It Boosts Value:

The front yard is your home’s first impression. A neatly landscaped, inviting entryway instantly improves curb appeal and can increase perceived property value by 5–11%, according to the American Society of Landscape Architects.

A well-kept front garden makes the house feel loved and cared for—a major emotional trigger for buyers.

Features to Focus On:

  • Defined lawn edges and borders
  • Flower beds with seasonal color
  • Evergreen shrubs and native plants
  • Mulch or decorative stone
  • Attractive pathway leading to the entrance

Design Ideas:

  • Use a mix of perennials and annuals for year-round interest.
  • Incorporate symmetry in planting for a balanced look.
  • Add a statement tree or focal point, like a flowering dogwood or a Japanese maple.

Return on Investment:

  • Front yard landscaping can add up to 10% to home value when thoughtfully executed.
  • Simple upgrades like fresh mulch and plantings can be done for under $500.

3. Irrigation System or Smart Watering Setup

Why It Boosts Value:

Modern buyers want homes that are efficient and easy to maintain. An automated irrigation system eliminates the hassle of manual watering while promoting healthy, vibrant gardens.

Whether it’s a built-in sprinkler system or a smart drip irrigation network, this feature adds a layer of convenience and sustainability that’s attractive to homeowners—especially in drought-prone areas.

System Types:

  • Sprinkler systems: Great for lawns and large garden beds.
  • Drip irrigation: Conserves water, ideal for flower beds and vegetable gardens.
  • Smart controllers: Adjust watering based on weather forecasts, soil moisture, and plant type.

Eco-Benefits:

  • Promotes water conservation
  • Reduces water bills
  • Keeps plants healthier, reducing replacement costs

Return on Investment:

  • Installation costs can range from $1,000 to $3,500, but the system can pay for itself over time.
  • Smart systems also appeal to eco-conscious buyers, increasing marketability.

4. Outdoor Lighting for Beauty and Safety

Why It Boosts Value:

Landscape lighting does double duty: it adds aesthetic beauty to your garden and improves safety and security. Professionally installed lighting can completely transform your home at night, making it stand out on the street and increasing both real and perceived value.

Buyers are impressed by homes that look just as appealing at night as they do during the day.

Lighting Options:

  • Pathway lighting: Enhances safety and navigation
  • Uplighting trees and shrubs: Creates dramatic focal points
  • Accent lighting for architecture: Highlights home’s best features
  • Deck and step lighting: Adds ambiance and prevents tripping hazards

Solar vs. Wired:

  • Solar lighting is eco-friendly and budget-friendly but may be dimmer.
  • Low-voltage wired lighting provides consistent, reliable brightness.

Return on Investment:

  • Adds visual depth and perceived luxury to your garden.
  • Typically offers 50–80% ROI, with high impact in evening home showings.

5. Functional Garden Space (Edible or Ornamental)

Why It Boosts Value:

Functional garden spaces are highly sought after, especially as homeowners become more interested in self-sufficiency, sustainability, and wellness. Raised beds for vegetables, pollinator gardens, or herb spirals not only offer beauty but also practical value.

In urban or suburban homes, a dedicated space for growing food is a unique selling point that stands out to buyers.

Ideas to Include:

  • Raised vegetable beds: Easy to maintain and attractive
  • Compost bins: Encourages sustainability (choose modern, enclosed types)
  • Herb garden near the kitchen: Convenient and fragrant
  • Pollinator-friendly flowers: Attract butterflies and bees

Bonus:

  • Encourages healthier living and outdoor time
  • Helps the environment and builds soil health
  • Great talking point during property tours or open houses

Return on Investment:

  • ROI depends on execution, but function meets charm in this category.
  • Cost is minimal, and potential buyer appeal is high, especially post-2020, when gardening became a global trend.

Comparative Summary: ROI of Garden Features

FeatureROI EstimateKey Benefit
Outdoor Living Area70–80%Expands usable space
Front Yard Landscaping5–11% added valueBoosts curb appeal
Irrigation SystemLong-term savingsAdds convenience and efficiency
Outdoor Lighting50–80%Enhances safety and night appeal
Edible/Functional GardenVariableUnique appeal and lifestyle benefit

Real Estate Perspective: Why Buyers Care

Modern buyers—especially Millennials and Gen Z—are increasingly prioritizing:

  • Outdoor space over square footage
  • Energy-efficient and eco-conscious features
  • Private areas for entertainment or relaxation
  • Gardens that support wellness and mental health

According to a 2023 Zillow study, homes with outdoor features like patios, decks, and landscaping sold faster and for more money than similar homes without.

A garden isn’t just a space—it’s a lifestyle statement.


Final Thoughts

Your garden has the power to do much more than grow flowers—it can grow your home’s value.

From a welcoming front yard to a functional veggie plot, these five garden features are simple, effective ways to make a big impact. Whether you’re selling in the near future or just want to enjoy a more beautiful and practical space, investing in your garden offers tangible financial and lifestyle rewards.

Start small, plan with intention, and watch how these outdoor improvements pay off—both in enjoyment and in equity.