How to Grow Lilies for Stunning Summer Displays

How to Grow Lilies for Stunning Summer Displays

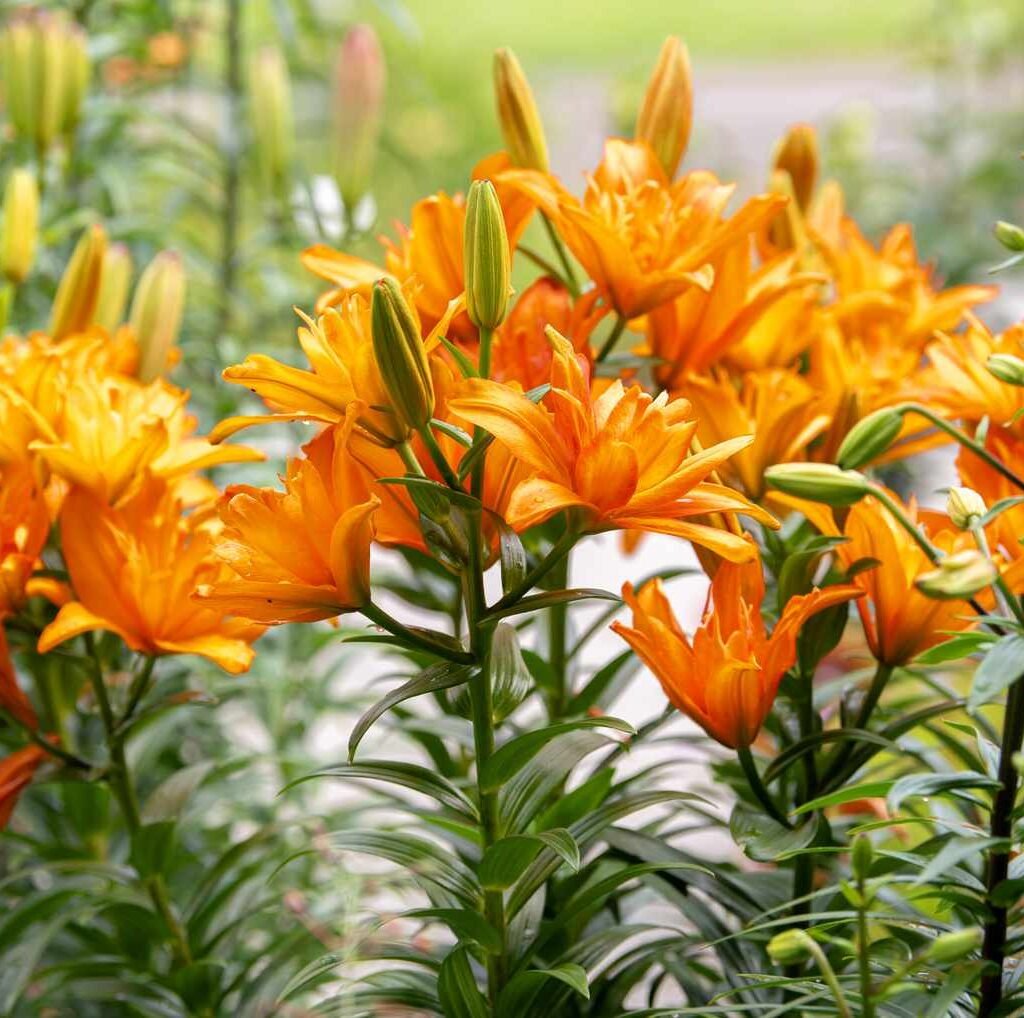
Lilies are among the most striking and elegant flowers in any garden. Their tall stems, large trumpet-shaped blooms, and captivating fragrance make them a centerpiece in flower beds, borders, and containers. Growing lilies successfully can provide gardeners with a spectacular summer display that attracts both the eye and pollinators. However, to achieve lush, vibrant blooms, it is essential to understand the requirements of these plants—from soil and planting to care and pest management. This article provides comprehensive guidance on how to grow lilies for stunning summer displays.


1. Understanding Lilies and Their Varieties

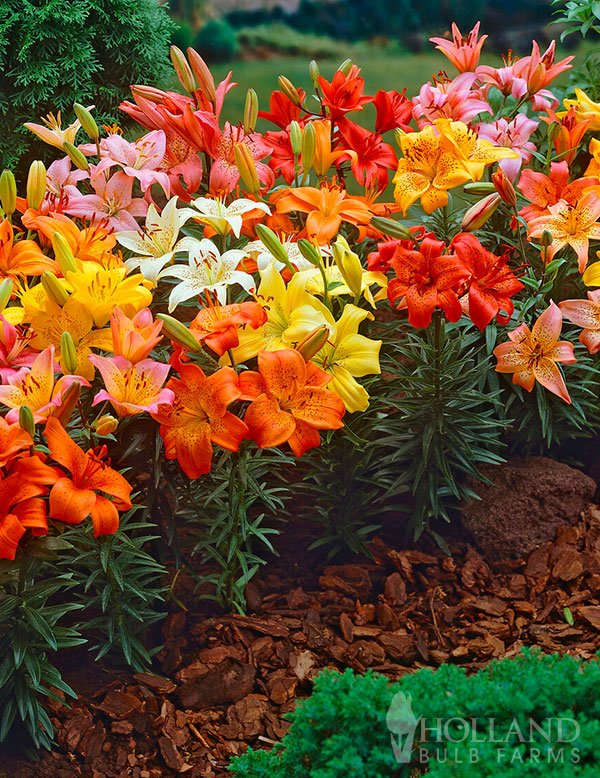
Lilies belong to the genus Lilium, which includes hundreds of species and countless hybrids. They are bulbous perennials, meaning they grow from bulbs that store nutrients and energy for the next season. The most common types of lilies include:

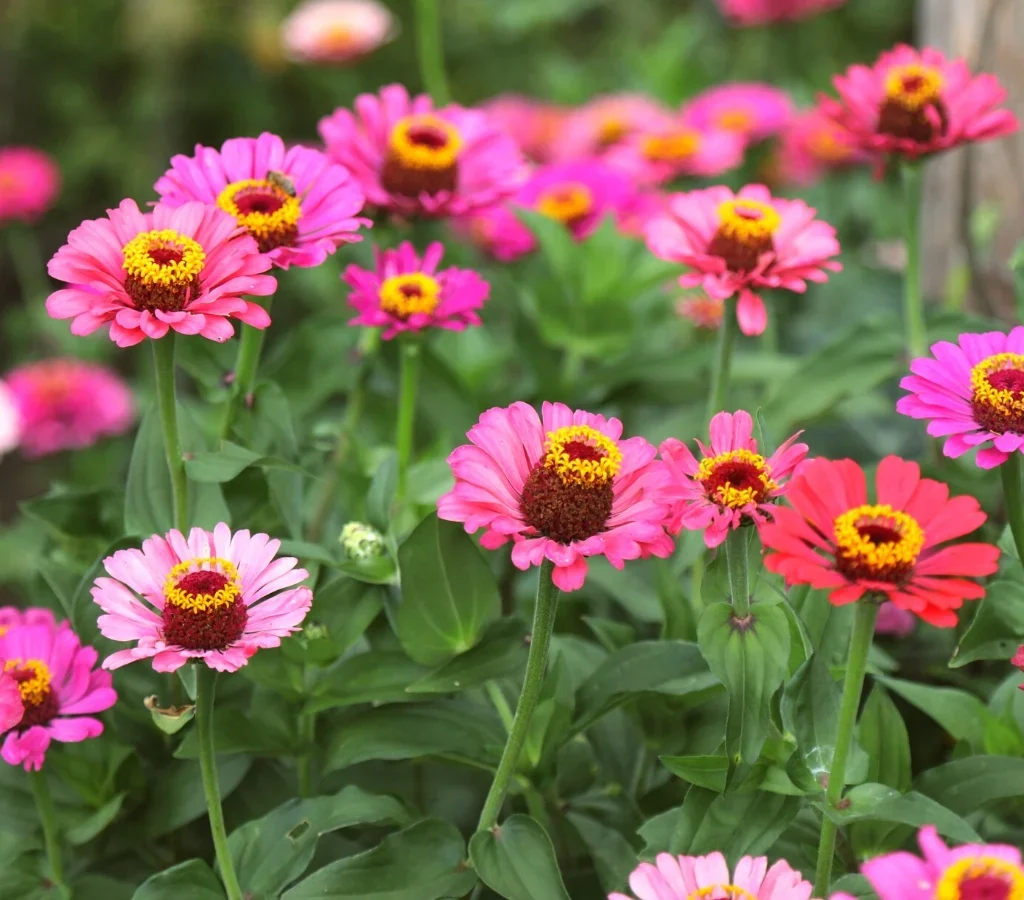
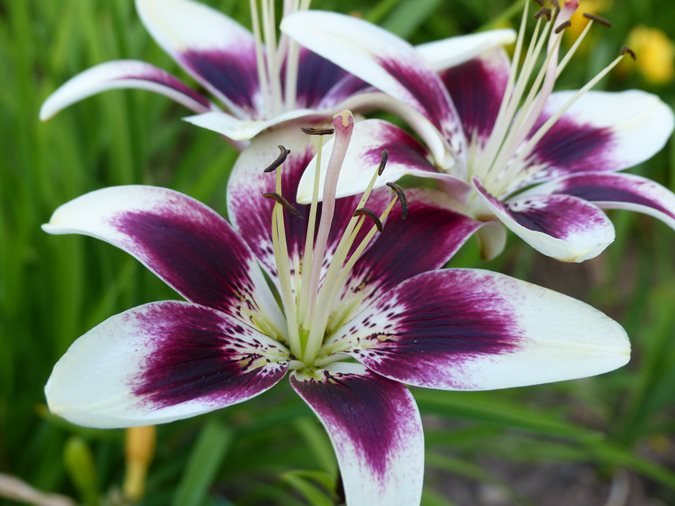
  • Asiatic Lilies: Early bloomers, vibrant colors, generally unscented, ideal for mass displays.
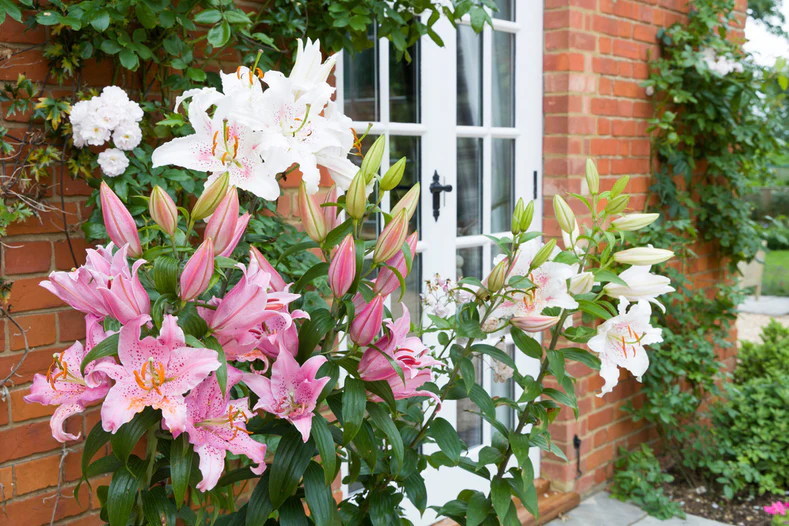
  • Oriental Lilies: Fragrant, late bloomers with large, dramatic flowers.
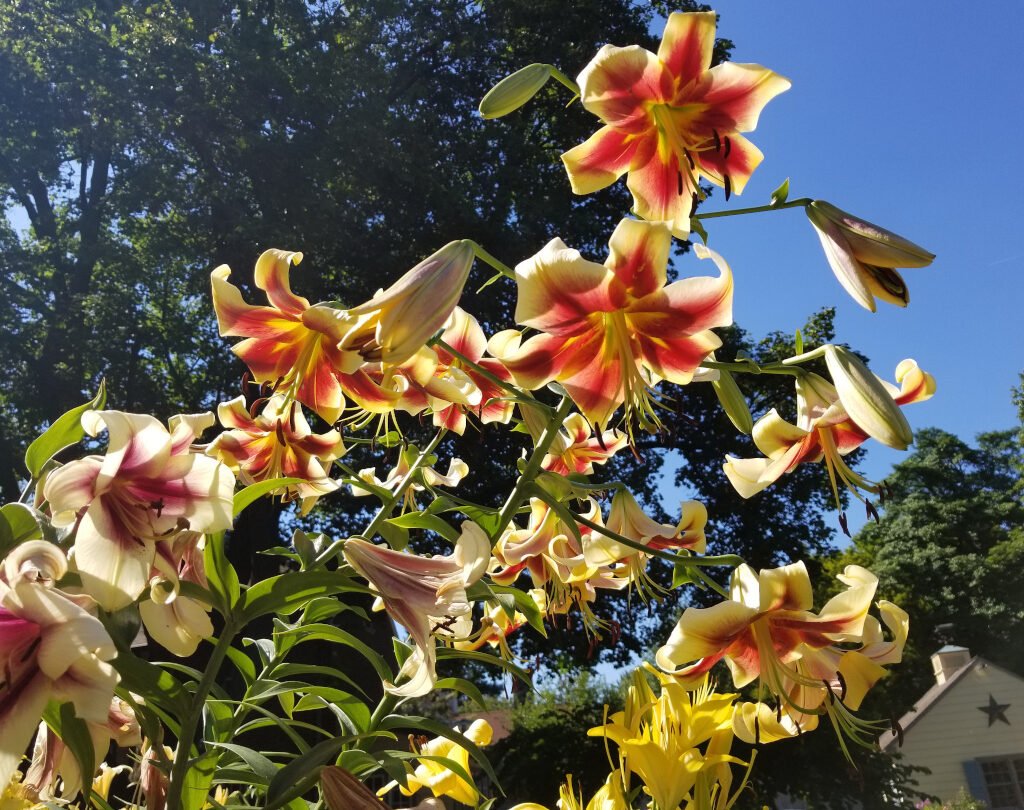
  • Trumpet Lilies: Tall, trumpet-shaped flowers, very fragrant, perfect for focal points.
  • Martagon Lilies: Smaller blooms on branching stems, shade-tolerant.
  • Turk’s Cap Lilies: Unusual downward-facing blooms, often in spotted patterns.

Choosing the right variety depends on your climate, garden space, and desired display. For a summer display, Asiatic and Oriental lilies are particularly popular due to their vibrant colors and long-lasting blooms.


2. Selecting the Perfect Site

Location is crucial for lily growth. Lilies need:

  • Full Sun to Partial Shade: Most lilies require at least 6 hours of direct sunlight daily. However, in hot climates, partial shade in the afternoon helps prevent scorching.
  • Well-Drained Soil: Lilies do not tolerate waterlogged soil, which can cause bulb rot. Raised beds or mounds improve drainage.
  • Air Circulation: Proper spacing and airflow help prevent fungal diseases and support strong stems.

When planning your garden, consider placing lilies where they can be viewed from multiple angles, such as along borders, pathways, or in mixed flower beds.


3. Preparing the Soil

Healthy soil is the foundation for robust lily growth. Follow these steps for soil preparation:

  • Soil Type: Lilies thrive in slightly acidic to neutral soil (pH 6.0–7.0) that is rich in organic matter.
  • Amending Soil: Mix compost, well-rotted manure, or leaf mold to improve fertility and drainage.
  • Bulb Bed Preparation: Loosen soil to a depth of 12–15 inches to allow roots to penetrate easily.
  • Drainage Check: Ensure water does not pool around the planting site. Adding sand or grit can improve drainage in heavy clay soils.

Proper soil preparation ensures strong root development, which directly impacts the size and longevity of blooms.
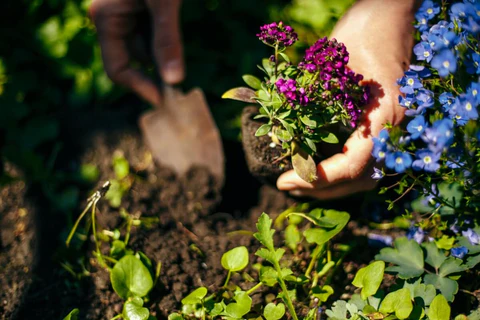

4. Planting Lilies

Planting lilies correctly is essential for their growth and summer display. Follow these guidelines:

  • Bulb Selection: Choose firm, healthy bulbs free from mold or damage.
  • Planting Depth: Typically, plant bulbs 6–8 inches deep, depending on bulb size. Larger bulbs should be planted deeper for stability.
  • Spacing: Space bulbs 8–12 inches apart to allow room for growth and airflow.
  • Orientation: Position bulbs with the pointed end up for proper shoot emergence.
  • Timing: Plant lilies in early spring or fall, depending on your climate. In cooler zones, spring planting ensures blooms during summer.

After planting, water bulbs thoroughly to help settle the soil and initiate root growth.


5. Watering and Mulching

Consistent watering and proper mulching support healthy lilies:

  • Watering: Lilies need deep, regular watering, especially during dry periods. Avoid overhead watering to reduce the risk of fungal diseases.
  • Mulching: Apply a 2–3 inch layer of organic mulch (straw, bark, or compost) around the base to retain moisture, regulate soil temperature, and suppress weeds.
  • Avoid Waterlogging: Ensure mulch does not trap excessive water around the bulb base.

Proper water management ensures lilies develop strong stems and abundant blooms without succumbing to rot or disease.


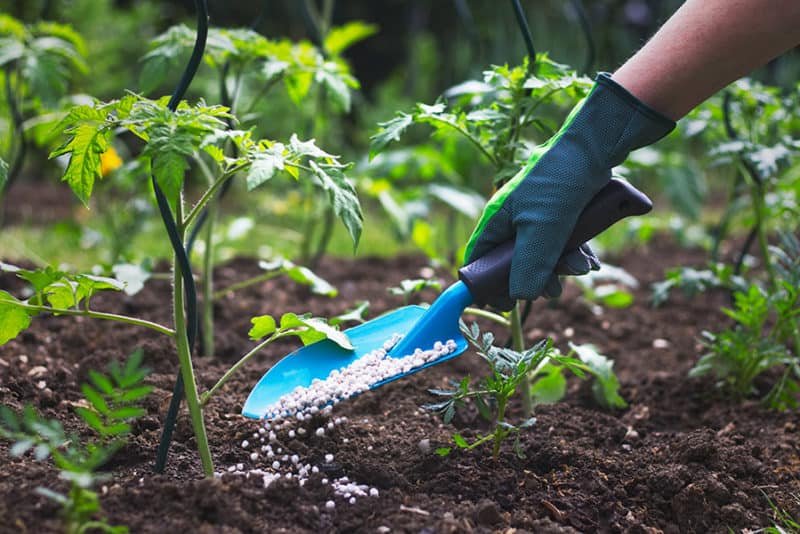
6. Fertilization for Abundant Blooms

Nutrient-rich soil is essential for lilies to produce large, vibrant flowers:

  • Balanced Fertilizer: Use a fertilizer with a balanced ratio of nitrogen, phosphorus, and potassium (NPK 10-10-10 or 14-14-14).
  • Timing: Apply fertilizer in early spring as shoots emerge and again when flower buds form.
  • Organic Alternatives: Compost tea, bone meal, or well-rotted manure provides slow-release nutrients.
  • Avoid Excess Nitrogen: Too much nitrogen promotes leafy growth at the expense of flowers.

Regular fertilization ensures strong stems, larger blooms, and prolonged flowering.


7. Supporting Stems and Preventing Damage

Tall lilies often require support to prevent bending or breakage:

  • Stakes: Use bamboo stakes or garden supports, securing stems with soft ties.
  • Wind Protection: Plant lilies in areas sheltered from strong winds.
  • Spacing: Avoid overcrowding to prevent stems from leaning on each other.

Proper support keeps your summer display upright and visually striking.


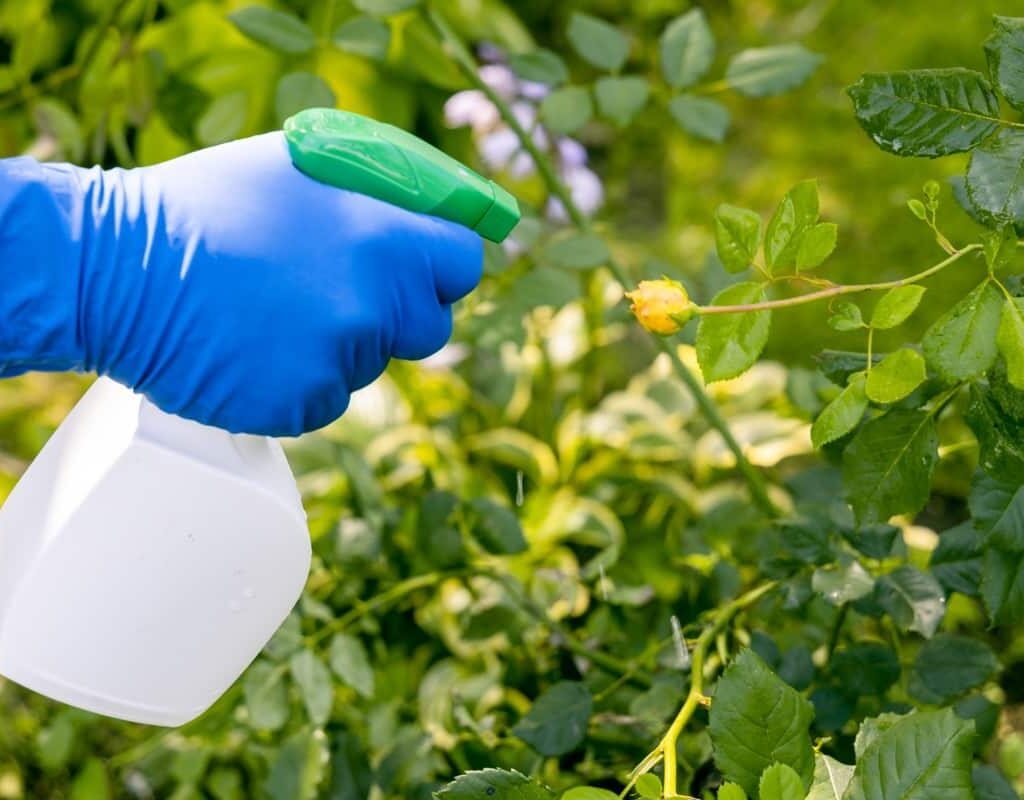
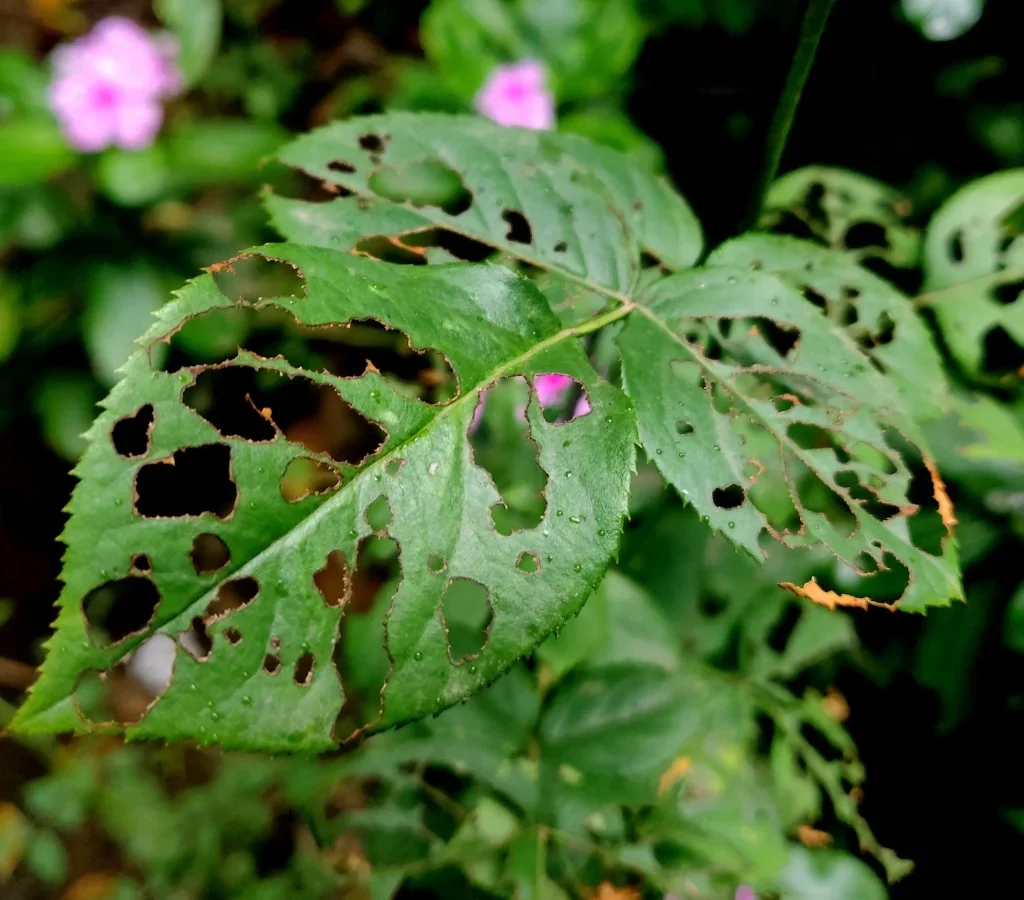
8. Pest and Disease Management

Lilies are susceptible to pests and diseases, but preventive care can keep them healthy:

  • Common Pests: Aphids, lily beetles, and slugs can damage leaves and flowers. Regular inspection and handpicking pests are effective.
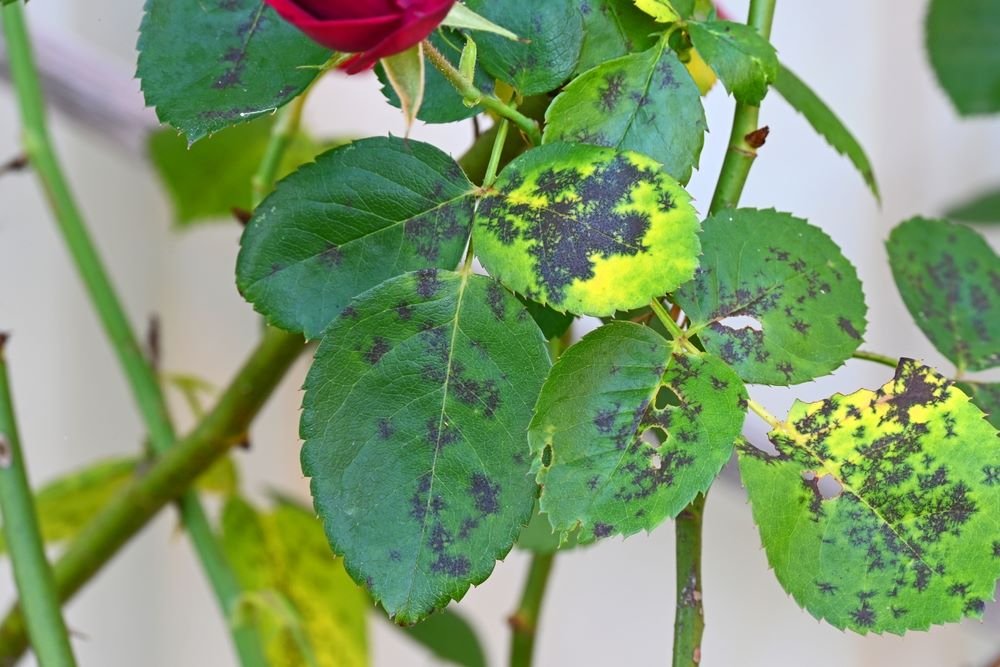
  • Diseases: Fungal diseases like botrytis blight cause spotting and stem rot. Ensure proper spacing, good air circulation, and avoid overhead watering.
  • Organic Solutions: Neem oil, insecticidal soaps, or biological controls help manage pests without harming the environment.

Early intervention is key to maintaining a flawless summer display.


9. Deadheading and Pruning

Maintaining lilies during bloom improves longevity and encourages new growth:

  • Deadheading: Remove spent flowers to redirect energy to bulbs for next season’s growth.
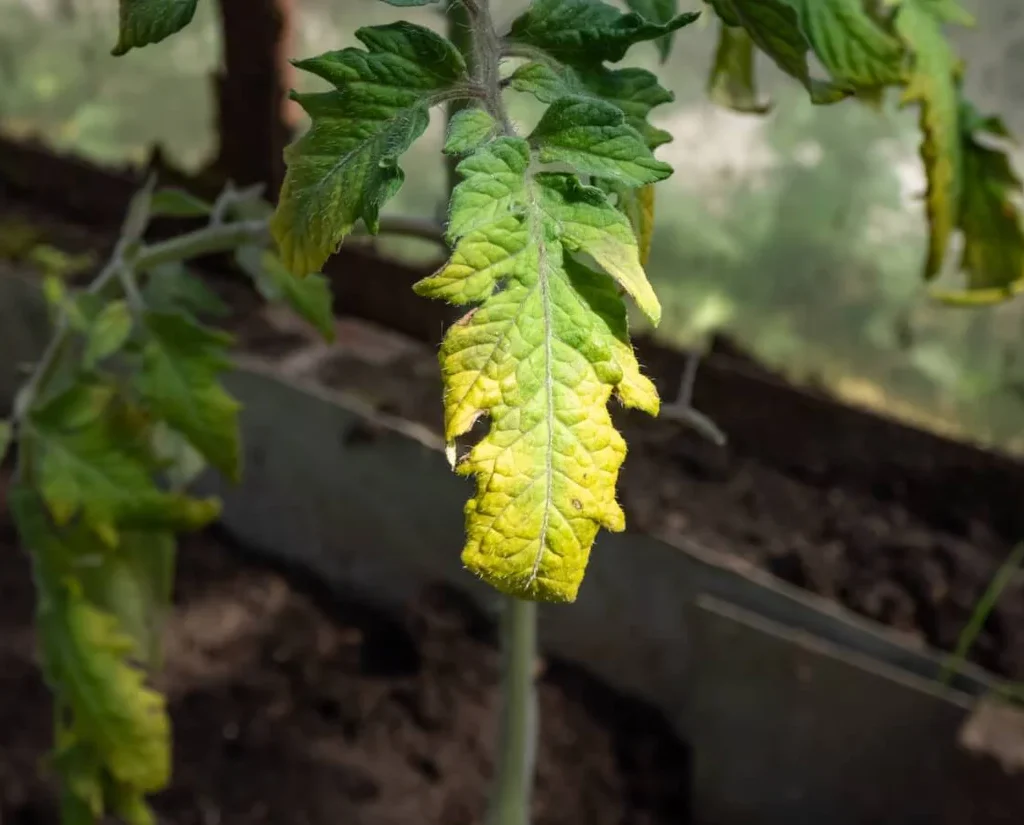
  • Pruning: Cut back damaged or yellowing leaves but leave healthy foliage, as it feeds the bulb for next year.
  • Post-Bloom Care: After flowering, allow foliage to die back naturally before cutting down completely.

Proper maintenance ensures that lilies come back year after year with stunning summer blooms.


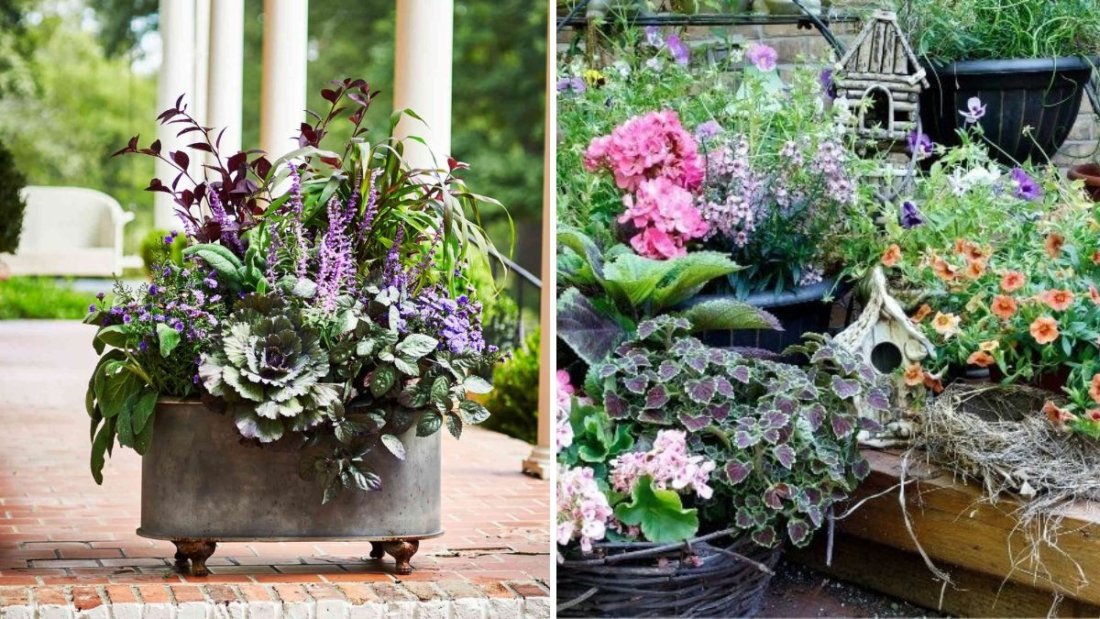
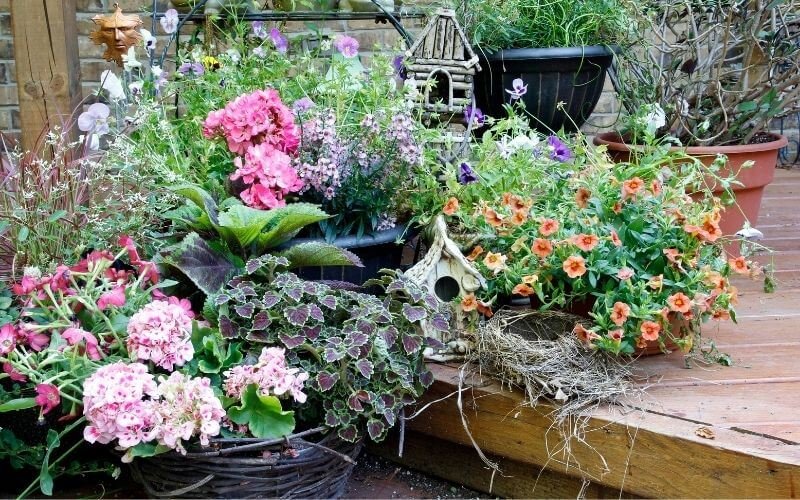
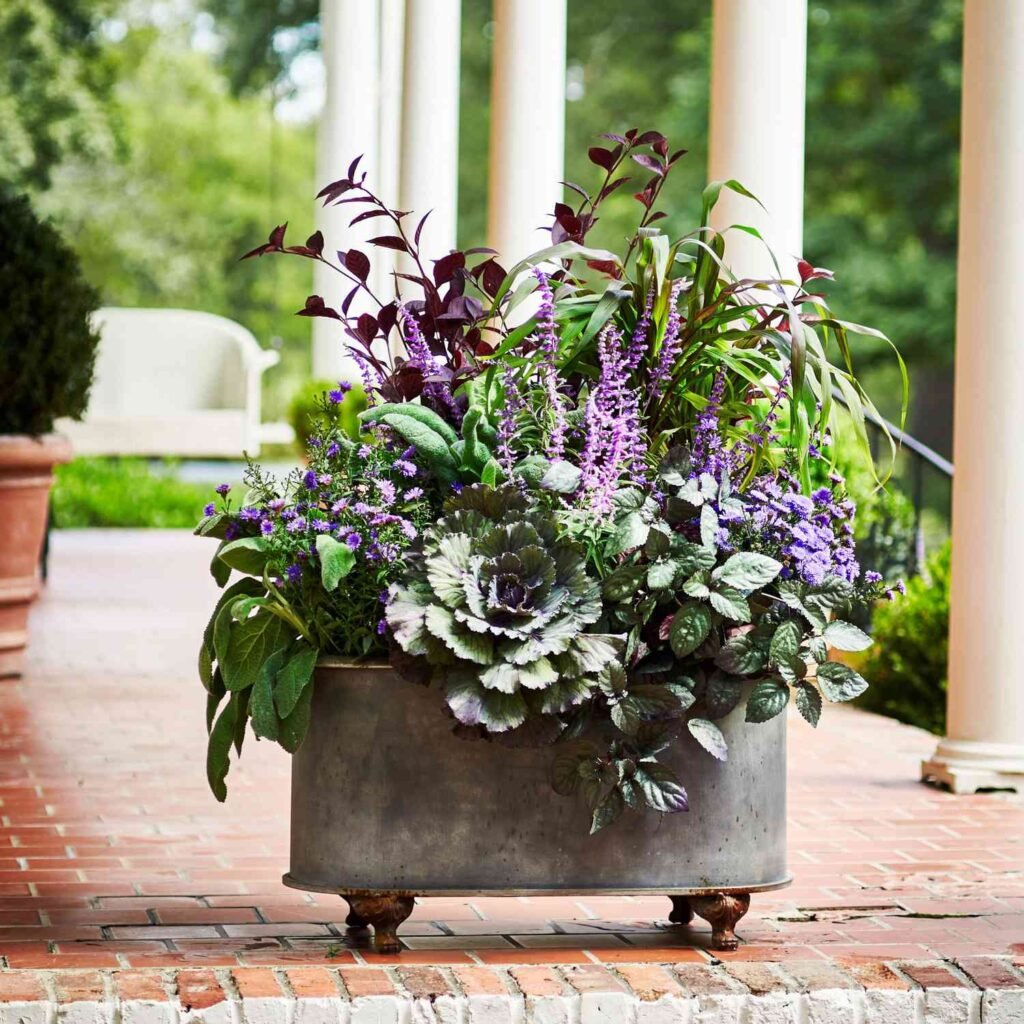
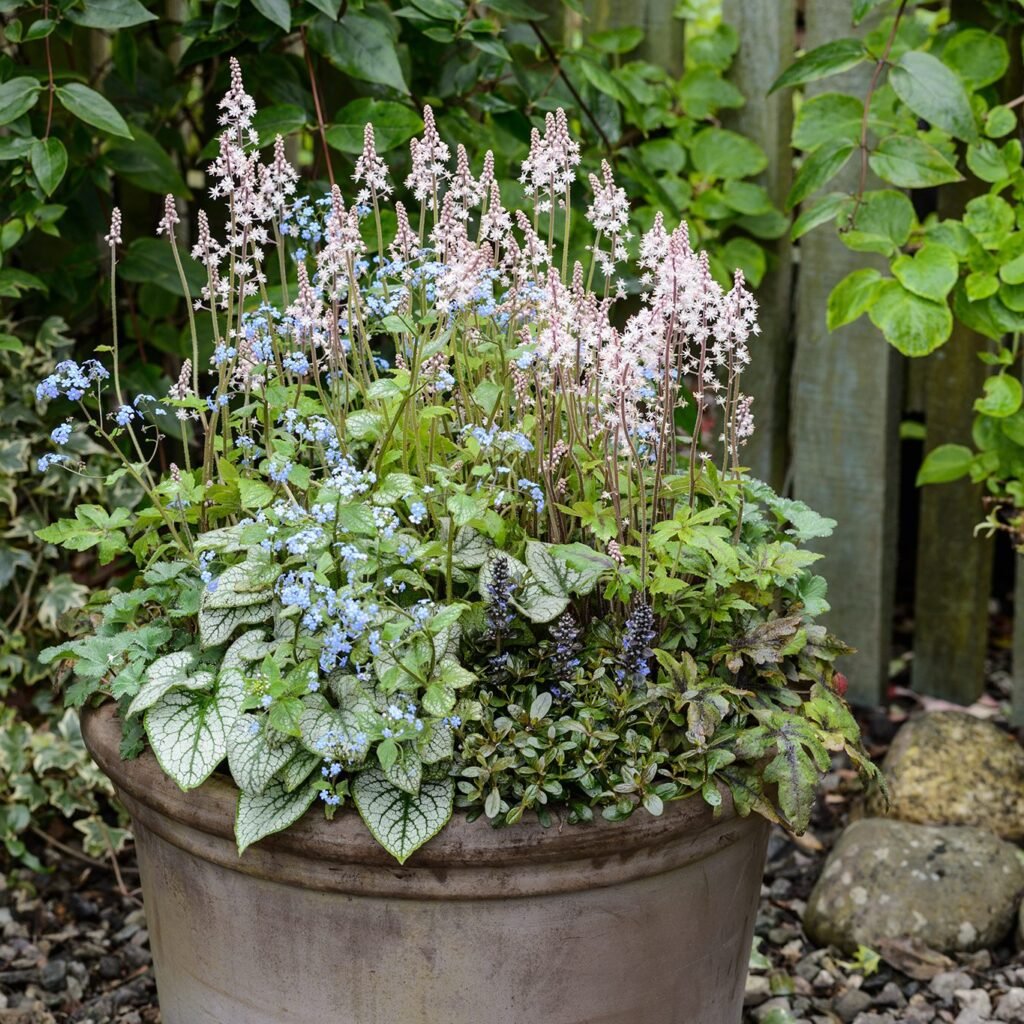
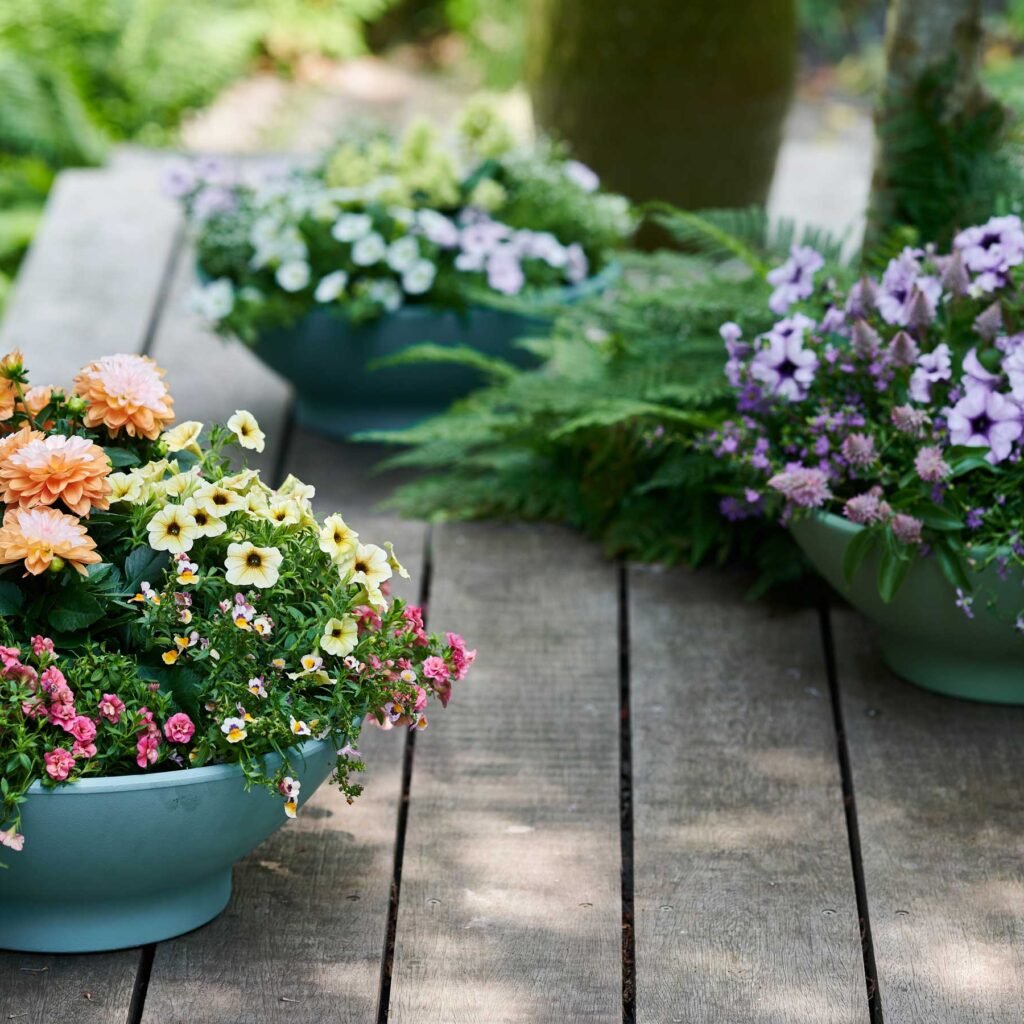
10. Container and Specialty Displays

Lilies also thrive in containers and special garden arrangements:

  • Containers: Use deep pots with well-draining soil and regular feeding.
  • Mixed Planting: Combine lilies with complementary plants like hostas, ferns, or annuals for color contrast.
  • Focal Points: Group tall lilies together in strategic garden locations to create dramatic summer displays.
  • Cut Flowers: Lilies make excellent cut flowers, extending their beauty indoors.

Containers and focal planting allow flexibility in design and enhance the visual impact of your summer garden.


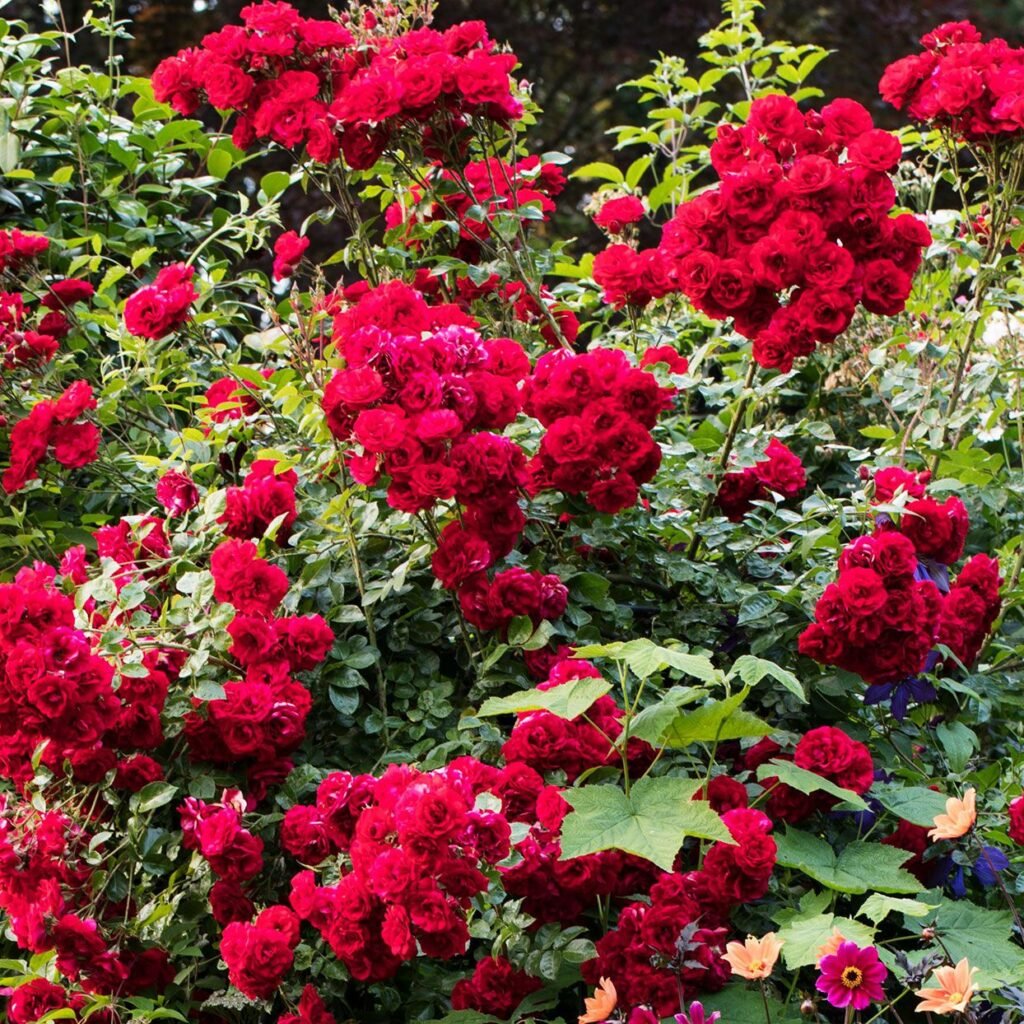
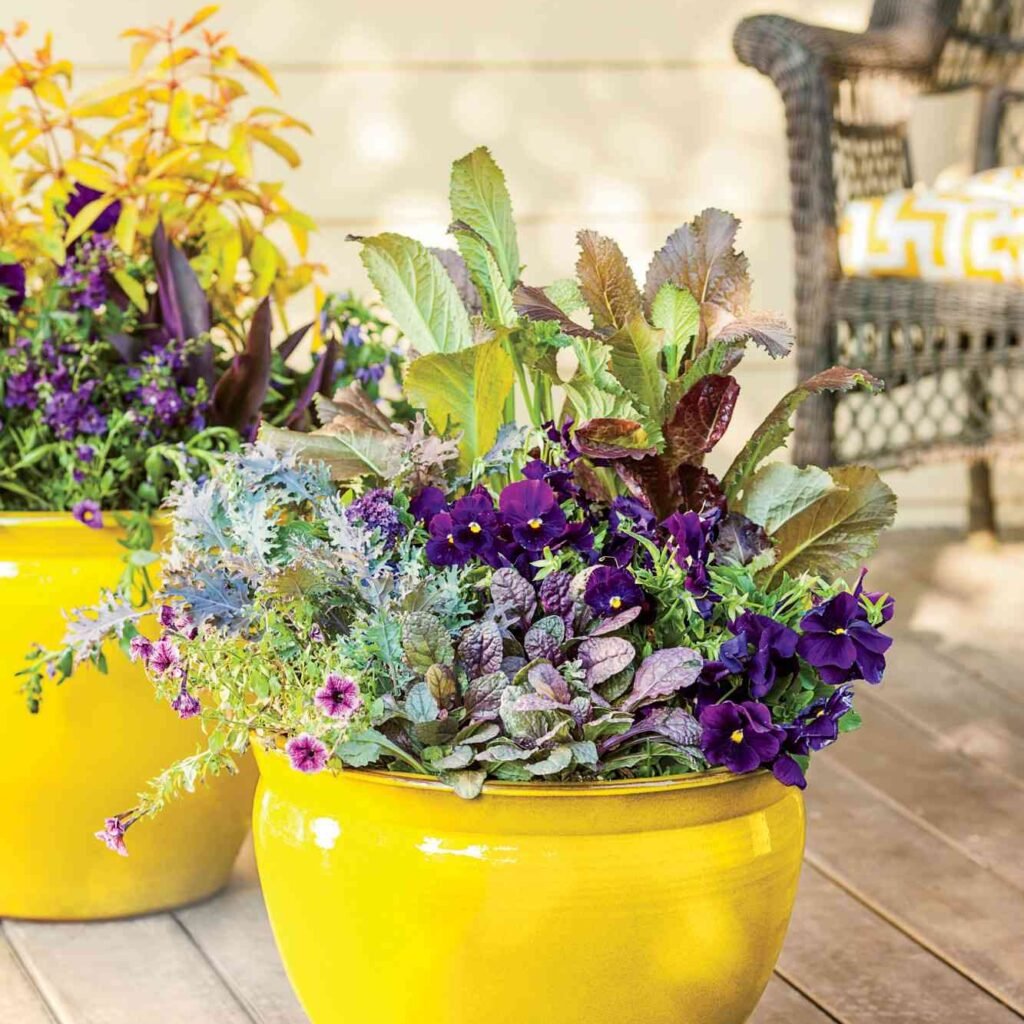
11. Tips for Maximizing Bloom Impact

  • Plant in Odd Numbers: Groups of 3, 5, or 7 create a natural, visually appealing look.
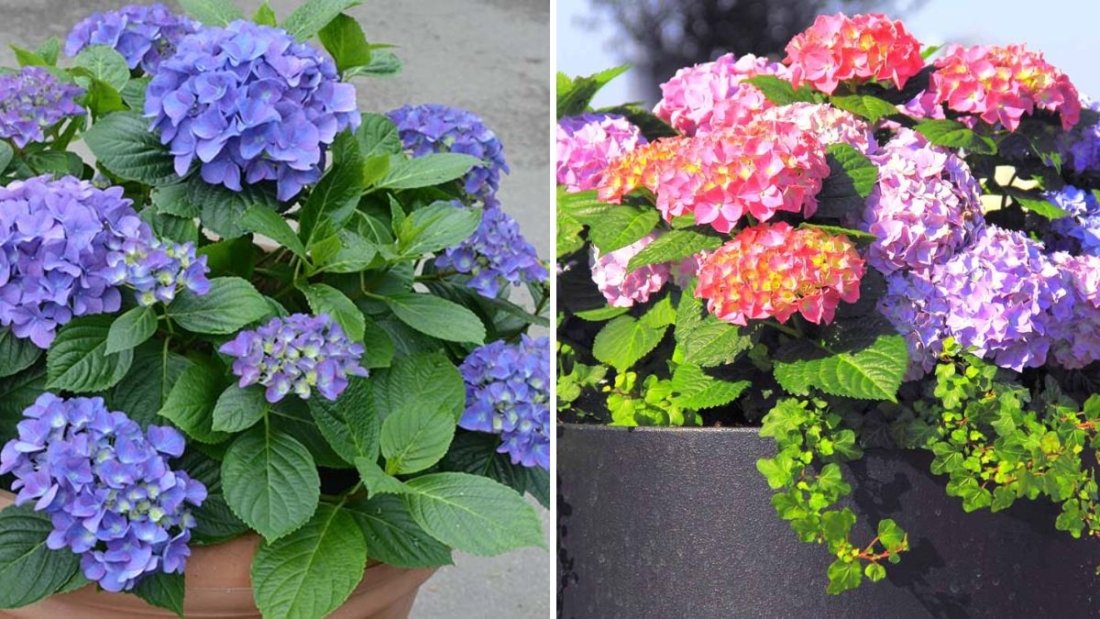
  • Color Harmony: Choose colors that complement your garden or create vibrant contrasts.
  • Layering Heights: Plant shorter flowers around the base to highlight the tall lilies.
  • Scent Consideration: Place fragrant varieties near pathways or seating areas for maximum enjoyment.

By applying these design principles, your lilies will stand out and make a memorable summer display.


Conclusion

Lilies are among the most rewarding garden plants for summer displays. With proper site selection, soil preparation, planting, watering, fertilization, and maintenance, gardeners can achieve spectacular blooms that last throughout the season. By understanding their varieties, providing support, preventing pests and diseases, and planning arrangements thoughtfully, lilies can transform any garden into a striking, colorful oasis. Whether planted in borders, containers, or mixed displays, these elegant flowers bring height, fragrance, and drama to summer gardens, creating an unforgettable seasonal spectacle.

How to Revive a Wilted Flower Bed Quickly

How to Revive a Wilted Flower Bed Quickly

Avibrant flower bed is the crown jewel of any garden, radiating color, fragrance, and life. However, flower beds can quickly lose their charm when plants begin to wilt, leaving a tired, lifeless appearance. Wilted flower beds are often caused by water stress, nutrient deficiencies, pests, diseases, or environmental stressors. Fortunately, with careful observation and timely action, most wilted flower beds can be revived quickly, restoring their beauty and health.

This guide provides step-by-step strategies to rejuvenate a wilted flower bed, including assessment, watering, soil management, pest control, pruning, and preventive care, ensuring your garden thrives all season long.


1. Understanding Why Flower Beds Wilt

The first step in revival is identifying the cause of wilting:

  • Water Stress: Overwatering or underwatering can cause leaves to droop and stems to collapse.
  • Heat Stress: Excessive sun or high temperatures can lead to temporary wilting.
  • Nutrient Deficiency: Lack of essential nutrients such as nitrogen, potassium, or phosphorus can weaken plants.
  • Soil Compaction: Poor soil aeration restricts root growth, preventing water and nutrient absorption.
  • Pest or Disease Infestation: Aphids, fungal infections, root rot, or other issues can cause rapid wilting.

Tip: Carefully inspect leaves, stems, and soil to determine the primary cause before taking action.


2. Immediate Steps to Rehydrate Wilted Plants

One of the quickest ways to revive wilted plants is through proper hydration:

a) Deep Watering

  • Water the flower bed thoroughly, allowing water to reach the root zone.
  • Use a garden hose with a gentle spray or a watering can to avoid disturbing the soil.
  • Avoid shallow watering, which only moistens the surface.

b) Morning or Evening Watering

  • Water during cooler parts of the day to minimize evaporation and prevent leaf burn.

c) Soaking Containers

  • For potted plants, submerge pots in a bucket of water for 10–15 minutes to allow thorough absorption.

Tip: Check soil moisture by inserting a finger or a small trowel into the soil; it should be moist but not waterlogged.


3. Improving Soil Health for Long-Term Revival

Healthy soil is essential for recovery and sustained plant growth:

  • Aerate the Soil: Gently loosen compacted soil to improve root oxygenation and water penetration.
  • Add Organic Matter: Incorporate compost, leaf mold, or well-rotted manure to boost nutrients and moisture retention.
  • Mulch: Apply a 2–3 inch layer of mulch around plants to regulate soil temperature, retain moisture, and reduce stress.

Tip: Avoid piling mulch directly against plant stems, which can encourage rot.


4. Nutrient Management and Fertilization

Wilted plants often lack essential nutrients required for recovery:

  • Balanced Fertilizer: Apply a slow-release or water-soluble fertilizer with a balanced ratio of nitrogen (for leaves), phosphorus (for roots and flowers), and potassium (for overall health).
  • Liquid Fertilizers: Quick-acting liquid fertilizers or compost tea can help revitalize stressed plants rapidly.
  • Foliar Feeding: Spray a diluted fertilizer solution on leaves to provide immediate nutrient absorption.

Tip: Avoid over-fertilizing, which can further stress wilted plants.


5. Pruning and Removing Damaged Growth

Pruning helps plants conserve energy and focus on recovery:

  • Remove wilted, yellowed, or damaged leaves and stems.
  • Cut back dead flowers or seed heads to encourage new growth.
  • Thin overcrowded plants to improve airflow and reduce competition for nutrients.

Tip: Use clean, sharp pruning shears to prevent introducing pathogens.


6. Addressing Pest and Disease Issues

Wilted flower beds may be suffering from hidden pests or diseases:

  • Pest Inspection: Check for aphids, spider mites, slugs, or caterpillars. Use natural controls like neem oil, insecticidal soap, or beneficial insects.
  • Disease Management: Identify fungal infections like powdery mildew or root rot. Remove infected parts and apply organic fungicides if necessary.
  • Preventive Measures: Rotate crops, avoid overhead watering, and maintain proper spacing to reduce disease pressure.

Tip: Early detection of pests and diseases prevents further wilting and supports recovery.


7. Adjusting Environmental Conditions

Wilted plants often need immediate environmental adjustments:

  • Shade Protection: Provide temporary shade for sensitive flowers during heatwaves.
  • Wind Protection: Use garden screens or temporary barriers to reduce stress from strong winds.
  • Temperature Management: Mulch and water adequately to regulate soil temperature.

Tip: Minor adjustments in environmental factors can significantly improve recovery speed.


8. Encouraging Root Health

Strong roots are essential for a flower bed’s revival:

  • Check for Root Problems: Carefully lift a plant to inspect roots; prune any rotten or damaged roots.
  • Replanting: If roots are severely compacted or damaged, consider replanting in fresh, well-draining soil.
  • Aeration: Gently loosen soil around roots to allow oxygen, water, and nutrients to penetrate.

Tip: Healthy roots absorb water efficiently, speeding up the revival process.


9. Using Companion Plants and Natural Boosters

Certain companion plants and natural additives can help revive stressed flower beds:

  • Beneficial Companions: Plant herbs like basil or marigolds nearby to repel pests naturally.
  • Compost Tea: Provides beneficial microbes and nutrients to encourage quick recovery.
  • Seaweed Extracts: Stimulates root growth and strengthens plant resilience.

Tip: Natural boosters not only revive wilted plants but improve long-term garden health.


10. Creating a Recovery Plan for Wilted Flower Beds

A systematic approach ensures faster recovery:

  1. Assessment: Identify causes of wilting (water stress, pests, nutrient deficiency).
  2. Immediate Hydration: Deep water thoroughly, especially at the root zone.
  3. Soil Improvement: Aerate soil and apply organic matter.
  4. Fertilization: Use liquid or slow-release fertilizers for essential nutrients.
  5. Pruning: Remove damaged growth to focus energy on healthy stems.
  6. Pest and Disease Control: Inspect and treat naturally as needed.
  7. Environmental Adjustment: Provide shade or wind protection if necessary.
  8. Monitor: Check soil moisture, plant health, and new growth regularly.

Tip: Consistent follow-up care over 1–2 weeks often leads to visible recovery.


11. Preventing Future Wilting

Once your flower bed has recovered, implement preventive measures:

  • Regular Watering Schedule: Water deeply but infrequently to encourage strong root growth.
  • Mulching: Maintain soil moisture and regulate temperature.
  • Seasonal Fertilization: Keep soil fertile with periodic organic amendments.
  • Pest Monitoring: Early detection prevents infestations.
  • Plant Selection: Choose resilient, heat-tolerant, or drought-resistant flowers for vulnerable areas.

Tip: Healthy, well-maintained flower beds are less likely to wilt during environmental stress.


12. Design Tips to Minimize Stress

Thoughtful flower bed design can reduce future wilting:

  • Plant Grouping: Group plants with similar water and sunlight requirements.
  • Layering: Place taller plants at the back to provide natural shade to smaller, delicate flowers.
  • Bordering and Edging: Protect flowers from wind and heavy foot traffic.
  • Drainage Management: Use raised beds or improve soil drainage to avoid waterlogging.

Tip: Well-planned design enhances both aesthetics and plant health.


Conclusion

Reviving a wilted flower bed is possible with timely observation, proper hydration, soil management, pruning, and natural pest control. By addressing the root causes of wilting and providing consistent care, you can restore vitality and beauty to your garden quickly.

Key takeaways:

  1. Identify the cause of wilting—water stress, nutrient deficiency, pests, or disease.
  2. Hydrate plants deeply and appropriately.
  3. Improve soil aeration and add organic matter.
  4. Fertilize with balanced or liquid nutrients.
  5. Prune damaged or dead growth.
  6. Manage pests and diseases naturally.
  7. Adjust environmental conditions like shade and wind protection.
  8. Encourage strong root health through inspection and aeration.
  9. Use companion plants and natural boosters for quick recovery.
  10. Monitor and implement preventive strategies to avoid future wilting.

With proper care, a wilted flower bed can be transformed back into a vibrant, thriving display in just a few days to weeks, ensuring your garden remains a source of beauty and relaxation year-round.

The Best Flowers for Cutting and Indoor Vases

The Best Flowers for Cutting and Indoor Vases

Flowers have always been a symbol of beauty, joy, and elegance. Their vibrant colors, delicate shapes, and captivating scents can transform any space into a serene and inviting environment. Among all their uses, one of the most rewarding practices is cutting flowers for indoor vases. Not only does this bring nature directly into our homes, but it also allows gardeners and flower enthusiasts to enjoy their blooms for an extended period. However, not all flowers are suitable for cutting, and some last longer in vases than others. This article explores the best flowers for cutting, offering guidance on their selection, care, and arrangement for indoor enjoyment.


1. Criteria for Choosing Cut Flowers

Before diving into specific flowers, it’s essential to understand the characteristics that make a flower ideal for cutting and indoor display:

  1. Longevity: Flowers should stay fresh in a vase for several days to weeks.
  2. Sturdy Stems: A strong stem prevents wilting and makes arranging easier.
  3. Repeat Blooming: Some flowers produce multiple blooms, allowing successive harvests.
  4. Fragrance: While optional, aromatic flowers enhance indoor ambiance.
  5. Aesthetic Appeal: Flowers with vibrant colors, unique textures, or interesting shapes create visually stunning arrangements.

When selecting flowers, consider these qualities to ensure that your cut arrangements remain fresh and appealing.


2. Top Flowers for Cutting and Indoor Vases

Here are some of the most popular and reliable flowers for cutting, along with tips for vase care:

a) Roses

Overview: Roses are arguably the most classic cut flower, admired for their elegance, fragrance, and variety of colors.

Why They’re Ideal:

  • Long vase life, often lasting 7–12 days with proper care.
  • Sturdy stems that support large blooms.
  • Wide color palette suitable for various décor styles.

Vase Care Tips:

  • Cut stems at a 45-degree angle under running water.
  • Remove leaves below the waterline to prevent bacterial growth.
  • Change water every 2 days and add floral preservatives to extend longevity.

b) Lilies

Overview: Lilies are bold, fragrant, and dramatic, making them a favorite for both large and small arrangements.

Why They’re Ideal:

  • Long-lasting blooms, often 10–14 days.
  • Strong stems hold up large flowers gracefully.
  • Fragrance adds a sensory dimension to indoor spaces.

Vase Care Tips:

  • Cut buds just before they open for extended display.
  • Use a tall vase to accommodate their long stems.
  • Remove pollen after opening to avoid staining surfaces.

c) Tulips

Overview: Tulips are elegant, simple, and bright, perfect for adding a touch of spring indoors.

Why They’re Ideal:

  • Come in numerous colors and shapes.
  • Flexible stems allow creative arrangements.
  • Moderate vase life of 5–7 days.

Vase Care Tips:

  • Keep water cool to slow wilting.
  • Trim stems every 1–2 days as they continue to grow even in water.
  • Avoid overcrowding in vases; tulips expand and curve naturally.

d) Carnations

Overview: Carnations are versatile and durable flowers with ruffled petals that hold up well in arrangements.

Why They’re Ideal:

  • Very long vase life, often 2–3 weeks.
  • Sturdy stems are easy to arrange.
  • Available in a wide range of colors.

Vase Care Tips:

  • Remove lower leaves to reduce bacteria.
  • Use lukewarm water and floral preservative for optimal results.
  • Re-cut stems every few days to maintain freshness.

e) Chrysanthemums

Overview: Chrysanthemums, or “mums,” are cheerful flowers that add texture and fullness to bouquets.

Why They’re Ideal:

  • Extremely long-lasting, 2–3 weeks in water.
  • Varieties range from small button-like blooms to large pom-poms.
  • Strong stems resist wilting, ideal for intricate arrangements.

Vase Care Tips:

  • Cut stems early in the morning when turgidity is highest.
  • Keep in a cool room to prolong freshness.
  • Remove any fading blooms promptly.

f) Sunflowers

Overview: Sunflowers are bold, vibrant flowers that bring warmth and energy to indoor spaces.

Why They’re Ideal:

  • Large, cheerful blooms make a statement in any vase.
  • Sturdy stems support upright growth.
  • Moderate vase life of 5–7 days.

Vase Care Tips:

  • Use deep vases to stabilize tall stems.
  • Change water frequently, as sunflowers are prone to bacterial buildup.
  • Trim stems regularly to promote continued water absorption.

g) Alstroemeria (Peruvian Lily)

Overview: Alstroemeria is an elegant, delicate flower that produces multiple blooms on each stem.

Why They’re Ideal:

  • Very long vase life, often 2–3 weeks.
  • Multiple blooms per stem create full arrangements with fewer stems.
  • Low maintenance and vibrant colors.

Vase Care Tips:

  • Cut stems at a diagonal for better water uptake.
  • Remove any leaves submerged in water.
  • Replenish water every 2 days for sustained freshness.

h) Dahlias

Overview: Dahlias are dramatic, multi-petaled flowers that create eye-catching arrangements.

Why They’re Ideal:

  • Stunning colors and textures.
  • Moderate vase life of 5–7 days.
  • Can be cut when buds are just opening for a longer display.

Vase Care Tips:

  • Cut stems early in the morning.
  • Keep flowers cool and out of direct sunlight.
  • Change water frequently and use floral preservative.

i) Peonies

Overview: Peonies are lush, romantic blooms that exude elegance.

Why They’re Ideal:

  • Fragrant and soft, perfect for intimate arrangements.
  • Large, layered blooms add volume with minimal stems.
  • Vase life of 5–7 days when cut in bud stage.

Vase Care Tips:

  • Cut stems before full bloom for maximum longevity.
  • Place in cool water and avoid direct sunlight.
  • Trim stems slightly every few days to aid hydration.

j) Snapdragons

Overview: Snapdragons offer vertical interest with their tall, spiked blooms.

Why They’re Ideal:

  • Adds height and texture to mixed bouquets.
  • Long-lasting in vases, 7–10 days.
  • Available in multiple bright colors.

Vase Care Tips:

  • Cut stems at an angle and remove excess leaves.
  • Use tall vases to prevent tipping.
  • Change water regularly to reduce bacteria growth.

3. General Tips for Maximizing Vase Life

Even the best cut flowers can wilt prematurely without proper care. Here are some universal tips:

  1. Fresh Cuts: Always cut stems fresh, ideally early in the morning.
  2. Water Quality: Use clean, lukewarm water with a floral preservative.
  3. Stem Maintenance: Re-cut stems every 2–3 days to improve water uptake.
  4. Remove Foliage: Leaves in water promote bacterial growth, so remove them.
  5. Placement: Keep vases away from direct sunlight, heaters, or drafts.
  6. Flower Food: Use commercial or homemade flower food to extend freshness.

4. Creative Arrangement Ideas

Cut flowers can be displayed in a variety of ways to enhance indoor décor:

  • Monochromatic Bouquets: Choose flowers of a single color for a modern, cohesive look.
  • Mixed Bouquets: Combine multiple types of flowers for vibrant, dynamic arrangements.
  • Minimalist Vases: Use single stems in tall vases for a chic, elegant style.
  • Seasonal Themes: Incorporate seasonal flowers for a natural, timely feel.
  • Layered Heights: Arrange flowers at varying heights for depth and visual interest.

Conclusion

Selecting the right flowers for cutting and indoor vases transforms any living space with beauty, fragrance, and elegance. Roses, lilies, tulips, carnations, chrysanthemums, sunflowers, alstroemeria, dahlias, peonies, and snapdragons are all excellent choices, each offering unique qualities that suit different styles and preferences. By understanding their care requirements, vase life, and arrangement techniques, flower enthusiasts can enjoy fresh blooms for longer periods, creating a lively and welcoming indoor environment. Whether for everyday enjoyment or special occasions, these flowers make indoor spaces bloom with life and charm.

How to Grow Cosmos for a Cottage Garden Look

How to Grow Cosmos for a Cottage Garden Look

Cosmos flowers are a favorite among gardeners seeking a wildflower, carefree aesthetic. Their delicate, daisy-like blooms, tall airy stems, and vibrant colors—ranging from pinks and purples to reds and whites—make them perfect for creating a charming cottage garden look. Cosmos are easy to grow, low-maintenance, and attract pollinators, adding life and movement to your garden space.

This guide covers how to grow cosmos successfully, including site selection, soil preparation, sowing techniques, care, companion planting, and design ideas to achieve a bountiful, whimsical cottage garden.


1. Why Cosmos Are Ideal for Cottage Gardens

Cosmos plants naturally lend themselves to the relaxed, colorful style of cottage gardens:

  • Tall, airy stems create movement and a soft, flowing backdrop.
  • Vibrant, cheerful blooms provide continuous color throughout the growing season.
  • Pollinator-friendly: Attract bees, butterflies, and even birds.
  • Low-maintenance: Tolerant to poor soil and drought conditions once established.
  • Self-seeding: Cosmos readily reseed, creating a natural, abundant look year after year.

Tip: Mixing cosmos with other cottage-style flowers like hollyhocks, foxgloves, and larkspur enhances the naturalistic aesthetic.


2. Choosing the Right Variety of Cosmos

Several varieties suit cottage garden settings:

  • Cosmos bipinnatus: The most common type, featuring finely divided foliage and blooms in pink, white, and red. Ideal for borders and mixed beds.
  • Cosmos sulphureus: Produces bright yellow or orange flowers, adding a sunny, cheerful tone. Hardy and compact, suitable for containers and mass planting.
  • Cosmos ‘Candy Stripe’ or ‘Sensation Mix’: Variegated and multicolored varieties that enhance visual interest.

Tip: Combine tall and shorter varieties to create layers and depth in your garden design.


3. Site Selection and Sunlight

Cosmos thrive in full sun and well-draining soil. Key considerations include:

  • Sunlight: At least 6–8 hours of direct sunlight daily.
  • Wind Protection: Plant in a sheltered spot to prevent tall stems from snapping.
  • Soil: Cosmos prefer light, sandy, or loamy soil. Avoid overly rich soil, which can produce excessive foliage at the expense of flowers.

Tip: Raised beds or borders near walkways work well to showcase cosmos blooms and provide easy access for deadheading and maintenance.


4. Soil Preparation and Fertilization

Proper soil preparation ensures healthy growth:

  • Light and Well-Draining: Cosmos tolerate poor soil, but loose soil encourages strong roots.
  • Moderate Fertility: Avoid heavy fertilizers; too much nitrogen leads to lush leaves but fewer flowers.
  • Organic Matter: Mix in compost or aged manure for a light nutrient boost without overfeeding.

Tip: A slightly acidic to neutral pH (6.0–7.0) is ideal for cosmos.


5. Sowing Cosmos Seeds

Cosmos are best grown from seeds for a natural cottage garden appearance:

  • Direct Sowing: Sow seeds outdoors after the last frost date. Scatter seeds in the desired area and lightly cover with ¼ inch of soil.
  • Indoor Sowing: Start seeds 4–6 weeks before the last frost in seed trays. Transplant seedlings when they reach 3–4 inches tall.
  • Spacing: Sow seeds 12–18 inches apart for tall varieties, 8–12 inches for shorter varieties.
  • Watering: Keep soil consistently moist until germination, which occurs in 7–14 days.

Tip: Cosmos self-seed easily, so leave some spent flowers to dry on the plant for natural reseeding.


6. Watering and Mulching

Once established, cosmos are drought-tolerant, but young plants need regular watering:

  • Watering Frequency: Water moderately; avoid overwatering to prevent root rot.
  • Mulching: Use straw or shredded leaves to retain soil moisture, suppress weeds, and enhance the rustic garden look.

Tip: Avoid excessive mulch directly against stems to prevent fungal growth.


7. Staking and Support

Tall cosmos varieties may need support to prevent flopping:

  • Staking: Use bamboo stakes or decorative trellises for taller varieties.
  • Grouping: Plant in clusters; the weight of multiple stems can provide natural support.
  • Wind Protection: Choose a sheltered spot or use a garden netting to reduce wind damage.

Tip: Tall cosmos add height and movement when swaying in the breeze, enhancing the cottage garden feel.


8. Fertilization and Care During Growth

Cosmos require minimal care but benefit from occasional attention:

  • Fertilization: Use a balanced, low-nitrogen fertilizer if needed. Excessive fertilization reduces flower production.
  • Deadheading: Regularly remove spent blooms to encourage continuous flowering.
  • Pest Control: Generally pest-free; monitor for aphids and spider mites. Use natural solutions like neem oil if needed.

Tip: Cosmos tolerate neglect, making them ideal for low-maintenance cottage gardens.


9. Companion Planting for a Cottage Garden Look

Mixing cosmos with other flowers enhances color, texture, and charm:

  • Tall Backdrops: Hollyhocks, foxgloves, delphiniums.
  • Mid-Height Fillers: Coreopsis, zinnias, rudbeckia.
  • Ground Covers: Sweet alyssum, creeping thyme, or lobelia.
  • Foliage Contrast: Ferns, ornamental grasses, or hostas.

Tip: Aim for a natural, informal layout, scattering flowers rather than planting in rigid rows for a true cottage garden style.


10. Seasonal Care and Maintenance

Cosmos are annuals, but careful care maximizes blooms:

  • Spring: Sow seeds or transplant seedlings; ensure proper sunlight.
  • Summer: Water regularly during dry periods; deadhead for prolonged blooming.
  • Autumn: Allow some flowers to go to seed for natural reseeding next year.
  • Winter: Remove dead stems and prepare beds for spring sowing.

Tip: Companion planting with herbs and perennials ensures year-round interest even after cosmos fade.


11. Design Tips for a Cottage Garden Look

To achieve a quintessential cottage garden:

  • Layering: Use a mix of tall, medium, and low plants for depth.
  • Curved Beds: Avoid straight lines; natural curves and informal groupings look more charming.
  • Color Harmony: Combine pinks, whites, and purples for a soft romantic palette. Add occasional bright splashes for vibrancy.
  • Wildflower Mixes: Integrate cosmos with other self-seeding wildflowers for an effortless, natural feel.
  • Pathways: Plant along pathways or edges for a welcoming, whimsical touch.

Tip: Incorporate decorative elements like rustic trellises, wooden benches, or stone paths to enhance the cottage ambiance.


Conclusion

Growing cosmos is a simple and rewarding way to add charm, color, and natural beauty to your garden. Their tall, airy stems, vibrant flowers, and low-maintenance nature make them ideal for creating a relaxed, romantic cottage garden look.

Key takeaways:

  1. Choose the right cosmos varieties for height, color, and bloom style.
  2. Plant in sunny, well-draining locations with light, moderately fertile soil.
  3. Sow seeds directly or start indoors for early blooms.
  4. Water moderately and mulch to retain moisture.
  5. Provide staking or group planting for support.
  6. Deadhead spent flowers to encourage continuous blooming.
  7. Monitor for pests naturally and avoid chemical interventions.
  8. Use companion planting and layering for visual depth and color contrast.
  9. Embrace informal planting patterns and curved beds for a natural look.
  10. Allow some flowers to self-seed for effortless future growth.

With thoughtful planting and minimal care, cosmos can transform any garden into a lively, colorful, and quintessentially charming cottage retreat, inviting pollinators and delighting gardeners season after season.

How to Keep Roses Pest-Free Naturally

How to Keep Roses Pest-Free Naturally

Roses are among the most beloved flowers in the world, admired for their beauty, fragrance, and timeless elegance. However, their delicate petals and tender foliage often make them a prime target for pests, which can damage leaves, flowers, and even roots. While chemical pesticides can be effective, they pose risks to the environment, pollinators, and human health. Fortunately, there are natural, sustainable ways to protect your roses from pests while maintaining a healthy, thriving garden.

This guide explores how to keep roses pest-free naturally, covering pest identification, prevention, organic solutions, companion planting, and long-term rose care, ensuring your roses flourish without harmful chemicals.


1. Common Rose Pests and Their Impact

Understanding the types of pests that attack roses is the first step toward prevention:

  • Aphids: Small, soft-bodied insects that cluster on new shoots and buds, sucking sap and causing curling leaves.
  • Spider Mites: Tiny arachnids that form webs and cause yellow speckling on leaves.
  • Japanese Beetles: Metallic green beetles that feed on leaves and flowers, leaving skeletonized foliage.
  • Thrips: Tiny, slender insects that damage flower petals, causing discoloration and deformed blooms.
  • Rose Slugs (Sawfly Larvae): Small, greenish larvae that chew holes in leaves.
  • Scale Insects: Hard-shelled pests that attach to stems, sucking nutrients and weakening plants.

Tip: Regular inspection of buds, stems, and leaves helps detect pests early, preventing severe infestations.


2. Natural Pest Prevention Techniques

Preventing pests is easier than treating infestations. Implement these prevention strategies:

a) Maintain Healthy Roses

  • Proper Spacing: Ensure adequate airflow by planting roses at recommended distances.
  • Soil Health: Use nutrient-rich, well-draining soil to strengthen plants against pest attacks.
  • Watering: Water at the base to avoid wetting foliage, which attracts pests and promotes fungal diseases.

b) Pruning and Cleaning

  • Remove dead or diseased branches to prevent pests from nesting.
  • Dispose of fallen leaves and flowers to eliminate breeding grounds.

c) Encourage Beneficial Insects

  • Ladybugs, lacewings, and parasitic wasps feed on aphids and other harmful pests.
  • Plant nectar-rich flowers nearby to attract these natural predators.

Tip: A well-maintained rose plant is far less susceptible to pest damage.


3. Homemade Natural Pest Solutions

Several natural remedies can control pests without chemicals:

a) Neem Oil Spray

  • Effectiveness: Controls aphids, spider mites, and scale insects.
  • Preparation: Mix 2 tablespoons of neem oil with 1 teaspoon liquid soap in 1 liter of water. Spray on leaves, stems, and buds every 7–10 days.

b) Garlic Spray

  • Effectiveness: Repels aphids, beetles, and caterpillars.
  • Preparation: Blend 2–3 garlic cloves with water, strain, and spray on rose plants weekly.

c) Soap Spray

  • Effectiveness: Kills soft-bodied insects like aphids and thrips.
  • Preparation: Mix 1 tablespoon mild liquid soap in 1 liter of water; spray thoroughly.

d) Chili or Cayenne Pepper Spray

  • Effectiveness: Deters beetles and larger chewing insects.
  • Preparation: Mix 1 teaspoon chili powder in 1 liter of water; add a few drops of soap to help adherence.

e) Companion Plants

  • Marigolds: Repel nematodes and certain insects.
  • Lavender and Rosemary: Deter aphids and beetles.
  • Alliums (Garlic and Onions): Naturally repel pests through scent.

Tip: Apply sprays early in the morning or late evening to avoid burning leaves in direct sunlight.


4. Natural Mulching and Soil Care

Healthy soil and mulching reduce pest problems:

  • Organic Mulch: Straw, shredded leaves, or compost reduces weeds and maintains soil moisture, discouraging pests like slugs and beetles.
  • Beneficial Microbes: Compost and organic amendments improve soil health, boosting plant immunity.
  • Crop Rotation and Diversity: Interplant roses with vegetables or herbs to confuse pests and reduce infestations.

Tip: Mulch should not touch the base of the rose stems directly to prevent fungal growth.


5. Companion Planting for Pest Control

Companion planting enhances both aesthetic appeal and pest resistance:

  • Borage: Attracts pollinators and deters tomato and rose pests.
  • Chives and Garlic: Repel aphids naturally.
  • Tansy: Deters beetles and ants.
  • Nasturtiums: Trap pests away from roses, acting as a decoy plant.

Tip: Companion plants also provide flowers, fragrance, and color diversity alongside your roses.


6. Beneficial Insects and Biological Control

Encourage natural predators to manage pests sustainably:

  • Ladybugs: Eat aphids and mites.
  • Lacewings: Feed on aphids and small caterpillars.
  • Parasitic Wasps: Lay eggs inside pest larvae, naturally controlling populations.
  • Predatory Beetles: Consume scale insects and larvae.

Tip: Avoid broad-spectrum insecticides that kill beneficial insects; they help maintain a balanced ecosystem.


7. Regular Monitoring and Maintenance

Consistent care is crucial for keeping roses pest-free:

  • Inspect leaves, stems, and buds at least twice a week.
  • Remove and destroy infested or damaged parts immediately.
  • Rotate natural sprays and remedies to prevent pest resistance.
  • Check the undersides of leaves where pests often hide.

Tip: Early detection prevents minor problems from escalating into major infestations.


8. Seasonal Strategies

Pests vary with seasons, so adapt your approach:

  • Spring: Monitor for aphids and spider mites; encourage pollinators.
  • Summer: Watch for beetles and thrips; increase watering during heat.
  • Autumn: Prune old stems and remove fallen leaves to reduce overwintering pests.
  • Winter: Protect dormant roses from extreme cold and inspect for scale insects.

Tip: Seasonal awareness helps prevent pest buildup and maintains rose vitality year-round.


9. Natural Fertilization to Boost Resistance

Healthy, well-fed roses are more resistant to pests:

  • Organic Fertilizers: Compost, manure, and worm castings provide slow-release nutrients.
  • Liquid Fertilizers: Fish emulsion or seaweed extract boosts growth and flowering.
  • Balanced Nutrition: Ensure adequate nitrogen for leaves, phosphorus for flowers, and potassium for overall plant health.

Tip: Avoid over-fertilization, which can make roses more attractive to pests.


10. Creating a Balanced Rose Garden Ecosystem

A thriving rose garden incorporates diversity, natural pest control, and sustainable practices:

  • Mix flowers and herbs to attract beneficial insects.
  • Use mulch and organic amendments to improve soil health.
  • Apply natural sprays and maintain regular pruning and hygiene.
  • Encourage natural predators to reduce reliance on chemicals.

Tip: A balanced ecosystem naturally minimizes pest problems and enhances overall plant vitality.


Conclusion

Keeping roses pest-free naturally requires a combination of prevention, observation, and sustainable care. By understanding pest behavior, maintaining plant health, and using organic sprays, companion plants, and beneficial insects, gardeners can protect roses without harming the environment or pollinators.

Key takeaways:

  1. Identify common rose pests and monitor plants regularly.
  2. Maintain healthy soil, proper spacing, and adequate watering.
  3. Use natural remedies like neem oil, garlic, soap, and chili sprays.
  4. Encourage beneficial insects to naturally control pests.
  5. Practice pruning, deadheading, and hygiene to reduce infestation sites.
  6. Employ companion planting to deter pests and enhance beauty.
  7. Adjust care seasonally to address varying pest pressures.
  8. Fertilize naturally to strengthen plants against pests.
  9. Mulch to retain moisture and protect roots.
  10. Foster a balanced ecosystem to sustainably maintain rose health.

By adopting these practices, gardeners can enjoy lush, vibrant, and pest-free roses that enhance their garden’s beauty, fragrance, and charm—all without relying on harmful chemicals.

The Best Flowers for Container Displays in Shade

The Best Flowers for Container Displays in Shade

Container gardening is a versatile and rewarding way to grow flowers, especially in spaces with limited sunlight, such as patios, balconies, and shaded corners of gardens. While many flowering plants thrive in full sun, shade-tolerant flowers can add color, texture, and charm to darker areas, turning them into vibrant, inviting spots.

This guide explores the best flowers for container displays in shade, including plant selection, container choices, soil preparation, watering, fertilization, and creative design ideas, helping gardeners create lush, low-light floral displays.


1. Understanding Shade and Its Implications

Shade is not uniform, and understanding the type of shade is crucial for successful container gardening:

  • Full Shade: Less than 3 hours of direct sunlight daily; ideal for plants that prefer indirect light.
  • Partial Shade (Filtered Light): 3–6 hours of sunlight, often morning sun or dappled light.
  • Deep Shade: Areas blocked by walls, trees, or structures; only indirect light reaches these spots.

Tip: Observe your container location at different times of day to determine sunlight patterns and select suitable plants accordingly.


2. Advantages of Container Gardening in Shade

Shade container gardening offers several benefits:

  • Space Efficiency: Ideal for small patios, balconies, or apartments.
  • Mobility: Containers can be moved to optimize light or protect plants from harsh weather.
  • Aesthetic Flexibility: Offers opportunities to mix foliage and flowering plants for a layered look.
  • Reduced Heat Stress: Shade containers are less prone to drying out, reducing watering needs.

Tip: Shade gardens benefit from plants with colorful leaves and flowers to brighten darker spaces.


3. Choosing Containers for Shade Flowers

Container selection impacts plant health and appearance:

  • Material: Terra-cotta retains moisture but may dry faster; plastic is lightweight and retains water; ceramic adds decorative appeal.
  • Size: Larger containers allow more root growth and better moisture retention.
  • Drainage: Drill holes in the bottom to prevent waterlogging.
  • Mobility: Use pots with saucers or wheels for easy movement.

Tip: Darker foliage and colorful pots can enhance visual contrast in shaded areas.


4. Shade-Tolerant Flowers for Container Displays

Several flowers thrive in shade while providing vivid colors and textures:

a) Impatiens

  • Features: Bright, eye-catching flowers in red, pink, white, and purple.
  • Benefits: Classic shade flower; continuous bloom throughout the season.
  • Care: Needs consistent moisture and partial to full shade.

b) Begonias

  • Features: Wax begonias offer glossy leaves and colorful blooms; tuberous begonias produce large, showy flowers.
  • Benefits: Performs well in partial shade; ideal for containers or hanging baskets.
  • Care: Water regularly; avoid overhead watering to prevent fungal diseases.

c) Hostas (Flowering Varieties)

  • Features: Variegated or textured foliage; some produce fragrant blooms.
  • Benefits: Excellent for deep shade; adds lush greenery and structure.
  • Care: Prefers moist, well-drained soil; cut back spent flowers to maintain appearance.

d) Fuchsias

  • Features: Pendulous, bell-shaped flowers in pinks, purples, and reds.
  • Benefits: Adds elegance and attracts pollinators even in partial shade.
  • Care: Requires regular watering and misting; partial shade is ideal.

e) Caladiums

  • Features: Striking foliage with red, pink, green, and white patterns.
  • Benefits: Provides visual interest without needing full sun; thrives in shaded containers.
  • Care: Keep soil moist; avoid frost and extreme heat.

f) Lobelia

  • Features: Small, vivid blue, purple, or white flowers forming trailing mats.
  • Benefits: Perfect for container edges or hanging baskets; blooms profusely in shade.
  • Care: Water consistently; partial shade enhances color intensity.

g) Astilbe

  • Features: Feathery plumes in pink, red, or white; adds vertical interest.
  • Benefits: Shade-tolerant and low maintenance; attracts butterflies.
  • Care: Prefers consistently moist soil and partial shade.

h) Heuchera (Coral Bells)

  • Features: Variegated foliage in shades of purple, green, and silver; delicate flower spikes.
  • Benefits: Adds texture and color contrast in shaded containers.
  • Care: Well-drained soil and partial shade; cut back flower stalks to maintain foliage focus.

5. Soil Preparation for Shade Containers

Shade plants often thrive in moist, nutrient-rich soil:

  • Potting Mix: Use high-quality, well-draining potting soil.
  • Organic Matter: Incorporate compost or leaf mold to enhance fertility and water retention.
  • Drainage: Add perlite, sand, or small pebbles to prevent waterlogging.
  • pH Level: Most shade flowers prefer slightly acidic to neutral soil (pH 6.0–7.0).

Tip: Avoid heavy garden soil alone, as it may compact and suffocate roots in containers.


6. Watering and Moisture Management

Shade containers often retain moisture longer, but proper watering is still crucial:

  • Frequency: Check soil regularly; water when the top inch feels dry.
  • Method: Water at the base to prevent fungal diseases on leaves and blooms.
  • Mulching: Use organic mulch like bark chips or leaf litter to maintain soil moisture and reduce evaporation.

Tip: Container plants in deep shade may need less frequent watering than sun-exposed containers.


7. Fertilization for Shade Flowers

Container flowers depend on limited soil nutrients:

  • Balanced Fertilizers: Use a slow-release fertilizer or liquid feed every 2–3 weeks.
  • Organic Options: Compost tea or diluted fish emulsion improves soil fertility and encourages flowering.
  • Leafy vs. Flowering: Adjust fertilizer based on plant growth—more phosphorus encourages blooms.

Tip: Avoid excessive nitrogen, which can promote leaf growth at the expense of flowers.


8. Plant Arrangement and Design

Thoughtful arrangement enhances visual appeal and plant health:

  • Layering: Place taller plants like astilbe at the back and trailing plants like lobelia at the front.
  • Grouping: Combine different textures and colors for contrast.
  • Hanging Baskets: Use fuchsias, lobelia, or trailing begonias to add vertical interest.
  • Mix Foliage and Flowers: Combine plants with colorful leaves (caladiums, hostas, heuchera) with flowers for a balanced container display.

Tip: Odd numbers of containers (3, 5, 7) create natural visual harmony.


9. Pest and Disease Management

Shade environments can be more humid, favoring certain pests and diseases:

  • Common Issues: Aphids, slugs, spider mites, and fungal infections like powdery mildew.
  • Prevention: Ensure good air circulation, remove dead leaves, and avoid overcrowding.
  • Natural Control: Introduce beneficial insects, neem oil sprays, or organic insecticidal soap.

Tip: Inspect plants regularly, focusing on undersides of leaves where pests often hide.


10. Seasonal and Long-Term Care

Shade containers require adaptation to seasonal changes:

  • Spring: Plant new container flowers; fertilize and water as growth resumes.
  • Summer: Monitor for heat stress in partial shade; maintain moisture.
  • Autumn: Trim spent blooms and remove dead foliage to prepare for winter.
  • Winter: Protect frost-sensitive containers indoors or with covers; mulch to insulate roots.

Tip: Rotate containers periodically to maintain balanced growth and aesthetics.


11. Creative Tips for Shade Container Displays

  • Color Contrast: Bright flowers like impatiens or begonias pop against dark green foliage.
  • Trailing Plants: Use lobelia or ivy to soften container edges.
  • Mixed Containers: Combine foliage and flowering plants for layered textures.
  • Decorative Elements: Add stones, miniature statues, or colorful pots for visual interest.
  • Mobility: Lightweight containers allow you to rearrange for seasonal changes or sunlight optimization.

Tip: Experiment with different plant combinations to create unique, personalized container displays.


Conclusion

Creating beautiful container displays in shade requires careful plant selection, proper soil preparation, and consistent care. By choosing shade-tolerant flowers, arranging containers thoughtfully, and maintaining healthy growing conditions, gardeners can transform even the darkest corners into lush, vibrant, and inviting spaces.

Key takeaways:

  1. Determine sunlight levels before selecting plants.
  2. Use well-draining, nutrient-rich potting soil.
  3. Choose shade-loving flowers like impatiens, begonias, hostas, and fuchsias.
  4. Water and fertilize appropriately for container growth.
  5. Incorporate layering, trailing plants, and color contrast for visual impact.
  6. Monitor and manage pests naturally.
  7. Adjust care seasonally to maintain health and blooms.
  8. Use creative container designs to enhance aesthetic appeal.
  9. Mix foliage and flowering plants for texture and depth.
  10. Rotate and maintain containers for continuous charm throughout the year.

With thoughtful planning and care, shade containers can become stunning focal points, offering color, fragrance, and natural beauty, even in low-light areas.

How to Grow Hydrangeas With Deep Blue Flowers

How to Grow Hydrangeas With Deep Blue Flowers

Hydrangeas (Hydrangea macrophylla) are among the most popular flowering shrubs for gardens, known for their large, lush blooms and vibrant colors. While hydrangeas can display a range of hues from pink to purple to blue, achieving deep blue flowers requires specific soil conditions, careful plant care, and proper seasonal management. Deep blue hydrangea blooms are highly prized for their striking appearance and long-lasting floral display, making them a favorite for both garden beds and container arrangements.

This article provides a comprehensive guide on how to grow hydrangeas with deep blue flowers, covering soil management, fertilization, pruning, watering, and seasonal considerations.


1. Understanding Flower Color in Hydrangeas

Hydrangea flower color is primarily determined by soil pH and aluminum availability:

  • Acidic Soil (pH 5.2–5.5): Promotes blue blooms.
  • Neutral to Alkaline Soil (pH 6.5+): Produces pink or purple blooms.
  • Aluminum Availability: Essential for blue pigmentation; aluminum is more accessible in acidic soils.

Understanding the relationship between soil chemistry and flower color is crucial for cultivating deep blue hydrangeas.


2. Selecting the Right Hydrangea Varieties

Not all hydrangeas can produce true blue flowers. Choose varieties known for their blue color potential:

  • Bigleaf Hydrangeas (Hydrangea macrophylla): Most responsive to soil pH changes.
  • Blue-Flowered Cultivars: ‘Nikko Blue,’ ‘Endless Summer Blue,’ ‘Blue Wave,’ and ‘Bluebird.’
  • Climbing Varieties: Some climbing hydrangeas may show blue hues under acidic conditions.

Selecting the right variety ensures maximum potential for deep blue blooms.


3. Soil Preparation for Deep Blue Blooms

Soil preparation is key to achieving and maintaining blue flowers:

  • Acidic Soil: Aim for a pH between 5.2 and 5.5.
  • Amending Soil: Use sulfur, peat moss, or acidic compost to lower pH.
  • Aluminum Supplementation: Garden aluminum sulfate or commercially available hydrangea blue fertilizers increase aluminum availability.
  • Soil Testing: Regular testing ensures pH and nutrient levels are suitable.
  • Drainage: Well-draining soil prevents root rot while maintaining moisture.

Proper soil preparation provides the chemical environment needed for deep blue flowers.


4. Planting Hydrangeas

Planting hydrangeas correctly ensures healthy growth and abundant blooms:

  • Timing: Plant in spring or fall for optimal root establishment.
  • Spacing: 3–5 feet apart to allow airflow and reduce disease risk.
  • Depth: Plant at the same depth as in the nursery container to avoid stress.
  • Mulching: Apply a 2–3 inch layer of mulch to retain moisture and regulate soil temperature.

Correct planting creates a strong foundation for robust flowering.


5. Watering Practices

Hydrangeas require consistent moisture to maintain large, healthy blooms:

  • Frequency: Water deeply 2–3 times per week, more during hot or dry conditions.
  • Morning Watering: Reduces fungal risk and ensures moisture absorption.
  • Avoid Overhead Watering: Wet leaves can promote disease; use drip irrigation if possible.
  • Container Hydrangeas: Monitor closely, as pots dry faster than garden beds.

Proper watering supports vigorous growth and consistent flower production.


6. Fertilization for Blue Flowers

Balanced nutrition encourages strong plants and vibrant flower color:

  • Phosphorus Limitation: Excess phosphorus can inhibit aluminum uptake, reducing blue coloration.
  • Potassium and Nitrogen: Essential for healthy foliage and flower size.
  • Specialized Fertilizers: Use fertilizers labeled for blue hydrangeas or acid-loving plants.
  • Application Timing: Fertilize in early spring and mid-summer to support growth and blooming.

Fertilization ensures healthy plants with deeply pigmented blooms.


7. Maintaining Acidic Conditions

Maintaining low soil pH is crucial for blue hydrangeas:

  • Regular Soil Testing: Monitor pH every 6–8 weeks during the growing season.
  • Aluminum Supplementation: Apply aluminum sulfate in small, repeated doses to prevent toxicity.
  • Acidic Mulch: Pine needles or shredded oak leaves help maintain soil acidity.
  • Avoid Lime: Do not use lime or alkaline fertilizers, as they shift blooms toward pink.

Consistent acidity promotes intense, deep blue coloration in flowers.


8. Pruning and Deadheading

Proper pruning enhances bloom quality and longevity:

  • Timing: Prune after flowering for bigleaf hydrangeas, as they bloom on old wood.
  • Deadheading: Remove spent blooms to encourage new bud formation.
  • Shape Maintenance: Trim leggy branches to maintain a compact and healthy shrub.
  • Avoid Heavy Winter Pruning: Can reduce blooms the following season.

Pruning supports strong, vibrant flowers and bushy growth.


9. Sunlight Requirements

Hydrangeas need balanced sunlight to produce large, healthy blooms:

  • Partial Shade: 4–6 hours of morning sun is ideal.
  • Avoid Harsh Afternoon Sun: Can scorch leaves and reduce flower longevity.
  • Filtered Sunlight: Protects delicate blooms while supporting photosynthesis.

Proper sunlight ensures healthy foliage and well-formed flower heads.


10. Pest and Disease Management

Hydrangeas are susceptible to common fungal and insect pests, especially in moist conditions:

  • Powdery Mildew and Leaf Spot: Ensure good airflow and avoid overhead watering.
  • Aphids and Spider Mites: Monitor regularly and use organic treatments like neem oil if necessary.
  • Root Rot: Prevent waterlogged soil conditions.
  • Sanitation: Remove fallen leaves and debris to reduce pathogen presence.

Healthy, well-maintained plants are less prone to disease and consistently produce deep blue blooms.


11. Seasonal Care for Winter and Summer

Adjust care based on seasonal changes:

  • Spring: Test soil pH, apply fertilizers, and prune dead branches.
  • Summer: Maintain consistent watering, mulching, and aluminum supplementation.
  • Autumn: Reduce fertilizer, prepare soil for winter, and mulch heavily to protect roots.
  • Winter: Avoid pruning frozen branches; provide frost protection if necessary.

Seasonal care ensures continuous growth and flower quality throughout the year.


12. Container-Grown Blue Hydrangeas

For smaller spaces or patios, containers can support hydrangeas:

  • Pot Selection: Choose large pots (minimum 15–20 inches) with good drainage.
  • Soil Mix: Use acidified potting mix with peat moss and perlite.
  • Watering: Containers dry faster, requiring more frequent moisture monitoring.
  • Fertilization: Apply liquid or slow-release fertilizers suited for acid-loving plants.

Container hydrangeas can produce deep blue flowers similar to garden-grown plants when cared for properly.


13. Troubleshooting Flower Color Issues

Several factors can prevent blue blooms:

  • Soil Too Alkaline: Use sulfur or acidic amendments to lower pH.
  • Aluminum Deficiency: Add aluminum sulfate carefully.
  • Excess Phosphorus: Avoid phosphorus-heavy fertilizers.
  • Improper Pruning: Cutting old wood can remove future flower buds.

Understanding these factors helps gardeners maintain deep blue coloration season after season.


14. Benefits of Deep Blue Hydrangeas

Cultivating blue hydrangeas provides multiple rewards:

  • Aesthetic Appeal: Striking blooms create visual focal points in gardens.
  • Long-Lasting Flowers: Proper care ensures extended bloom periods.
  • Versatility: Suitable for beds, borders, and containers.
  • Pollinator Support: Hydrangeas provide nectar for bees and other pollinators.
  • Personal Satisfaction: Achieving true blue blooms is a fulfilling accomplishment for gardeners.

Deep blue hydrangeas elevate garden beauty and visual interest.


Conclusion

Growing hydrangeas with deep blue flowers requires careful attention to soil acidity, aluminum availability, and proper plant care practices. Selecting the right variety, preparing acidic soil, providing balanced fertilization, maintaining consistent moisture, and following seasonal pruning strategies all contribute to healthy, vibrant, long-lasting blooms. By combining proper sunlight, pest management, and container or garden bed techniques, gardeners can enjoy stunning blue hydrangea displays that enhance the beauty of any outdoor or patio space. With dedication and knowledge, achieving deep blue hydrangea flowers is both rewarding and sustainable.

7 Flowers That Bloom Even in Sandy Soil

7 Flowers That Bloom Even in Sandy Soil

Gardening in sandy soil presents unique challenges. Sandy soils drain quickly, lack nutrients, and can be prone to erosion, making it difficult for many plants to thrive. Despite these limitations, several flowering plants have adapted to grow and bloom beautifully even in sandy conditions, offering gardeners opportunities to create colorful, resilient landscapes. Choosing the right flowers ensures a vibrant garden with minimal soil amendments, making it perfect for coastal areas, deserts, or poor soil locations.

This article explores seven flowers that flourish in sandy soil, detailing their care, ideal conditions, and benefits for long-lasting blooms.


1. Marigolds (Tagetes spp.)

Marigolds are bright, hardy flowers known for vibrant yellow, orange, and red blooms:

  • Adaptation to Sandy Soil: Marigolds tolerate low-nutrient, well-drained soils and can withstand drought conditions.
  • Planting Tips: Plant in full sun; spacing of 8–12 inches ensures airflow.
  • Watering Needs: Water moderately, allowing the soil to dry between sessions.
  • Benefits: Their strong scent deters pests like nematodes and aphids, promoting healthy flower beds.

Marigolds provide cheerful color and natural pest control in sandy gardens.


2. Portulaca (Portulaca grandiflora)

Portulaca, also known as moss rose, is a low-growing succulent flower that thrives in challenging conditions:

  • Drought Tolerance: Requires minimal water and thrives in hot, sandy soils.
  • Sunlight: Full sun promotes maximum flowering.
  • Bloom Duration: Produces vibrant blooms throughout summer, closing at night or on cloudy days.
  • Soil Requirements: Prefers well-drained sandy or rocky soils; poor fertility does not hinder growth.

Portulaca adds continuous color and texture to sandy gardens with minimal care.


3. Blanket Flower (Gaillardia spp.)

Blanket flowers are hardy perennials known for red, orange, and yellow daisy-like blooms:

  • Adaptation to Sandy Soil: Tolerates dry, nutrient-poor soils and requires excellent drainage.
  • Planting Tips: Plant in full sun; avoid overwatering to prevent root rot.
  • Maintenance: Deadhead spent flowers to encourage continuous blooming.
  • Benefits: Attracts pollinators such as butterflies and bees, enhancing garden biodiversity.

Blanket flowers are low-maintenance, drought-tolerant, and long-blooming.


4. Lavender (Lavandula spp.)

Lavender is a fragrant herbaceous plant with purple flower spikes that thrive in sandy, well-drained soils:

  • Soil Preference: Requires sandy or gravelly soil for proper root development.
  • Sunlight: Full sun exposure is essential for optimal flowering.
  • Watering Needs: Minimal; overwatering can cause root rot.
  • Uses: Beyond ornamental purposes, lavender can be used for essential oils, dried bouquets, and natural pest control.

Lavender is both decorative and functional, enhancing garden appeal while tolerating sandy conditions.


5. Coreopsis (Coreopsis spp.)

Coreopsis, or tickseed, produces bright yellow, orange, or red blooms that flourish in sandy soils:

  • Drought and Heat Tolerance: Ideal for hot, dry environments with sandy soil.
  • Planting Tips: Full sun exposure promotes vibrant flower colors.
  • Maintenance: Low-maintenance; deadheading extends flowering period.
  • Soil Fertility: Performs well in nutrient-poor soils, making it perfect for sandy conditions.

Coreopsis is an easy-to-grow, resilient flower that provides long-lasting seasonal blooms.


6. Sea Holly (Eryngium spp.)

Sea holly is a unique ornamental plant with spiky blue or purple flowers that thrive in coastal or sandy soils:

  • Adaptation to Sandy Soil: Excellent drainage requirement makes it ideal for sandy gardens.
  • Sunlight: Full sun is necessary for best flower development.
  • Watering Needs: Low; once established, it tolerates drought well.
  • Benefits: Attracts pollinators and adds structural interest to flower beds.

Sea holly is a drought-tolerant, low-maintenance flower suited for sandy and coastal landscapes.


7. Yarrow (Achillea millefolium)

Yarrow produces clusters of flowers in shades of yellow, white, pink, and red and is exceptionally hardy:

  • Soil Adaptation: Thrives in sandy, well-draining soils and requires minimal fertility.
  • Sunlight Requirements: Full sun ensures healthy foliage and blooms.
  • Maintenance: Drought-tolerant and deer-resistant; deadhead to encourage more blooms.
  • Benefits: Attracts beneficial insects and supports pollinators.

Yarrow adds texture, color, and ecological benefits to sandy gardens.


Care Tips for Flowers in Sandy Soil

Even though these flowers are adapted to sandy conditions, proper care ensures long-lasting blooms:

  1. Soil Amendments: Incorporate organic matter such as compost or peat moss to improve moisture retention without compromising drainage.
  2. Mulching: Apply a thin layer of mulch to reduce evaporation, moderate temperature, and retain moisture.
  3. Fertilization: Use slow-release fertilizers or liquid feeds tailored for flowering plants. Sandy soil loses nutrients quickly due to drainage.
  4. Watering: Establish a consistent but moderate watering routine; avoid overwatering to prevent root rot.
  5. Pest Management: Monitor for common pests such as aphids or spider mites and use organic treatments when necessary.
  6. Sunlight Management: Most sandy-soil flowers require full sun; ensure adequate exposure.
  7. Spacing: Allow proper plant spacing to encourage airflow and reduce disease risk.

Implementing these care strategies enhances flowering quality and garden resilience.


Benefits of Gardening in Sandy Soil

Gardening in sandy soil, while challenging, offers distinct advantages:

  • Excellent Drainage: Reduces the risk of root rot for drought-tolerant flowers.
  • Easy Root Penetration: Looser soils make it easier for roots to establish.
  • Rapid Warming: Sandy soils warm quickly in spring, supporting early bloom.
  • Low Compaction: Reduces soil stress for most hardy flowering plants.
  • Opportunities for Native Plants: Many native flowers are adapted to sandy, low-nutrient conditions.

With the right plant selection, sandy soil can produce vibrant, resilient, and low-maintenance flower gardens.


Conclusion

While sandy soil can pose challenges for gardeners, it is entirely possible to create stunning flower beds with continuous blooms. Plants such as marigolds, portulaca, blanket flowers, lavender, coreopsis, sea holly, and yarrow thrive in well-draining, low-nutrient conditions, offering both vibrant color and ecological benefits. By incorporating proper care practices—such as soil amendments, mulching, balanced watering, and regular fertilization—gardeners can maximize flower health, bloom longevity, and aesthetic appeal. Choosing the right flowers transforms sandy soil from a limitation into an opportunity for a beautiful, resilient, and low-maintenance garden.

The Best Soil for Long-Lasting Blooms

The Best Soil for Long-Lasting Blooms

Flowers are among the most rewarding elements of any garden, adding color, fragrance, and visual appeal to outdoor and indoor spaces. While sunlight, watering, and fertilization are often emphasized, soil quality is the foundation of plant health and bloom longevity. The right soil provides essential nutrients, proper drainage, and a supportive environment for roots, directly influencing flower vigor and bloom duration.

This article provides a comprehensive guide on choosing and preparing the best soil for long-lasting blooms, covering soil composition, amendments, testing, and seasonal care strategies.


1. Understanding Soil’s Role in Bloom Longevity

Soil is more than just a medium to anchor plants—it directly impacts nutrient availability, water retention, root development, and disease resistance. Flowers rely on healthy soil to:

  • Access Nutrients: Nitrogen, phosphorus, and potassium support growth and flowering.
  • Maintain Moisture: Adequate water retention prevents wilting and stress.
  • Promote Aeration: Oxygen-rich soil supports root respiration.
  • Support Beneficial Microorganisms: Microbes help break down organic matter and enhance nutrient uptake.

Healthy soil ensures vibrant, resilient plants with prolonged blooming periods.


2. Types of Soil for Flower Gardening

Choosing the right type of soil is essential for different flowering plants:

  • Loamy Soil: Ideal for most flowering plants; balances drainage and nutrient retention.
  • Sandy Soil: Drains quickly but may require frequent fertilization and organic matter.
  • Clay Soil: Retains nutrients well but can become compacted; may need amendments for aeration.
  • Silty Soil: Fertile and retains moisture; can become waterlogged if not managed.

Understanding your soil type is the first step to creating an optimal bloom-friendly environment.


3. Testing and Improving Soil Quality

Before planting, test your soil to ensure it supports long-lasting blooms:

  • Soil pH: Most flowers prefer slightly acidic to neutral soil (pH 6.0–7.0).
  • Nutrient Testing: Check for nitrogen (growth), phosphorus (flowers), and potassium (overall health).
  • Texture Assessment: Ensure the soil is neither too sandy nor too compacted.

Based on the results:

  • Adjust pH: Use lime to raise pH or sulfur to lower it.
  • Amend Nutrients: Add organic compost or fertilizers to correct deficiencies.
  • Improve Texture: Incorporate sand, perlite, or organic matter to enhance drainage and aeration.

Testing ensures soil conditions are ideal for vigorous, long-lasting flowering.


4. The Role of Organic Matter

Organic matter is critical for soil fertility, moisture retention, and microbial activity:

  • Compost: Supplies nutrients and improves structure.
  • Leaf Mold: Increases water retention and enriches soil with micronutrients.
  • Manure: Provides slow-release nutrients but should be well-rotted to avoid burning plants.
  • Peat Moss: Helps retain moisture in sandy soils and improves aeration in clay soils.

Regular addition of organic matter supports continuous growth and prolonged flowering.


5. Choosing the Right Fertilizers

Soil alone is rarely enough; balanced fertilization enhances bloom longevity:

  • Balanced Fertilizers: N-P-K ratio around 10:10:10 supports overall growth.
  • High-Phosphorus Fertilizers: Encourage flowering and strong root development.
  • Slow-Release Fertilizers: Provide nutrients over time, reducing frequent applications.
  • Liquid Fertilizers: Useful for container plants or to boost blooms mid-season.

Correct fertilization ensures plants remain vigorous and flowers last longer.


6. Soil Drainage and Aeration

Waterlogged soil can lead to root rot and fungal issues, shortening bloom duration:

  • Raised Beds: Improve drainage and prevent water accumulation.
  • Amendments: Add sand, perlite, or coarse compost to improve drainage.
  • Mulching: Prevents soil compaction while retaining moisture.
  • Aeration Practices: Loosen soil gently around plants to allow air penetration.

Good drainage and aeration promote strong roots and healthy flowers.


7. Container Soil Considerations

Container-grown flowers need specialized soil for longevity:

  • Potting Mixes: Lightweight, well-draining, and nutrient-rich.
  • Avoid Garden Soil: Heavy soil in containers can compact and suffocate roots.
  • Add Perlite or Vermiculite: Enhances aeration and drainage.
  • Top Dressing: Refresh soil annually or replace it to maintain nutrient levels.

Container soil management ensures flowers continue blooming throughout the season.


8. Water Retention and Mulching

Maintaining consistent soil moisture is essential for long-lasting blooms:

  • Mulch Layers: Organic mulch retains moisture and regulates soil temperature.
  • Moisture Monitoring: Keep soil evenly moist, avoiding water stress.
  • Drip Irrigation: Delivers water directly to roots without wetting foliage.
  • Watering Schedule: Water in the morning to allow soil to dry and prevent fungal growth.

Moisture management ensures flowers remain healthy and vibrant for longer periods.


9. Seasonal Soil Care

Adjusting soil care based on seasons helps maximize blooms:

  • Spring: Prepare soil with compost and fertilizers for active growth.
  • Summer: Monitor moisture closely; consider mulching to retain water.
  • Autumn: Remove dead plant material and add organic matter to improve fertility for next season.
  • Winter: Protect soil in garden beds or containers to prevent compaction and nutrient loss.

Seasonal adjustments enhance bloom duration and overall plant health.


10. Avoiding Soil-Related Problems

Common soil issues can shorten bloom periods:

  • Compacted Soil: Restricts root growth; amend with organic matter and aerate.
  • Nutrient Deficiencies: Yellowing leaves or weak flowers indicate insufficient nutrients.
  • Overwatering or Poor Drainage: Leads to root rot and fungal infections.
  • Soil Contamination: Use clean, disease-free soil to prevent pathogens.

Preventing these problems ensures a strong foundation for long-lasting flowers.


11. Companion Planting for Soil Health

Companion planting improves soil conditions naturally:

  • Nitrogen-Fixing Plants: Beans and peas enrich the soil.
  • Cover Crops: Clover or vetch prevent erosion and add organic matter.
  • Flower Diversity: Mixing species improves soil microbe diversity and prevents disease.

Companion planting creates a healthier soil ecosystem for sustained flowering.


12. Monitoring and Adjusting Soil pH and Nutrients

Regular monitoring helps maintain soil for continuous blooms:

  • pH Testing: Seasonal checks prevent nutrient lockout.
  • Foliar Symptoms: Observe leaves for signs of deficiencies.
  • Adjust Fertilization: Modify nutrient application based on soil and plant needs.
  • Soil Rejuvenation: Add compost or organic matter annually.

Ongoing soil monitoring ensures flowers remain vibrant and long-lasting.


13. Benefits of Proper Soil Management

Investing in the right soil practices yields multiple advantages:

  • Prolonged Bloom Duration: Healthy soil supports continuous flowering.
  • Vibrant Colors and Fragrance: Adequate nutrients produce intense blooms.
  • Stronger, Healthier Plants: Reduced susceptibility to pests and diseases.
  • Lower Maintenance: Fewer replacements, less chemical intervention.
  • Environmental Sustainability: Organic matter and proper soil care improve garden ecology.

Healthy soil is the foundation for sustainable, beautiful flower beds.


Conclusion

The longevity and quality of flowers depend heavily on the soil they grow in. Choosing well-draining, nutrient-rich soil, amending it with organic matter, and maintaining proper moisture, aeration, and pH create ideal conditions for long-lasting blooms. Whether in garden beds or containers, soil management practices—including seasonal adjustments, fertilization, and mulching—ensure flowers remain vibrant, healthy, and resilient throughout the growing season. By prioritizing soil quality, gardeners lay the groundwork for stunning, sustainable floral displays that enhance any garden space.

How to Prevent Fungal Issues in Flower Beds

How to Prevent Fungal Issues in Flower Beds

Flower beds are the centerpiece of many gardens, adding color, texture, and aesthetic appeal. However, the beauty of flower beds can be compromised by fungal diseases, which are among the most common issues affecting ornamental plants. Fungal infections can lead to leaf spots, wilt, powdery growths, root rot, and even plant death if left unchecked. Preventing these issues is essential for maintaining healthy, vibrant, and long-lasting flower beds.

This article provides a comprehensive guide on how to prevent fungal issues in flower beds, covering plant selection, soil management, watering practices, environmental considerations, and seasonal care.


1. Understanding Fungal Issues in Flower Beds

Fungal diseases are caused by various microscopic fungi that thrive under specific conditions:

  • High Humidity and Moisture: Many fungi flourish in wet, poorly drained soils or on wet foliage.
  • Poor Air Circulation: Dense plantings reduce airflow, creating a microenvironment ideal for fungal growth.
  • Susceptible Plant Varieties: Some ornamental flowers are more prone to fungal infections than others.
  • Infected Soil or Debris: Fungal spores can persist in soil, mulch, or plant debris from previous seasons.

Understanding these factors is crucial to implement effective preventive strategies.


2. Choosing Disease-Resistant Plants

Selecting the right plants is the first line of defense against fungal infections:

  • Resistant Varieties: Many modern flower cultivars are bred for resistance to common fungal diseases.
  • Native Plants: Local species are often better adapted to local pathogens and climates.
  • Avoid Overcrowding: Select plant varieties that fit the available space to ensure airflow.
  • Diversity: Planting a mix of species reduces the likelihood of a disease outbreak wiping out entire flower beds.

Using resistant plants reduces the need for chemical interventions and promotes long-term garden health.


3. Preparing Soil for Healthy Flower Beds

Healthy soil reduces fungal susceptibility:

  • Well-Draining Soil: Prevents waterlogging, which can lead to root rot and other fungal infections.
  • Soil Amendments: Incorporate compost, sand, or perlite to improve drainage and structure.
  • Soil pH: Most ornamental flowers thrive in slightly acidic to neutral soils (pH 6.0–7.0).
  • Rotation and Renewal: Avoid planting the same species in the same soil year after year to reduce fungal spore buildup.

Healthy, well-prepared soil supports strong root systems and disease resistance.


4. Watering Practices to Prevent Fungal Growth

Watering methods greatly influence fungal development:

  • Avoid Overhead Watering: Wet foliage encourages leaf spot and mildew; use drip irrigation or soaker hoses.
  • Morning Watering: Allows leaves to dry during the day, reducing moisture retention overnight.
  • Deep, Infrequent Watering: Encourages strong root growth without creating persistently wet conditions.
  • Mulch Management: Keep mulch slightly away from plant stems to prevent moisture accumulation and fungal infection.

Correct watering practices significantly reduce the risk of fungal diseases.


5. Ensuring Proper Air Circulation

Good airflow prevents fungal spores from establishing:

  • Spacing Plants Appropriately: Follow recommended distances for each species.
  • Pruning and Thinning: Remove excess foliage and trim overcrowded plants.
  • Staking Tall Flowers: Supports airflow and prevents contact with the soil.
  • Garden Design: Arrange plants to allow movement of air, particularly in dense beds.

Air circulation is a natural and effective method to minimize fungal outbreaks.


6. Mulching Wisely

Mulch protects soil and supports plant health but can also harbor fungi if mismanaged:

  • Use Organic Mulch: Wood chips, straw, or bark prevent soil erosion and retain moisture.
  • Avoid Excessive Mulch: Thick layers can trap moisture and encourage fungal growth.
  • Distance from Stems: Keep mulch a few inches away from the base of plants.
  • Renew Annually: Replace old mulch to prevent fungal spores from persisting.

Proper mulching supports soil health while minimizing fungal risks.


7. Sanitation and Garden Hygiene

Maintaining cleanliness in flower beds is crucial:

  • Remove Debris: Regularly clear fallen leaves, spent flowers, and plant debris.
  • Sterilize Tools: Clean pruning shears and garden tools with alcohol or bleach solution.
  • Monitor New Plants: Quarantine new additions to ensure they are disease-free.
  • Dispose Infected Material: Burn or discard infected plants to prevent spread.

Sanitation is a preventive measure that significantly reduces the spread of fungal pathogens.


8. Monitoring and Early Detection

Vigilance is key to preventing severe fungal issues:

  • Regular Inspections: Check leaves, stems, and flowers for early signs of disease.
  • Look for Symptoms: Yellowing, spots, powdery coatings, or wilting can indicate fungal infections.
  • Early Intervention: Remove affected areas immediately to prevent spreading.
  • Record Observations: Keep a garden journal to track patterns and recurring problems.

Early detection ensures timely action and reduces long-term damage.


9. Environmental Considerations

Environmental factors play a major role in fungal outbreaks:

  • Sunlight: Ensure flower beds receive sufficient light; fungi thrive in shaded, damp areas.
  • Wind Exposure: Moderate wind helps dry foliage and improves airflow.
  • Soil Temperature: Cold, wet soils encourage certain fungal pathogens; raised beds can help.
  • Avoid Excess Fertilization: Too much nitrogen encourages lush, soft growth prone to fungal attack.

Creating an optimal environment naturally reduces fungal susceptibility.


10. Companion Planting and Biodiversity

Incorporating companion plants enhances resistance:

  • Beneficial Herbs: Basil, rosemary, and thyme may have antifungal properties.
  • Pollinator-Friendly Plants: Attracting pollinators encourages plant vigor.
  • Diverse Planting: Mixing species prevents monoculture and reduces pathogen buildup.

Biodiversity contributes to a balanced ecosystem and reduced fungal problems.


11. Seasonal Care Practices

  • Spring: Prepare soil, select resistant varieties, and plant with proper spacing.
  • Summer: Maintain watering routines, prune, and monitor for early signs of fungal infection.
  • Autumn: Remove plant debris, mulch appropriately, and prepare soil for winter.
  • Winter: Clear decayed foliage and avoid planting susceptible species in wet areas.

Seasonal adjustments ensure flower beds remain healthy year-round.


12. Organic and Chemical Preventive Measures

Sometimes, preventive treatments may be necessary:

  • Organic Fungicides: Neem oil, copper sprays, or sulfur-based products can help prevent fungal infections.
  • Chemical Fungicides: Use as a last resort, following label instructions carefully.
  • Application Timing: Apply during dry, calm weather to maximize effectiveness.
  • Integrated Pest Management (IPM): Combine cultural practices with preventive treatments for the best results.

Preventive applications supplement good gardening practices to maintain disease-free flower beds.


13. Benefits of Preventing Fungal Issues

Maintaining healthy flower beds yields multiple advantages:

  • Longer Blooming Periods: Healthy plants produce more flowers for extended periods.
  • Reduced Maintenance Costs: Fewer chemical treatments and replacements are required.
  • Improved Aesthetic Appeal: Vivid, disease-free flowers enhance garden beauty.
  • Environmental Benefits: Reducing fungicide use promotes biodiversity and soil health.
  • Stronger Plants: Disease-free plants develop better root systems and resilience.

Preventive measures ensure sustainable, vibrant, and low-maintenance flower beds.


Conclusion

Preventing fungal issues in flower beds requires a combination of thoughtful plant selection, proper soil preparation, careful watering, adequate spacing, and regular maintenance. By choosing disease-resistant varieties, ensuring good air circulation, practicing proper sanitation, and monitoring plants for early signs of infection, gardeners can maintain healthy, flourishing flower beds year-round. Additional measures such as mulching correctly, seasonal adjustments, and occasional preventive treatments further reduce fungal risks. Implementing these strategies allows gardens to remain vibrant, beautiful, and productive, providing continuous enjoyment while minimizing plant loss due to fungal diseases.